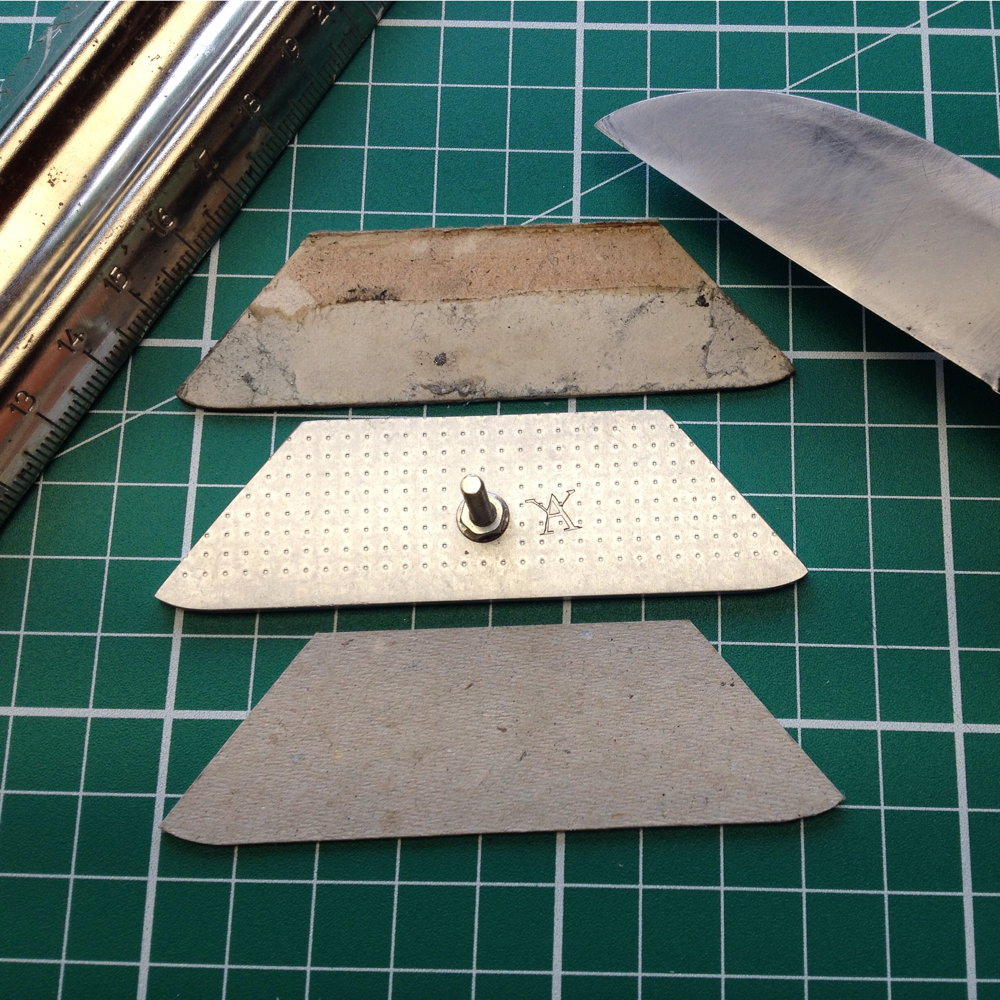
Recently I’ve been working on making myself a new set of tuning bellows. The first tool I made towards this goal was a new craft knife for cutting leather and card. I ground it from a piece of HSS machine hacksaw blade, because I had read that the steel is more wear-resistant than a simple carbon steel, and I wanted to test the theory.
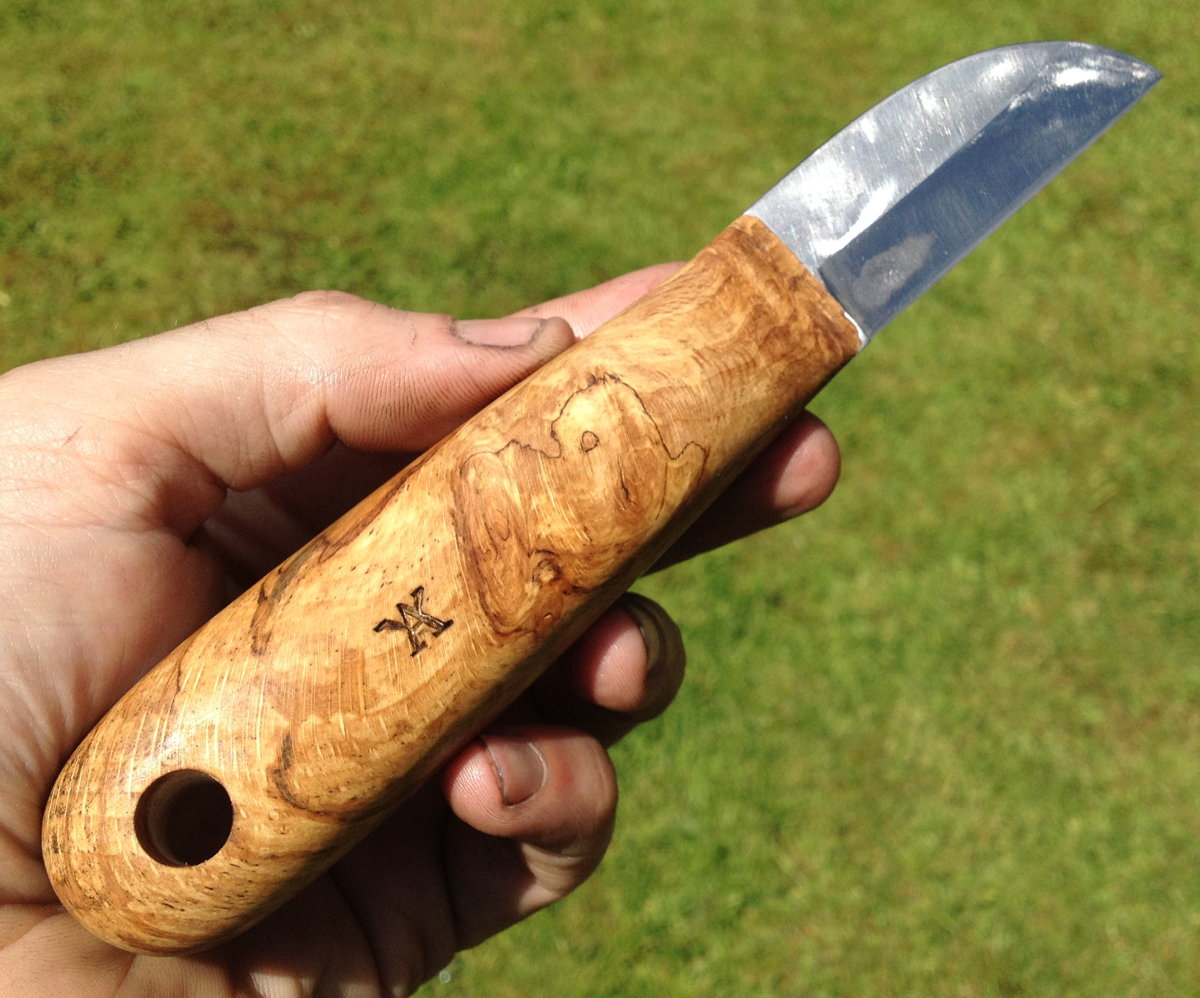
I’m not convinced it holds an edge better than a well-tempered O1 blade, however it does work pretty well. Unfortunately the spalted beech scales (glued on with epoxy resin) popped off after a couple of days. It would have been better to have riveted them on, however drilling holes in hardened HSS is easier said than done. For the time being I have just bound them on with a length of thick elastic.
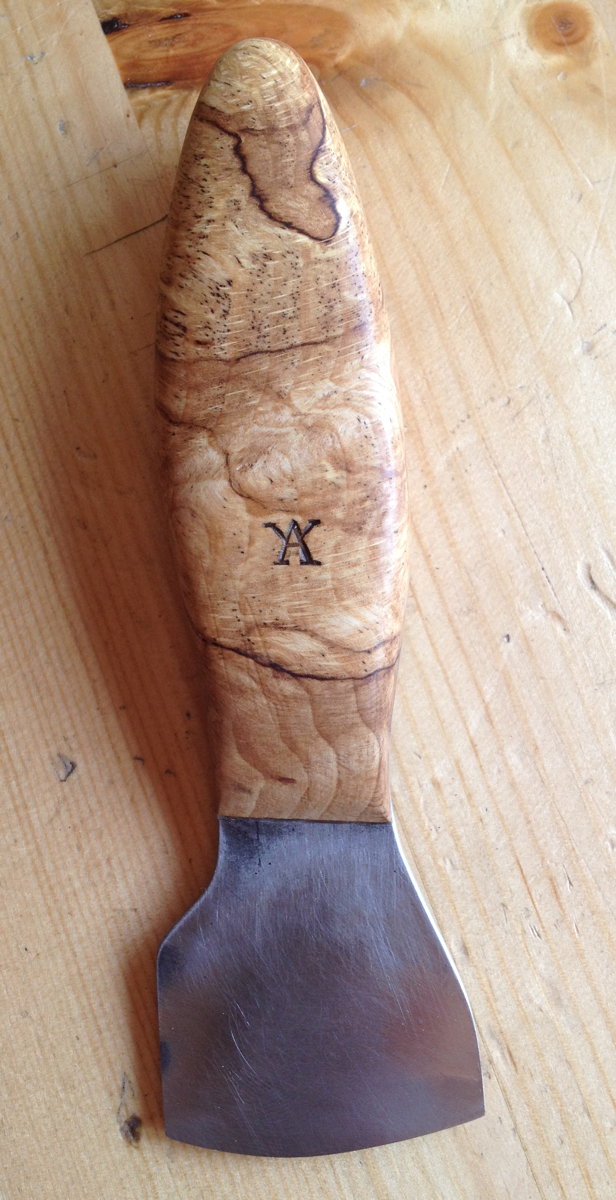
On a roll with the knife-making, I next made myself a leather skiving/paring knife from the same materials as the craft knife:
This video shows how I use it:
I do of course also have a Schärf-Fix 2000 skiving machine, which I wrote about previously:
The Schärf-Fix is good for long strips, whereas the knife is better for skiving small pieces (particularly gussets) and odd bits here and there. Both tools are tricky to use, and I wasted a frustrating amount of leather while getting to grips with them. The Schärf-Fix has a tendency while edge-skiving a long strip to suddenly dig in and cut a chunk out of the strip. The key is that the blades have to be absurdly sharp, because the thin leather tends to stretch badly if you have to use any significant force to pull it through the machine. I need to spend some more time figuring out a way to resharpen the disposable blades (stropping didn’t help much), or I’ll end up going through at least a couple of them per concertina.
I used my Käfer Dial Thickness Gauge to make sure I was paring it consistently:
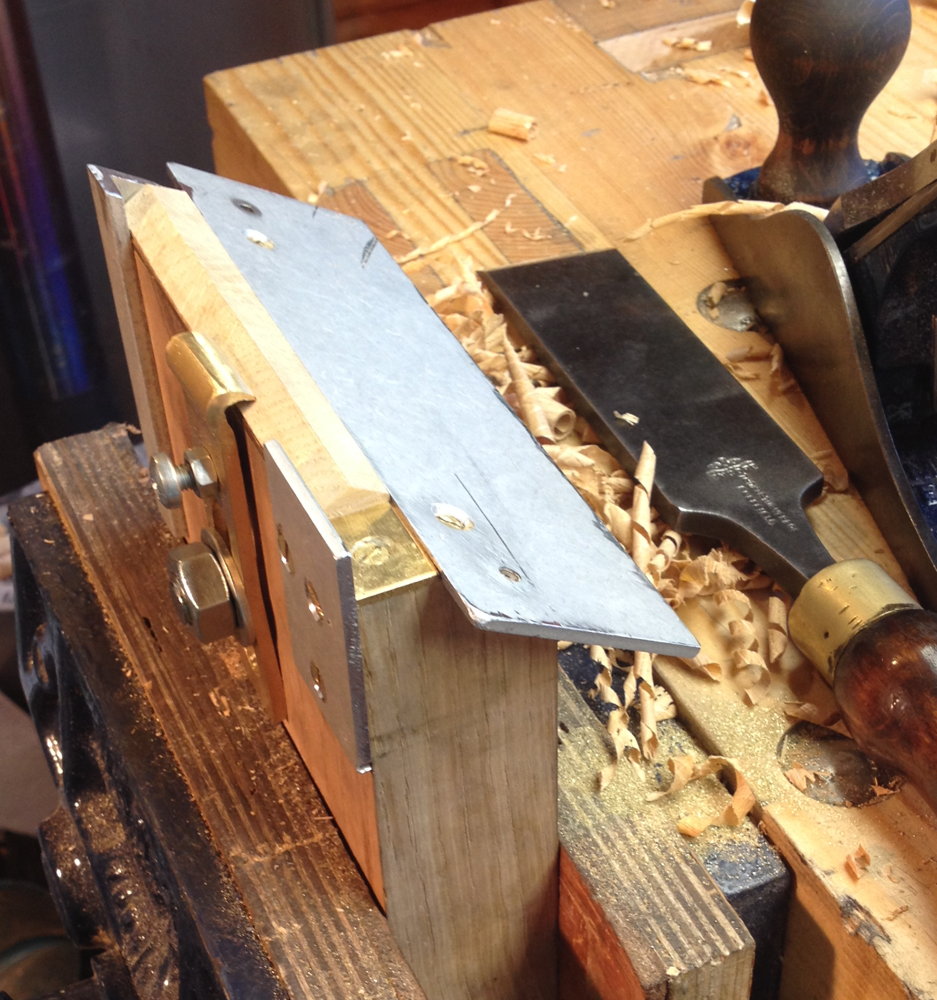
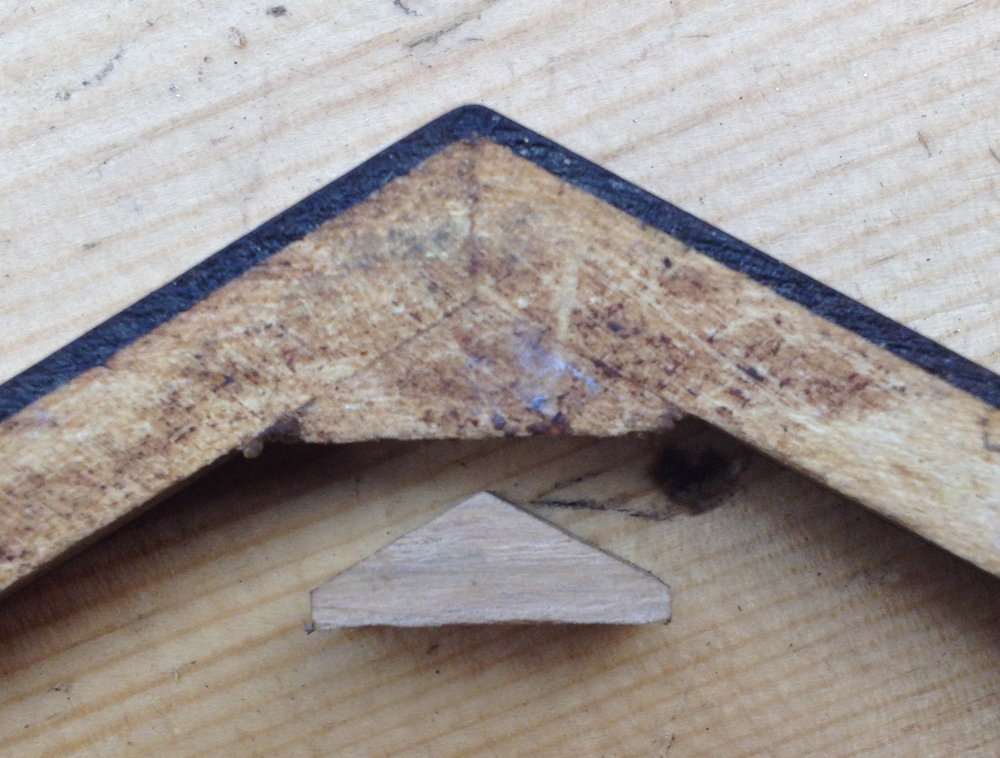
I needed to make end frames for my bellows, so I first needed a way to accurately make the corner reinforcing blocks. Here’s the jig I came up with. There’s a bit of a knack to using it, but the results aren’t bad:
And here’s one of my new corner blocks next to an antique Lachenal one:
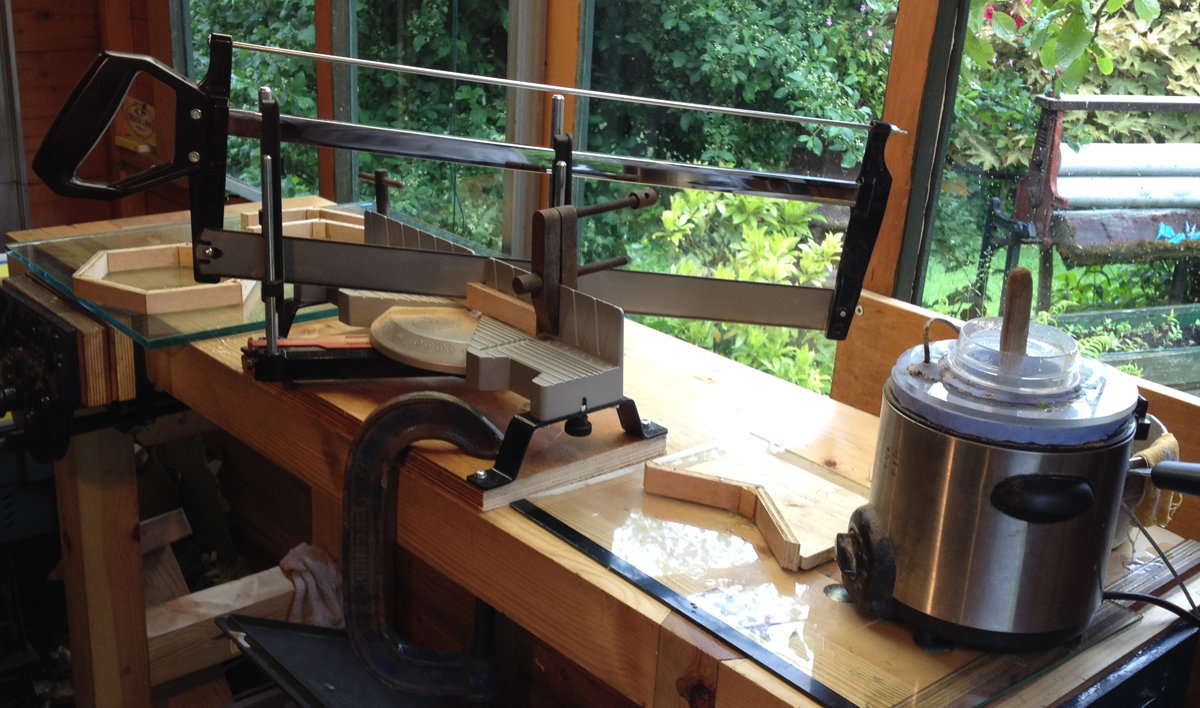
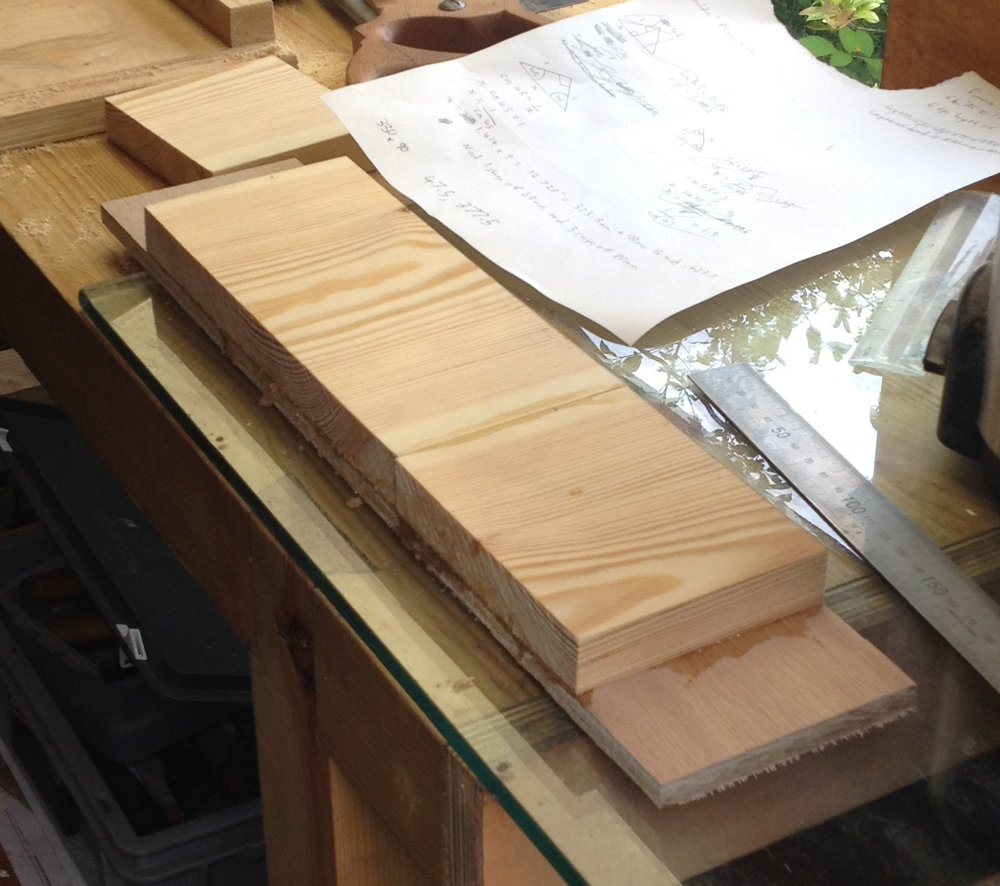
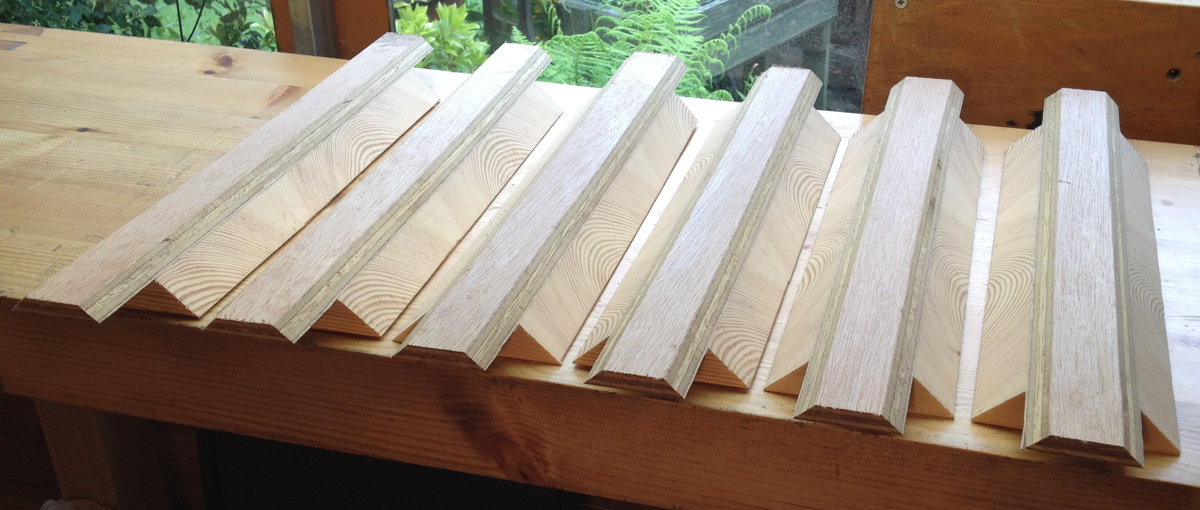
I cut the sides of my bellows frames from 9mm plywood using my Nobex Proman 110 mitre saw, and glued them together with hot hide glue:
After a bit of shaping, I checked that they fit in the scrap Jeffries bellows I was copying my dimensions from:

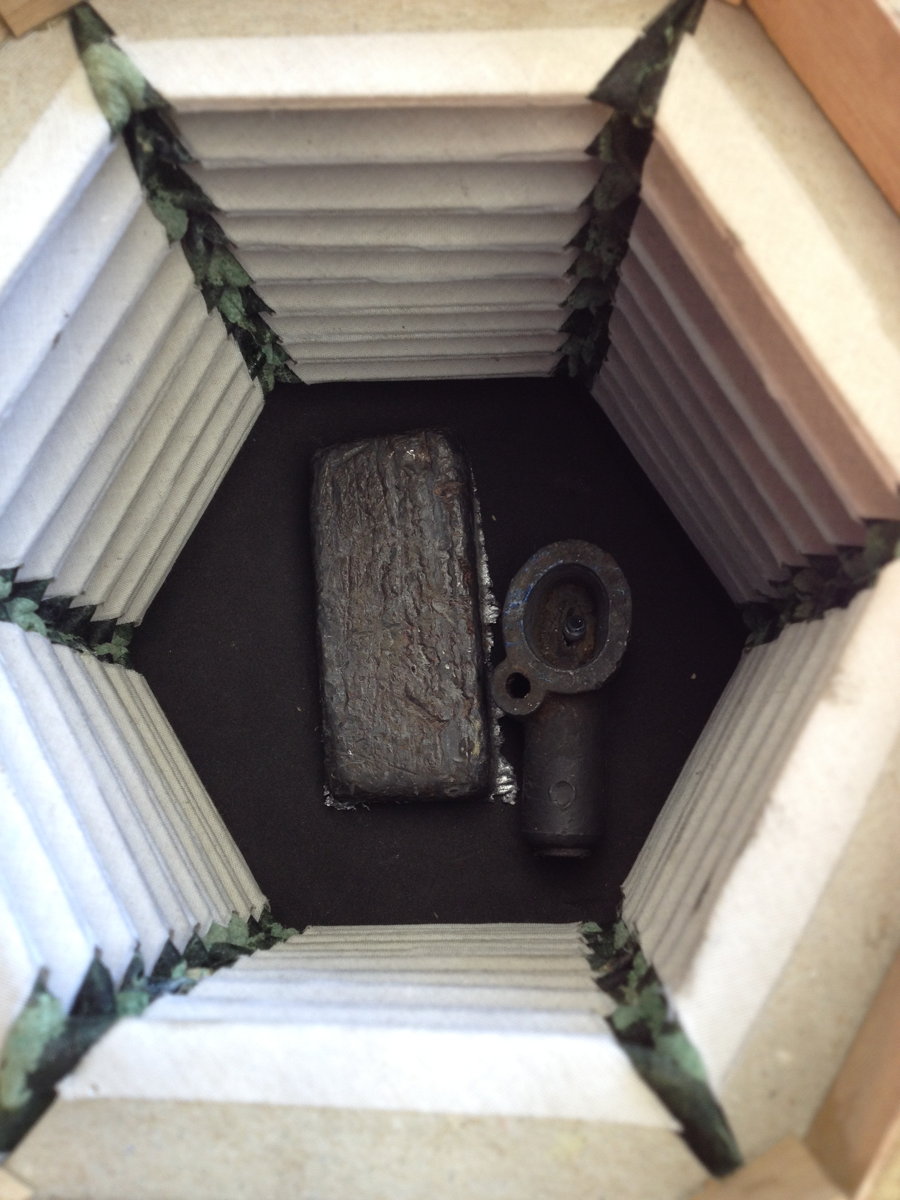
Next came the bellows mould. This proved quite a large sub-project in its own right. It has six forms (one of which is split in two to make it possible to remove the forms), screwed to a hexagonal core, suspended from a stand. Making the forms was the hardest part. I started by gluing blocks of pine to strips of plywood, with the grain running across the form, being careful to avoid including any large knots:
Then I used the bandsaw with the table tilted over at 45 degrees to relieve the under-sides of the forms:
Then I used the CNC milling machine to cut the valleys into the top sides of the forms (video sped way up: it actually took about an hour to machine each form):
After I had spent days making all six forms, I laid them out next to each other and realised I had made a silly mistake: five of them were spaced wrong, and in fact all of them were pitched slightly too tight to fit comfortably inside the Jeffries bellows:
I could have tried to unglue the blocks and glue them onto new plywood strips with the correct spacing, but I decided it was easier just to start again and remake them all. By the end, I was getting really tired of the noise the milling machine made as it cut the valleys, not to mention the dust everywhere!
I made the core of the bellows mould by mitring the edges of six pine boards on the bandsaw and gluing them together. I deliberately made it slightly oversize, then hand planed it to final shape/size (a good idea as it turned out slightly wonky, plus I wasn’t certain exactly how big it needed to be until I tried assembling it inside the Jeffries bellows):
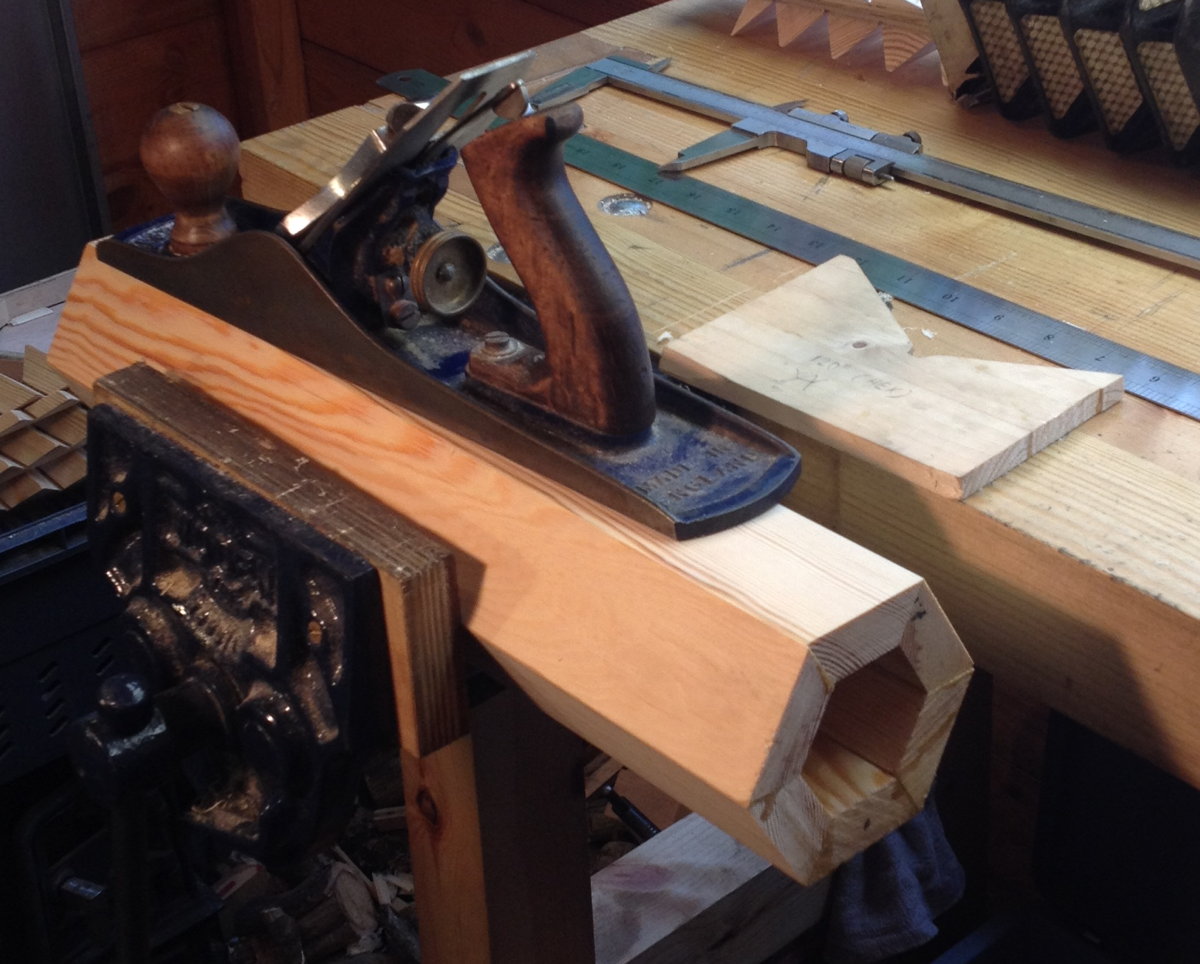
The stand is a simple affair with the vertical ends roughly dovetailed to the base. A nice feature of this style of core is that if you turn the central bar one way up, it presents the sides uppermost, and if you turn it the other way up, it presents the corners instead. This picture also demonstrates that the scrap Jeffries bellows fit on the mould:
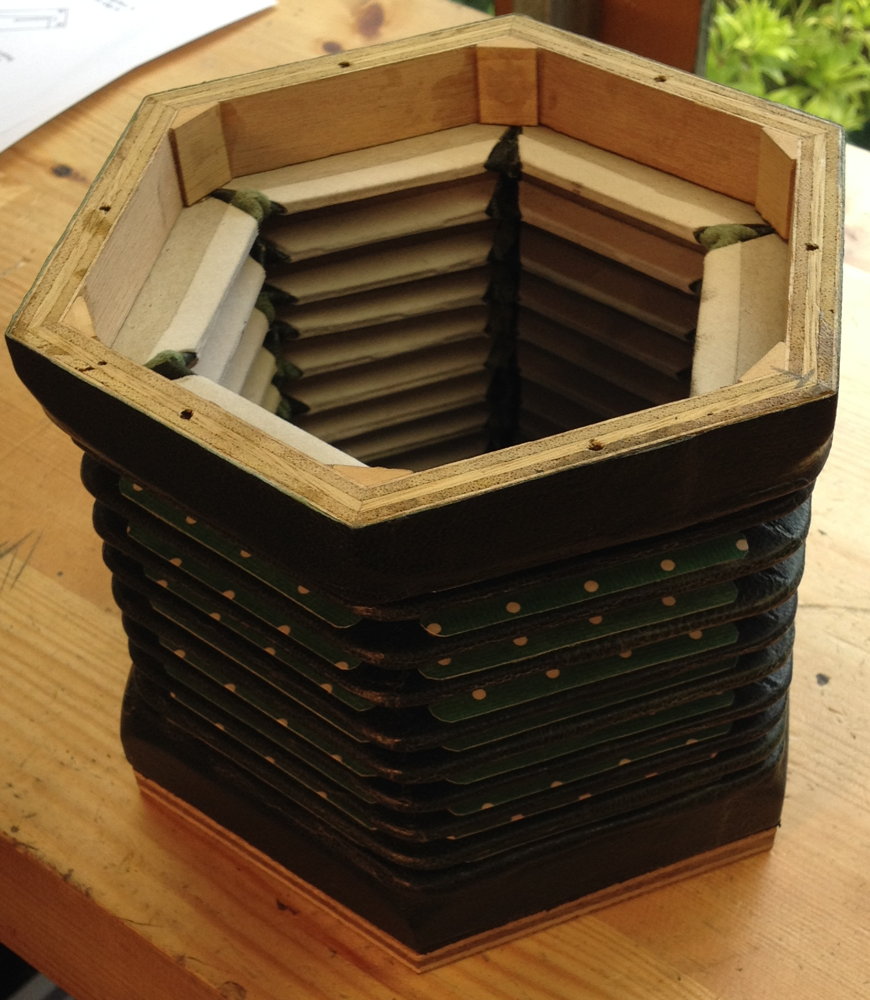
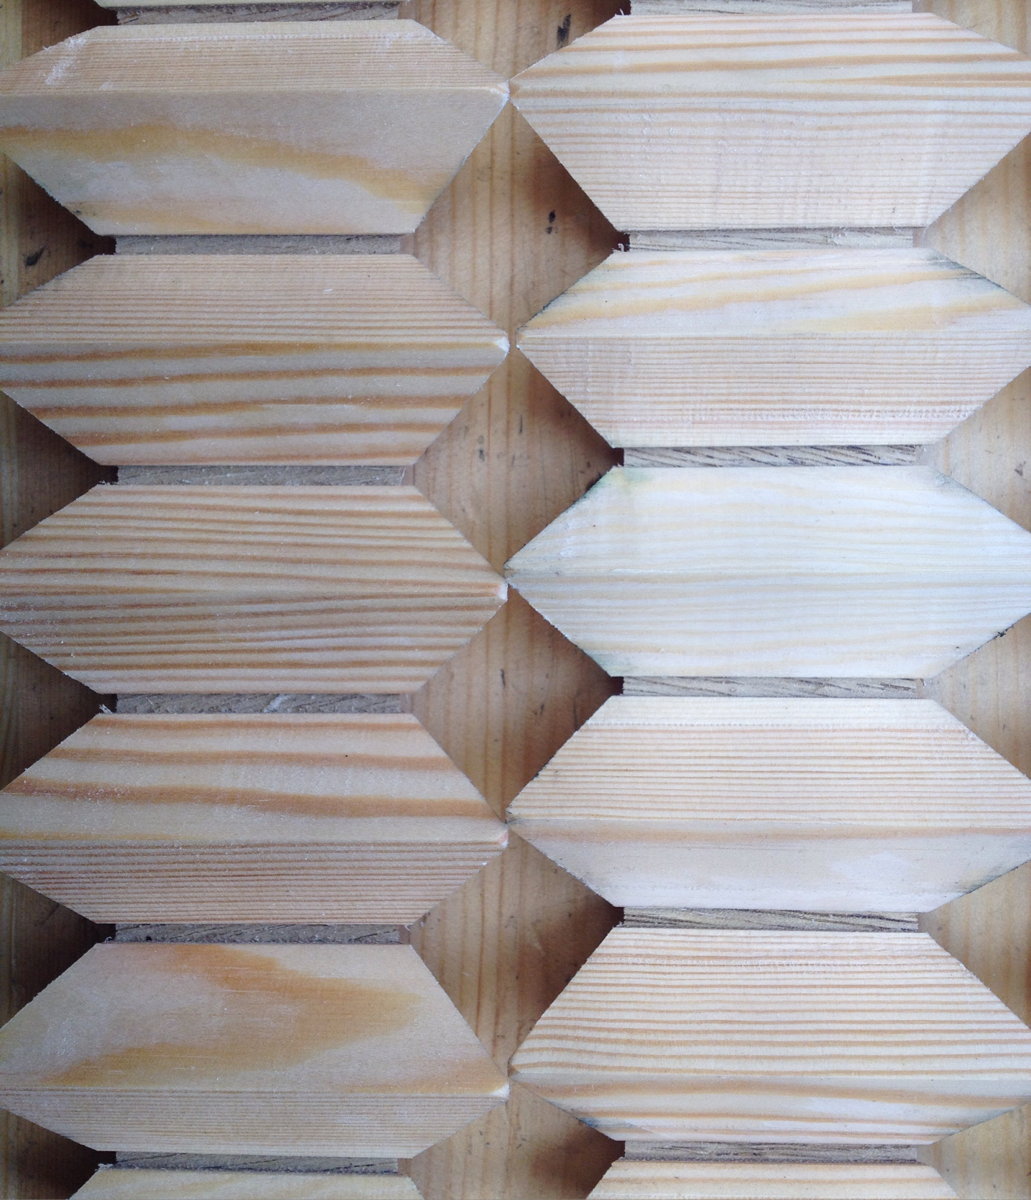
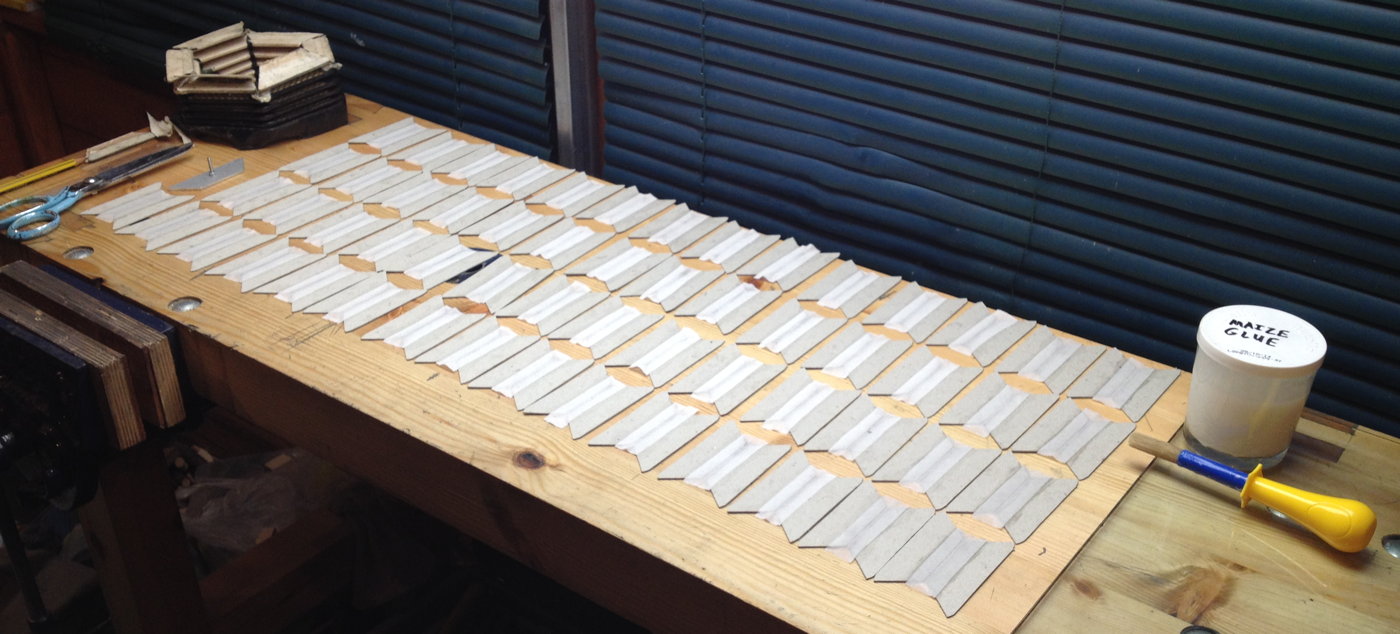
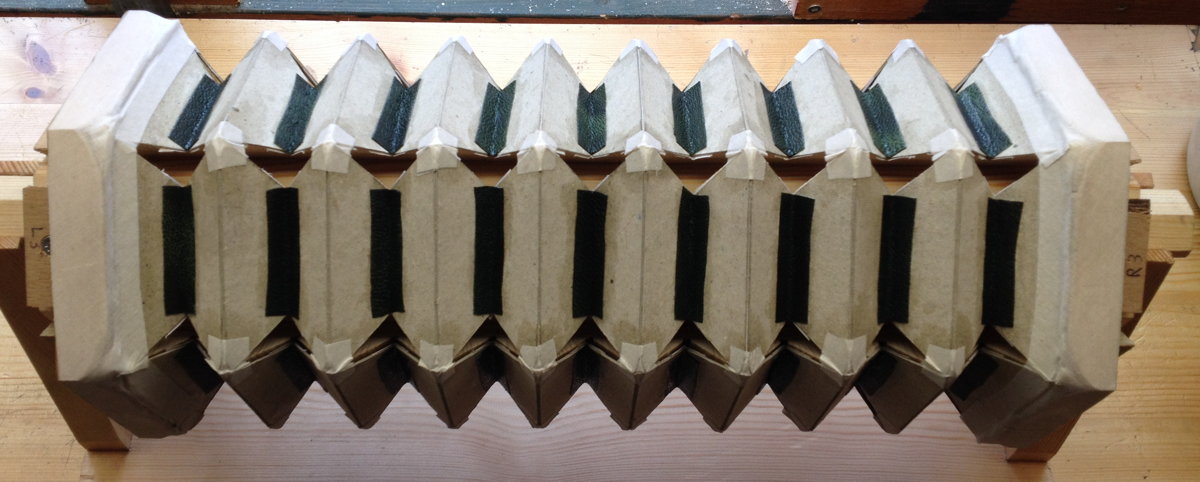
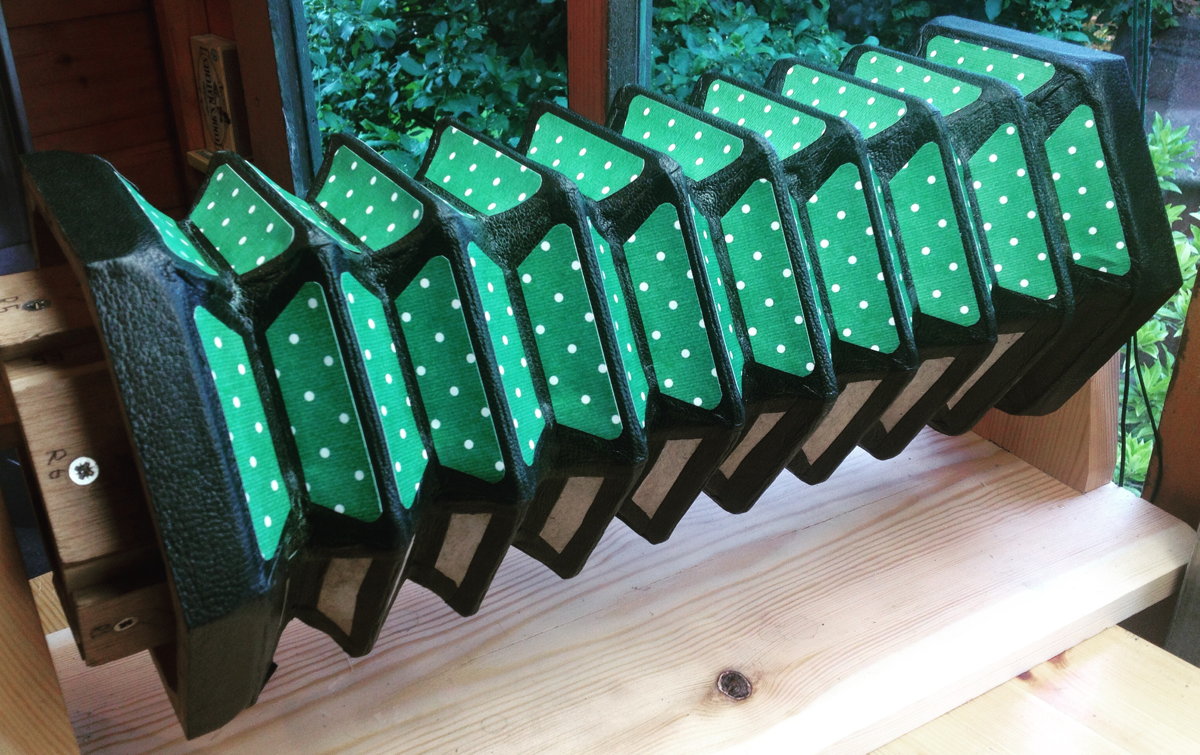
Finally time to start making the bellows! I cut the 108 individual cards out by hand, using a template I cut from a piece of scrap aluminium to match the shape of a card taken from the Jeffries bellows:
I hinged pairs of them together using strips of fine-woven linen cut on the bias and bookbinders’ maize paste (very similar to wheat starch paste but supplied pre-cooked and with some anti-fungal stuff mixed in):
Then I hinged the pairs together into six strips. Note that the hinges are both on what will become the inside of the bellows, and the valley hinges have to be pasted on with the hinge partly closed or they will tend to tear themselves apart when they close. There may be a less fiddly way to do this but it seemed to work well enough.
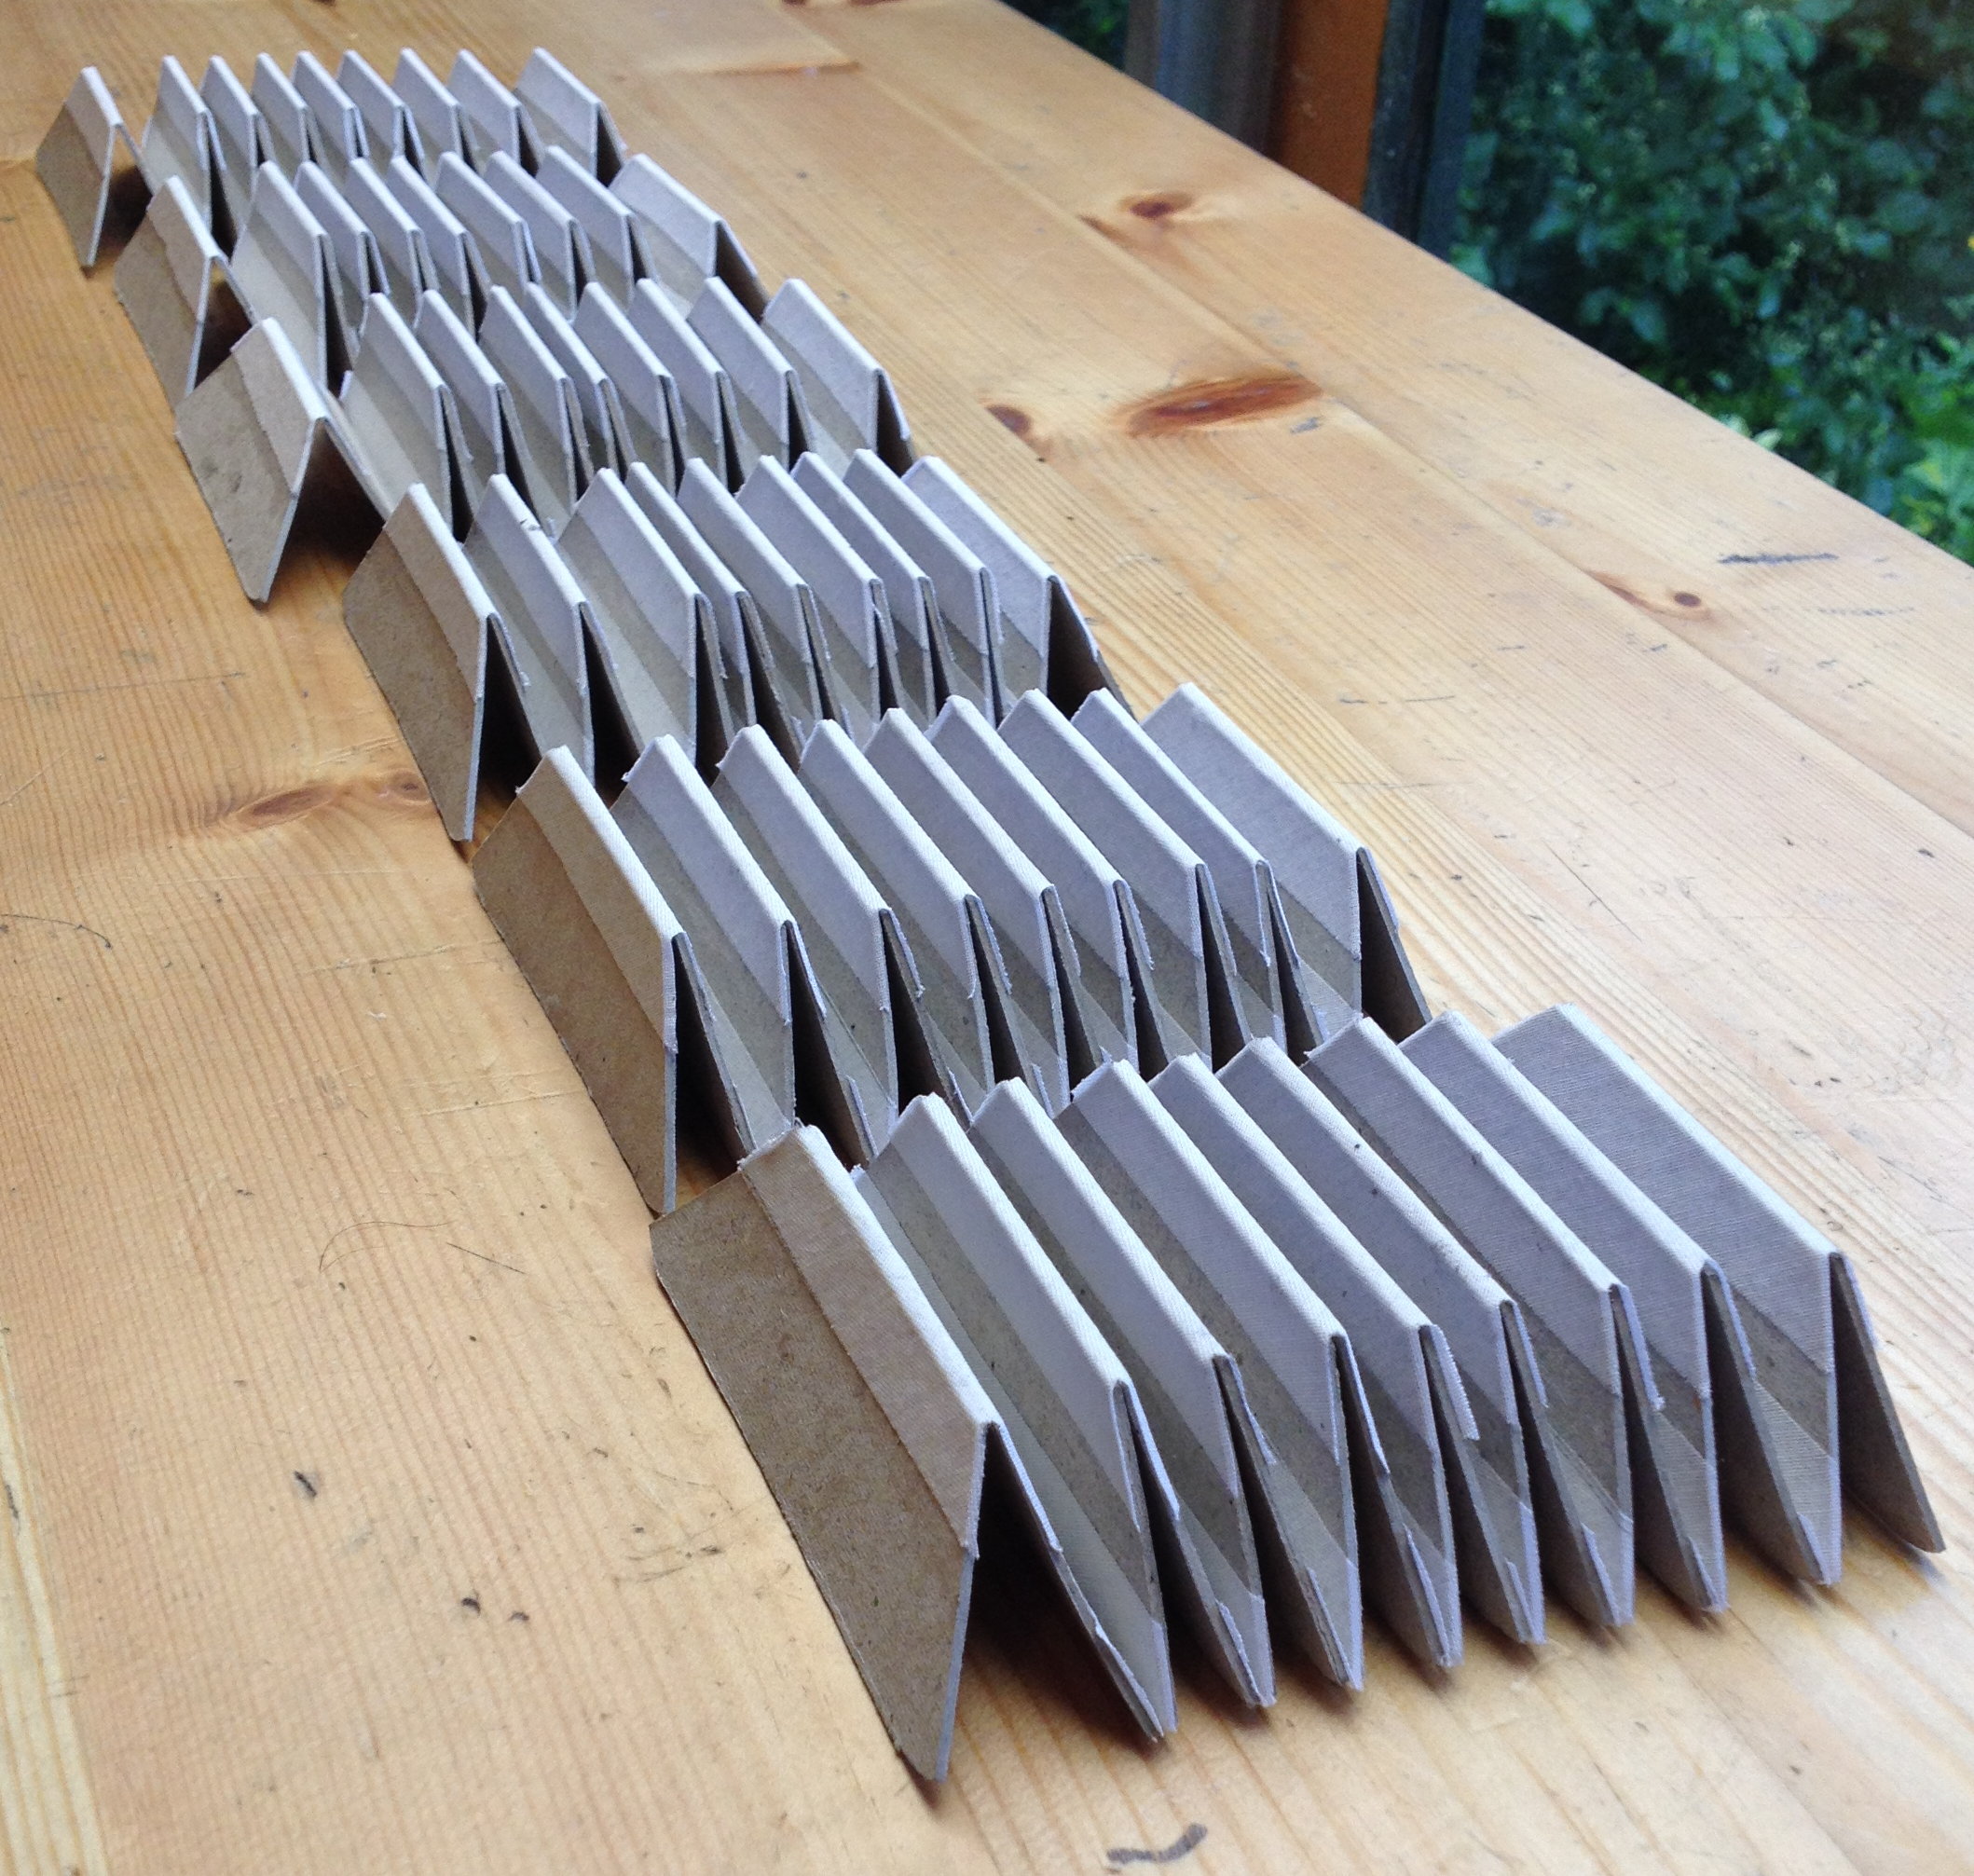
After the paste had initially dried, I noticed that the cards had all warped a bit, so I pressed them all tightly in a big wooden clamp for a couple of days (forgot to take a photo), which helped to flatten them out again.
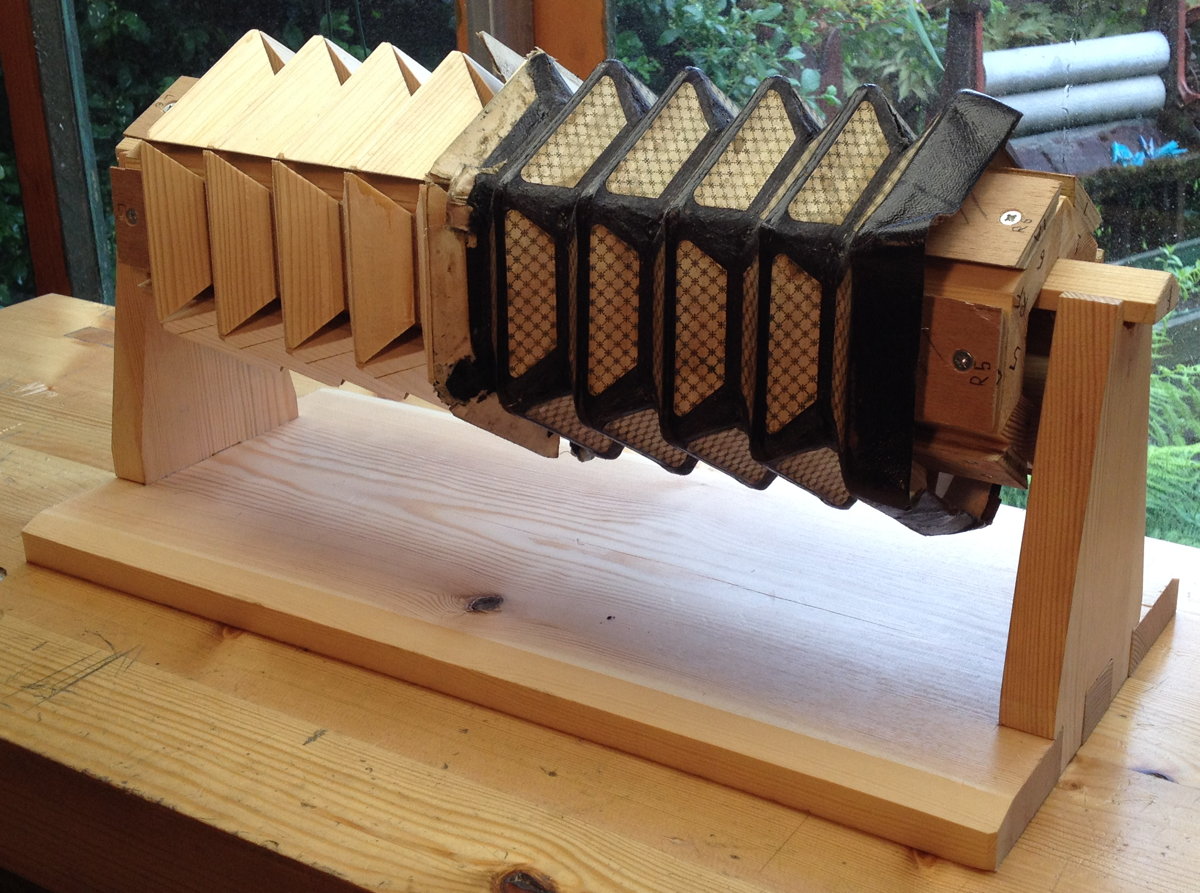
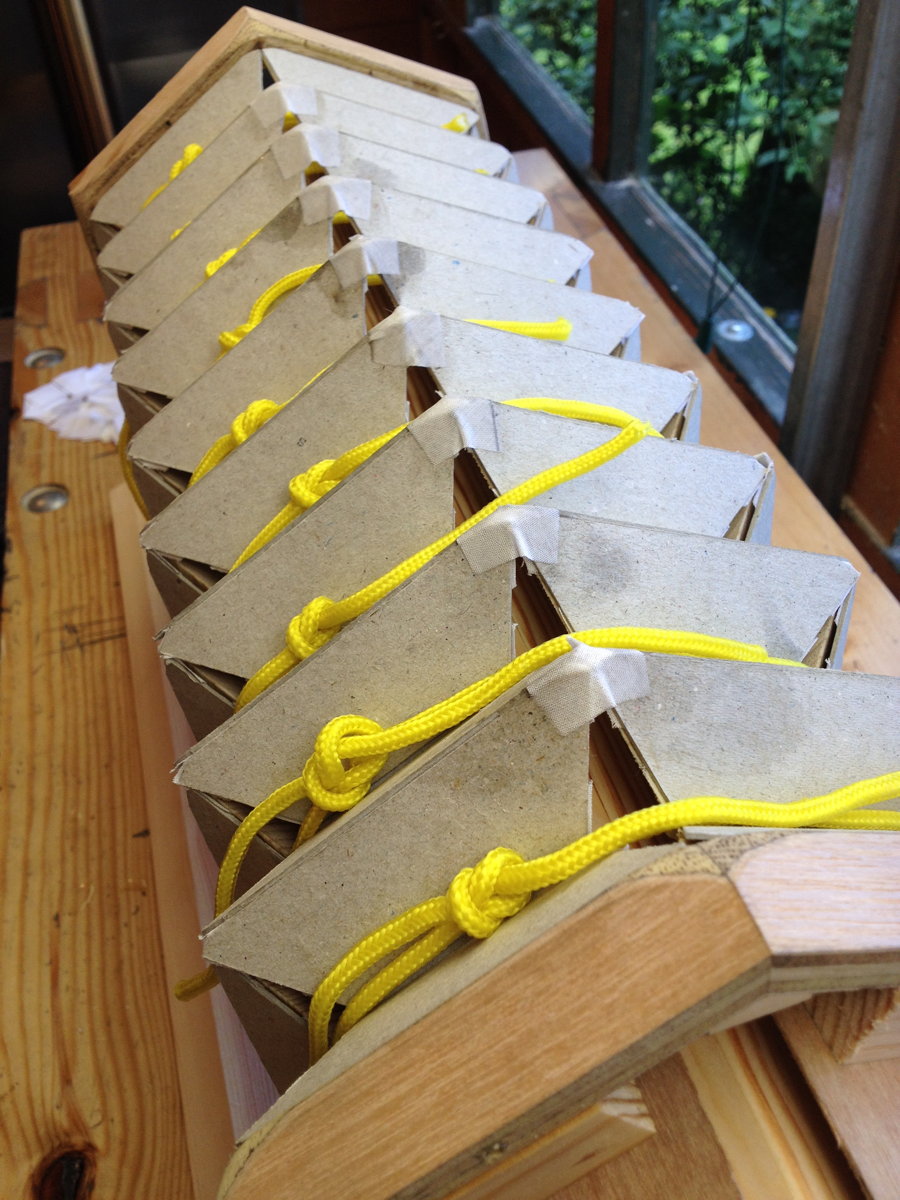
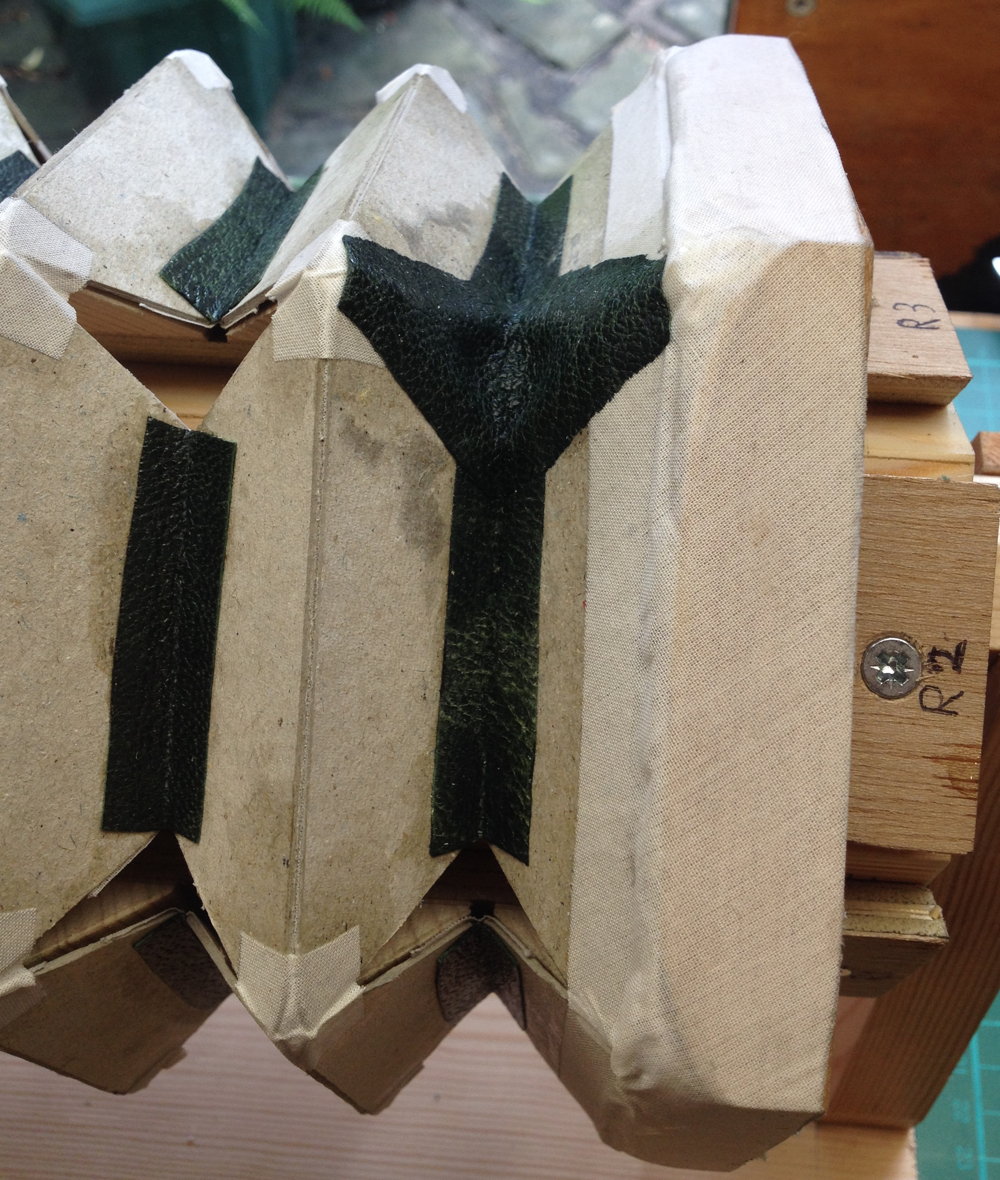
I tied the strips of cards onto the mould with string, then hinged the corners together with more bias-cut linen, though at this point I switched to using hot rabbit-skin glue. It’s messier and more difficult to work with than paste, but in my tests it was the strongest of all the glues I tried (slightly stronger even than PVA wood glue, and significantly more flexible when dry).
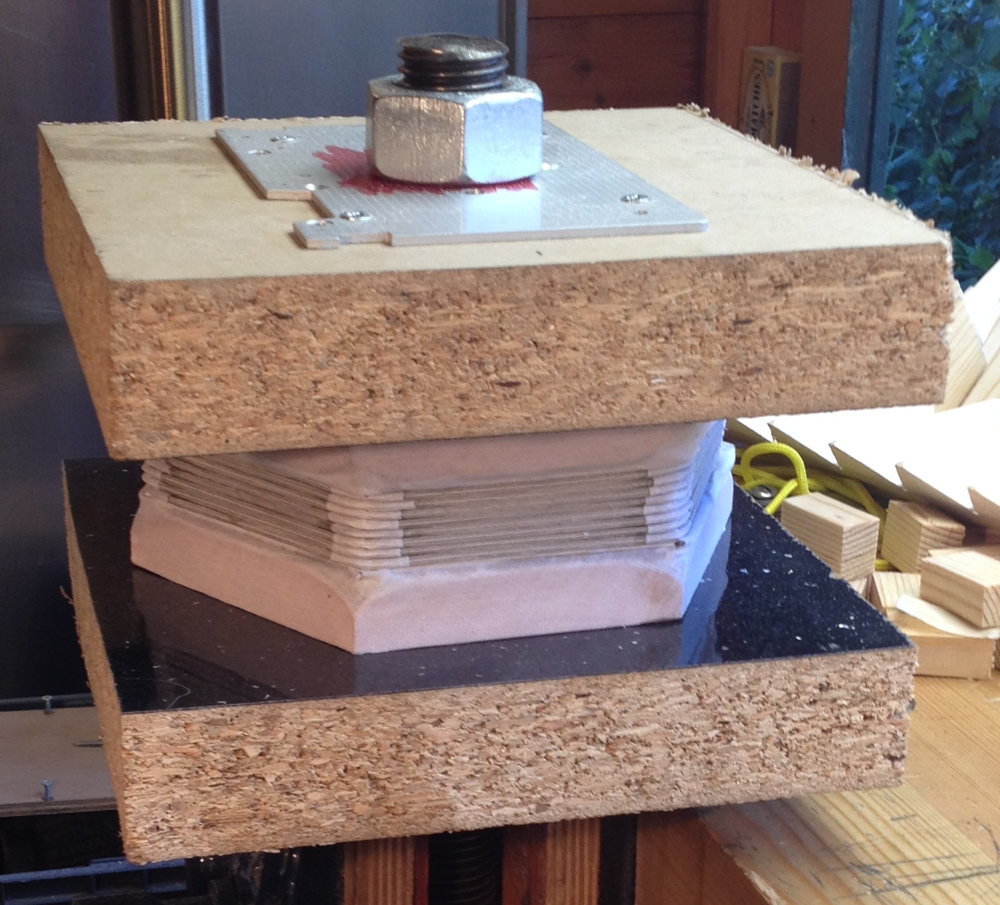
I made a simple press to clamp the bellows shut, and whenever I had to let the glue dry before the next stage, I took the bellows off the mould and transferred them to the press. If I hadn’t, they would have dried in the fully-open position and possibly torn apart when I tried to force them closed. It’s also necessary to periodically take the bellows out of the press and exercise them to avoid them drying fully shut.
Next I glued on the valley leather strips. I used goatskin for all the leather on the bellows. I pared the valleys down to about 0.65mm and skived the edges for cosmetic reasons. They are simple rectangles rather than butterflies because that’s how they were on the Jeffries bellows I was copying:
Next the gussets:
Here’s a video of me gluing a couple of gussets on:
The top and end runs. In hindsight the end runs would have worked better if they were both narrower and thinner, and perhaps I need to work on my technique for gluing them on, because I was unable to get them to go round the corners without creasing, which caused the end sets of gussets to be stiffer than the rest. It probably didn’t help that I made the cards all the same size (the end ones probably should have been slightly taller because of the inset):
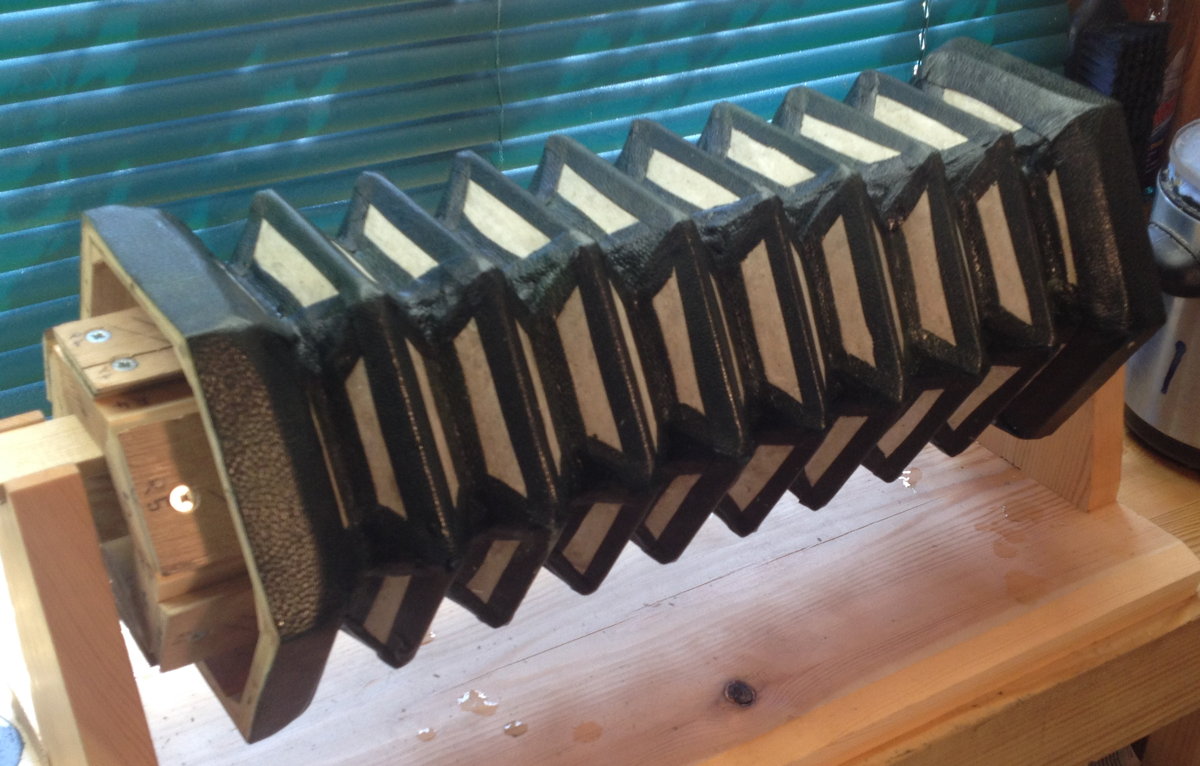
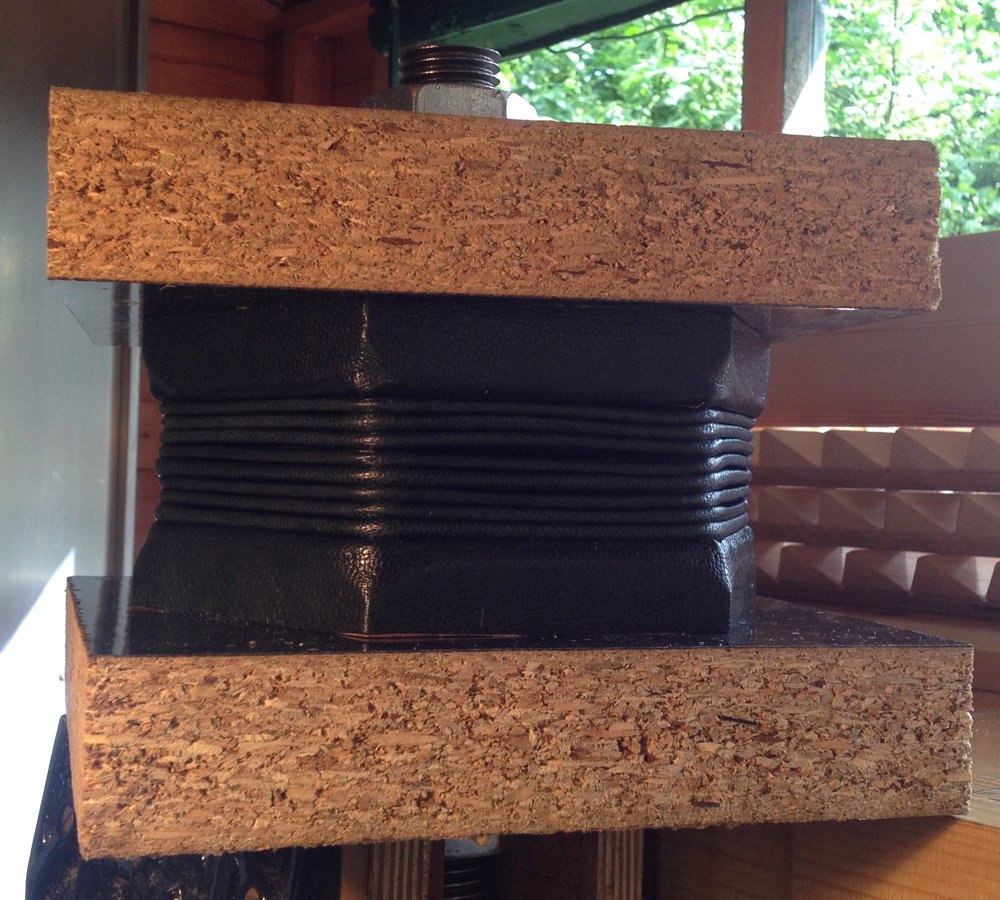
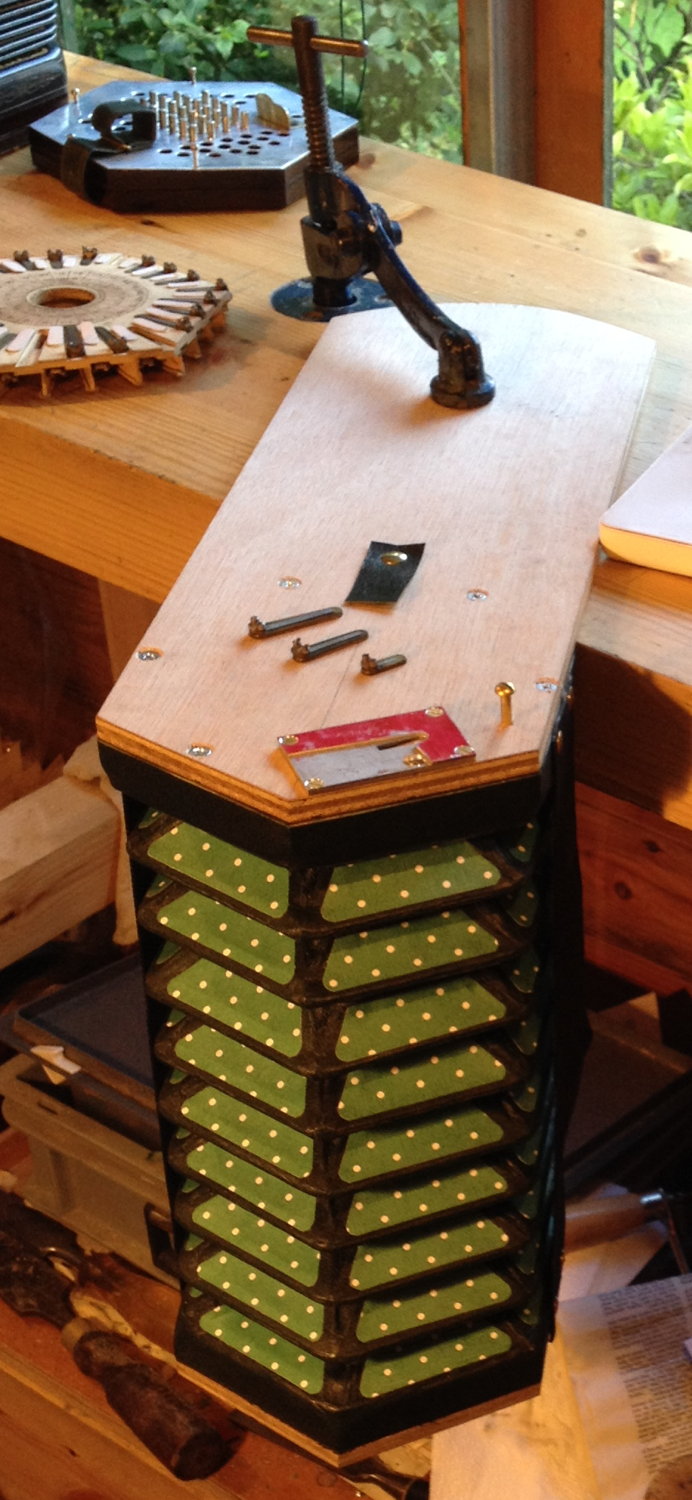
Pressing it all together:
To make them look a bit prettier, I made bellows papers from decoupage paper:
I screwed a plain piece of plywood onto the bottom end, with a sheet of black “funky foam” (closed cell EVA foam sold in thin sheets for craft purposes) as a gasket, and a couple of pieces of scrap lead to pull the bellows open with a consistent amount of force:
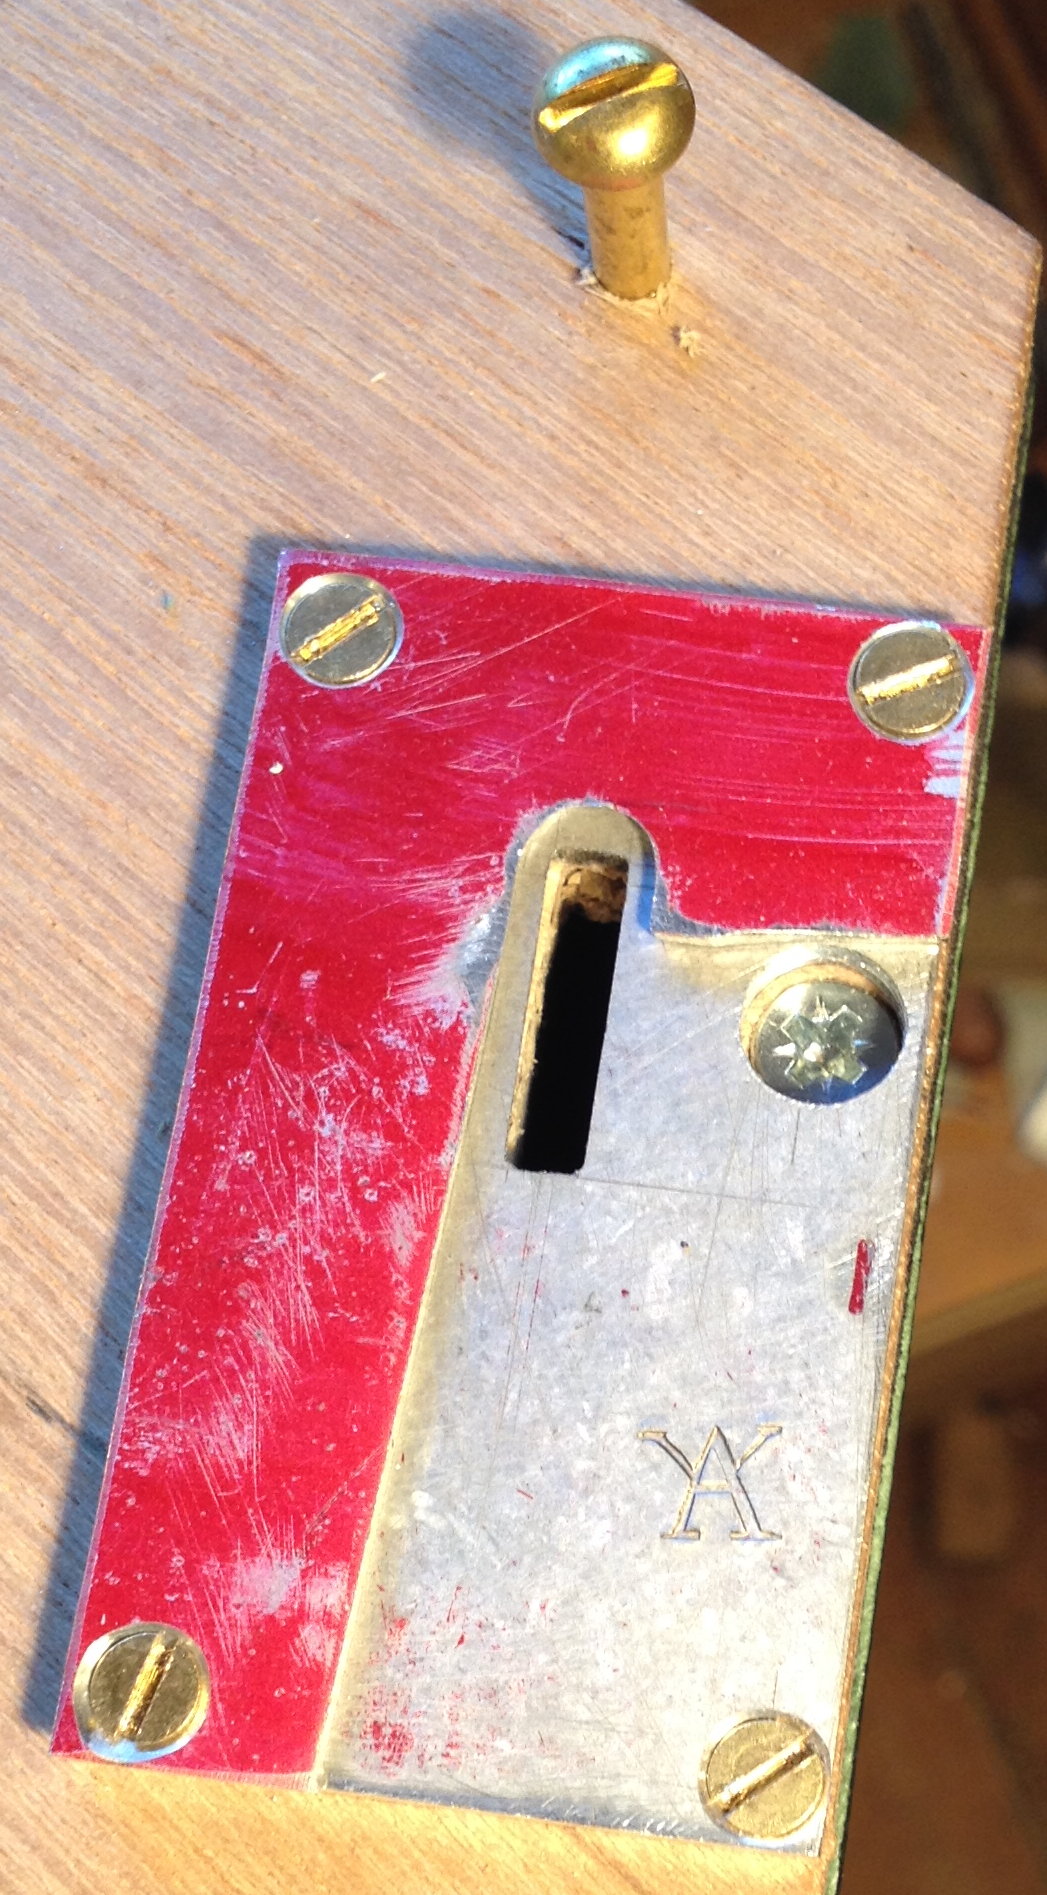
The top board has a reed holder next to one edge. It’s a simple design that doesn’t require any adjustment for different sizes of reed, though you do have to hold the reed in place with your thumb while sounding it. The top plate is slightly thinner than a reed frame so that it’s possible to file the reed in situ, and it has a slight undercut so as to hold the dovetailed reed frame more securely. It took some careful measurements and fiddling about to get the wind slot just right so that it works for the full range of sizes of reed I had available. It might require further adjustment if I ever want to use it with even bigger reeds from a bass instrument. The separate brass screw is used in conjunction with a specially shaped thin spring-steel shim (not pictured) to hold the reed tongue up above the frame while filing.
Here’s the finished tuning bellows clamped to my bench. The flap of leather is a relief valve to let the air out when you raise the bellows. Not clearly visible in the picture, there are a pair of straps tacked to the sides of the frames that prevent the bellows opening too far.
Finally, here is a quick video of me showing them in action. The reeds are the highest and lowest reeds from my antique Lachenal 48-button English, plus the A4, which is at 444Hz because it is tuned in old pitch, meantone temperament.
I want to thank Geoffrey Crabb for all his advice on the construction of the bellows moulds and the tuning rig, and also Bob Tedrow for his bellows-making essay (although my technique is quite different, I picked up several good ideas from it).
Hello Alex ,
I just wanted to say thank you for your helpful and informative postings
not only on your web site but also on c net .
You have helped me on my Concertina journey!
All the best
Martin