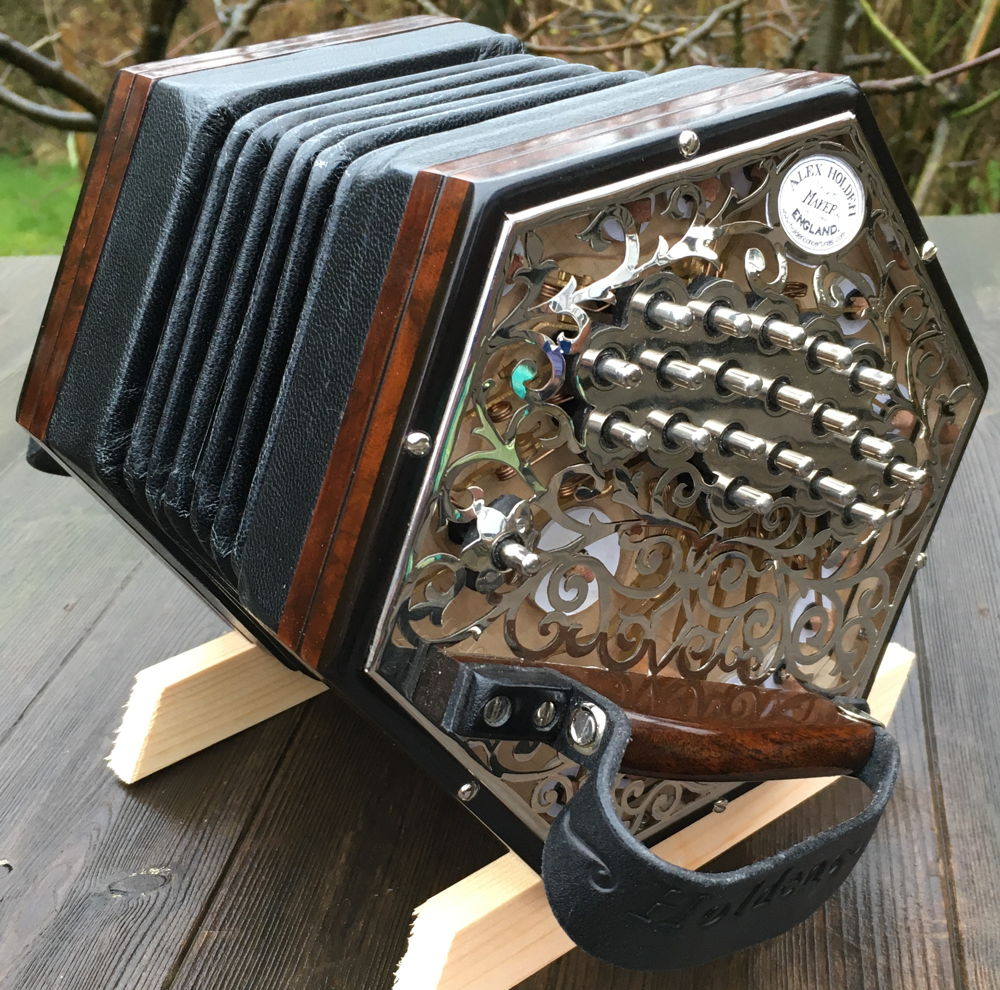
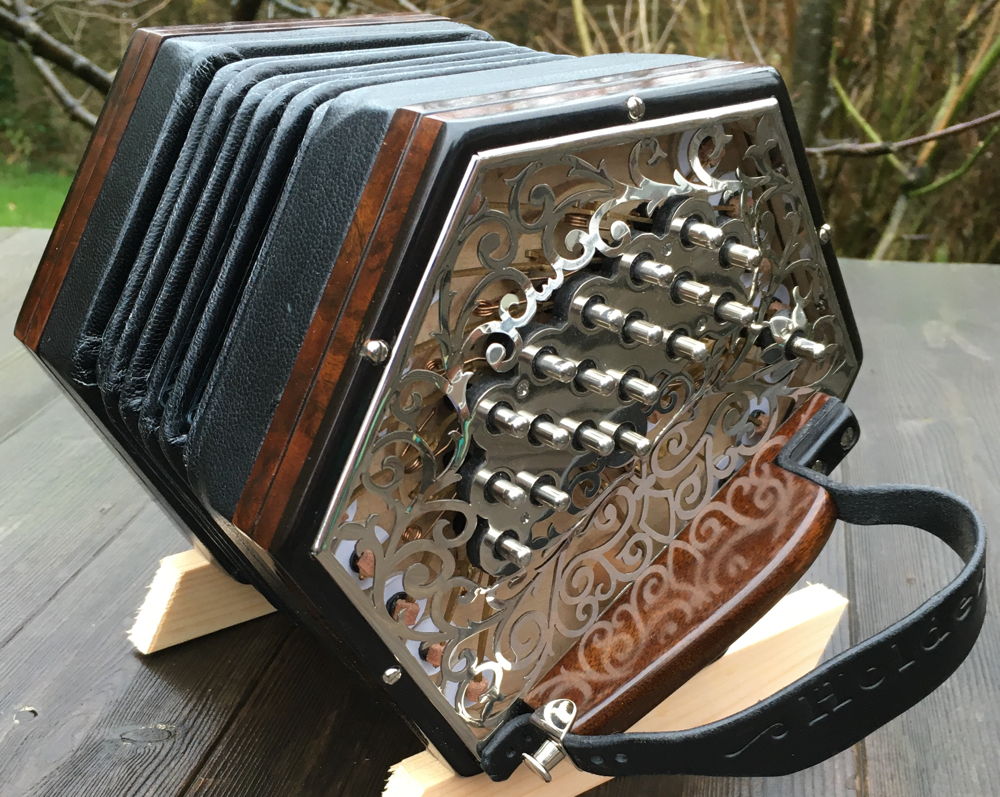
My latest instrument is a 38 button G/D anglo, with raised metal ends.
Here is its full specification:
- 38 button + air Jeffries layout Anglo in the keys of G/D.
- Six sides, 6 1/4″ wide.
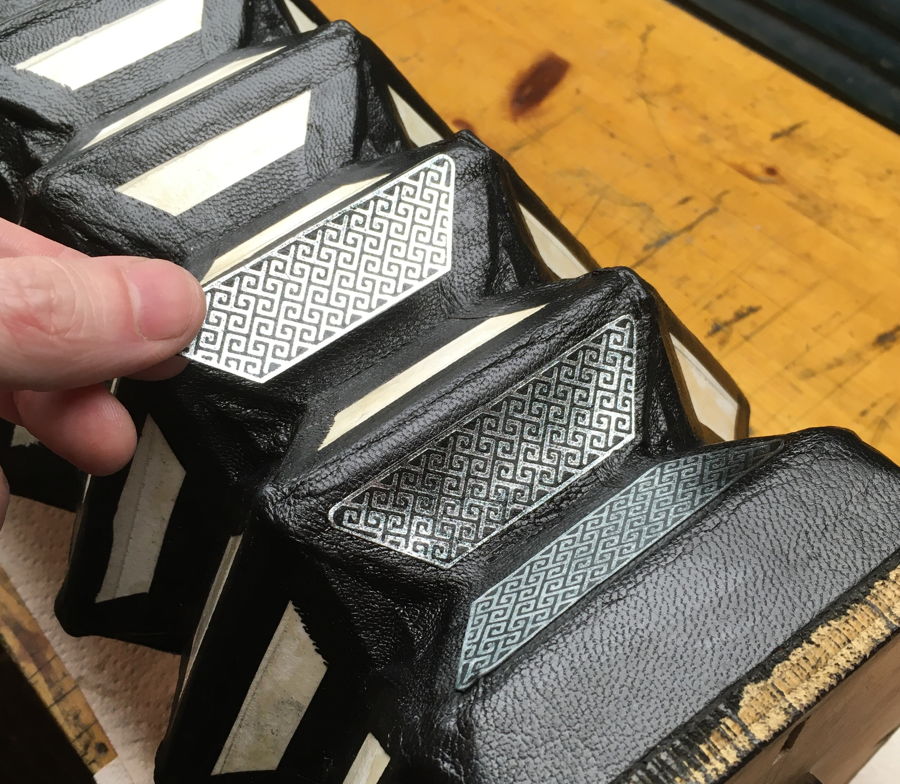
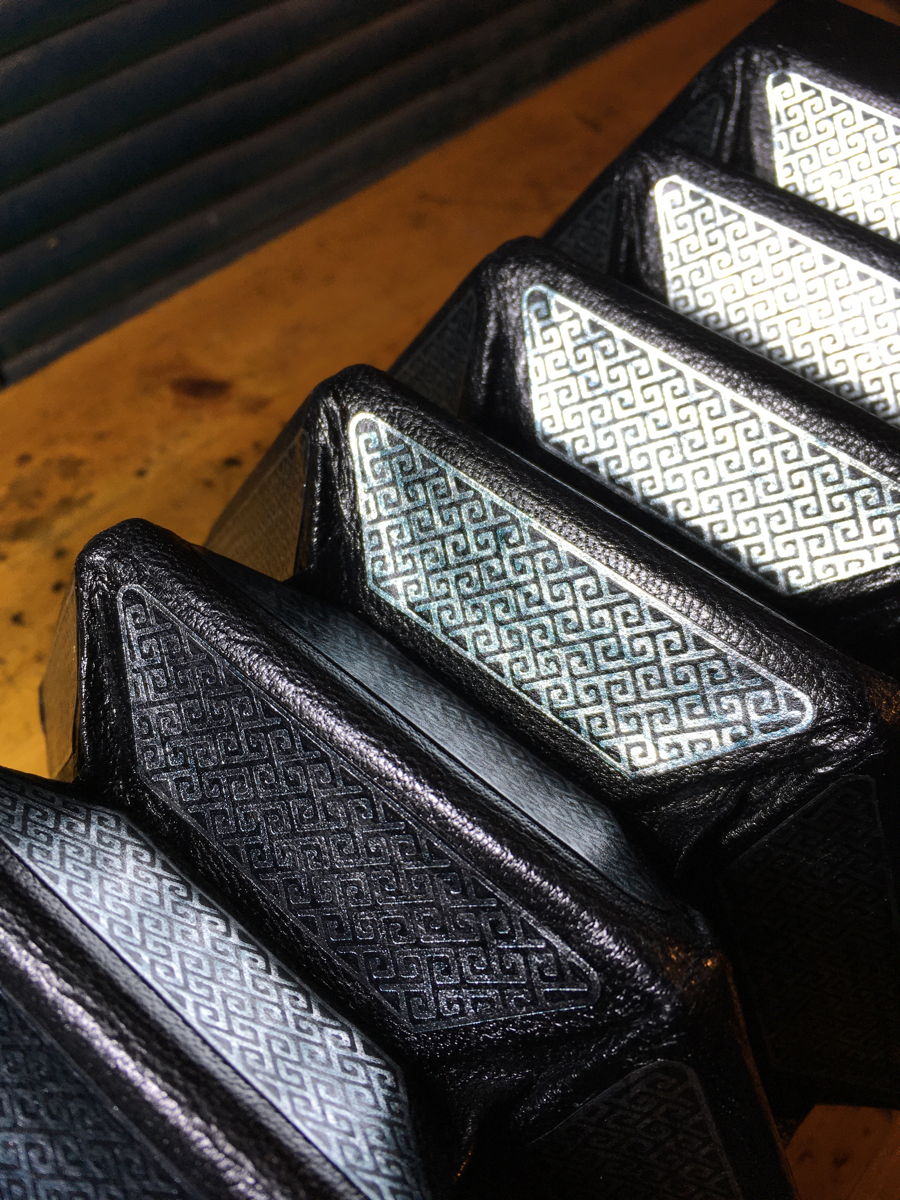
- Six fold black goatskin bellows with 1 1/8″ deep cards and Pictish key pattern bellows papers.
- Traditional long scale steel reeds in brass frames.
- Laminated maple parallel-chamber reed pans.
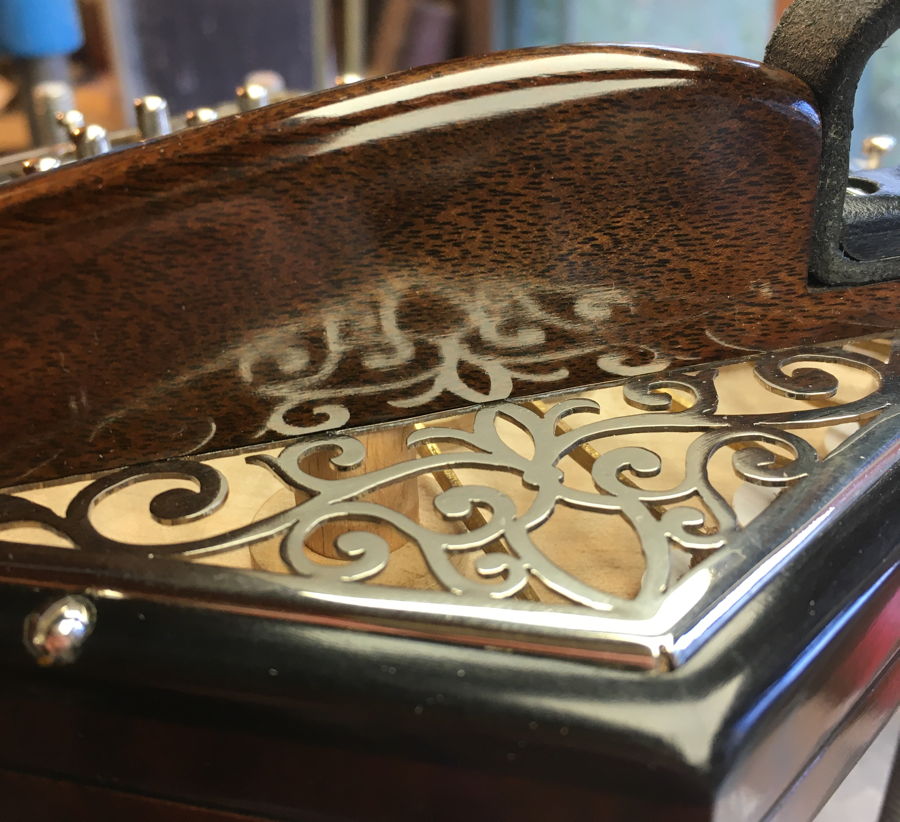
- Black walnut burr veneer sides with Rocklite Ebano borders and decorative stripes.
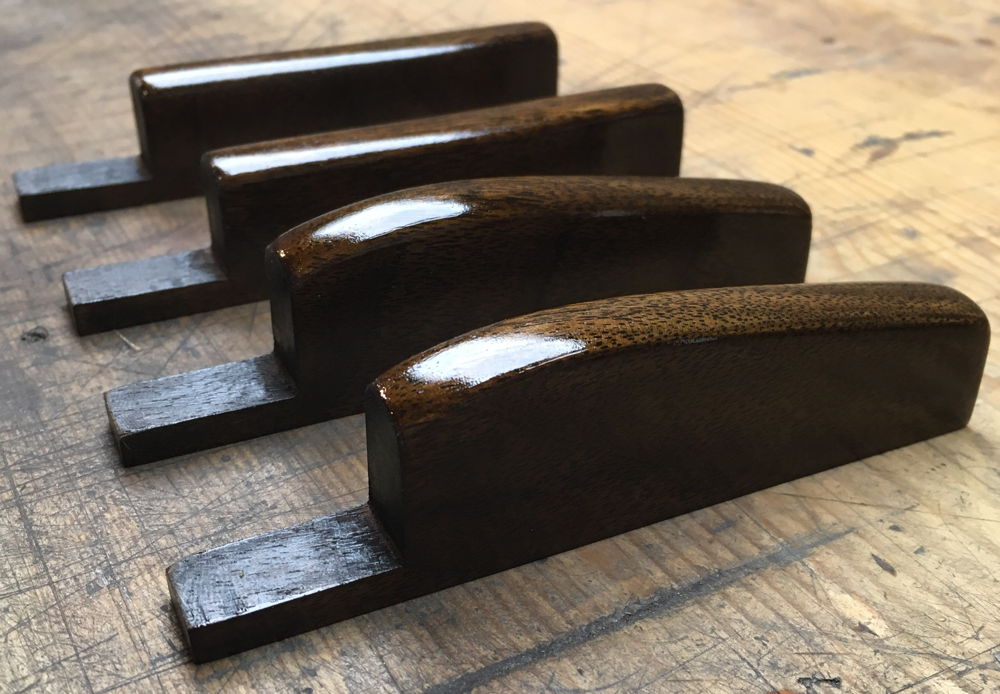
- Solid English walnut curved-top handrails (plus a spare set with straight tops).
- Brass riveted action levers.
- Sycamore pad/action boards.
- Raised inset nickel silver end plates with hidden fixing screws.
- 3/16″ nickel silver capped buttons with acetal cores.
- 3mm button travel (giving 6mm pad lift at a 2:1 action lever ratio).
- Black wool bushings.
- Nickel plating on all external metalwork apart from stainless steel bushing board screws.
- Weight: 1484g.
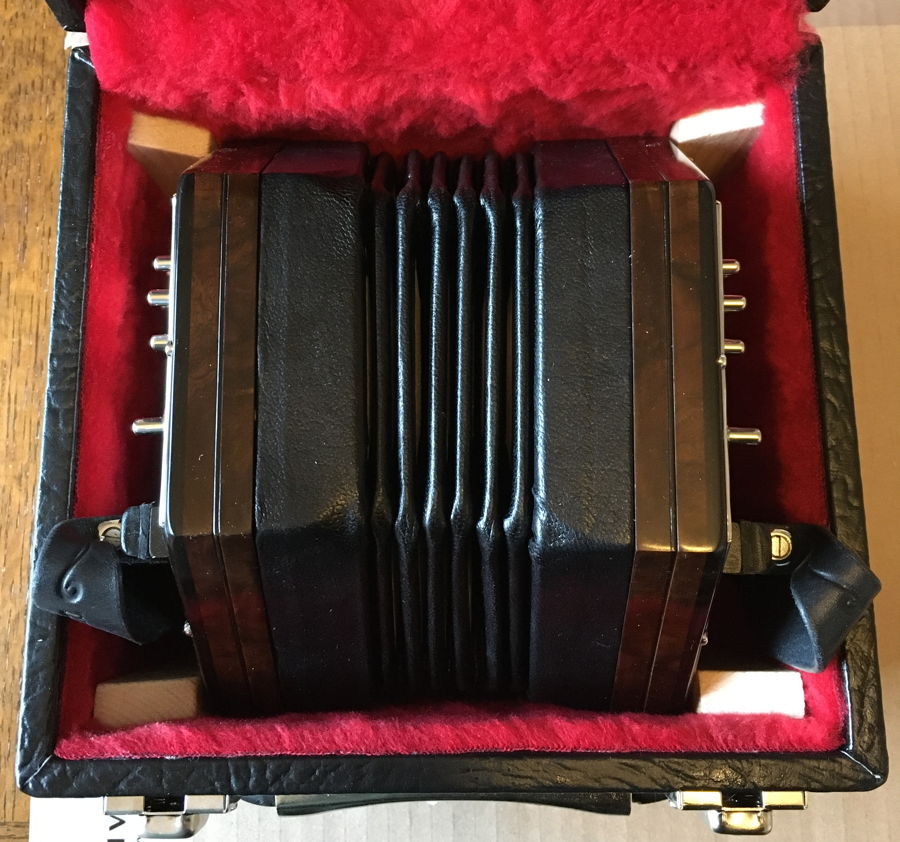
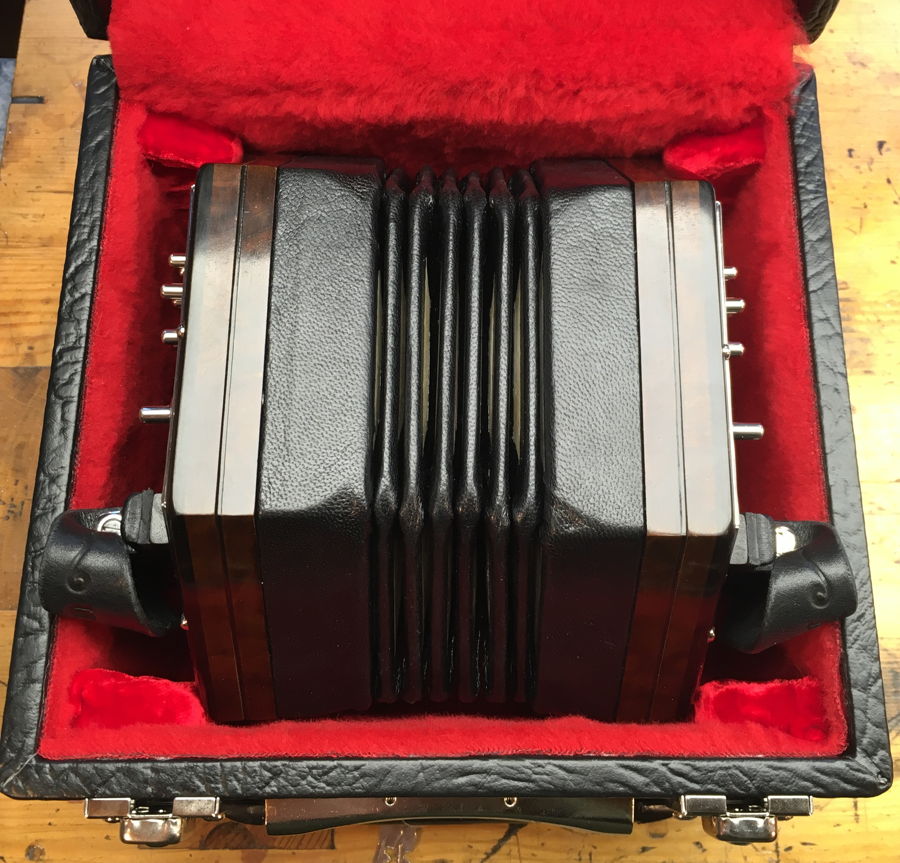
- Italian hard case with custom fitted corner blocks.
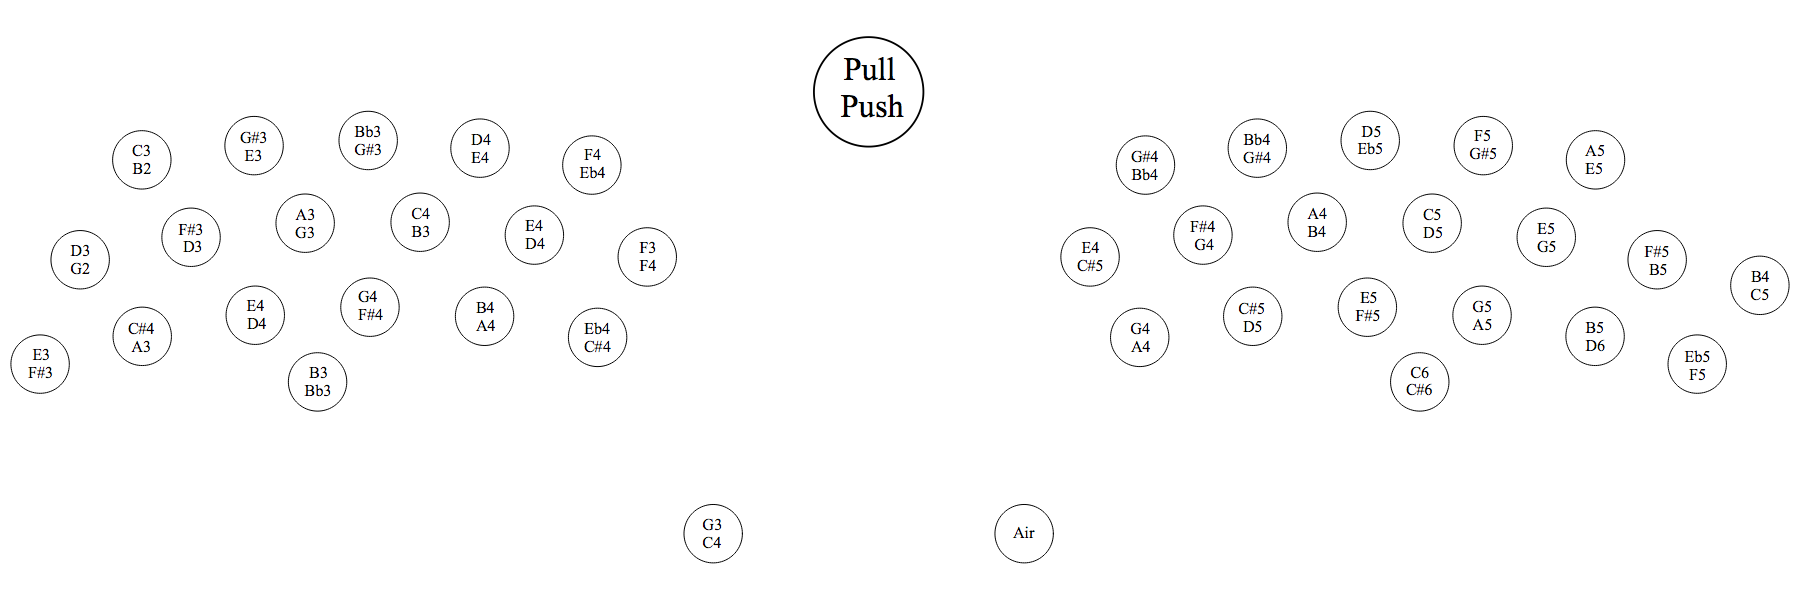
This chart (click to enlarge) shows the button layout. It is based on a fairly “standard” Jeffries C/G arrangement, transposed down to G/D:
Here is a video of Harry Scurfield kindly playing some tunes on the instrument for me. The occasional slight stumble was because some of the buttons on the accidental row weren’t in the places he is used to on his own instruments.
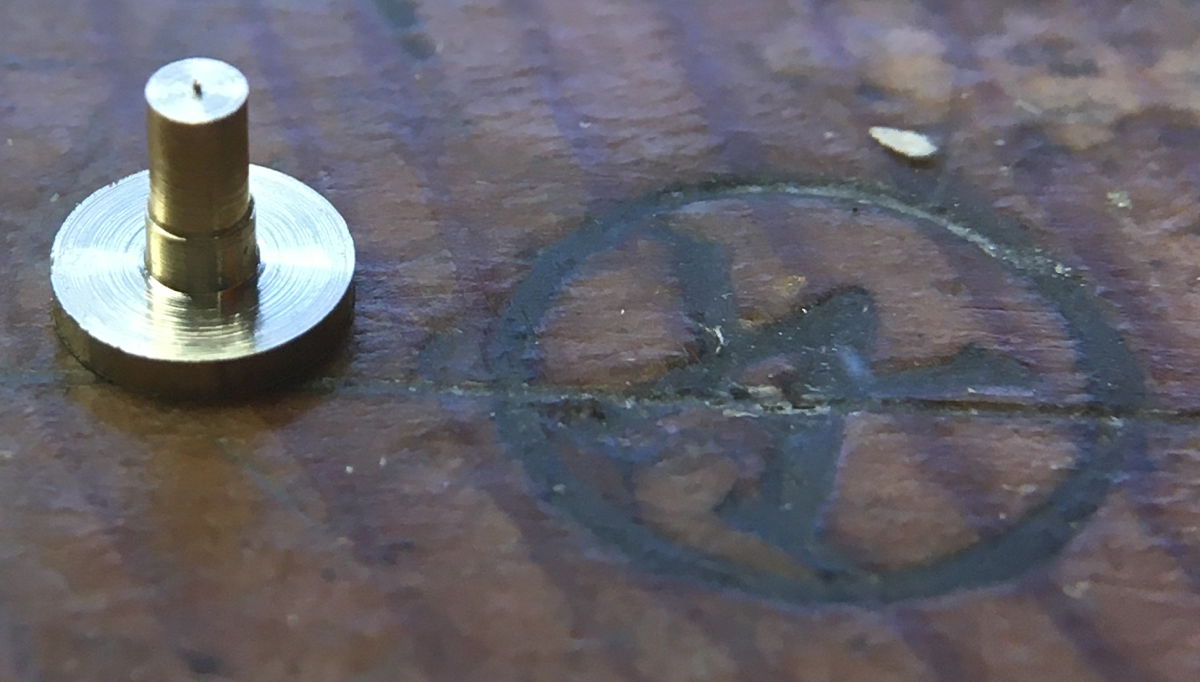
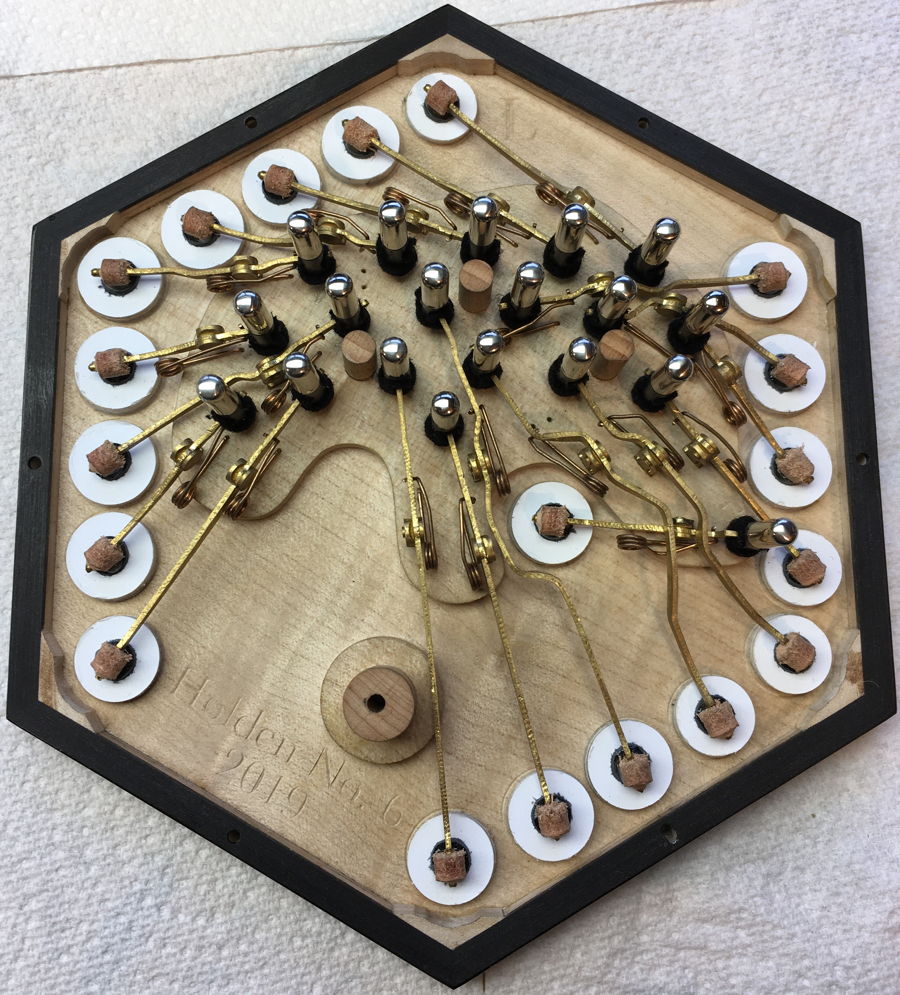
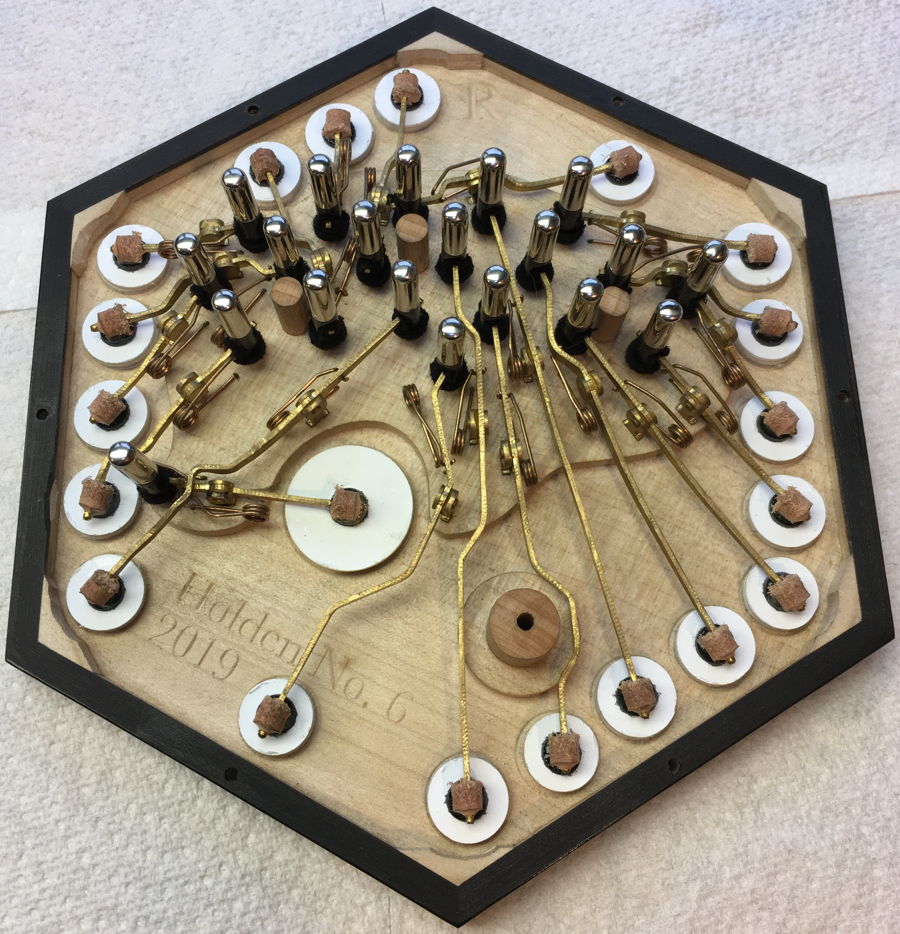
A significant improvement I made on this instrument was in one of the smallest parts: the action lever pivots. Previously I used these mass-produced brass rivets. The biggest problem with them was that the amount of side play varied depending on how you hammered the rivet, and occasionally a rivet moved a little causing the pivot to go loose or, worse, tighten up and prevent the pad closing.

From this instrument on, I plan to turn my own rivets from brass rod. The key difference is the precisely machined step, which sets a fixed amount of side play. You can rivet it firmly in place and there’s no risk of it later moving in the post and misbehaving. Other advantages are that it has significantly more bearing surface area, and it is thinner so it doesn’t take up as much space in the action box.
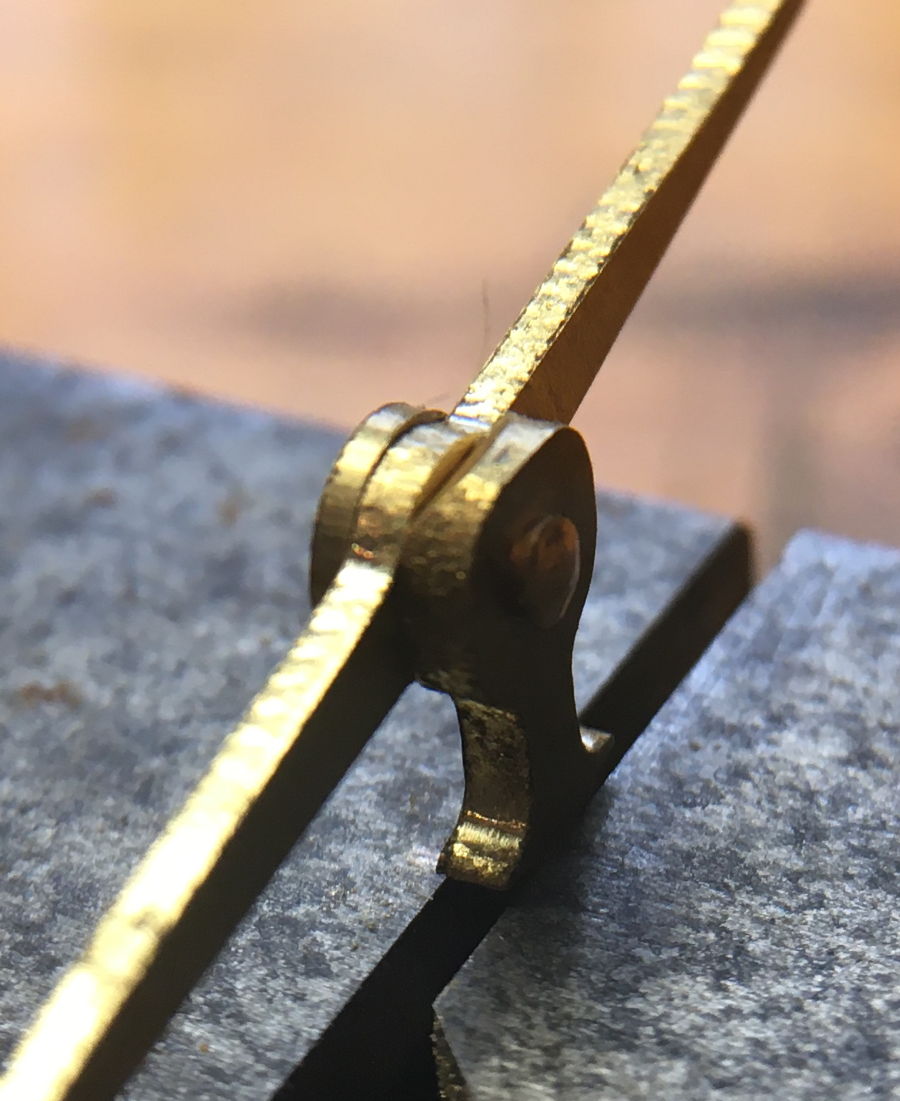
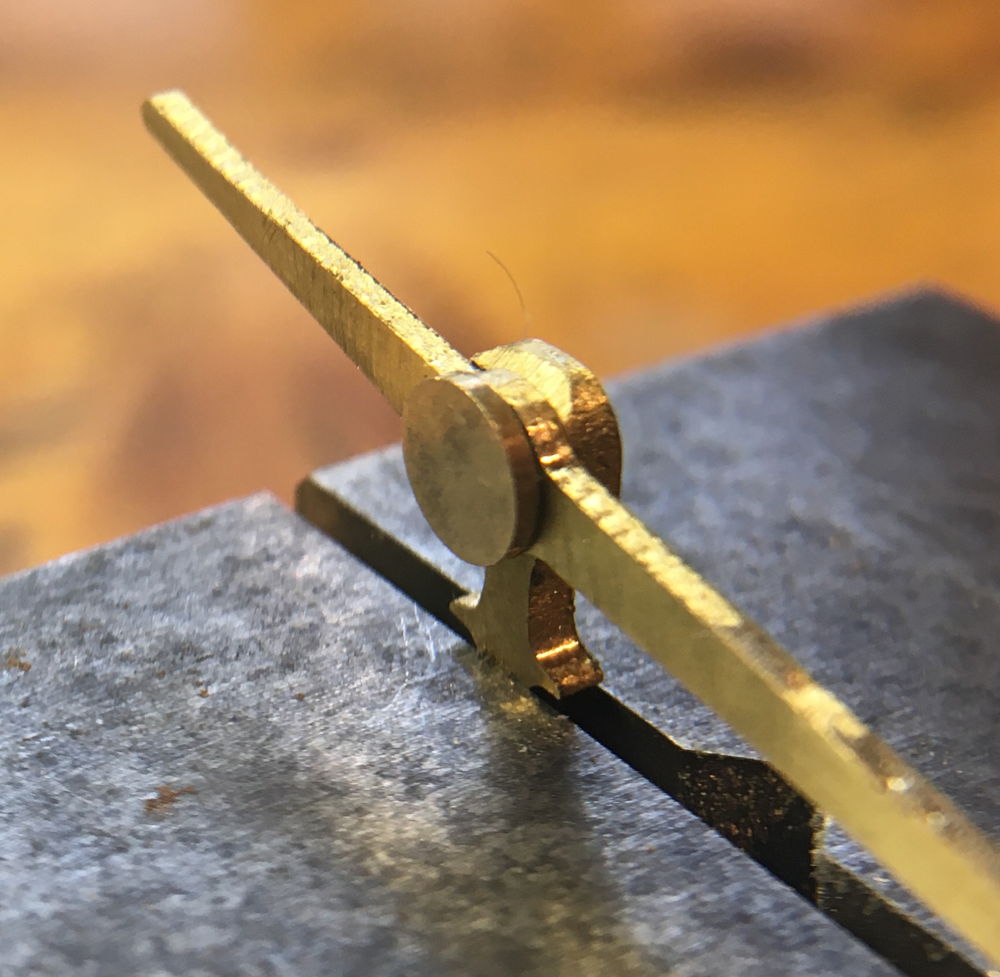
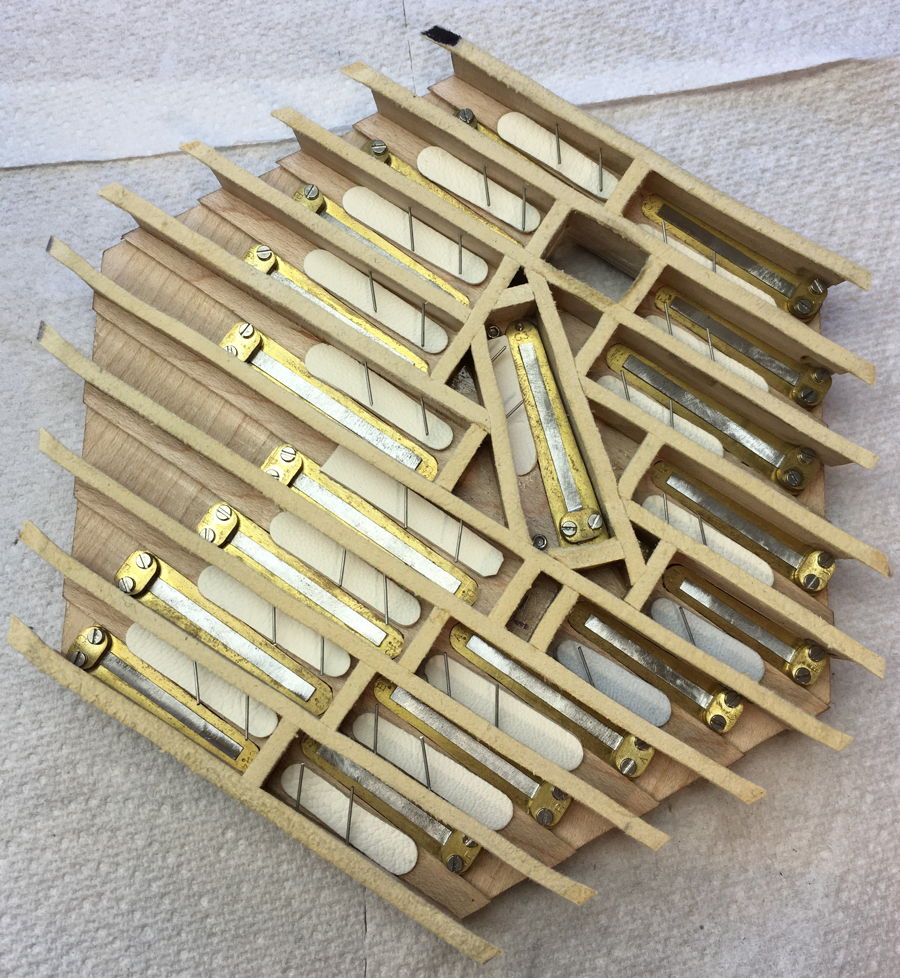
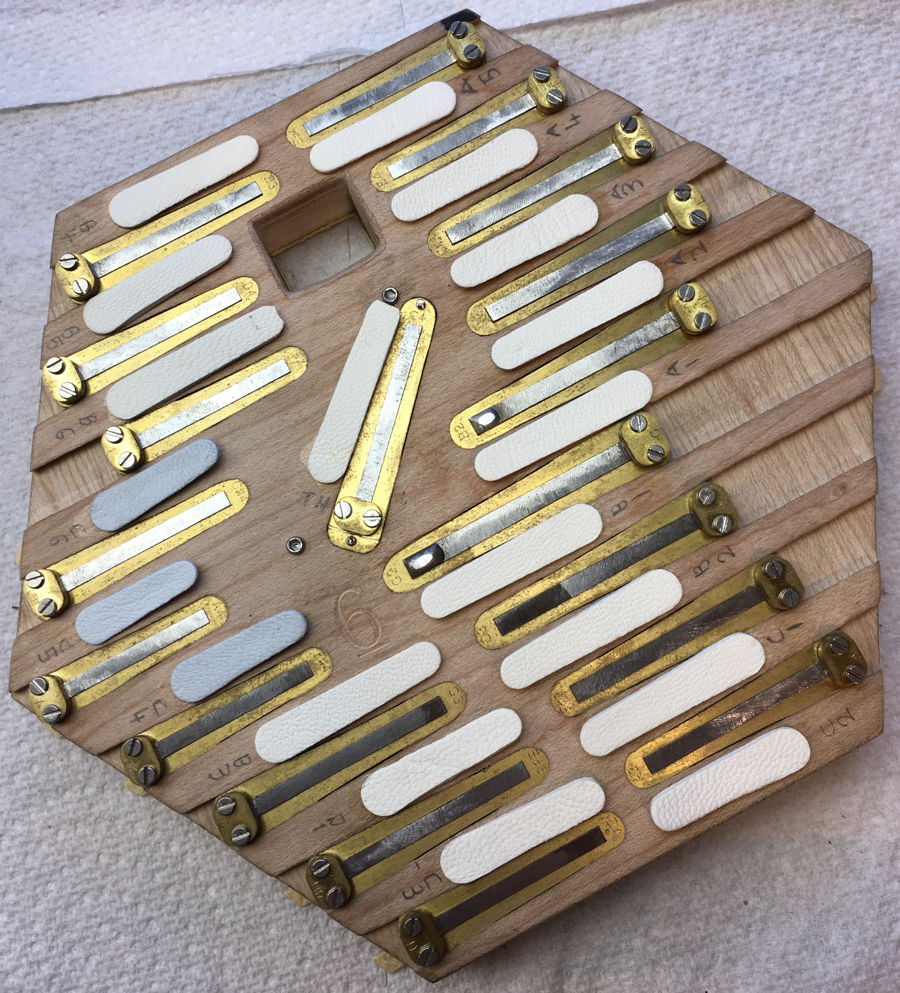
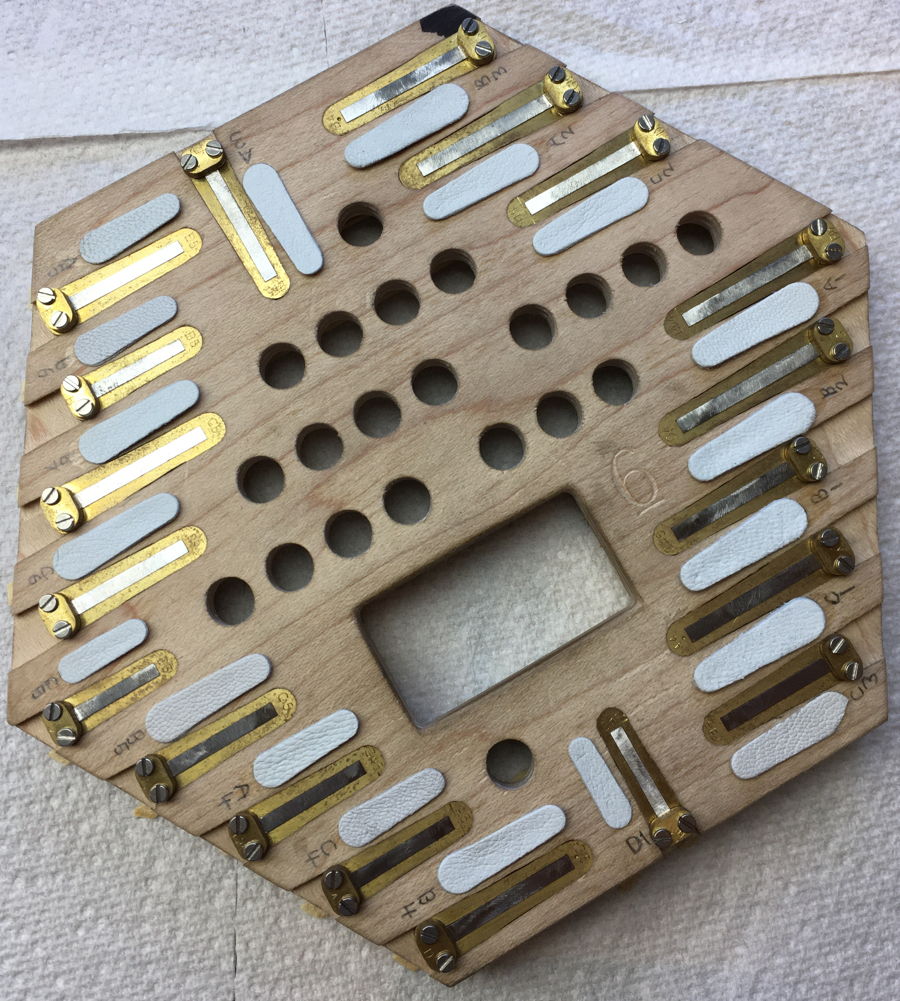
Both of the thumb buttons cross under one or two other levers to reach a pad in the middle of the action board. Something I did a little differently this time is that I made special extra-low pivot posts for those two levers.
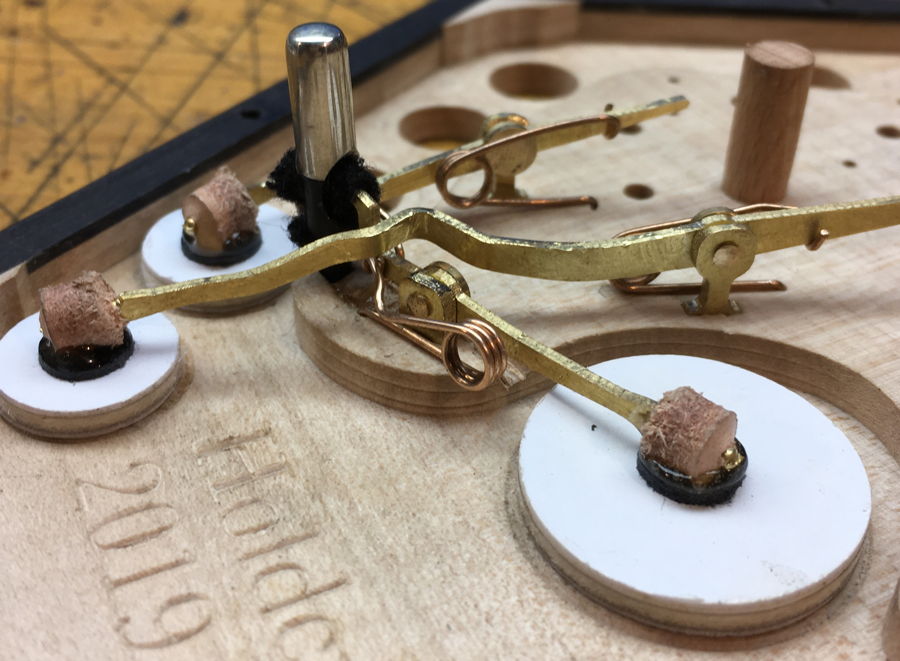

While not the densest actions I have designed, they do have a few fiddly areas. I managed to avoid any very short or heavily cranked levers, and I was able to fit in a large round air pad on the right.
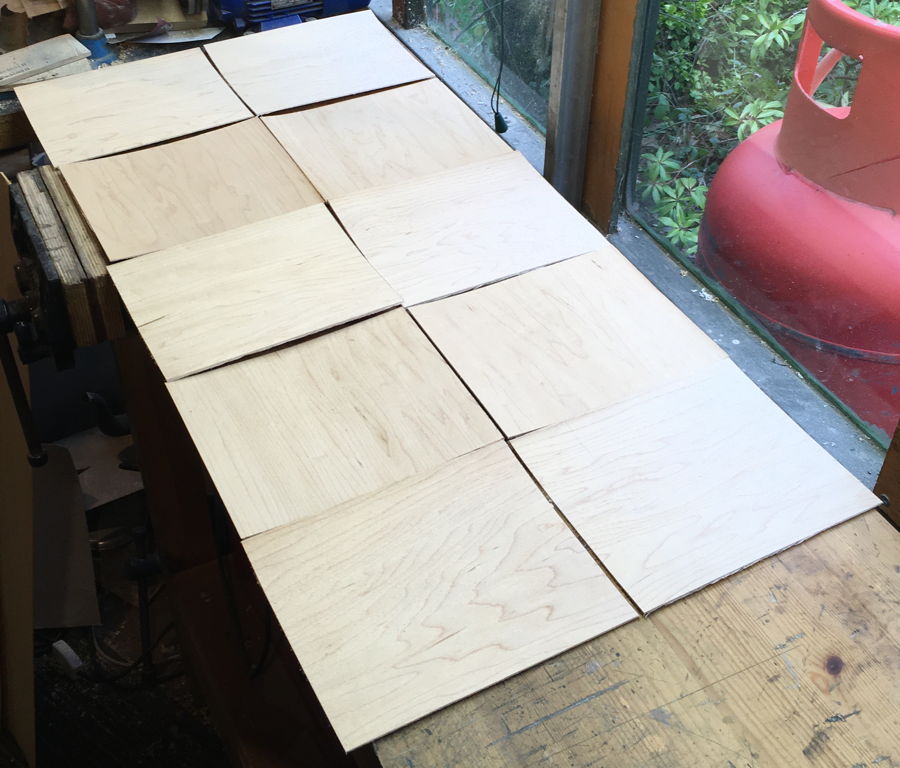
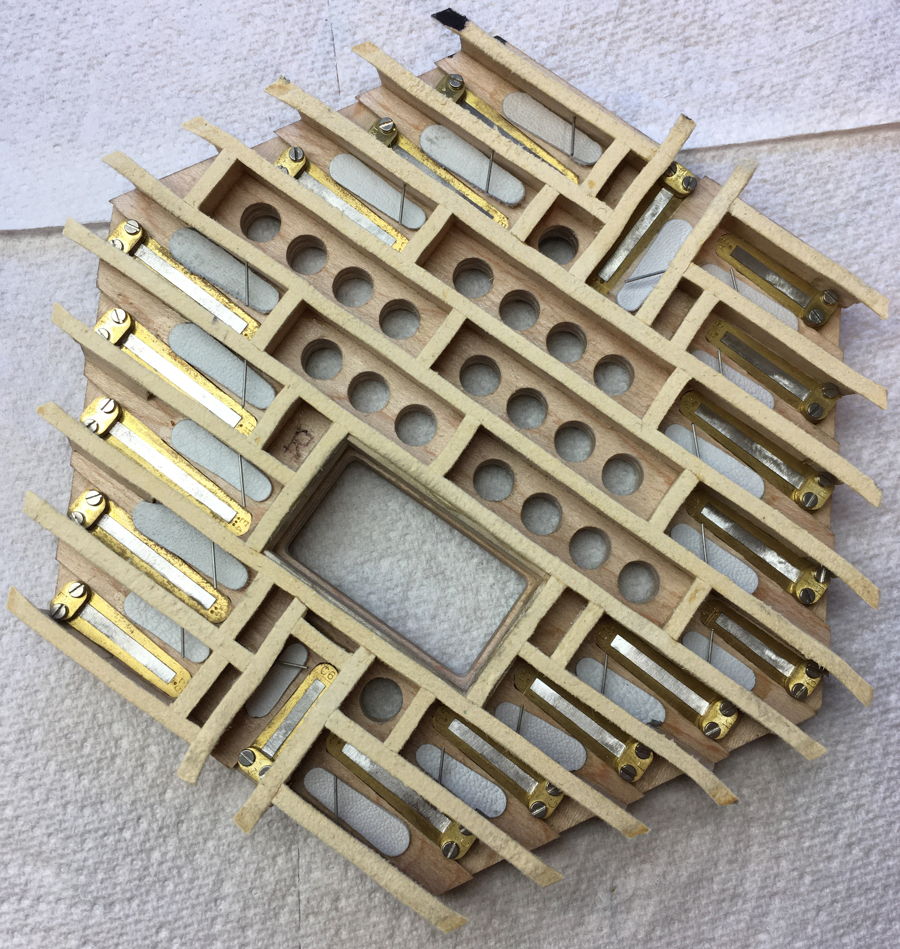
Because this concertina is destined for an area of America that is subject to significant seasonal humidity swings, I opted to use laminated reed pan boards for stability. Rather than use commercial plywood, I made my own boards from five plies of 1.5mm thick Canadian hard maple, glued with West System epoxy in a heated veneer press. The advantage of doing it this way is that the resulting boards are very hard and dense, and I know for sure that there are no hidden flaws on the inner layers of the boards. I also made the bushing boards the same way, but with three plies instead of five.
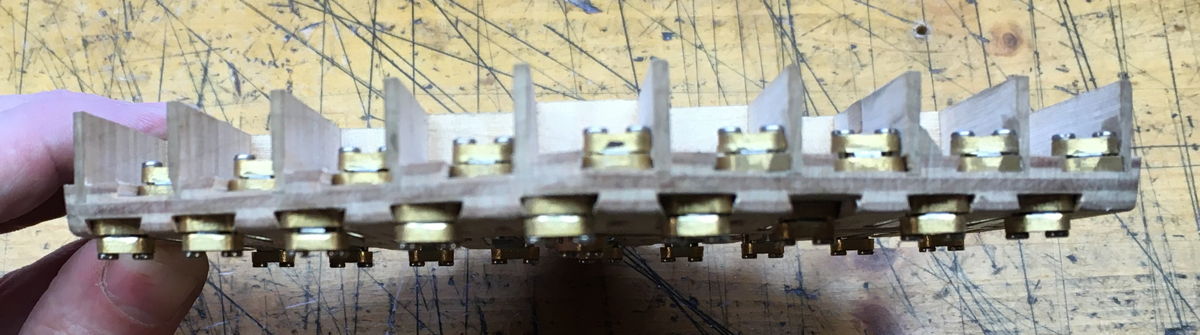
You can see the multiple plies when you look at the edge of one of the reed pans.
Due to space constraints I had to place one chamber in the middle of the reed pan on the left hand side, connected to the thumb button. It has a slightly different tone from the other chambers. I wouldn’t say that it is any quieter or slower to respond, it just has a slightly different sound.
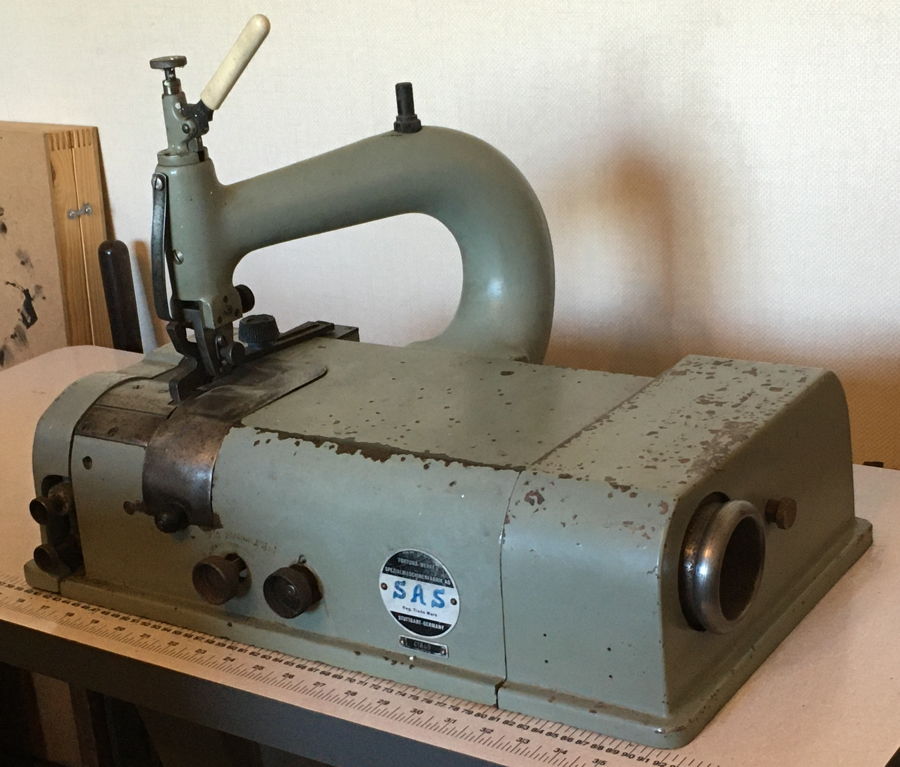
My most recent tool investment was an old Fortuna leather skiving machine. It needed some refurbishment and new parts to get it working properly, but after spending a while getting the hang of adjusting and using it I think it’s going to save me quite a bit of time and frustration when I’m skiving bellows leather.
I used my Pictish key pattern bellows papers, printed with silver foil on black paper to match the end plates. Something unexpected happened though: from some angles the printing looks bright silver but from others it has an aquamarine tint. The effect is that the colour of the bellows changes as you open and close them and move them around in the light (you can see the effect more clearly in the video above). I think the tinting effect was probably caused by the varnish that I painted onto the papers to protect them.
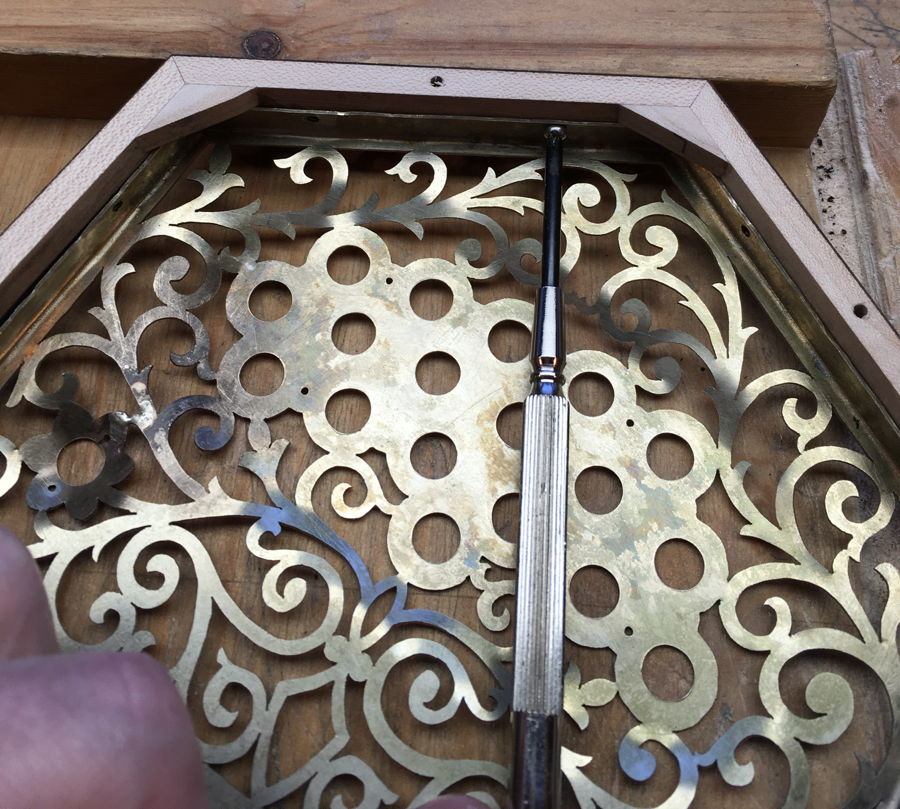
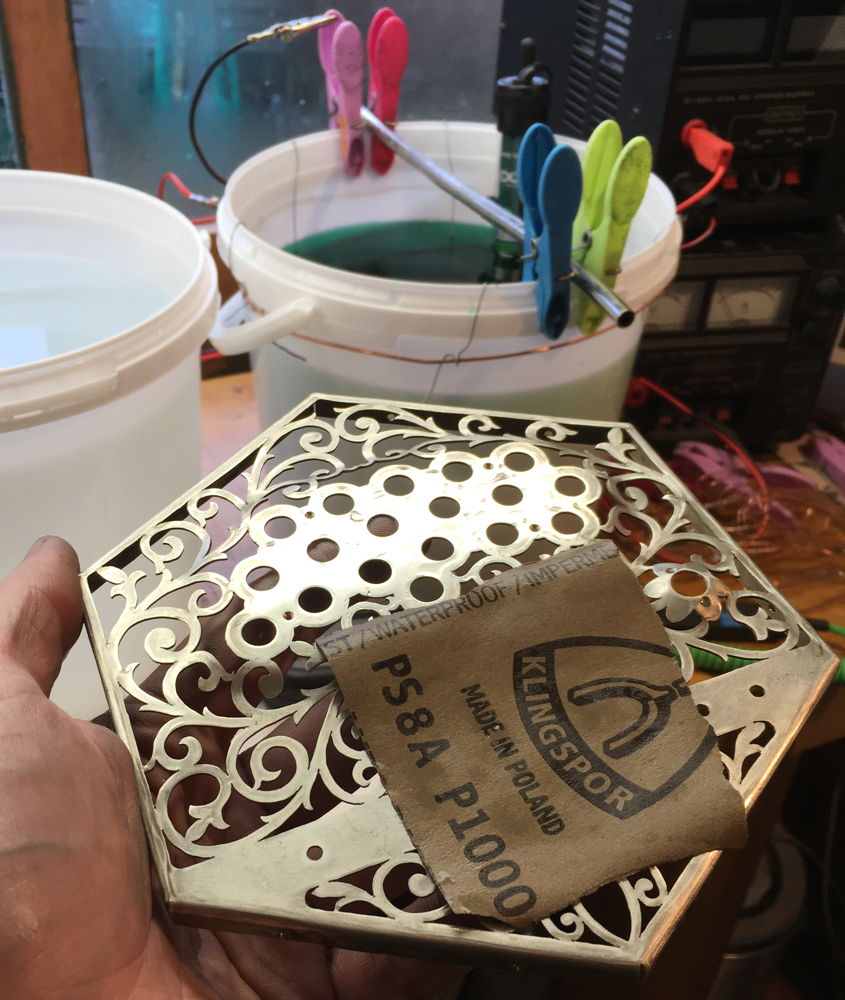
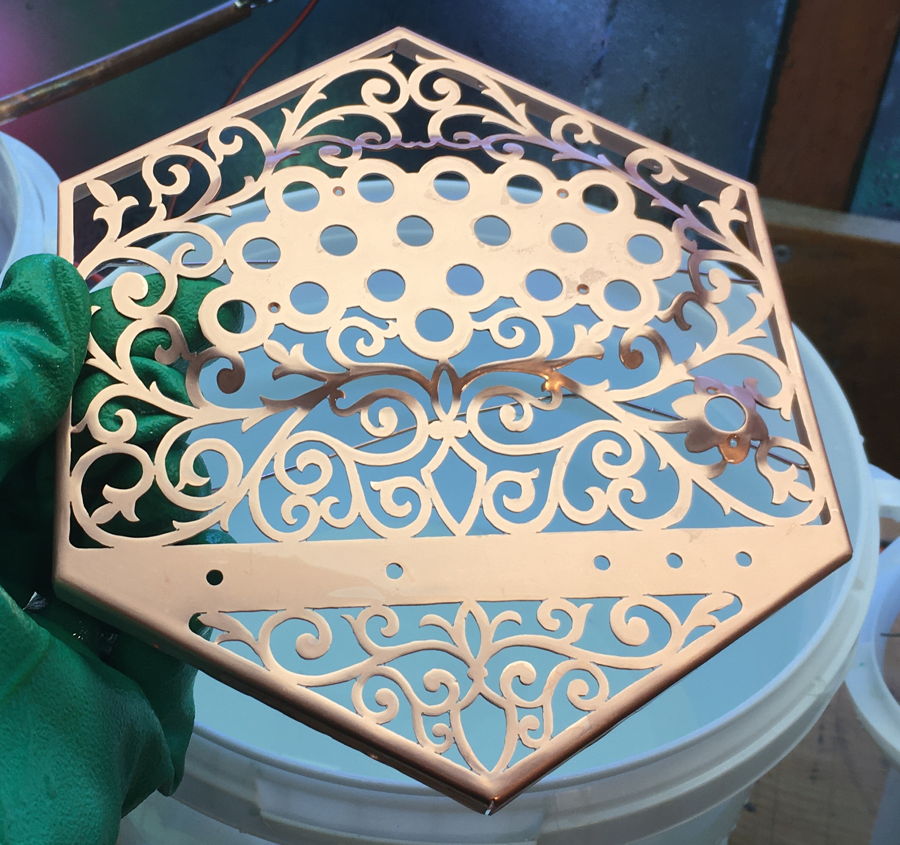
I hand pierced the end plates in nickel silver. It is my own fretwork design, though heavily inspired by vintage Crabb/Jeffries designs.
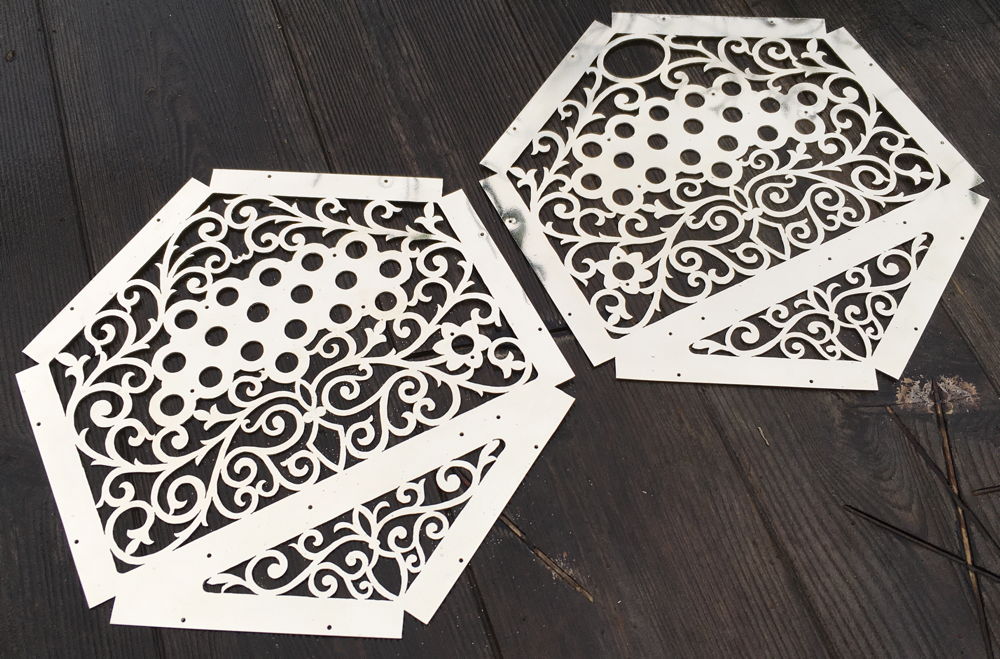
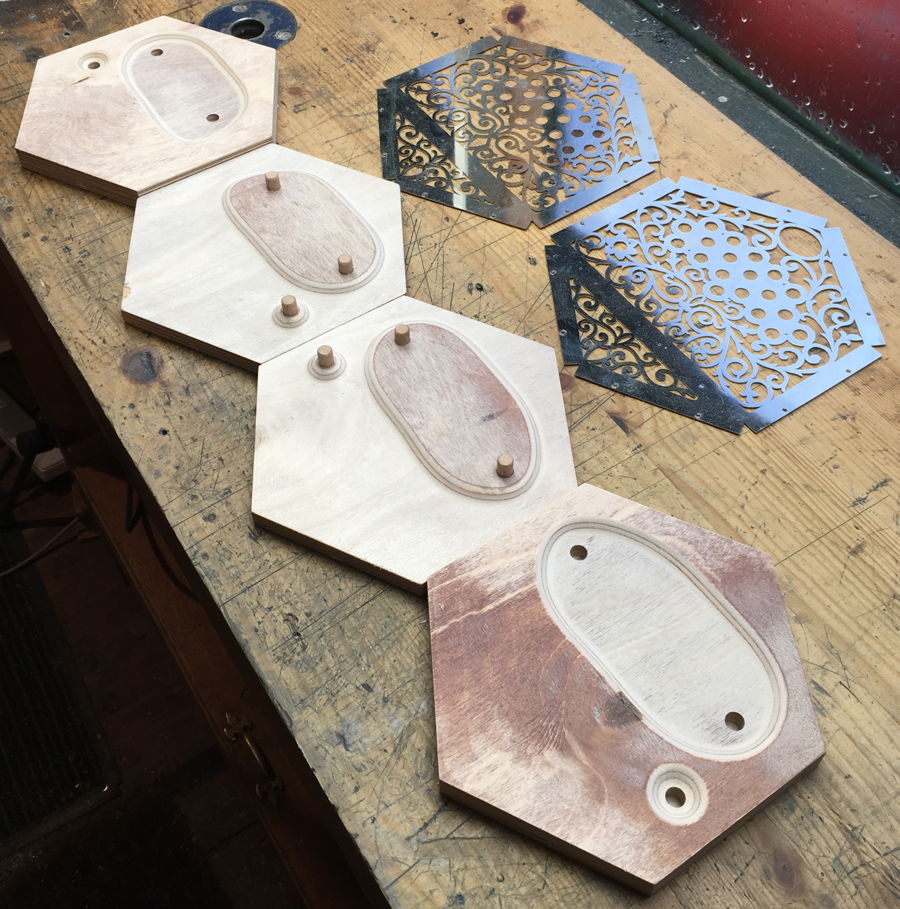
This was my first try at making raised metal ends. I routed two pairs of moulds from plywood with locating dowels through button holes:
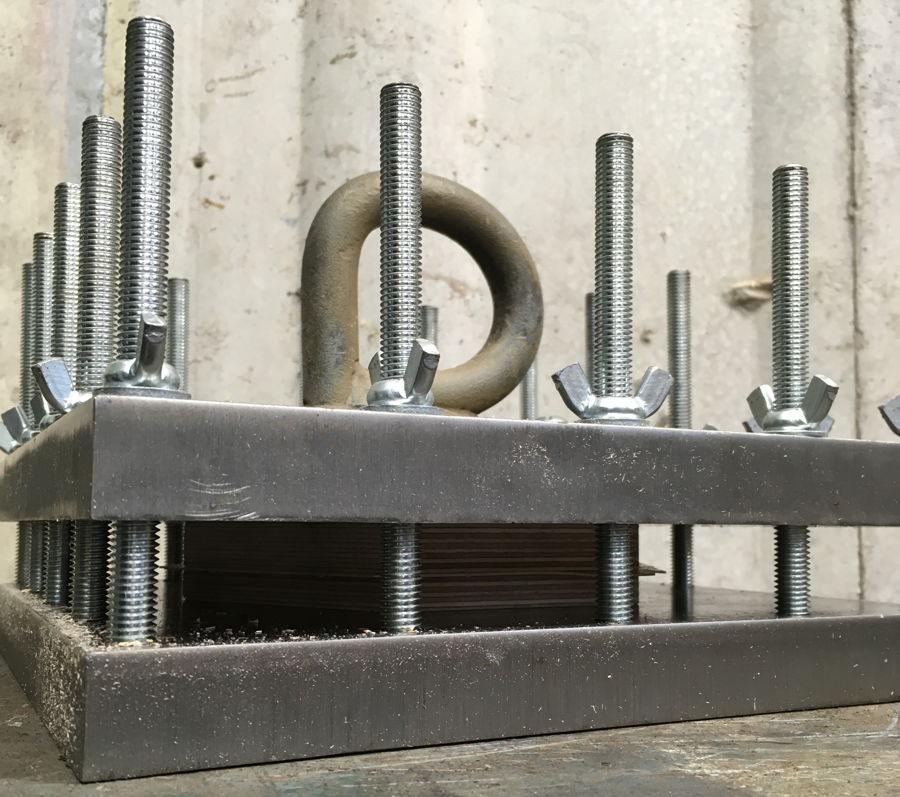
Then, one at a time, I placed an end plate in its mould and squeezed it in a heavy duty steel press (the same one I used for laminating the reed pan boards).
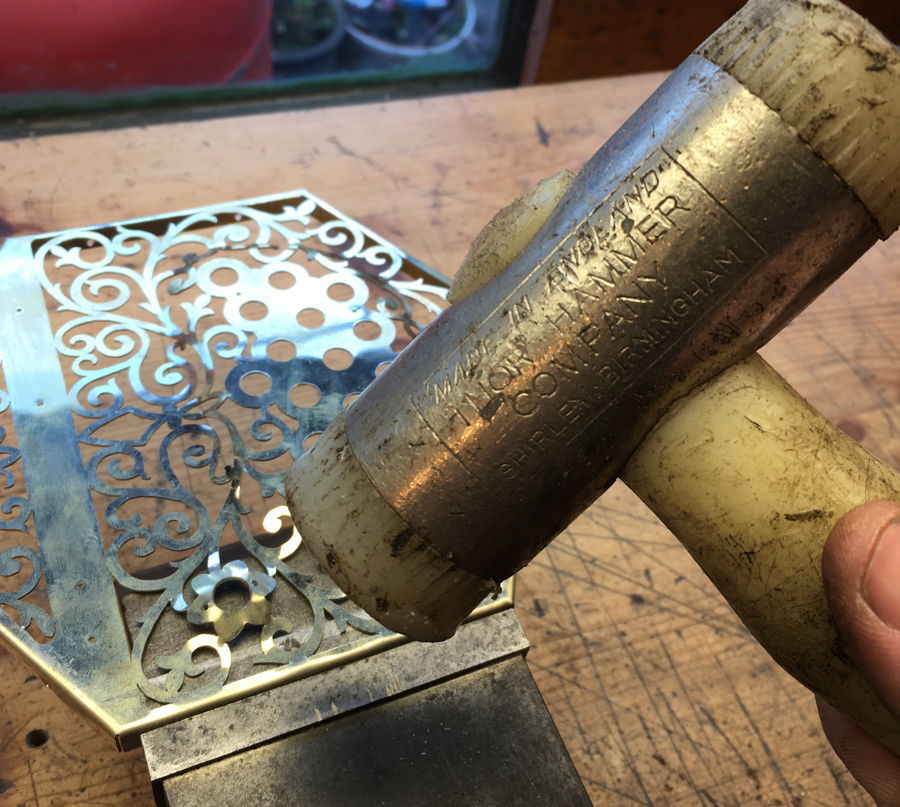
After raising the keyboard areas, I hammered down the edges. In hindsight this was not the best method; it worked but I will probably do it a bit differently next time.
The plates are held onto the action box sides by tiny stainless steel screws hidden underneath. They were a fiddly job to install!
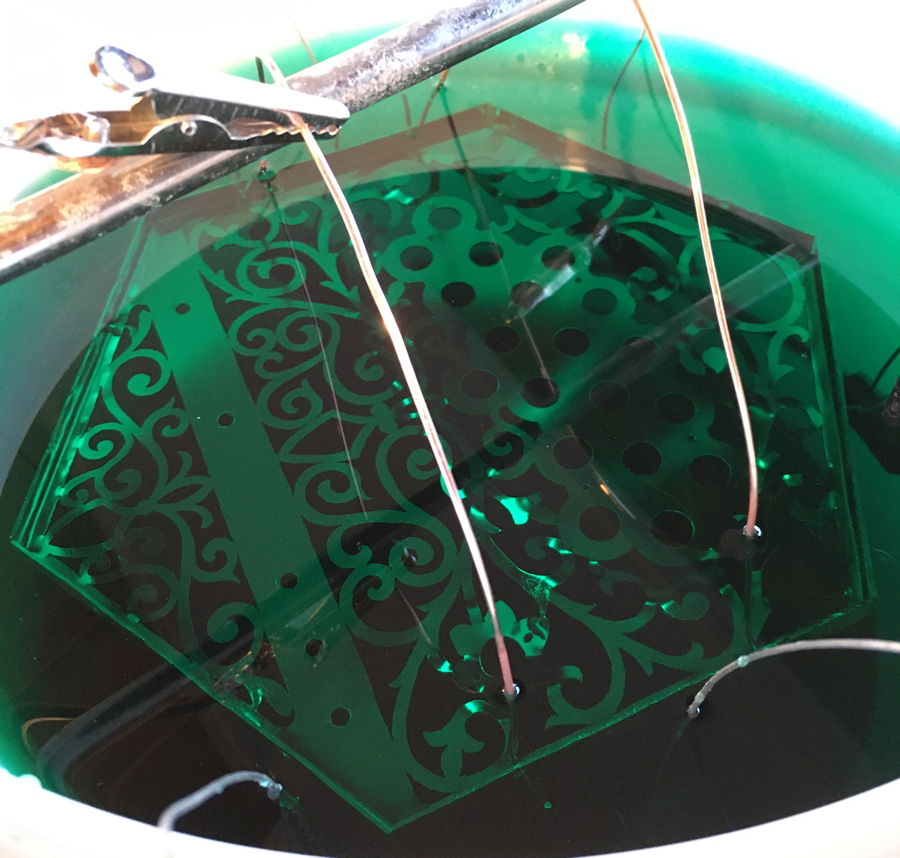
I had originally planned to have the metalwork professionally nickel plated, but the nickel plater let me down, so I bought a couple of DIY electroplating kits and figured out how to do it myself.
Step 1, wet sand up to a high grit because any visible scratches will show through in the final finish. It doesn’t have to be very highly polished because the nickel bath has brightening additives that produce a mirror finish as long as the surface starts out smooth.
Step 2, a strong degreasing bath.
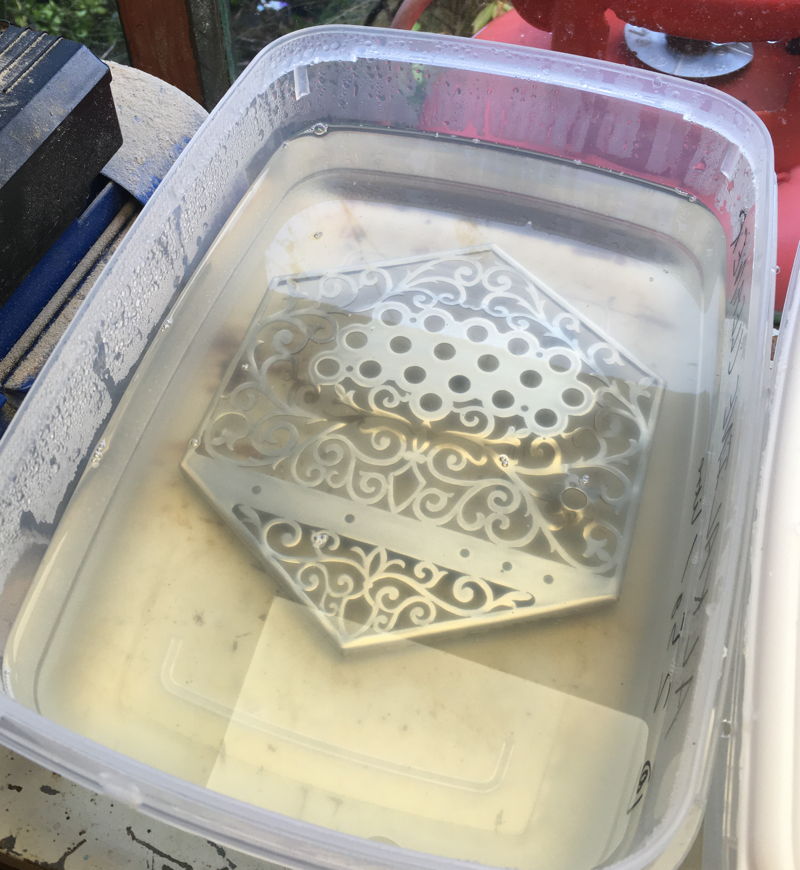
Step 3, an acid pickle to remove any remaining oxides.
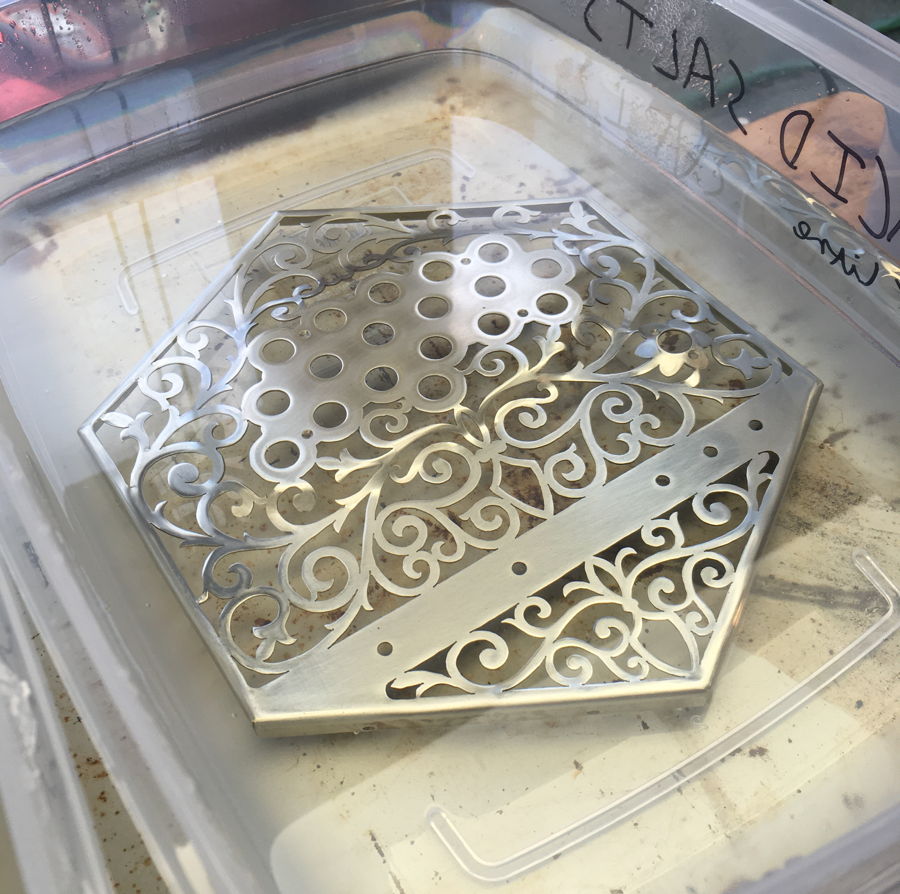
Step 4, copper electroplating.
The copper layer doesn’t need to be very thick; its main purpose is as an undercoat to help the nickel adhere better.
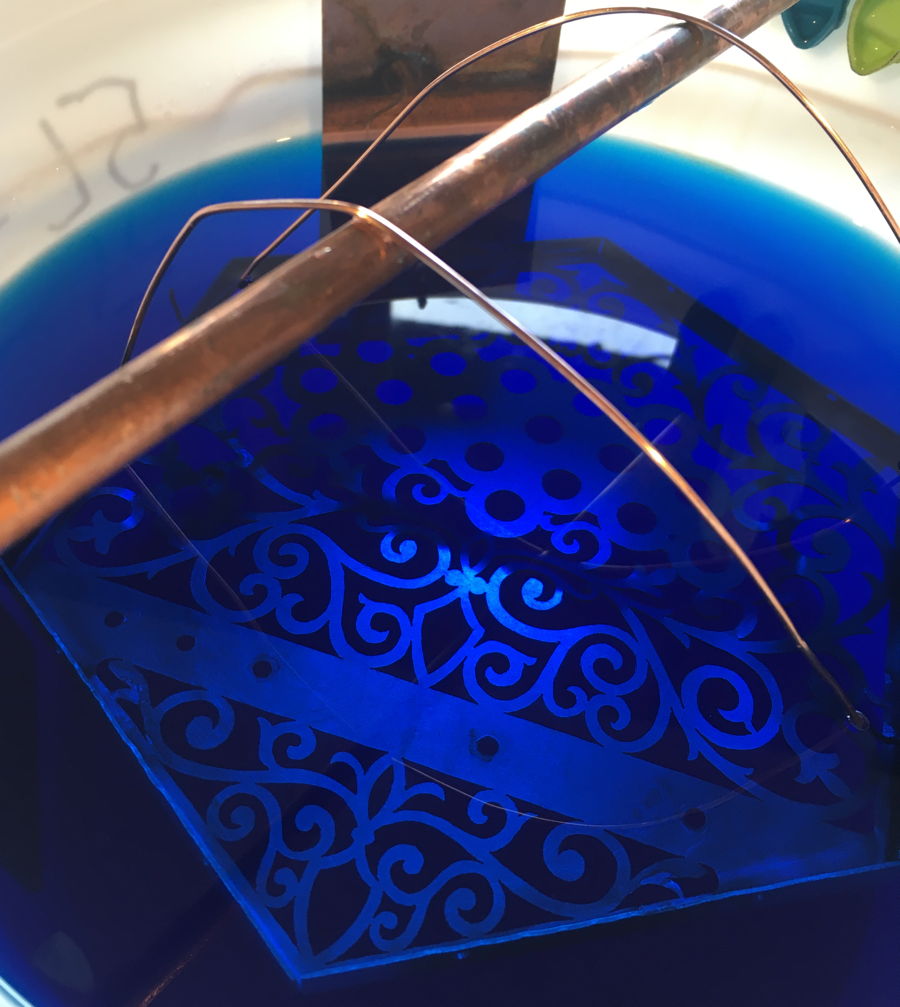
Step 5, nickel electroplating. This is where I had the most problems, mainly caused by dust falling into the bath (my workshop is not exactly a cleanroom environment!) and causing bumps in the finish. In the future I think I need a pumped filtration system to keep the chemicals clean.
Step 6, a light final buff.
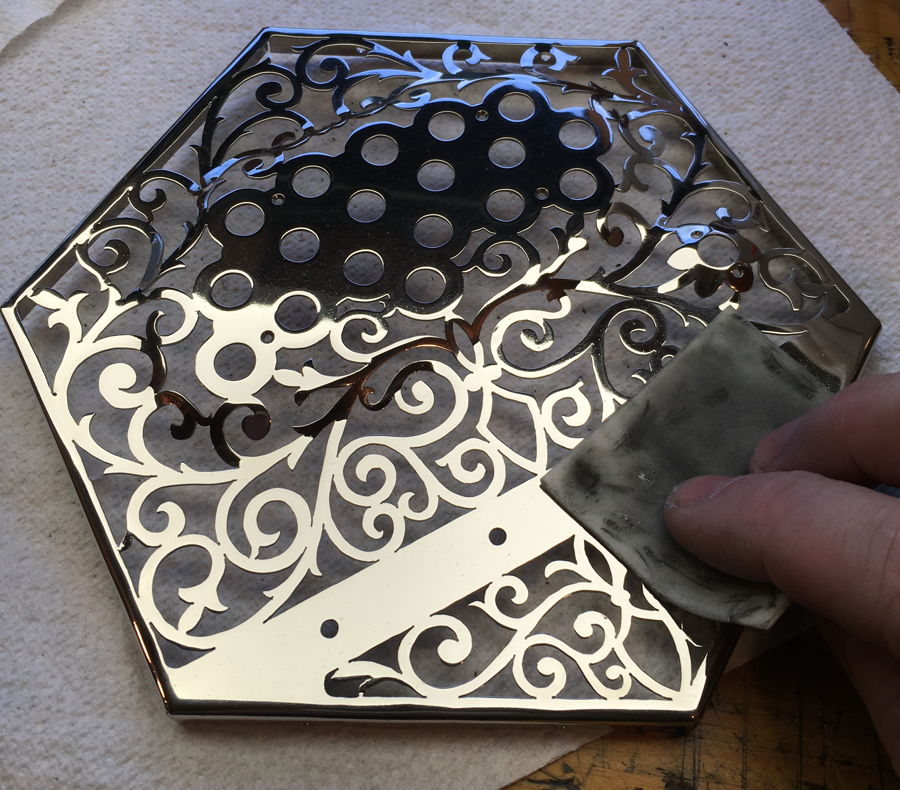
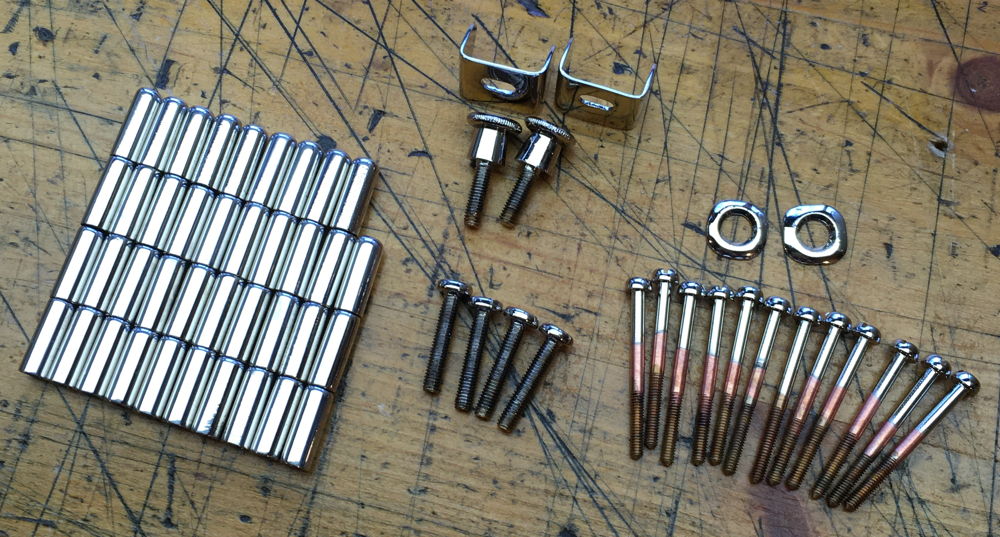
I also plated all the button caps, the tops of the end bolts, and the strap fixing hardware. The advantage of nickel plating instead of leaving it as bare nickel silver or brass is that it doesn’t tarnish quickly, so it will stay bright for a long time with just an occasional buffing. It is also fairly hard and less easily scratched.
The edges and corners of the action boxes are smoothly curved for playing comfort:
At the client’s request I made both curved handrails and straight ones.
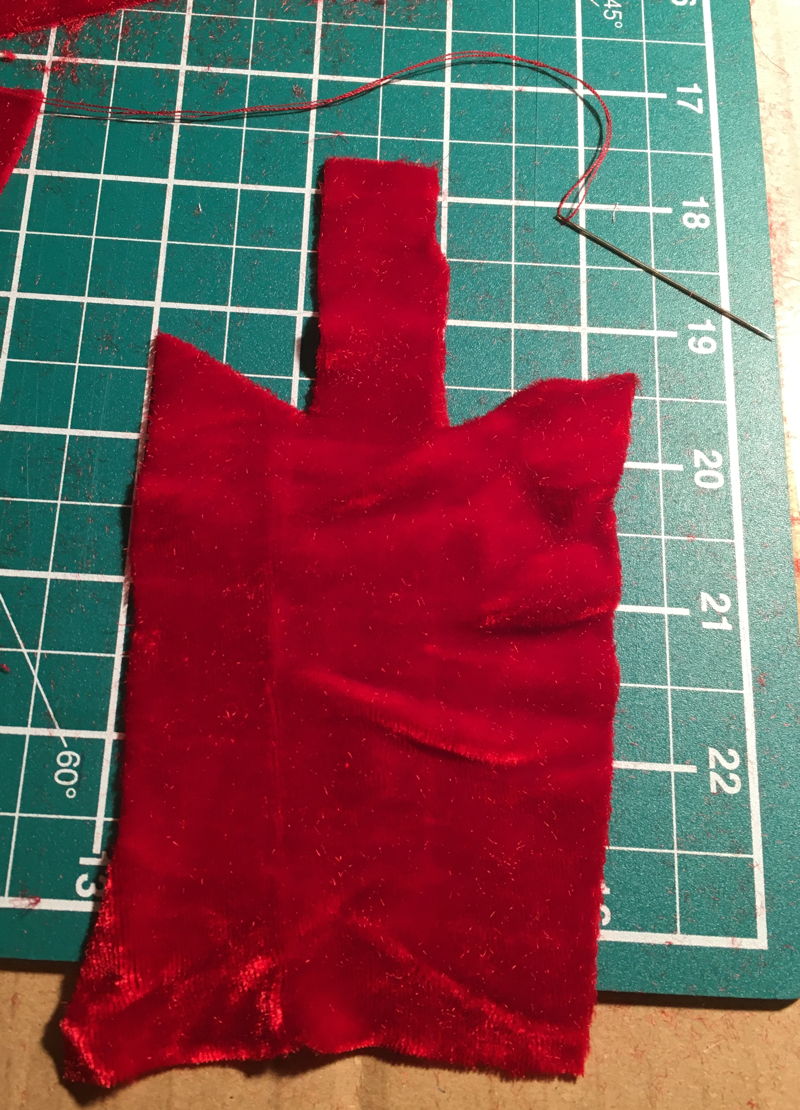
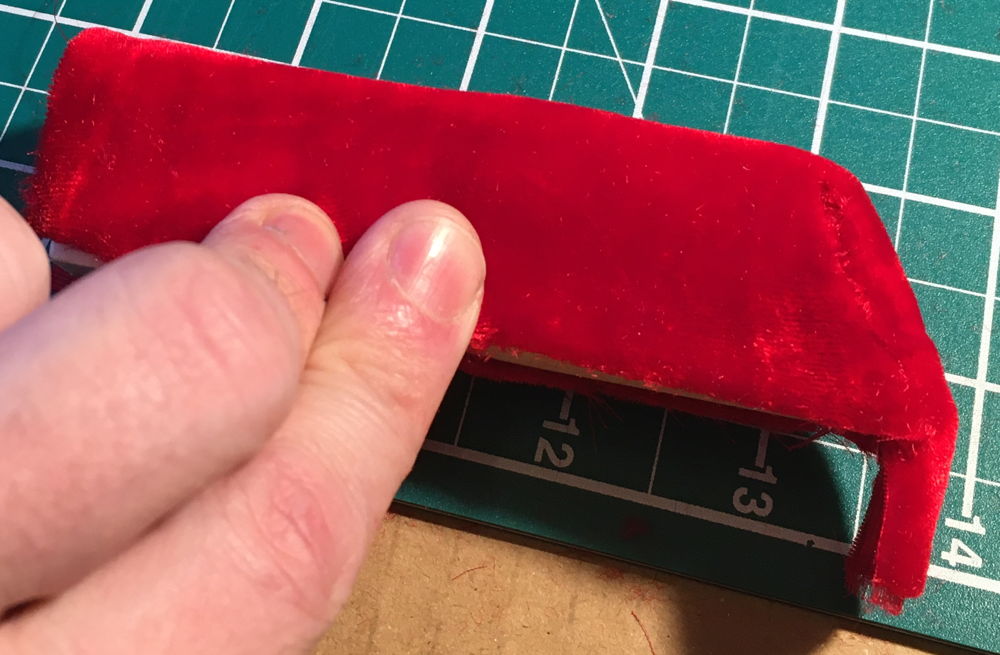
After listening to feedback from previous clients about how I did the corner blocks in my cases, I did this one a bit differently. The blocks are much smaller, don’t compress the bellows as tightly, and I tailored the velvet covers so they fit the blocks more tidily.
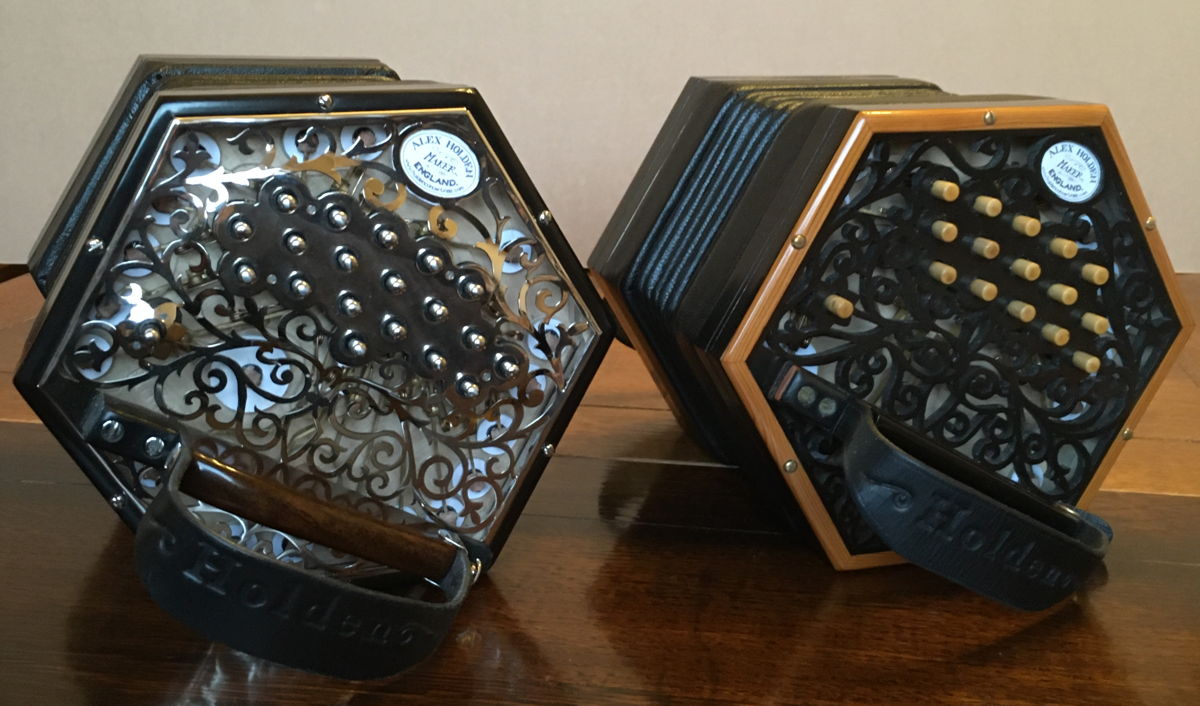
A family resemblance: No. 5 came back in for a service while I was finishing off No. 6 so I got a photo of the two together.