Introduction
My latest instrument is a very special custom 47 button Hayden duet. I also made a bespoke hard case to store and transport it.
Here is a demonstration of it being played by its owner, Israel Sánchez. The set has two tunes. The first is a waltz/bourree composed by José Climent. The second is a traditional pasacalles from the Aliste region of Spain.
Specification
- 47 buttons (+ air lever), based on the standard 46 button Hayden layout with a few small customisations.
- Six sides, 6 1/4″ wide.
- Seven fold black goatskin bellows with 1 1/8″ deep cards and custom bellows papers.
- Traditional concertina reeds in aluminium frames for weight saving, normal scale on the left hand and long scale on the right (the same distribution I previously used successfully on Holden No. 4).
- 1/5th comma meantone tuning, with A as the root note.
- Laminated maple radial-chamber tapered reed pans with two inner chambers on each side.
- Solid purpleheart action box sides with decorative stripes.
- Quilted maple laminated raised end plates with decorative striped border.
- Peacock Oil wood finish.
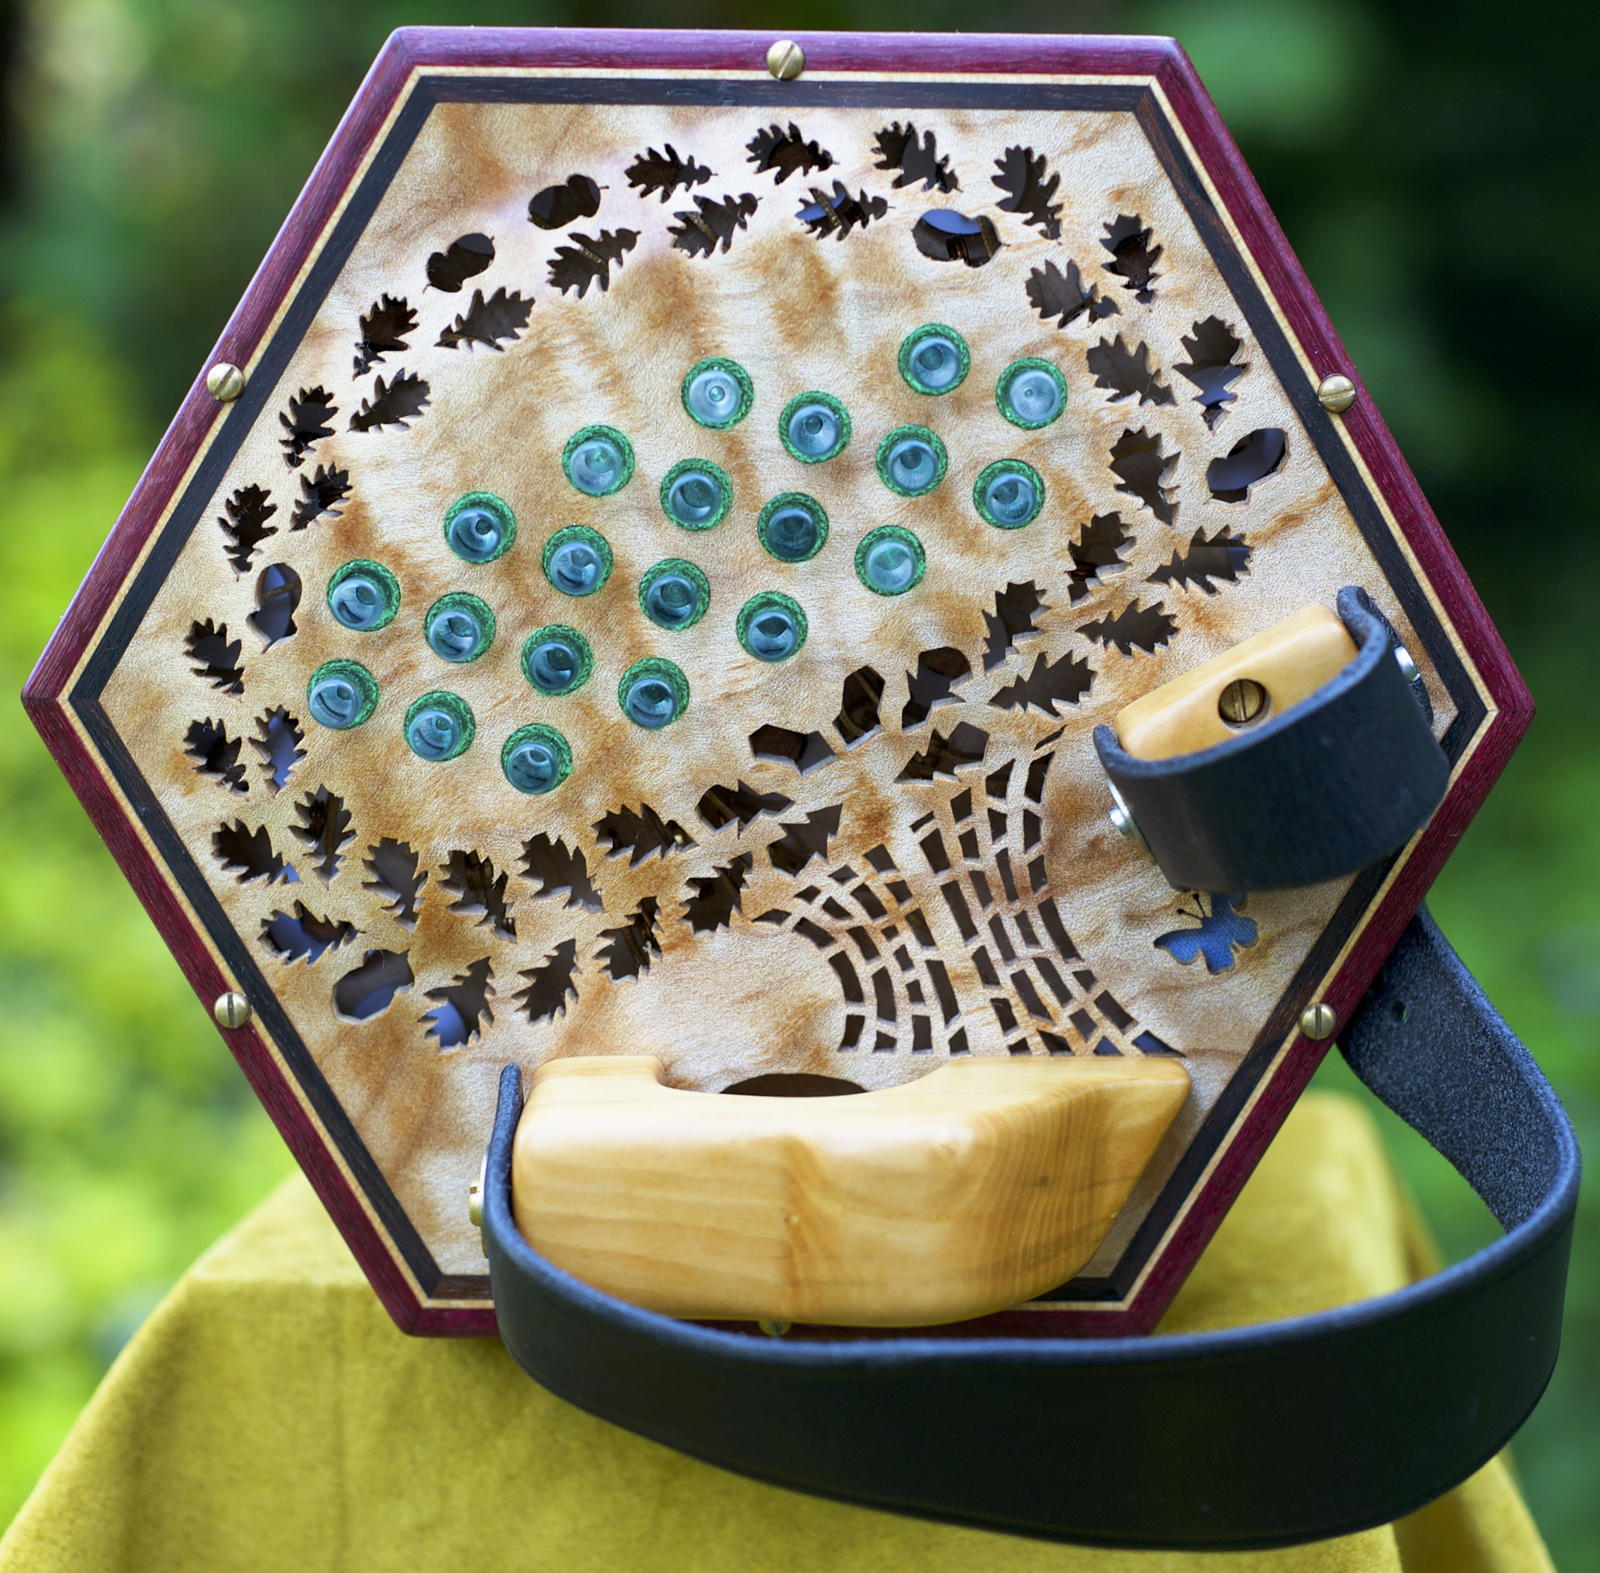
- 6mm diameter glass buttons.
- Green button bushings.
- Custom boxwood hand rests and thumb pads with custom hand and thumb straps.
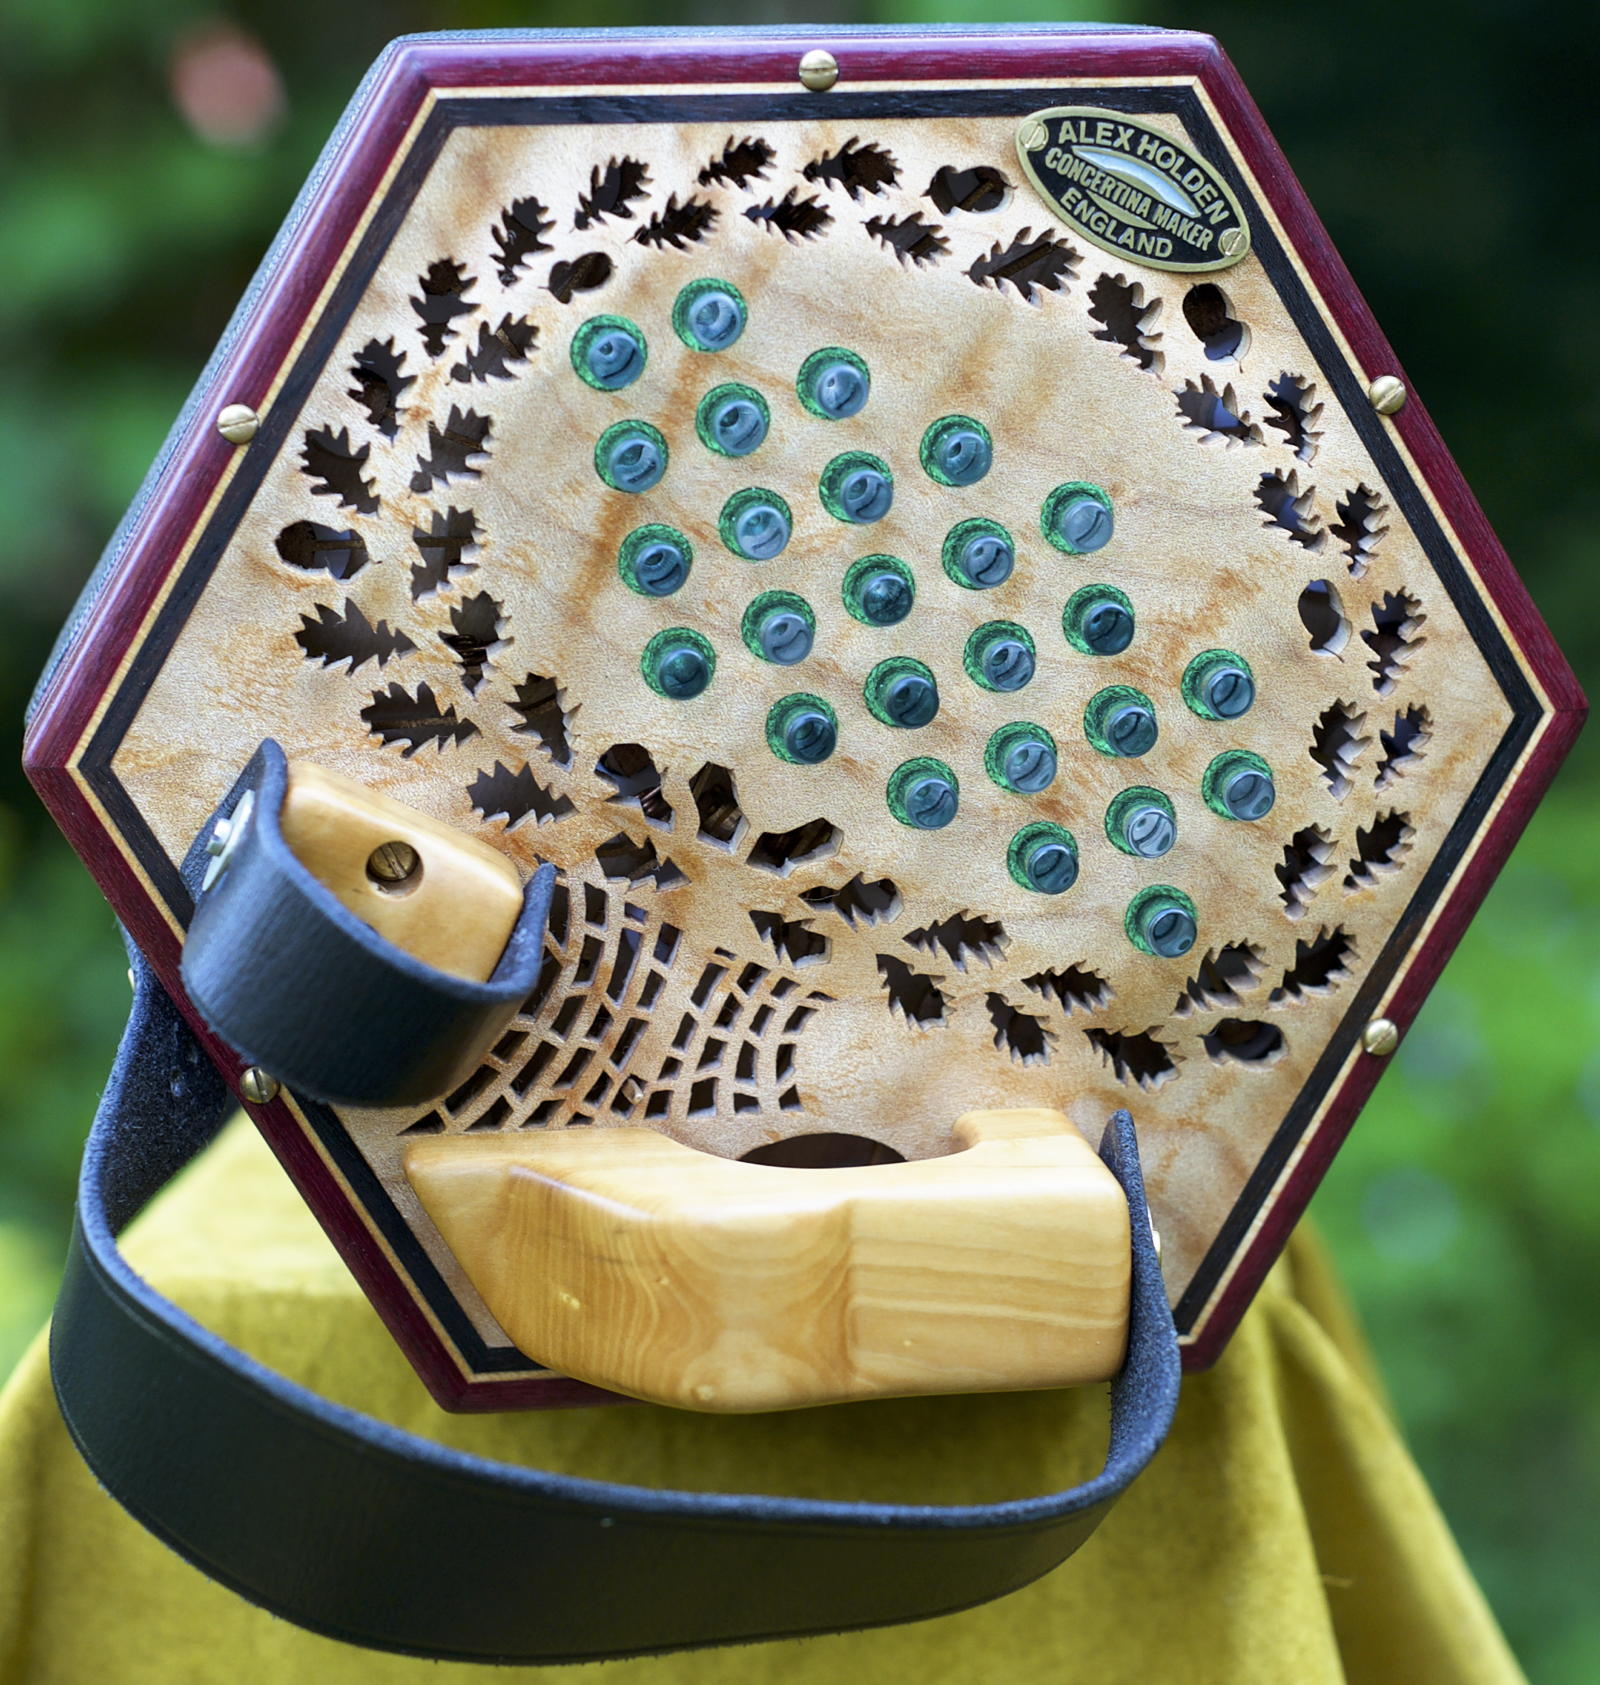
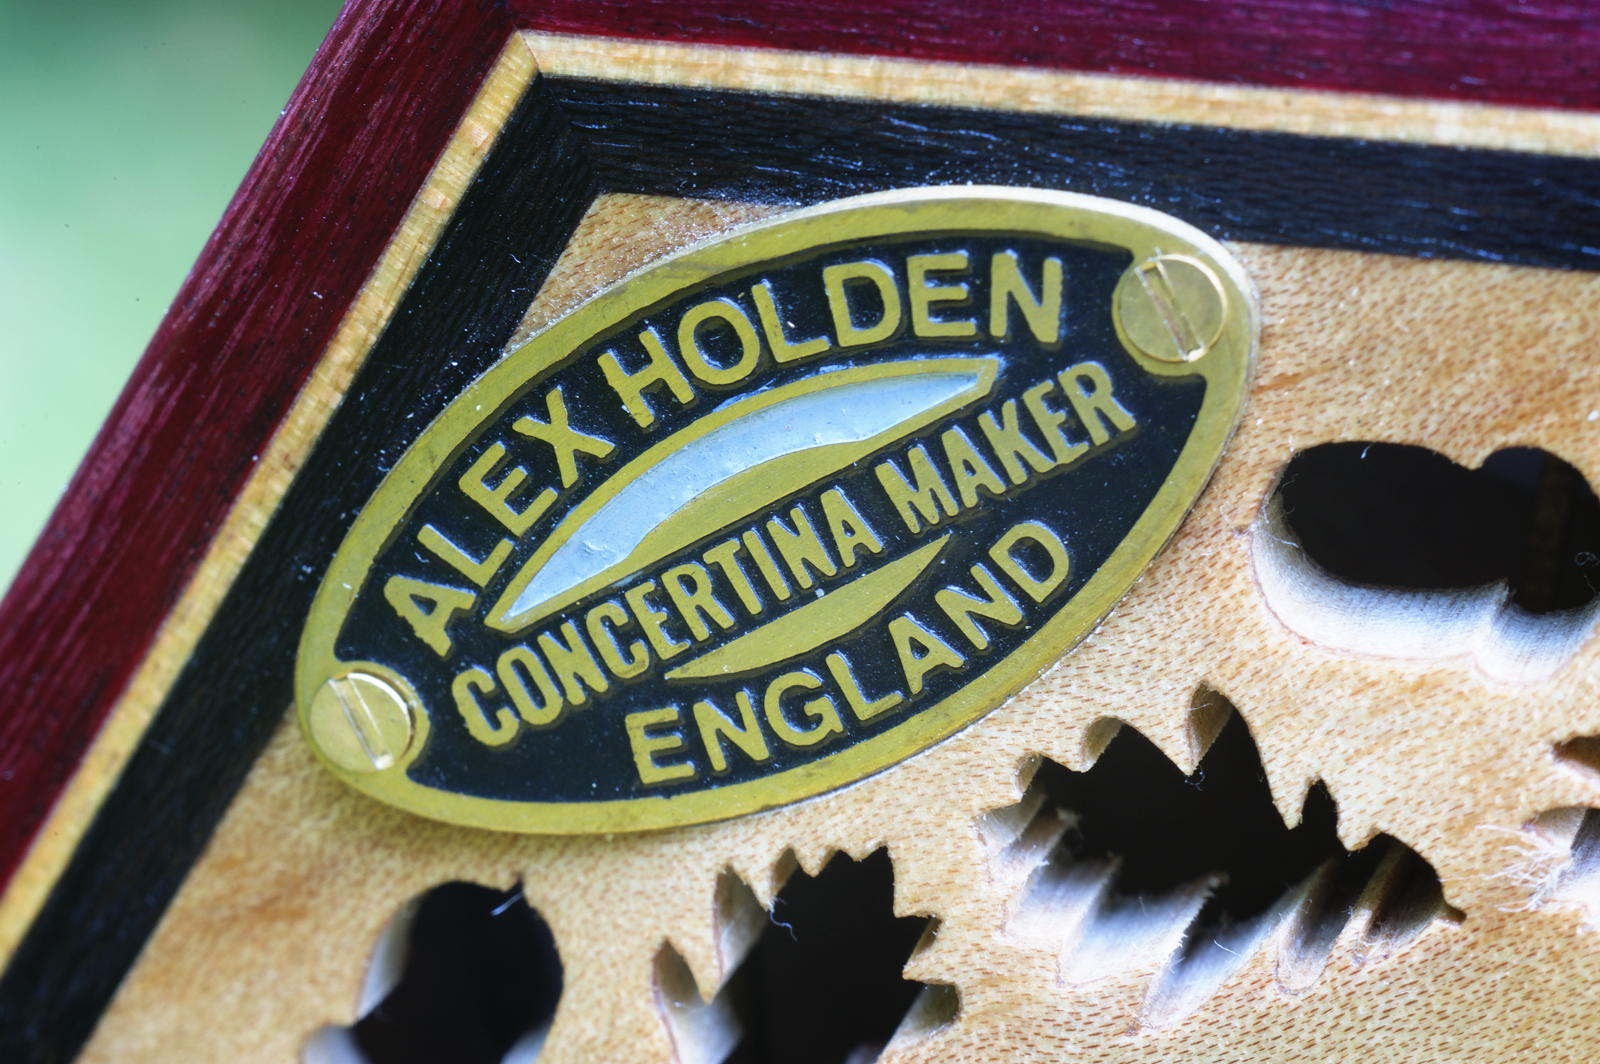
- The first instrument to feature my new etched brass maker’s plate.
- 2mm button travel (giving 4mm pad lift at a 2:1 action lever ratio).
- Weight: 1440g.
- Leather covered hexagonal clamshell case with suede covered padded interior and decorative shoulder strap.
Button Layout
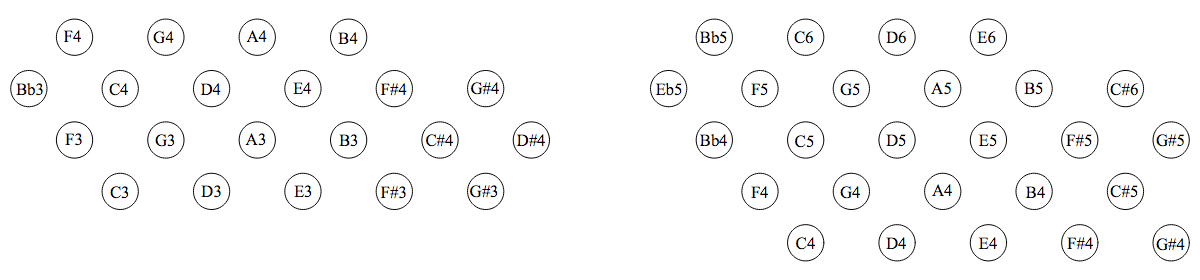
The button layout is based on the standard Hayden 46 button system with a few small changes requested by the customer who commissioned me to build this bespoke instrument. Note that because it is in a meantone tuning, the Eb button on the right hand is not enharmonic with the D# button on the left.
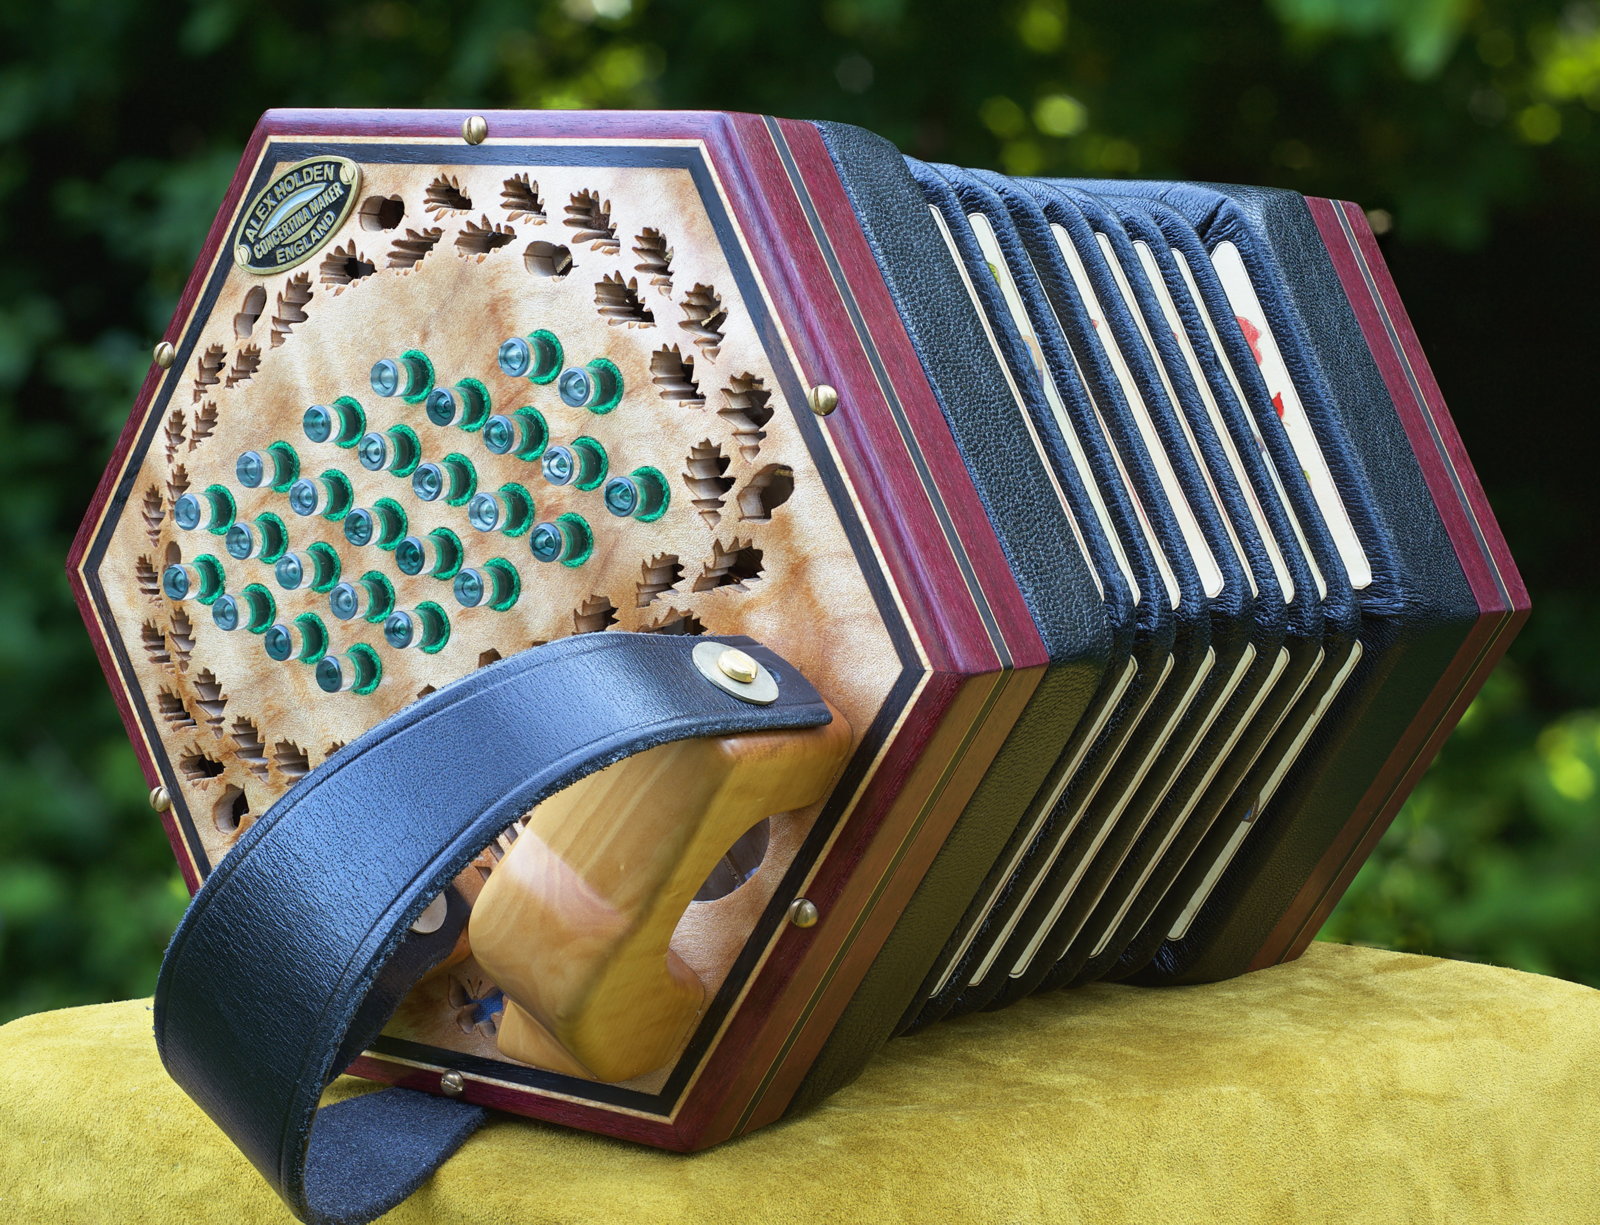
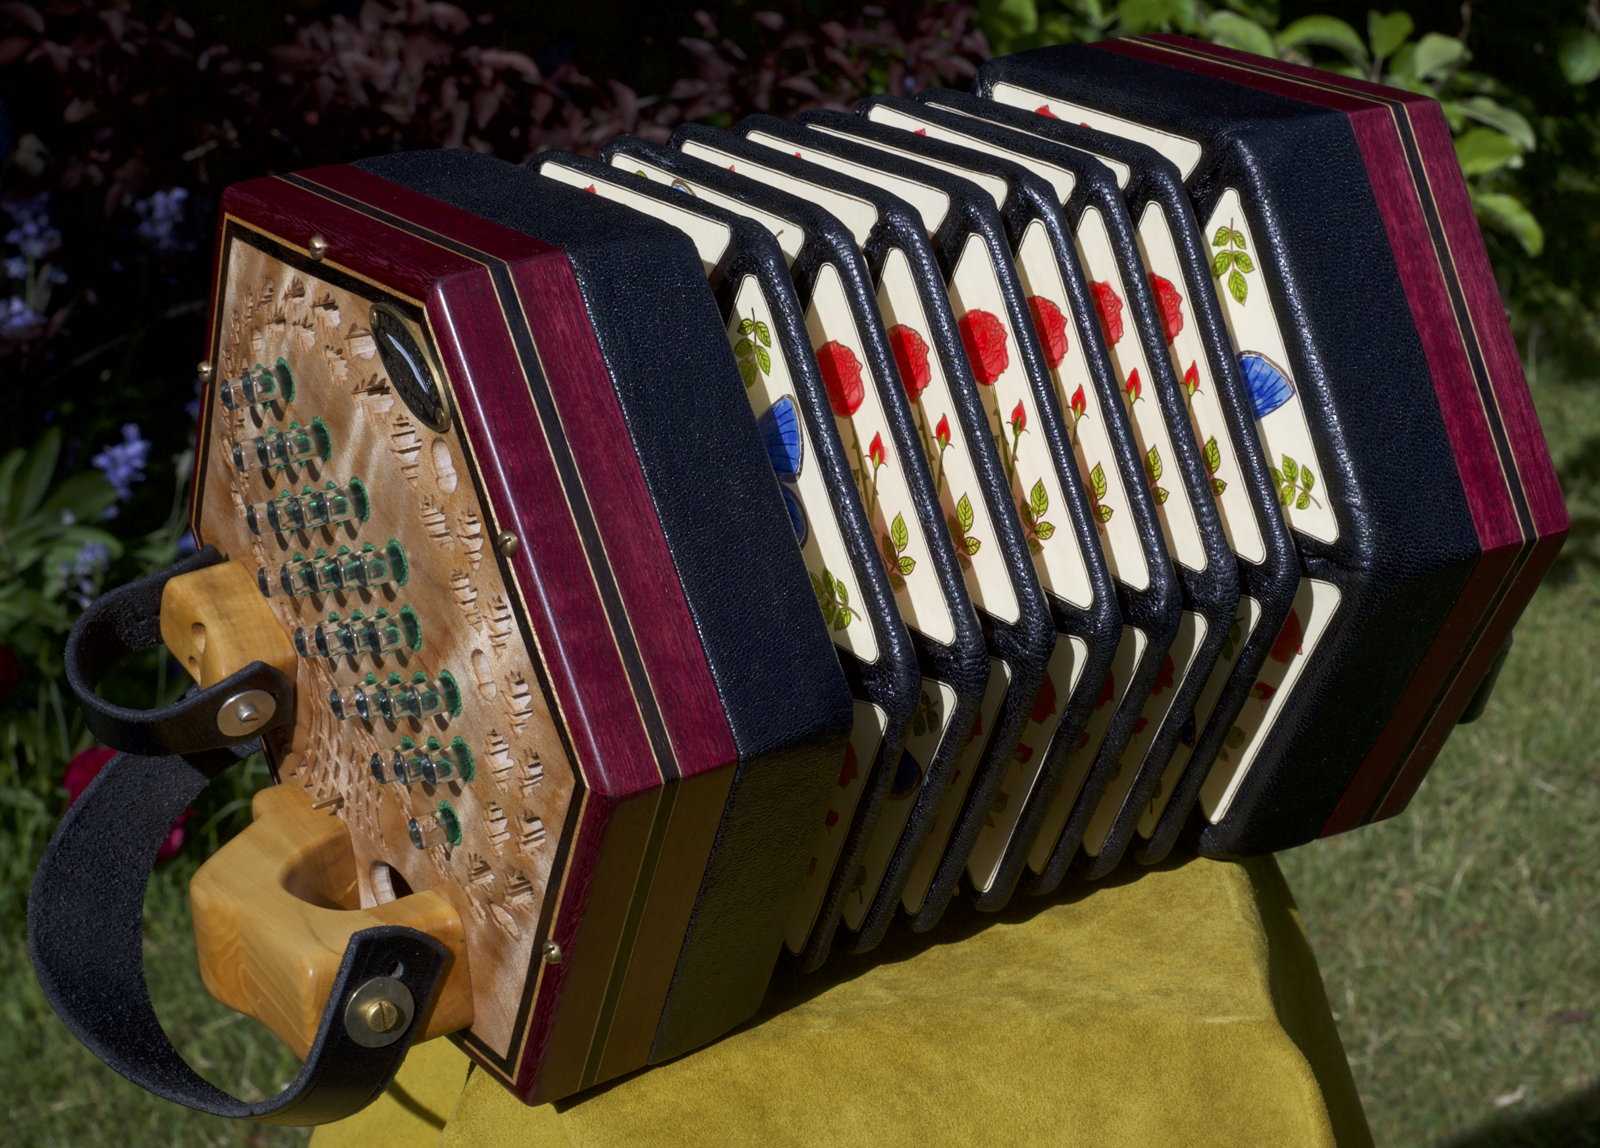
Hand Rests and Straps
A common question regarding previous Hayden system concertinas is whether or not the rows of the keyboards are parallel to the handrails. This instrument takes a different approach: the keyboards are parallel to the horizontal centre line of the end plate, while the hand rests are parallel to the side of the instrument that is closest to the player’s body. It is a unique arrangement, intended to allow increased freedom of hand movement and more versatile fingering options. The thumbs are inserted into straps similar to those on an English concertina, which provides the extra stability needed to play the instrument while standing up. There is a small amount of adjustability to the position of the hand rest.
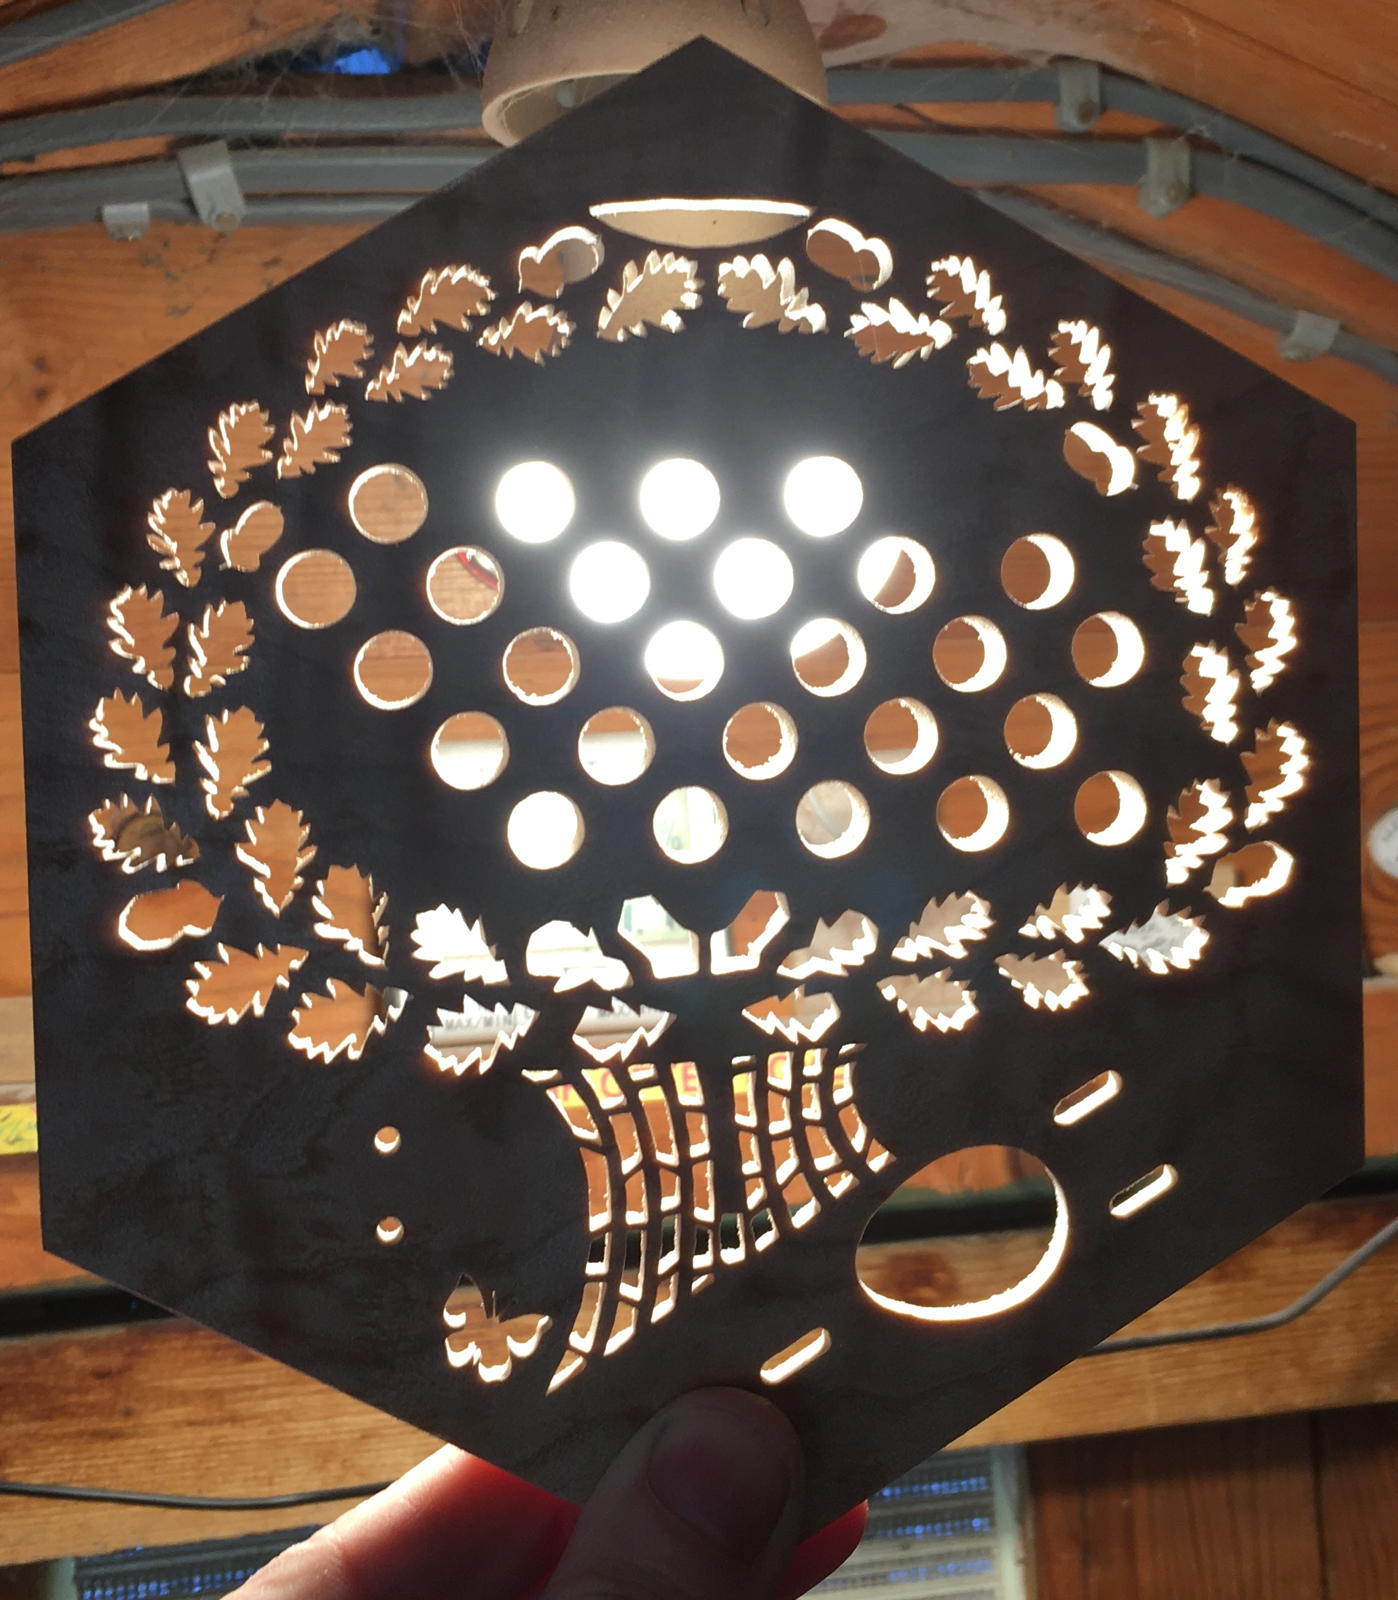
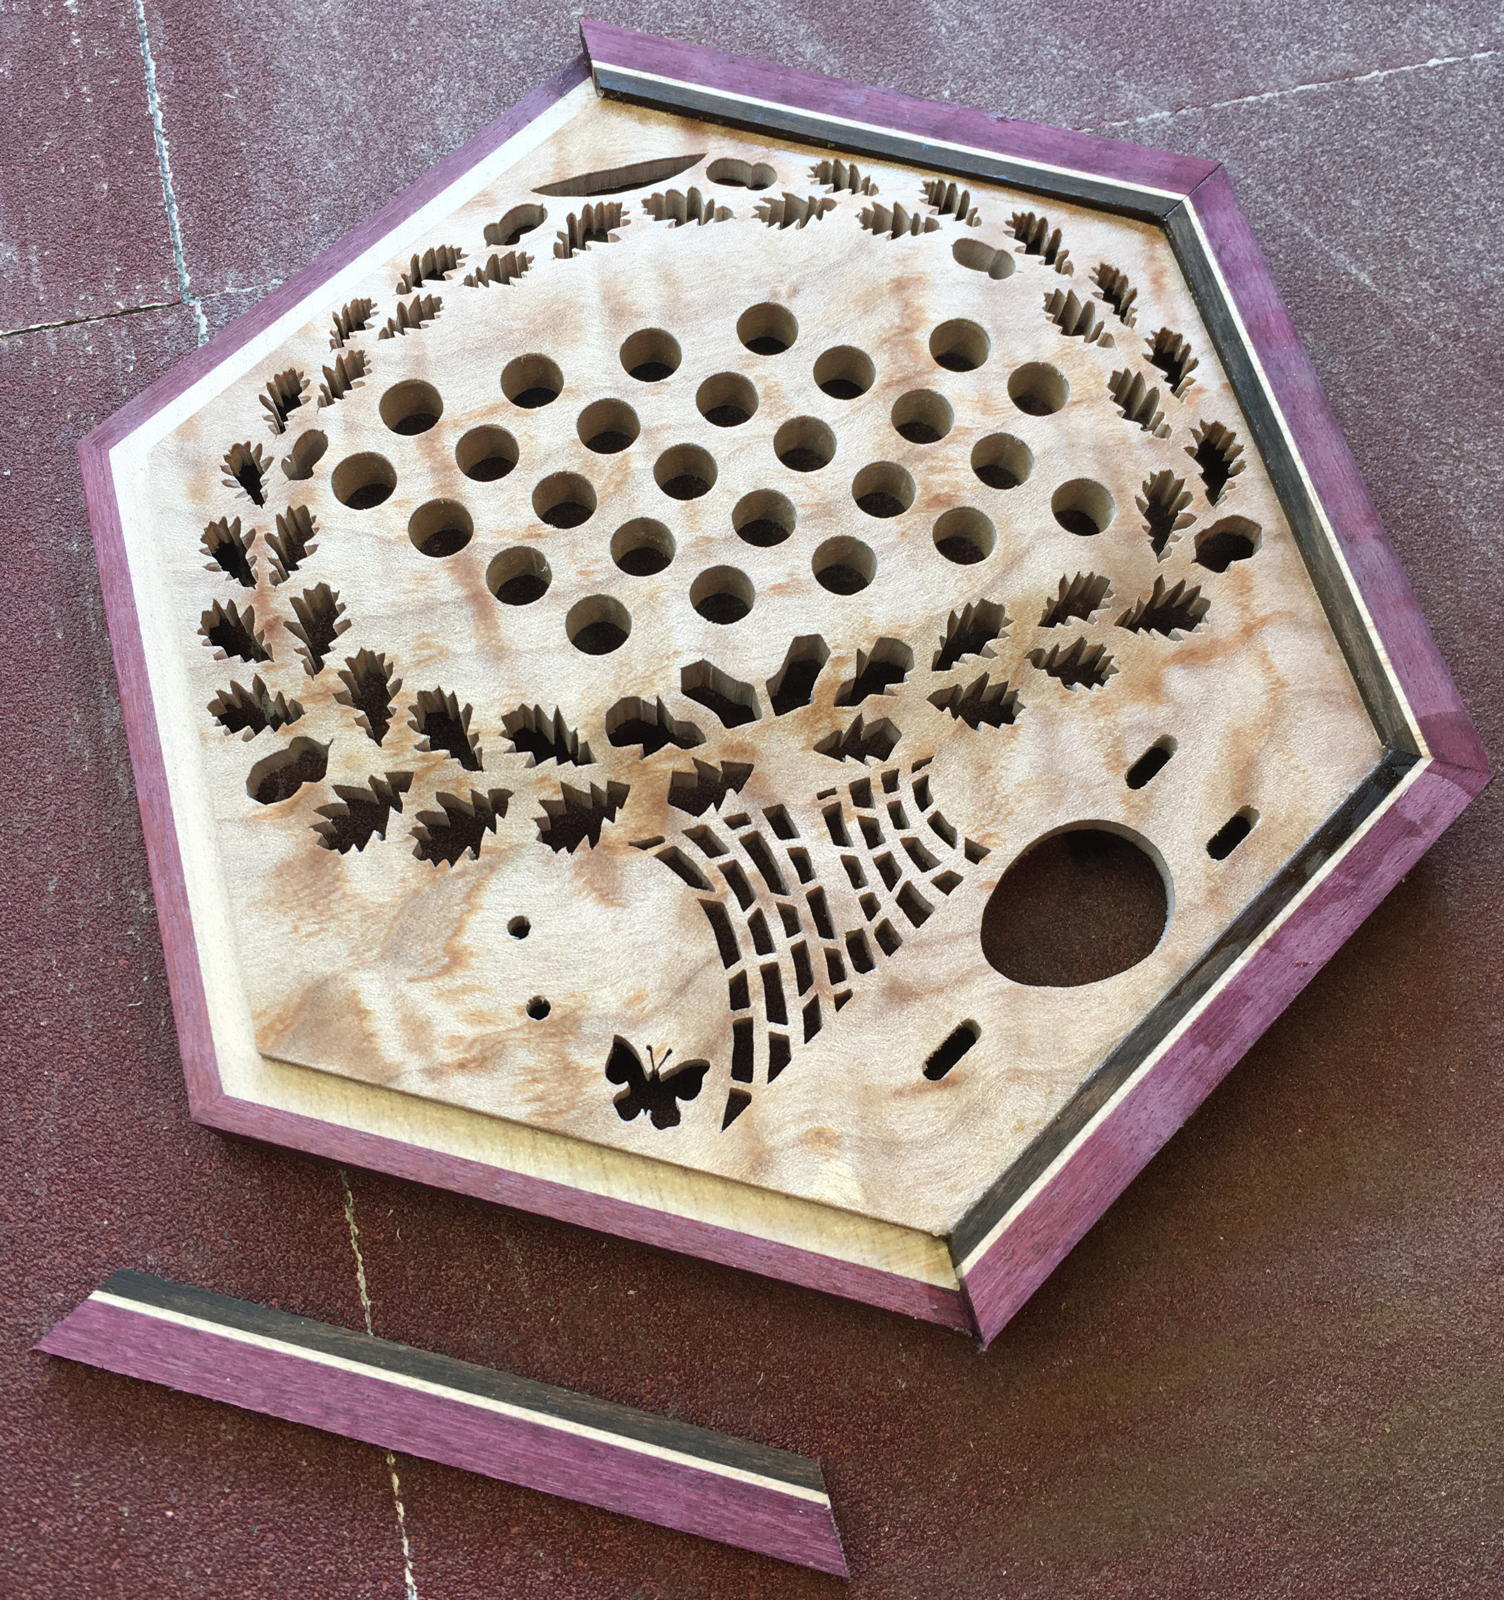
Raised Ends and Fretwork Pattern
This is the first instrument I have built with raised wooden ends. The approach I took was to start with a thick solid sycamore core board and CNC route a 4mm high raised area using a waterline method, then smooth out the steps with sandpaper.
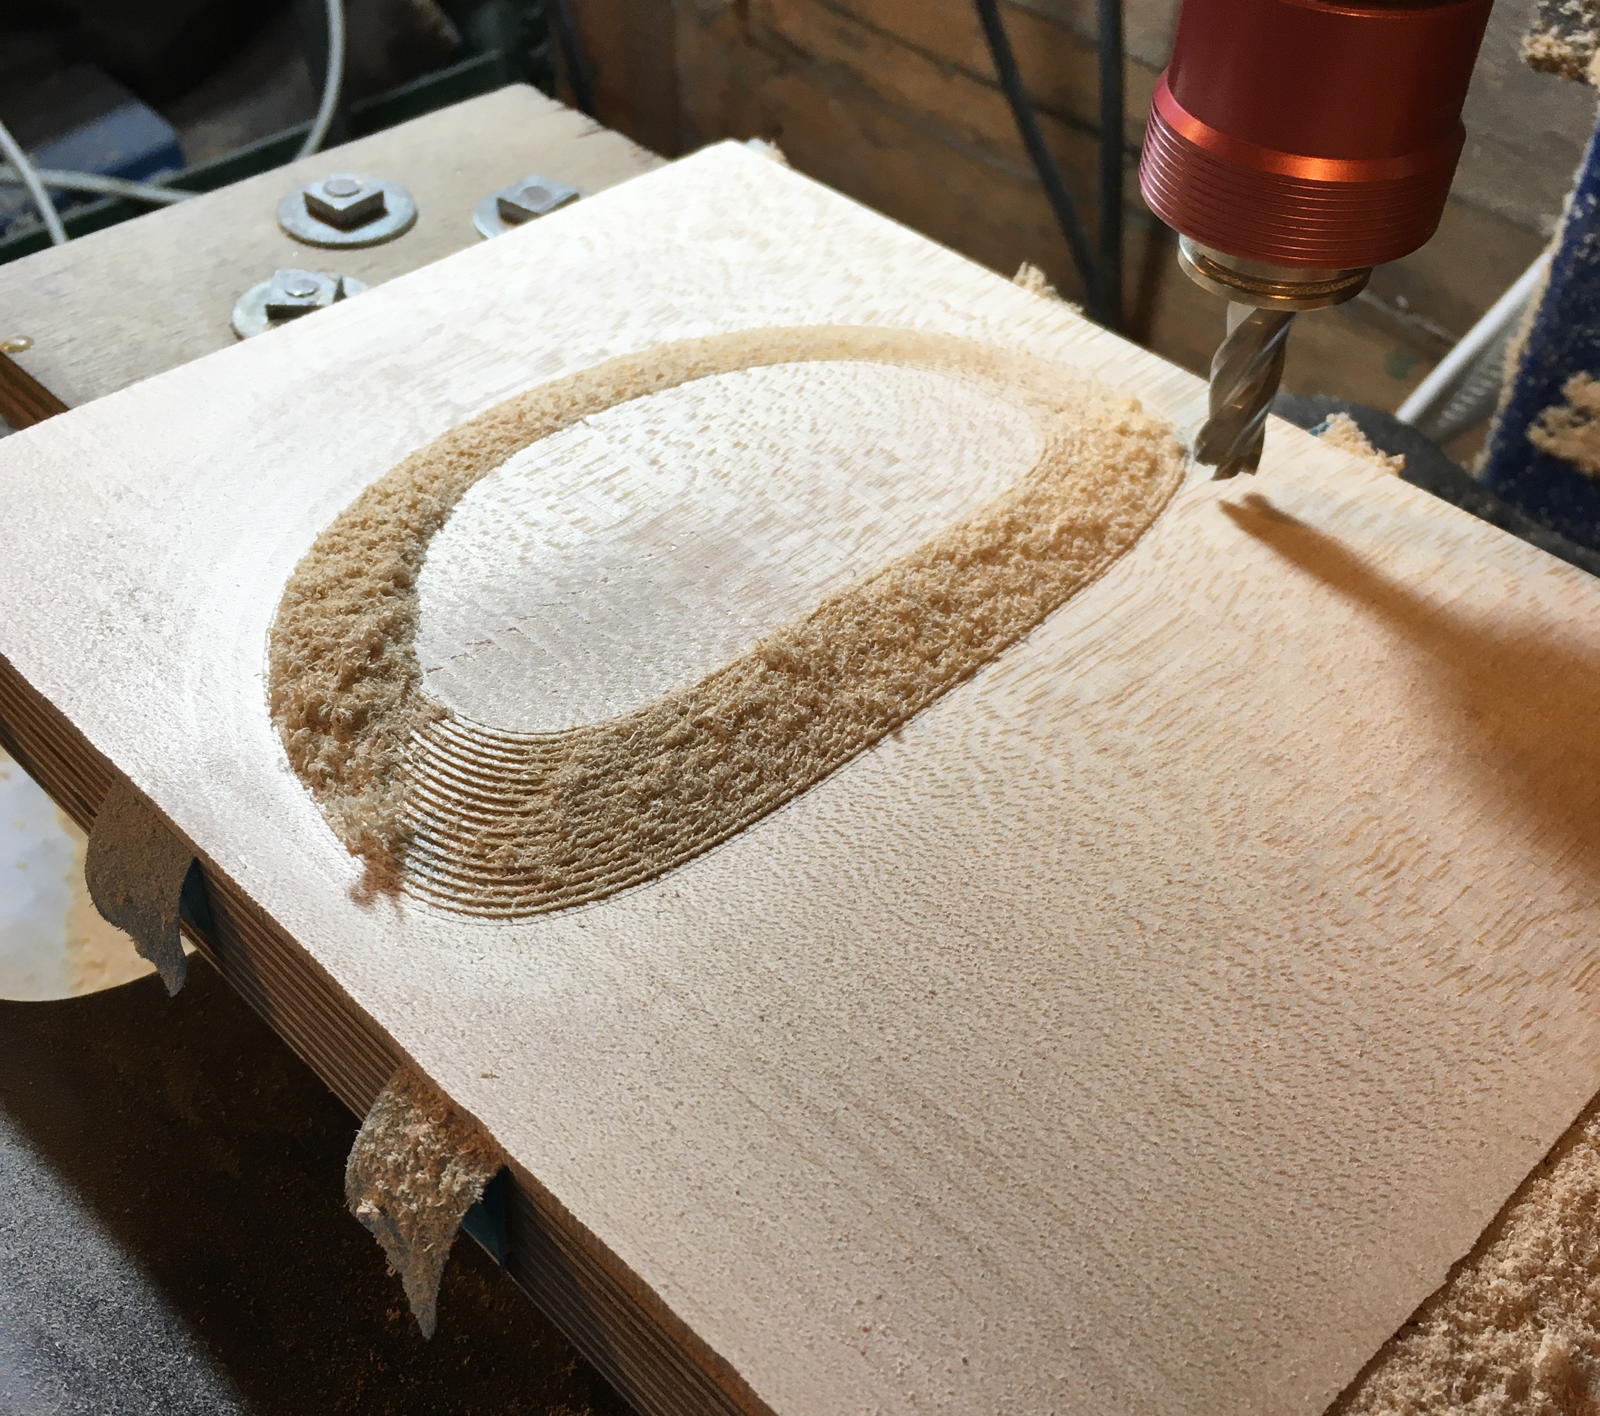

I then used a vacuum bag and epoxy resin to glue veneers to both sides of the raised core board.
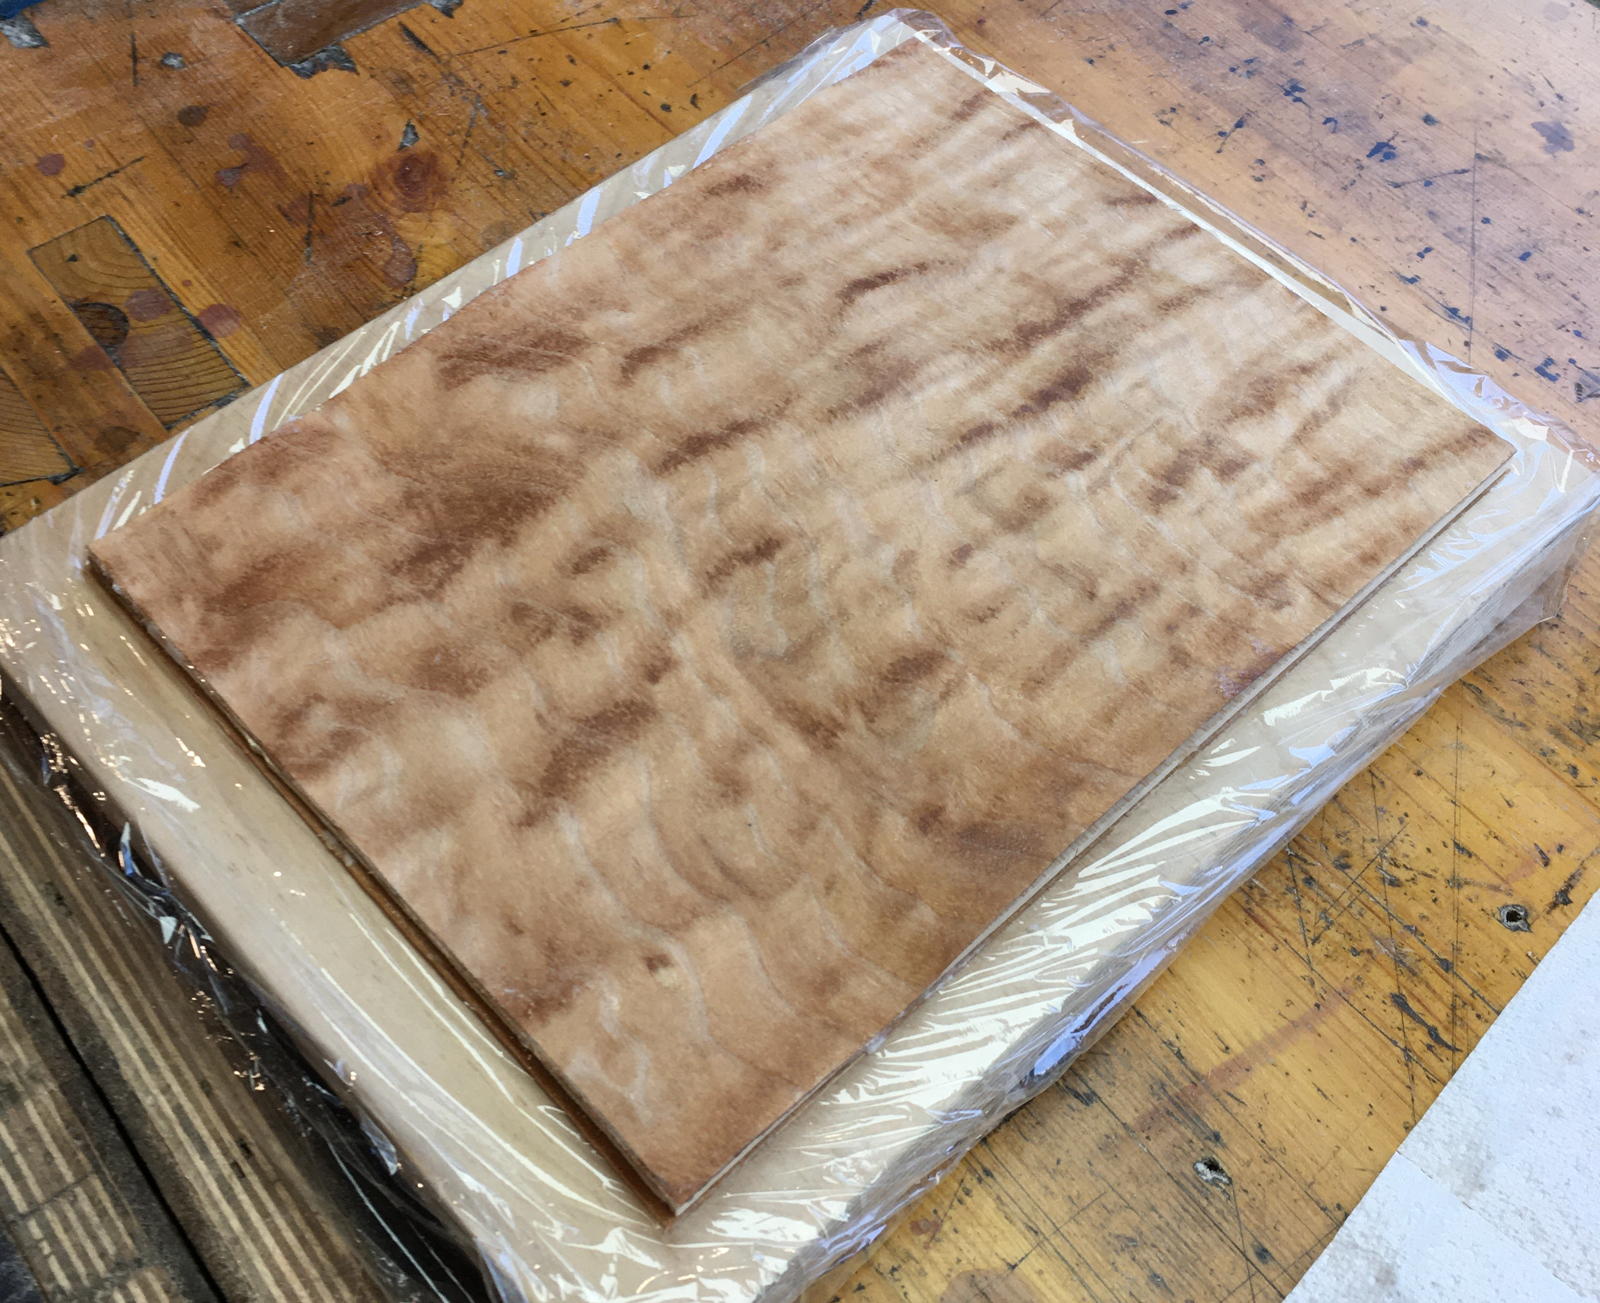

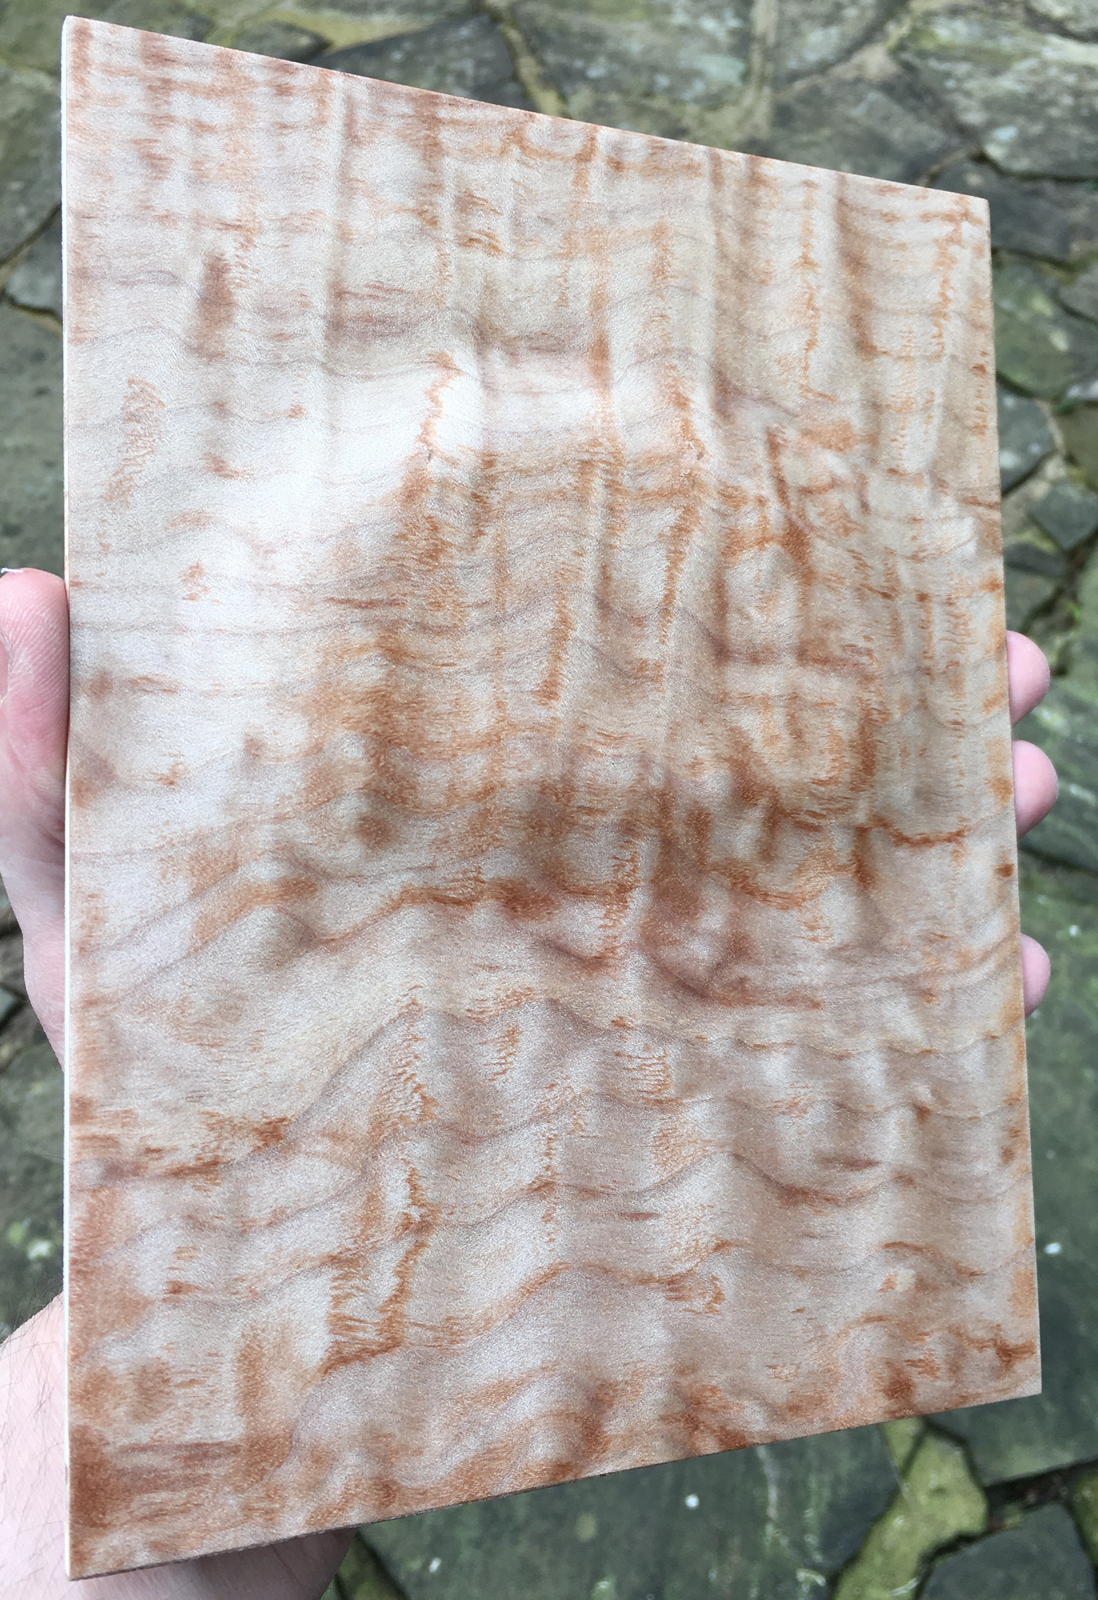
The face veneer is rippled maple, which has a 3D, almost holographic appearance that never fully comes across in static photographs.
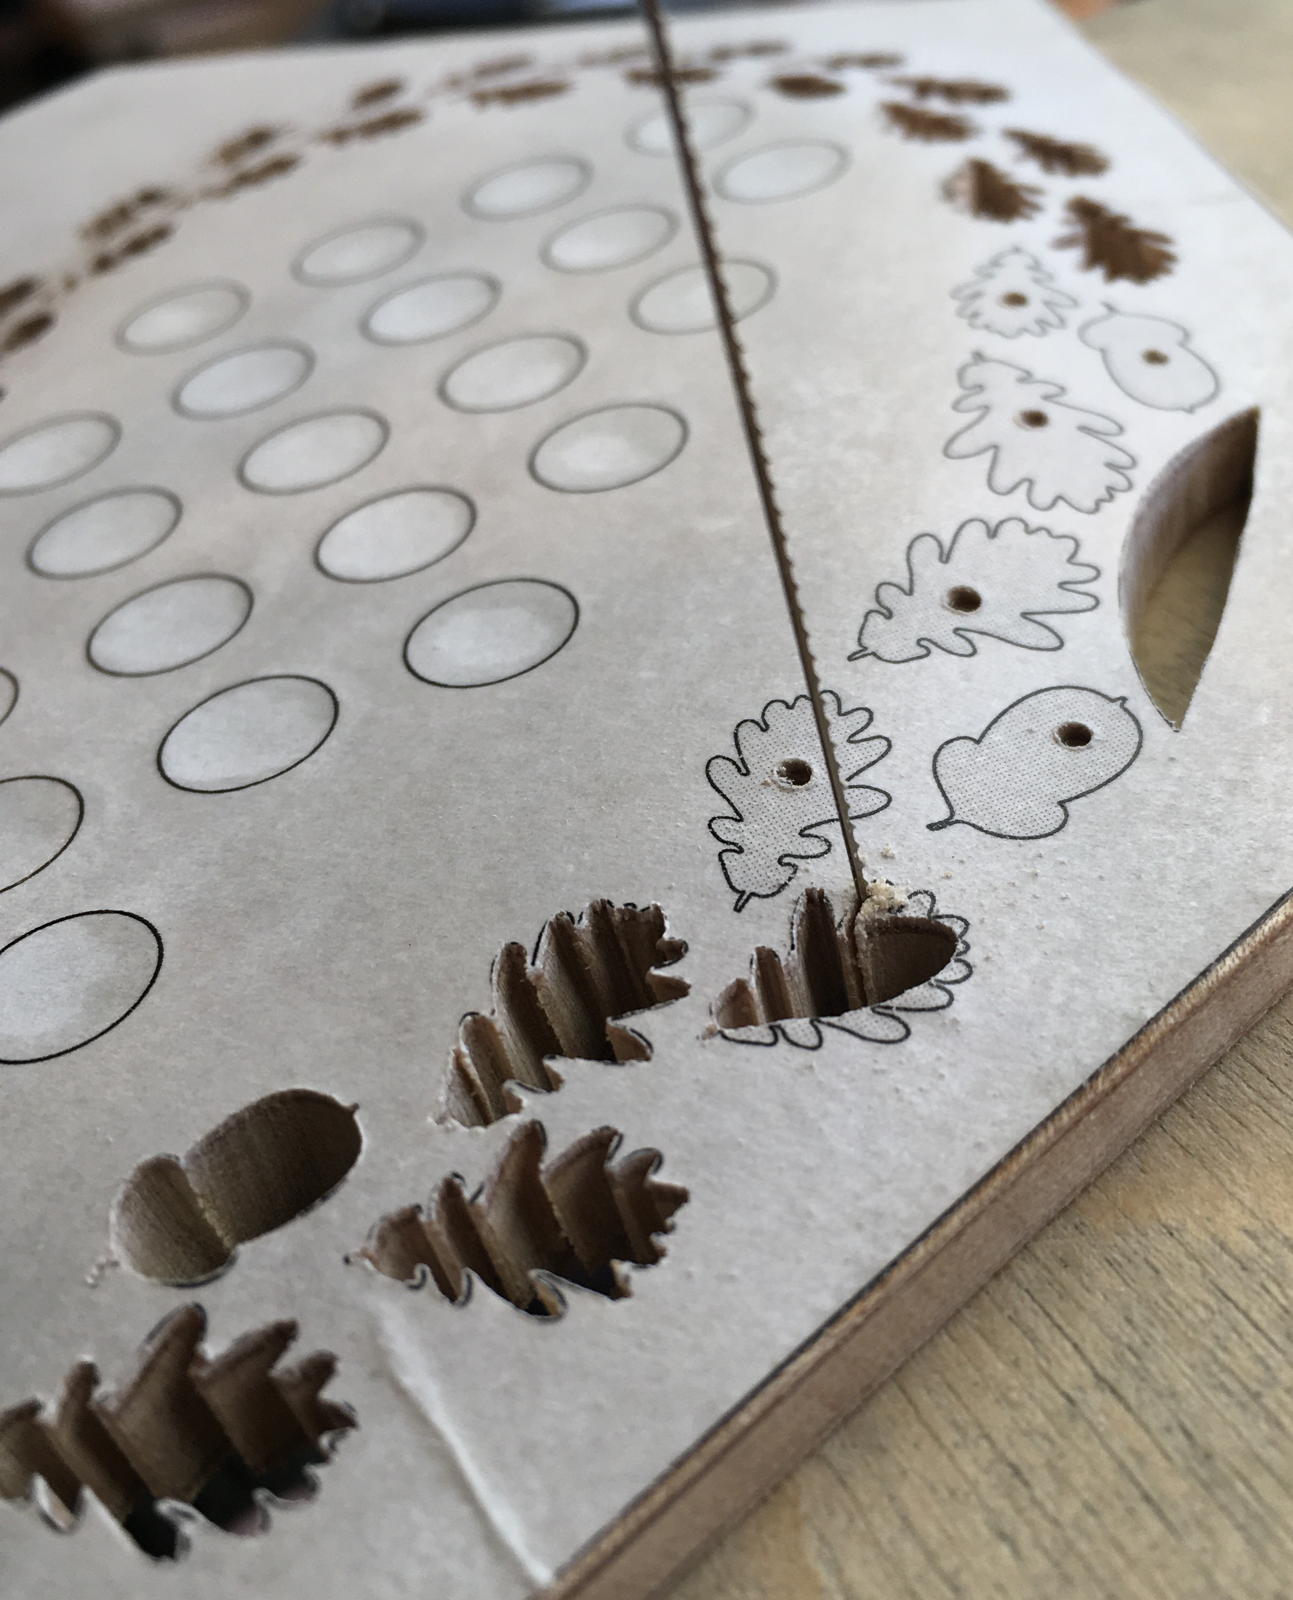
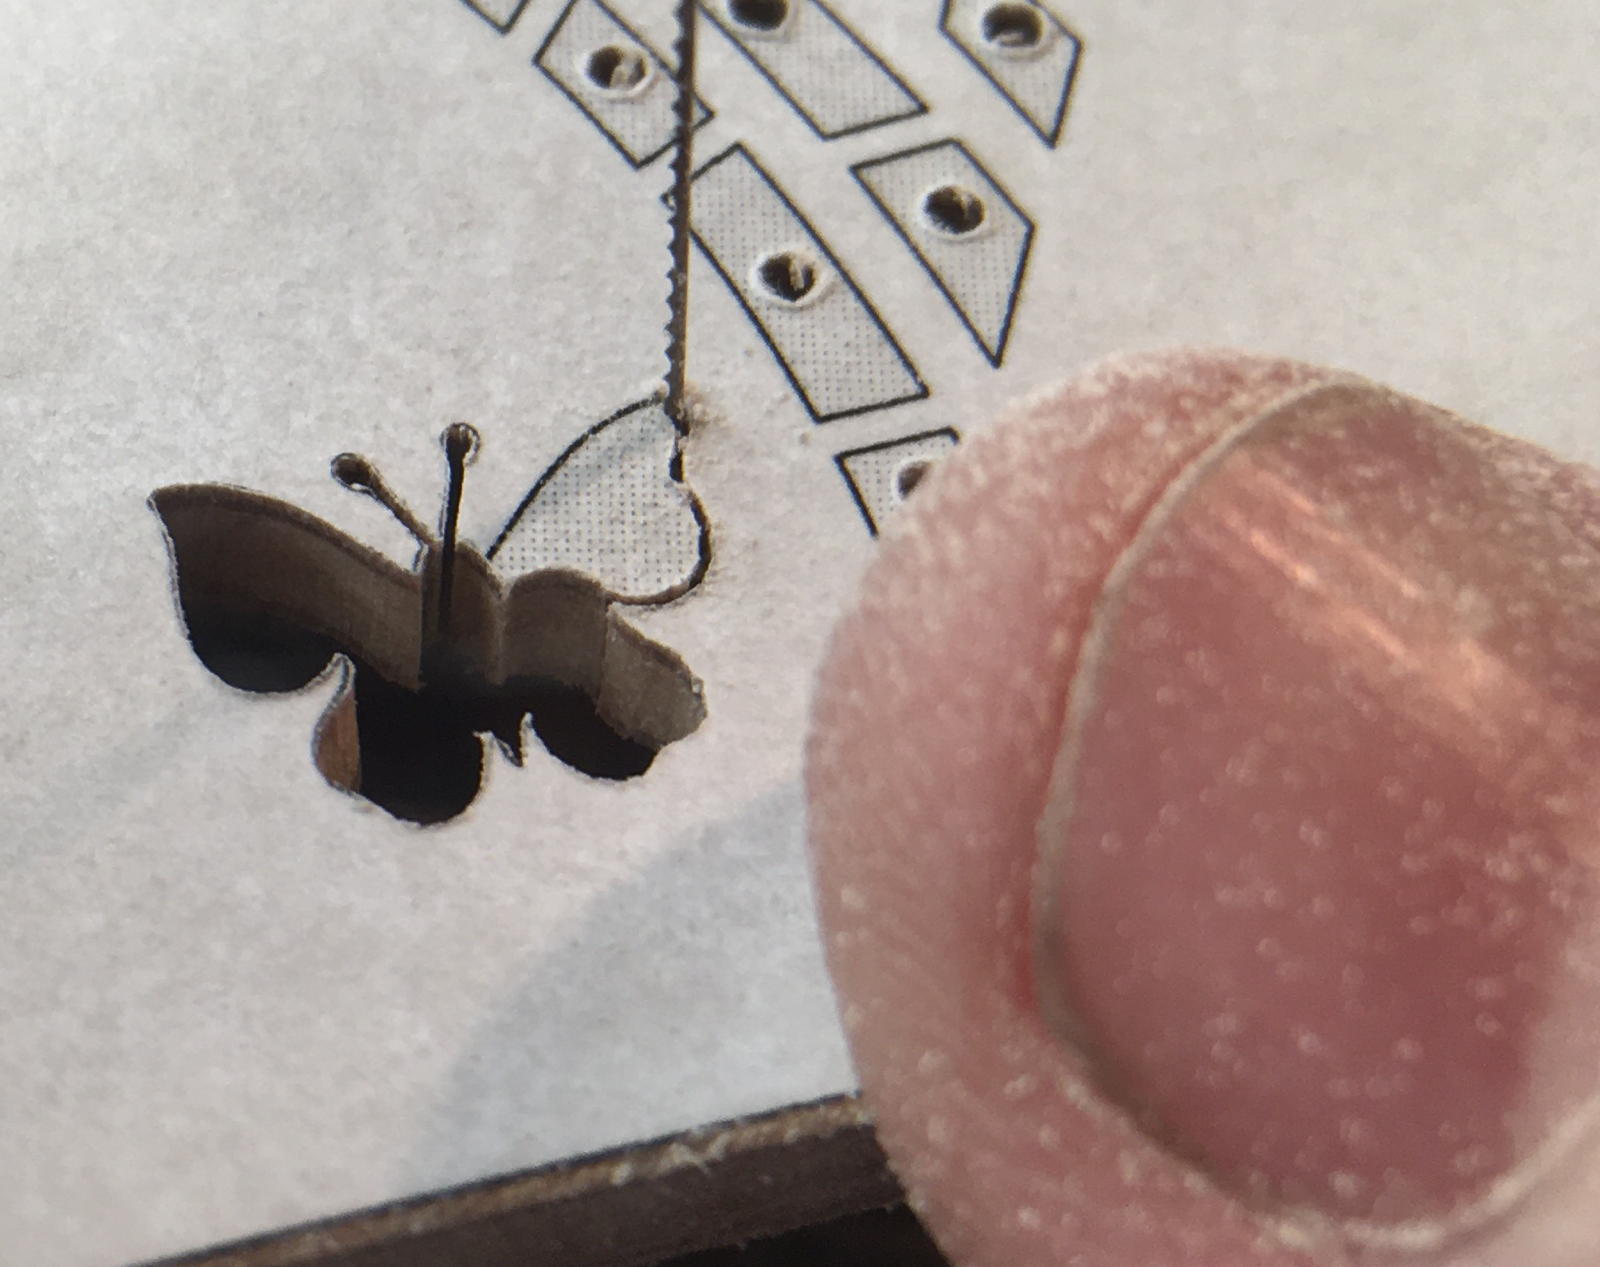
The shape of the raise is intended to evoke the crown of an ancient oak tree. The intricate hand-cut fretwork pattern is made up of oak leaves and acorns, as well as the bark of the trunk and a butterfly.
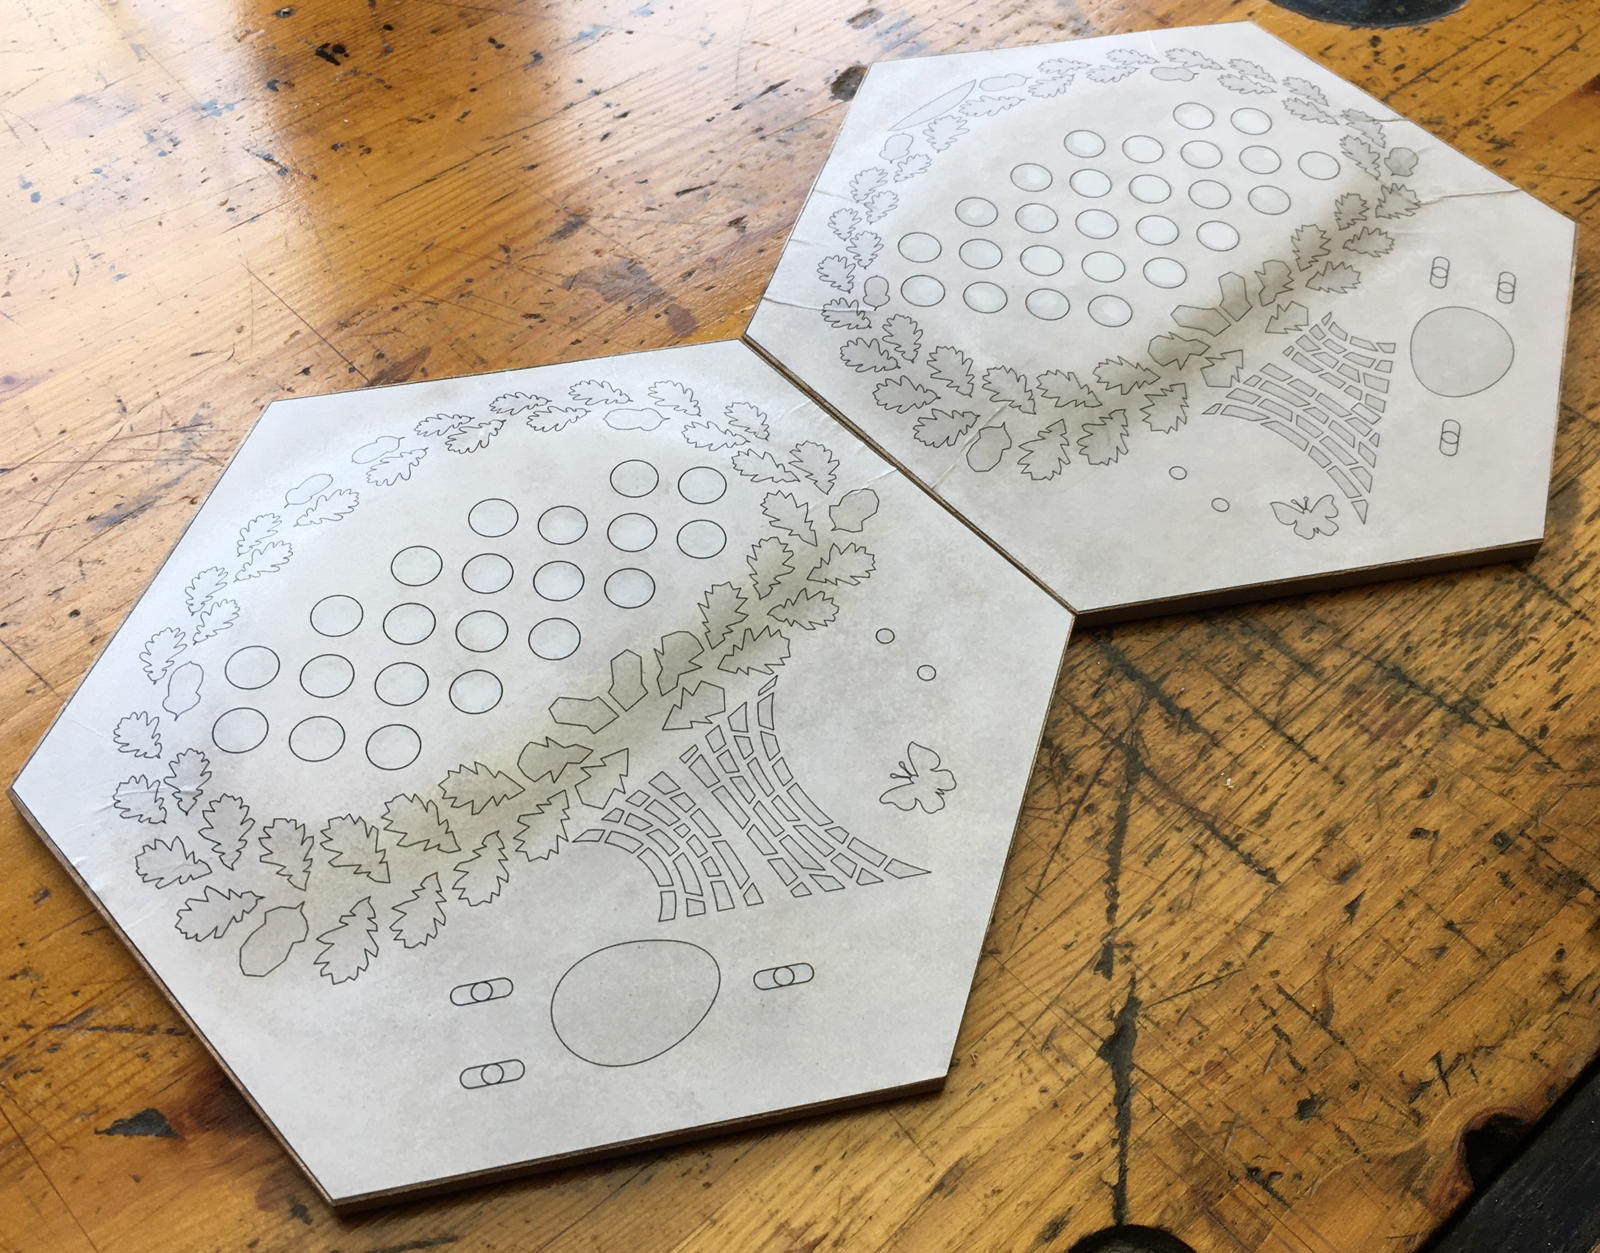
This is not the only butterfly to be found on this instrument.
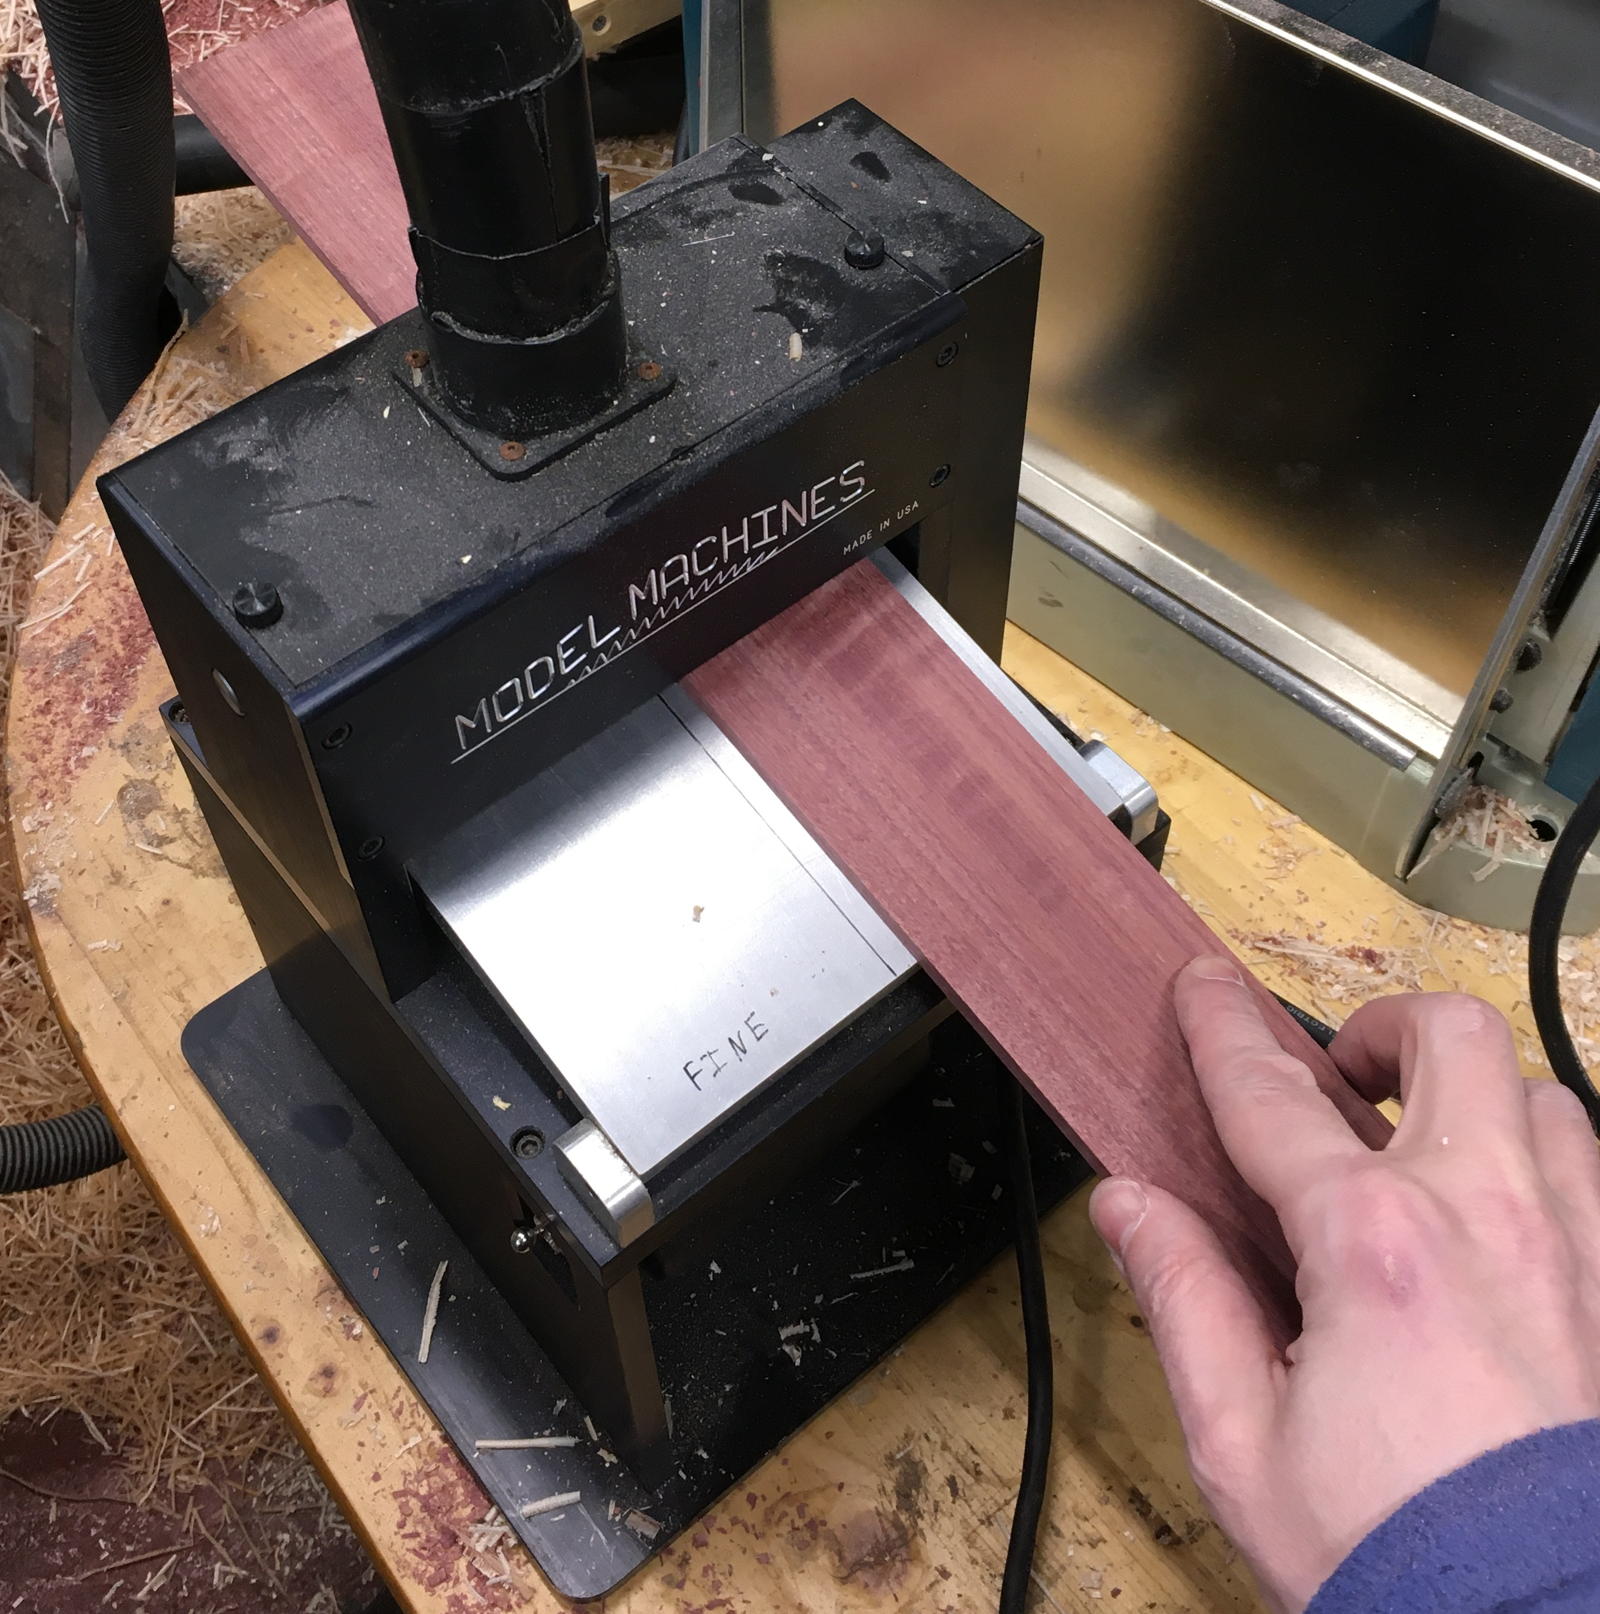
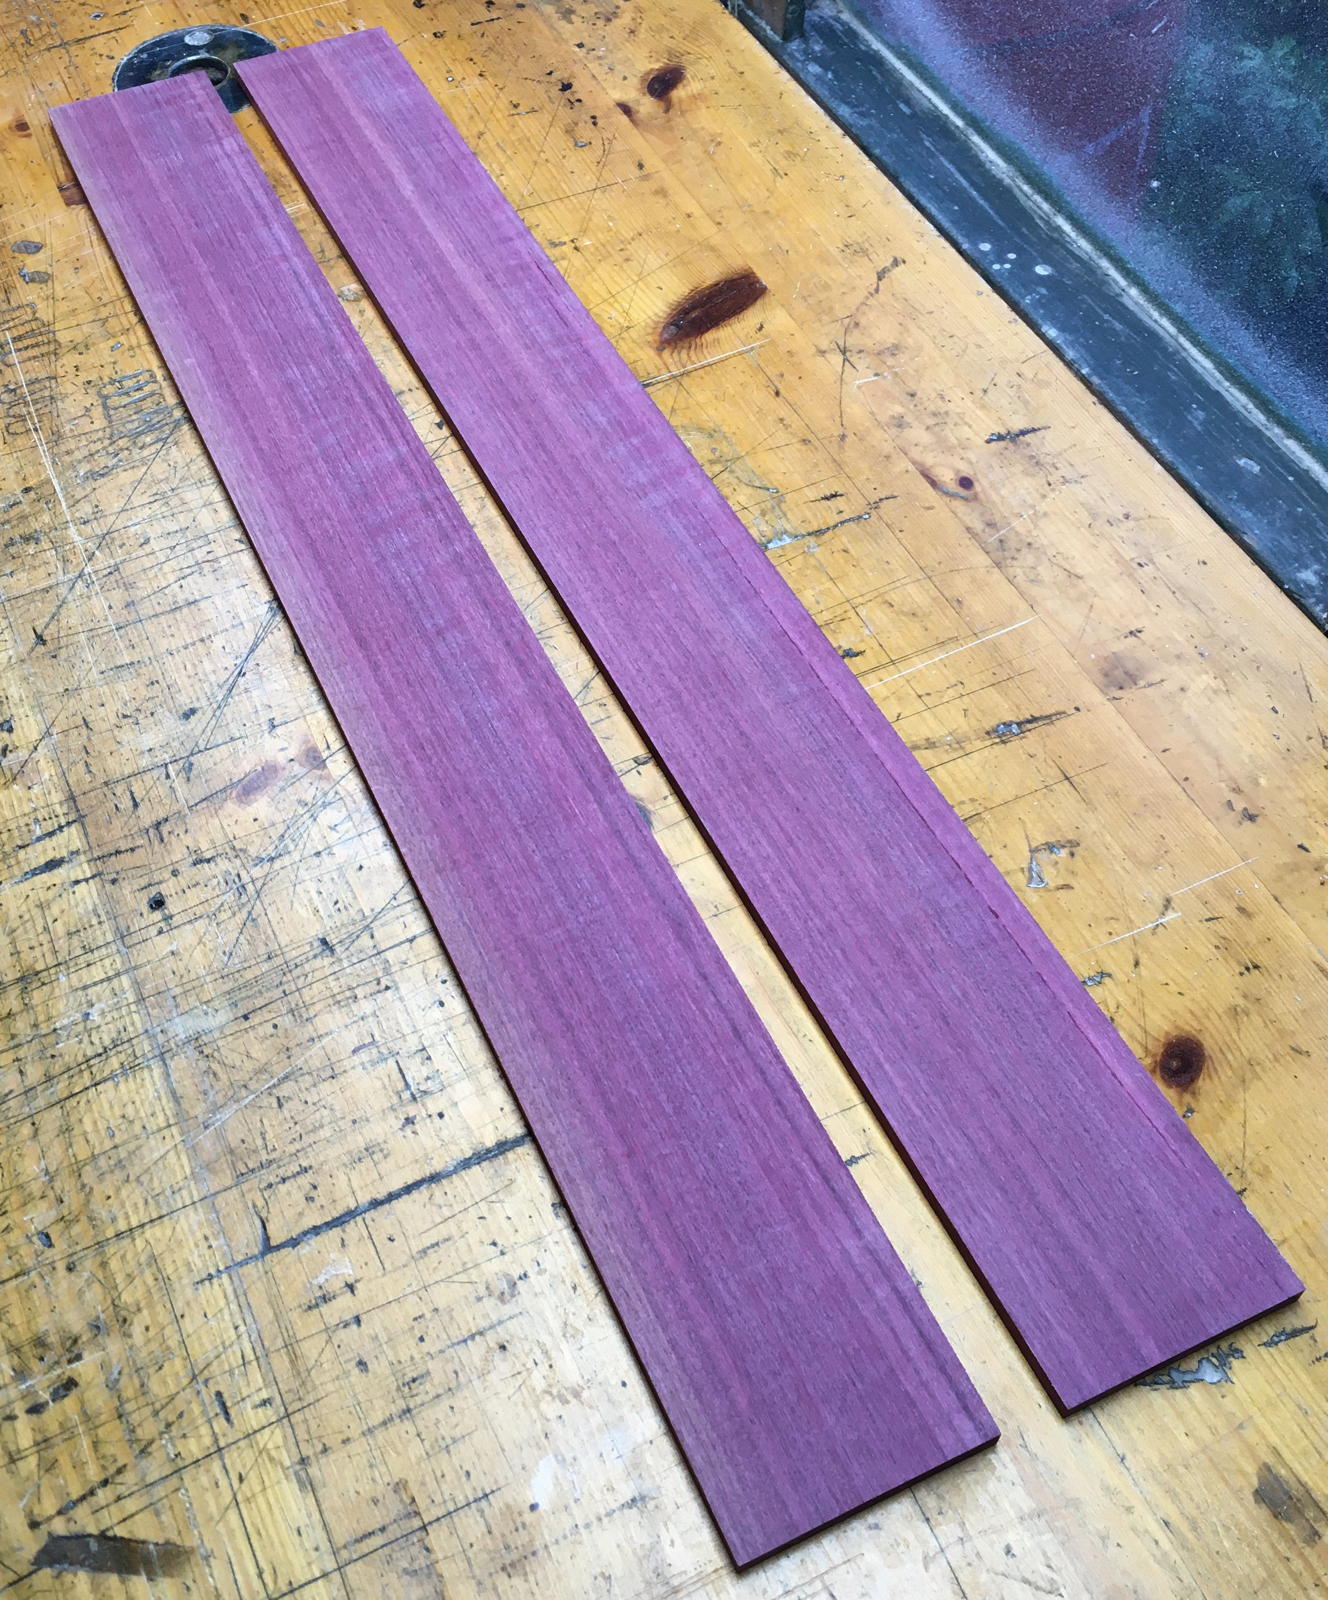
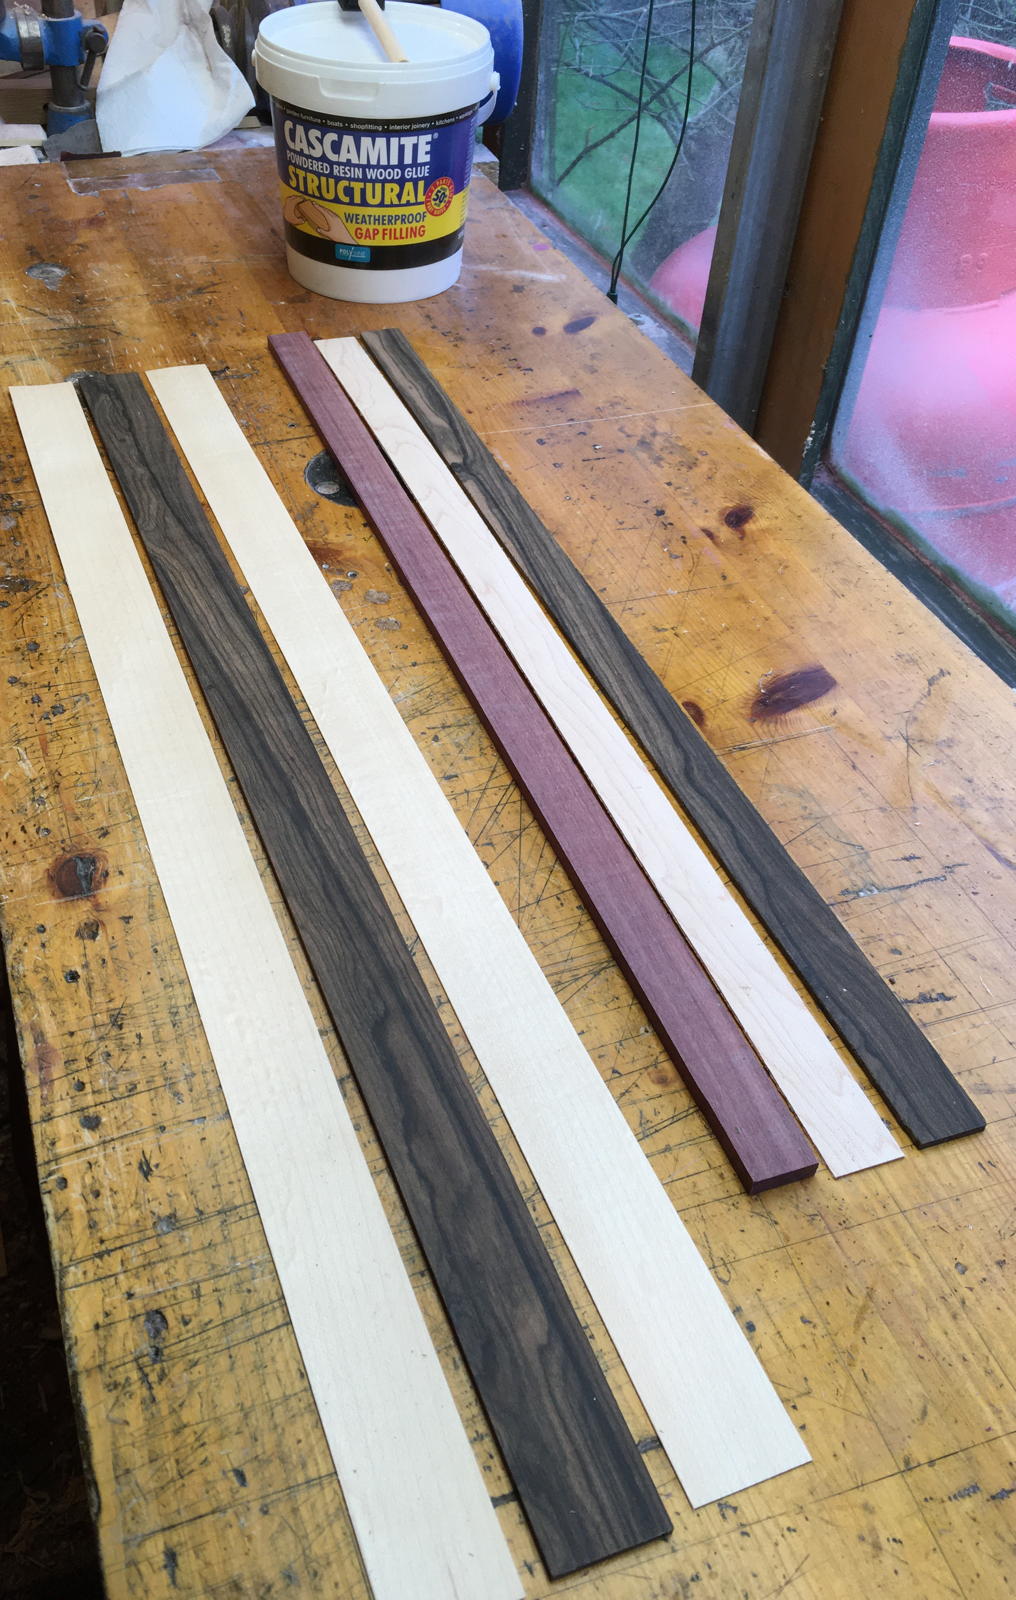
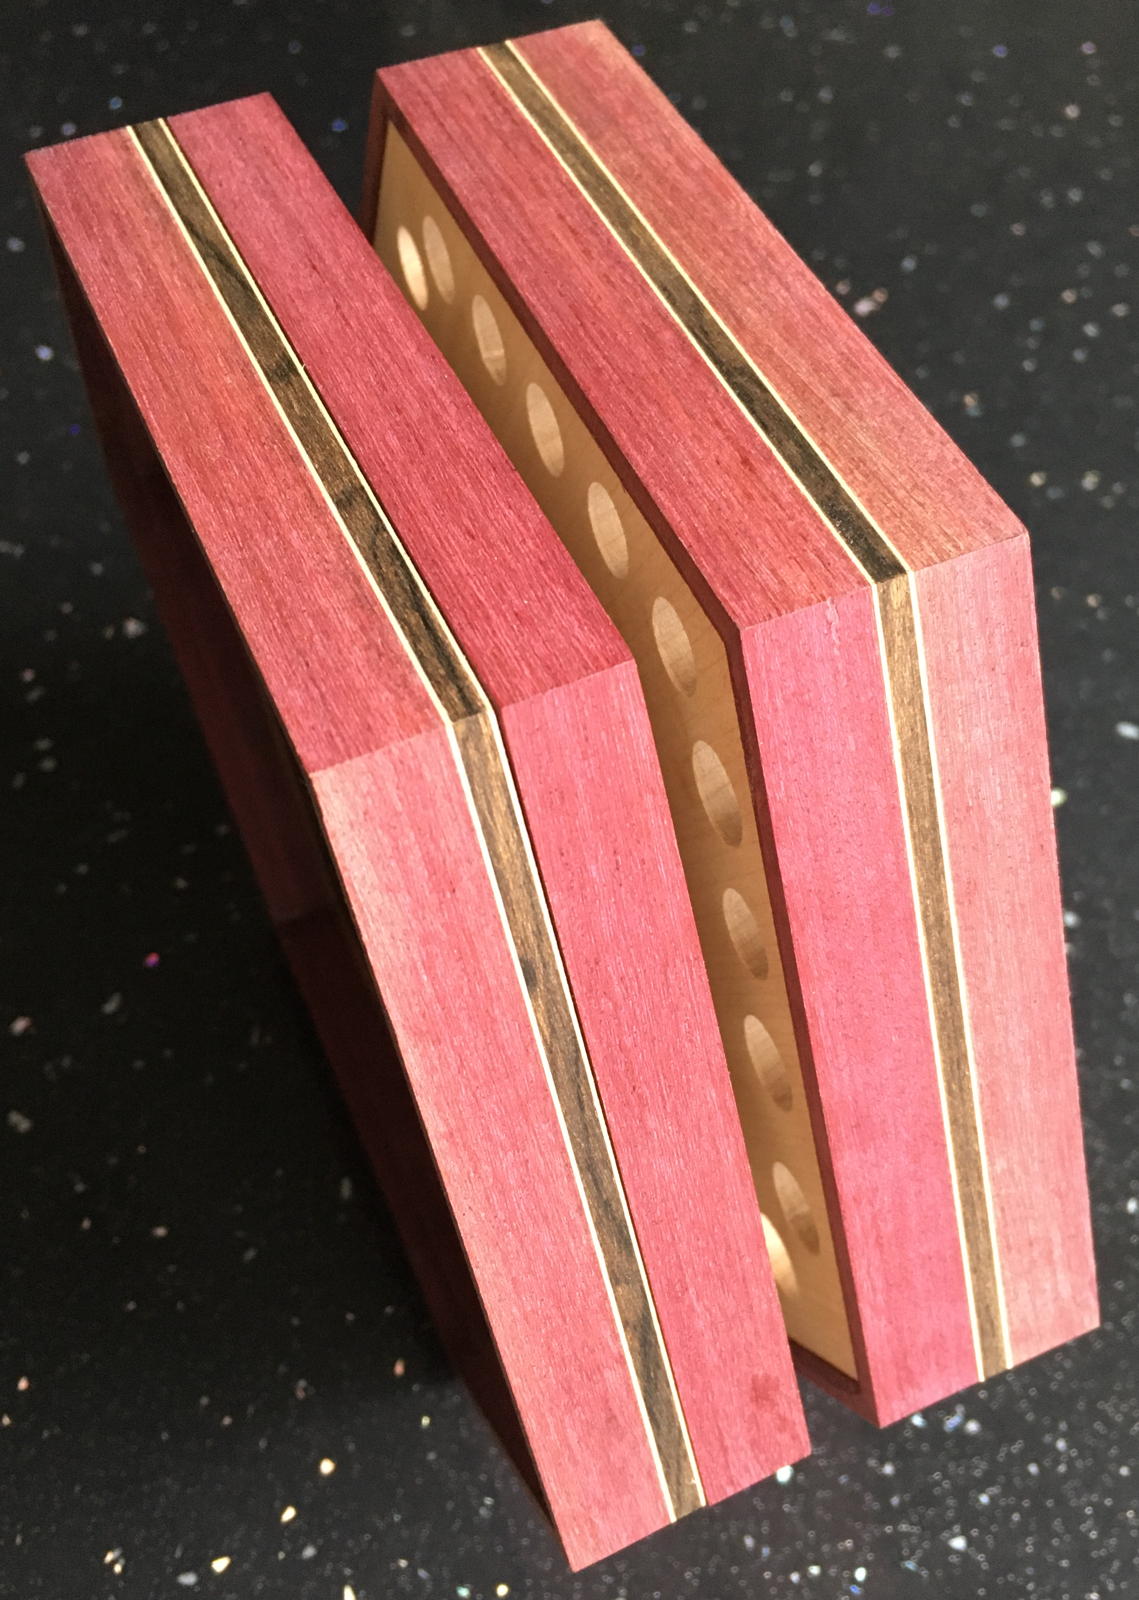
Striped Borders and Frames
The frames are made from solid purpleheart wood, with stripes of maple (very light, matches the end plate veneer) and ziricote heartwood (very dark brown). The stripes are quite time consuming to make but add a lot of visual interest. Note that purpleheart is light brown when first cut, oxidises to a vivid purple colour over a few days, and goes more of a burgundy red when oiled. It will probably eventually fade to a very dark brown.

The finish I used on the wood is antique amber Peacock Oil. It brings out the figure in the wood and gives it a nice subtle sheen without the glossy film of a traditional French polish finish.
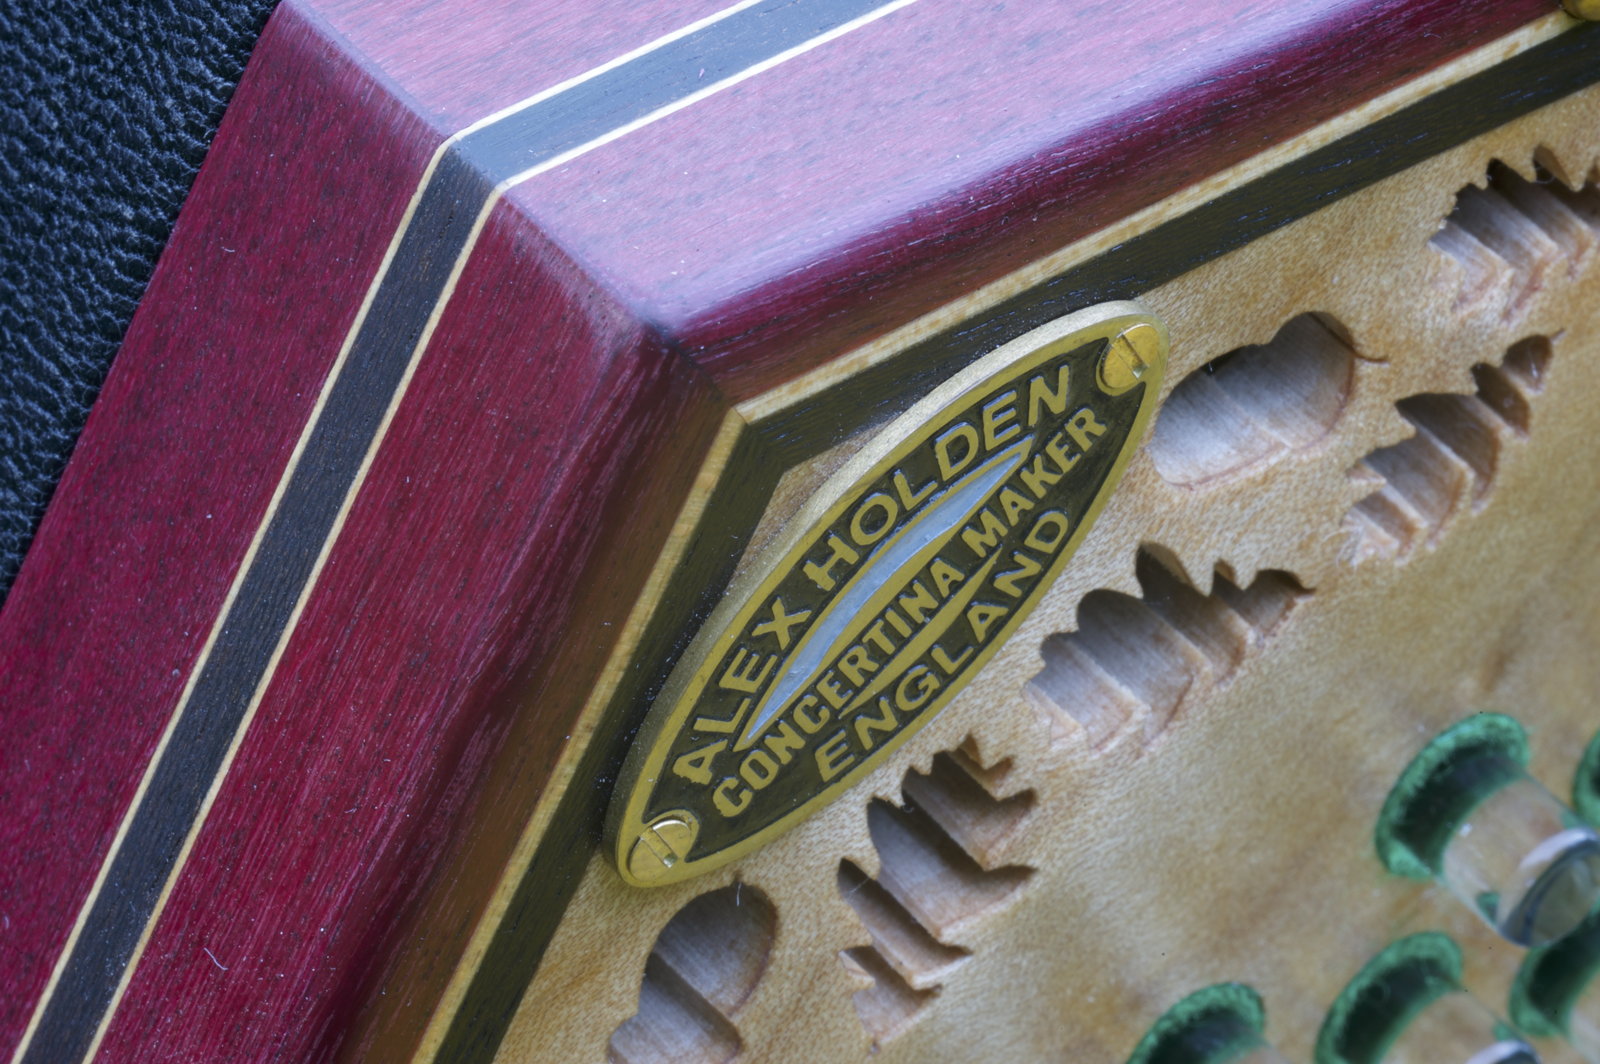
Etched Maker’s Plate
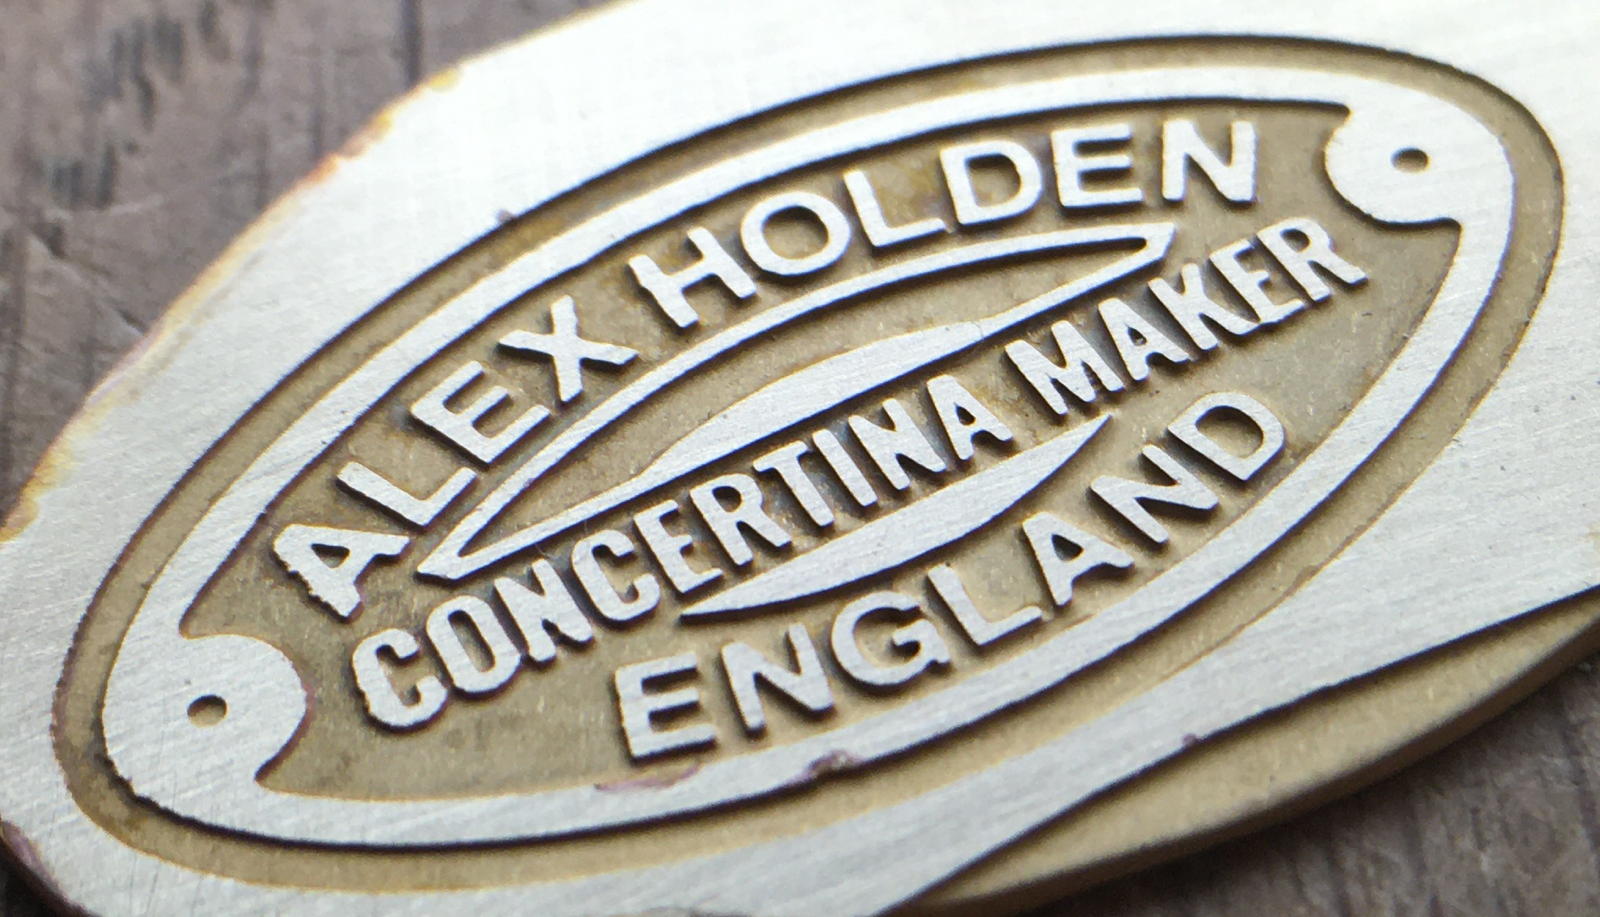
I decided to switch from a printed paper maker’s badge to an etched brass one for better longevity. Due to the limitations of the production process I had to come up with a less intricate design than the paper version. The new pattern was inspired by a classic maker’s plate used by H. Crabb & Son. The blue-filled arc below my name is intended to evoke blue sky and the horizon.
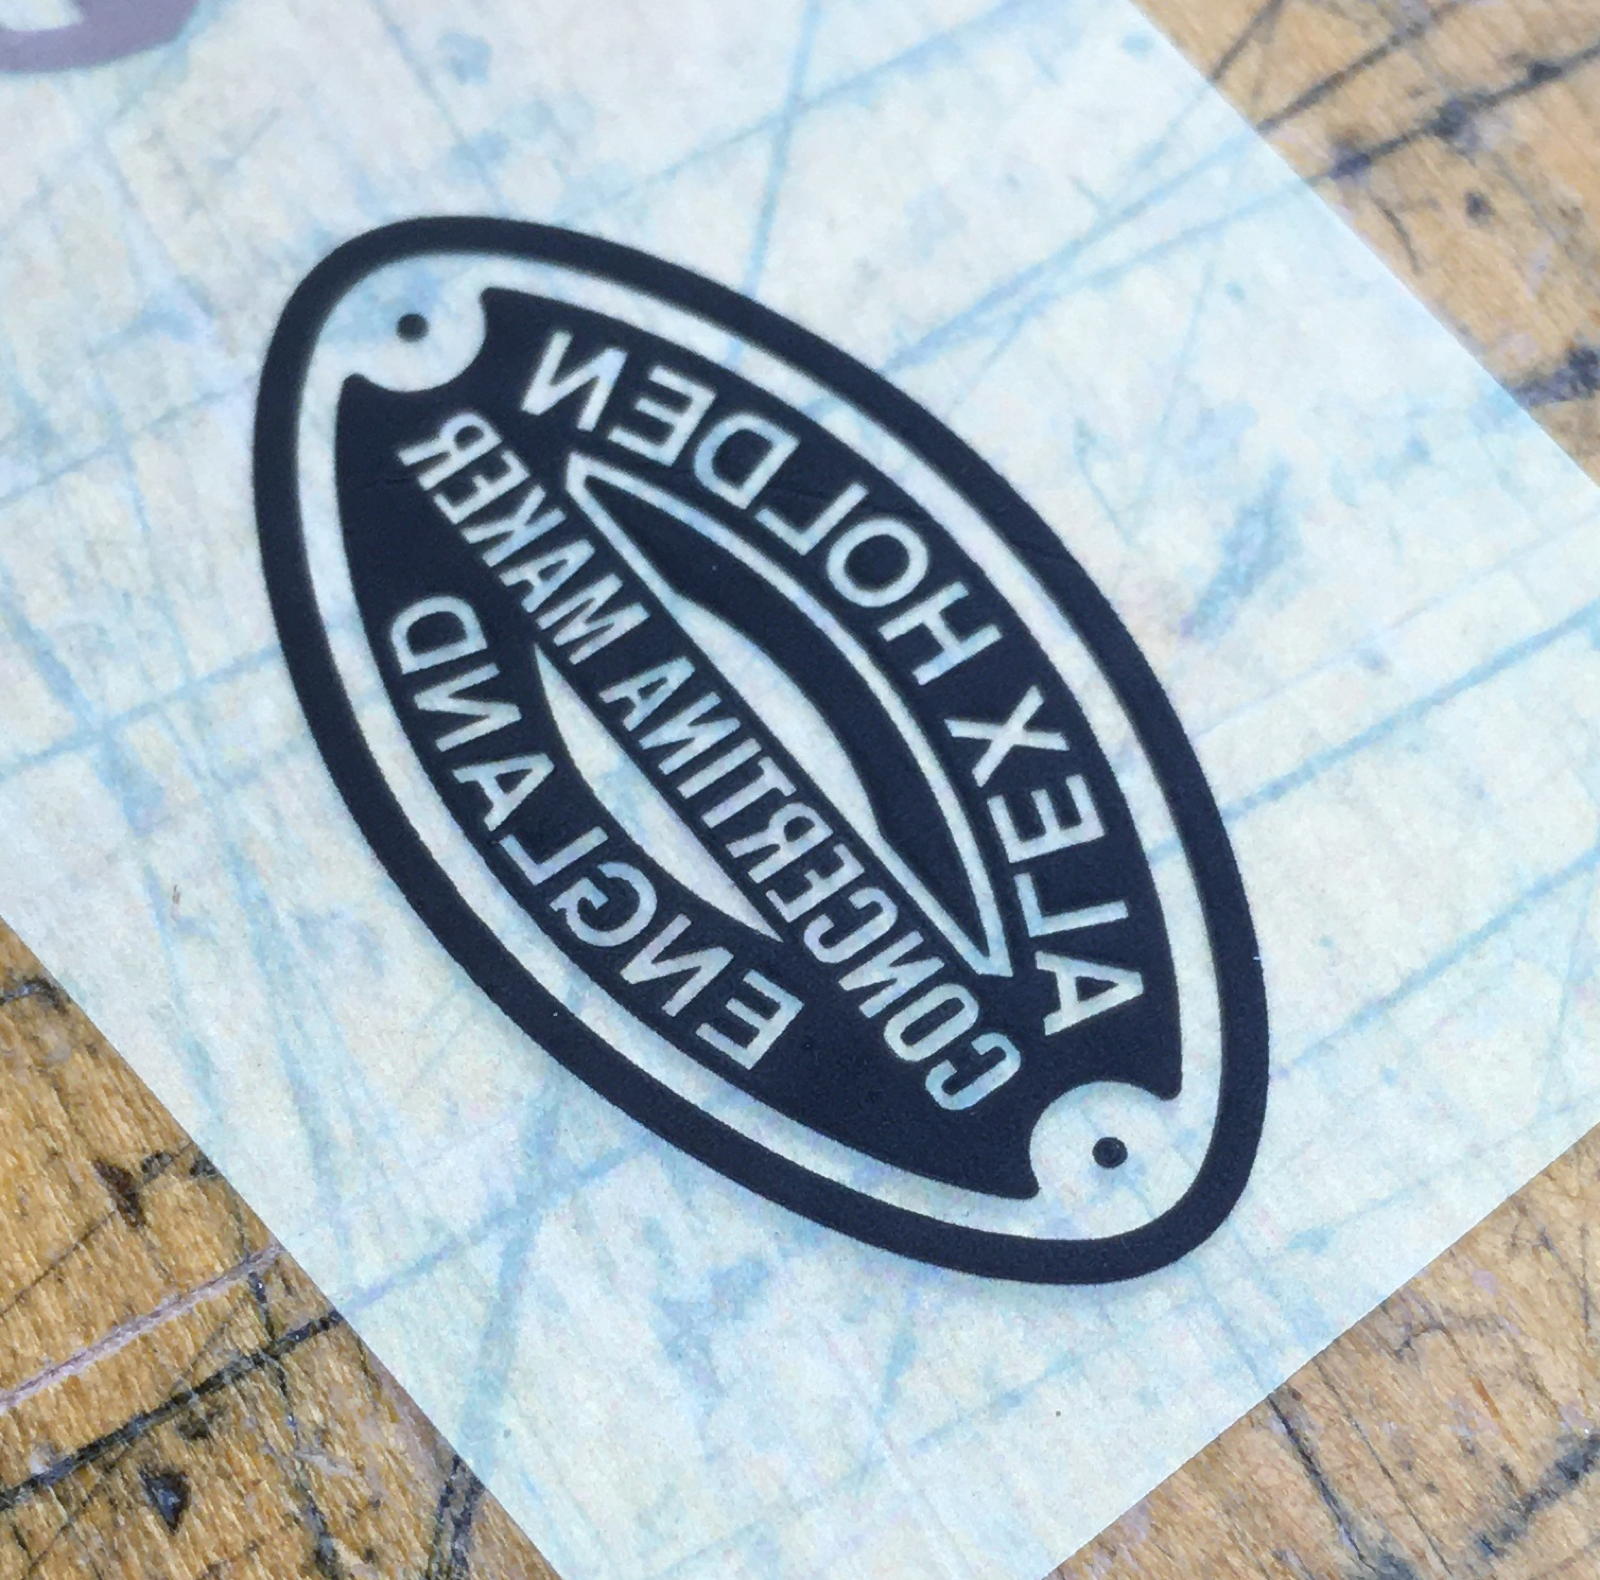
I used UV sensitive etch resist film. It is quite tricky to stick the film onto the metal without any air bubbles, which cause gaps in the design. This is what the film looks like after exposing it to UV light for about a minute behind the laser-printed pattern shown above.
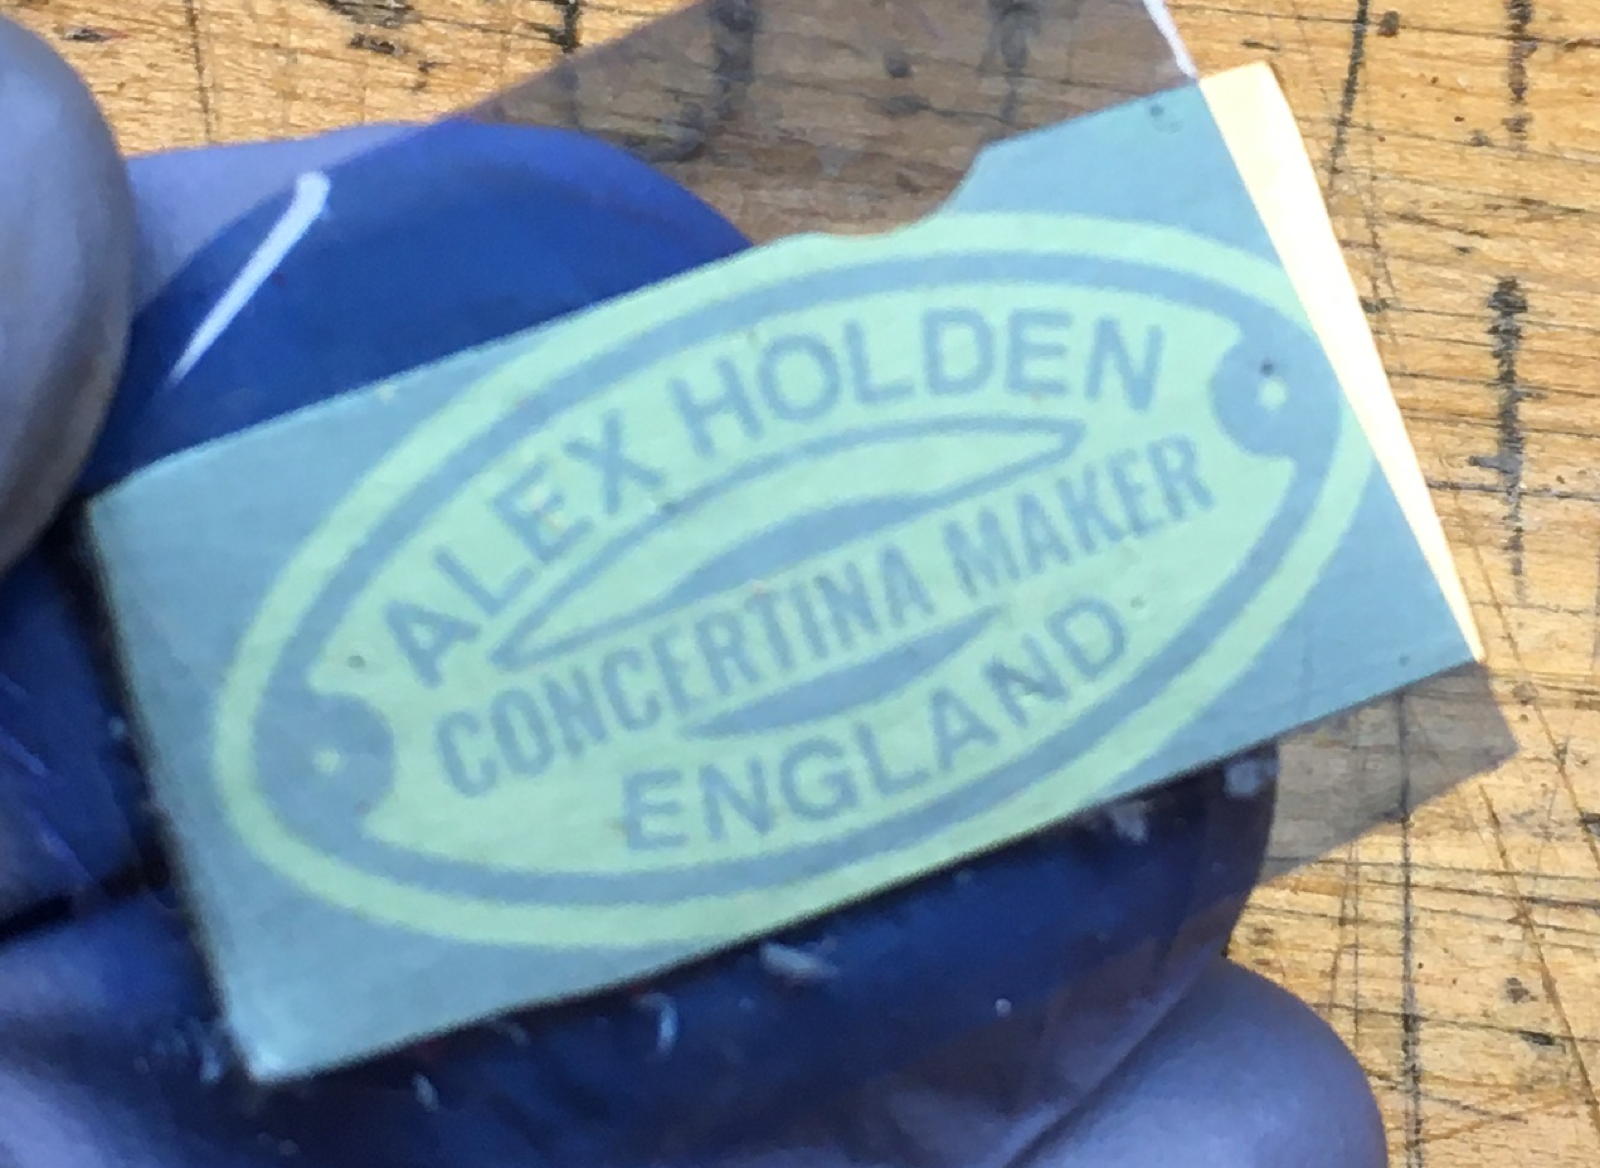
After you develop the exposed film, you are left with a pattern of acid resist stuck hard to the brass.
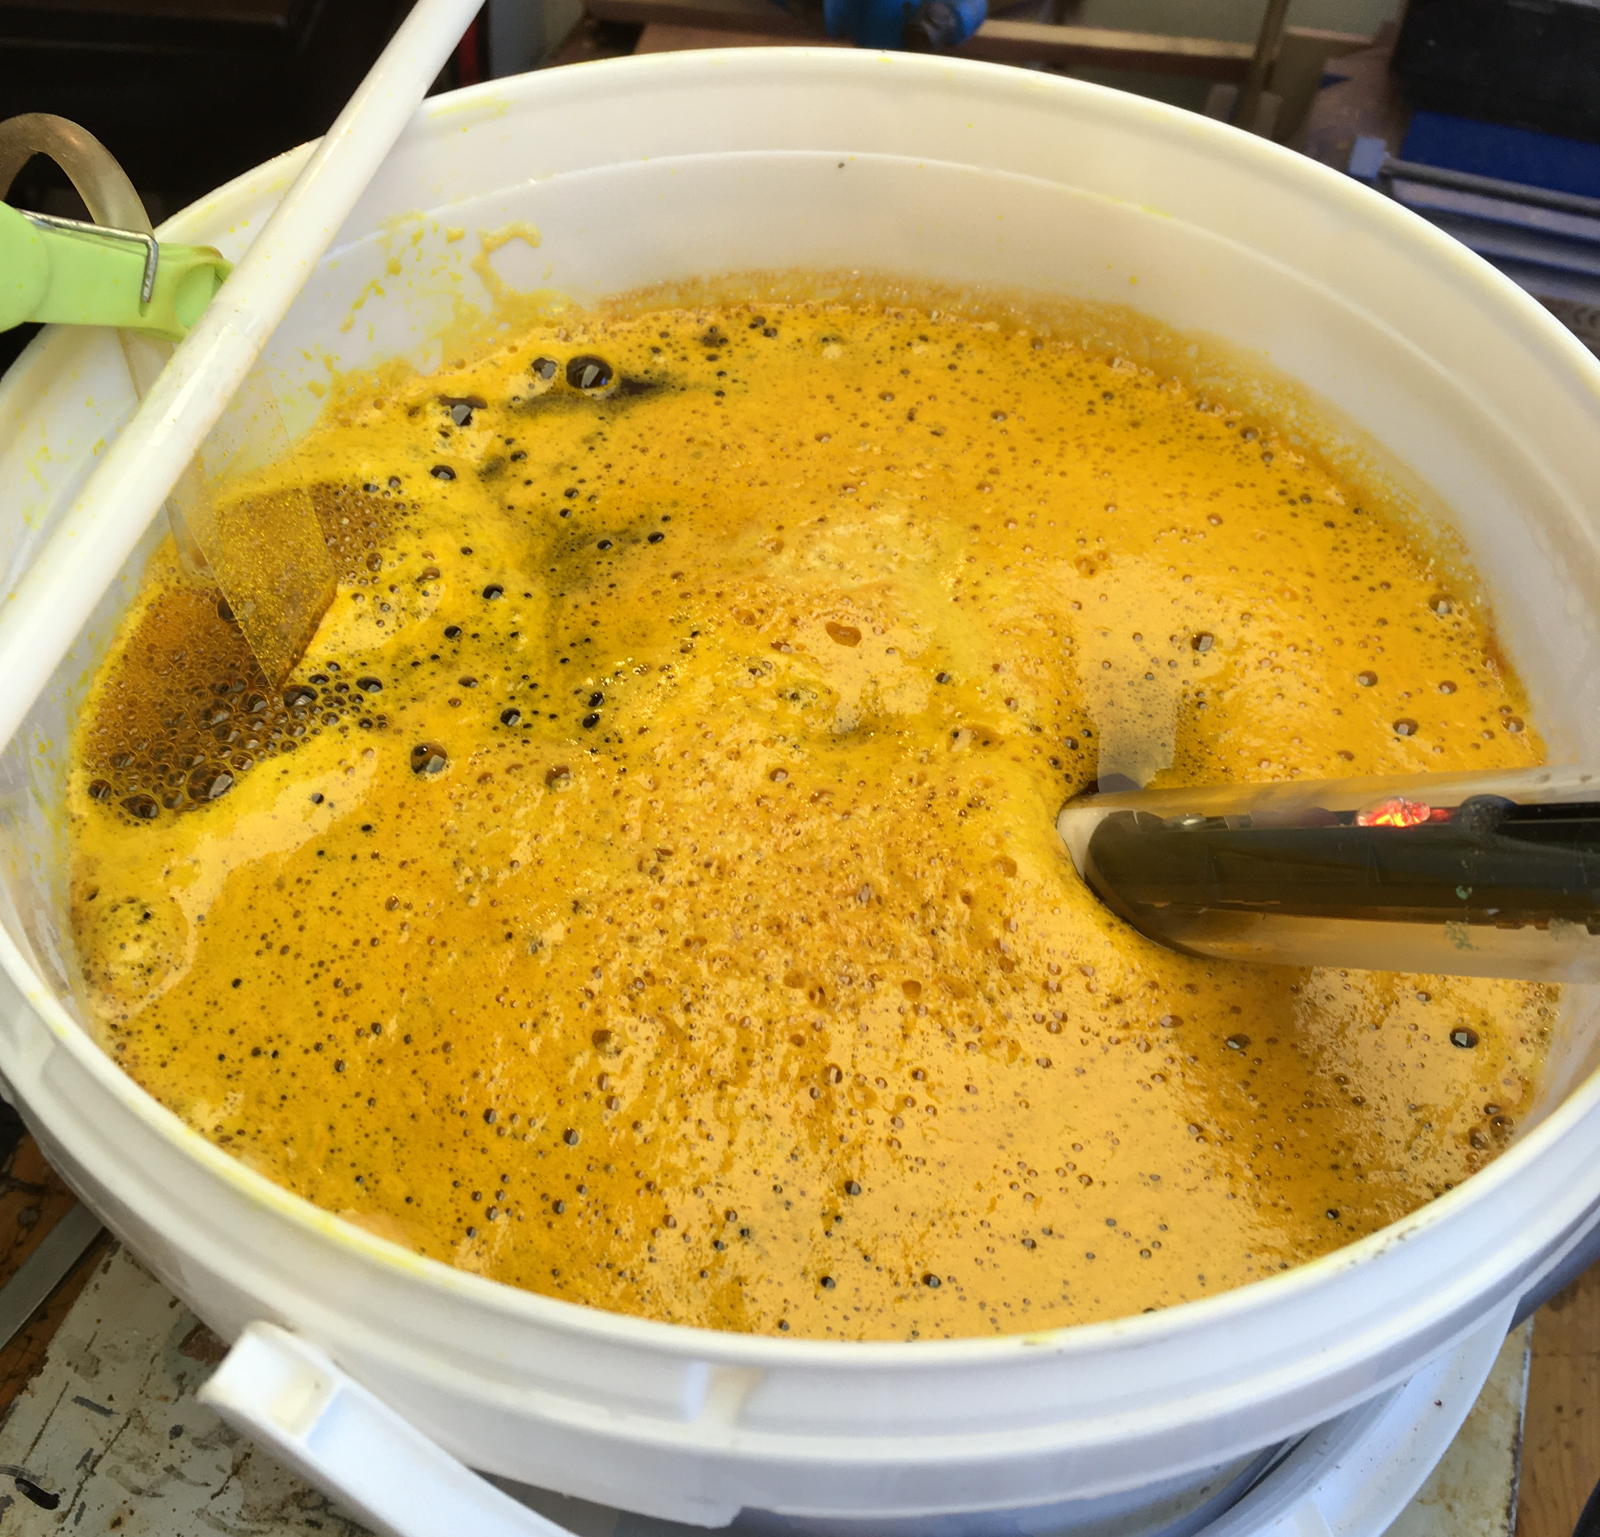
I etch the plates in warm ferric chloride solution with a fish tank air bubbler to agitate it. It looks like a real witches’ brew and tends to stain anything it splashes on.
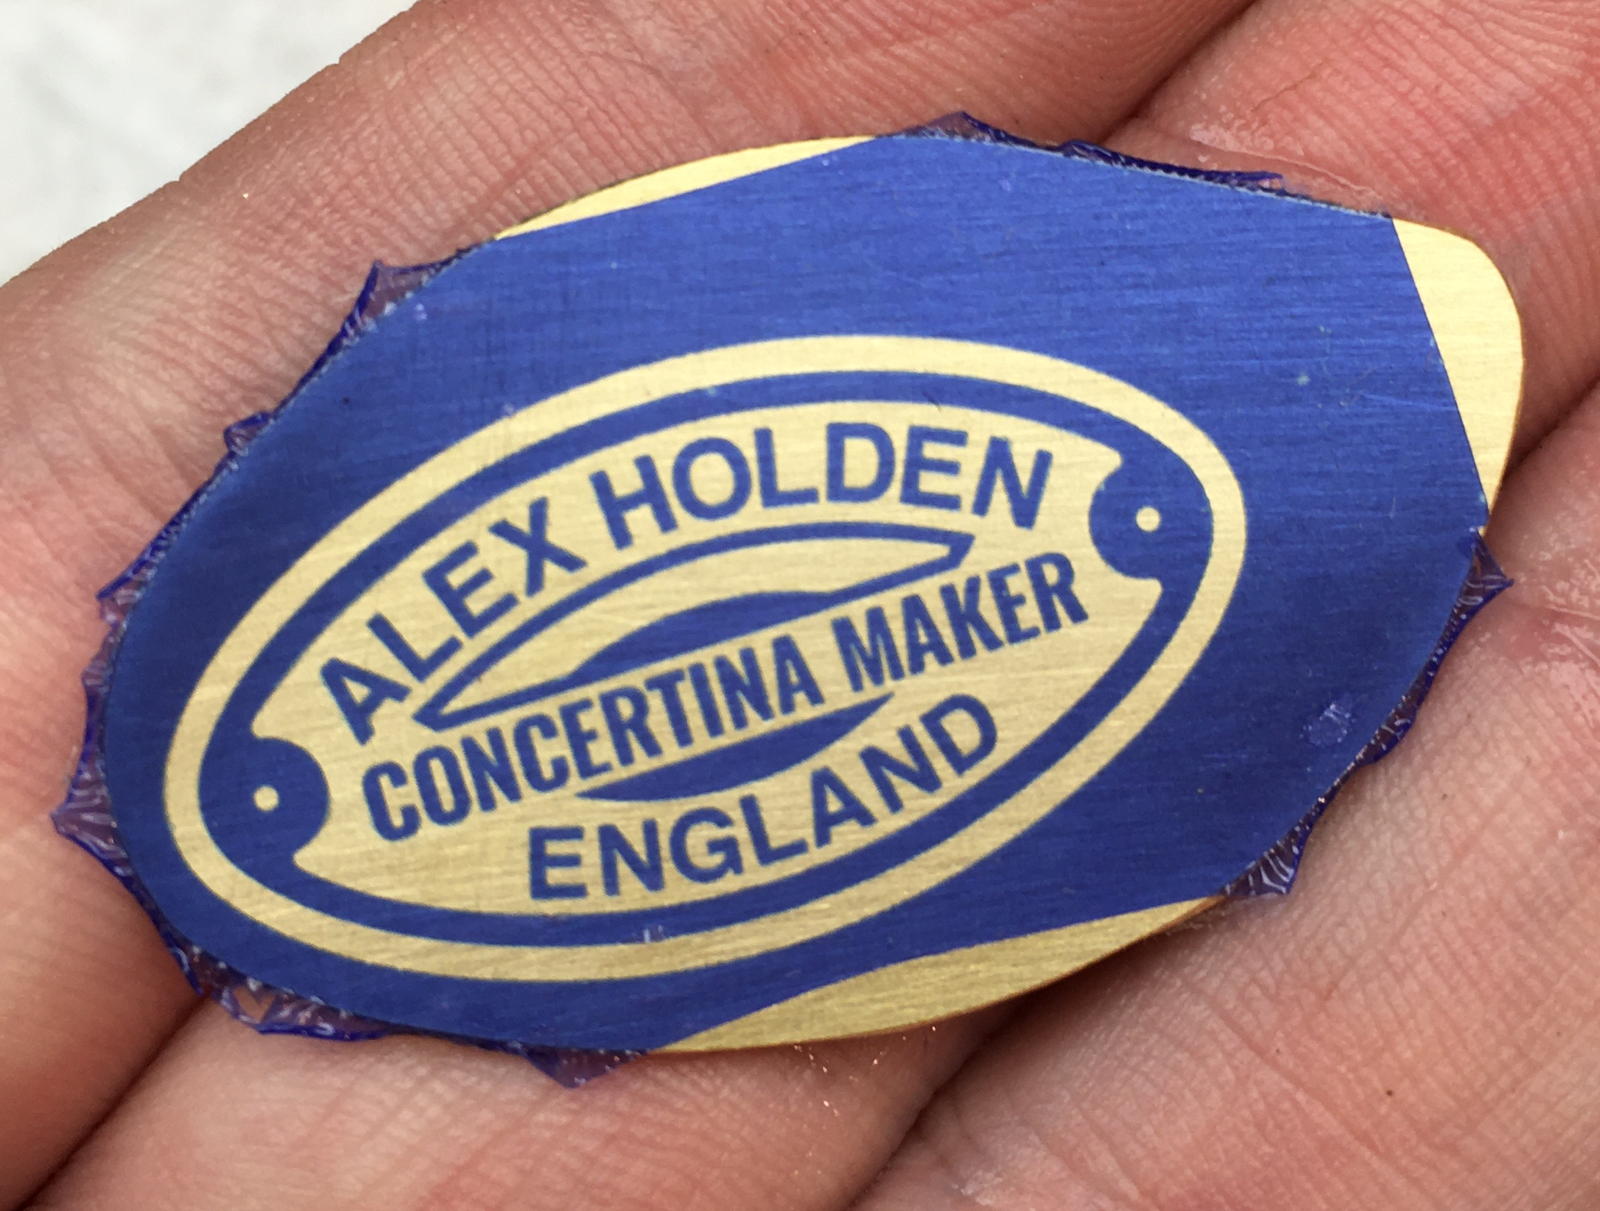
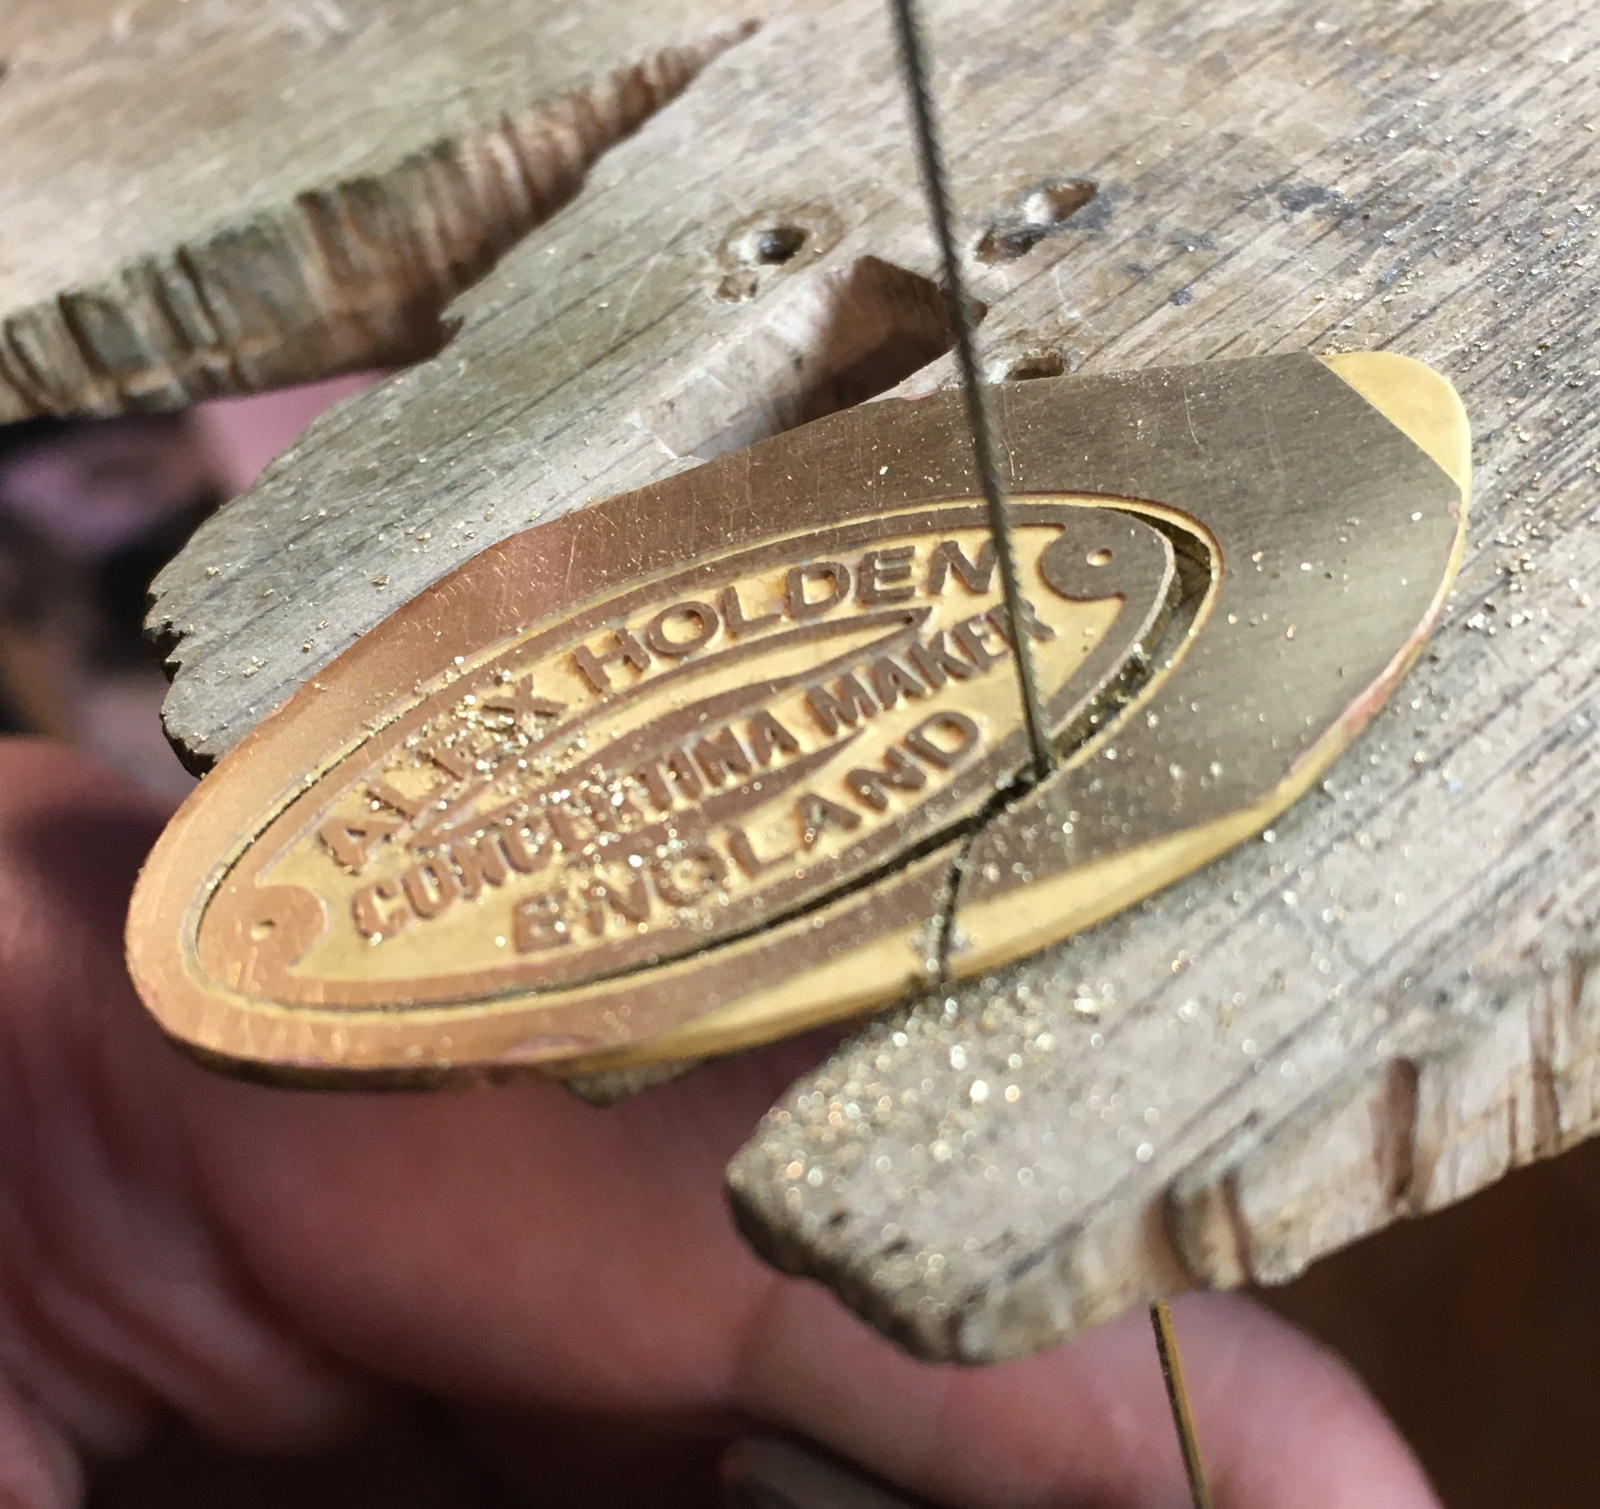
This is what a plate looks like after etching and sanding off the blue resist layer. I went for a fairly deep etch so it won’t wear off easily like I’ve seen on some vintage Wheatstone instruments.
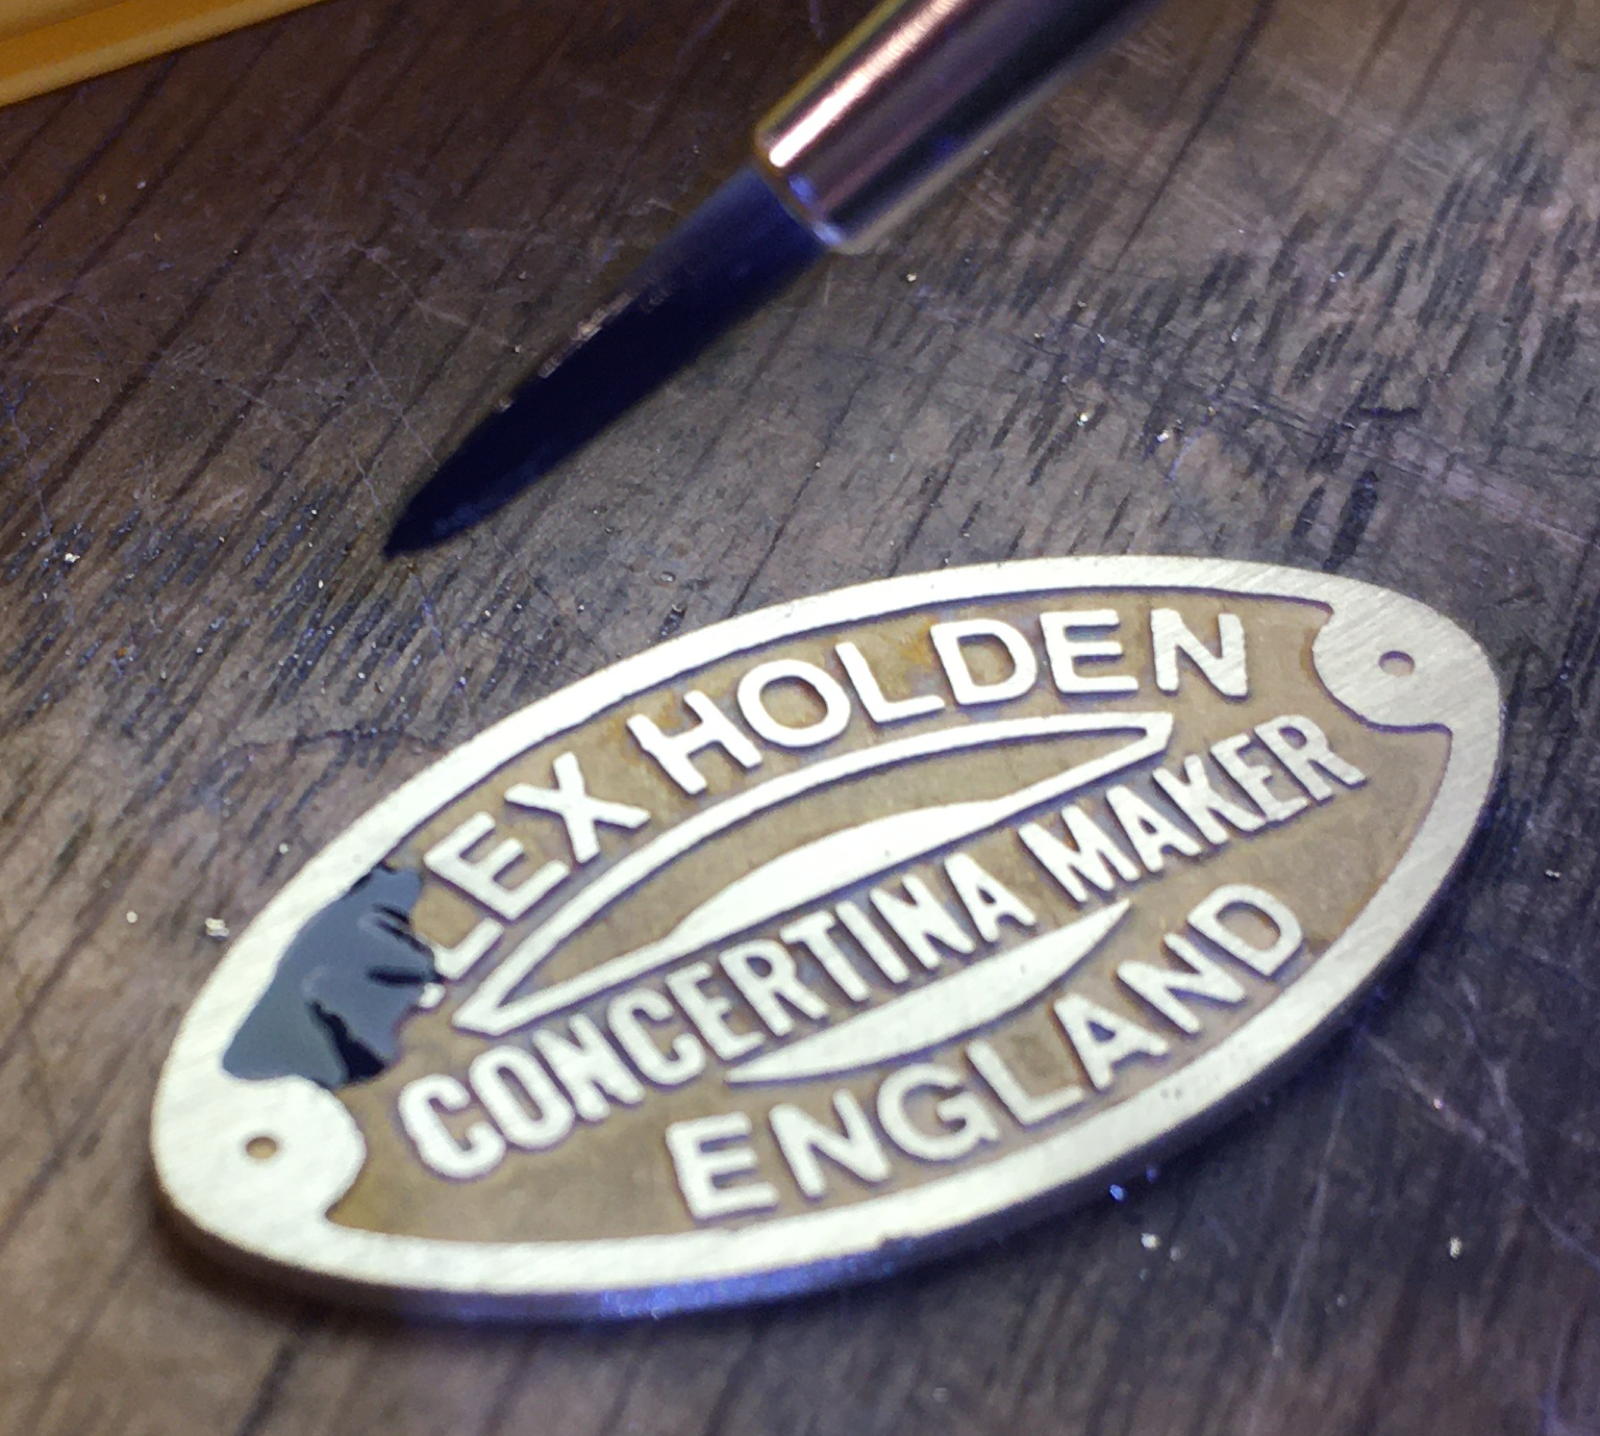
I painted the background with modelmakers’ acrylic paints, black behind the text and sky blue in the horizon shape.
After sanding the excess paint off the surface, the whole thing was lacquered to protect it.
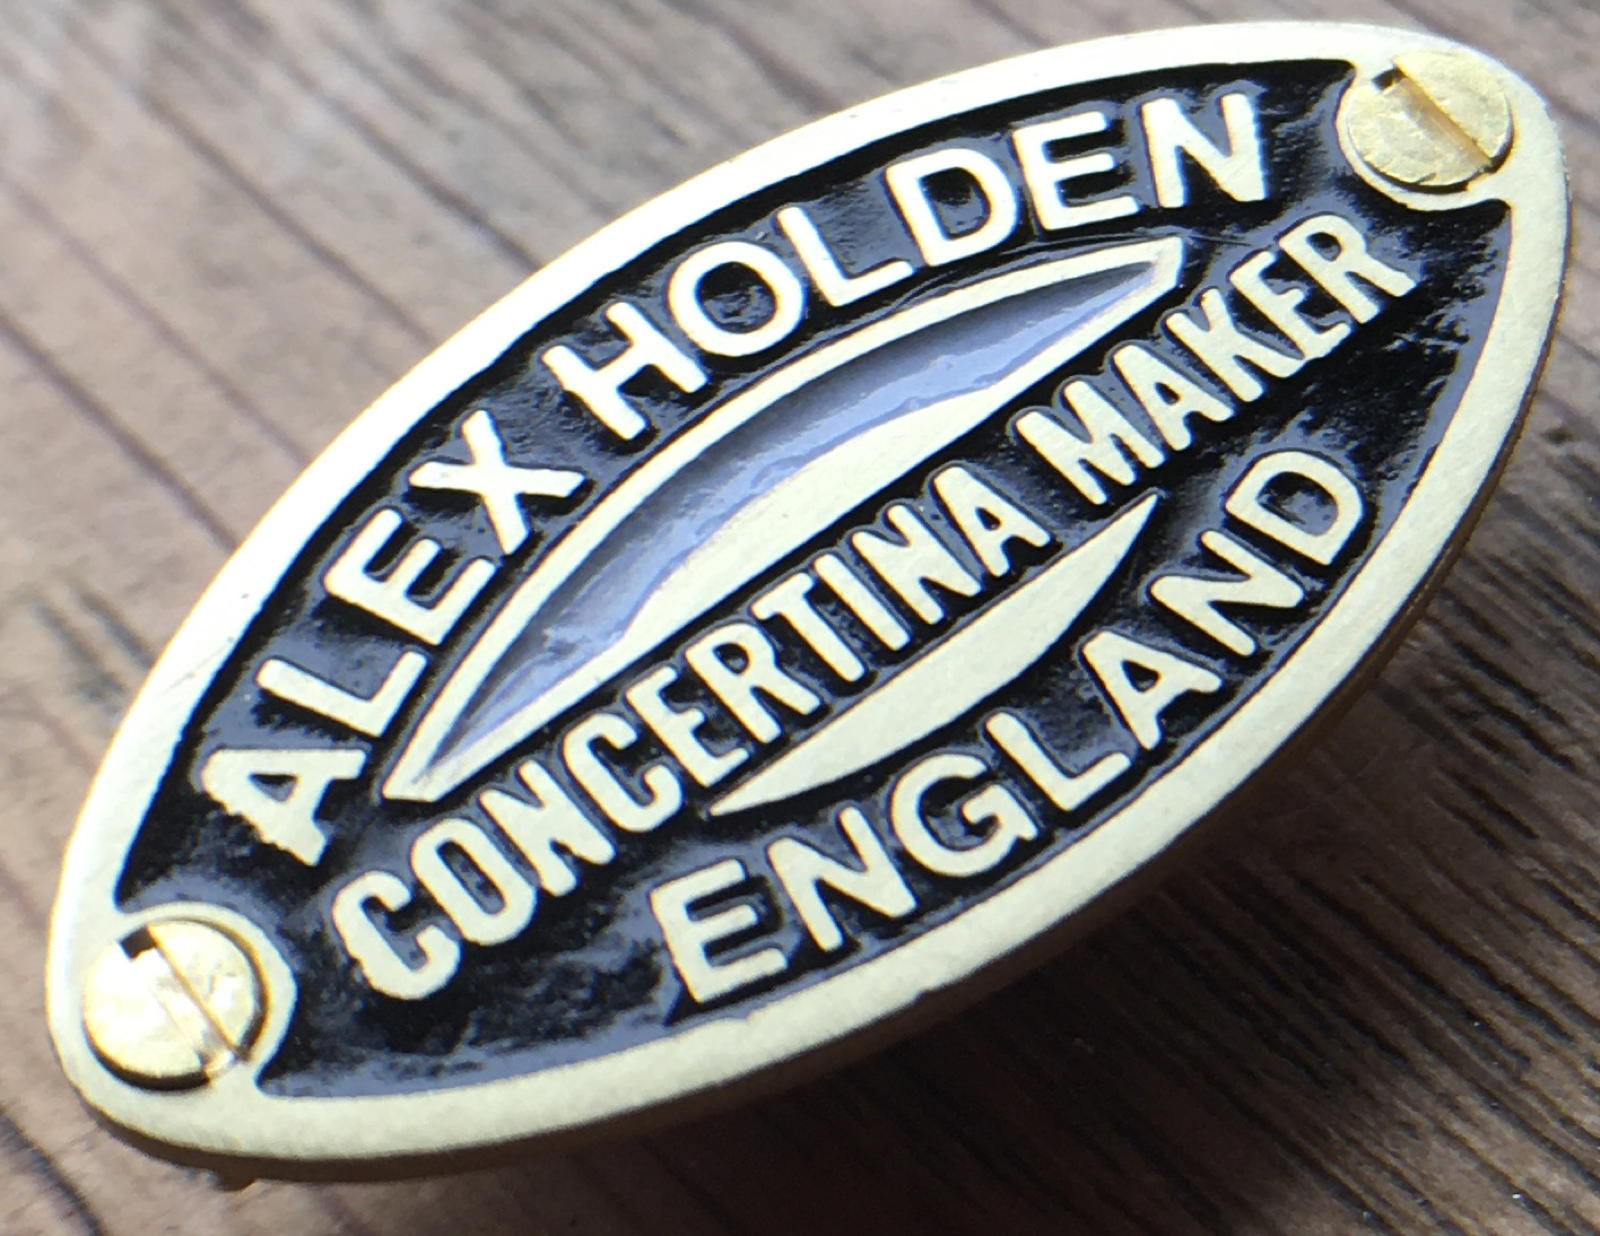
The raised end plates left me with little space where I could comfortably fit the plate in. I had to cut out a piece at the top of the tree crown for it to sit in.
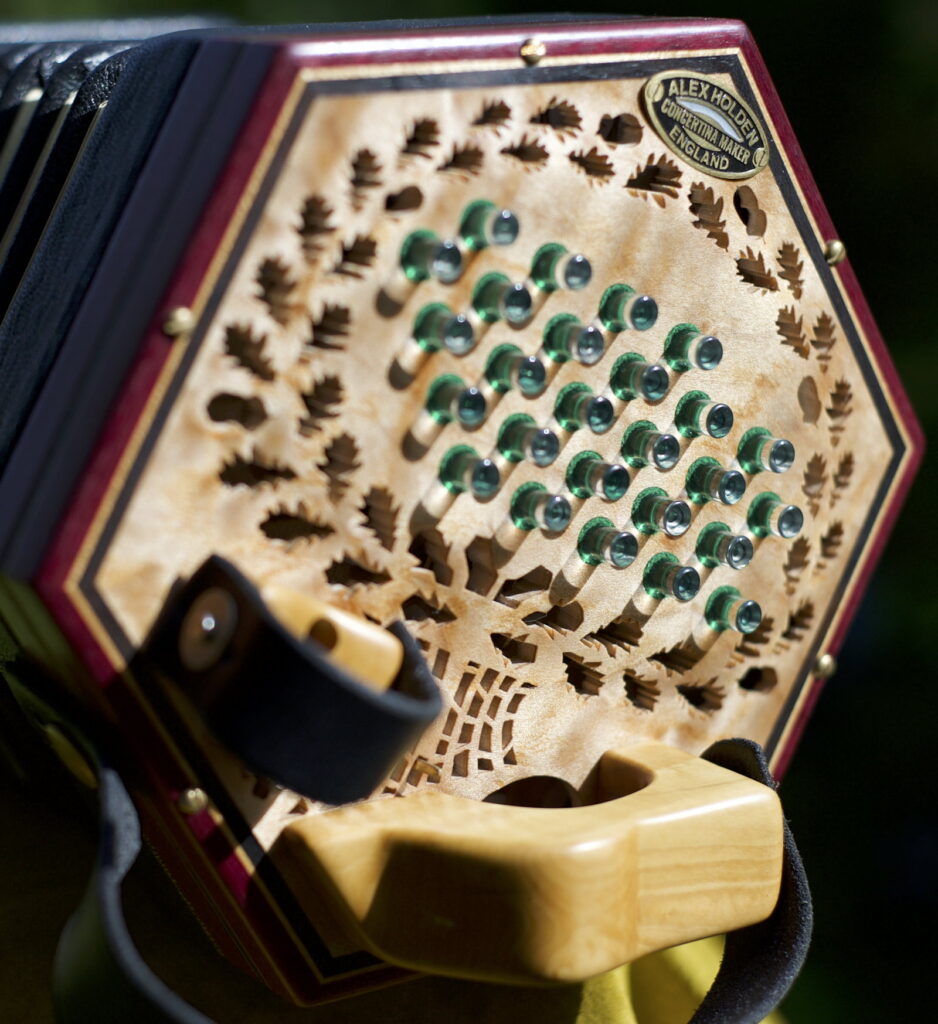
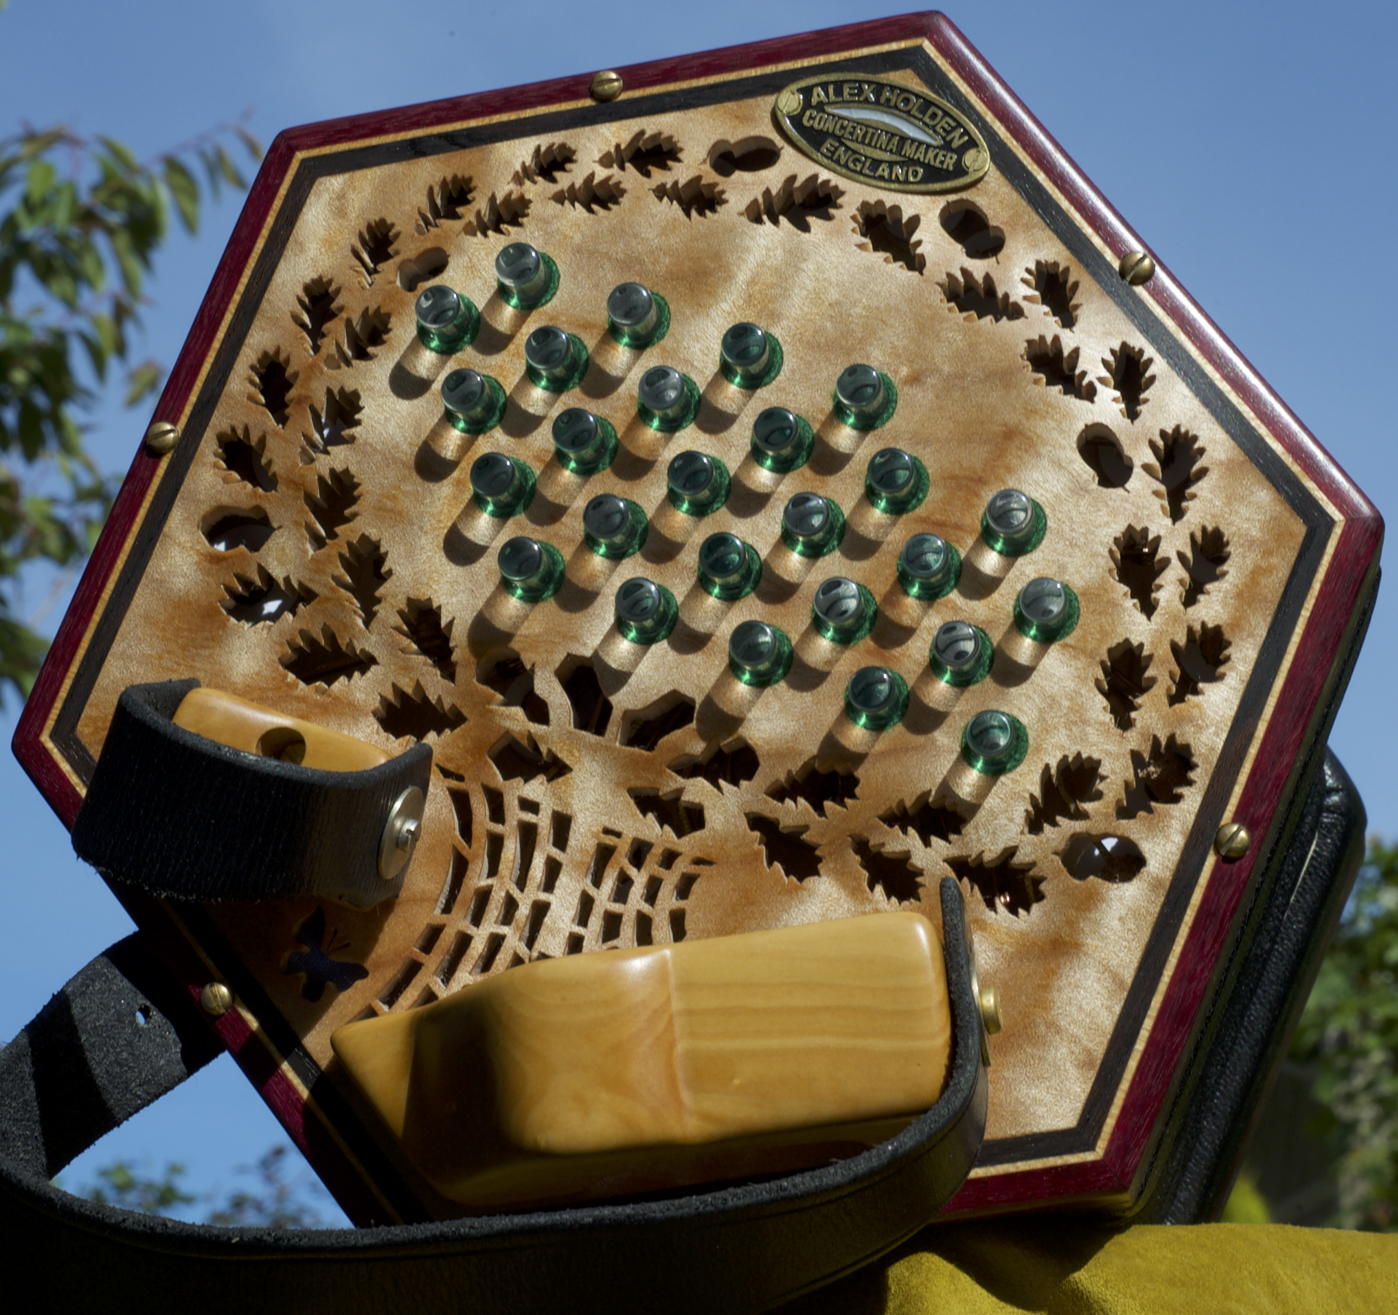
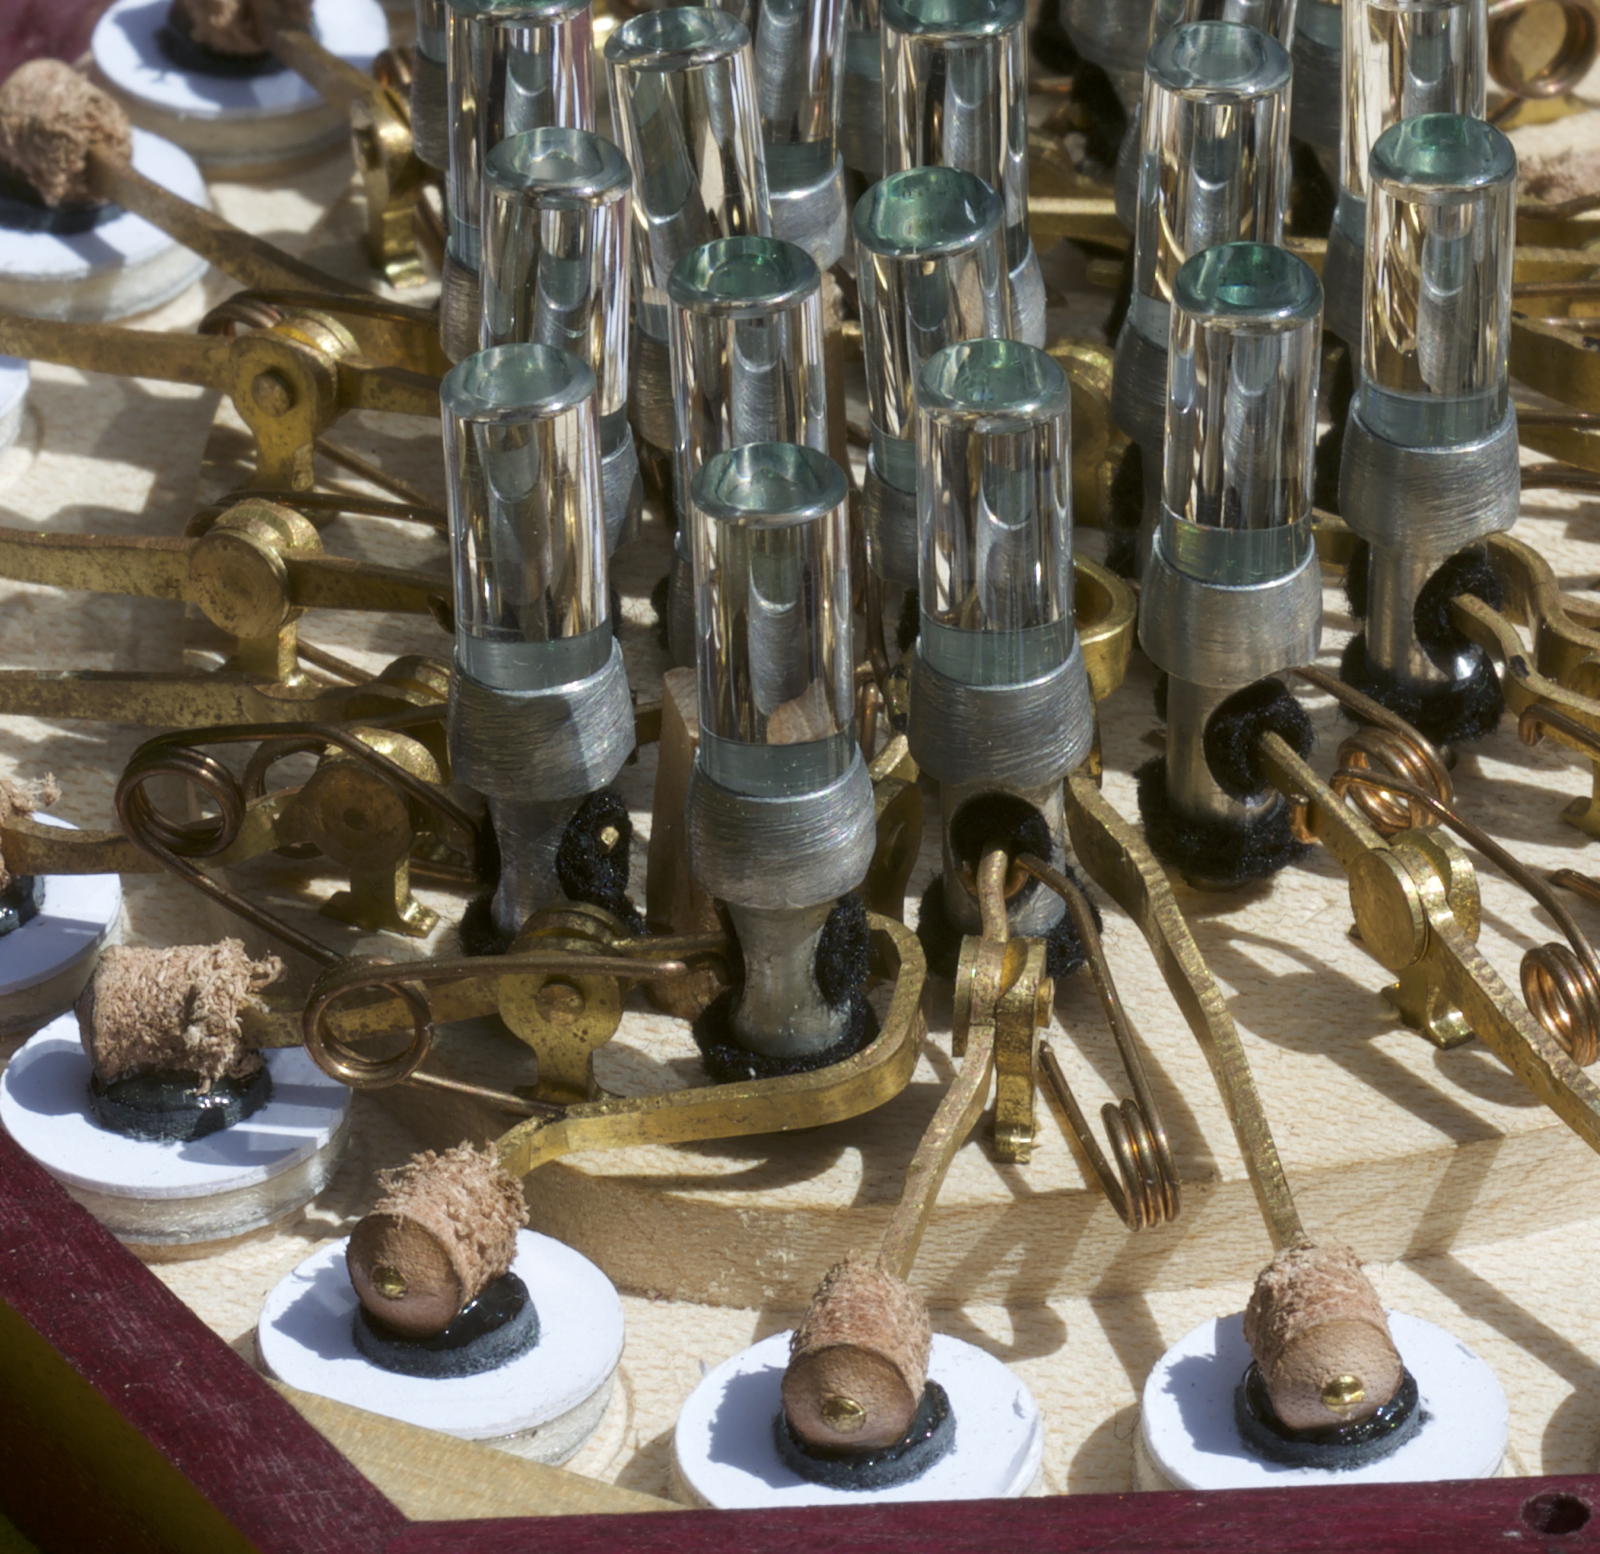
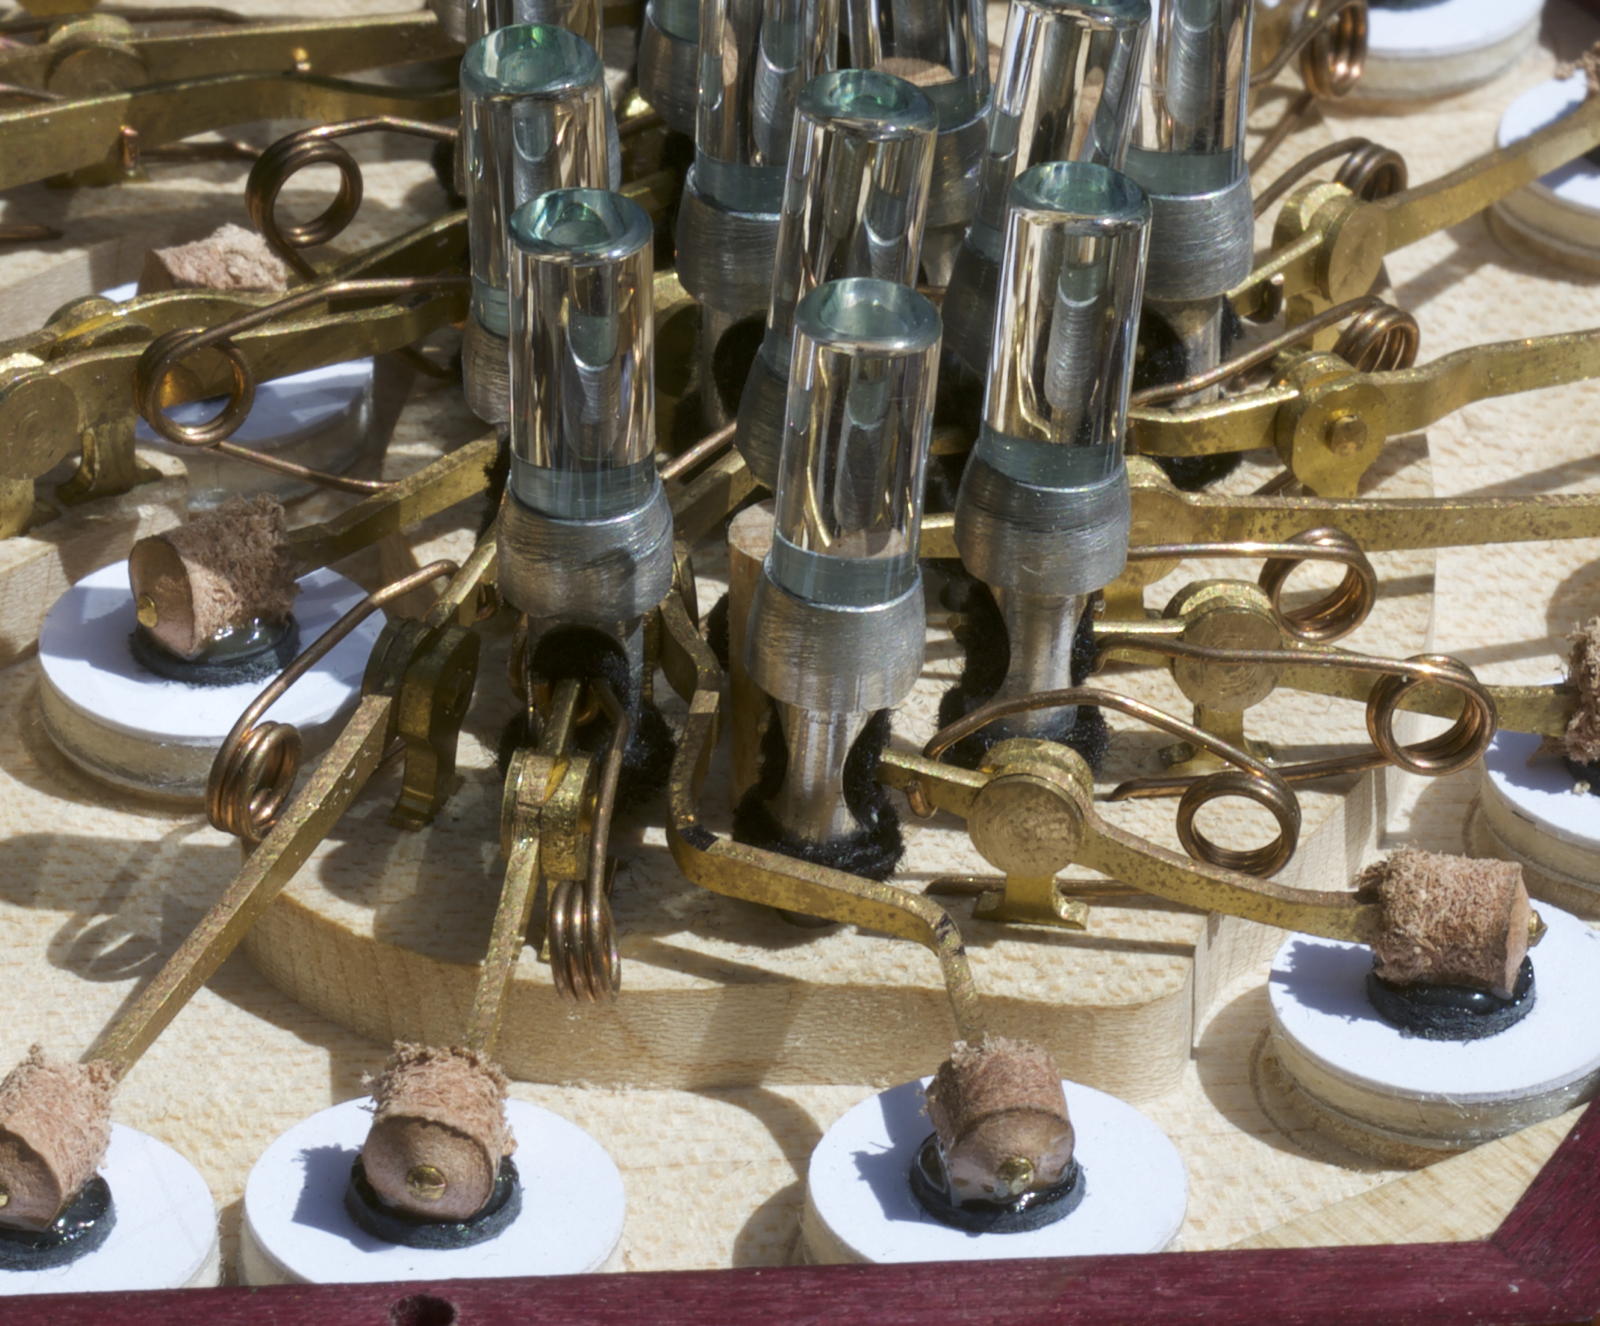
Glass Buttons
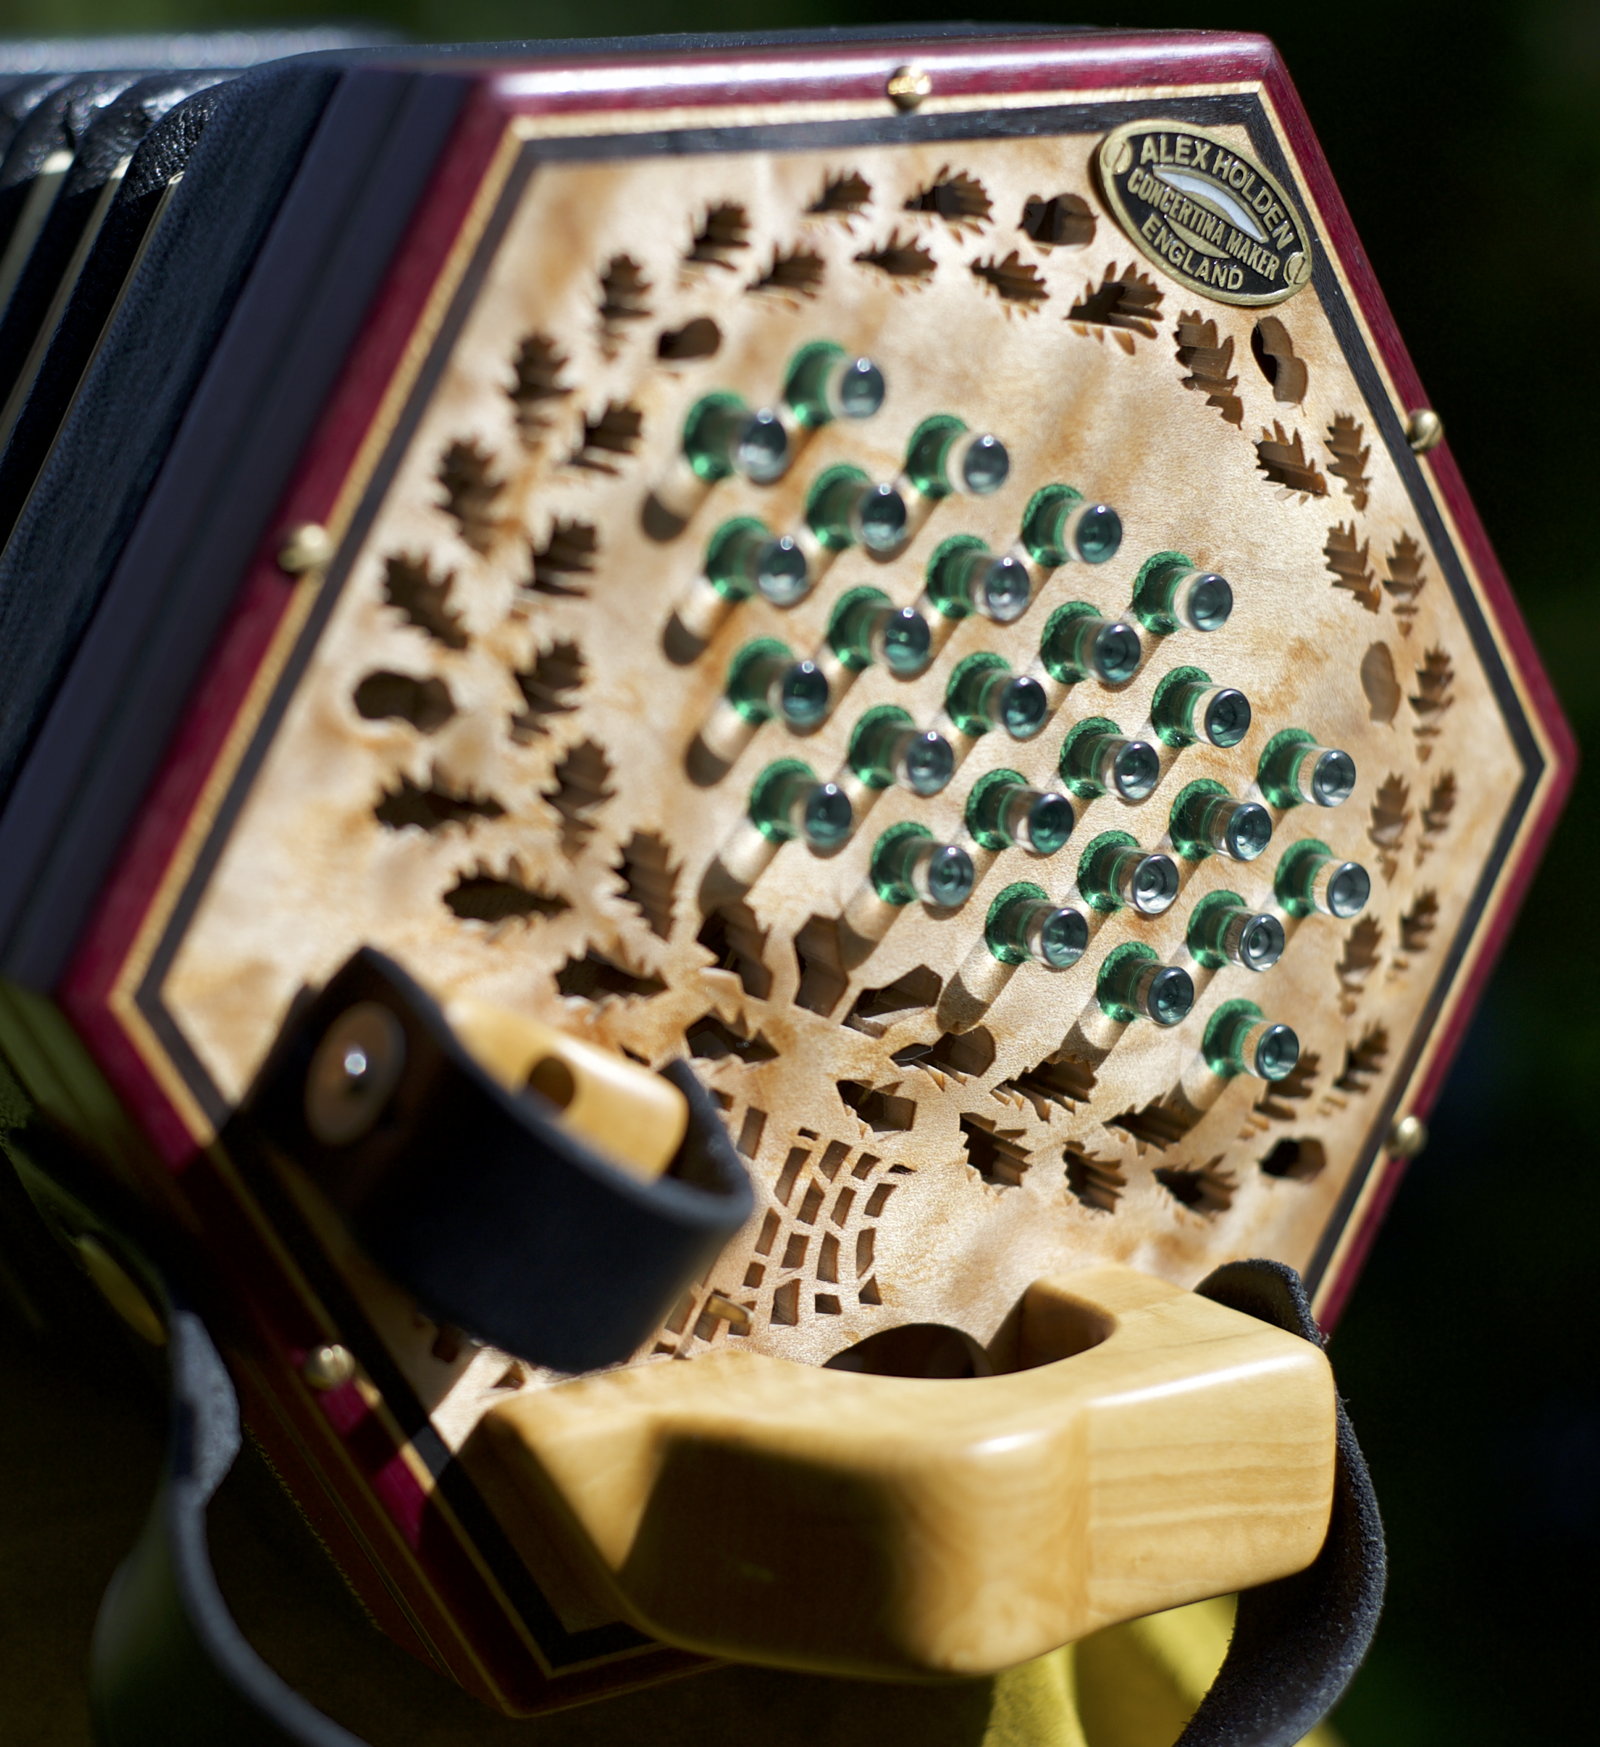
This was a new process for me and I am very pleased with how they turned out. As far as I am aware no other current makers offer the option of glass buttons. They look lovely, are hard wearing, don’t oxidise, have low friction against the bushes, and feel nice to touch. The drawbacks are that they are very labour intensive to make, and they are slightly heavier than my standard metal-capped buttons (though not as heavy as solid nickel silver, which I have seen some other makers use). I am also limited to making them using commercially available diameters of borosilicate glass rod, which in practice means I can make them 5, 6, or 7mm diameter. Note that the glass itself is clear, but I put some green ink on the bottom of each button to add a bit of colour to light that is reflected off the bottom. There are also green bushes around each button, so that from certain angles the buttons take on a dappled green appearance that evokes sunlight filtering though a forest canopy.
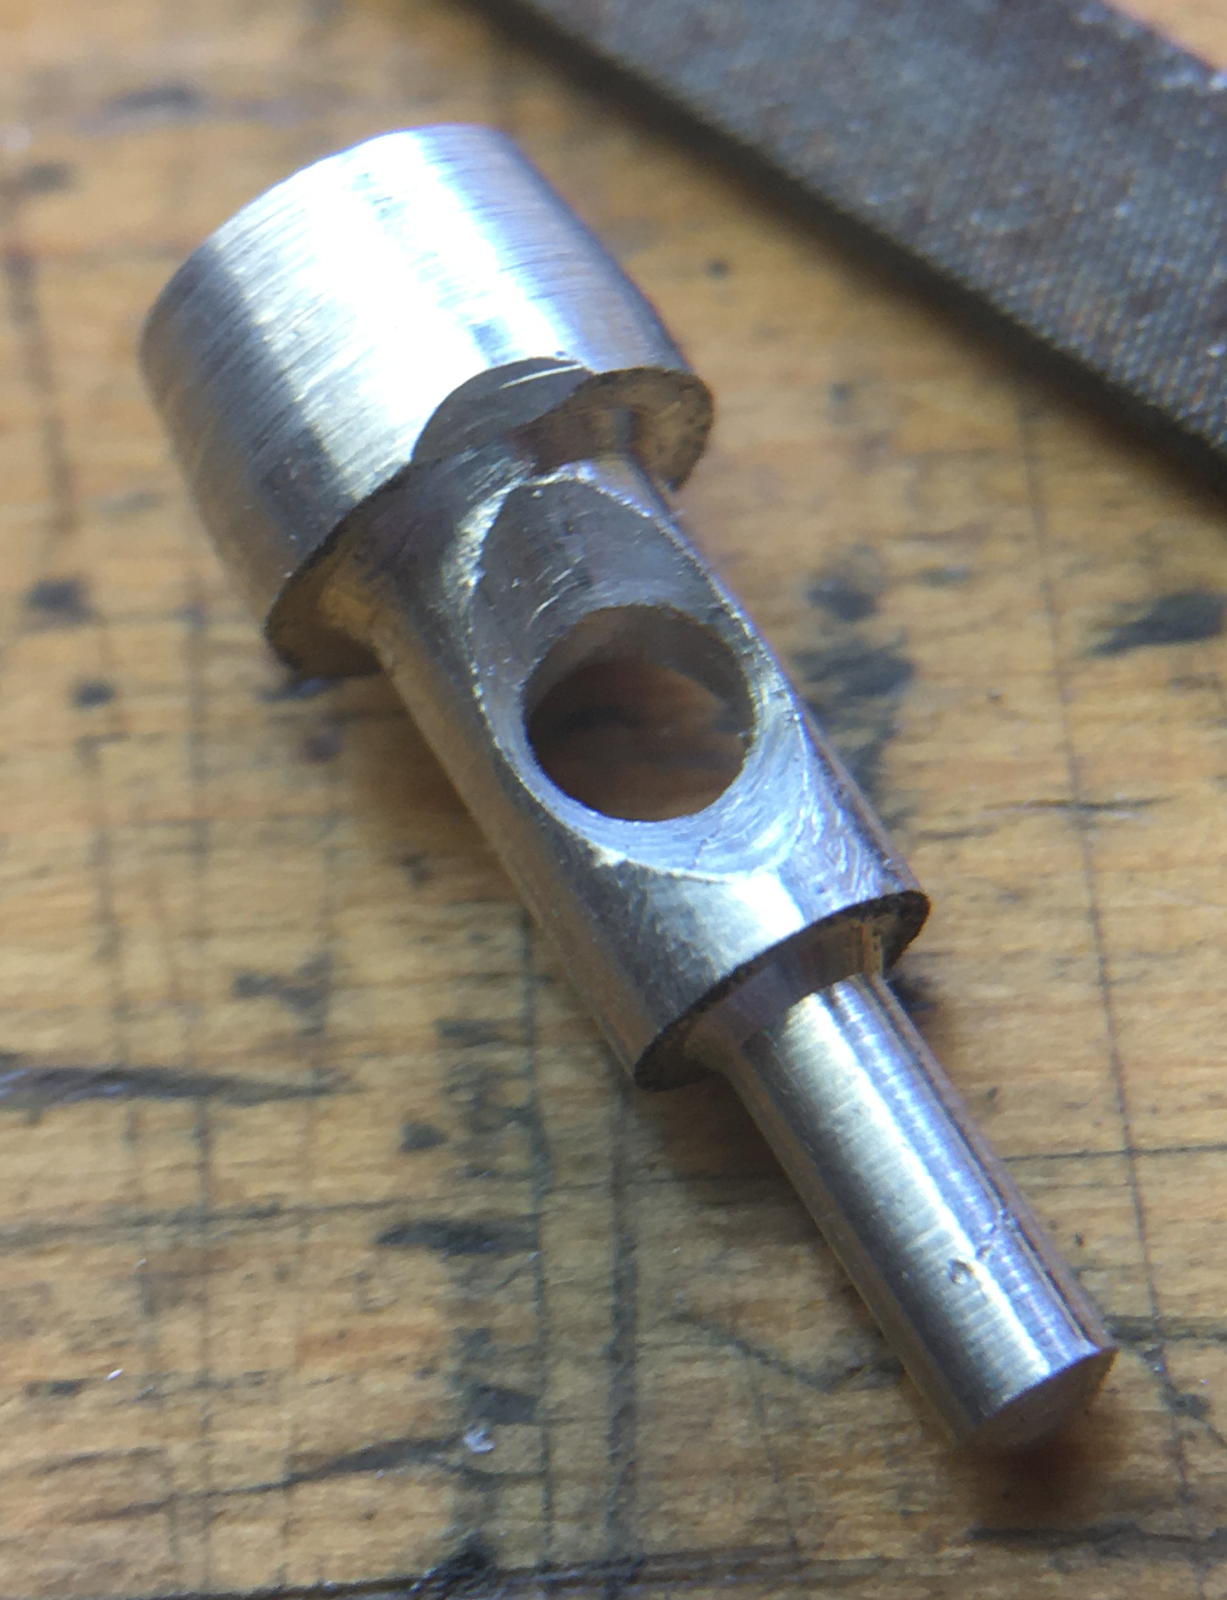
Hidden below the end plate, the glass part of each button is glued into an aluminium base with a cup shape bored into the top of it:
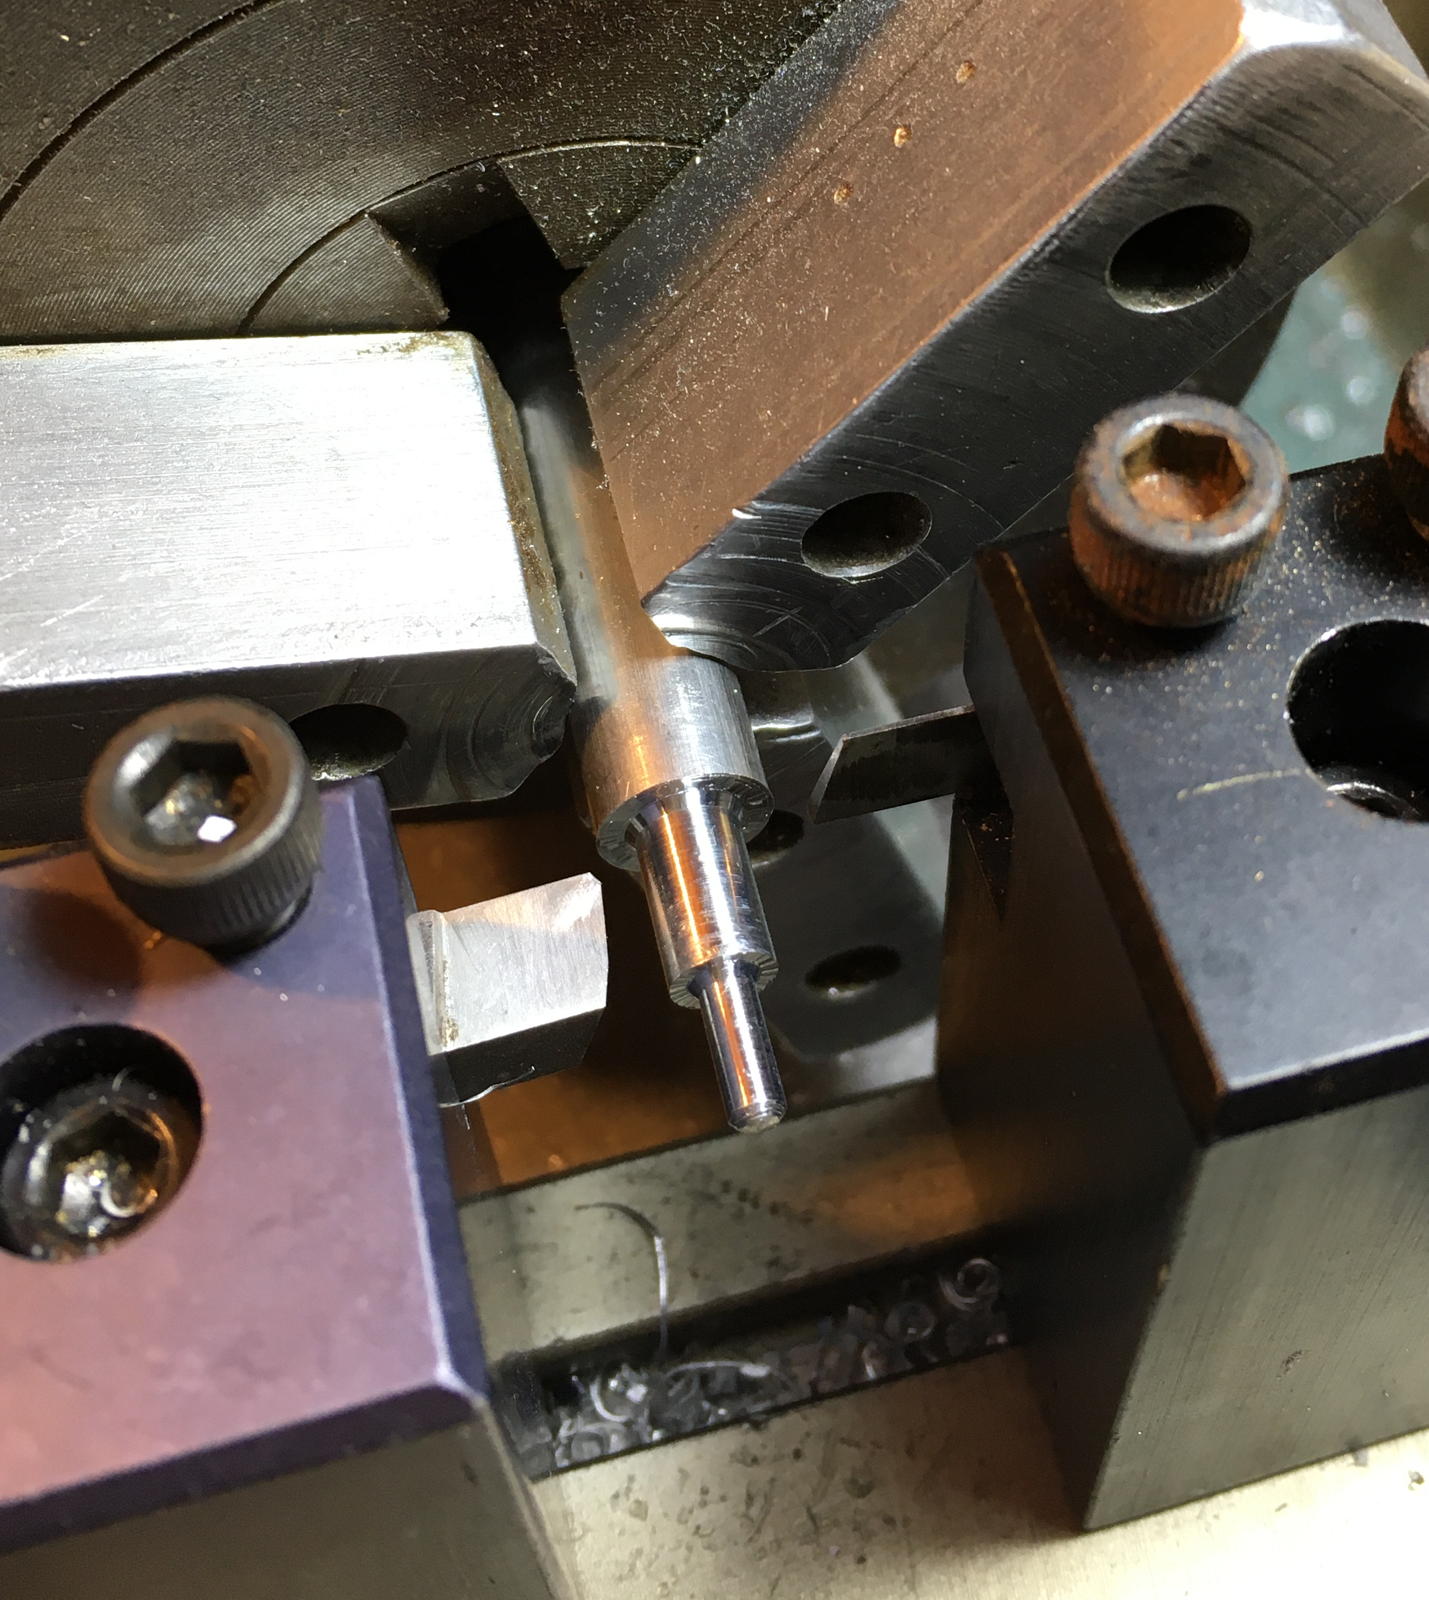
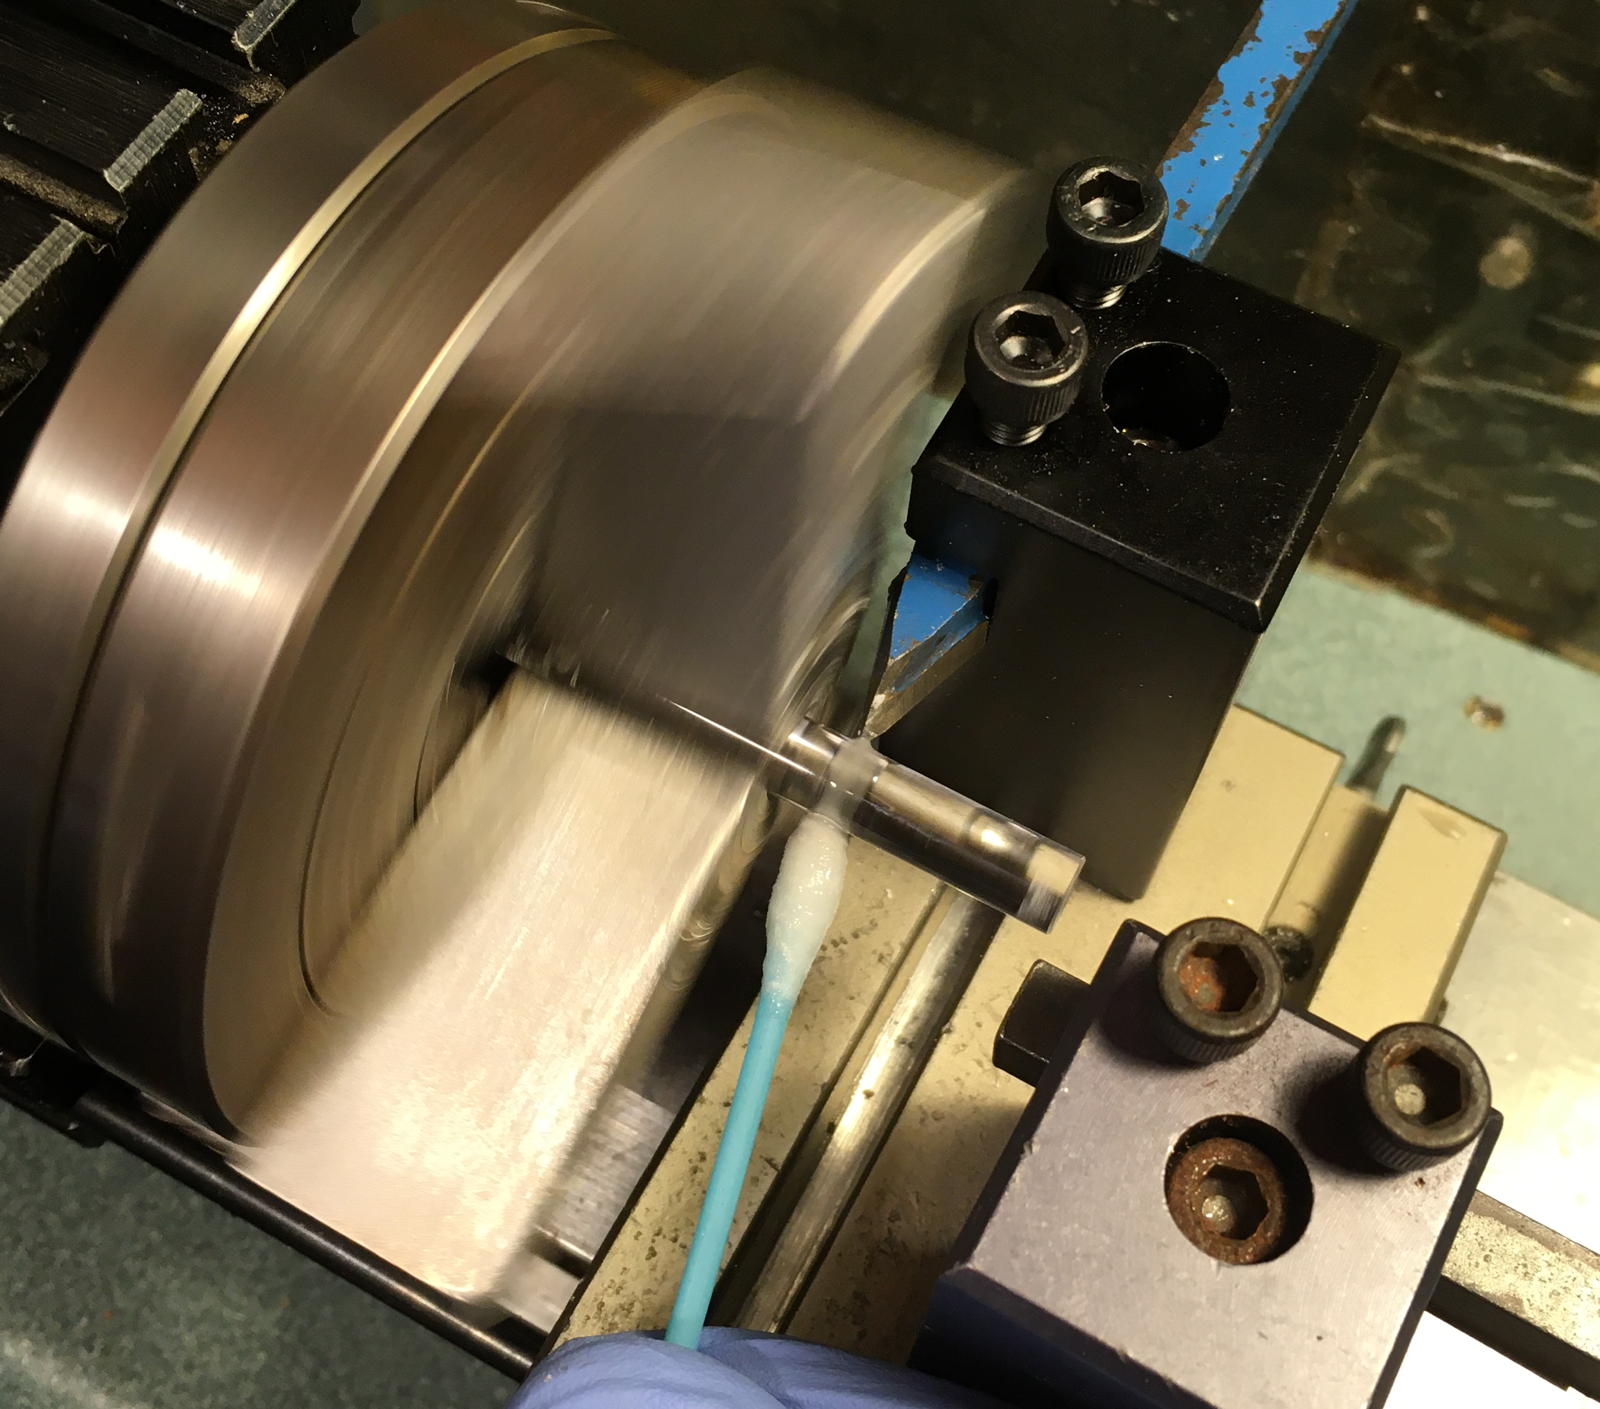
The trickiest part of the process to figure out was how to accurately cut short lengths of the glass rod without causing large chips that couldn’t be polished out. After trying many different methods, the most successful technique involved using a carbide blade to score around the rod in the lathe, then snapping it off by hand.
I used a wet diamond plate and a simple jig to lap both ends of each rod smooth.
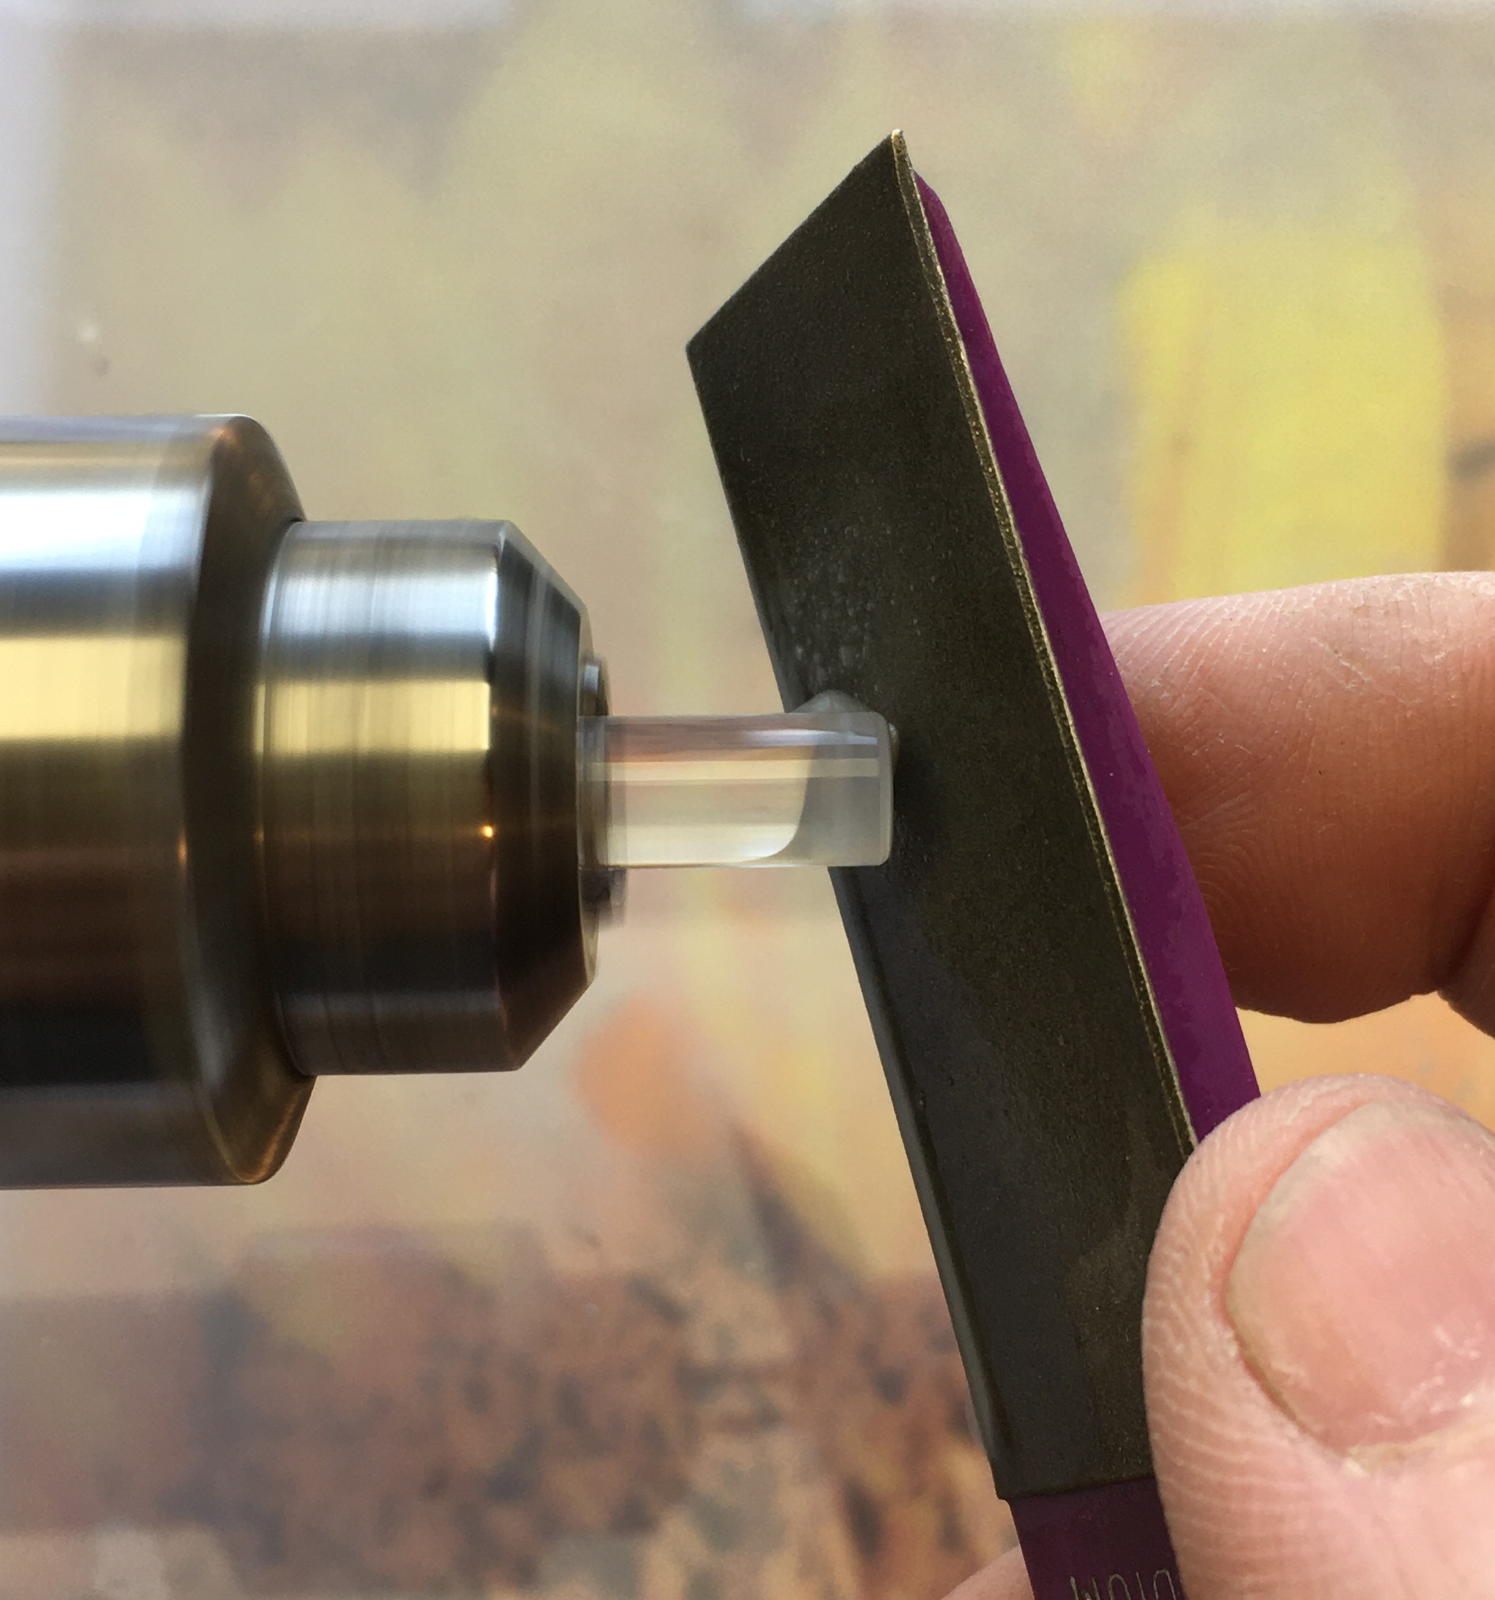
I rounded over the top of each button using a bench motor and a wet diamond paddle.
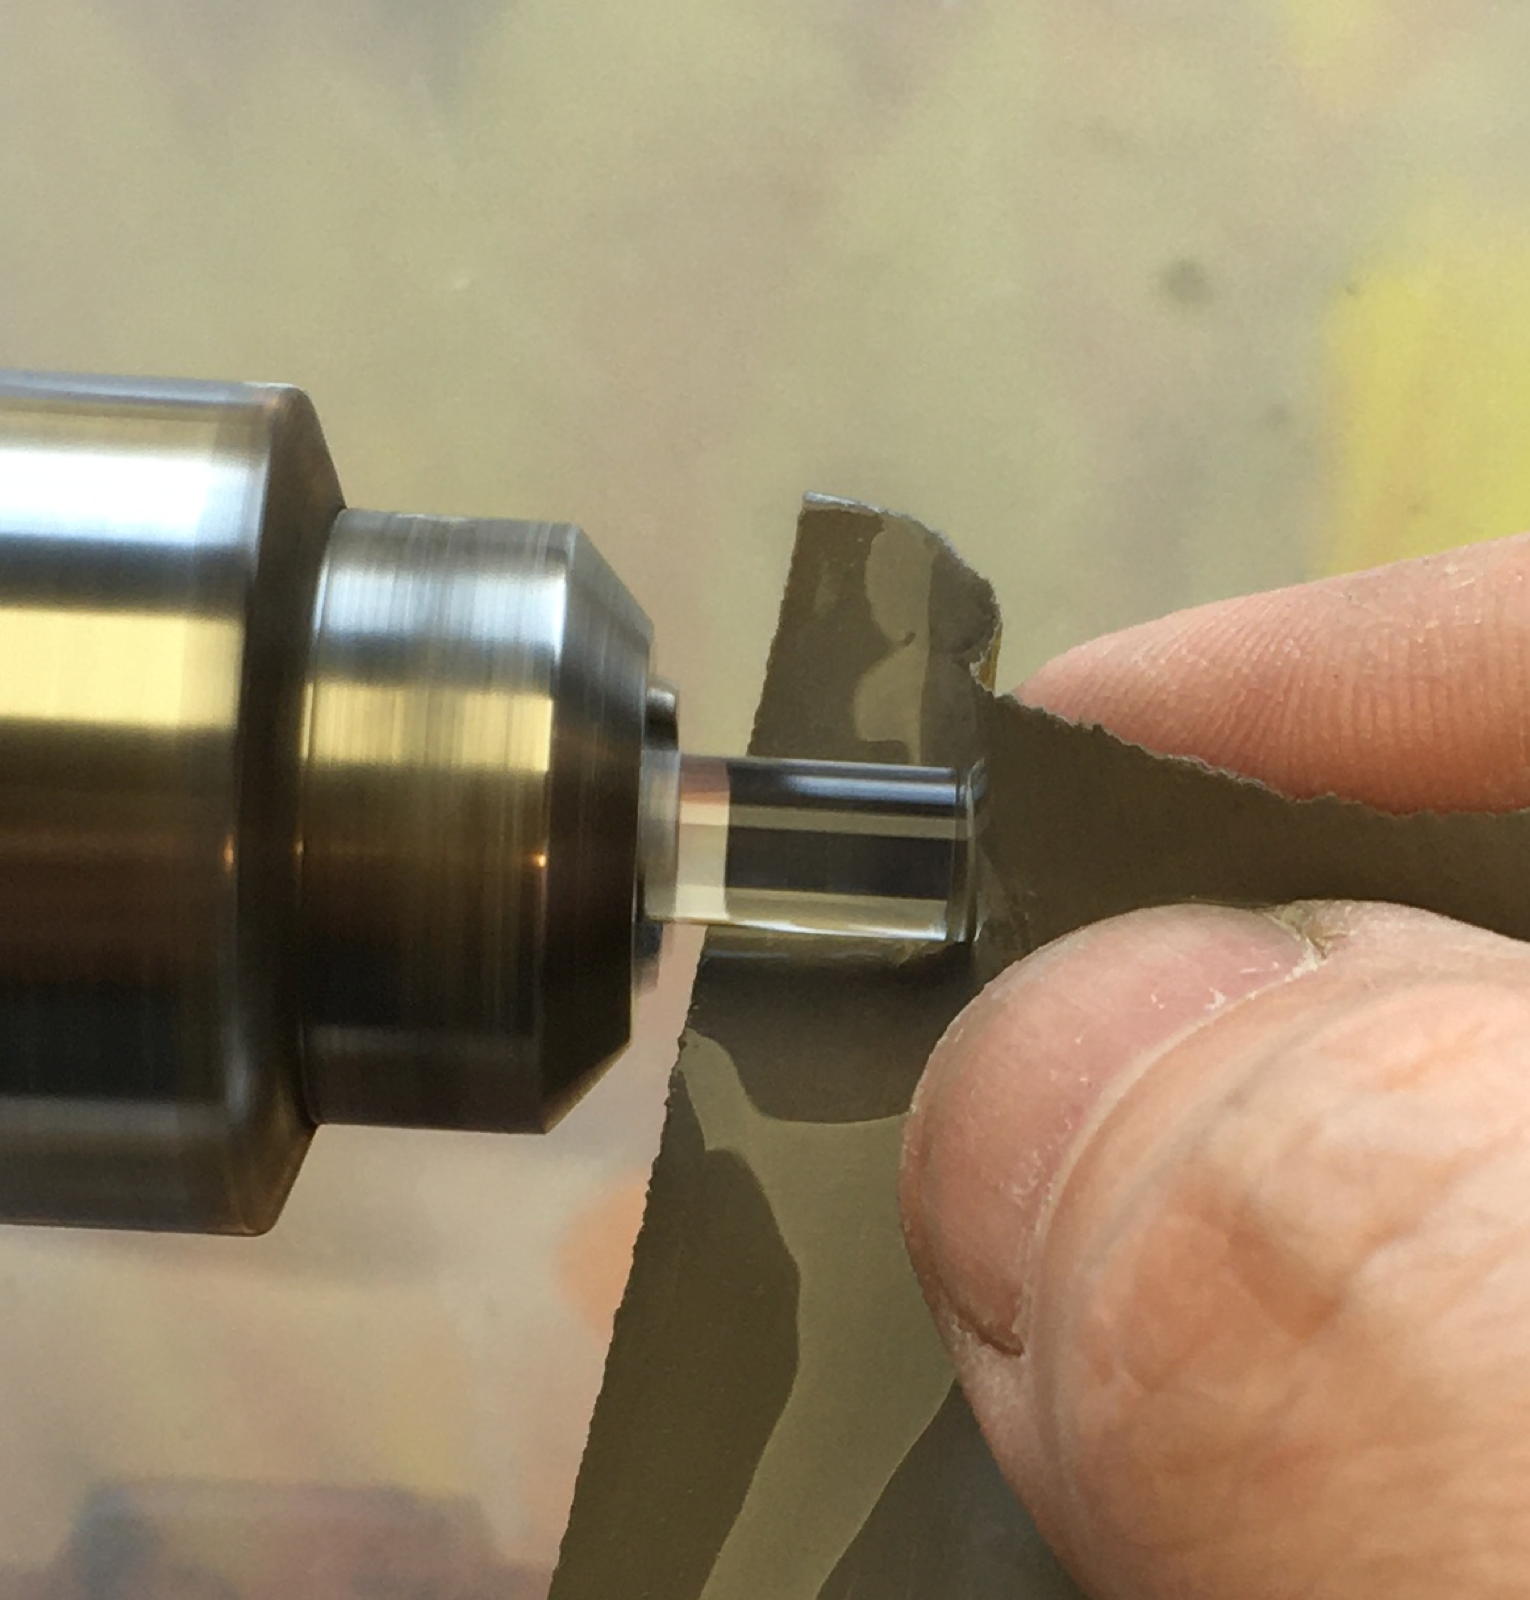
I used extremely fine wet and dry paper to smooth the top of each button.
I did the final polish on each button using cerium oxide powder on a hard felt buffing wheel; this left the surface optically smooth.
I glued the tops into the bases with clear West System epoxy.

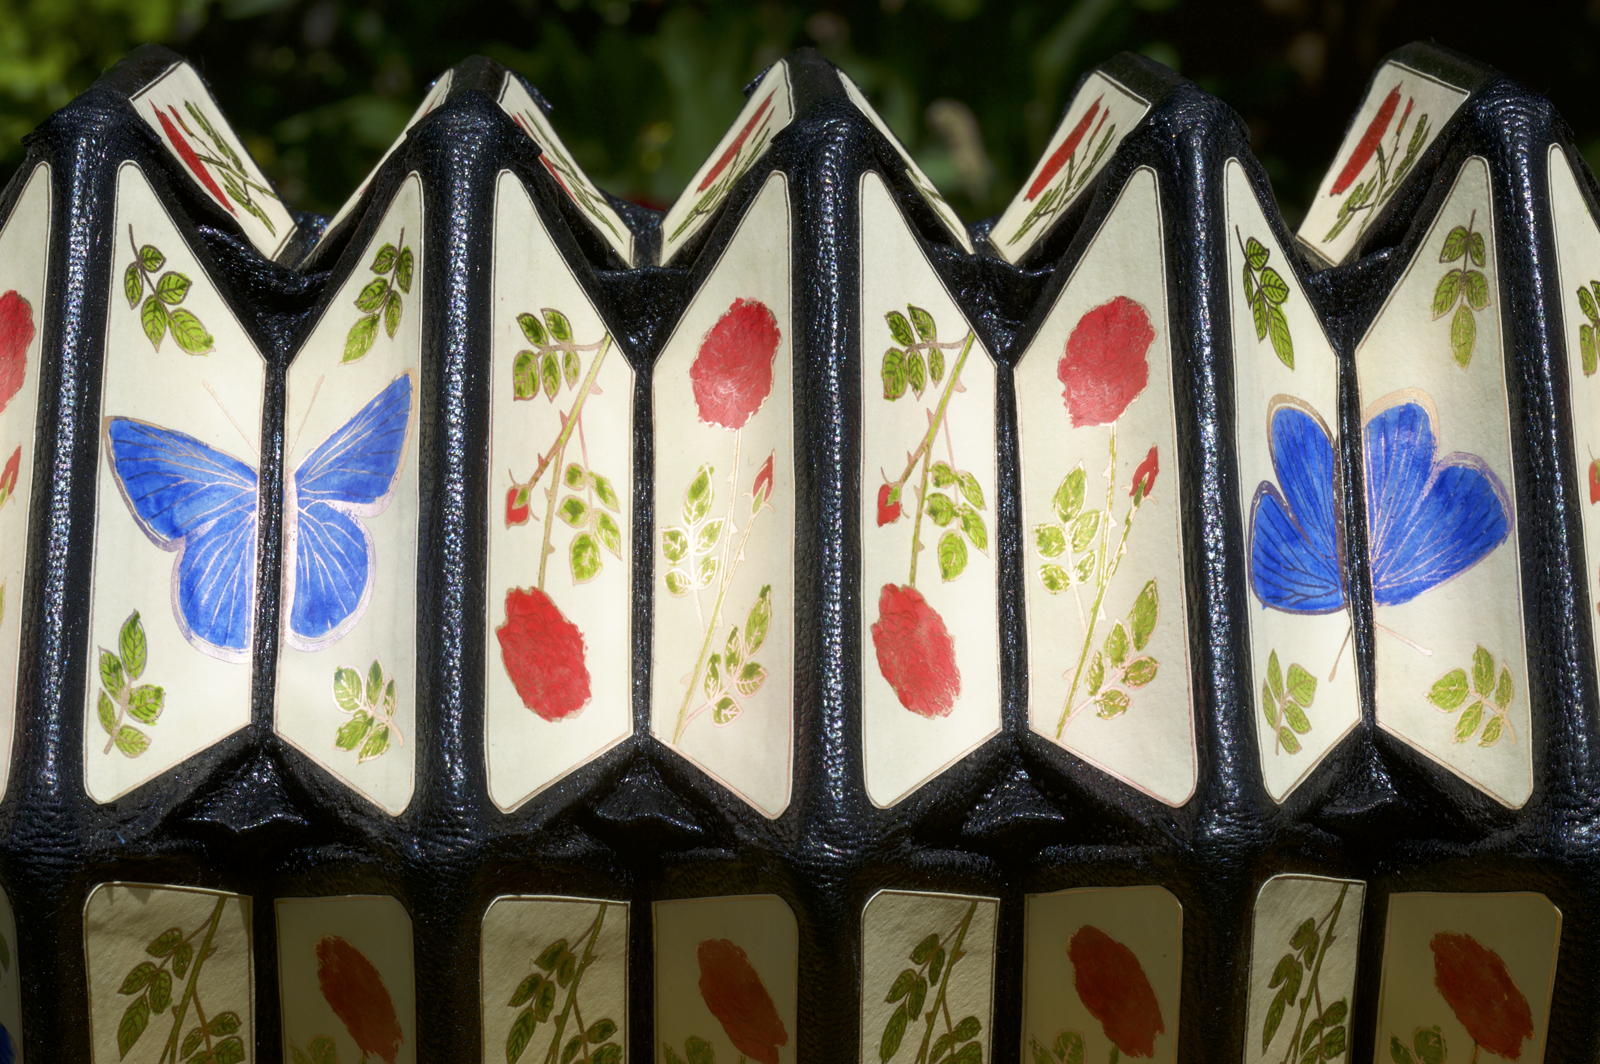
Hand-Coloured Bellows Papers
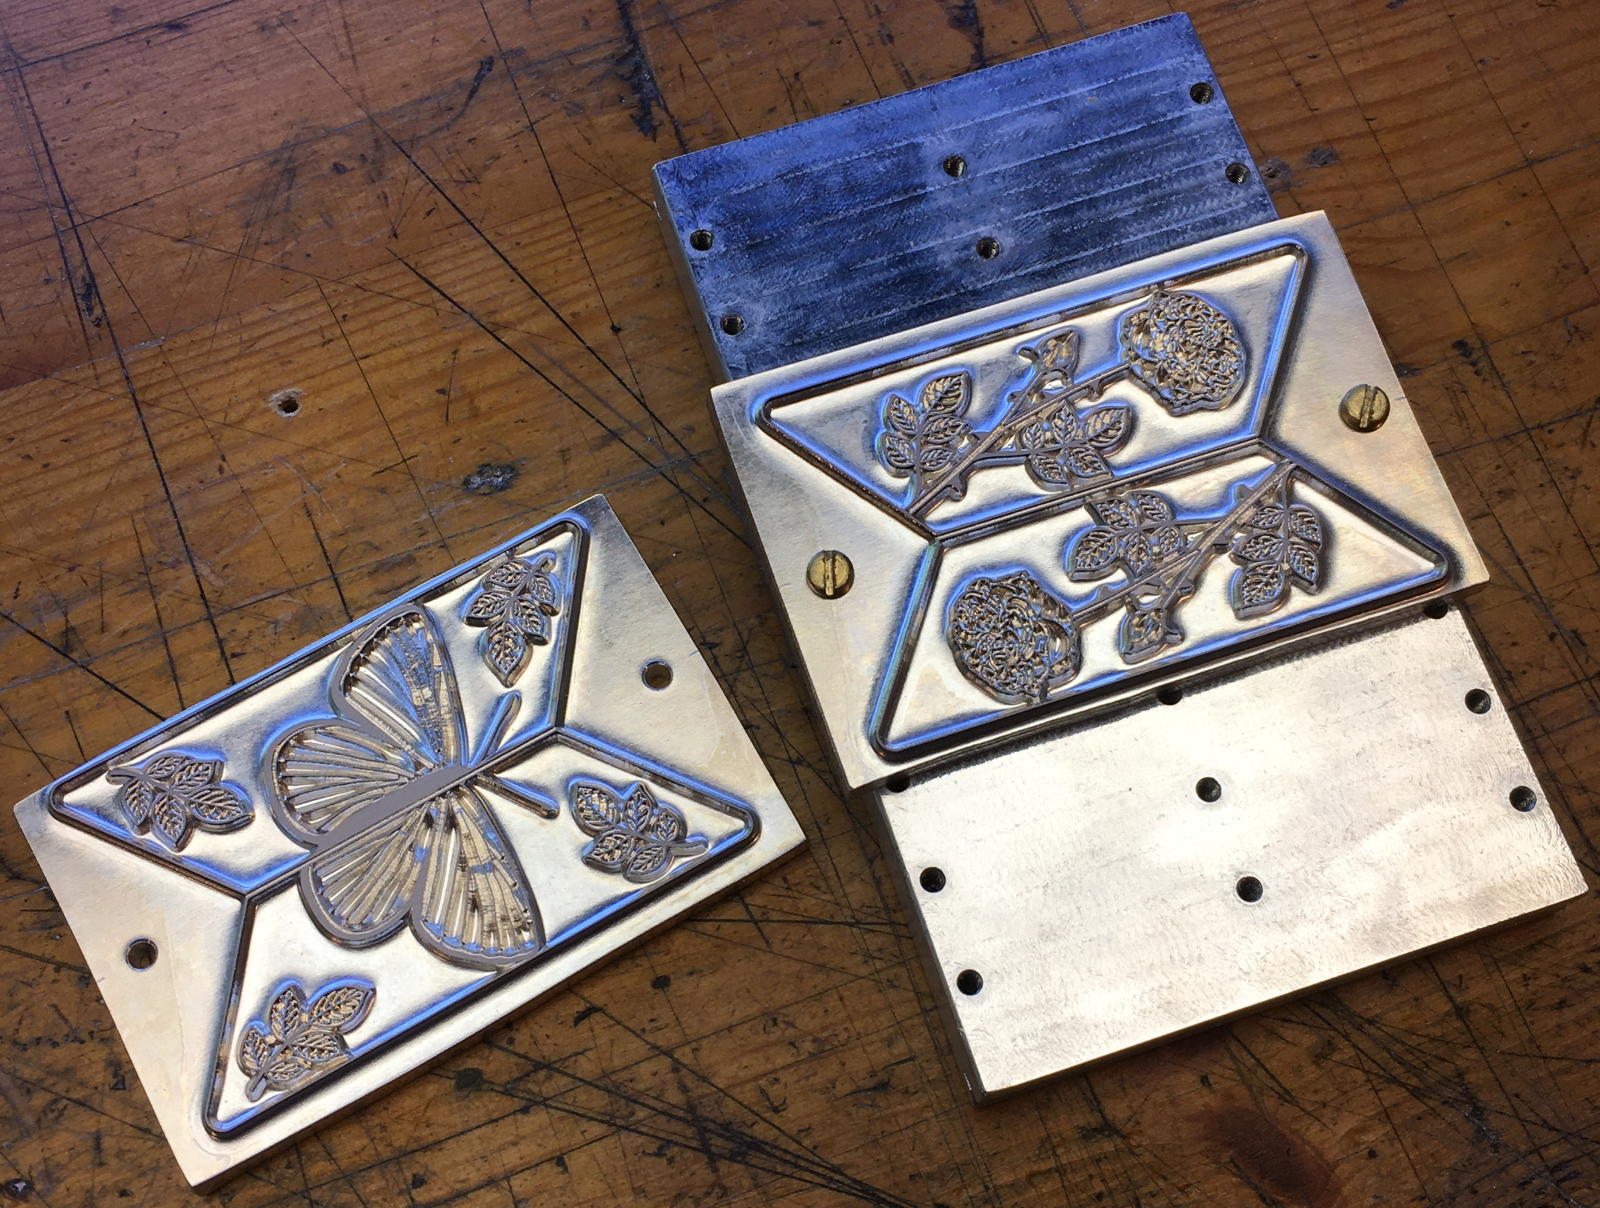
I used another new technique to make the bellows papers: I printed the designs using rose gold foil on ivory-coloured paper, then I hand coloured them using watercolour paint and a brush. There are two complementary designs arranged in a zig-zag pattern. I designed them myself (in a collaboration with my customer). The hot foil printing plates were made by a company that takes your design in digital vector format and etches it into a magnesium plate. I am quite happy with the level of detail they are able to reproduce.
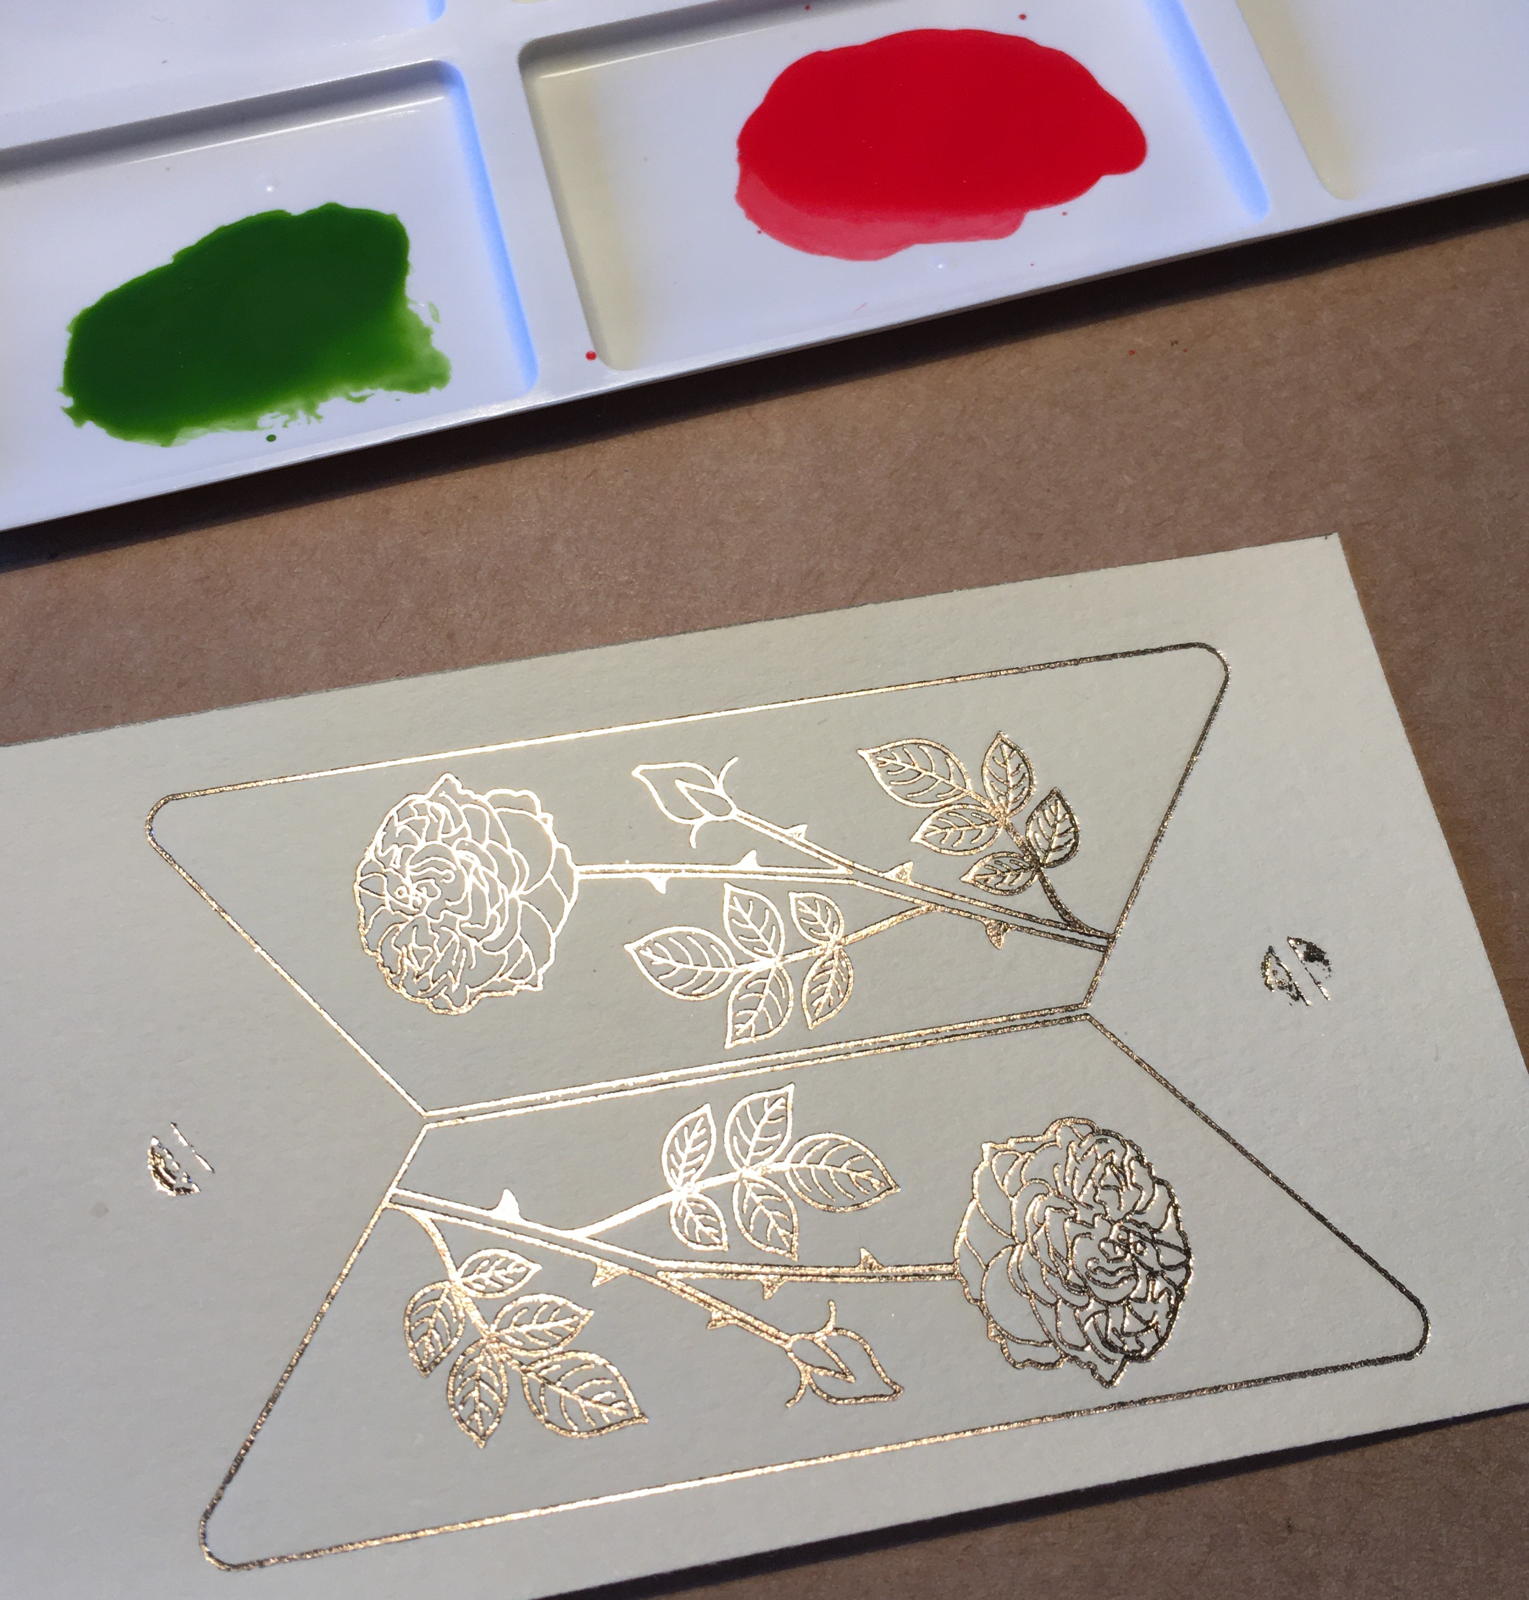
The colouring is intentionally slightly imperfect. We didn’t want it to look like they had been laser printed and they were all identical.
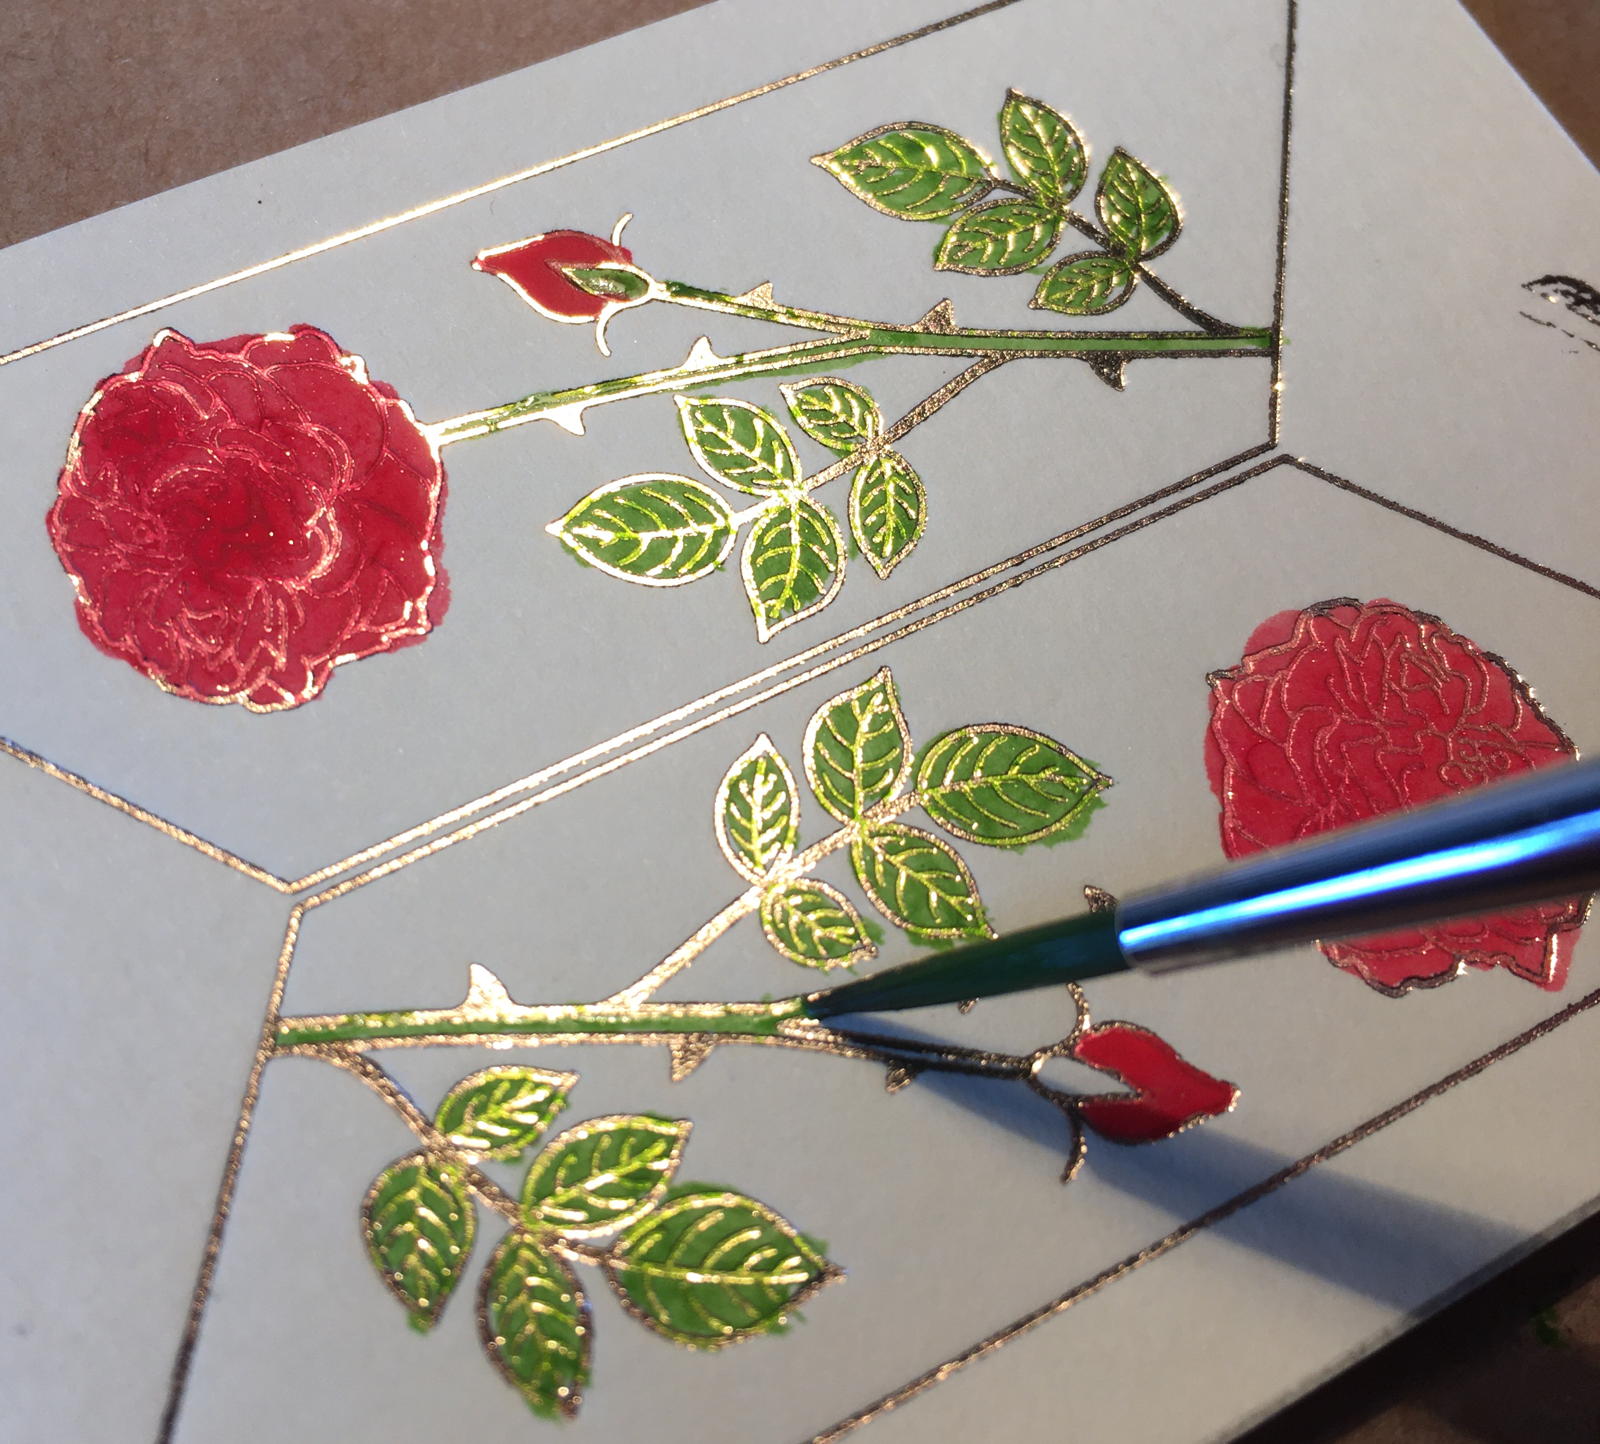
The butterfly depicted on the papers is a male Common Blue (polyommatus icarus). I used a water washing technique on the wings to vary the shading and give them more depth.
The butterflies seem to flutter around as you pump the bellows.
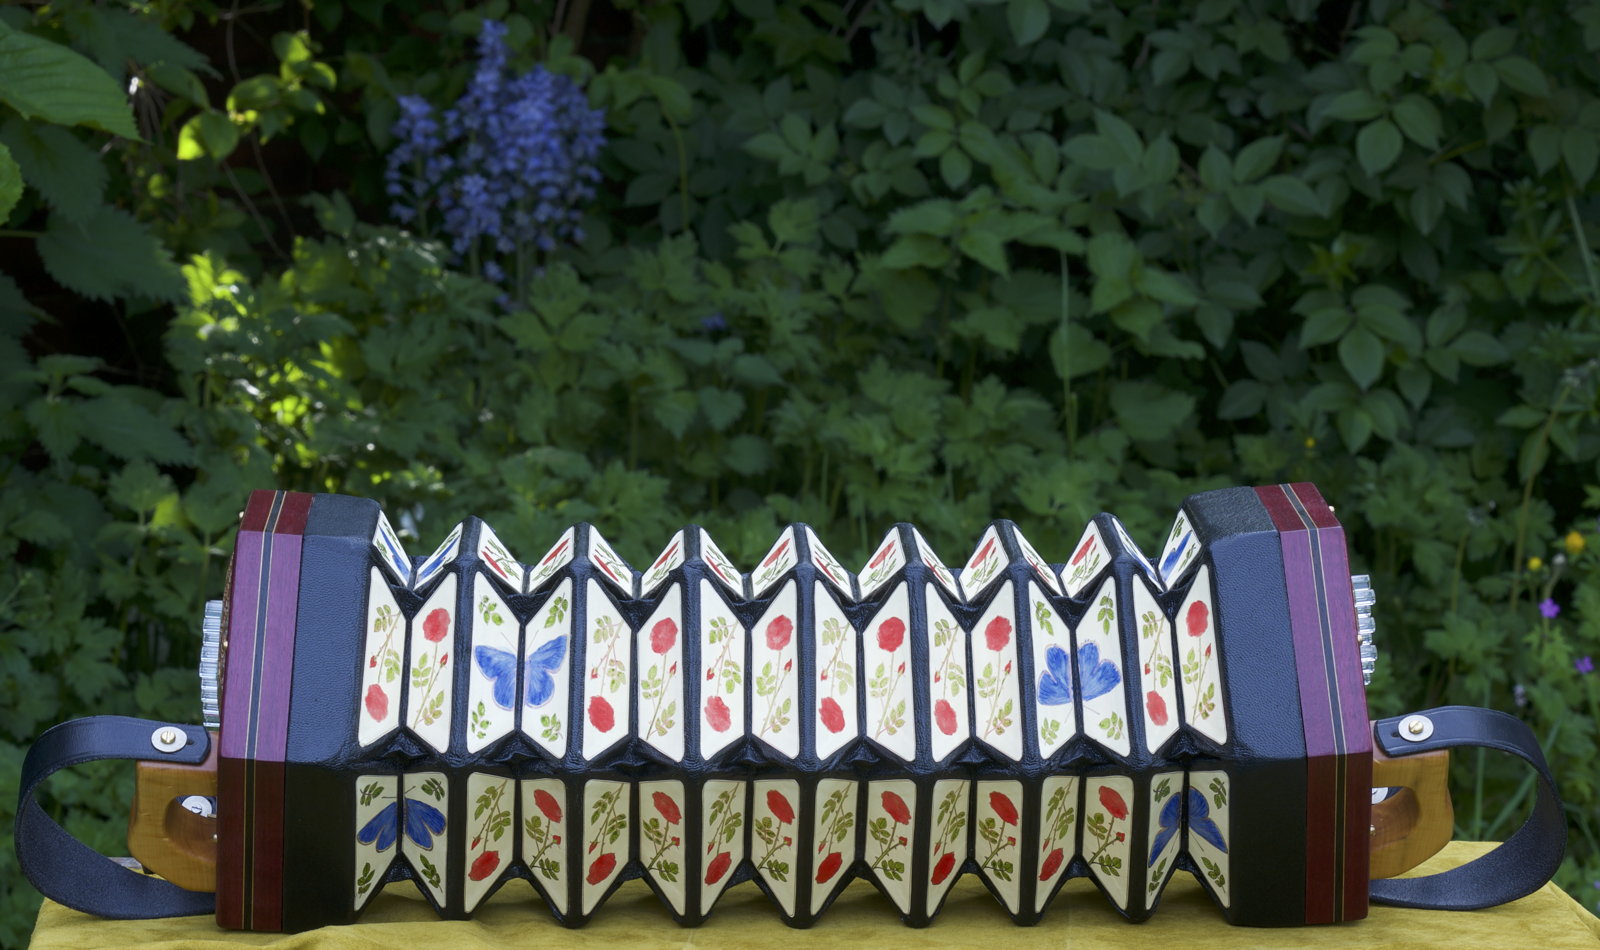
The bold primary colours and metallic print really stand out in bright daylight.
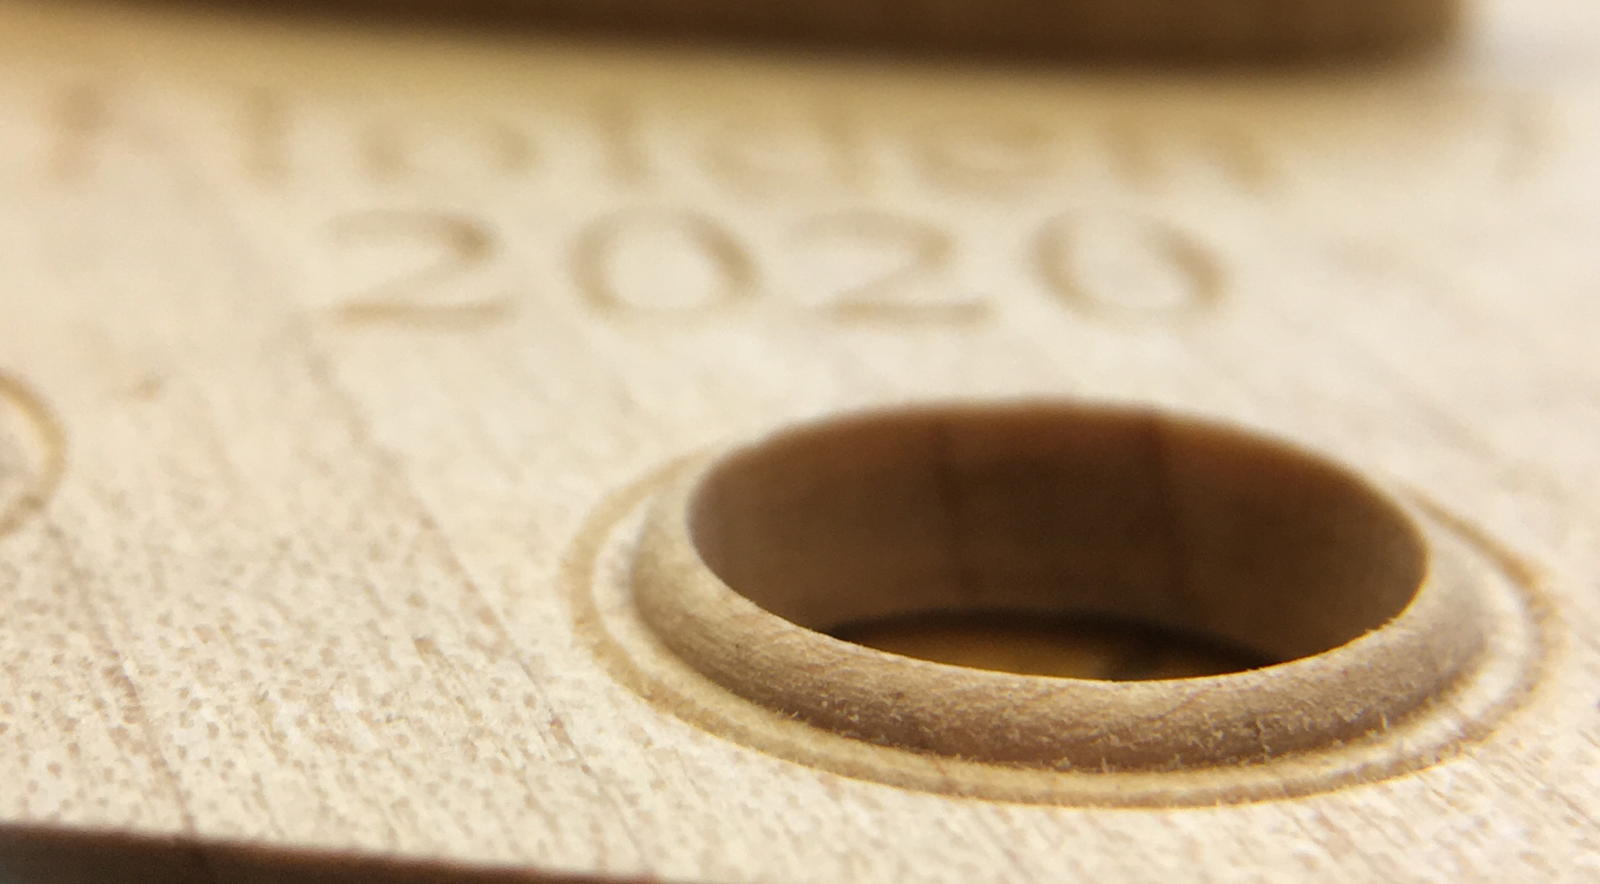
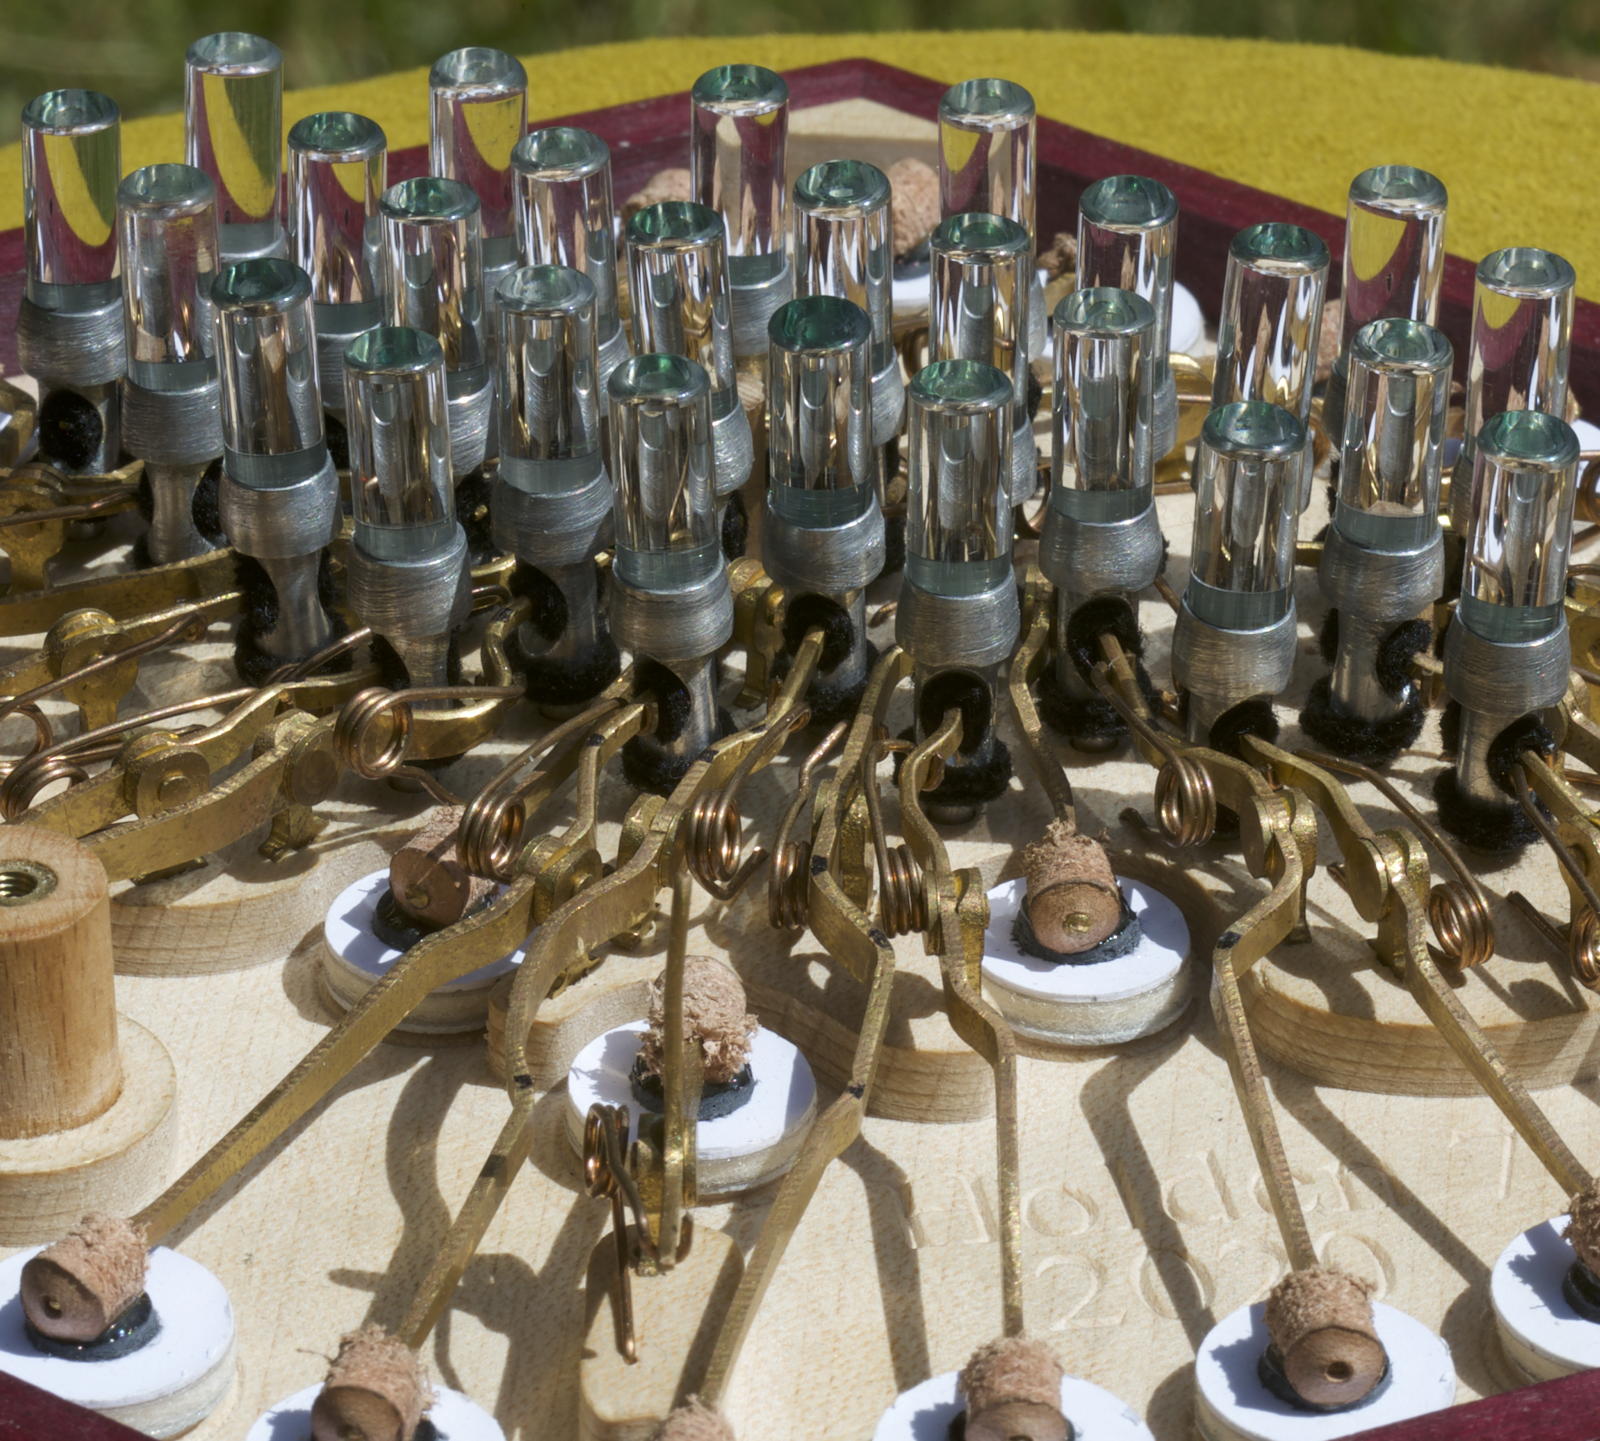
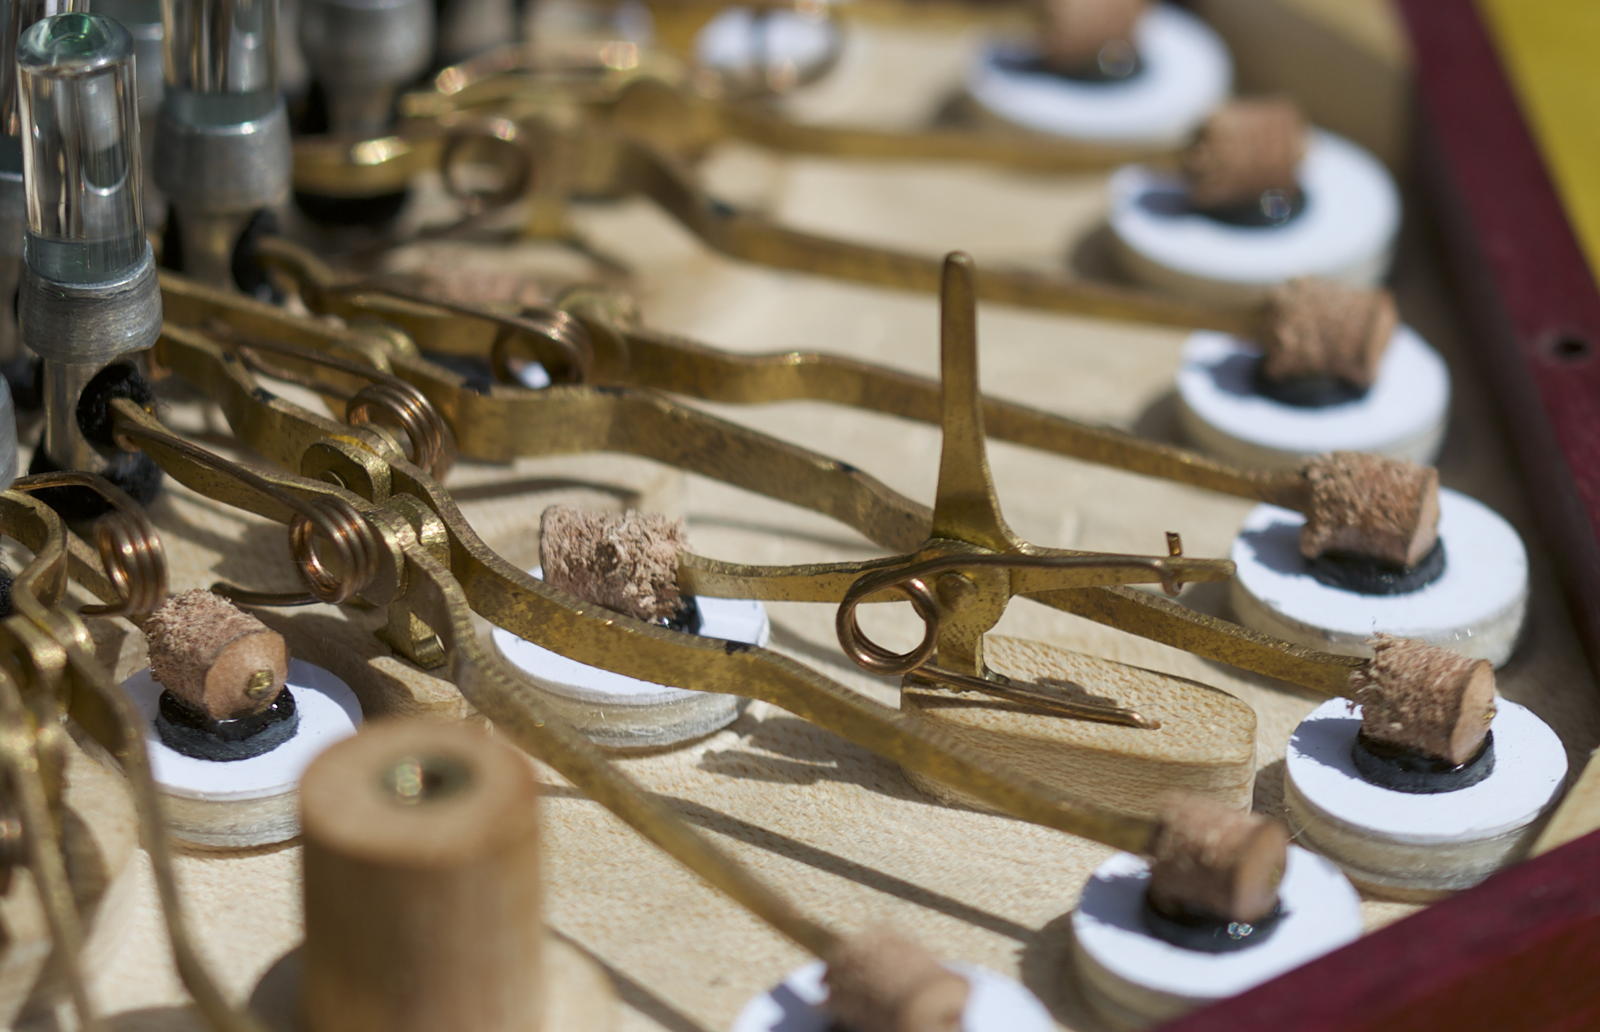
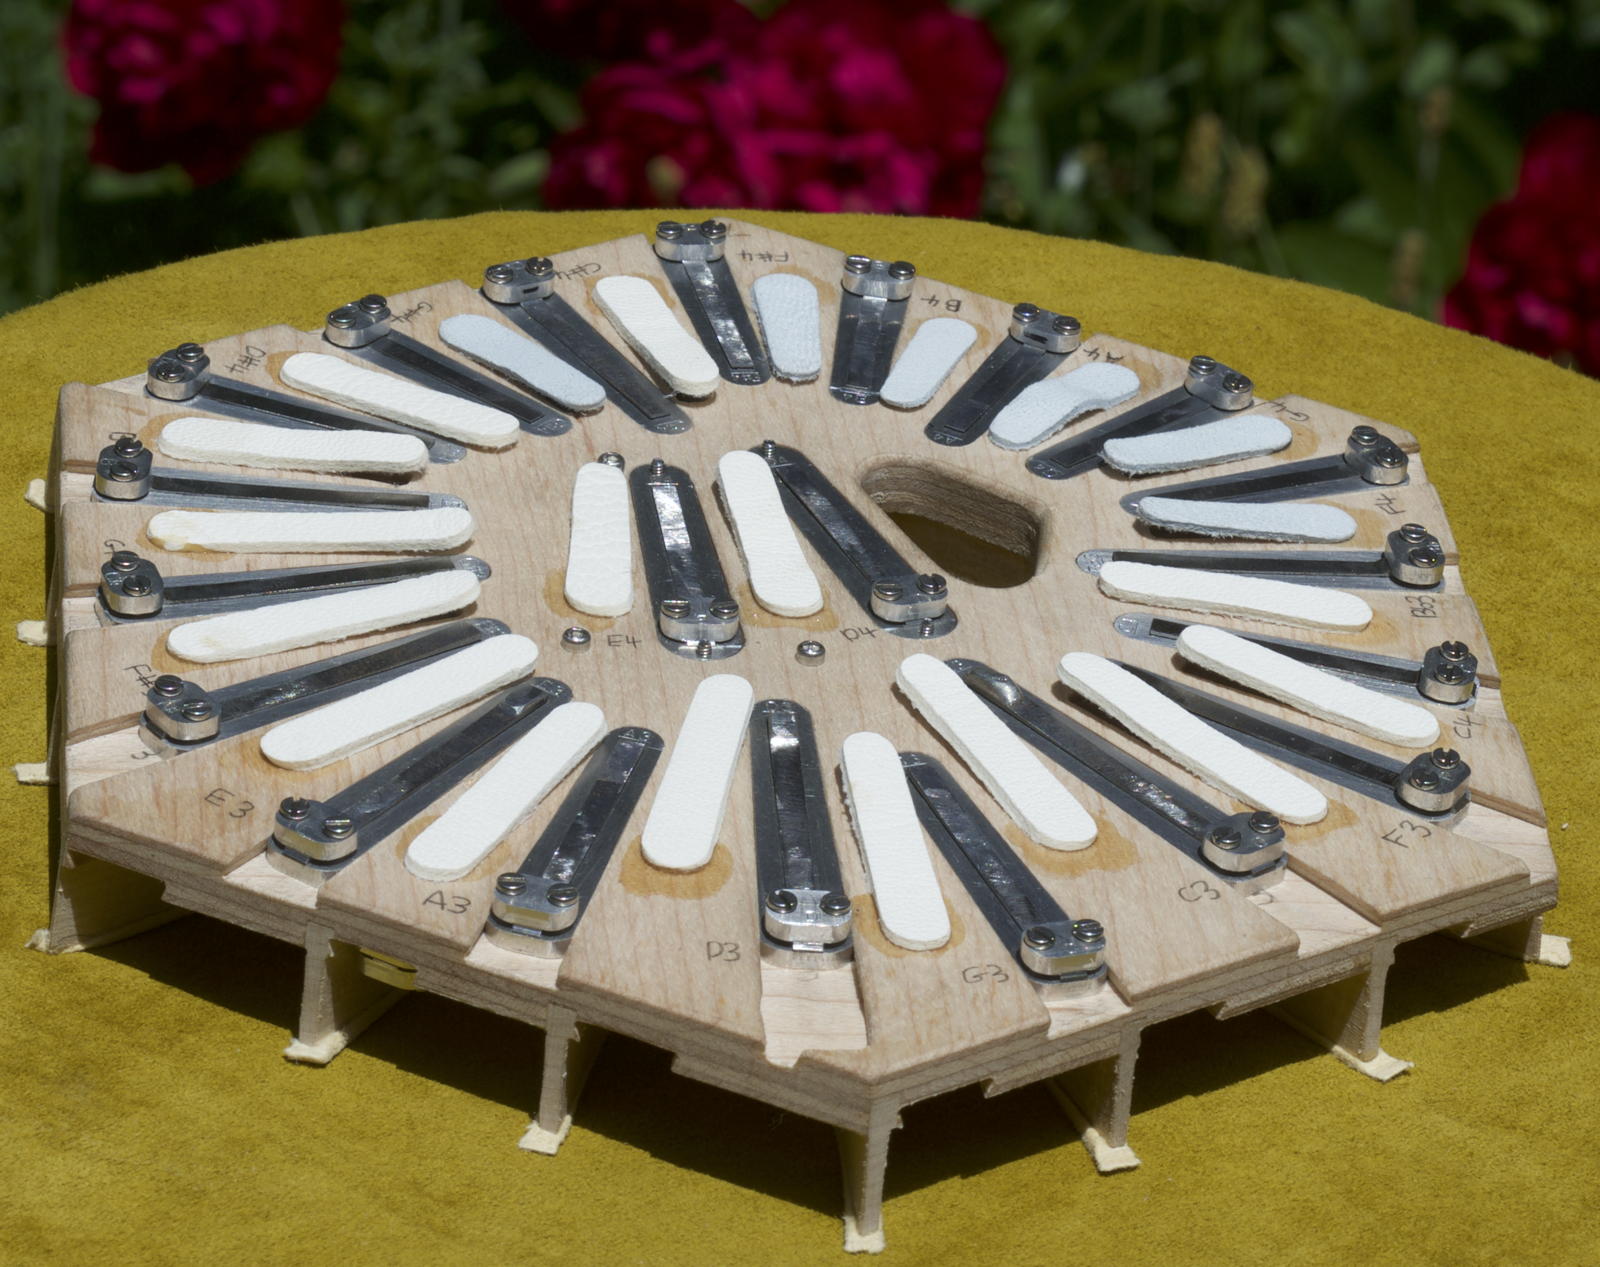
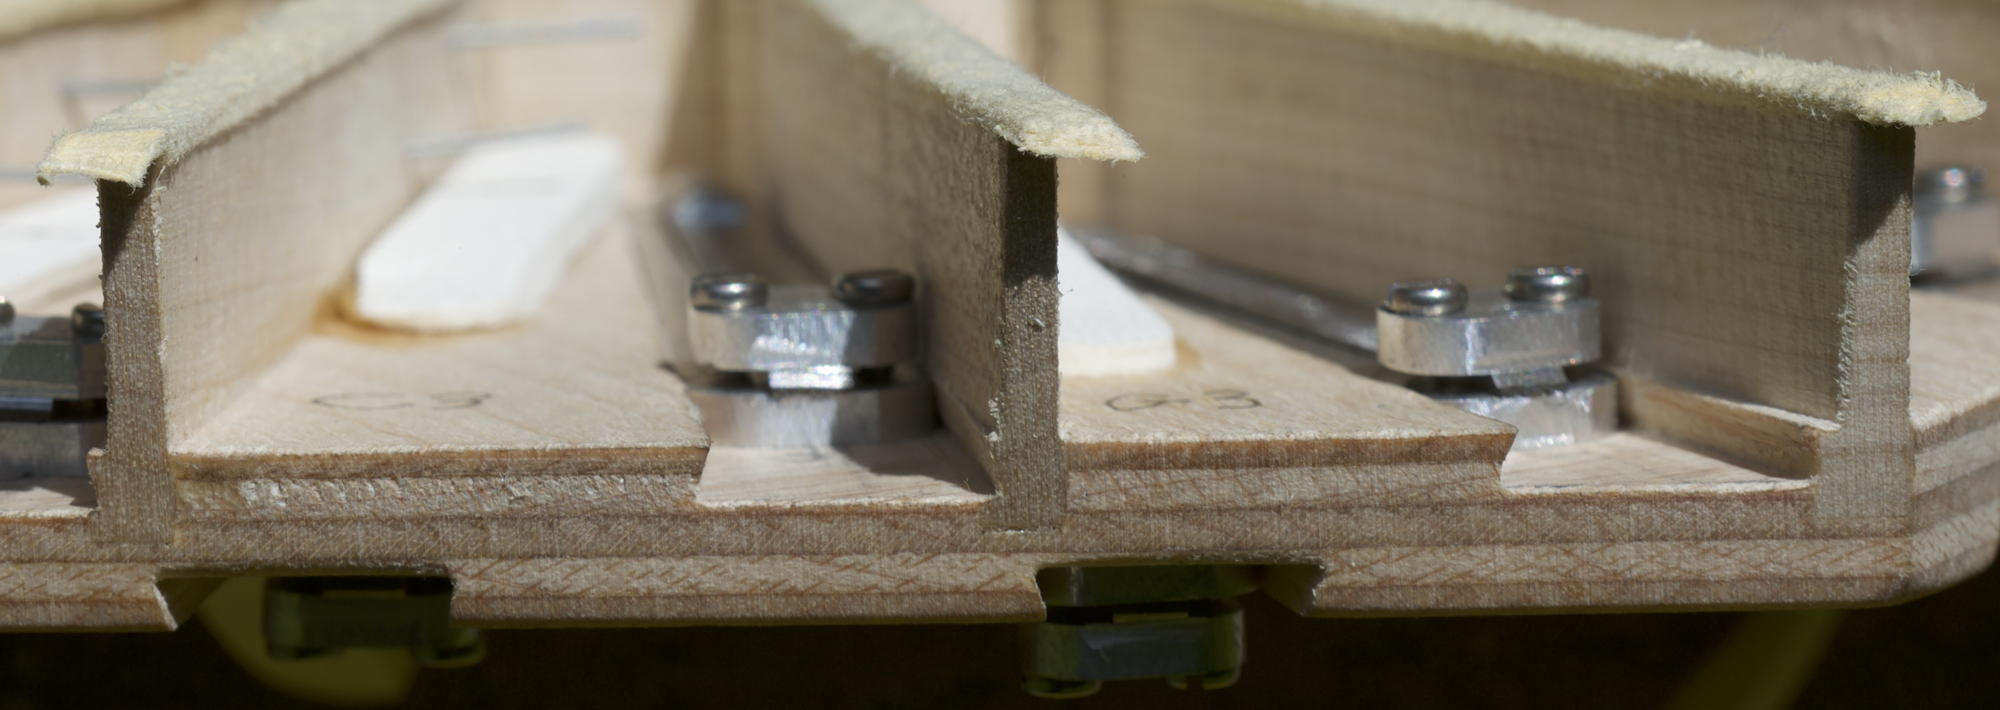
Raised Pad Seats
Inspired by a suggestion from Chris Ghent, I routed the pad board in such a way that there is a narrow raised seat around each pad hole. I believe this should help to reduce air leakage. It is a small detail but I intend to make this a standard feature on future instruments.
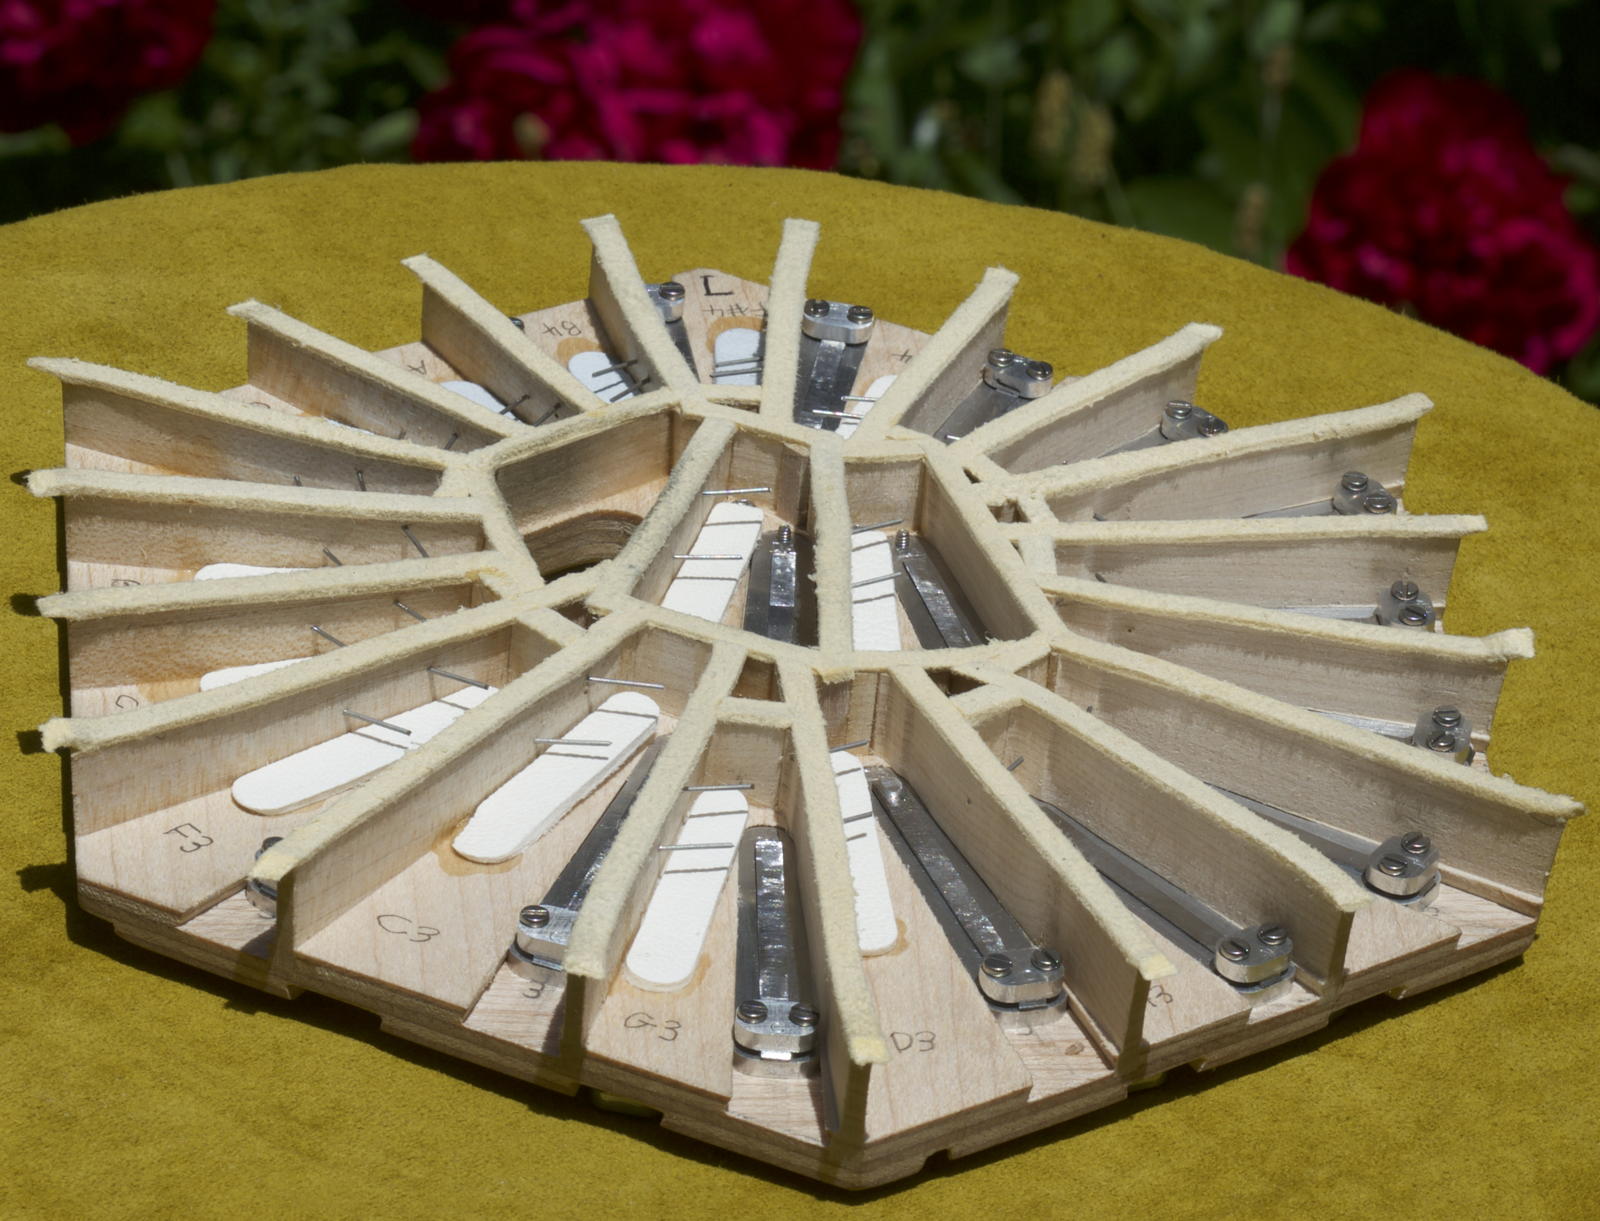
Action
As with my previous higher-button-count instruments there were some fairly fiddly action levers.
The air lever is very simple, easily triggered by curling one finger towards the palm (not intended for use while playing a melody).
Reed Pans
Because this instrument is destined for a mediterranean location, we opted for laminated maple reed pan bases like I used on No. 6. I made several small improvements to the machining process that allowed me to increase the chamber density even further and also improve the quality.
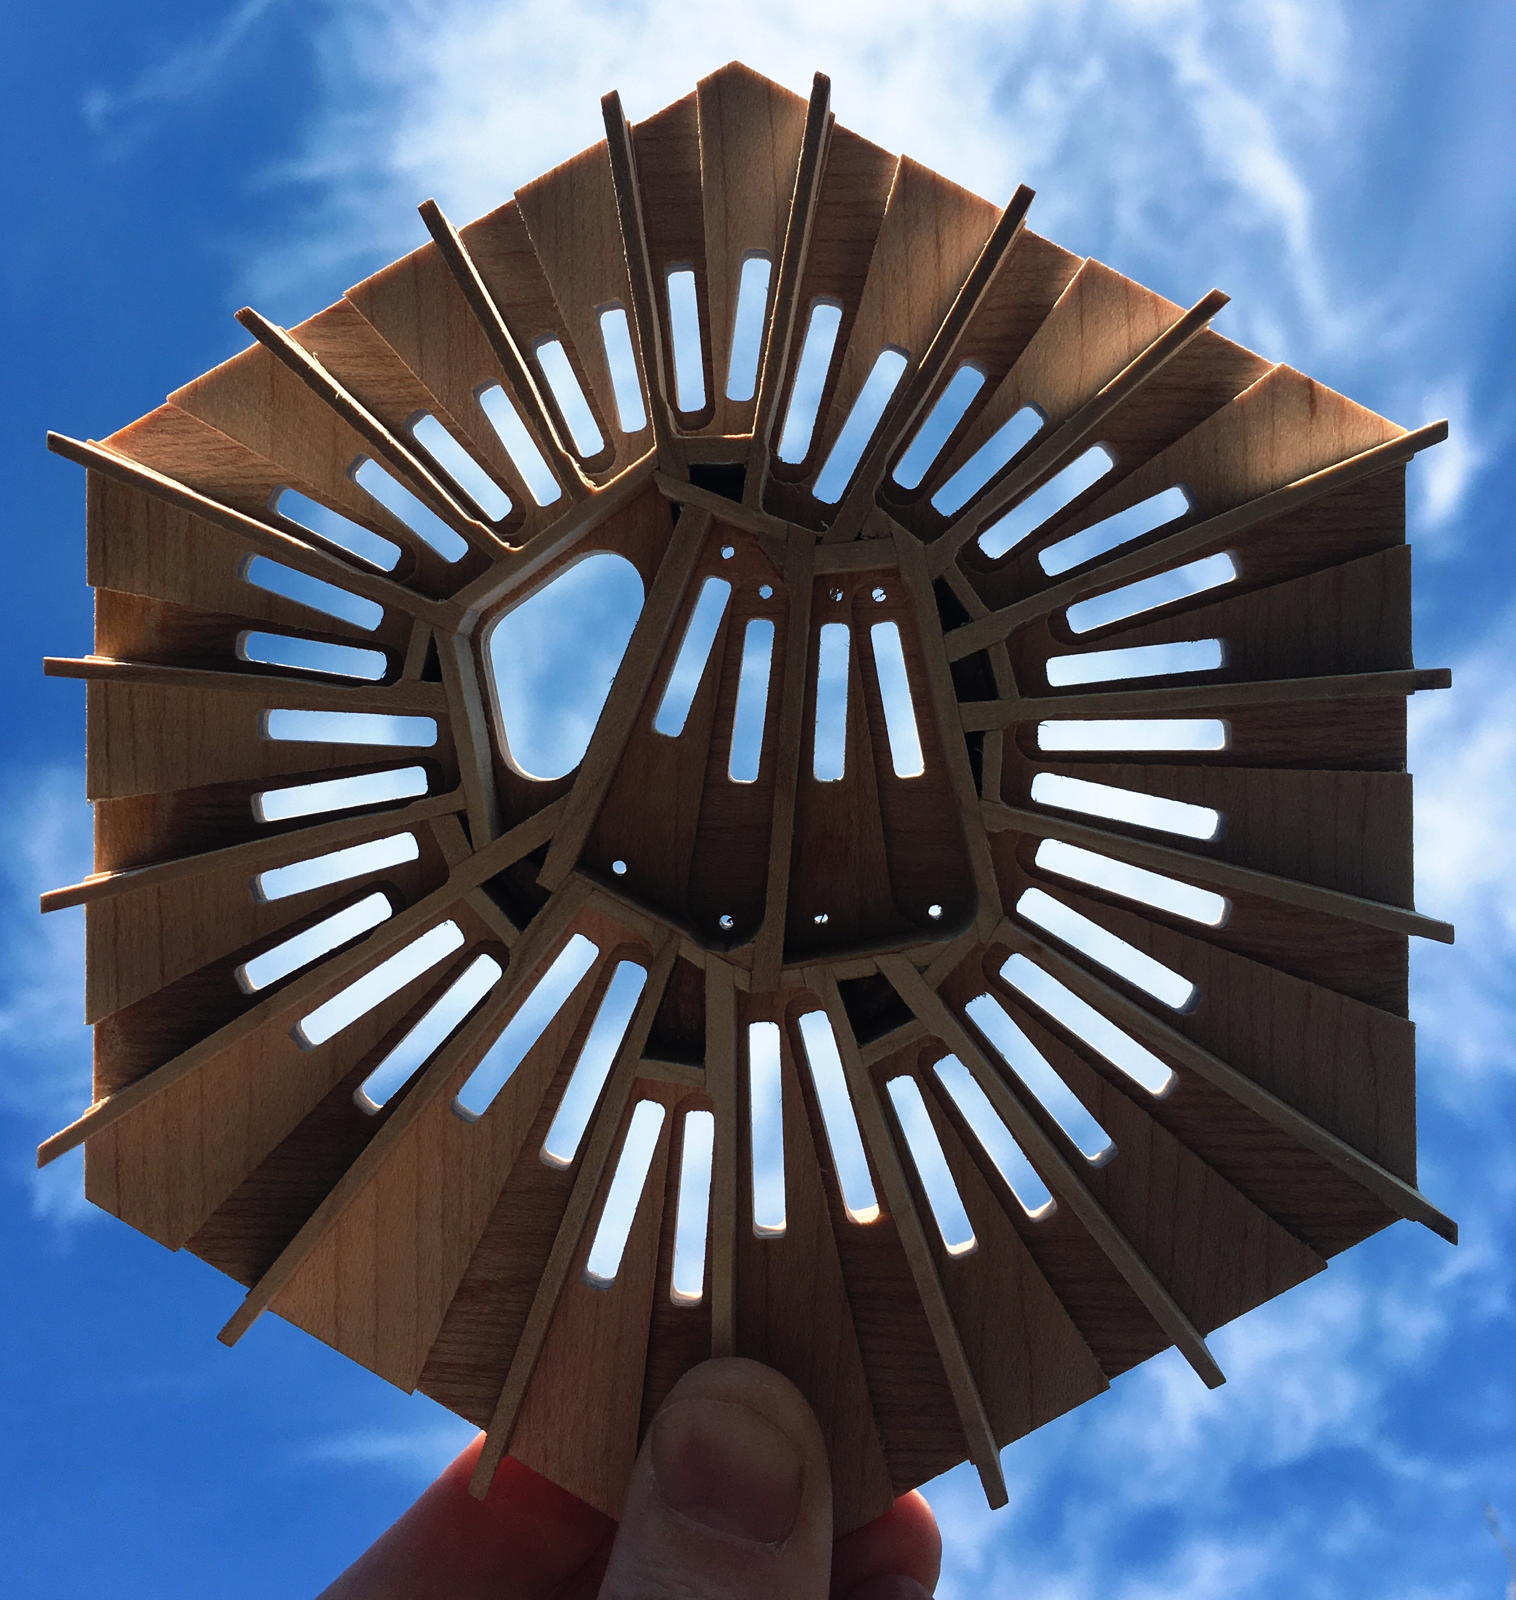
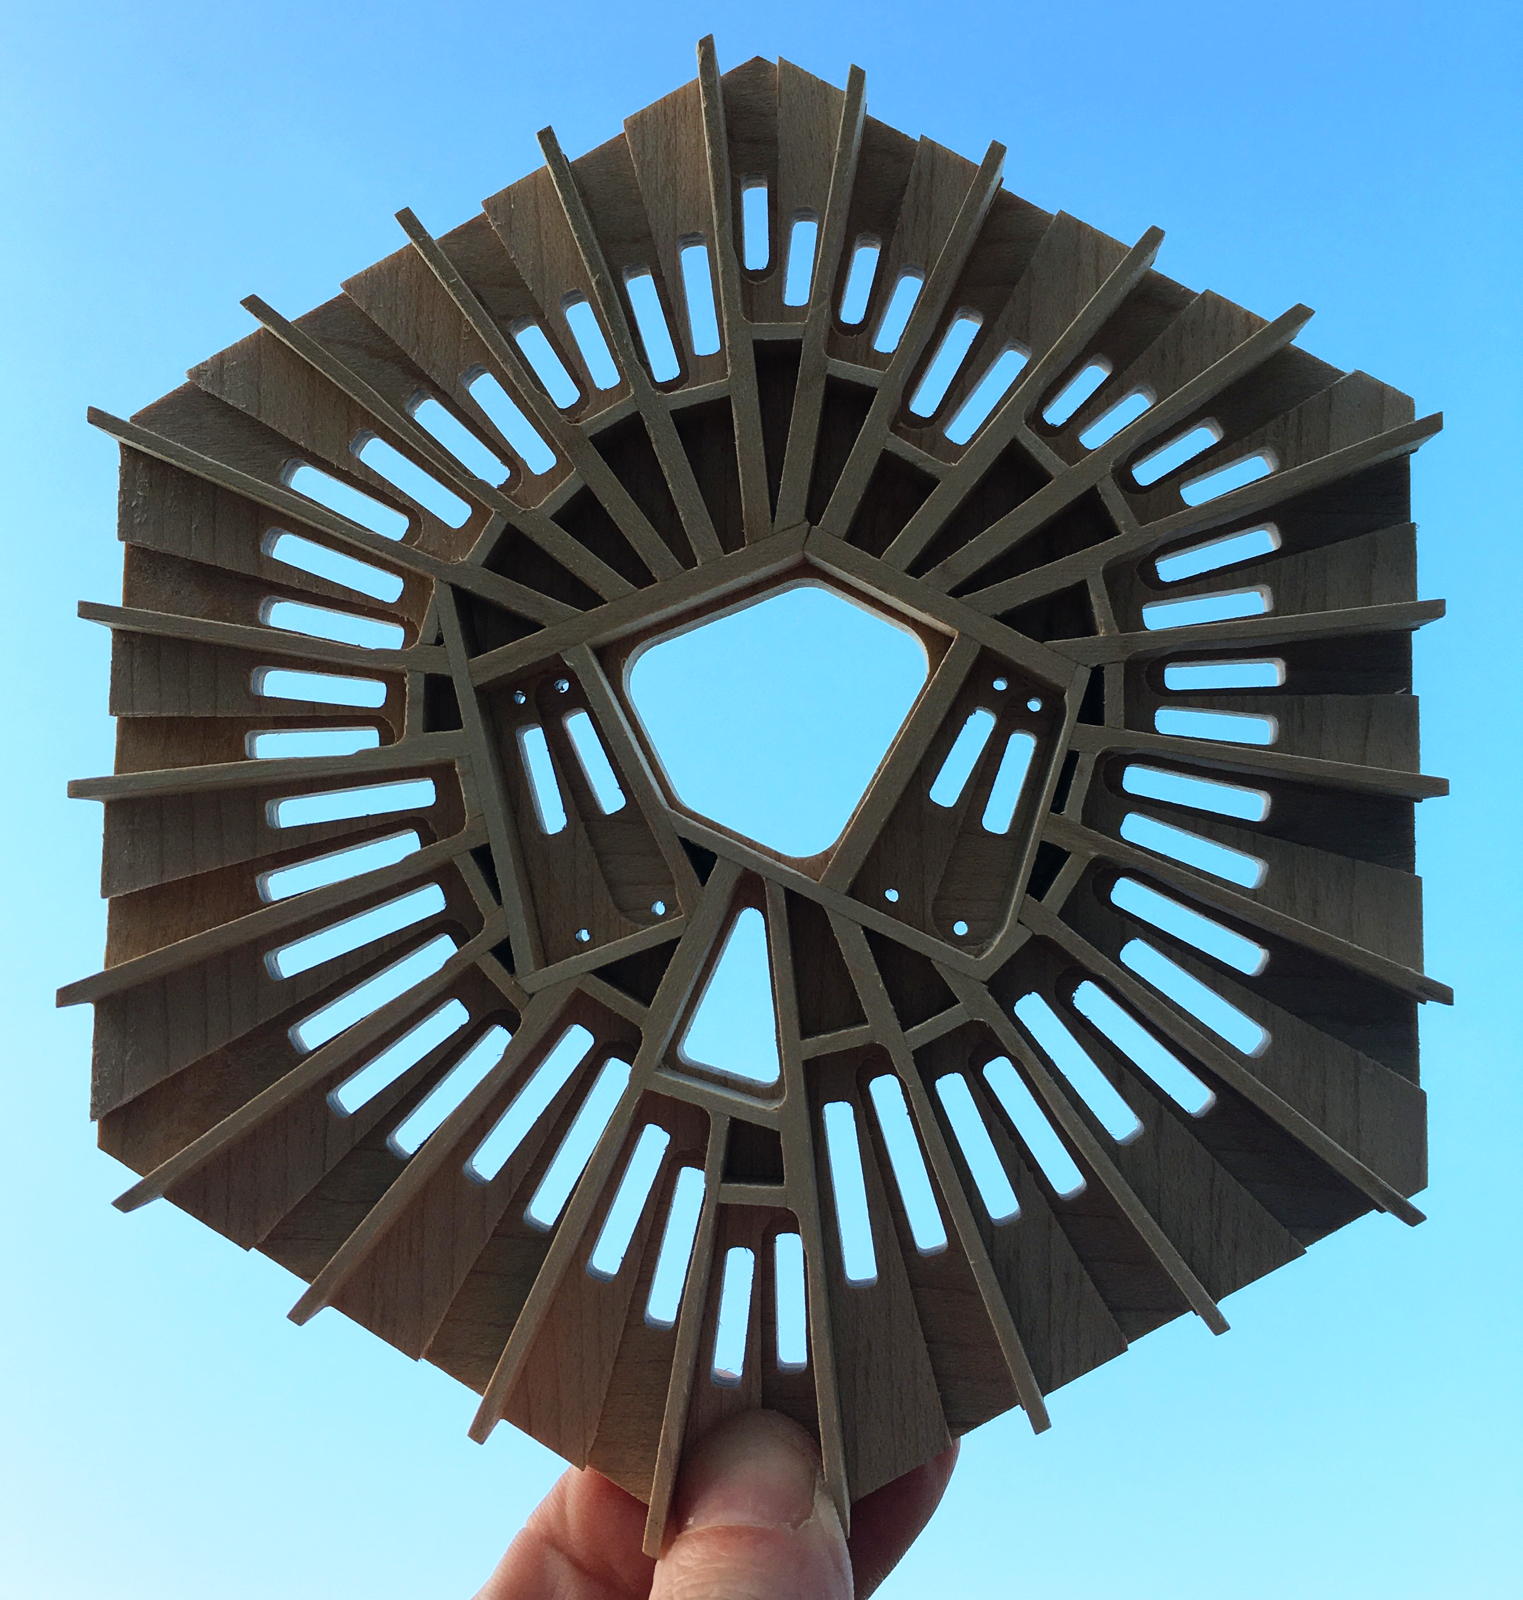
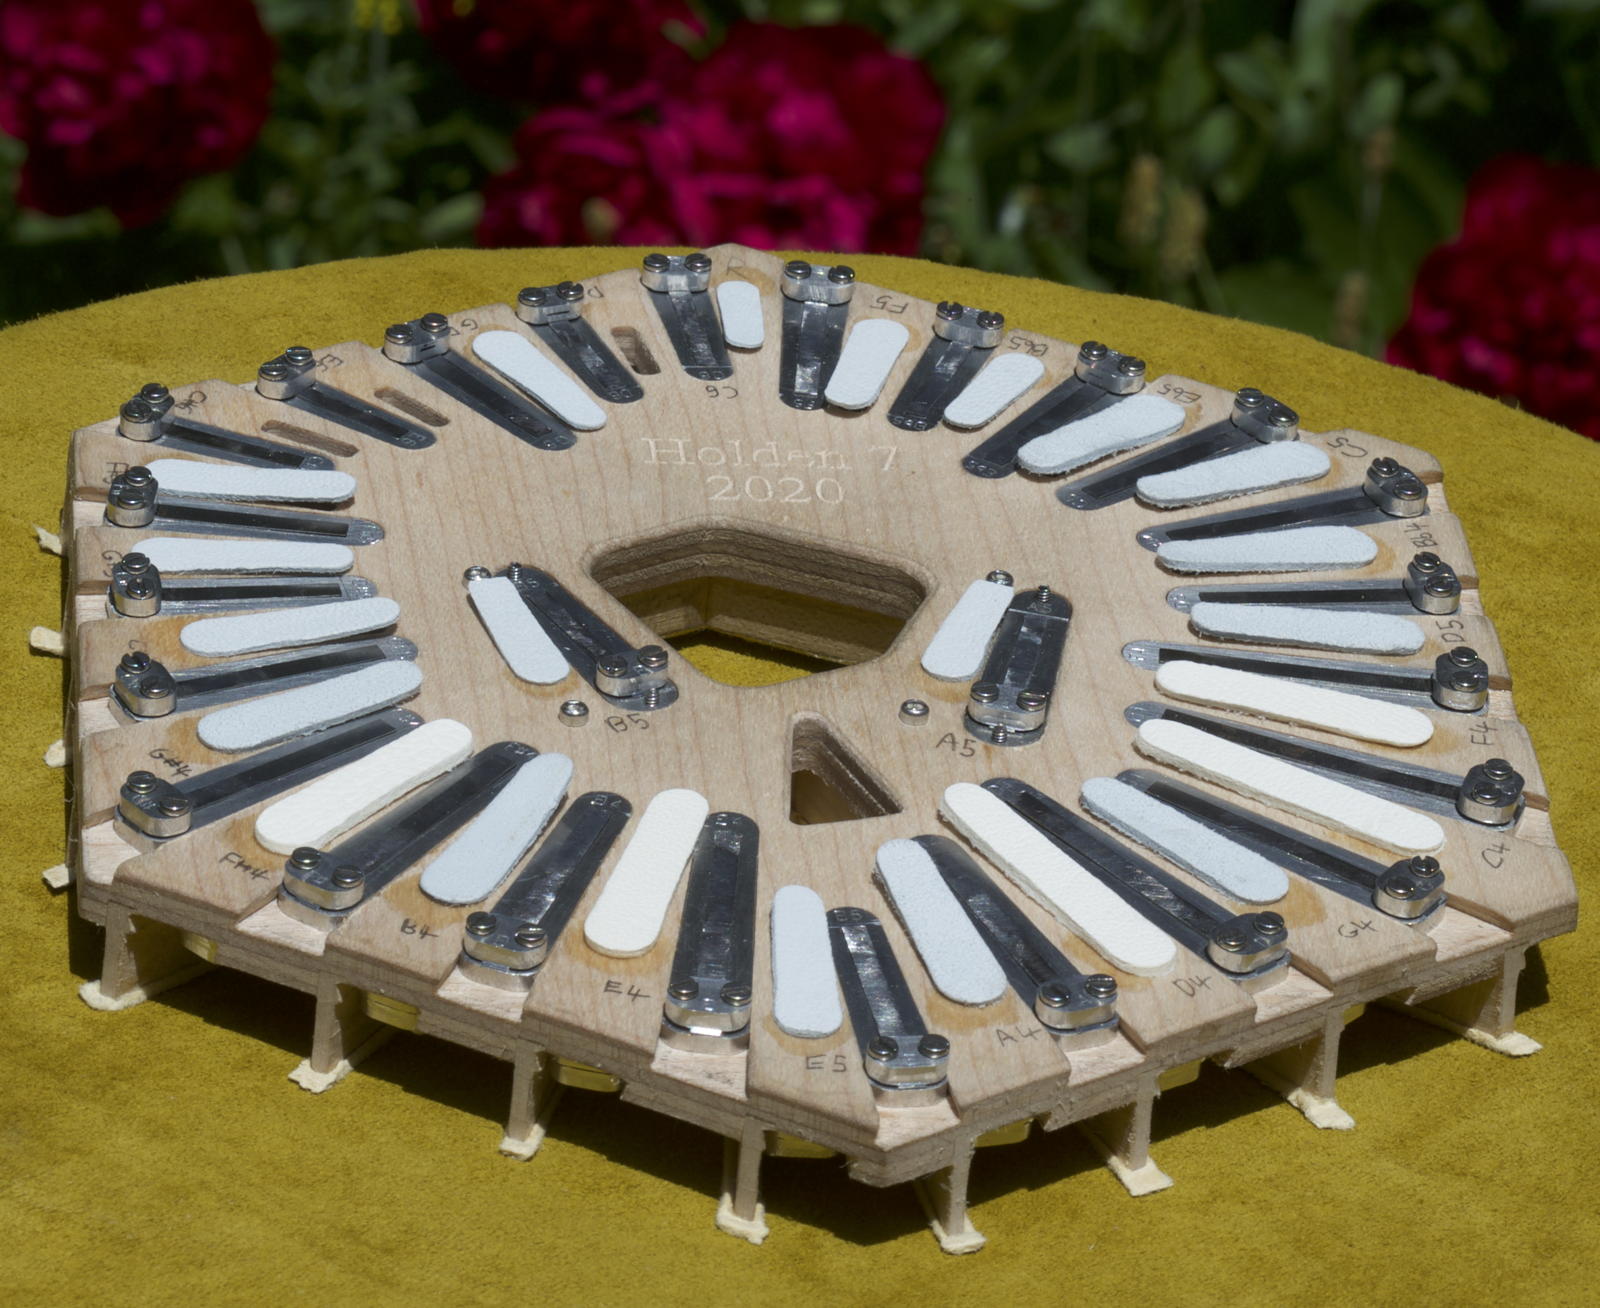
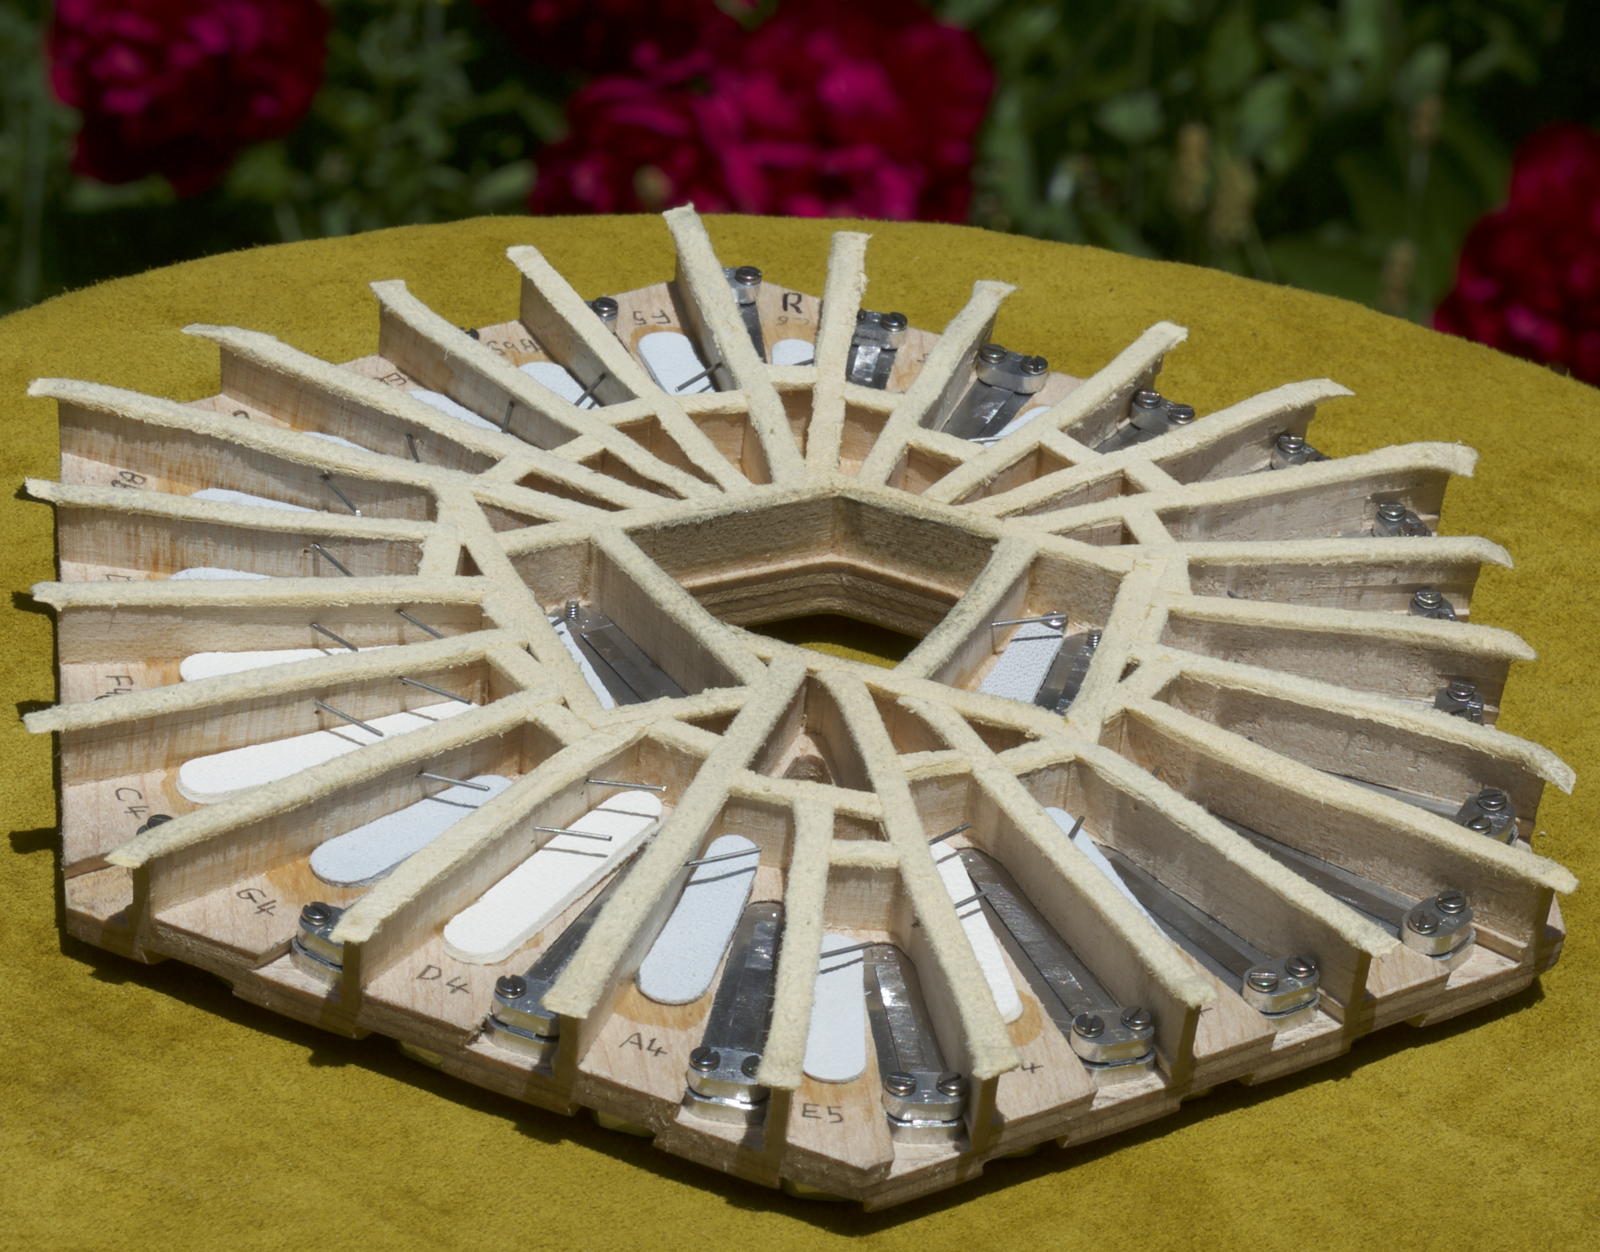
One difference is that the dividing walls are now 3mm thick at the base, but routed down to 2mm thick inside the chamber (even thinner in certain areas). This means that the ‘foundations’ of the walls are wider, which reduces splintering problems when the dovetail slots are cut.
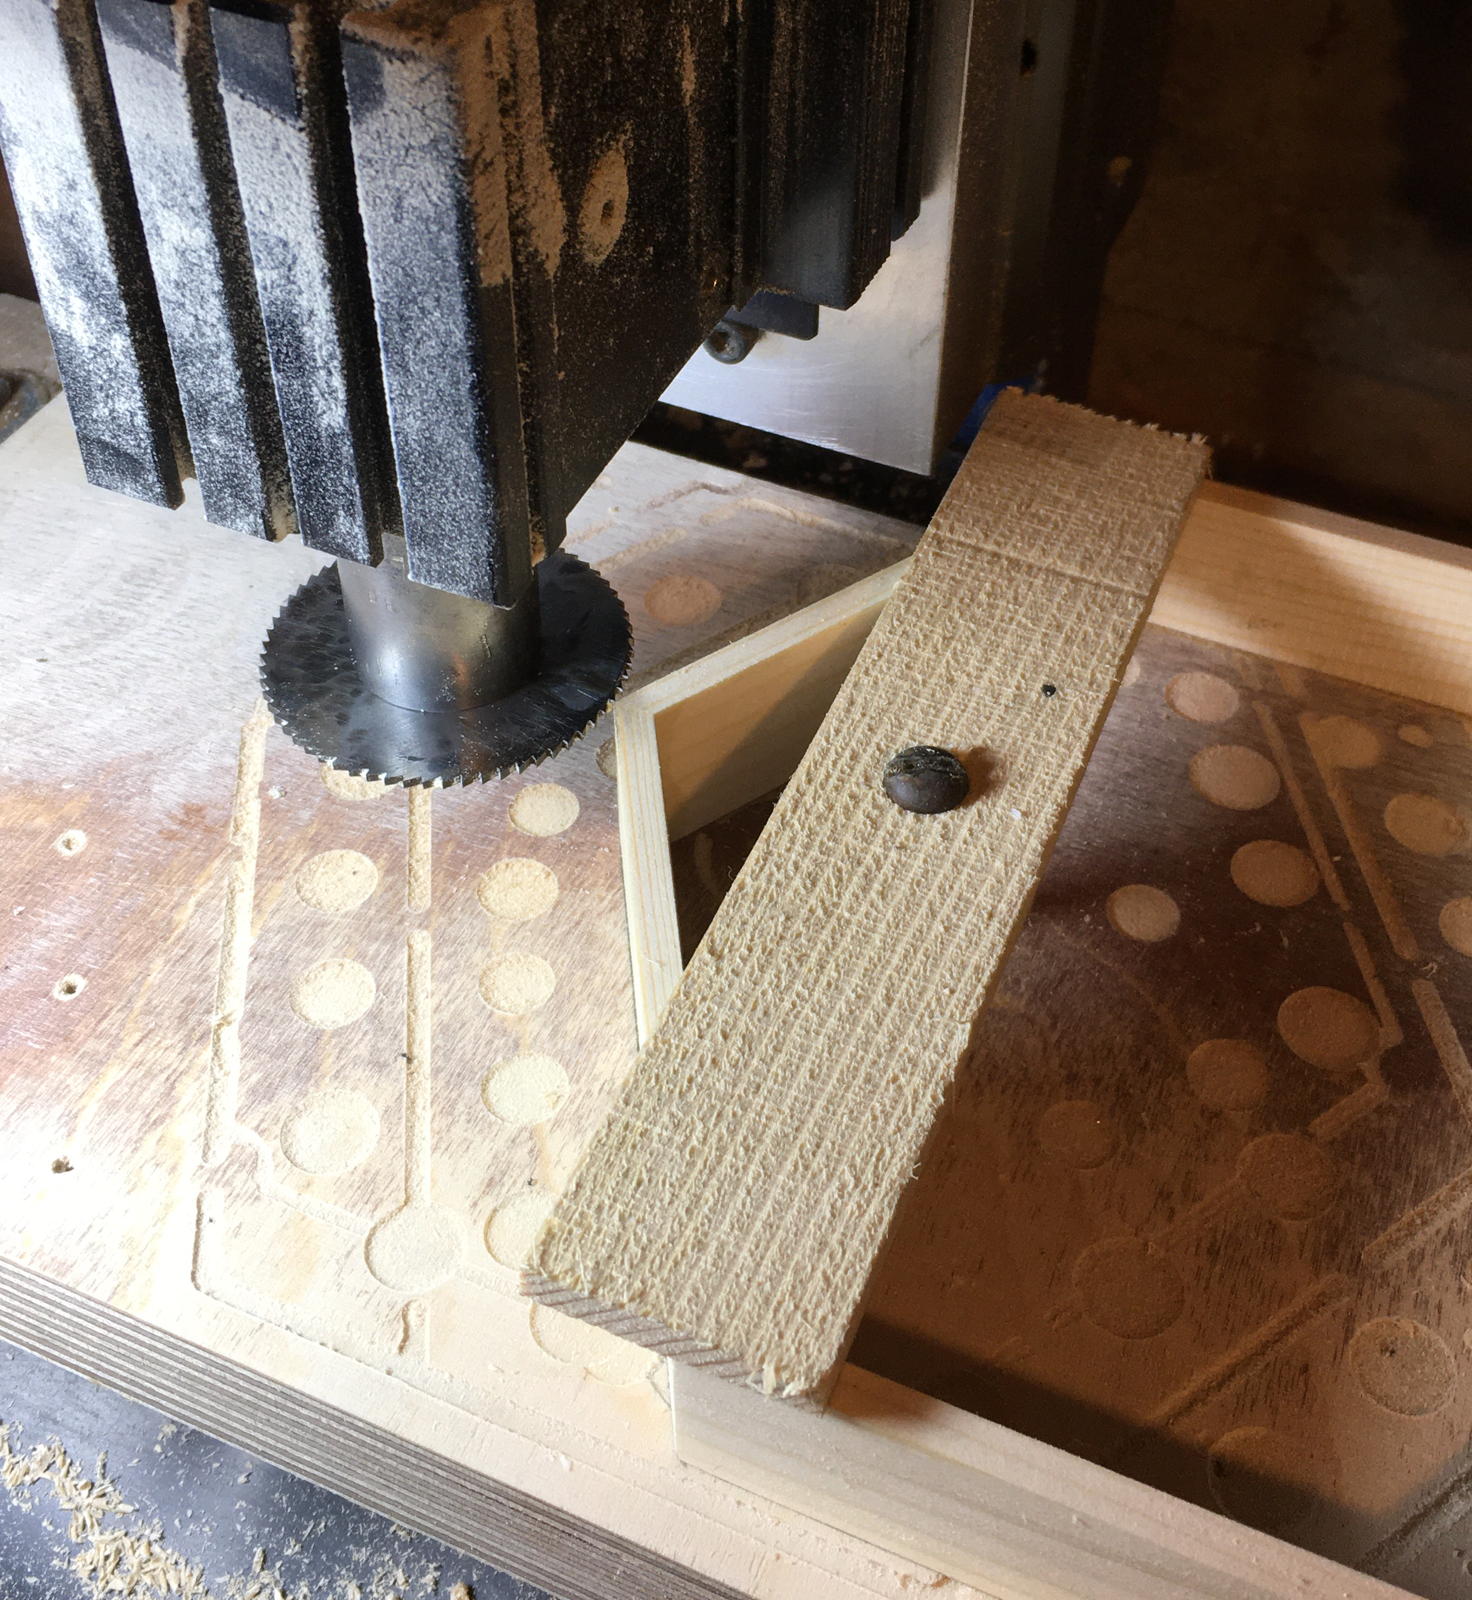
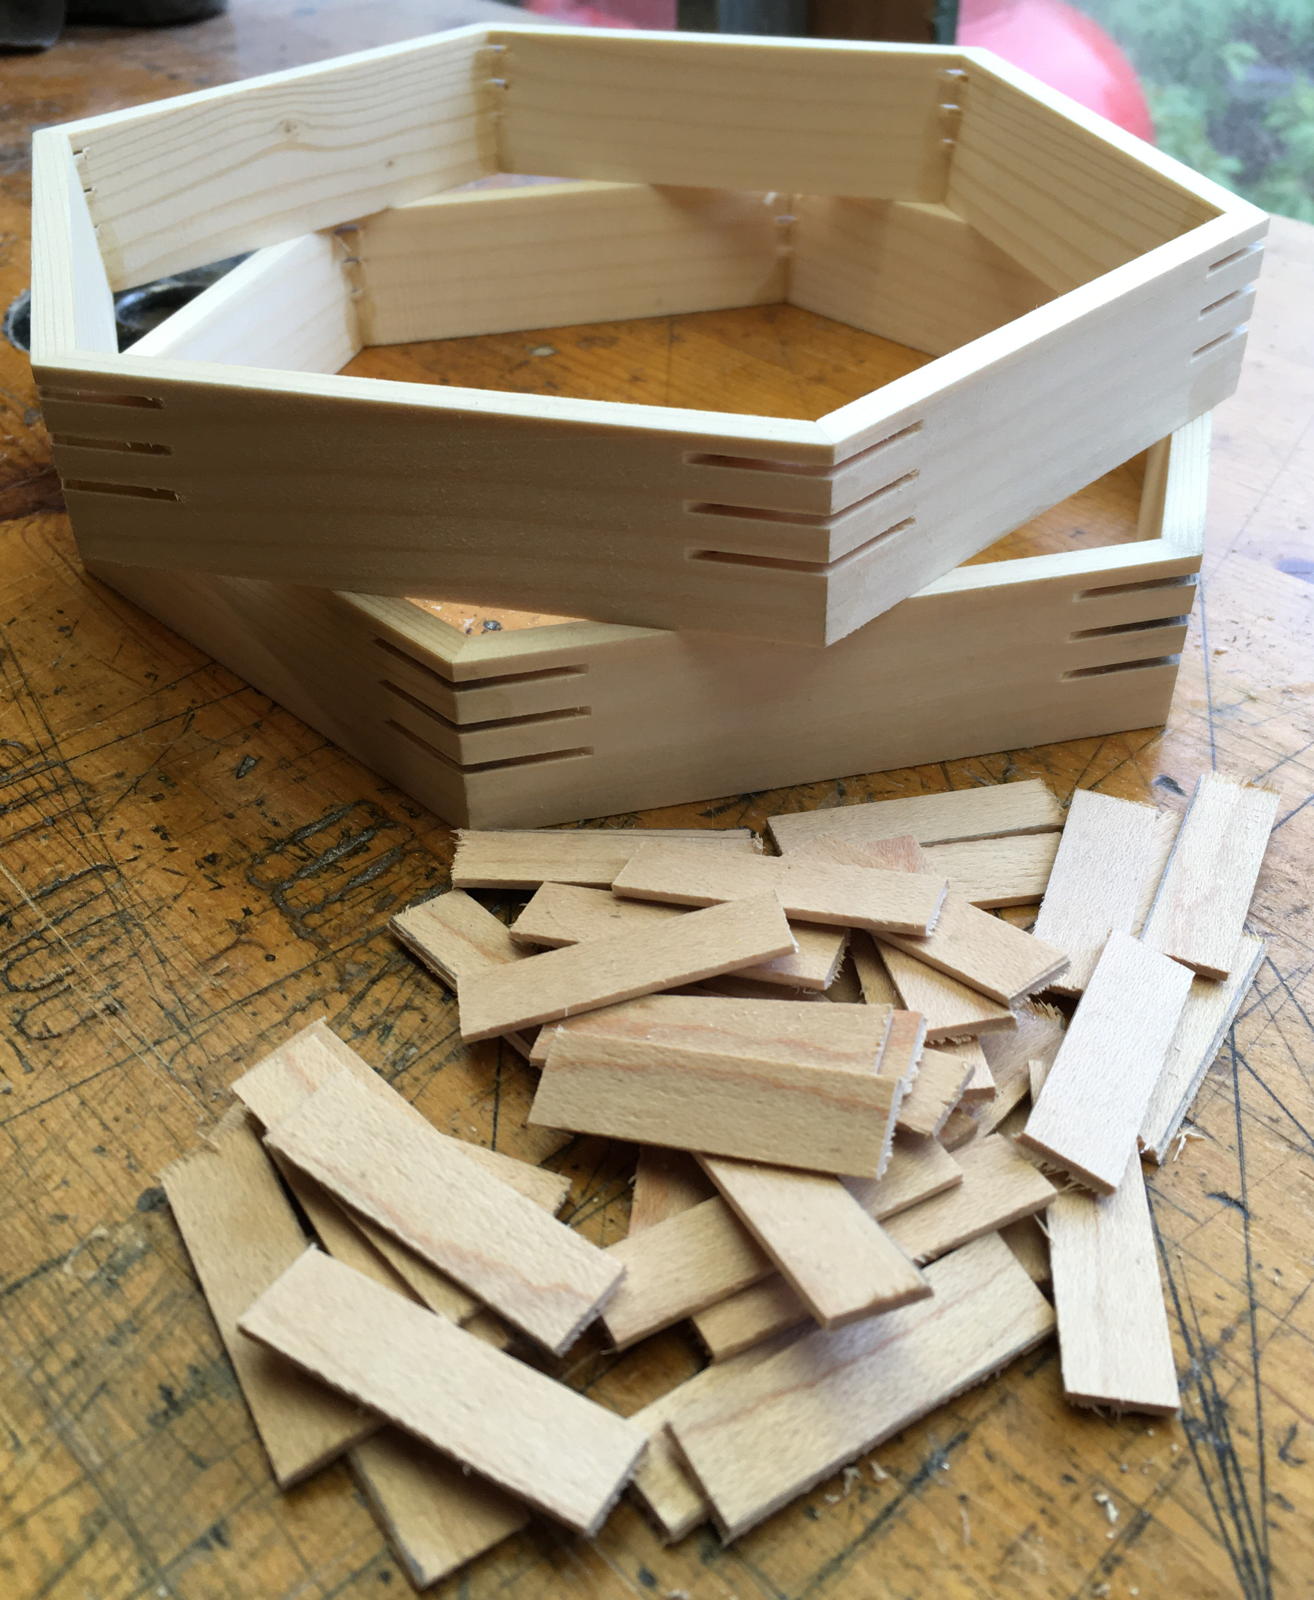
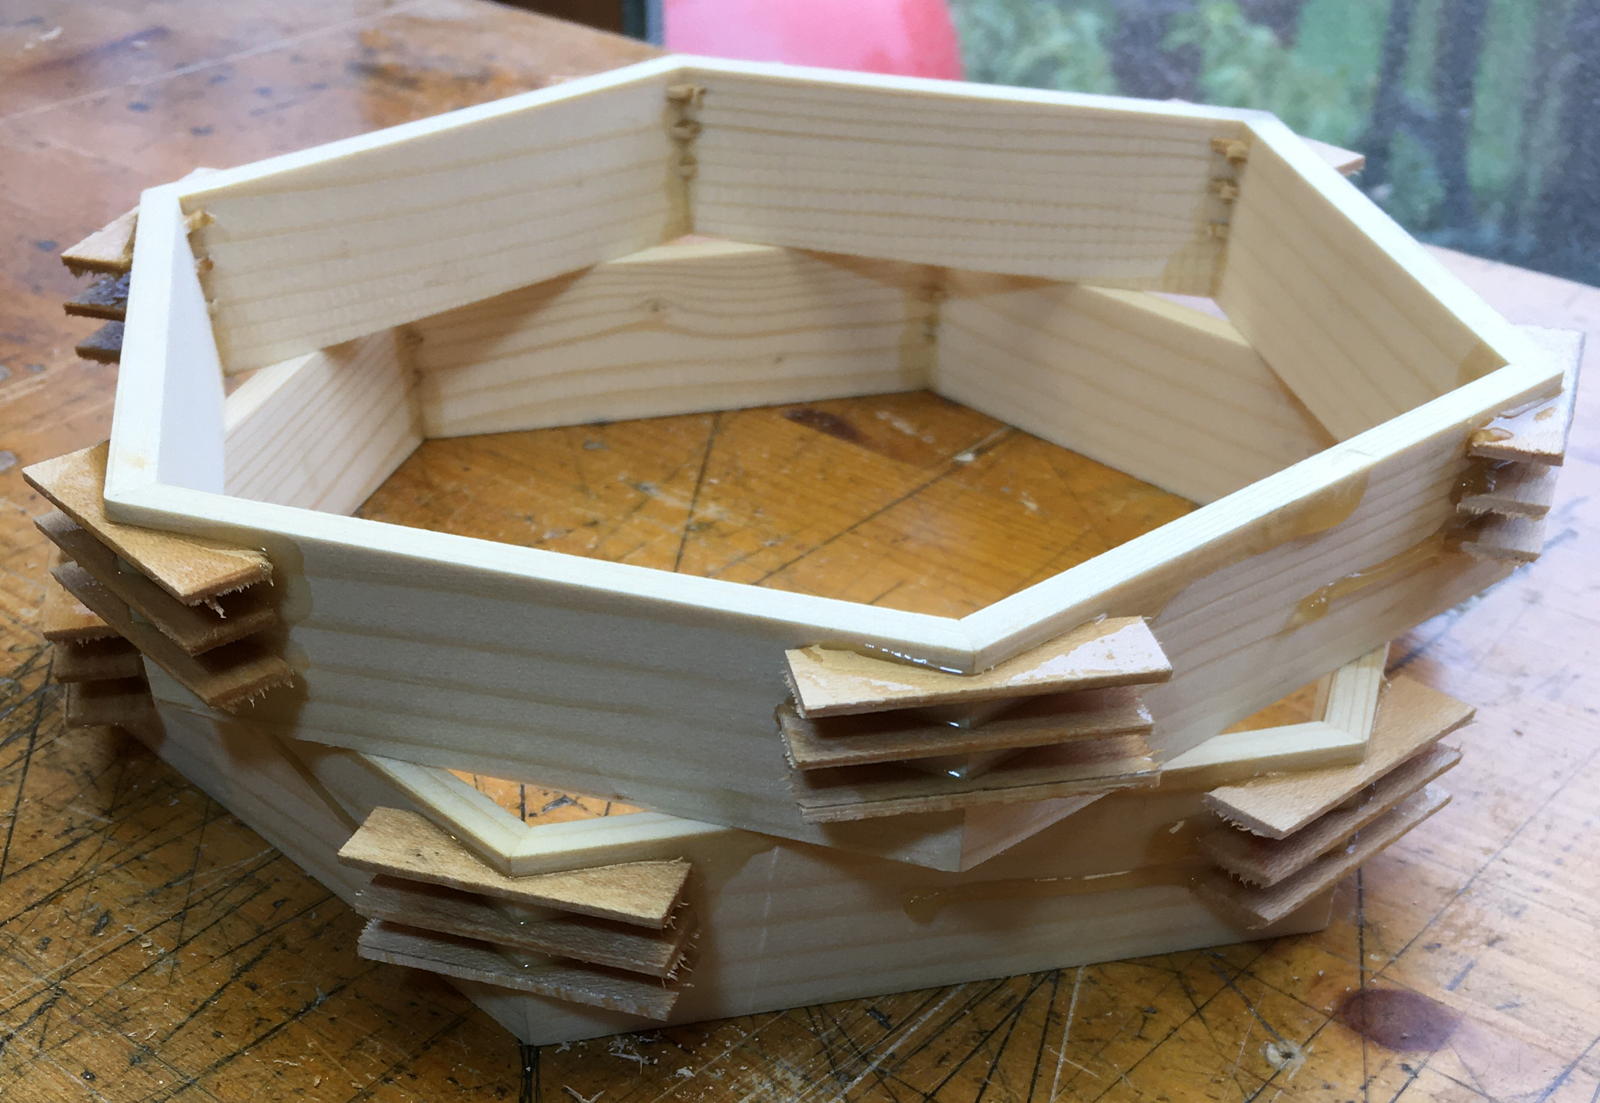
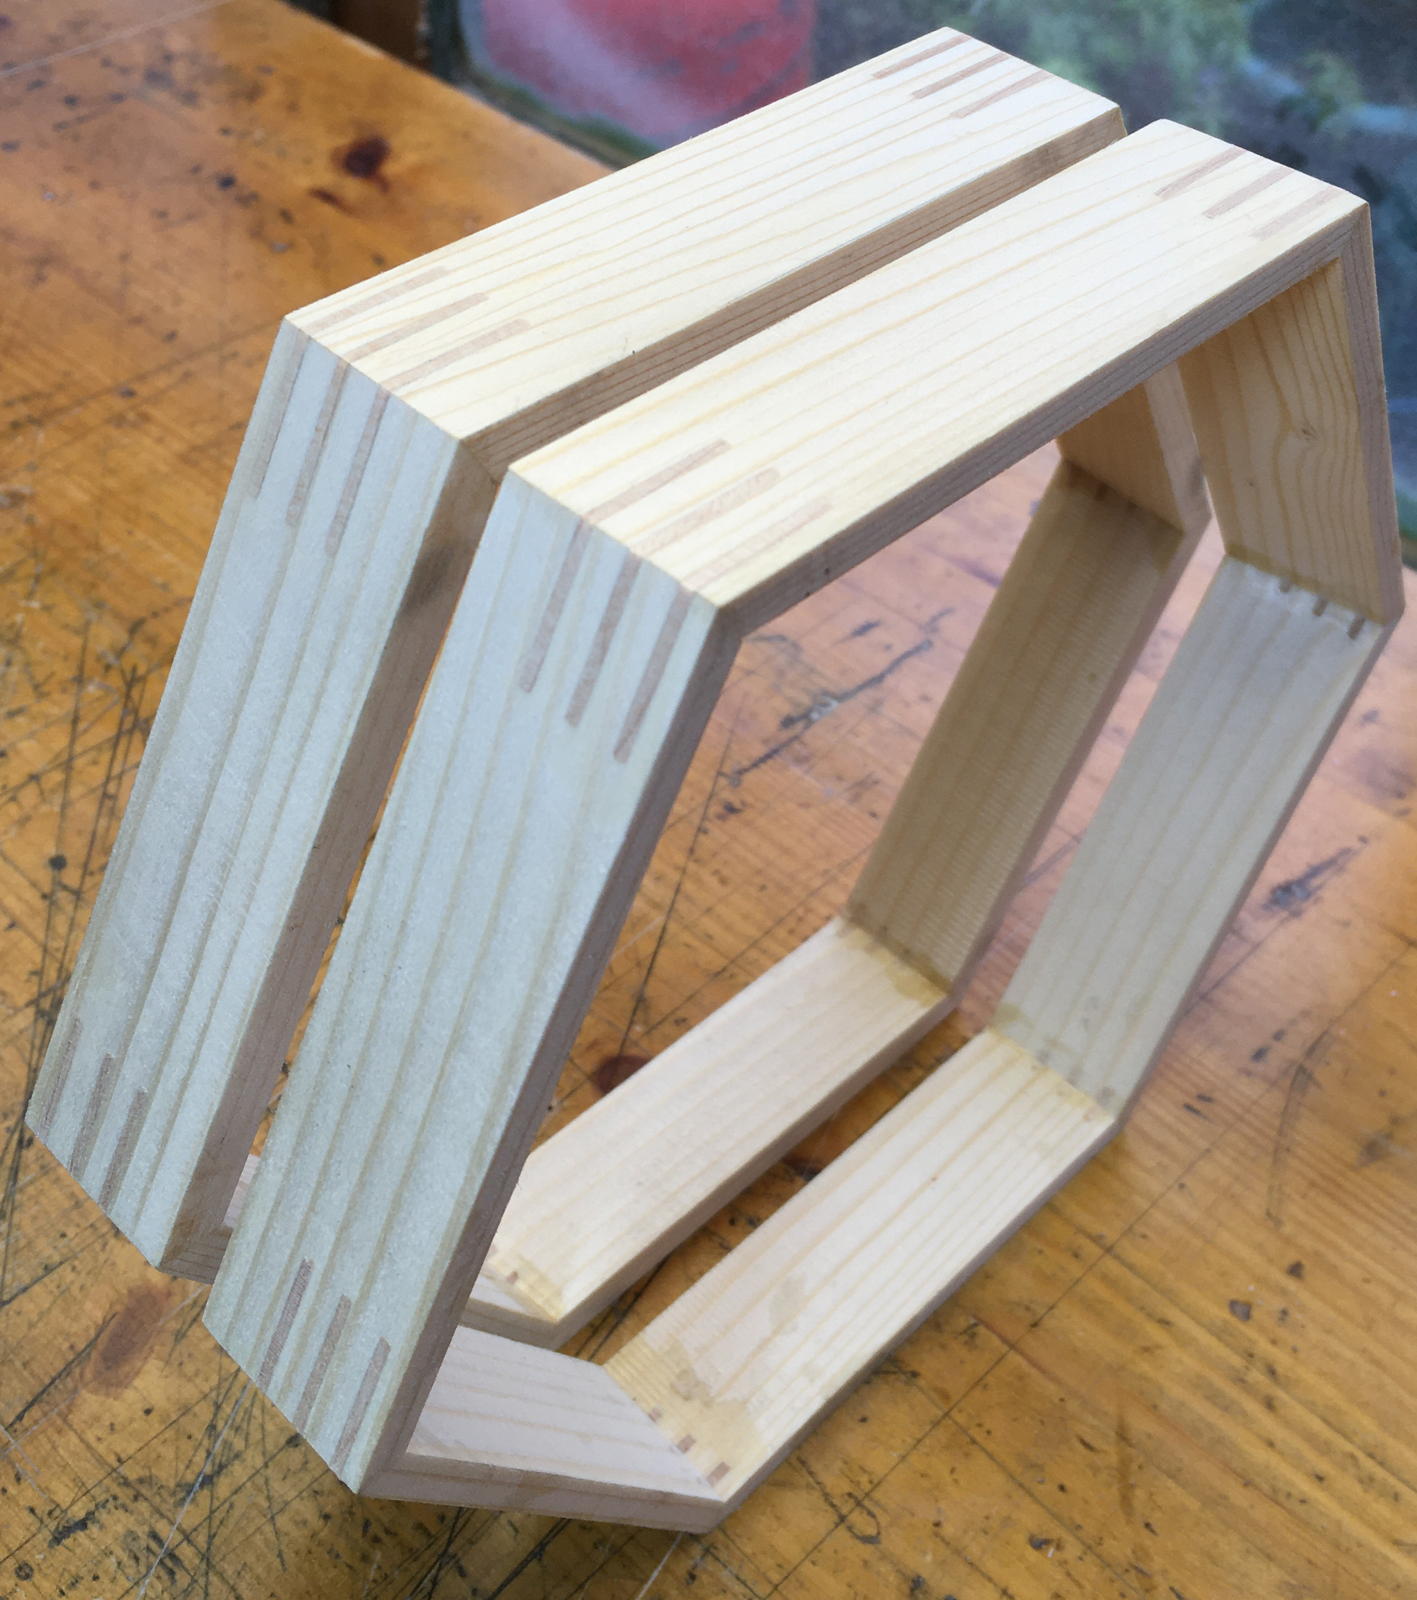
Bellows Frames
To increase the strength of the bellows frames, I tripled the number of splines in the corner joints and cut them with a slitting saw on the milling machine for a more accurate fit. This is another small incremental improvement that I will be carrying forward into future builds.
Bellows
I know I keep saying this with each build, but I continue to make small improvements to my bellows making process, and I think these are my best yet.
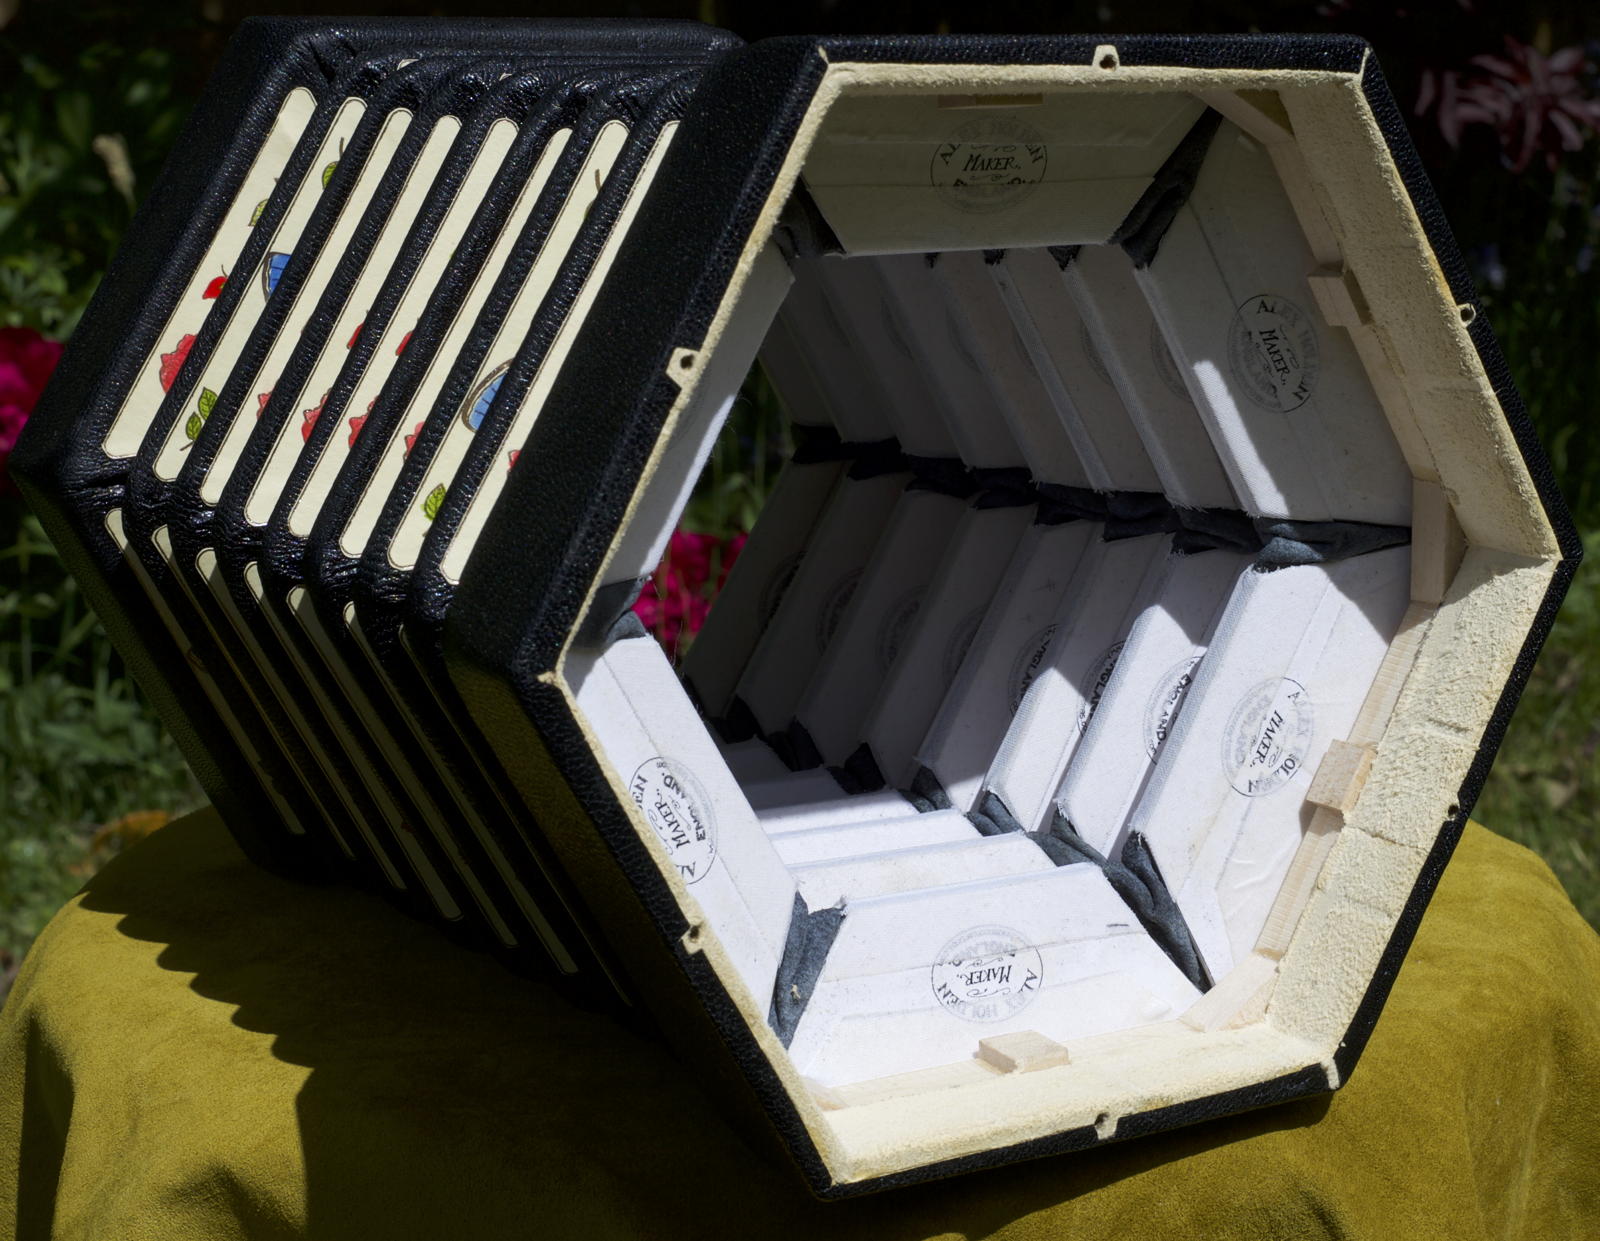
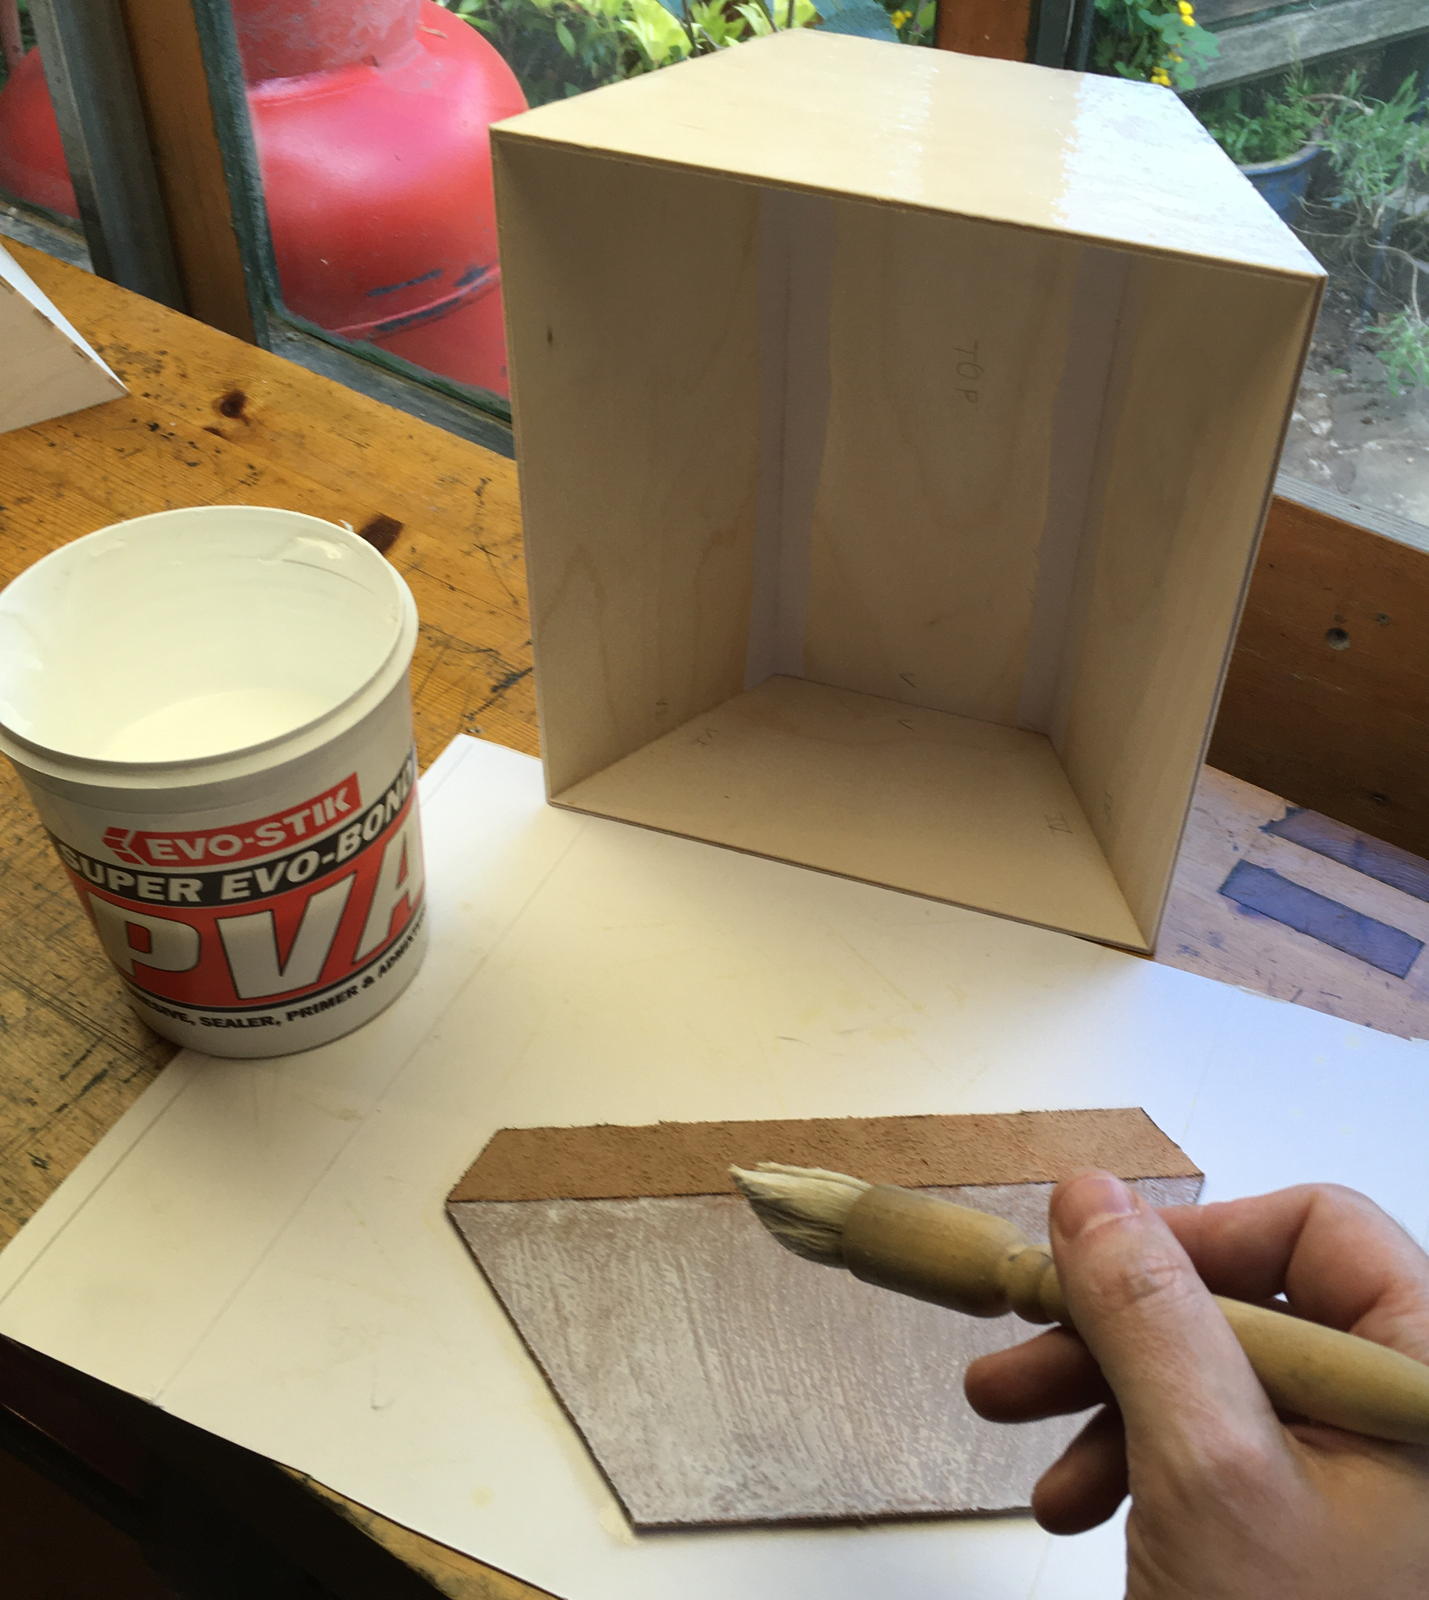
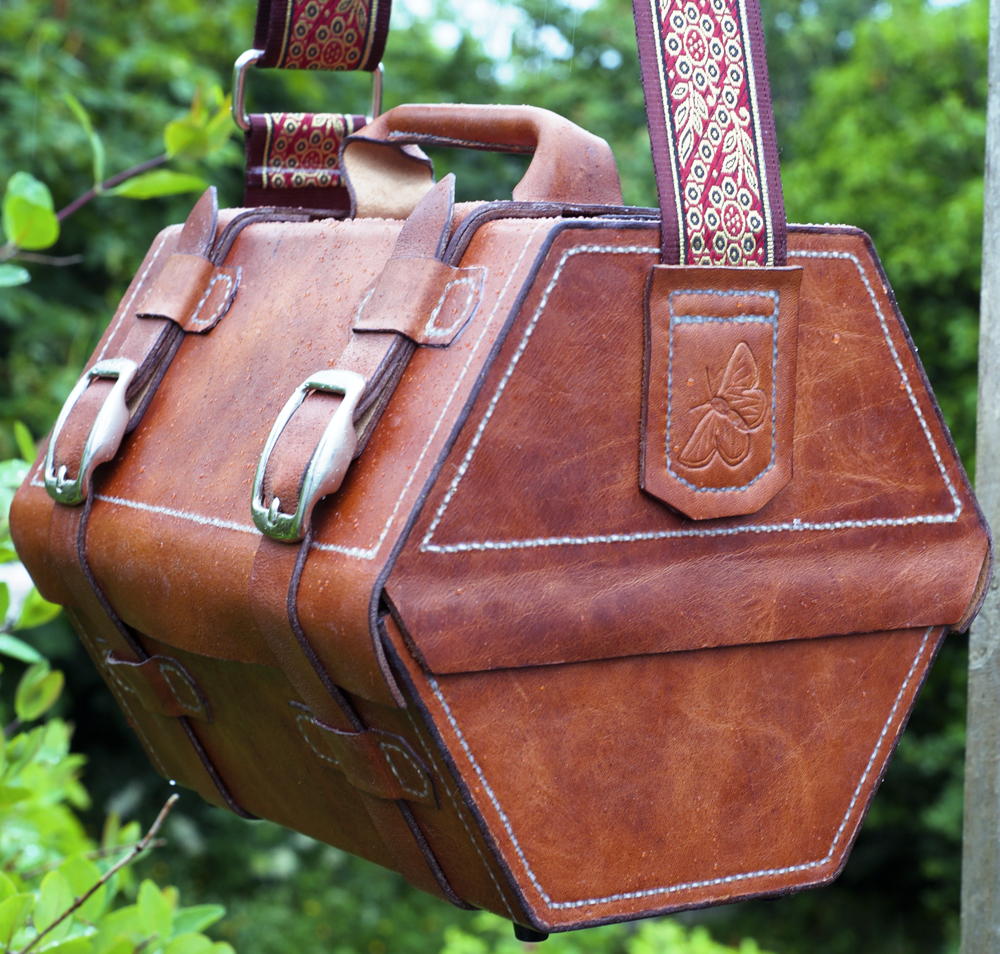
Case
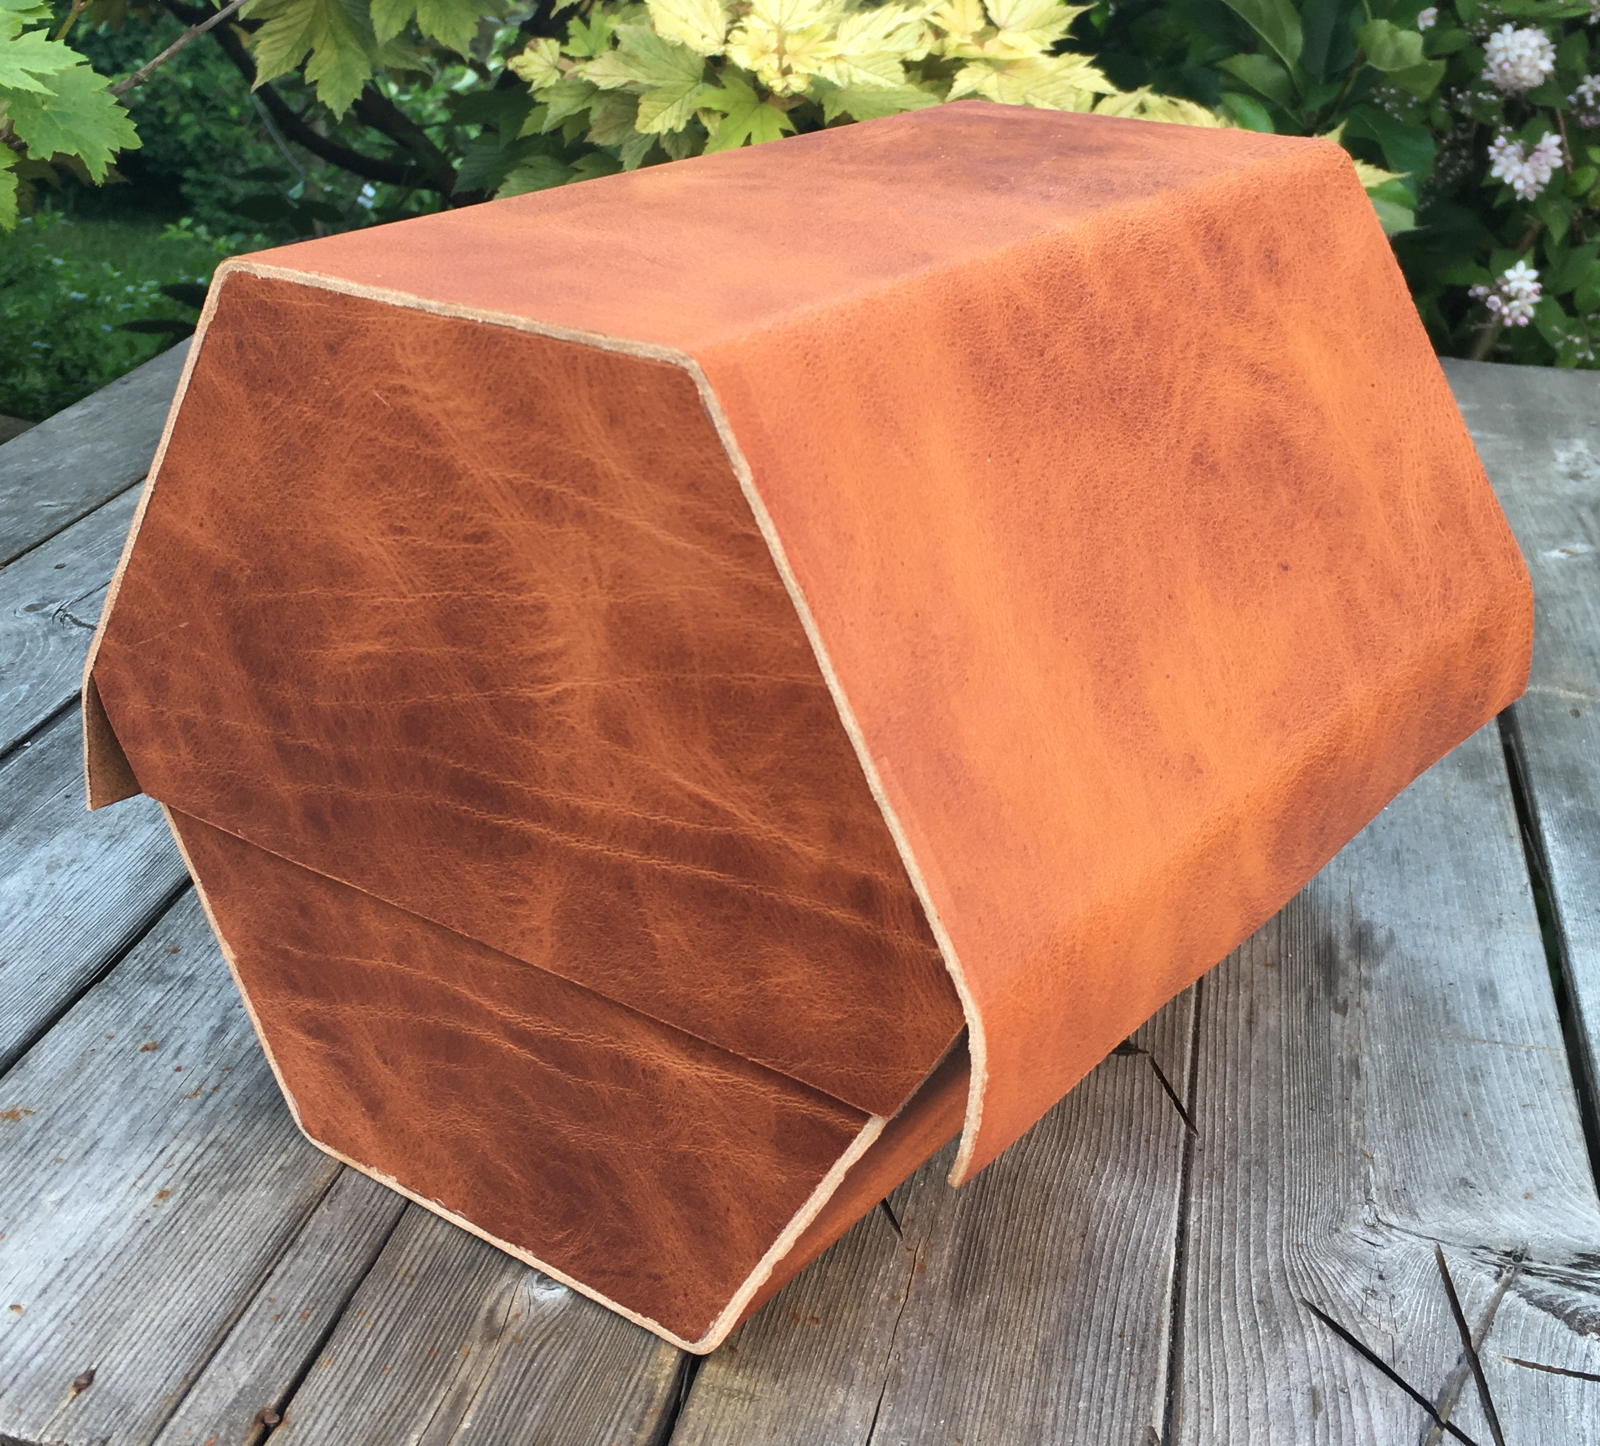
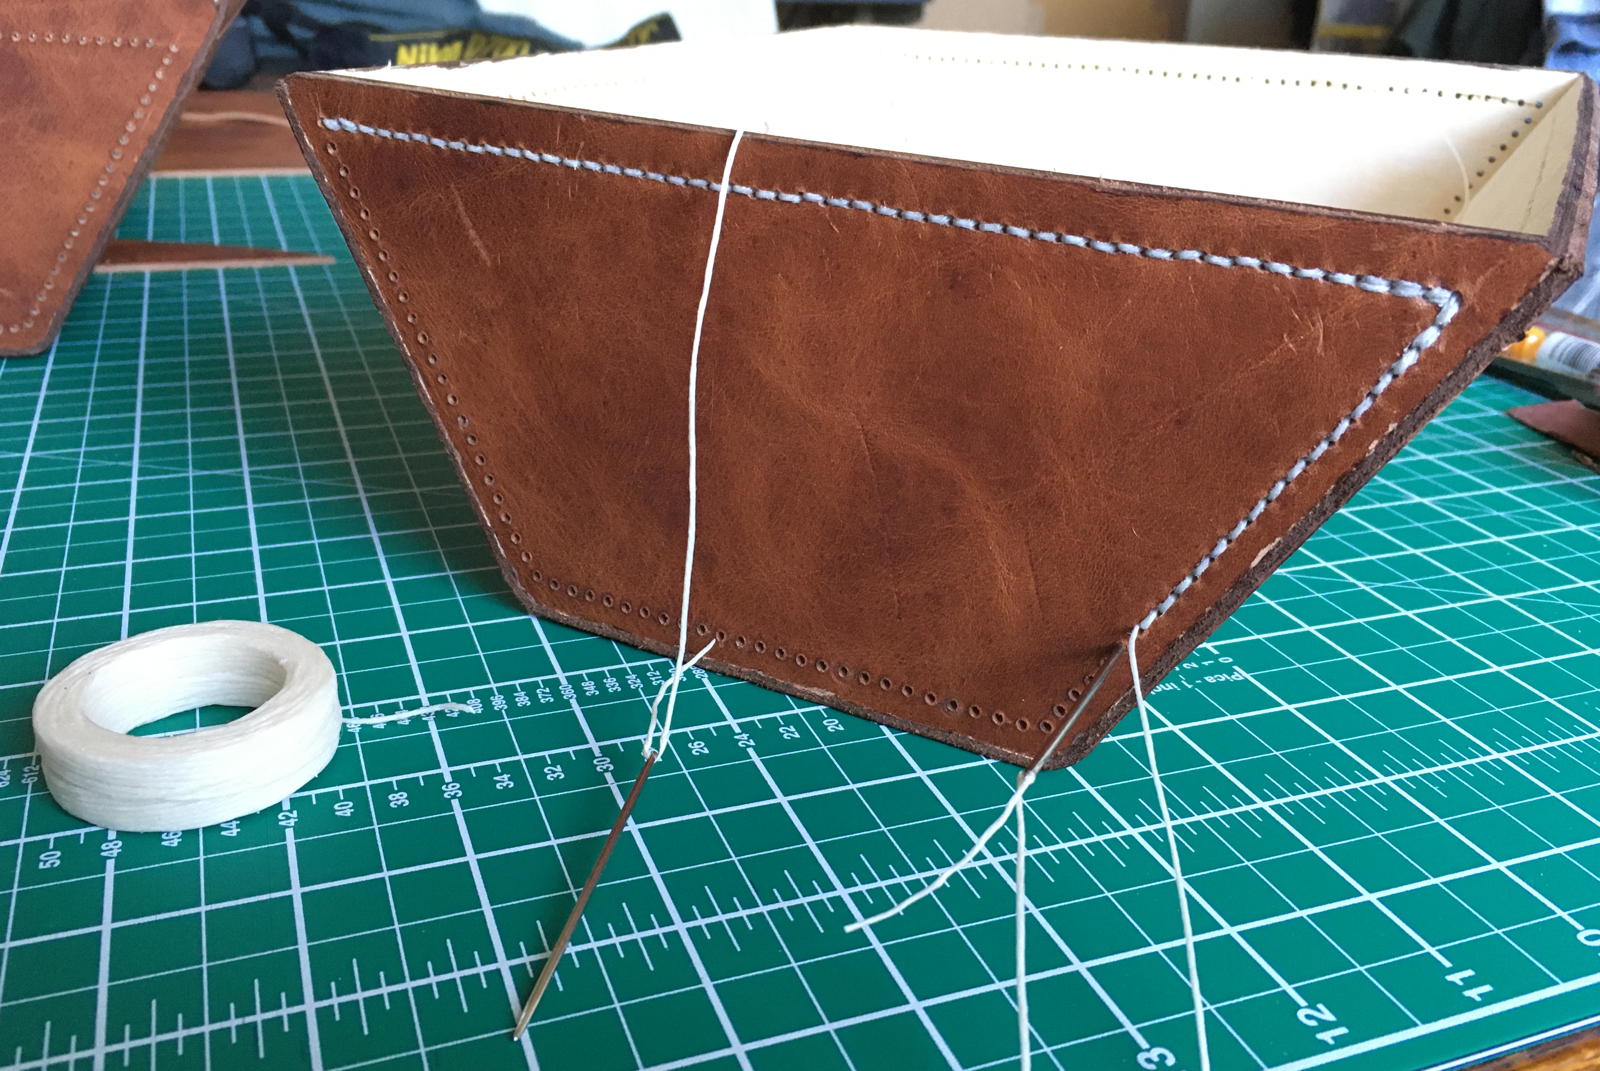
I made a custom hexagonal clamshell hard case with leather on the outside and a suede lining. Note that this was a lot of extra work and extra materials expenses, so I will continue to supply the Italian hard cases that I have shown in previous articles as standard unless a customer wishes to upgrade to a special handmade case like this one at extra cost.
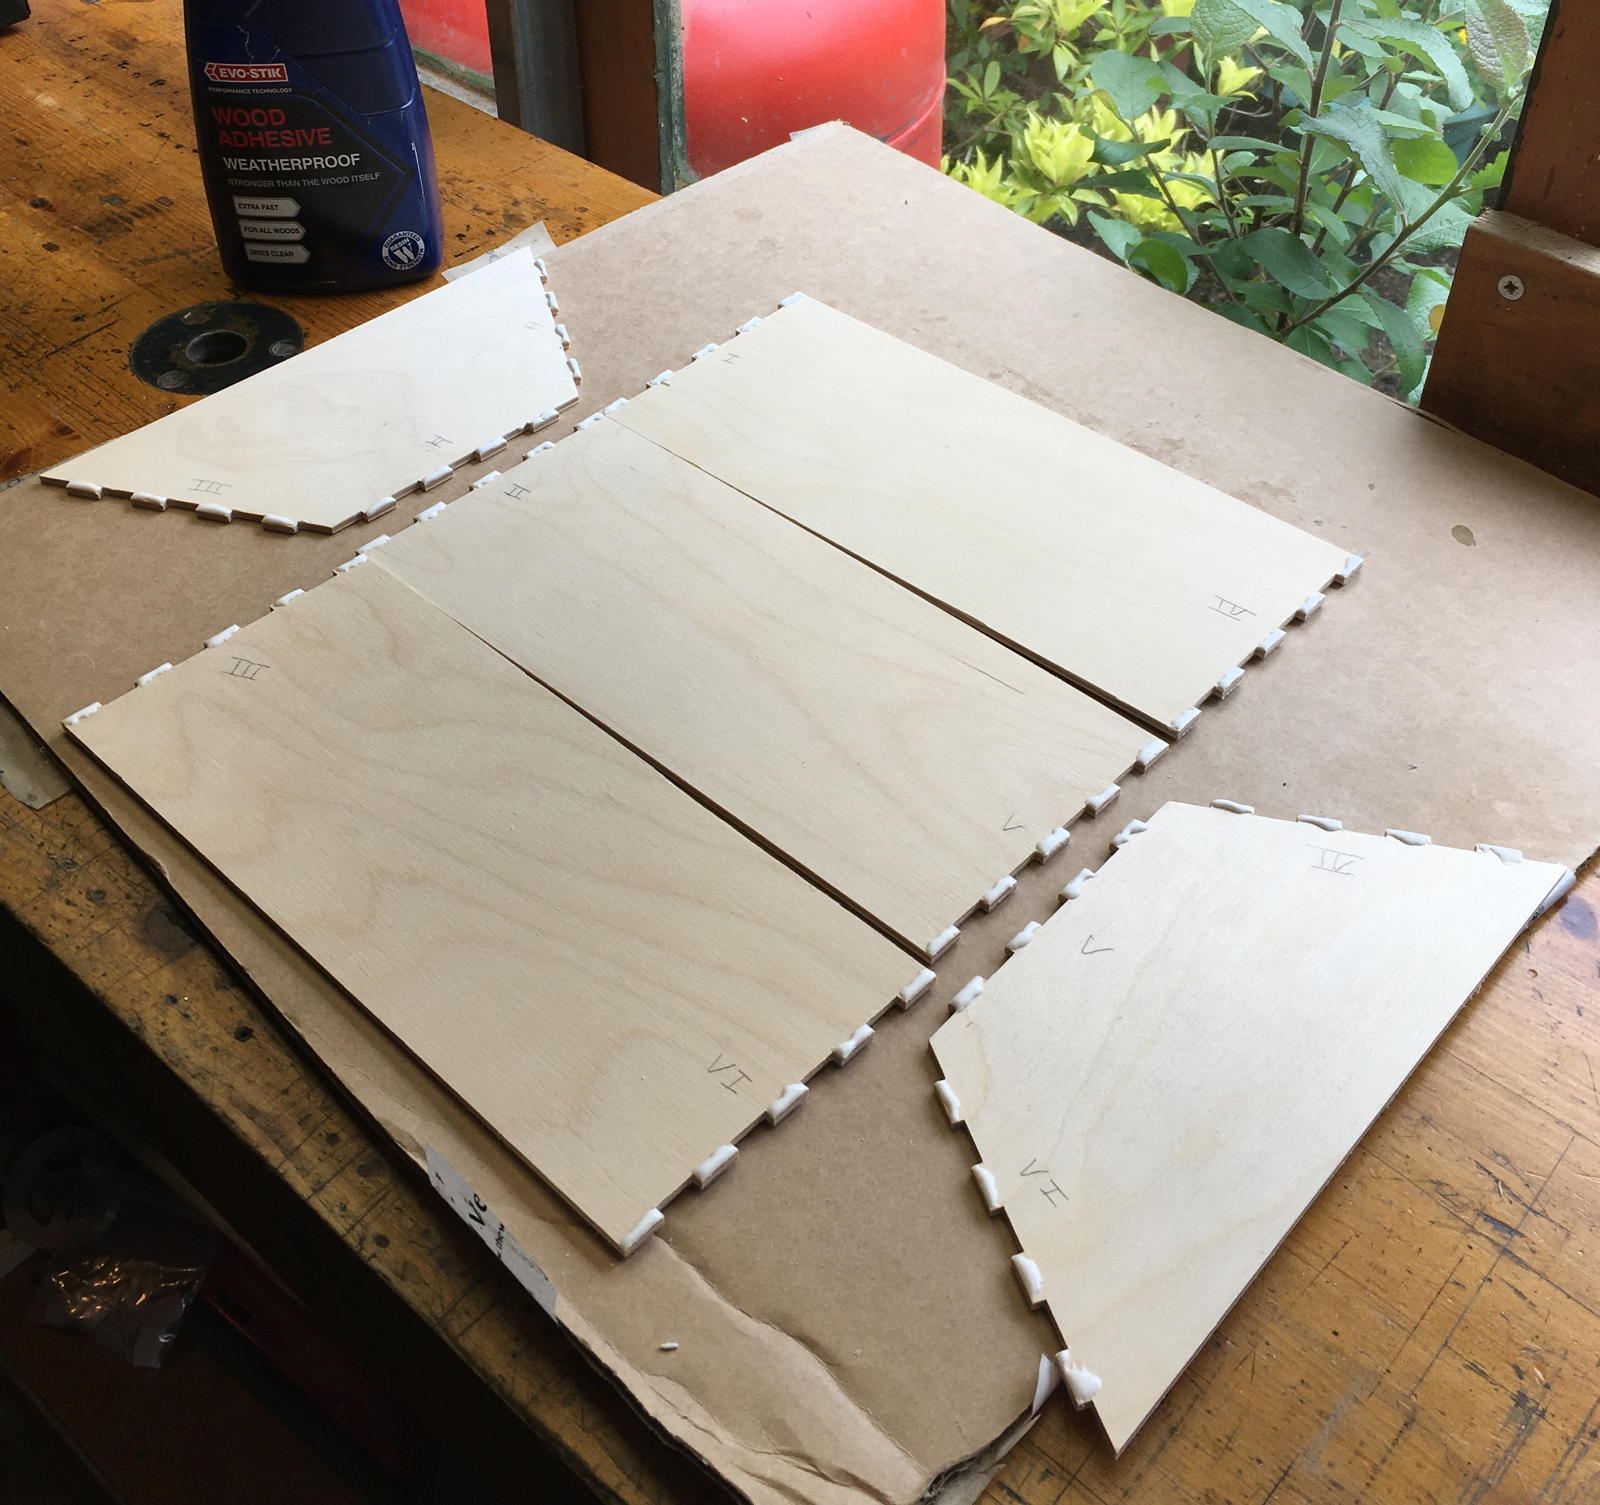
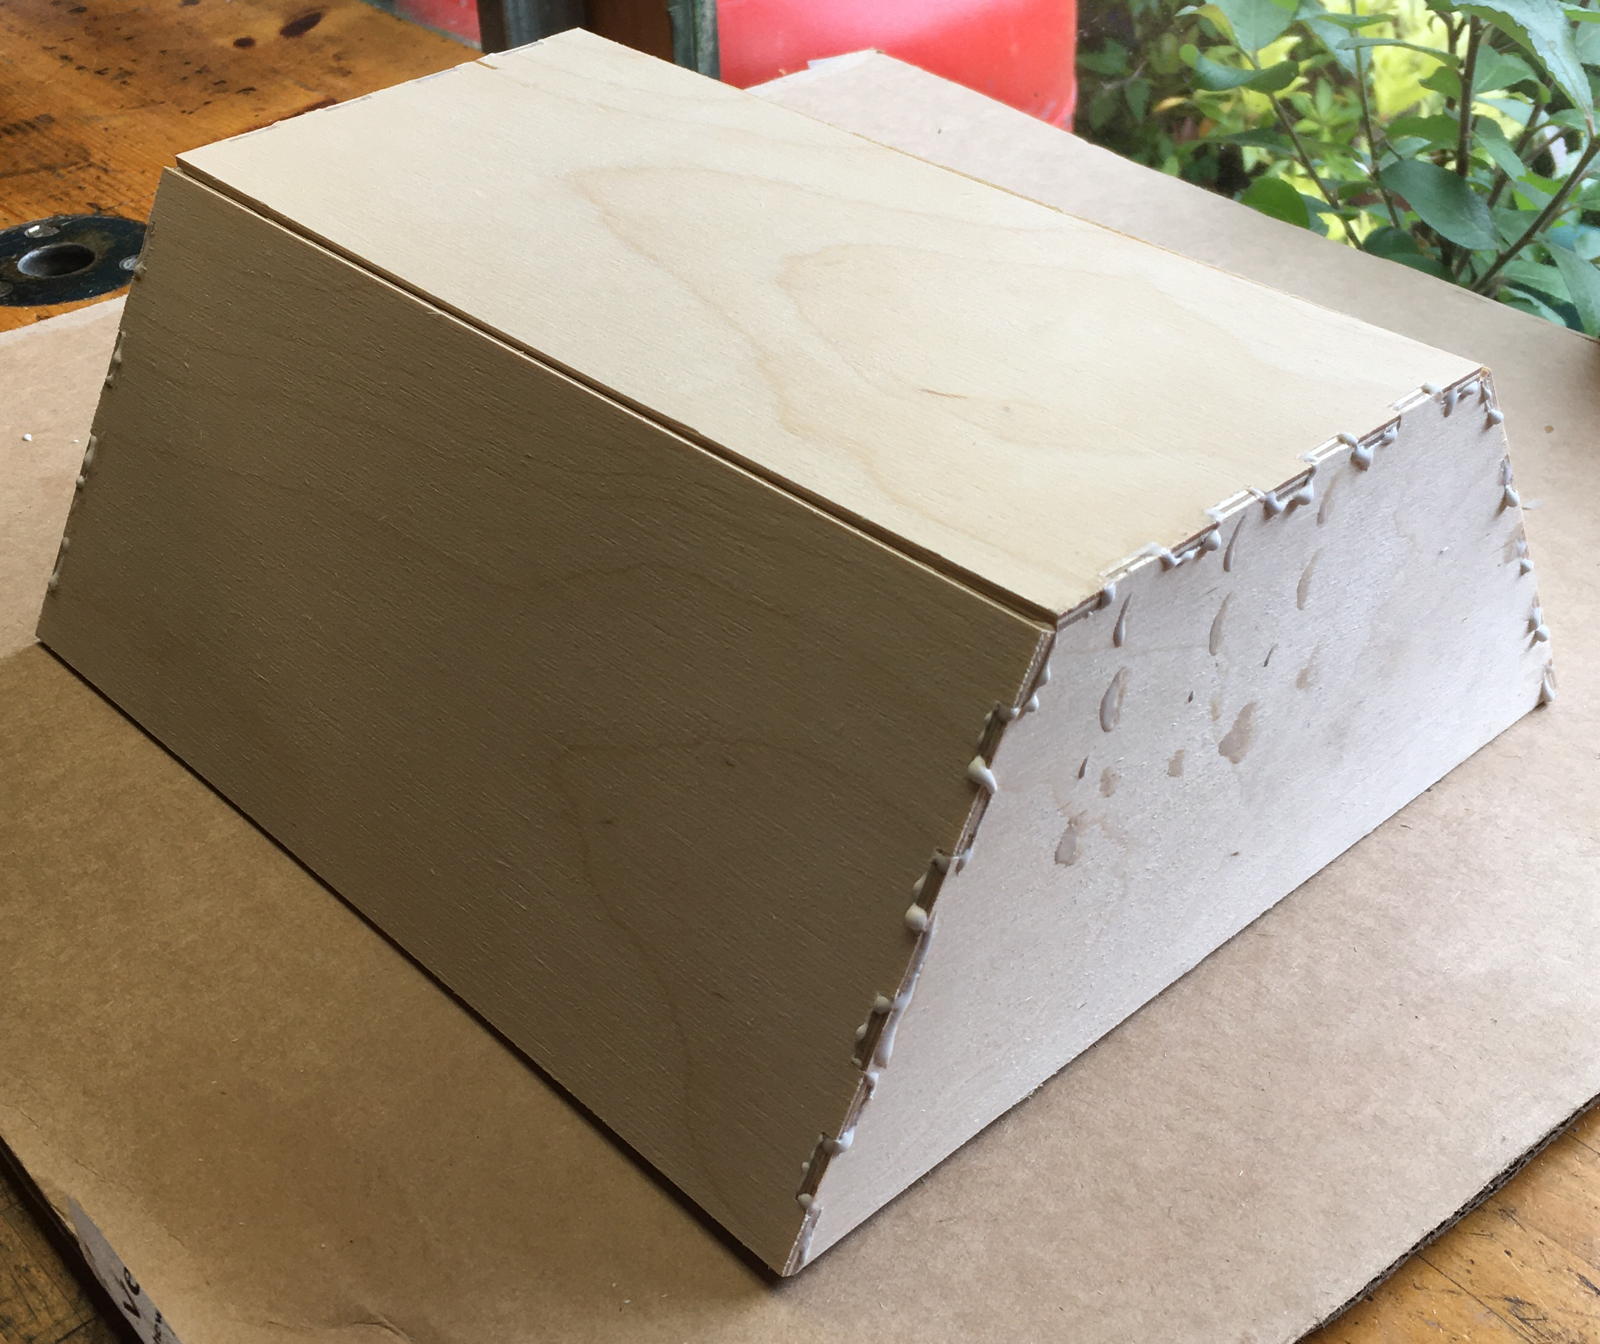
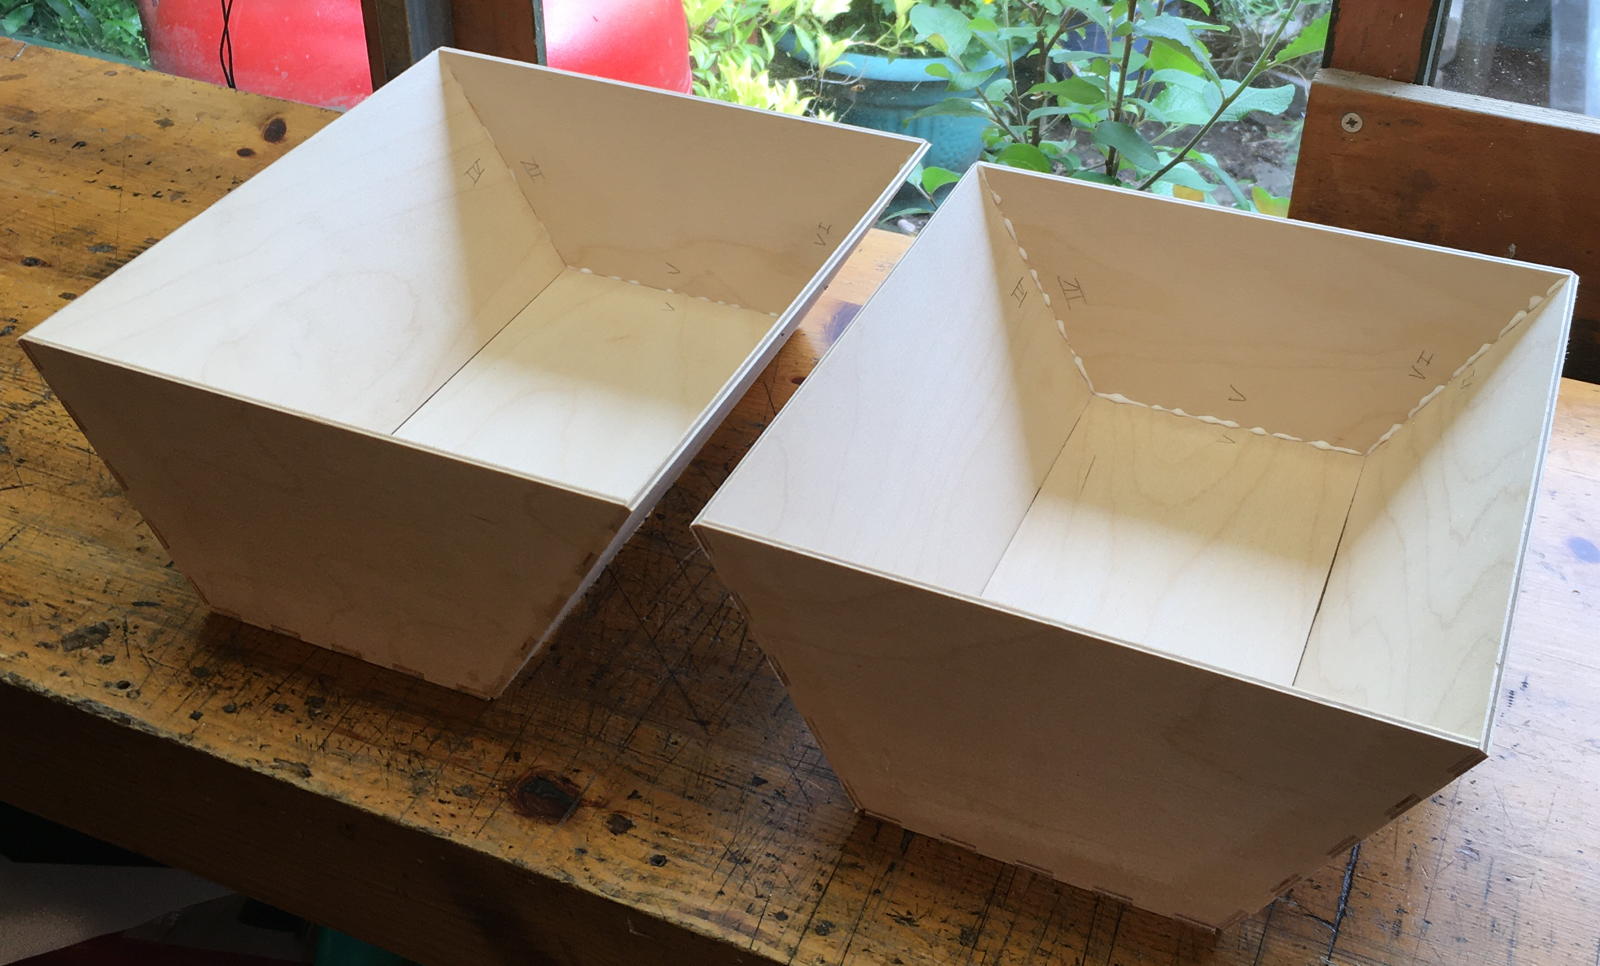
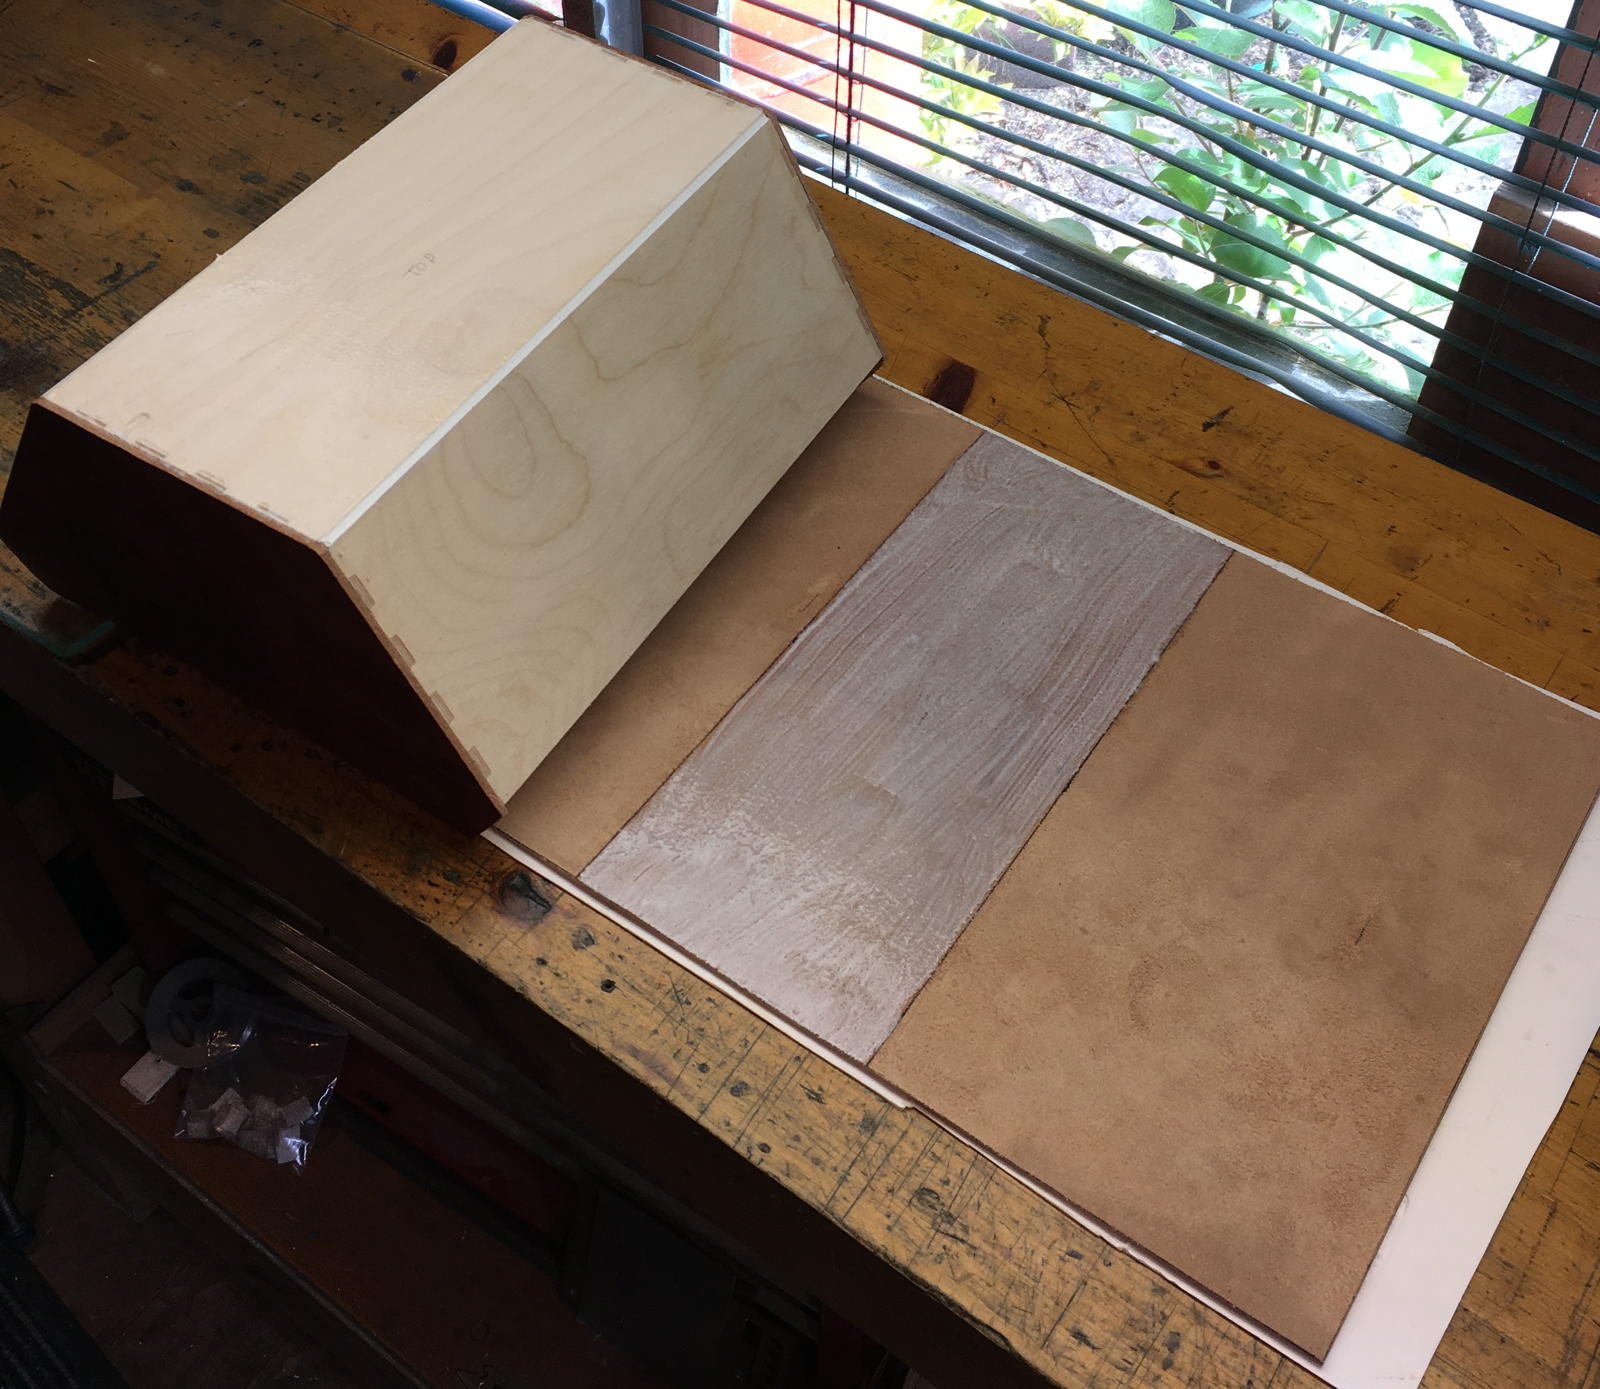
The structure was made from sheets of 3mm birch plywood with box joints, glued with waterproof wood glue.
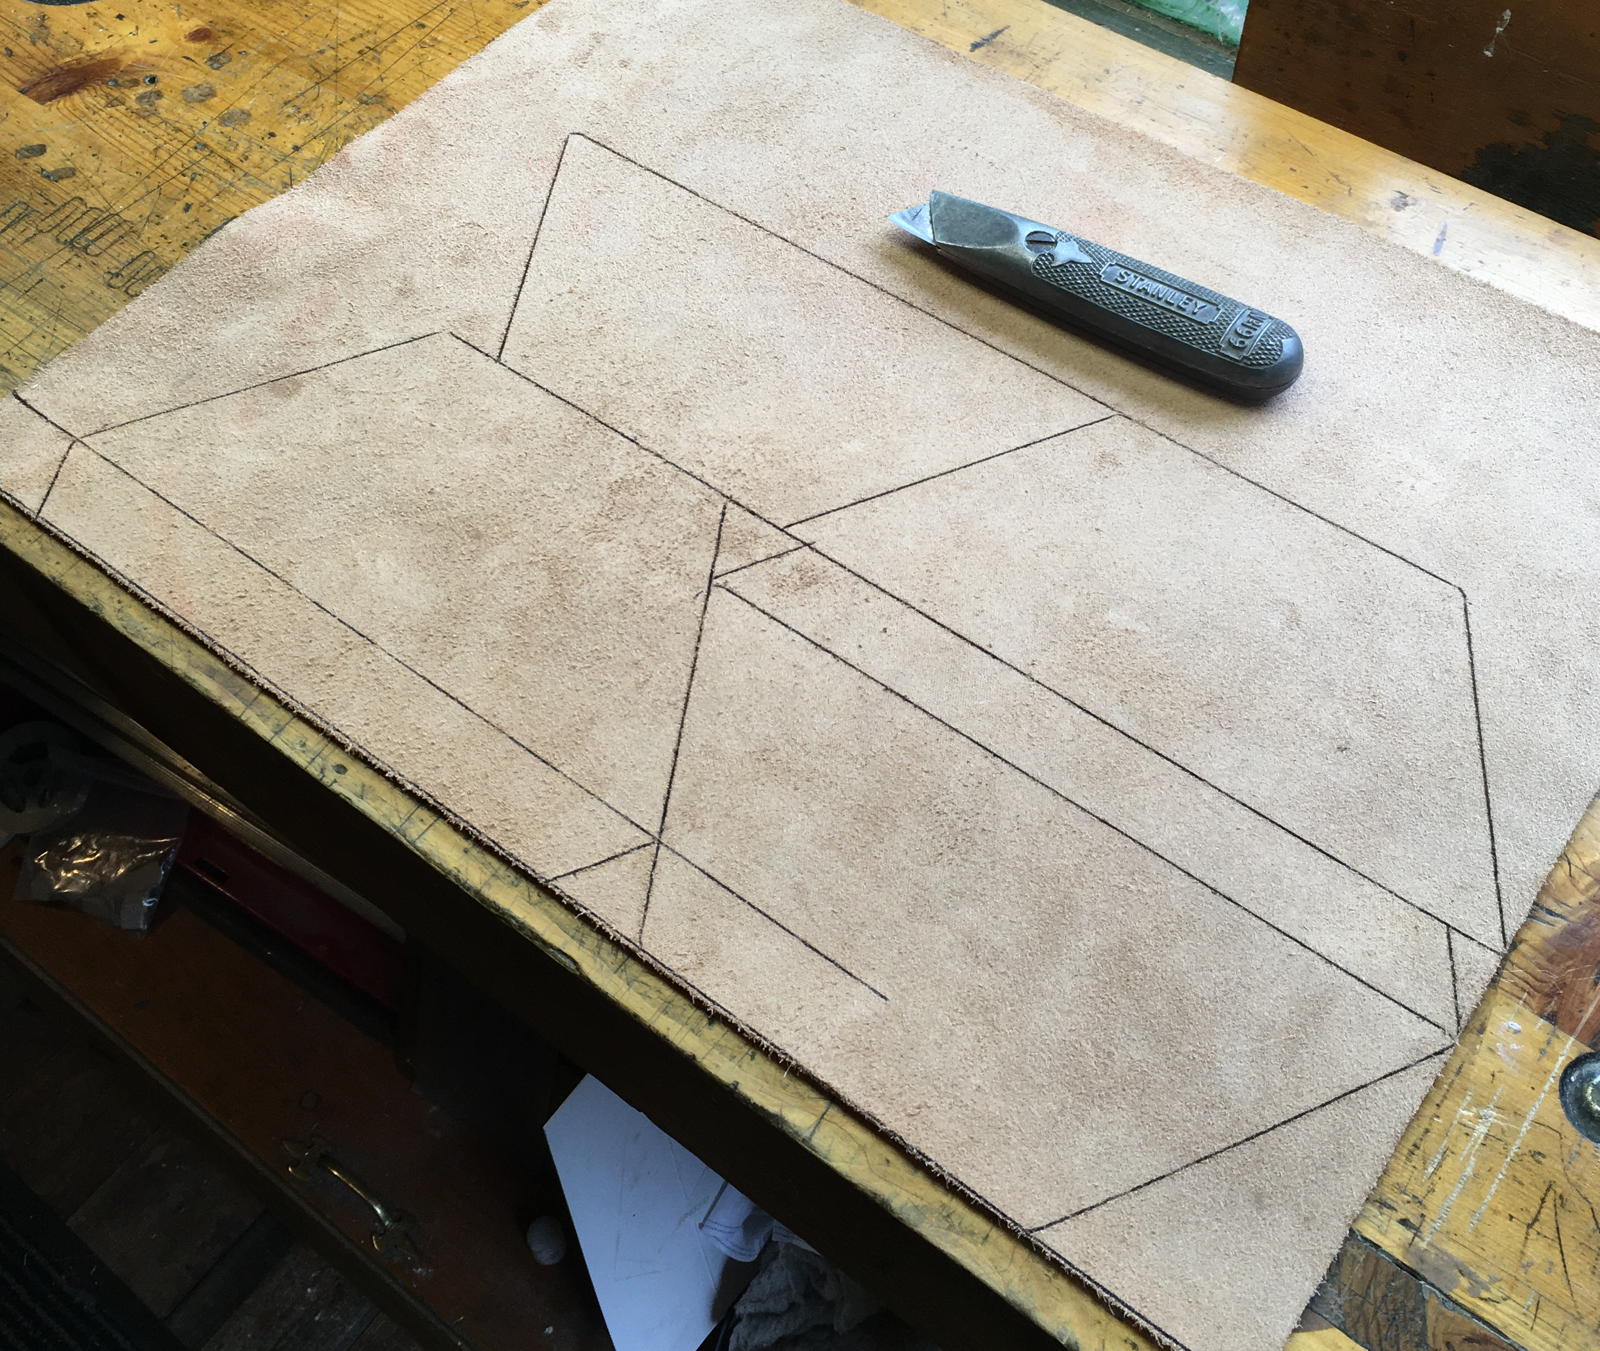
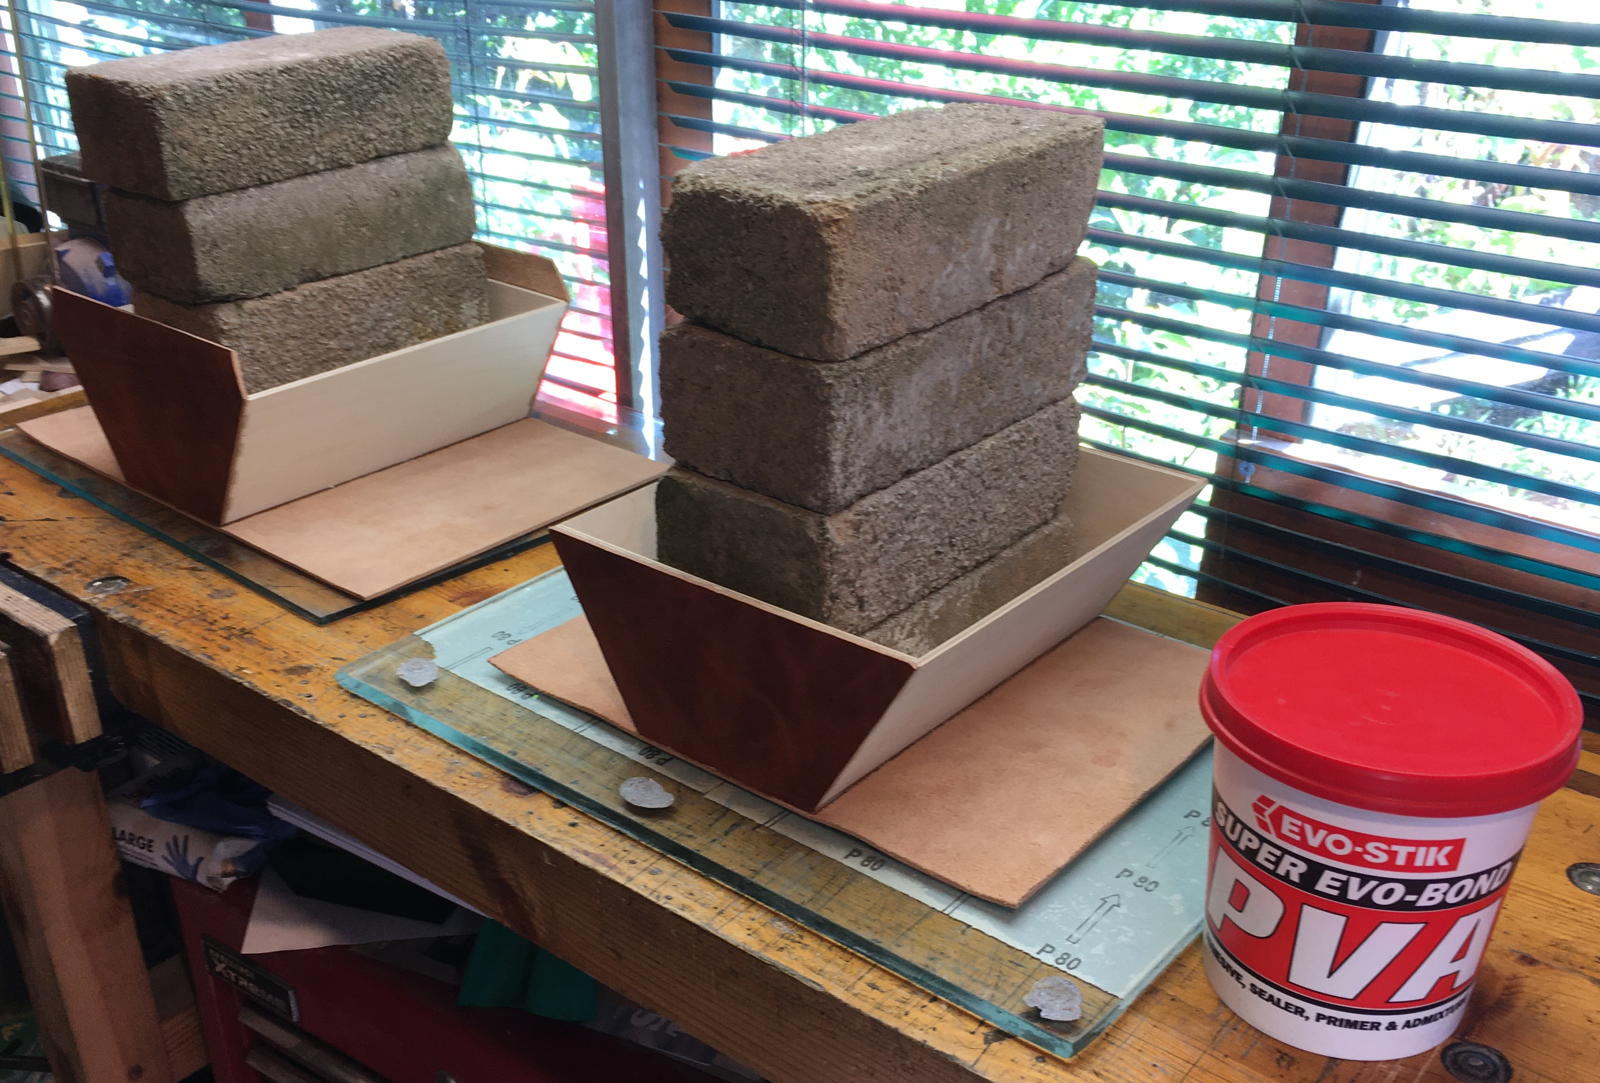
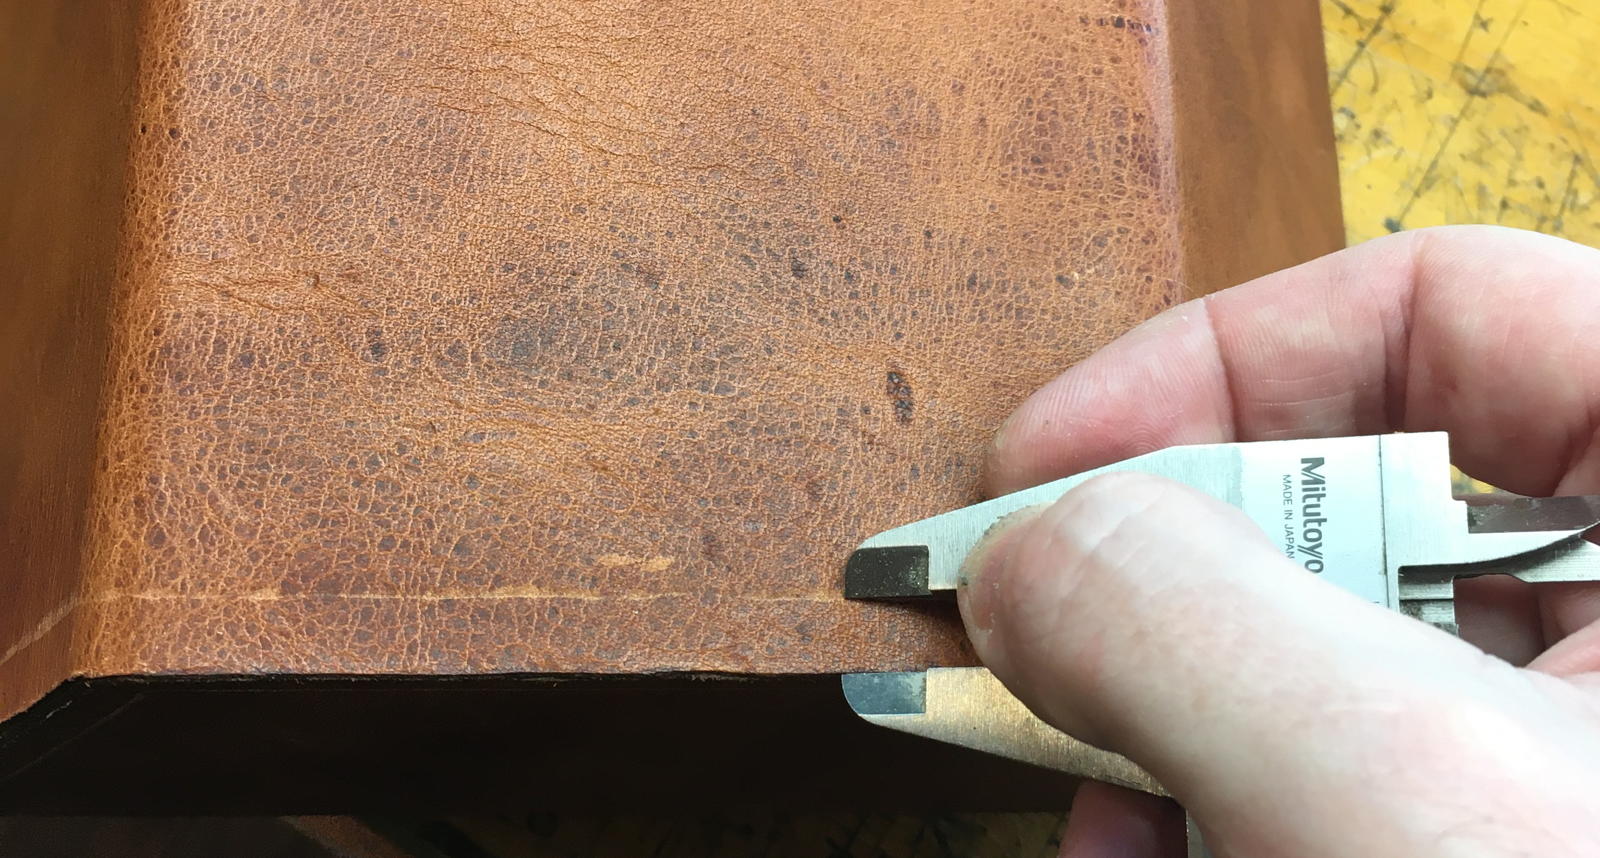
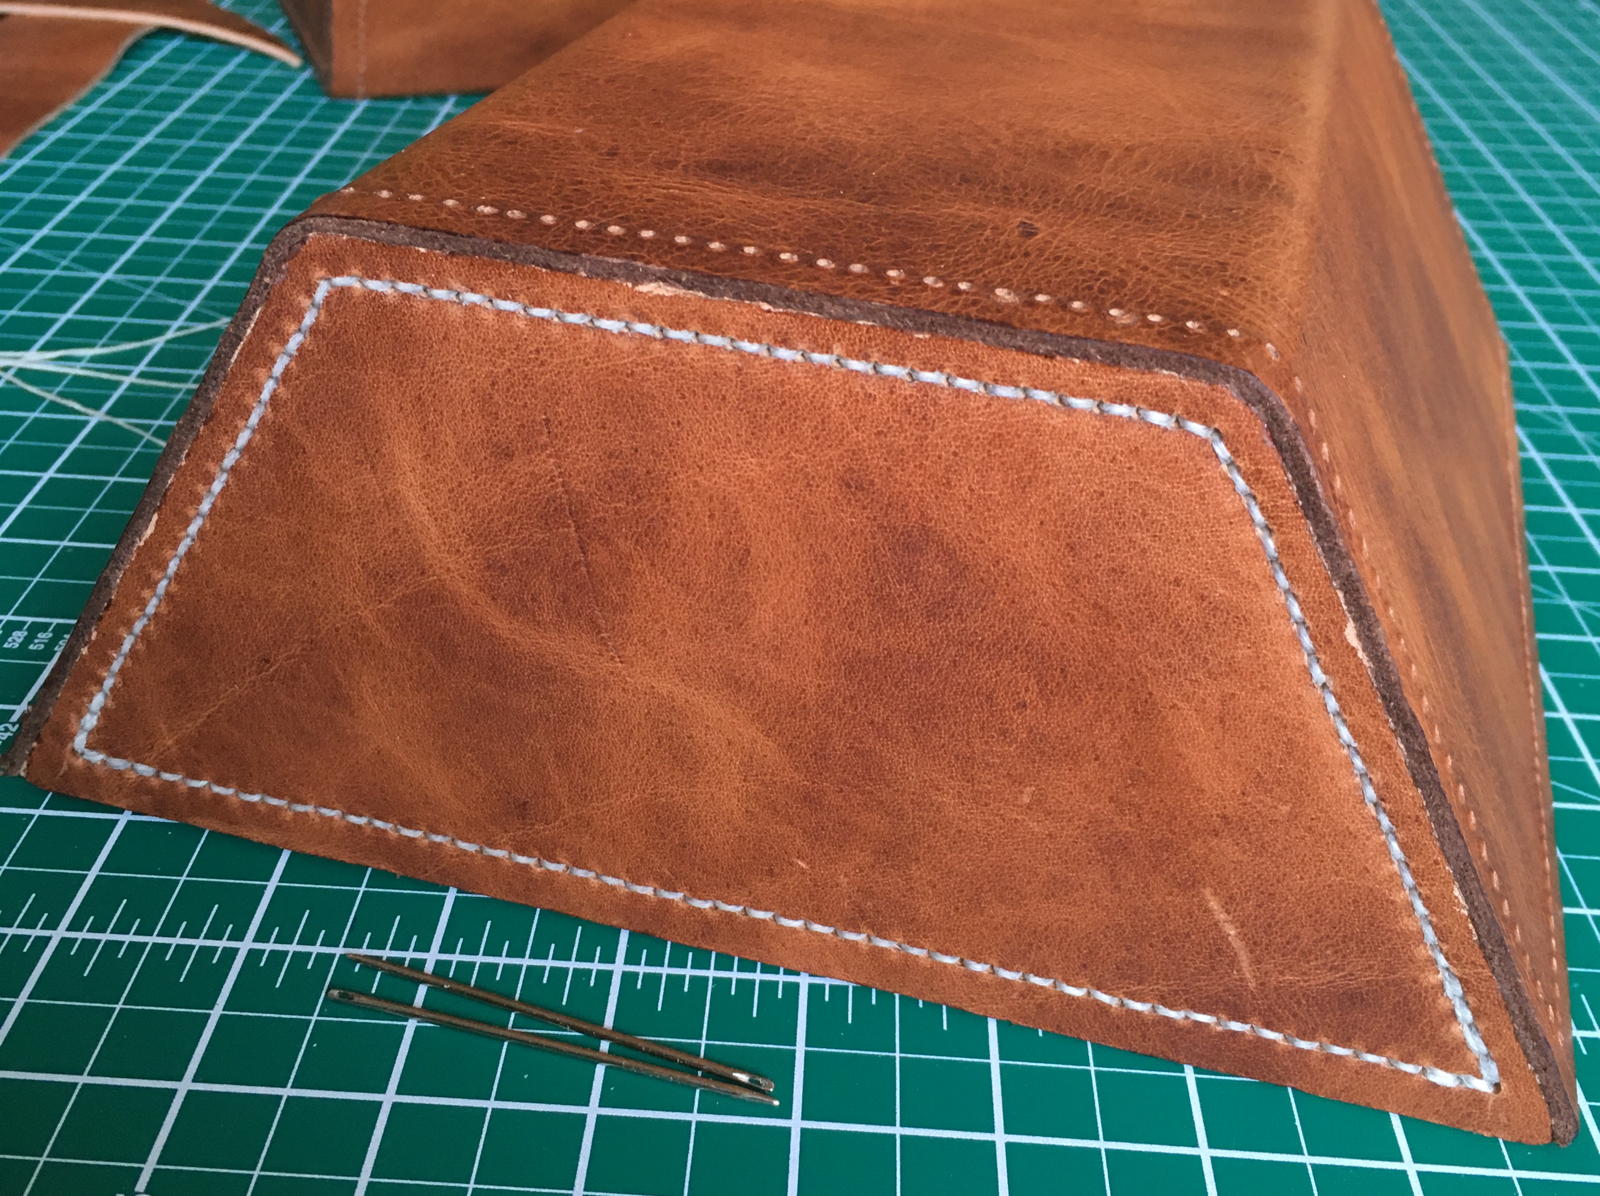
The outside was covered with a fairly thick cow hide leather.
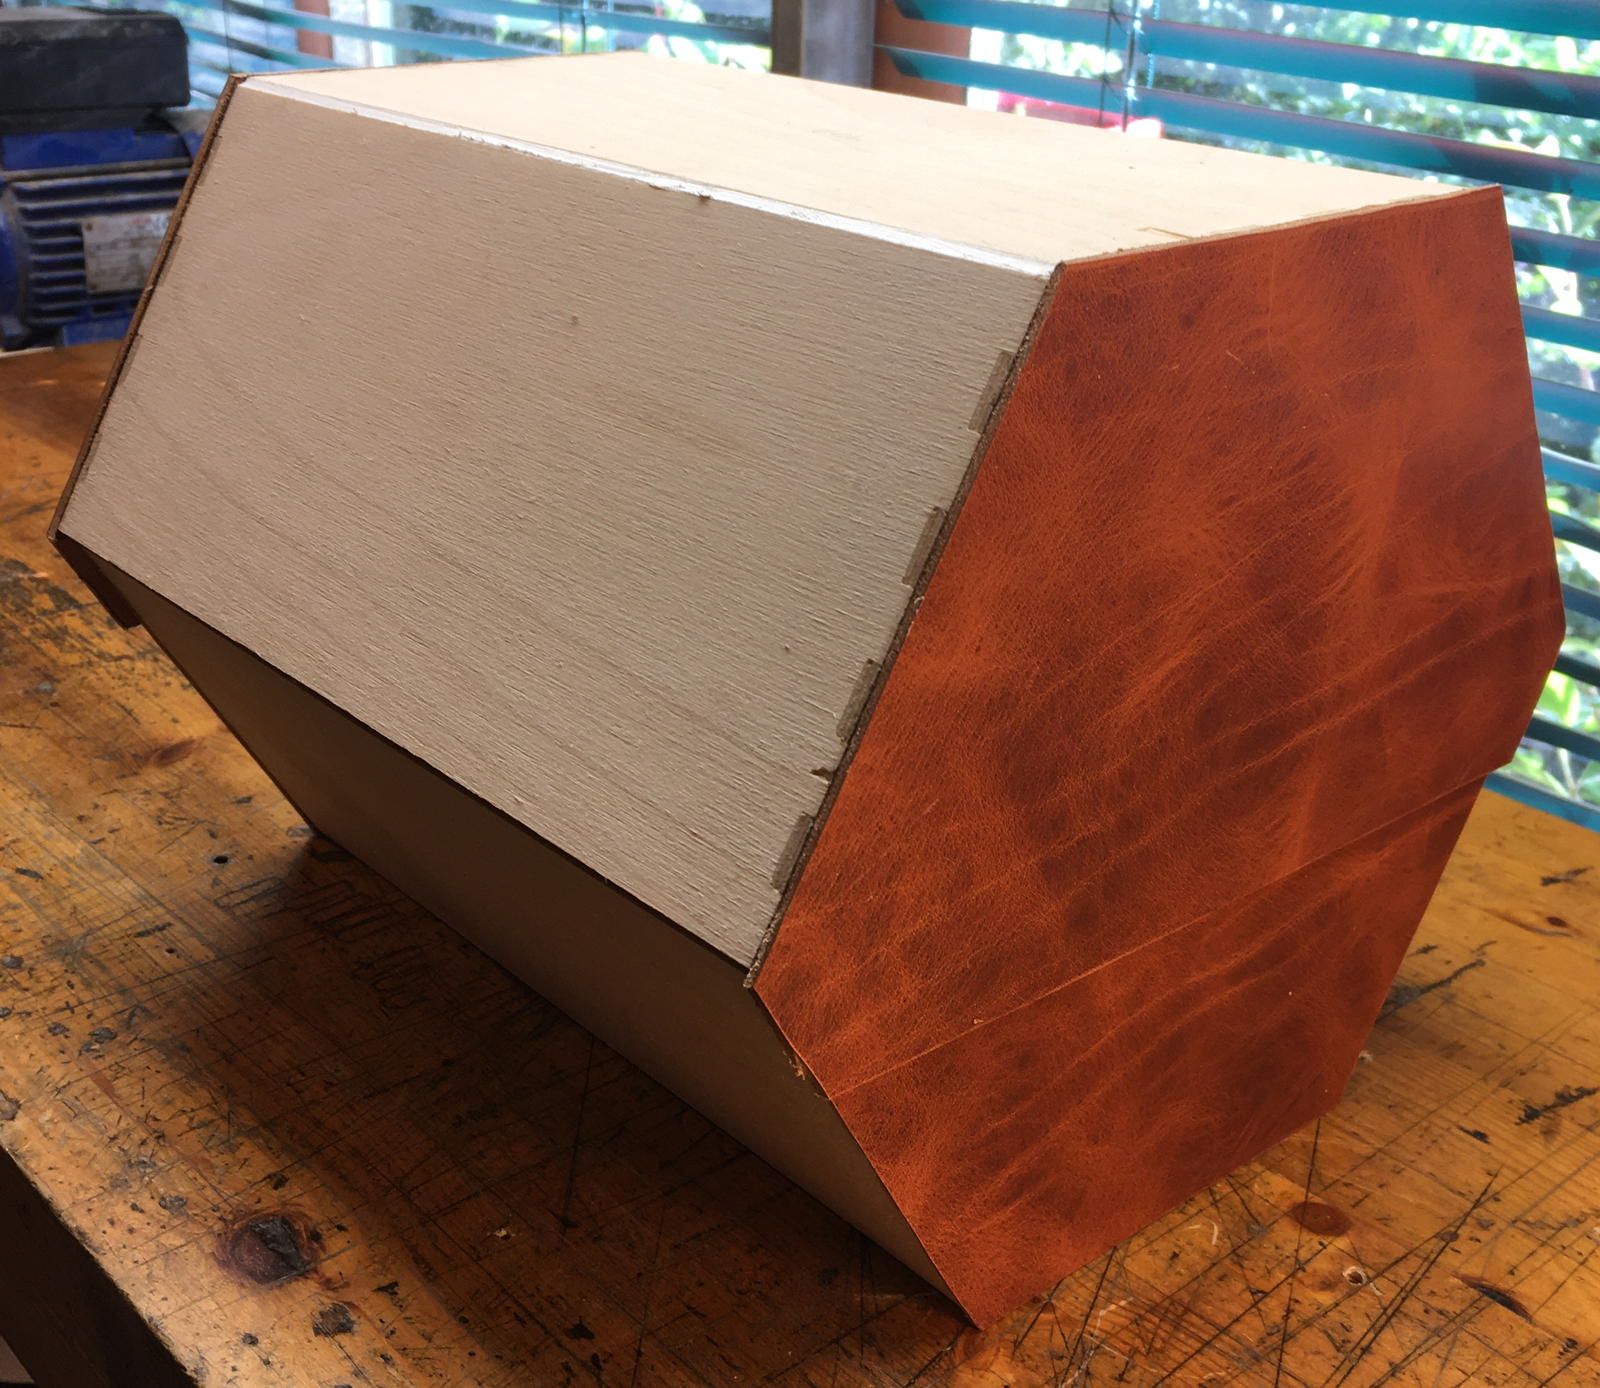
The leather covering on the lid has flaps that extend past the join for increased weather resistance.
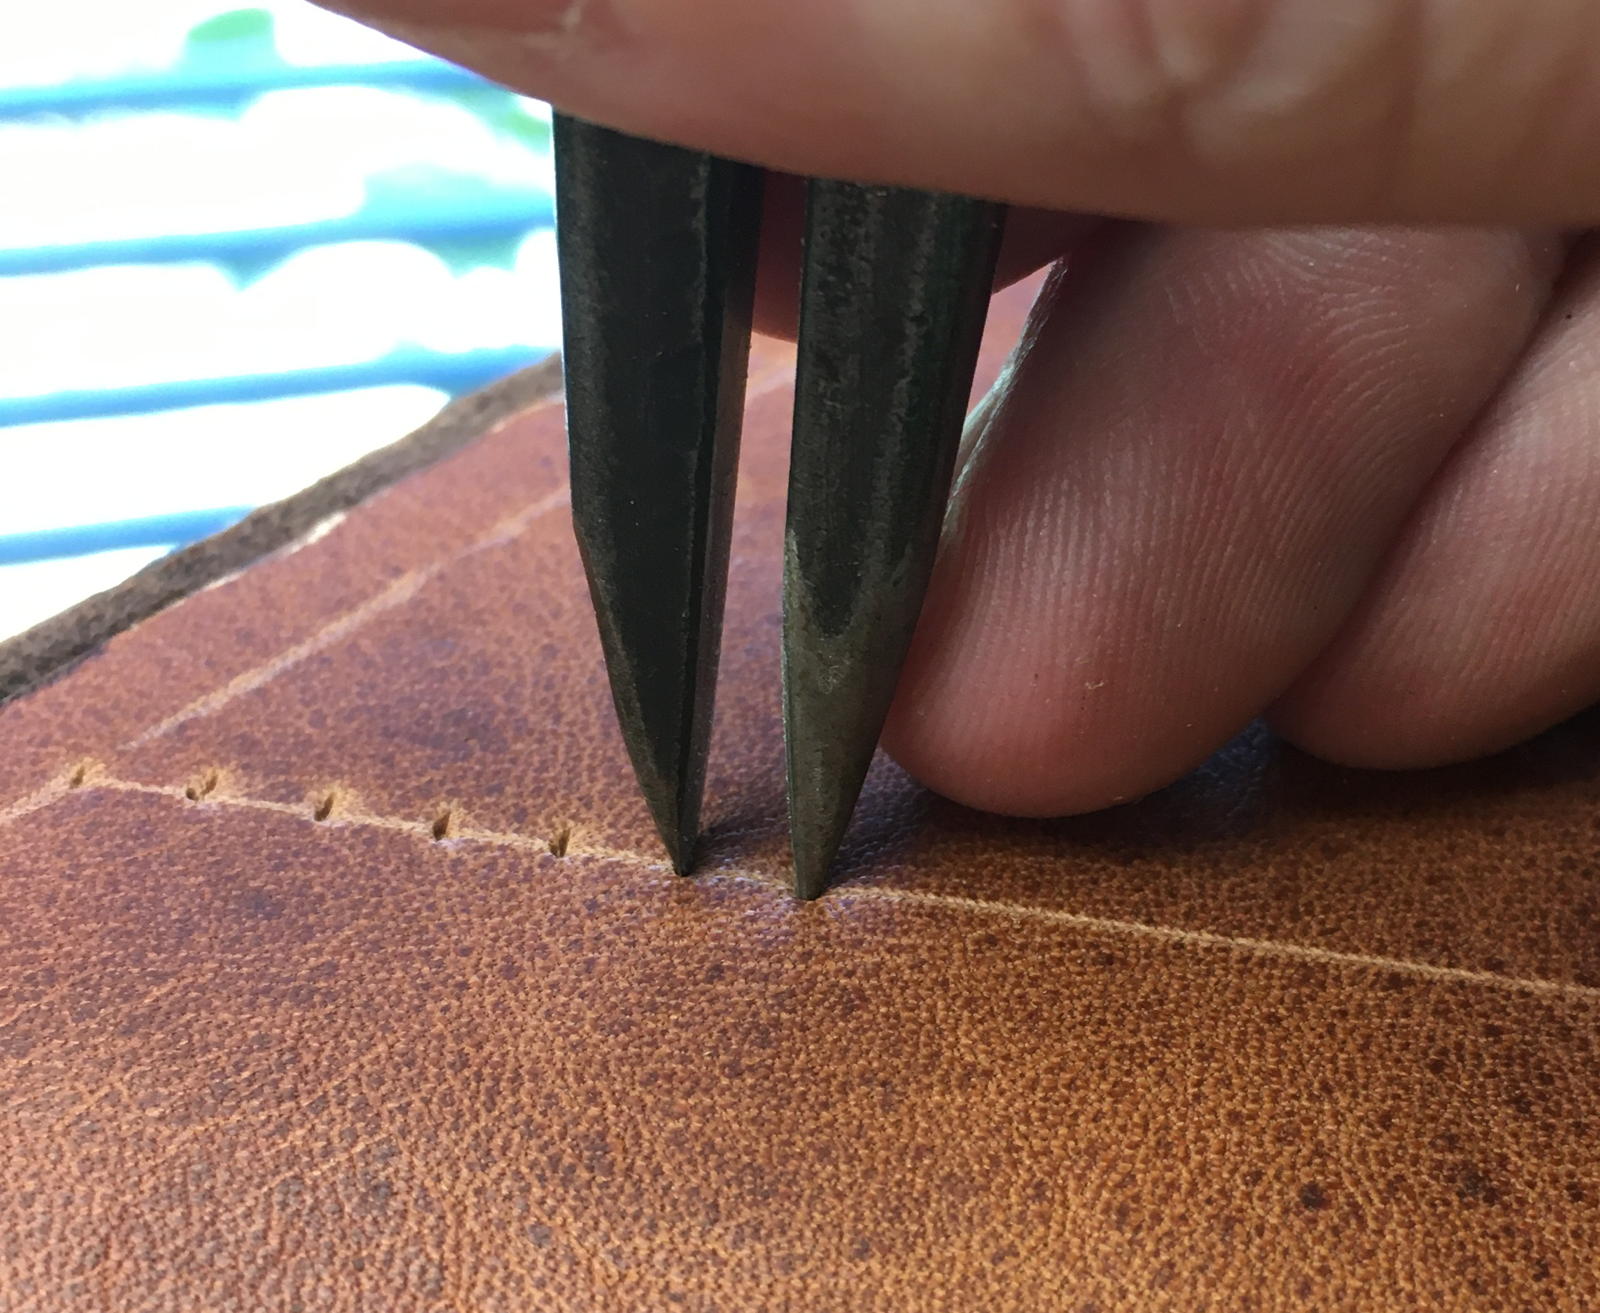
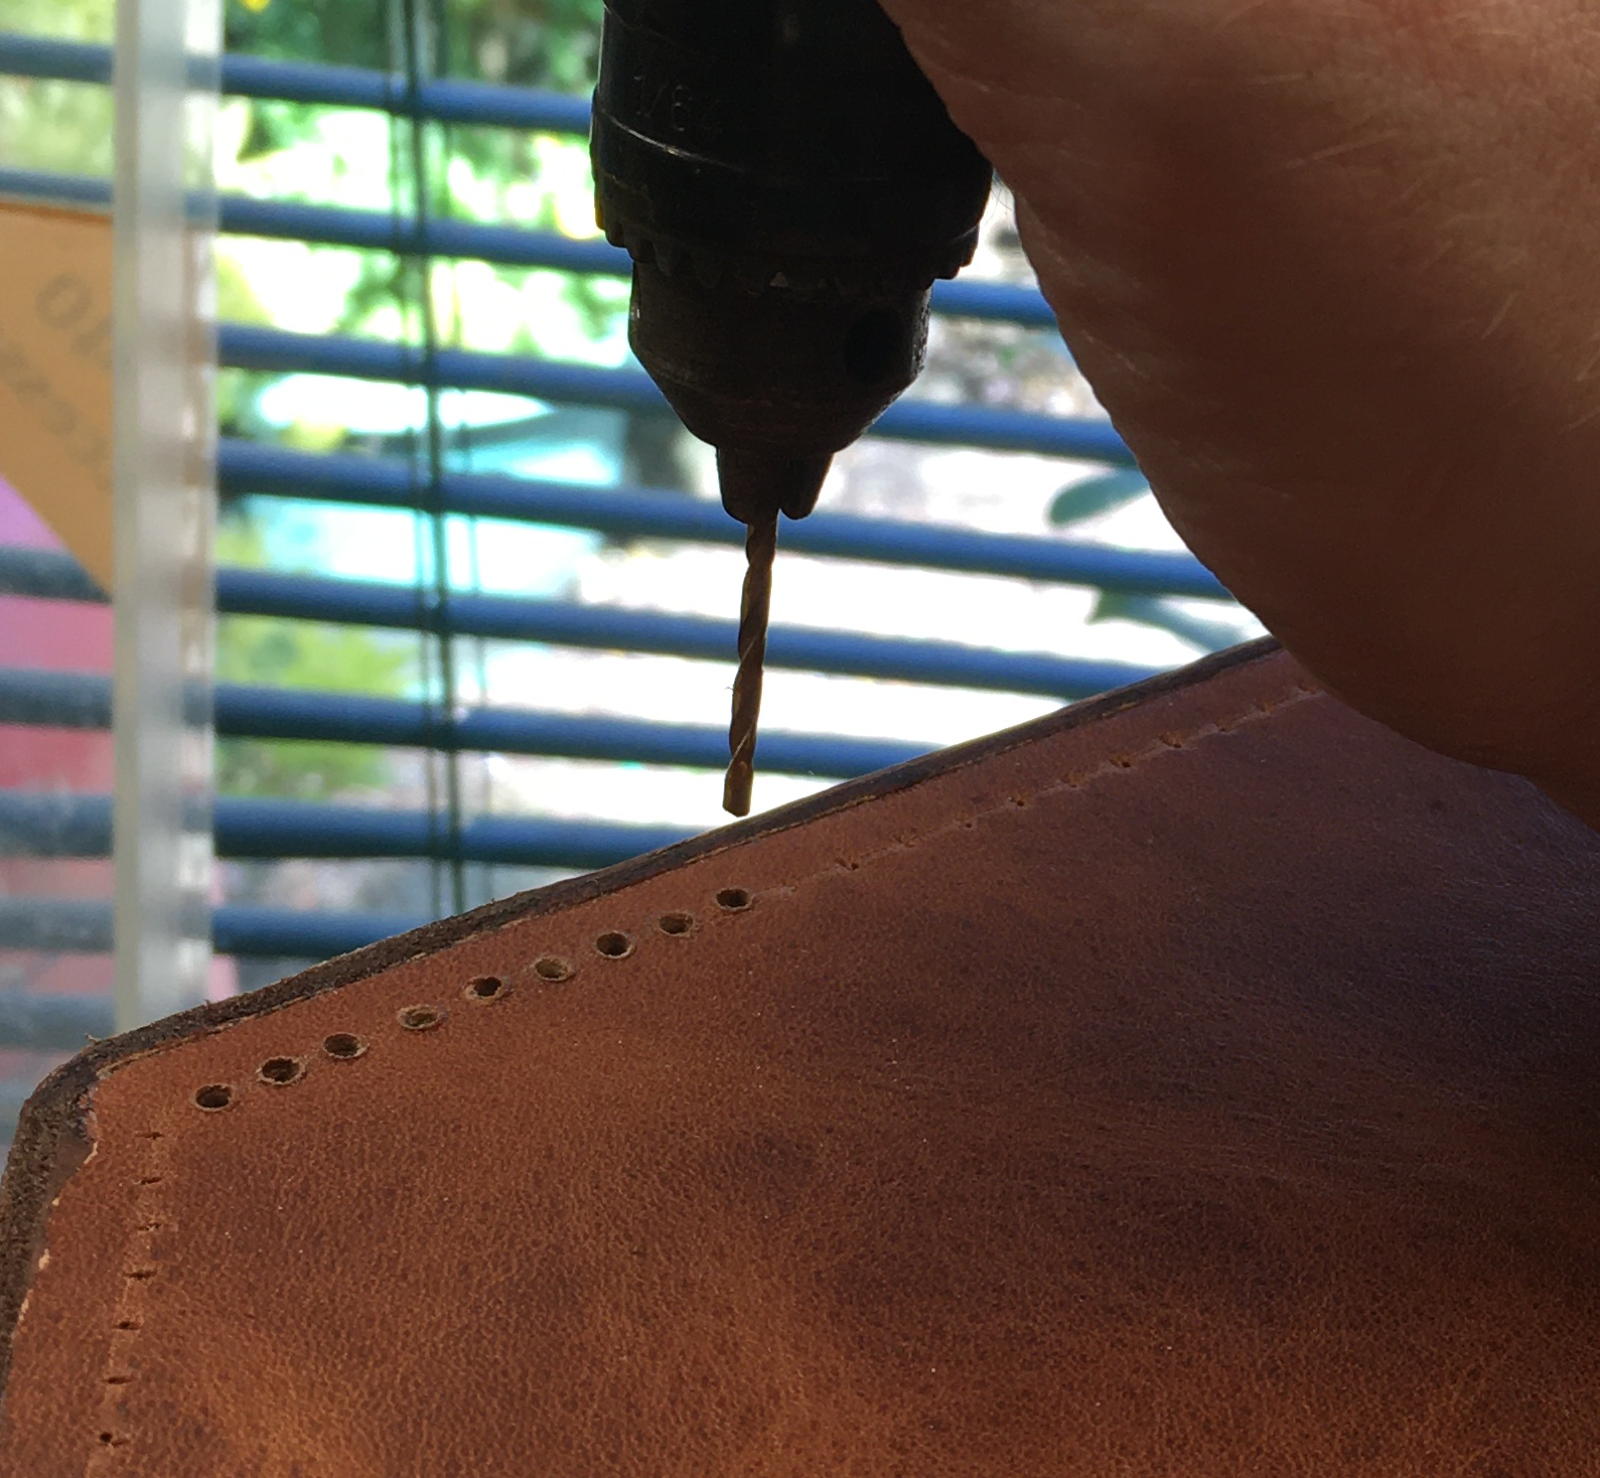
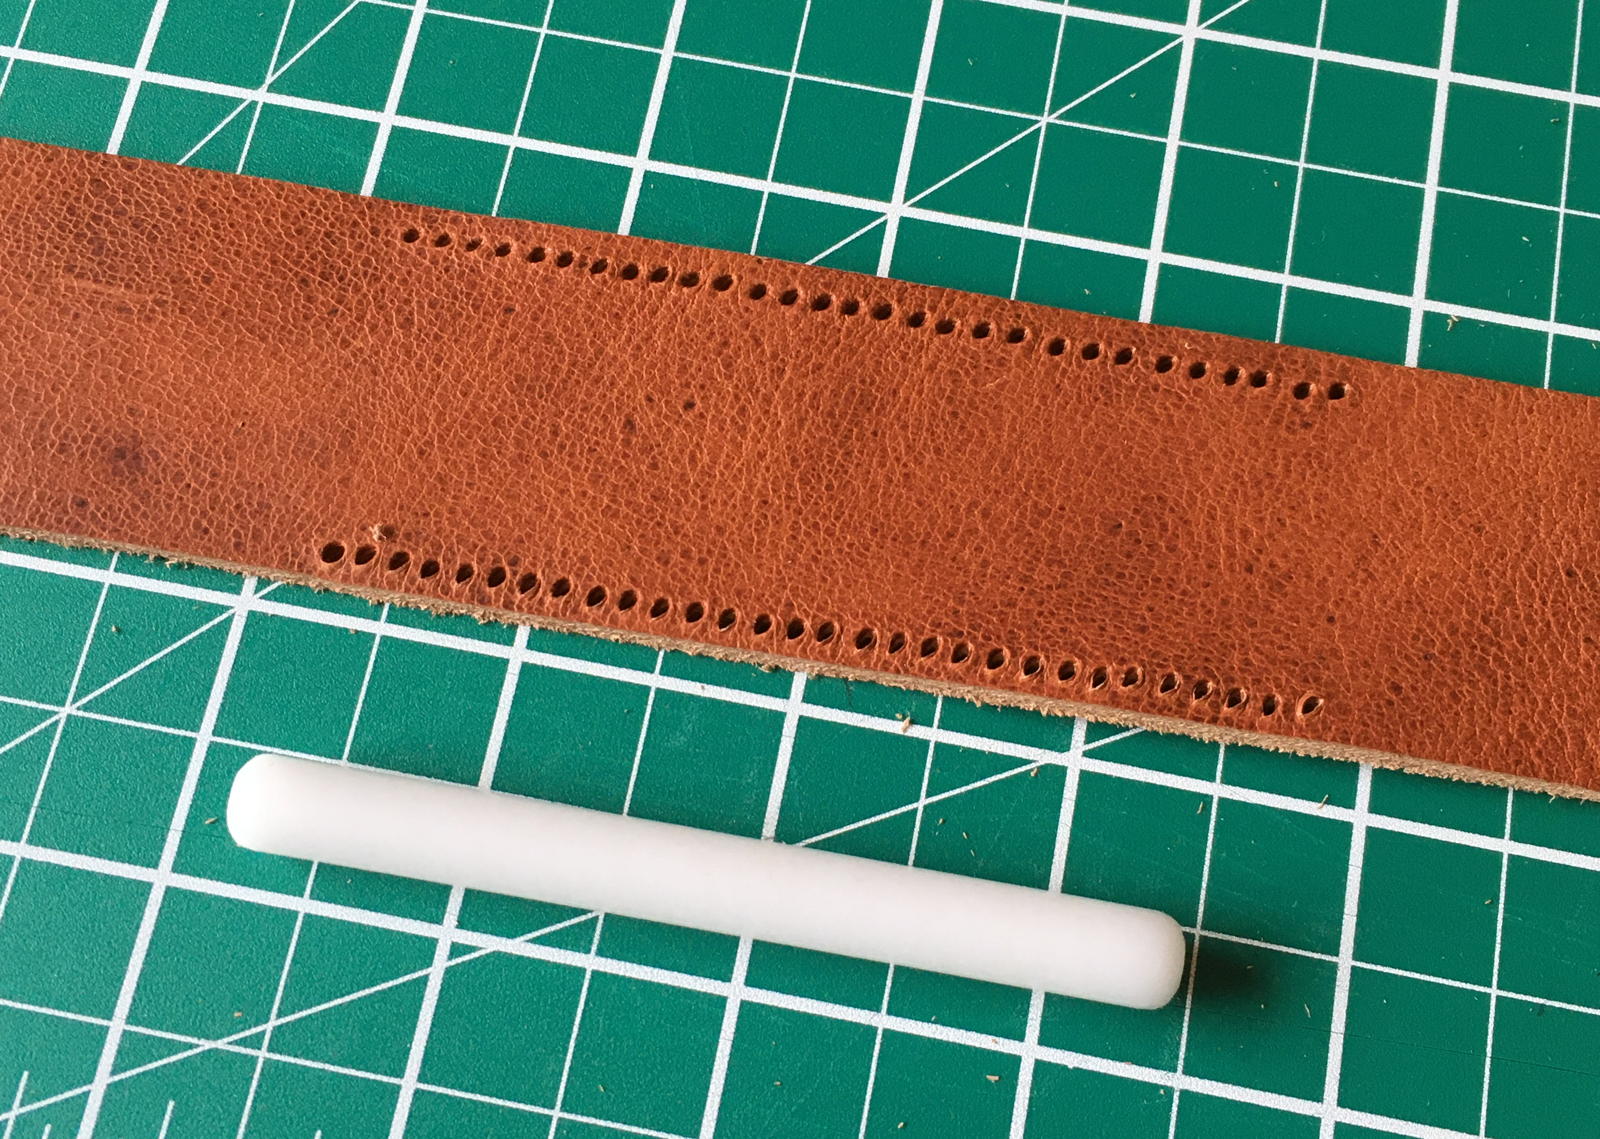
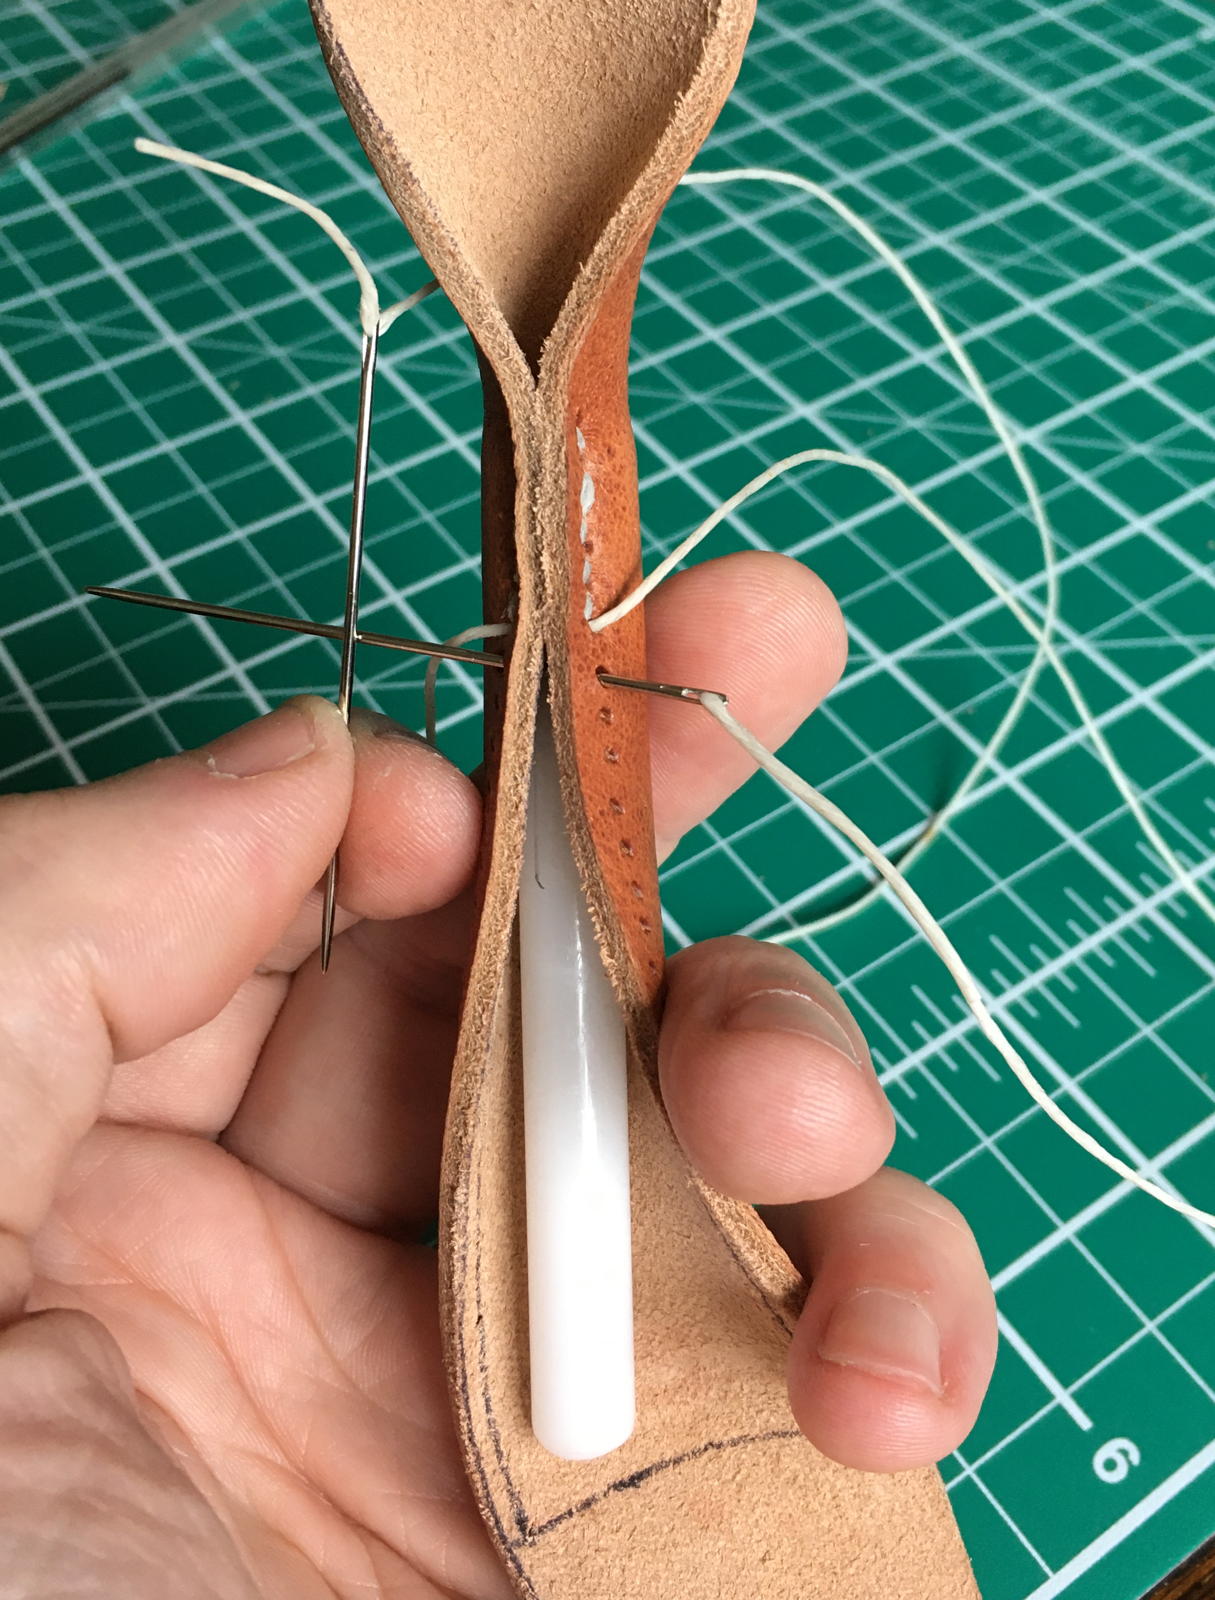
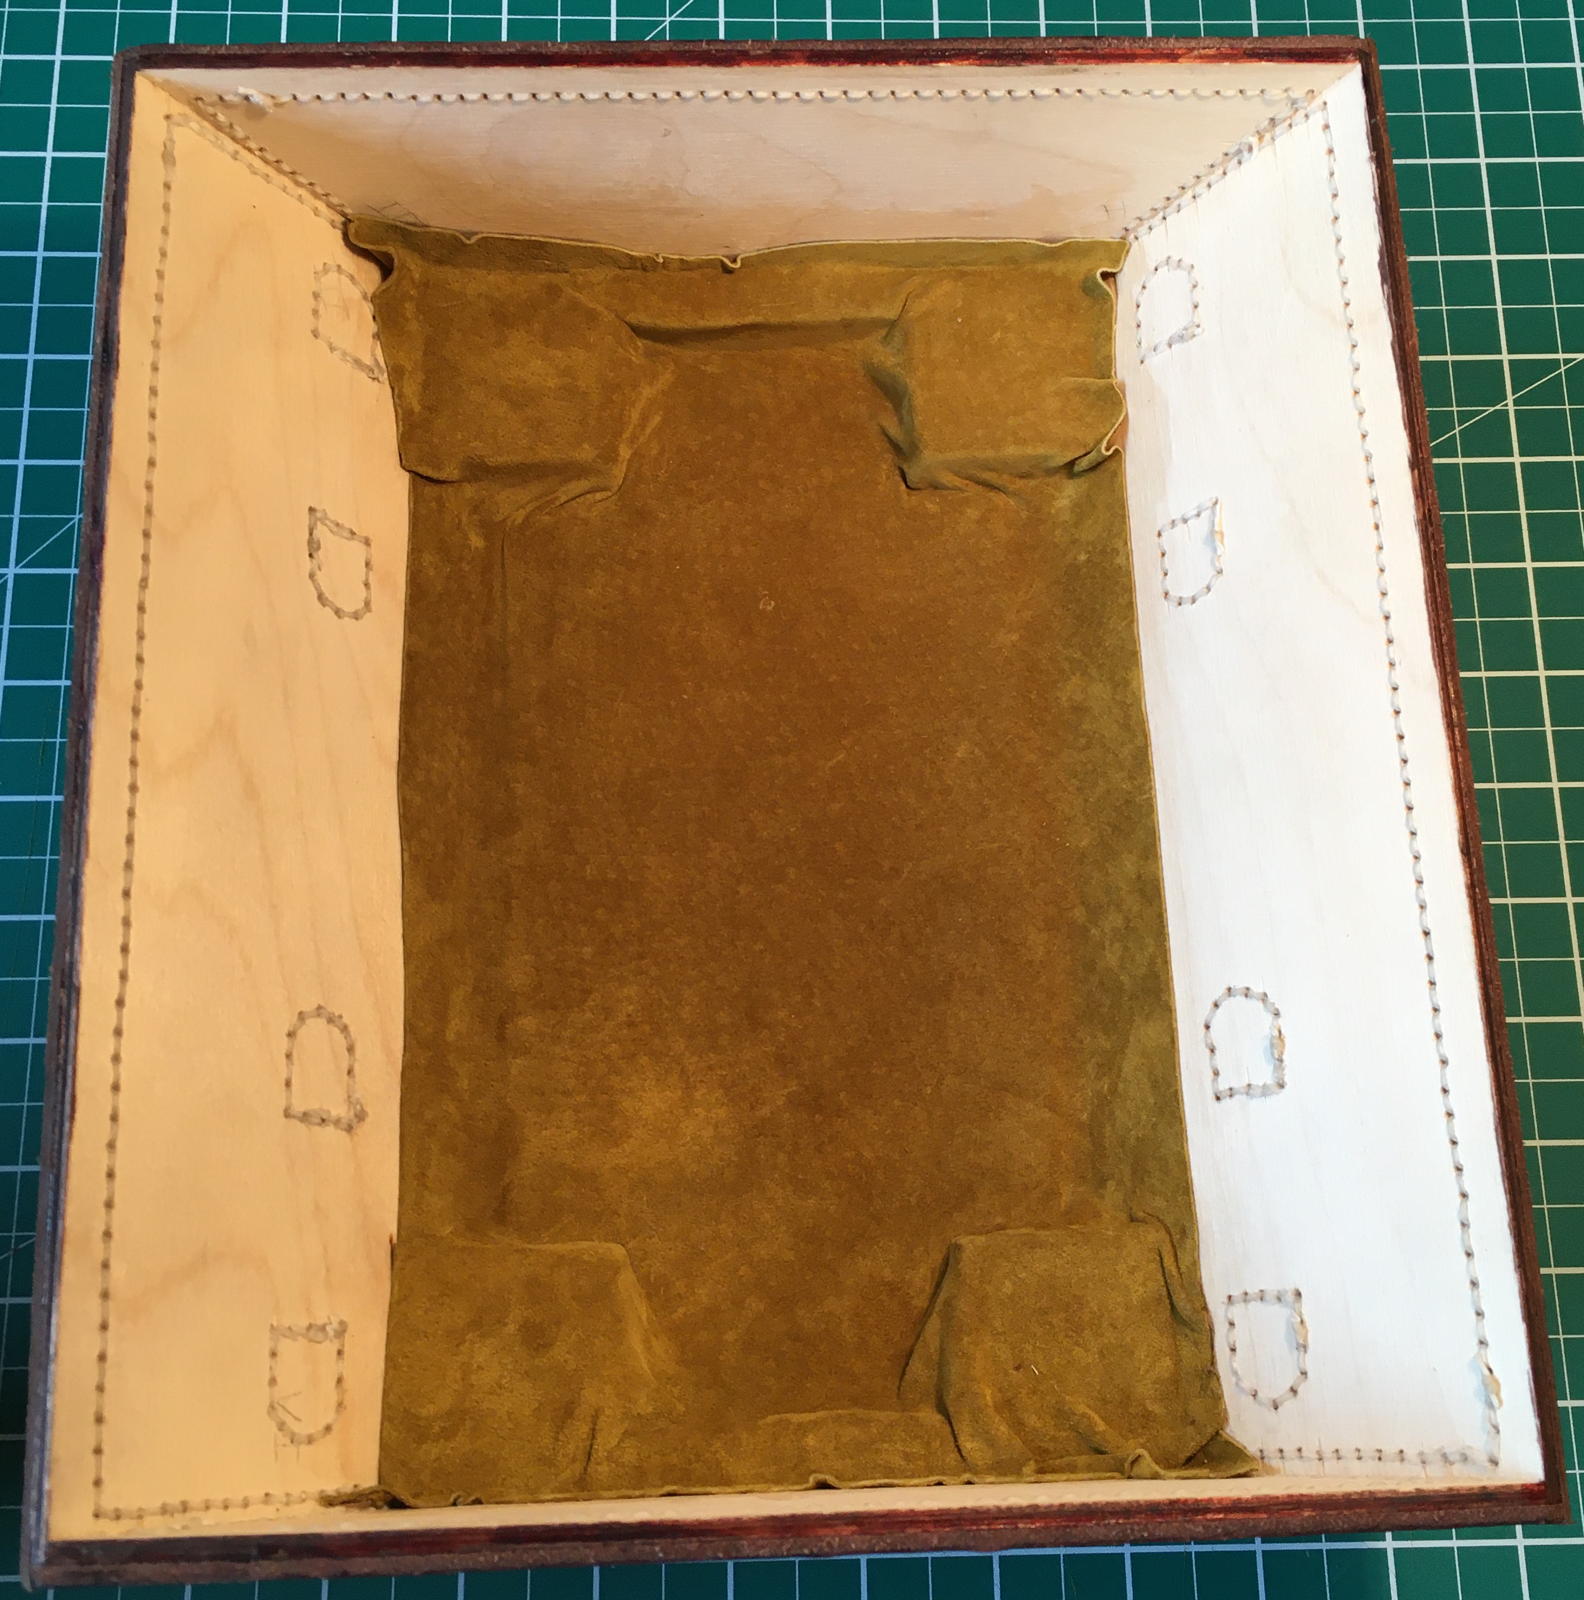
As well as gluing the leather to the plywood, I also saddle-stitched around all the edges by hand. This is quite a time consuming process as you have to mark out and drill every hole, then use pliers to pull two needles through in opposite directions.
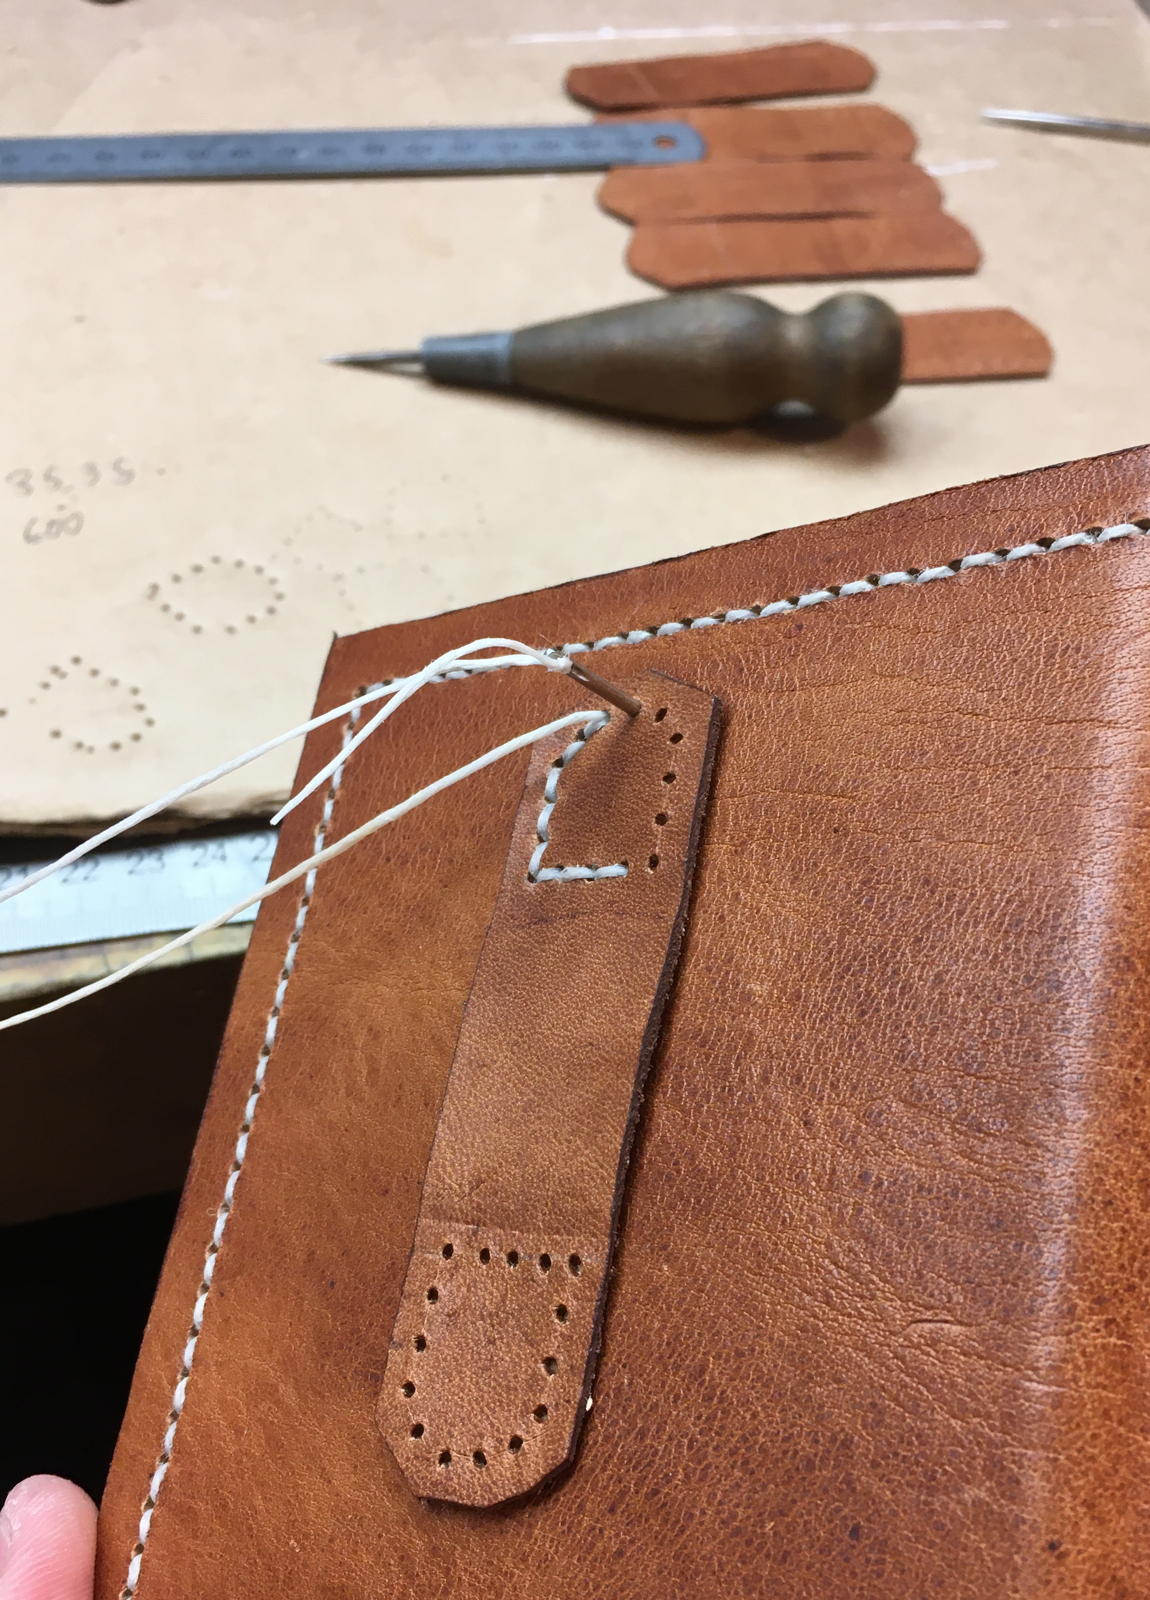
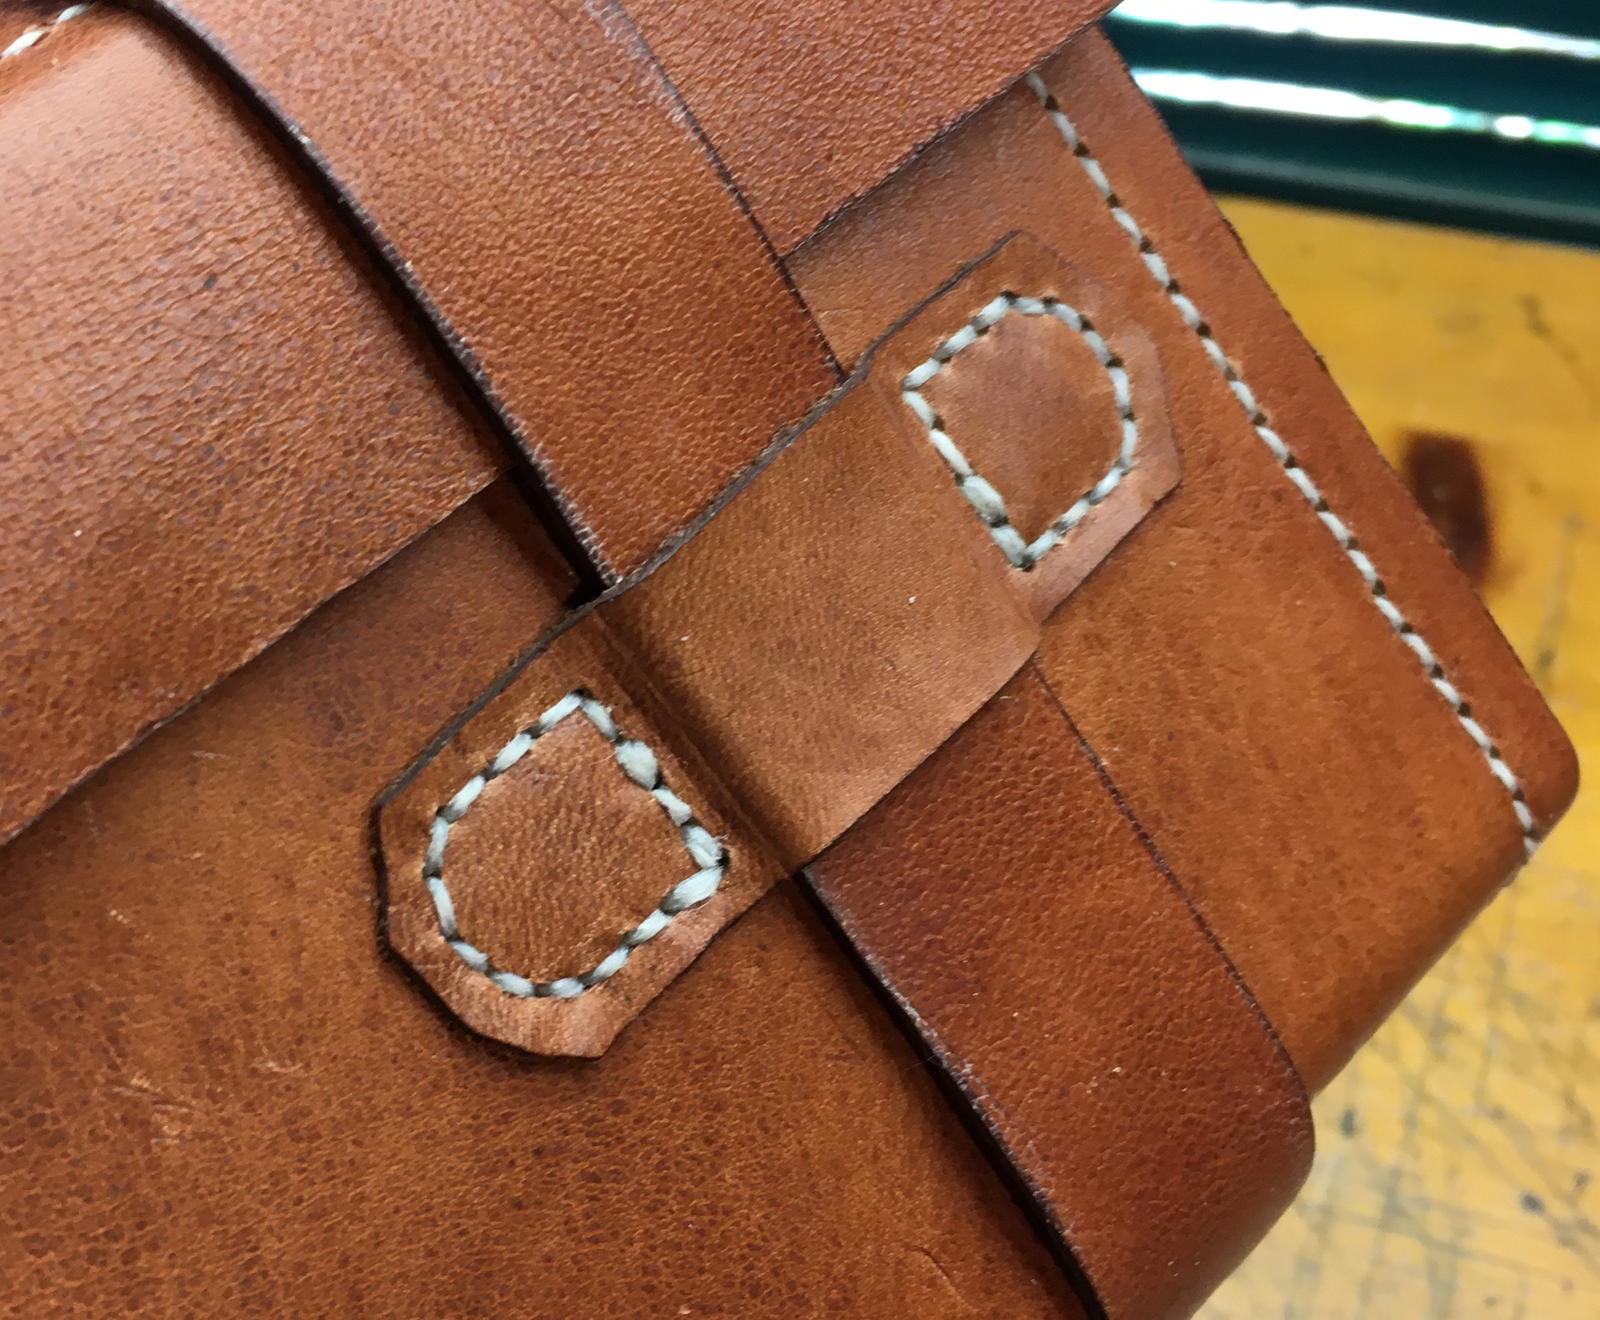
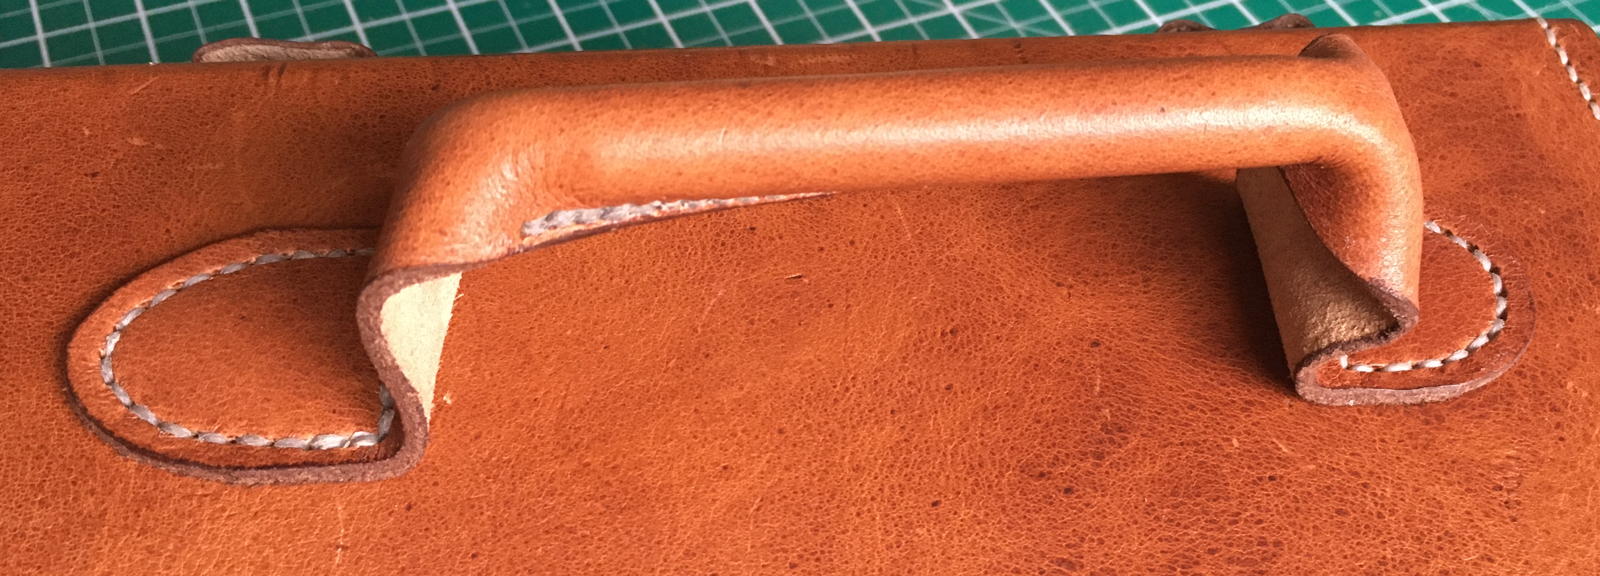
The straps, strap guides and handle were all made from matching leather.
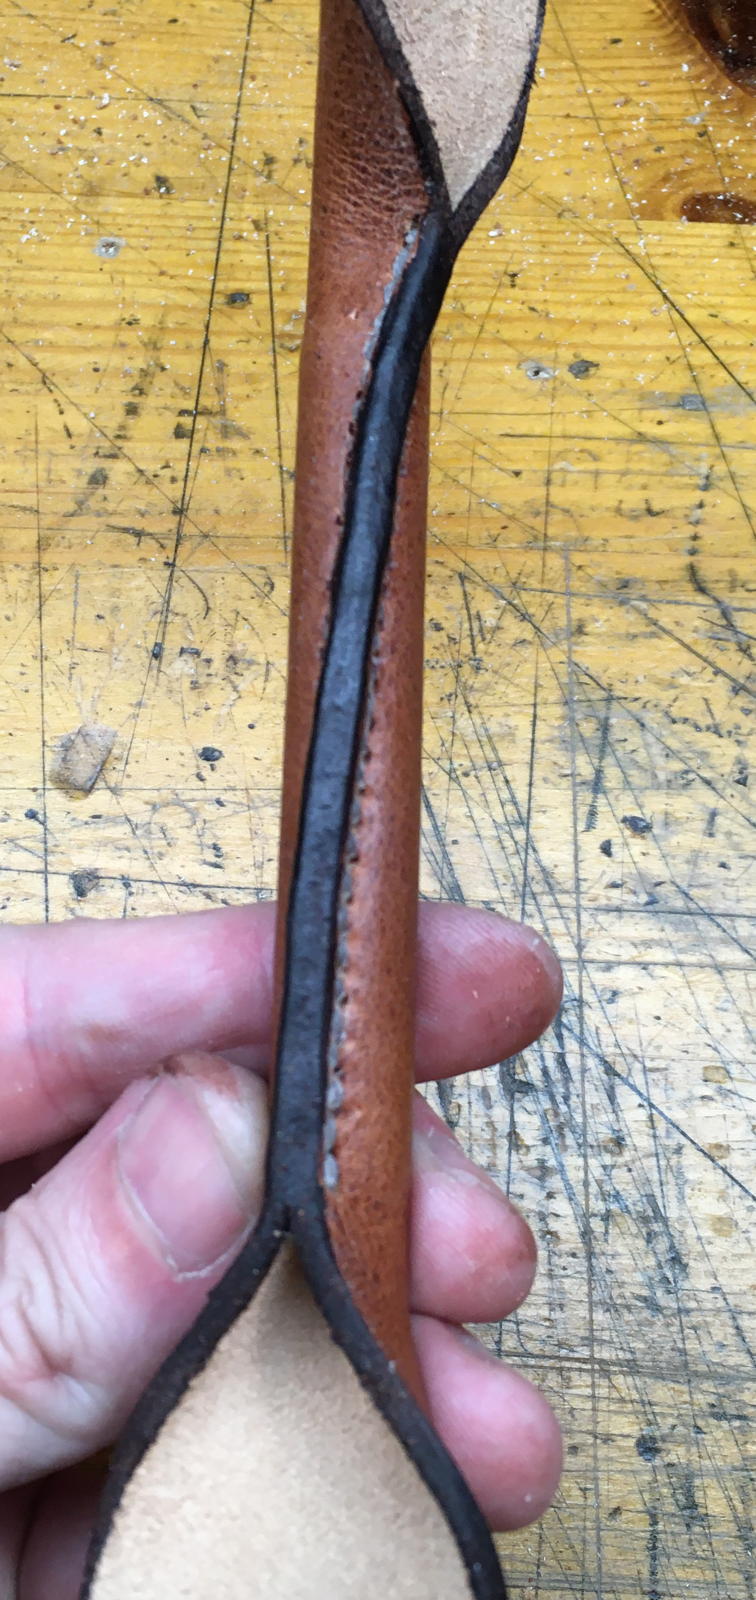
I stitched an acetal rod into the middle of the handle strap to stiffen it and make it more comfortable to hold.
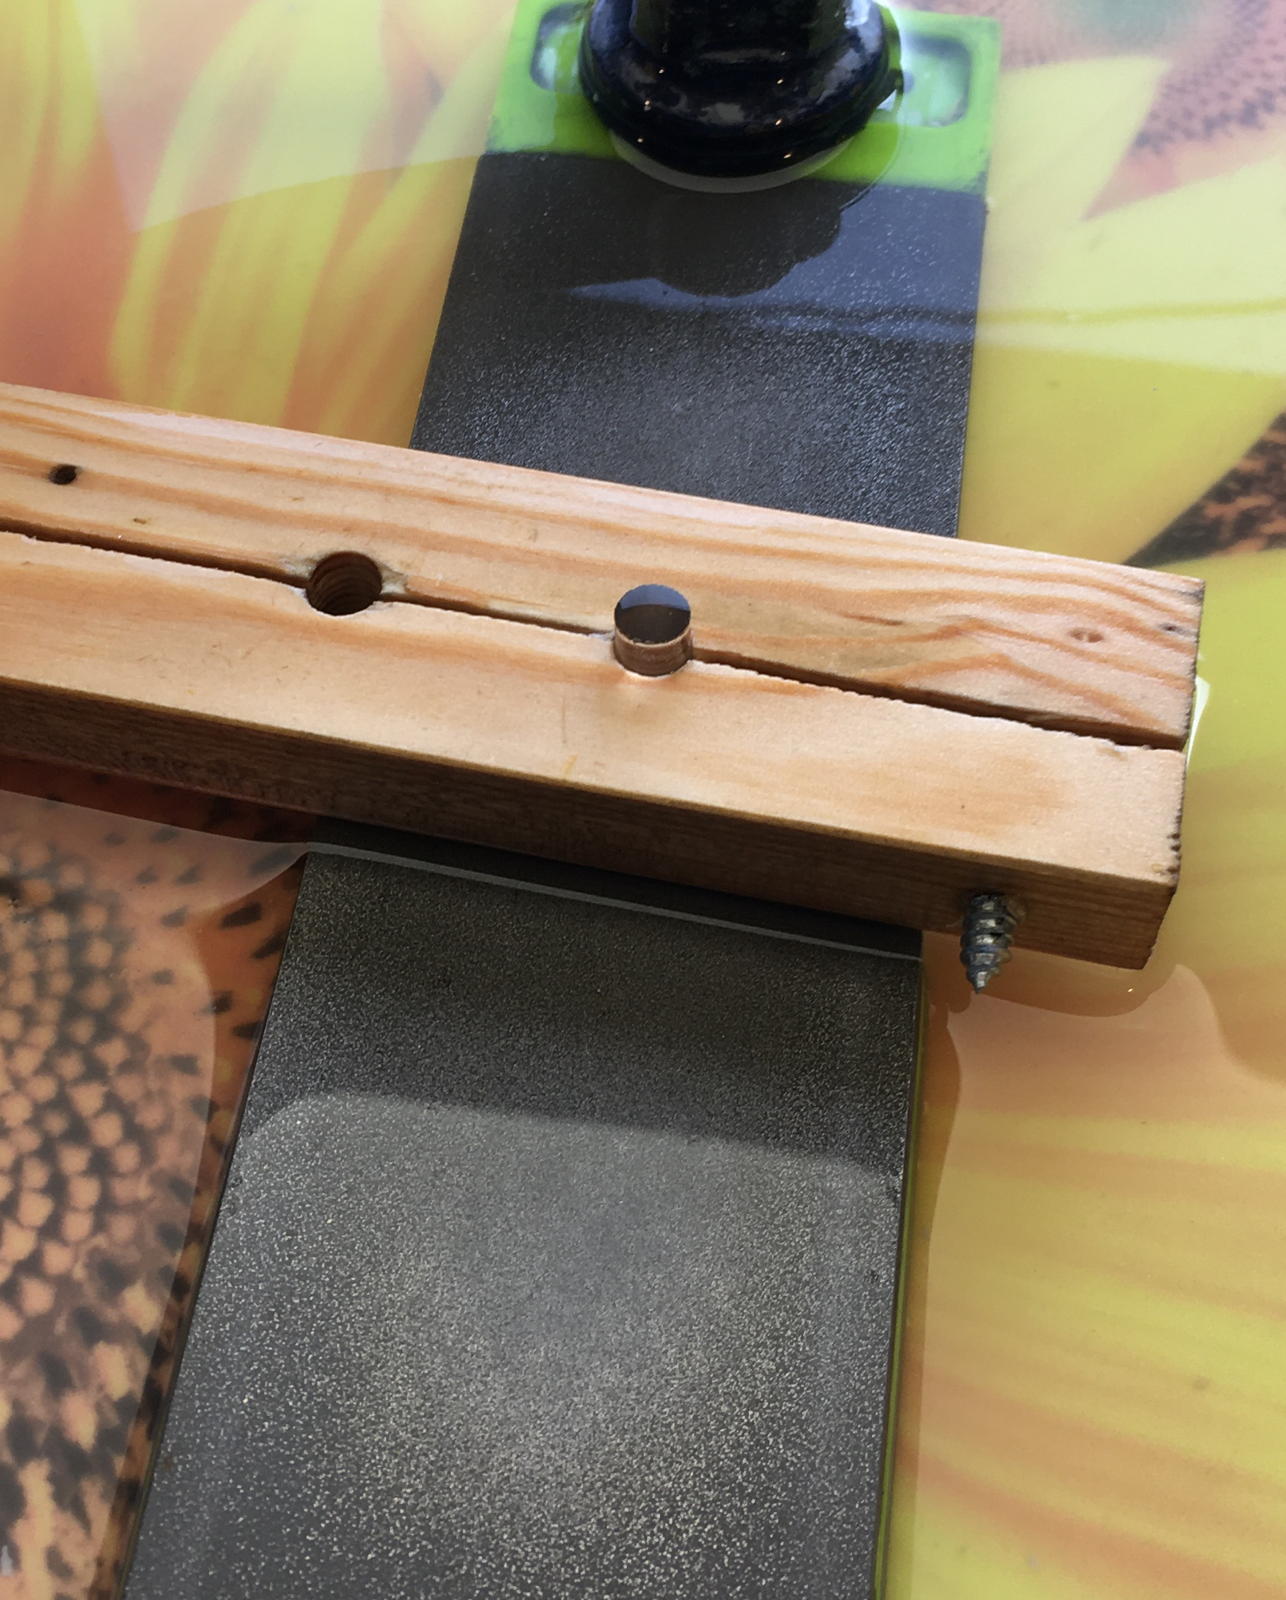
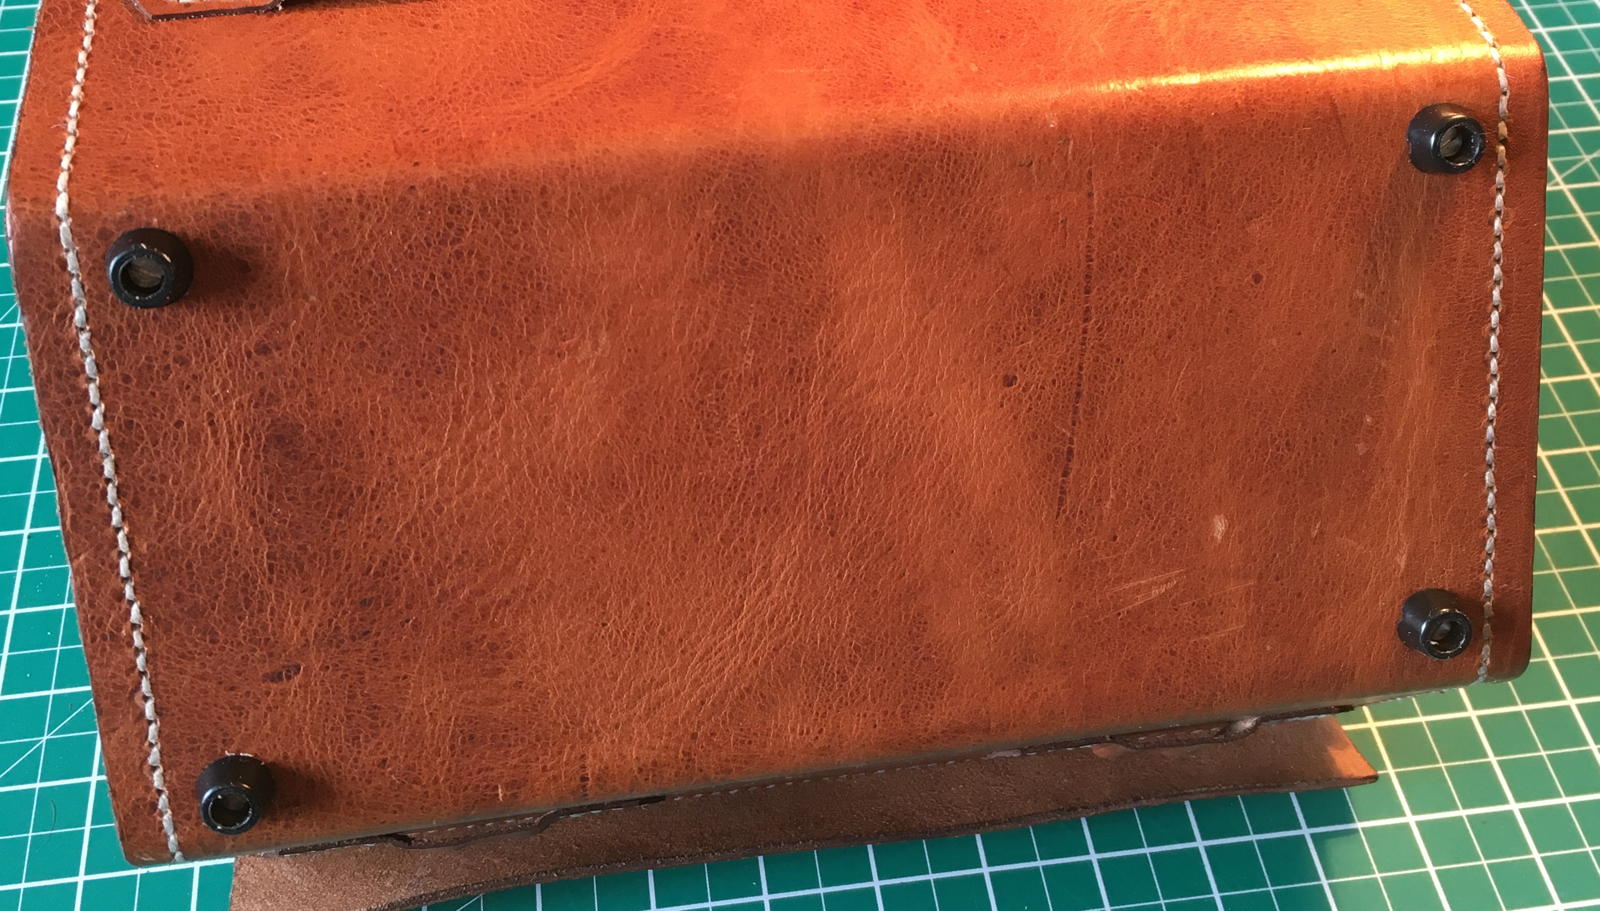
I glued wooden blocks into the corners of the bottom half, both to hold the bellows compressed and to provide something solid for the feet to screw into.
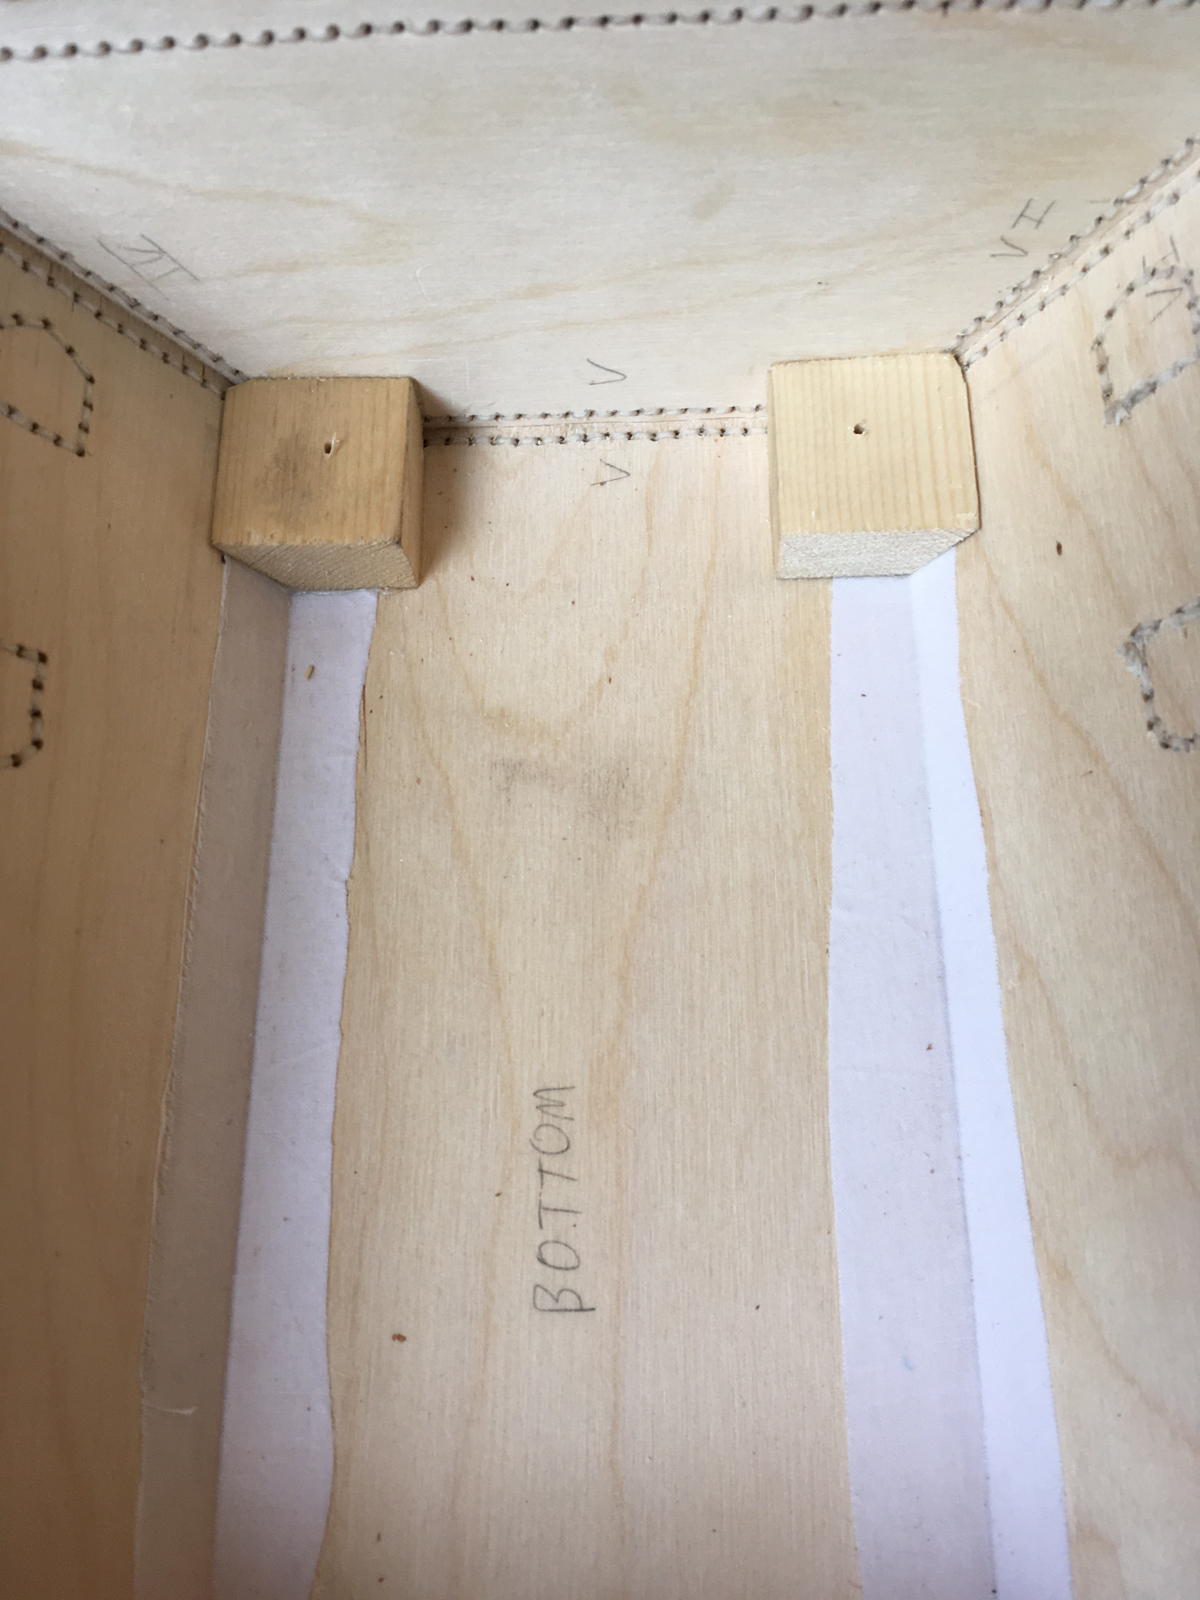
The rubber feet should keep the bottom of the case dry if it is set down on a wet surface, as well as protecting the leather from dents and scratches.
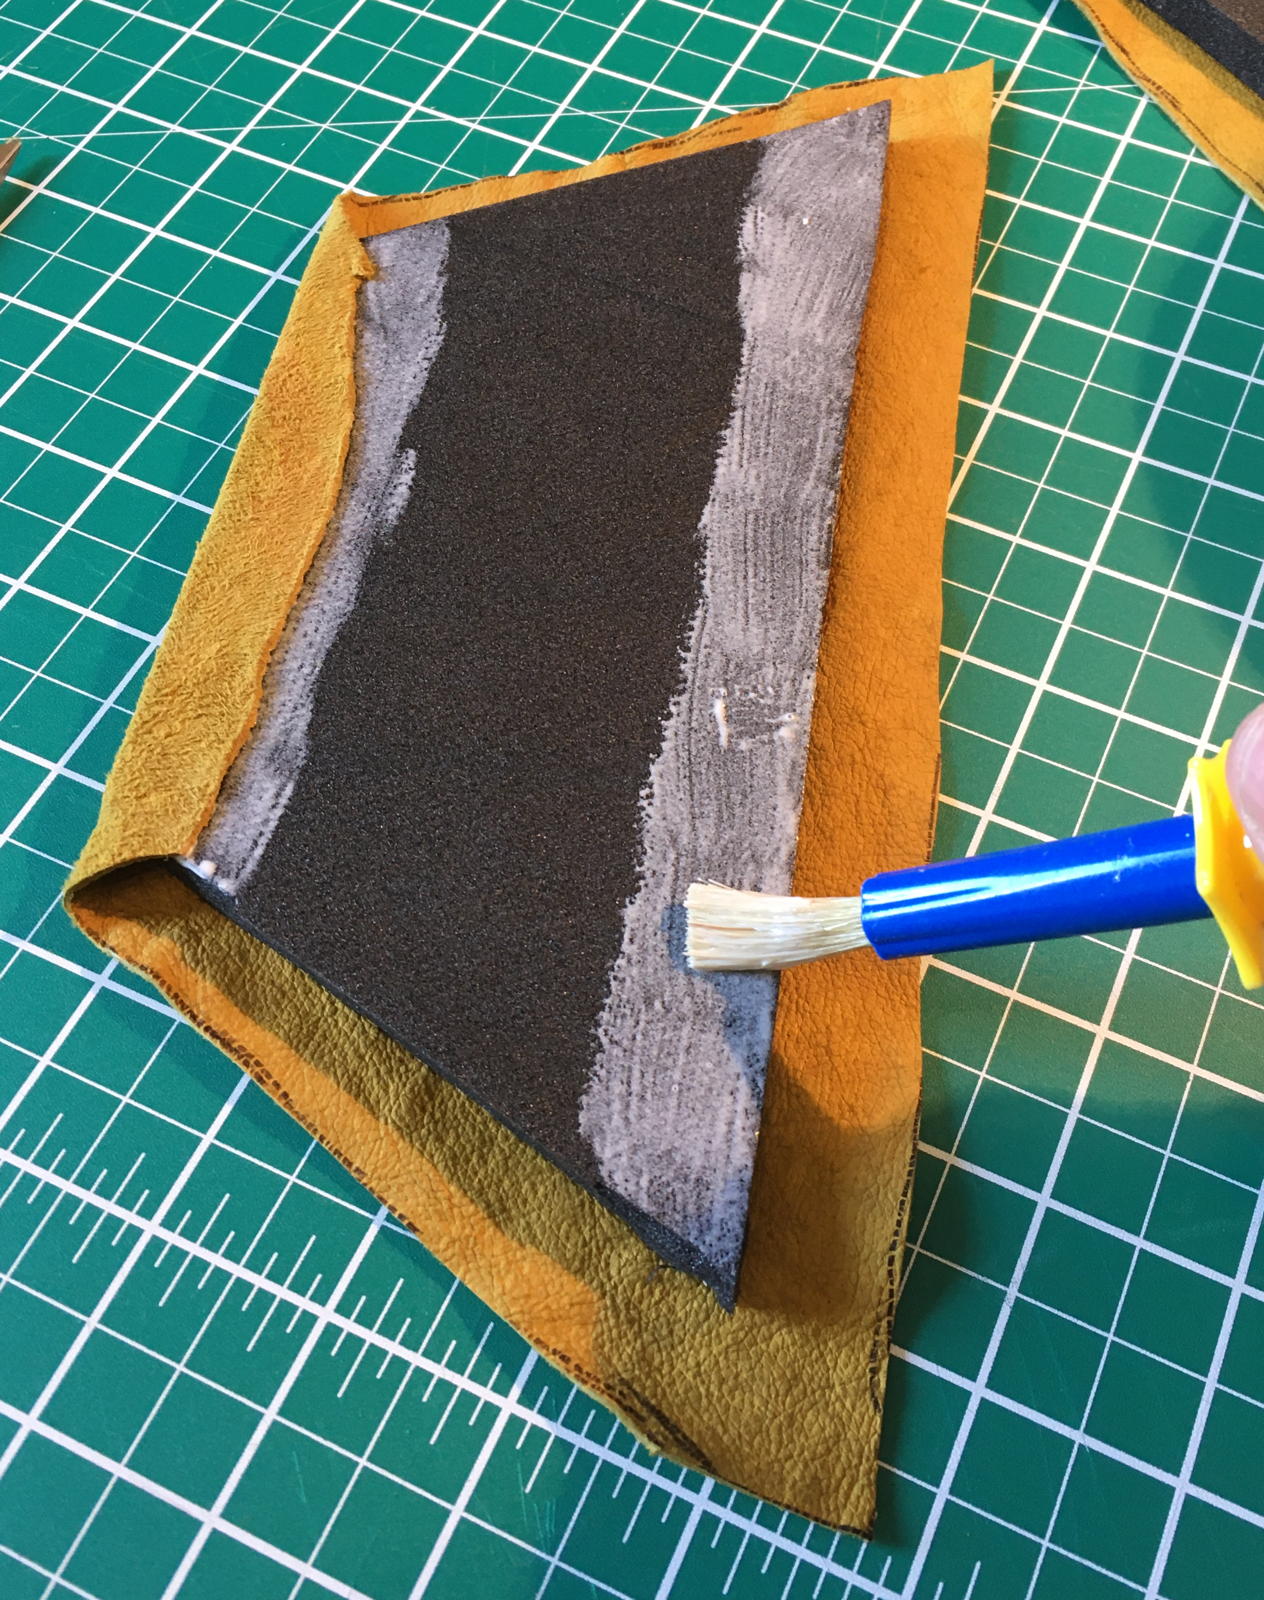
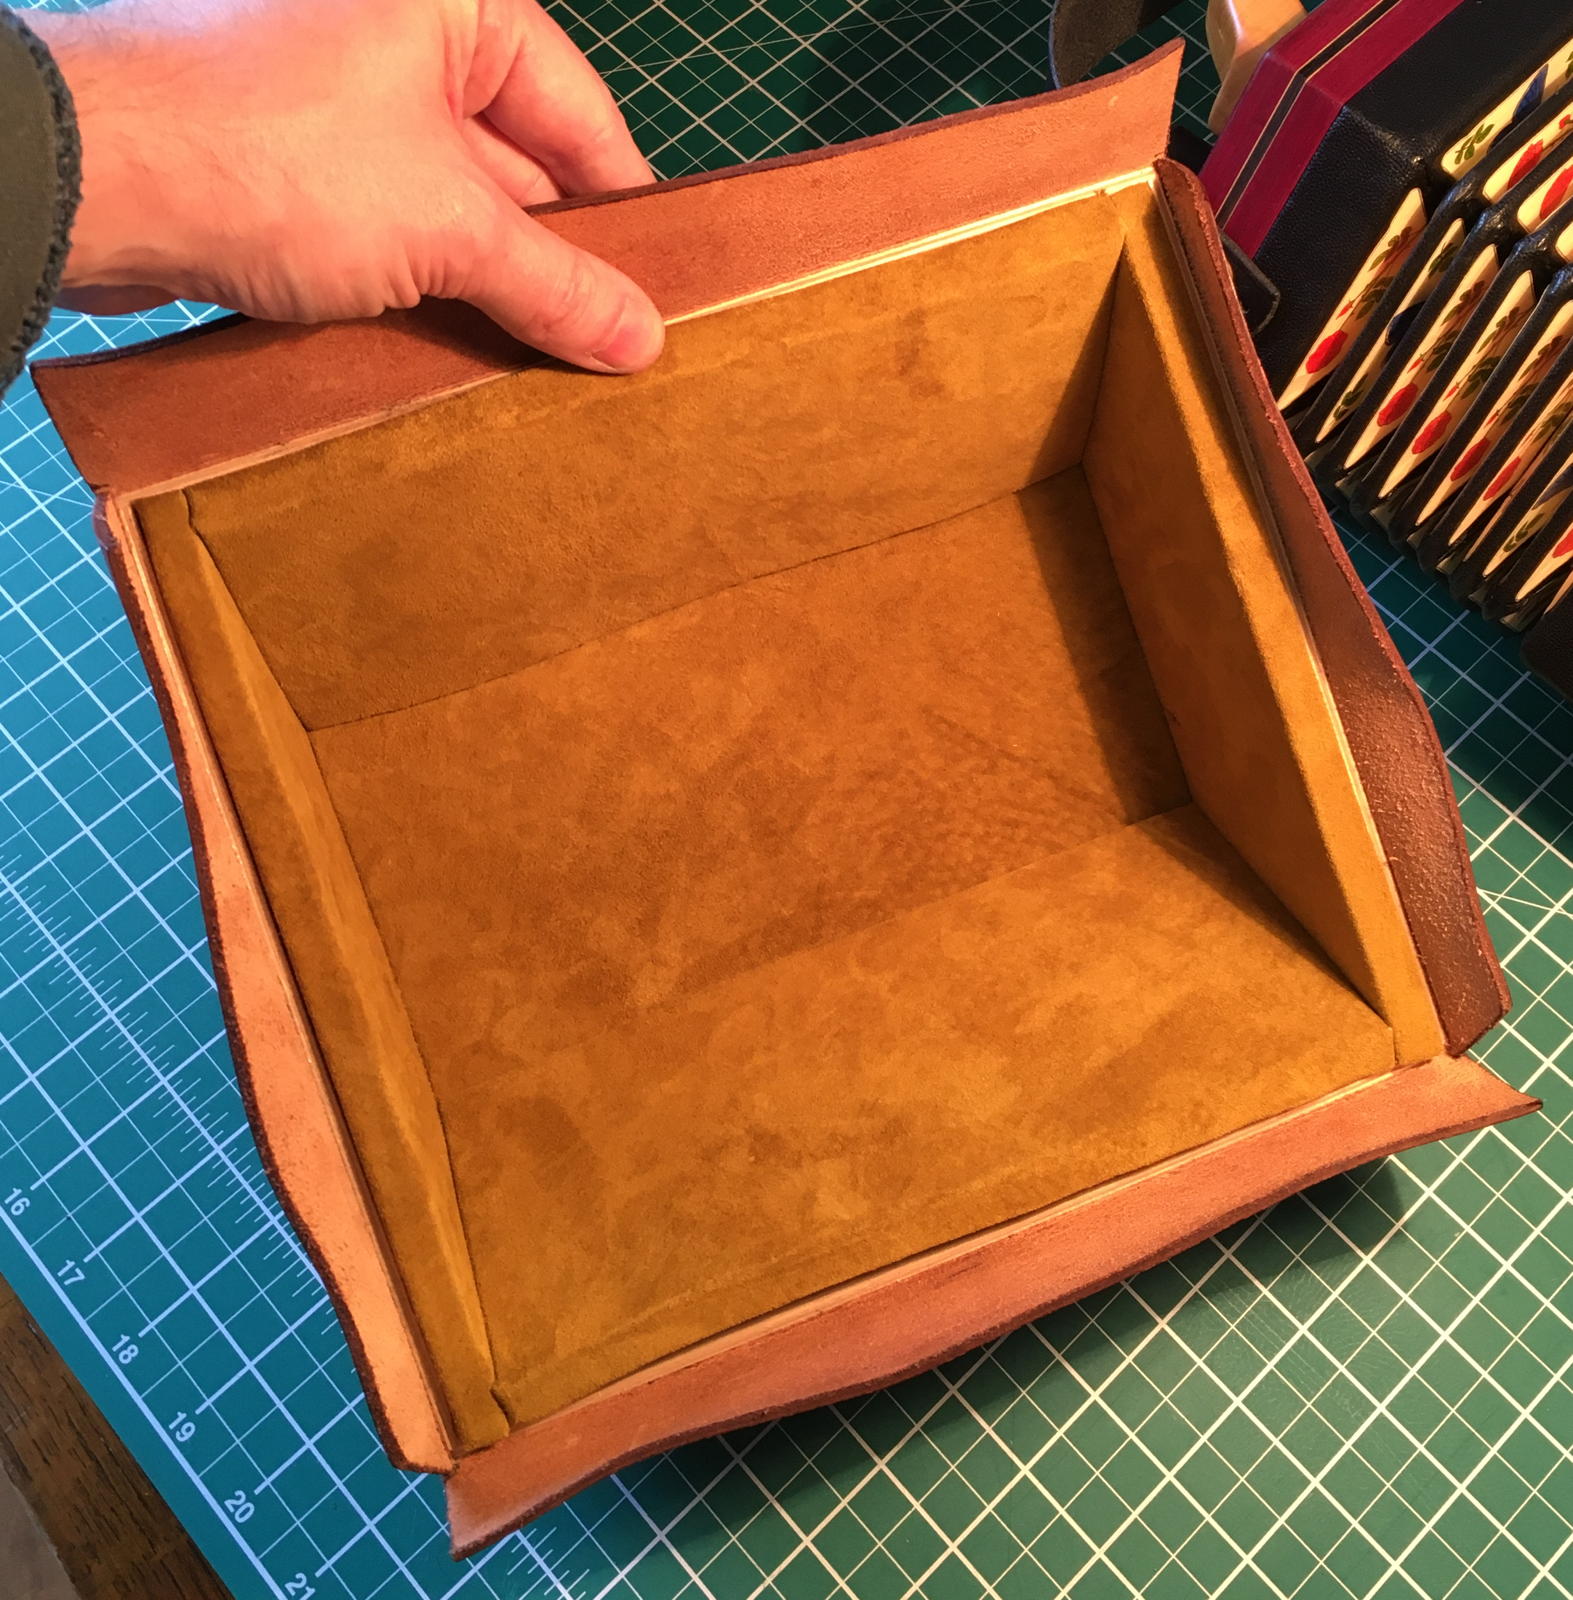
The inside is padded with a special high density closed cell foam that is designed for this sort of application.
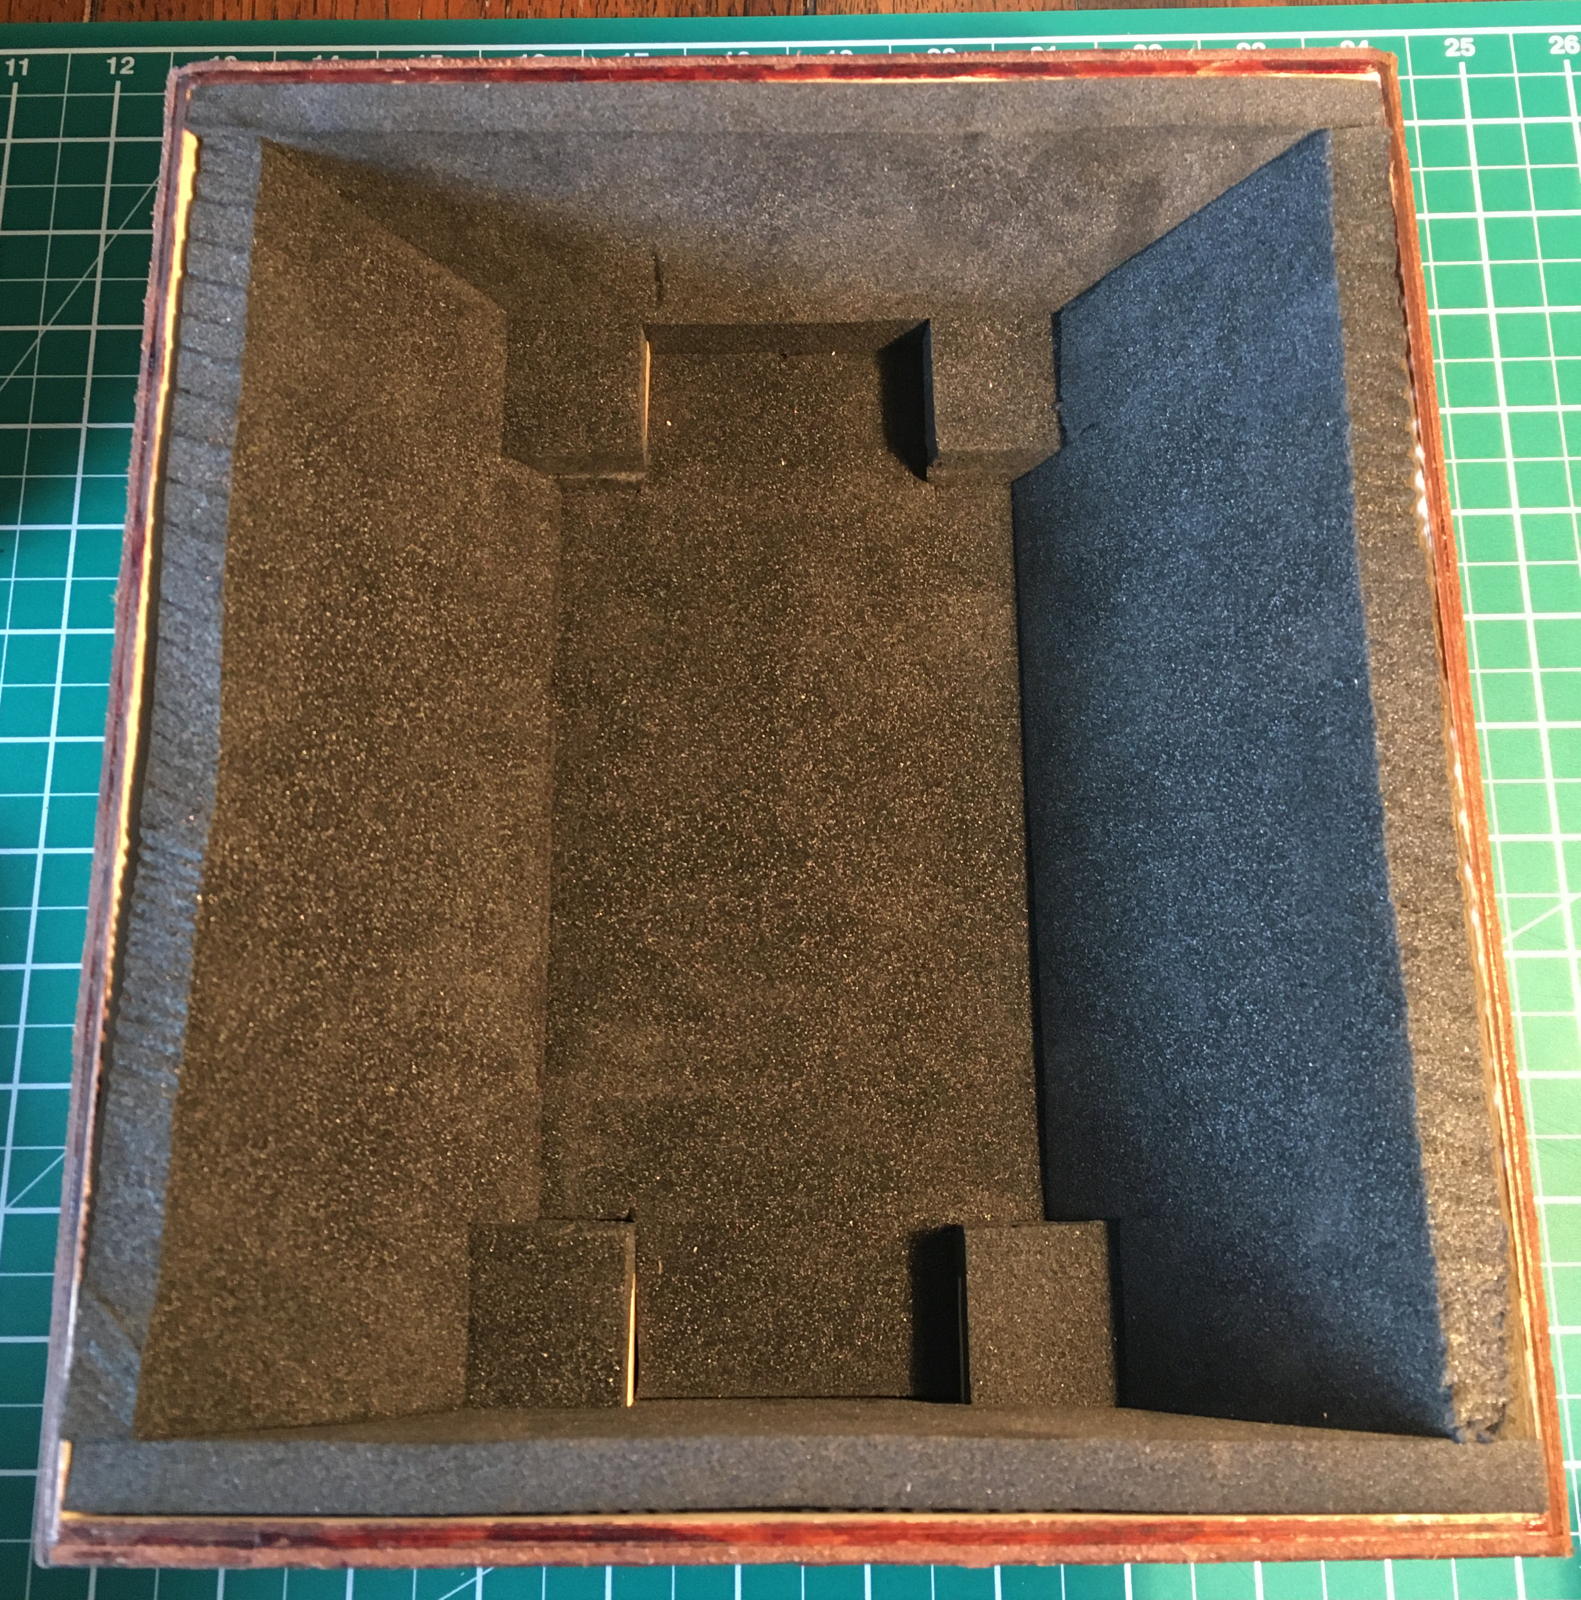
I covered the foam with pigskin suede.
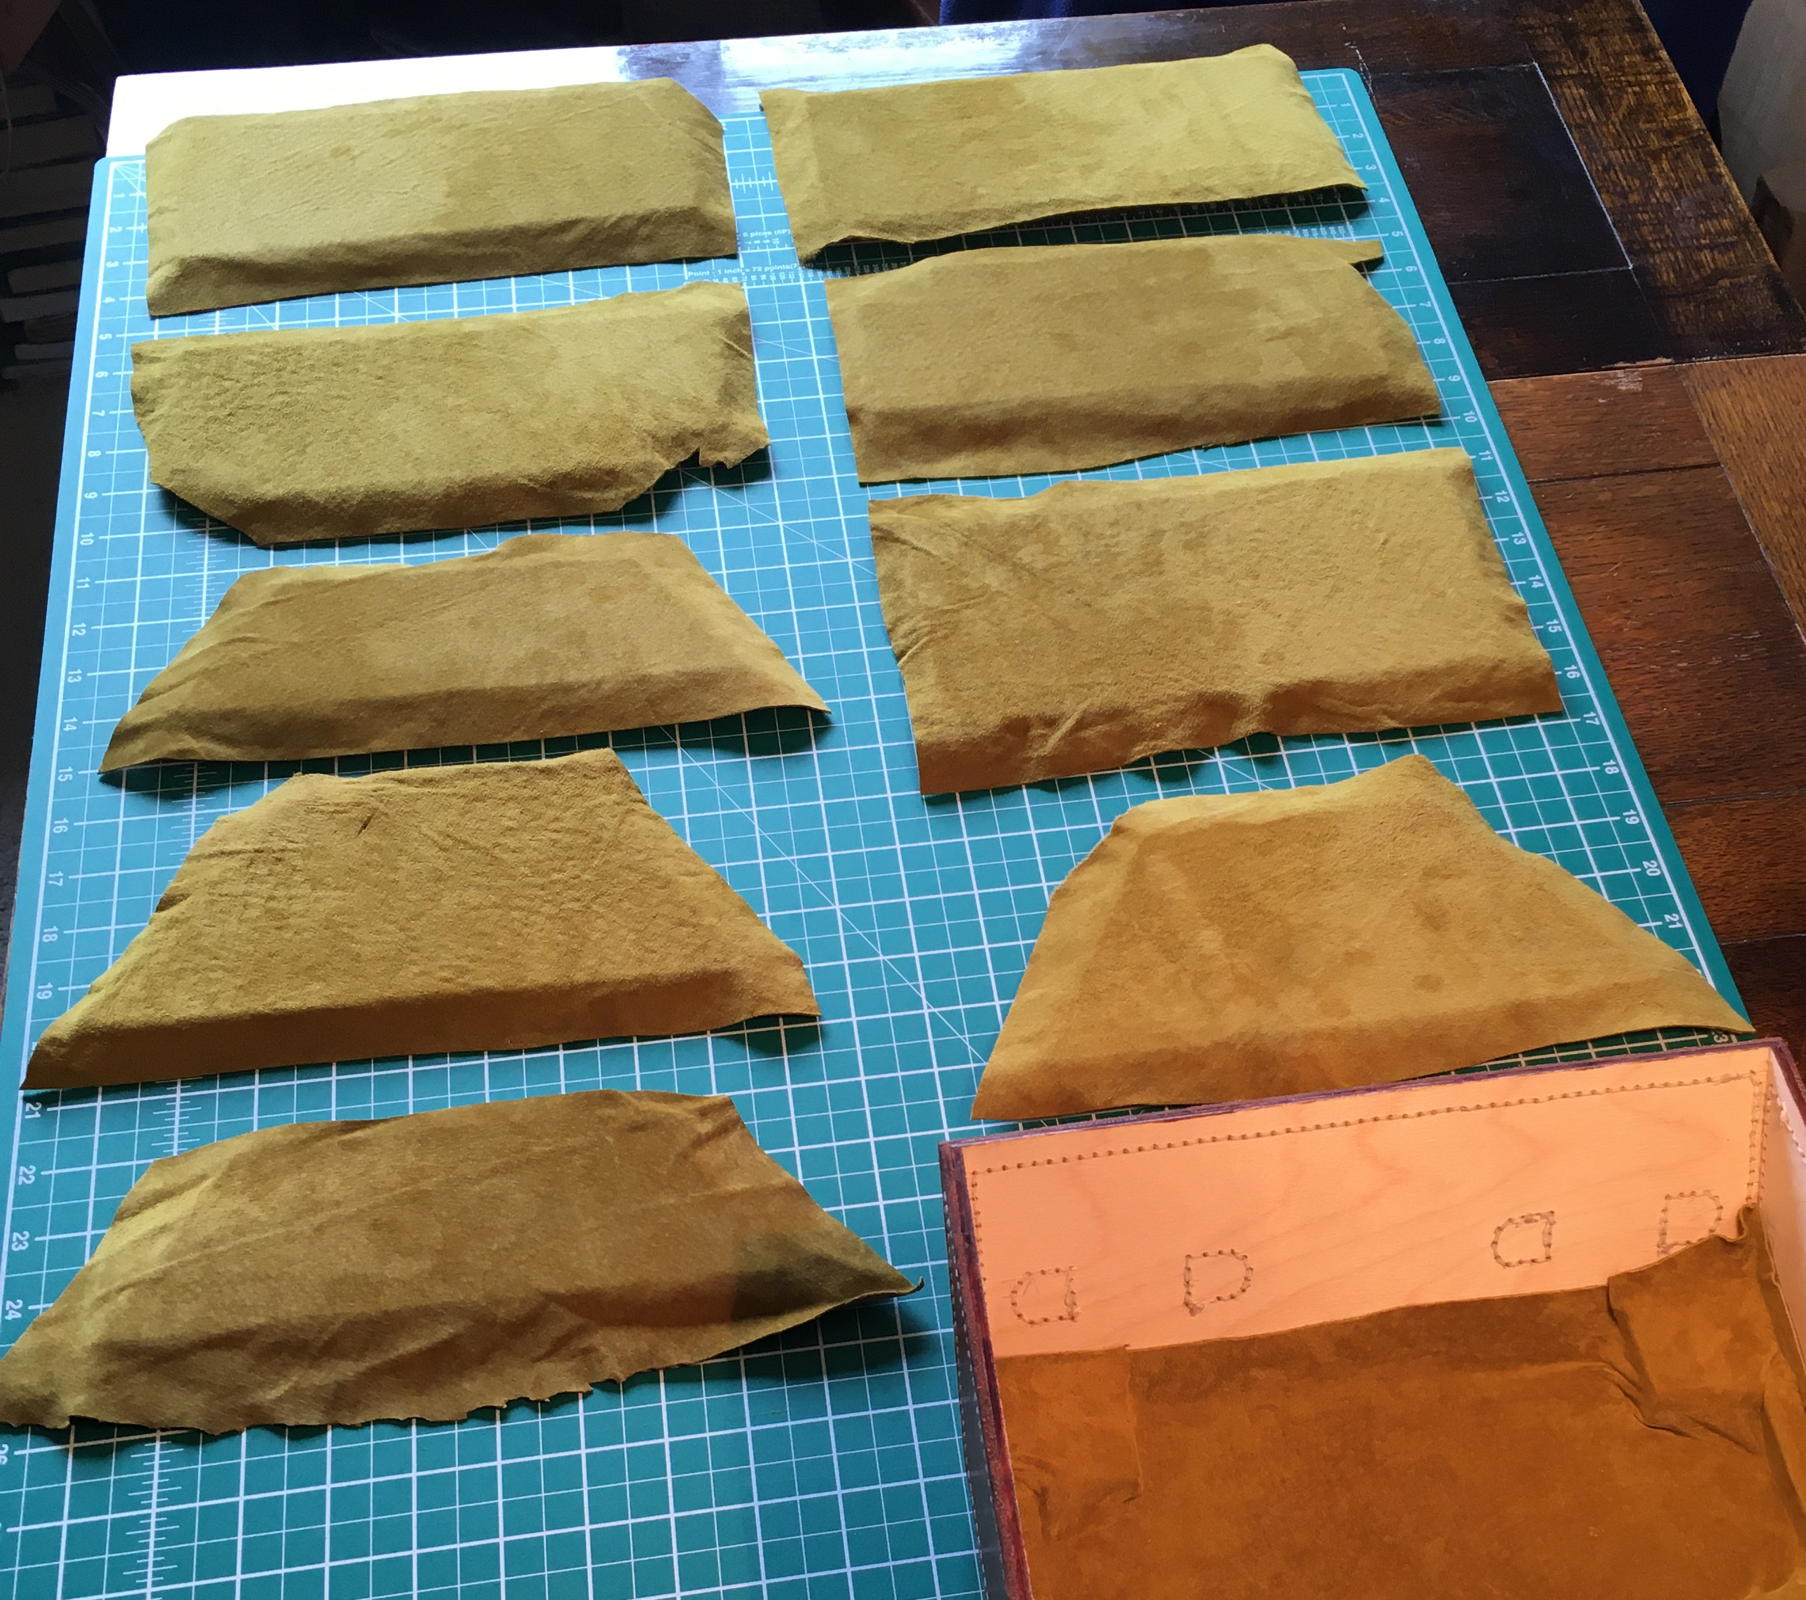
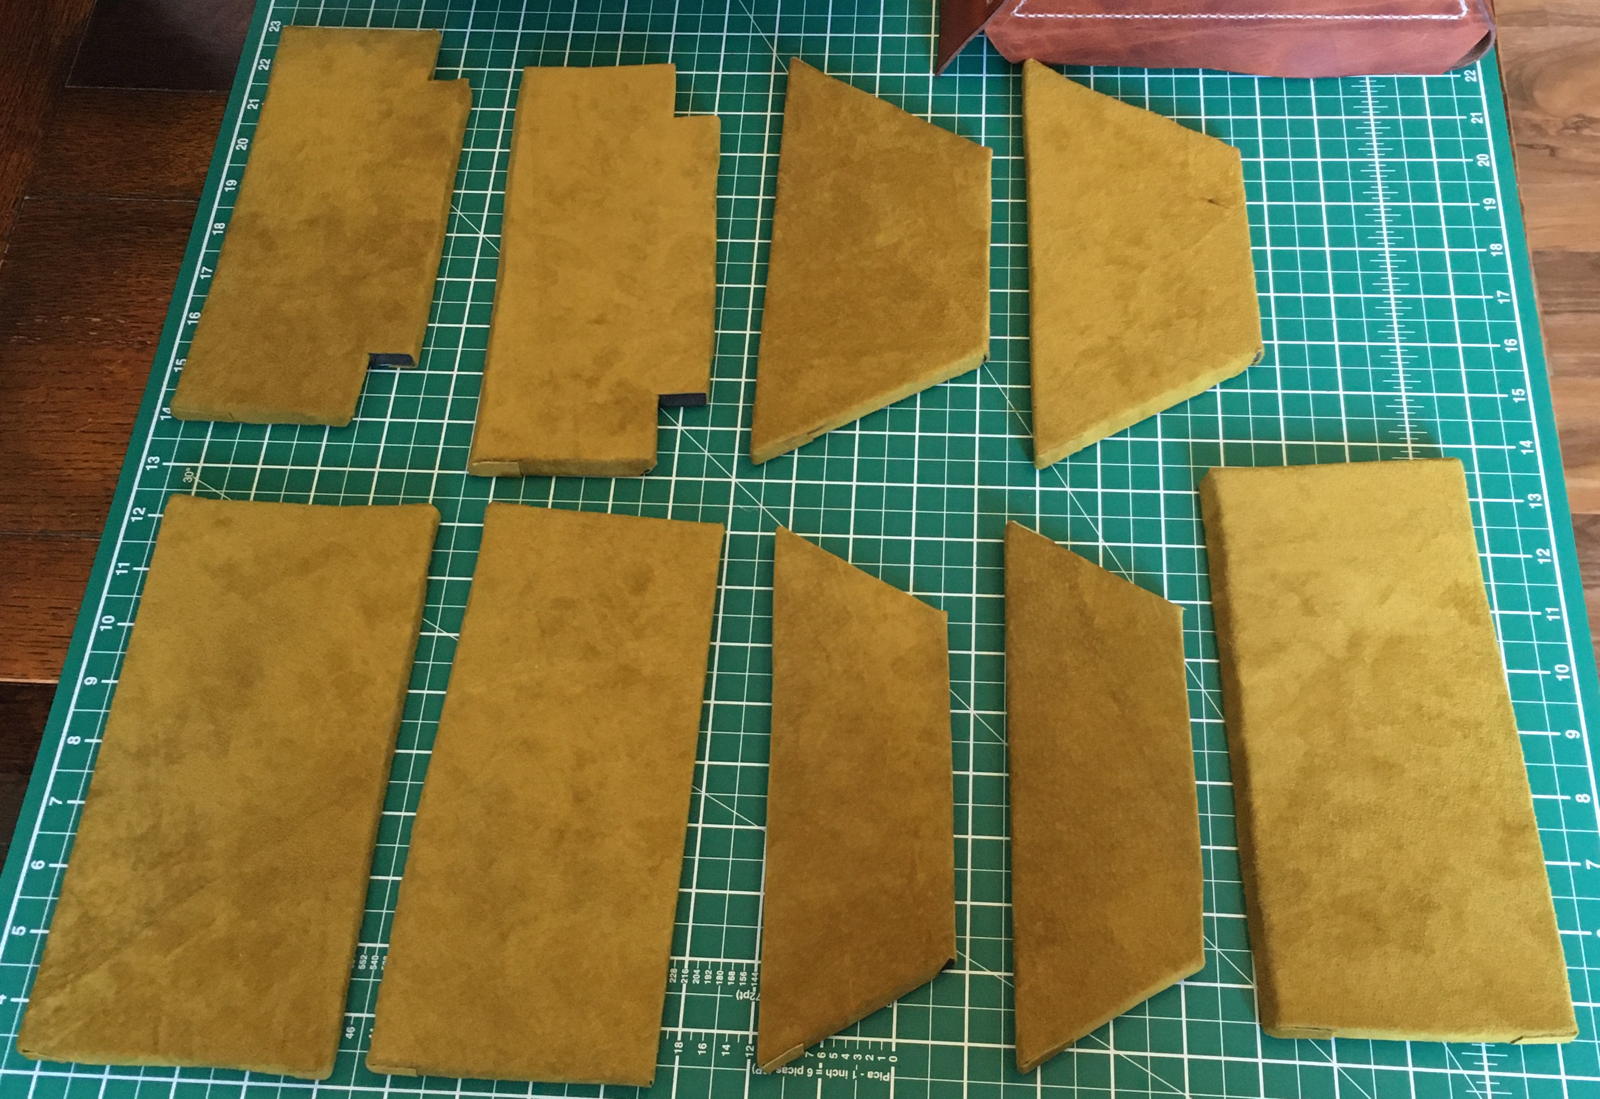
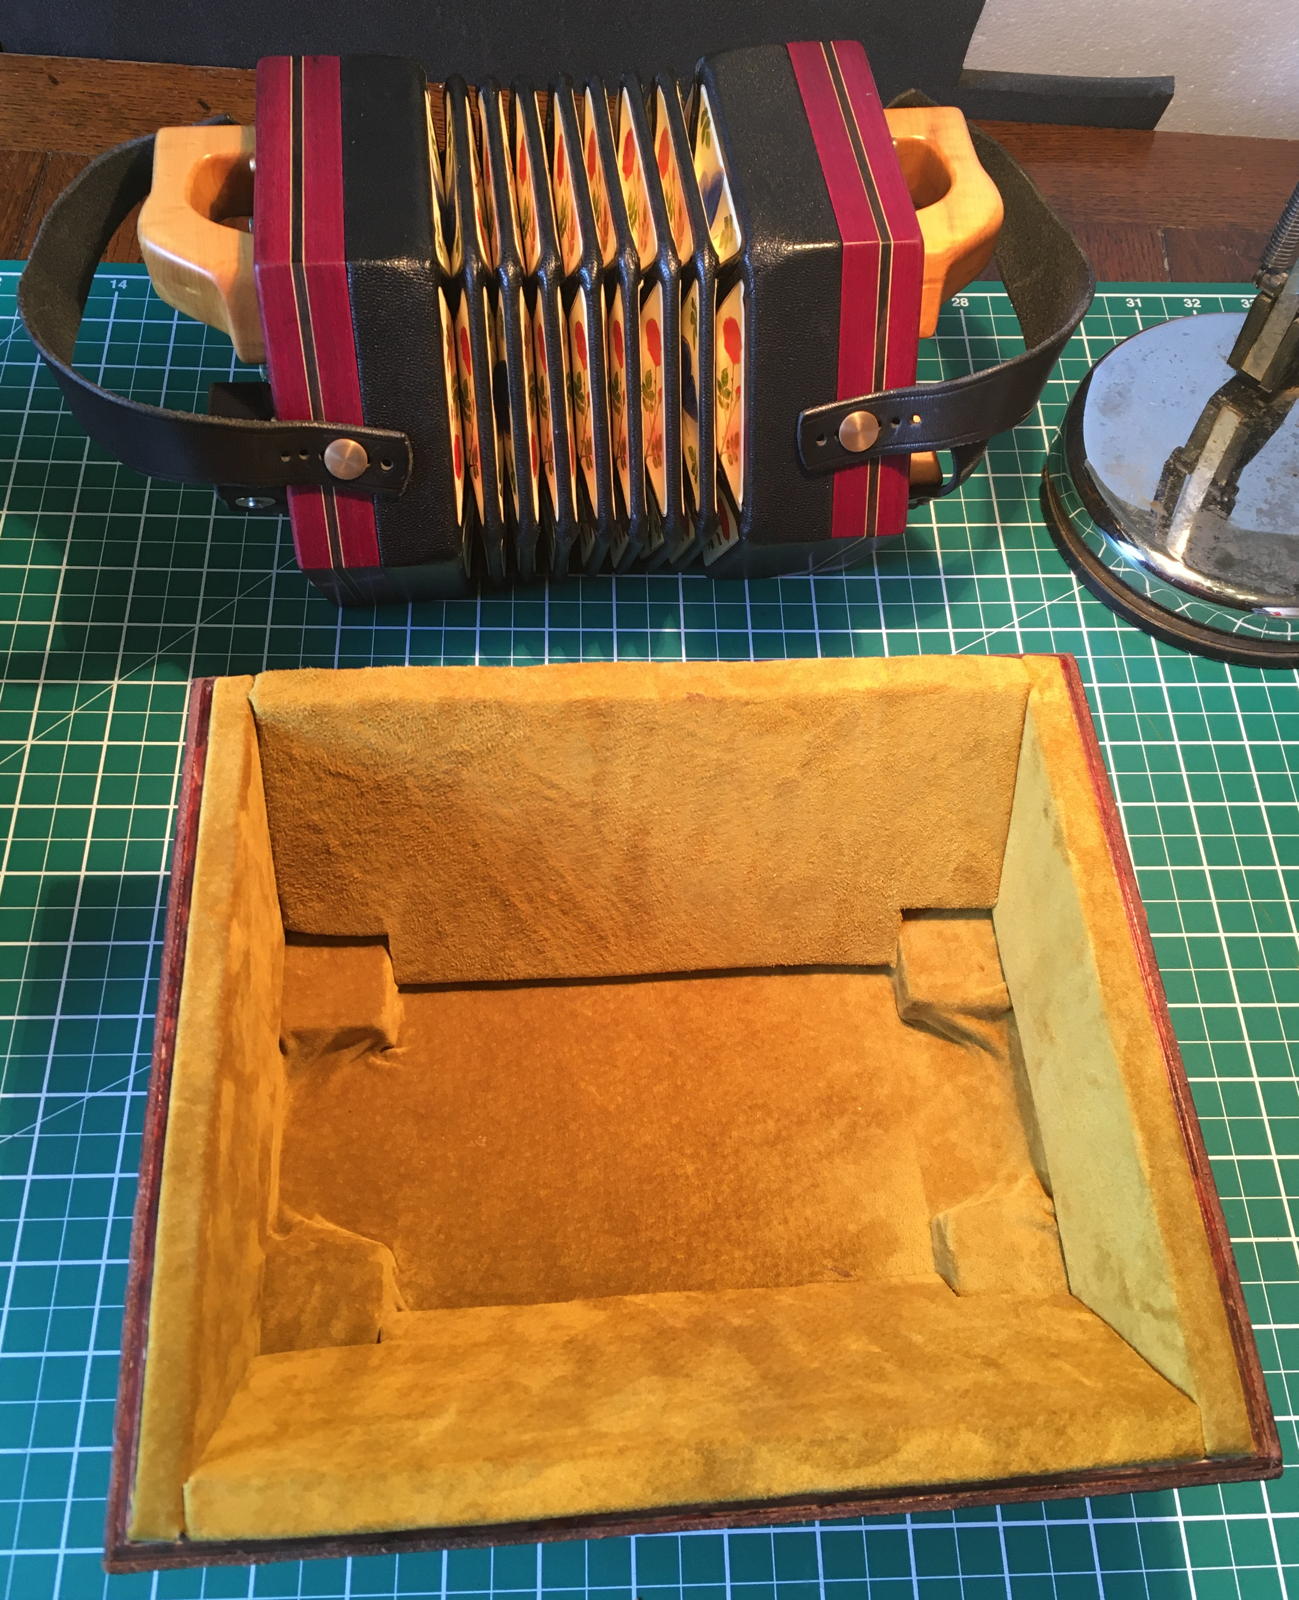
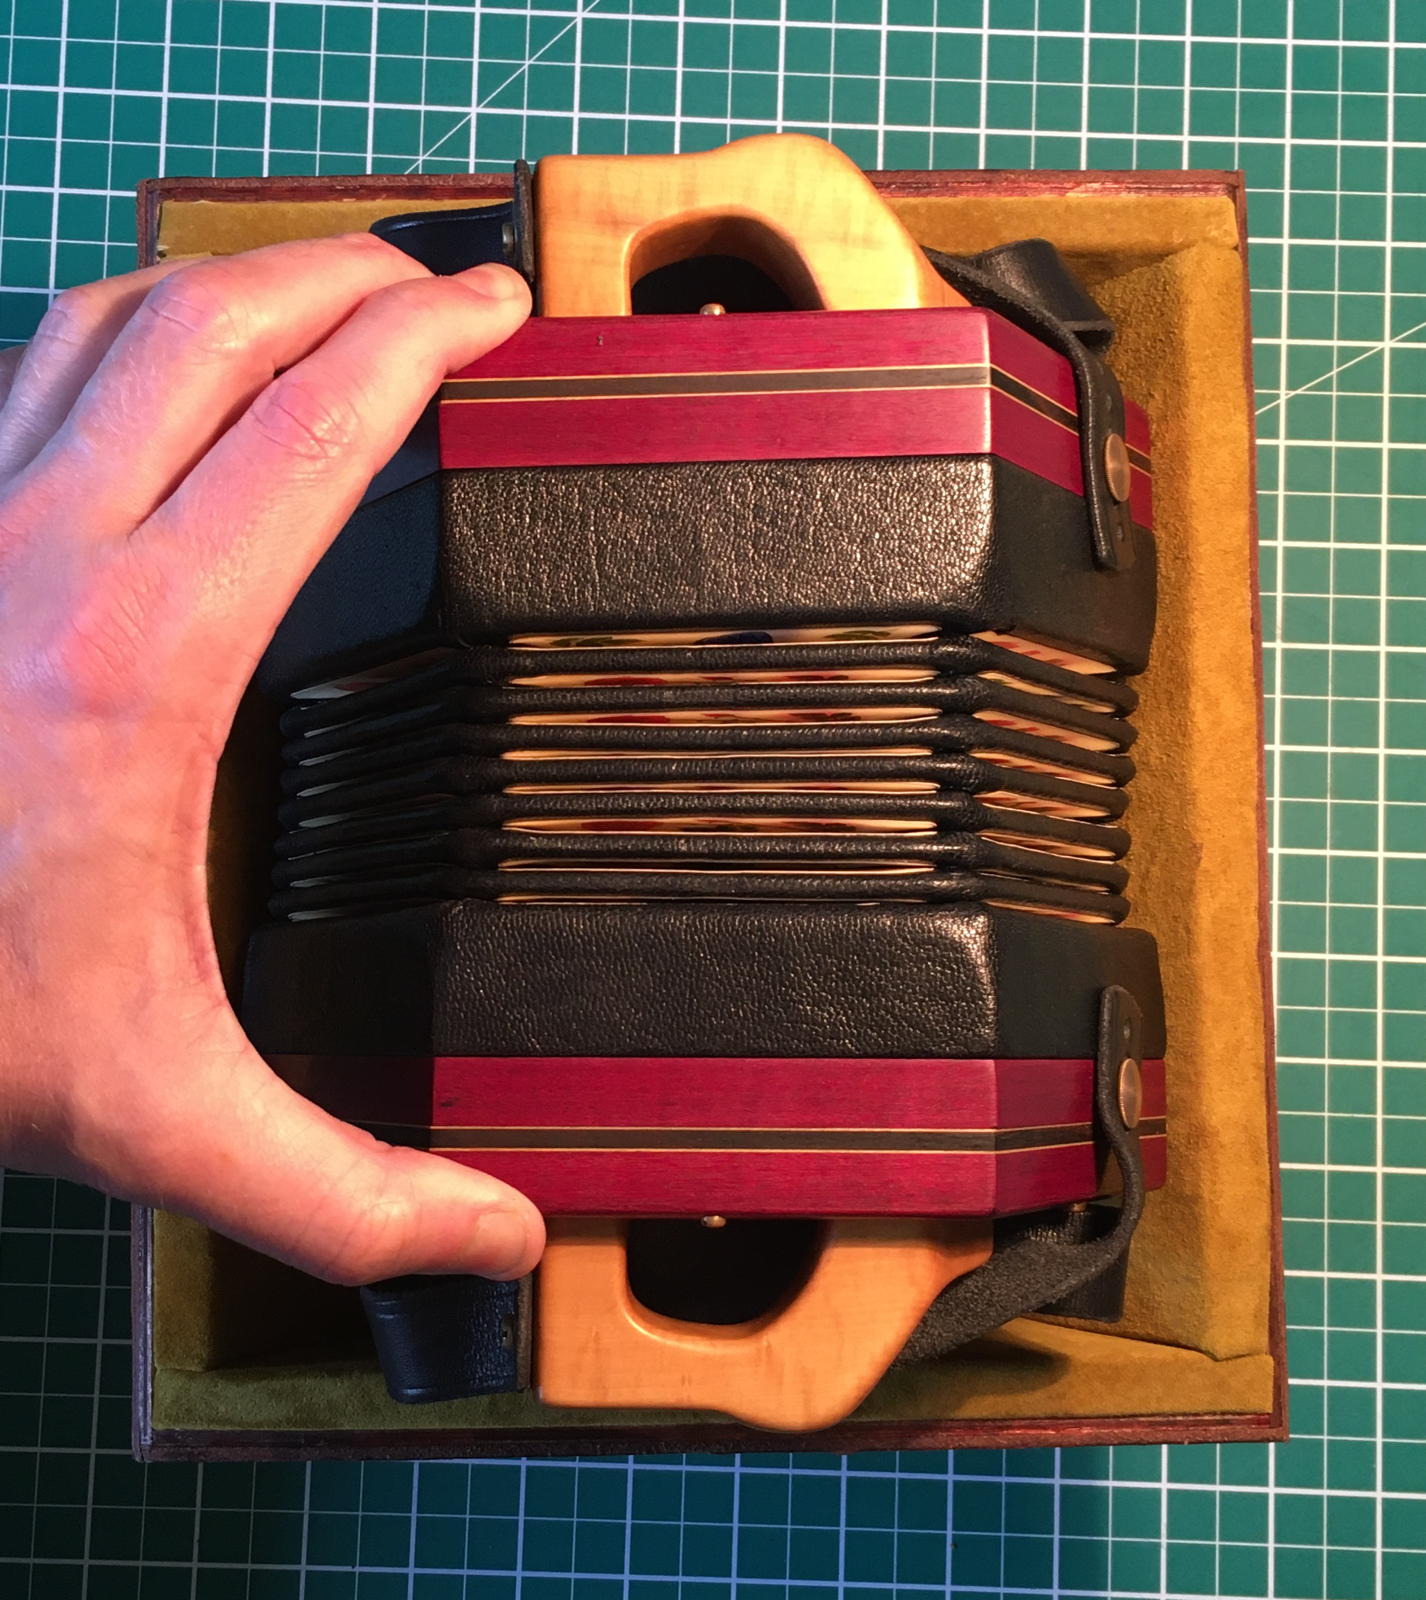
It’s quite a snug fit, but the lid does go on if you squeeze the bellows together first, and there isn’t any extra space for the instrument to rattle around in.
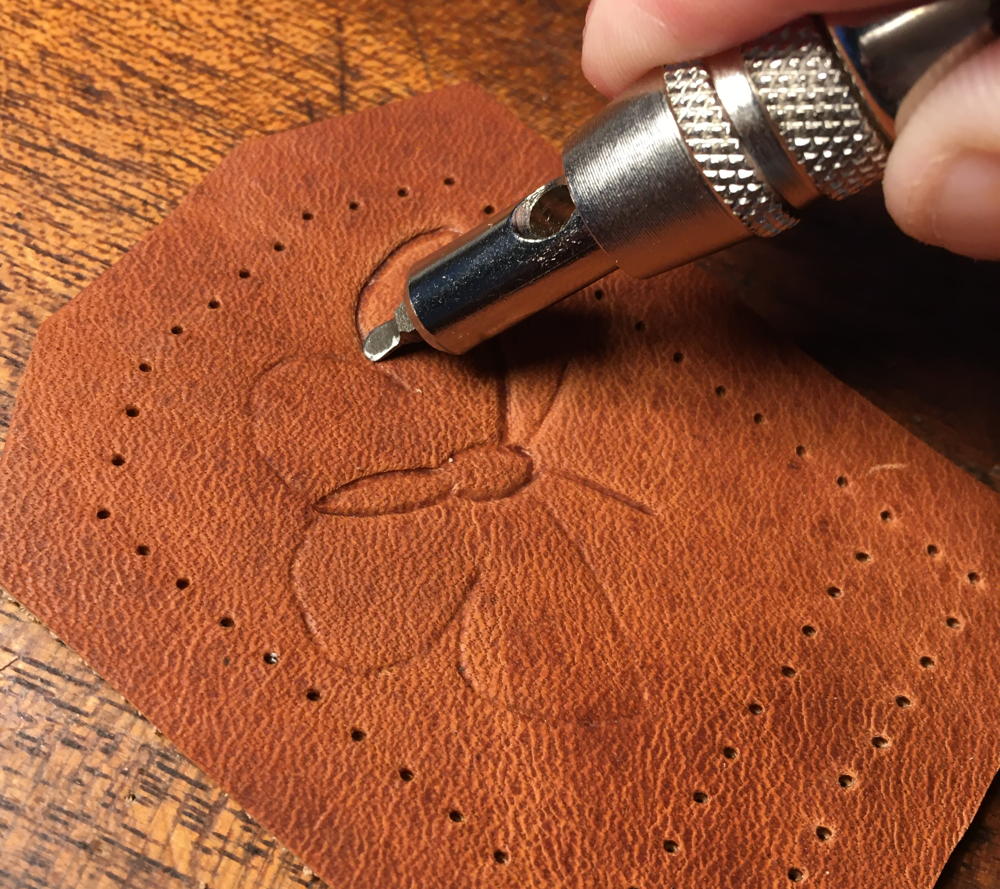
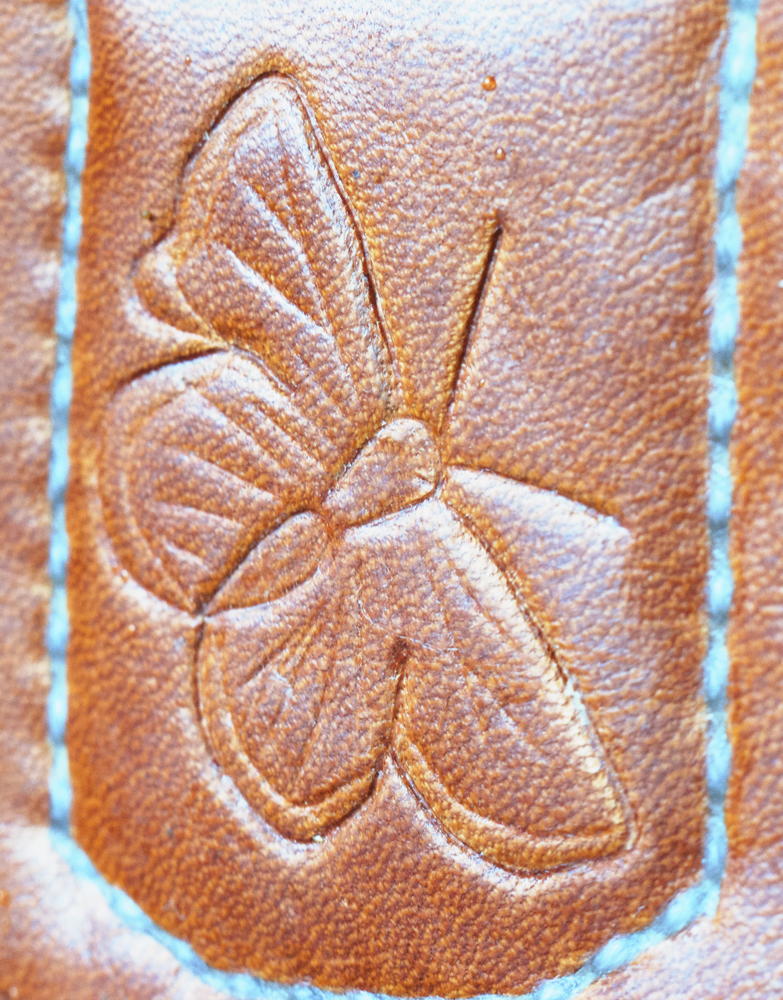
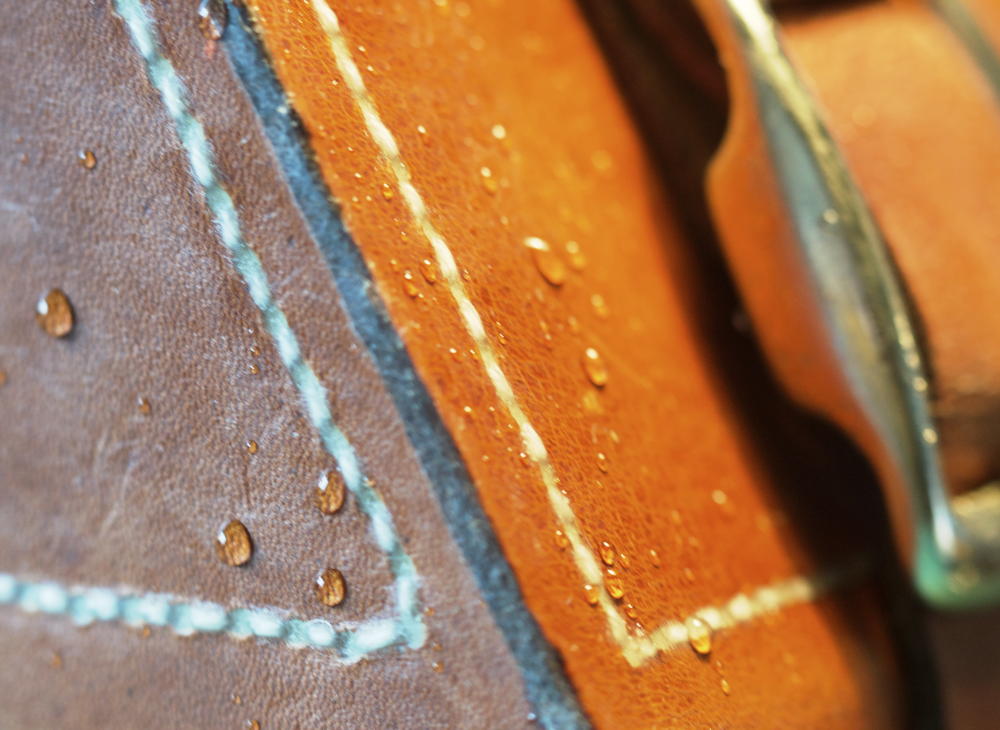
Returning again to the butterfly motif, I hand tooled a pair of them onto the leather patches that I used to attach the shoulder strap to the case.
I applied plenty of beeswax based waterproofing to the case, paying particular attention to working it into all the stitches.

I can’t claim that the case is completely waterproof, but it believe it should be able to protect the instrument if you are caught out in a light rain shower.
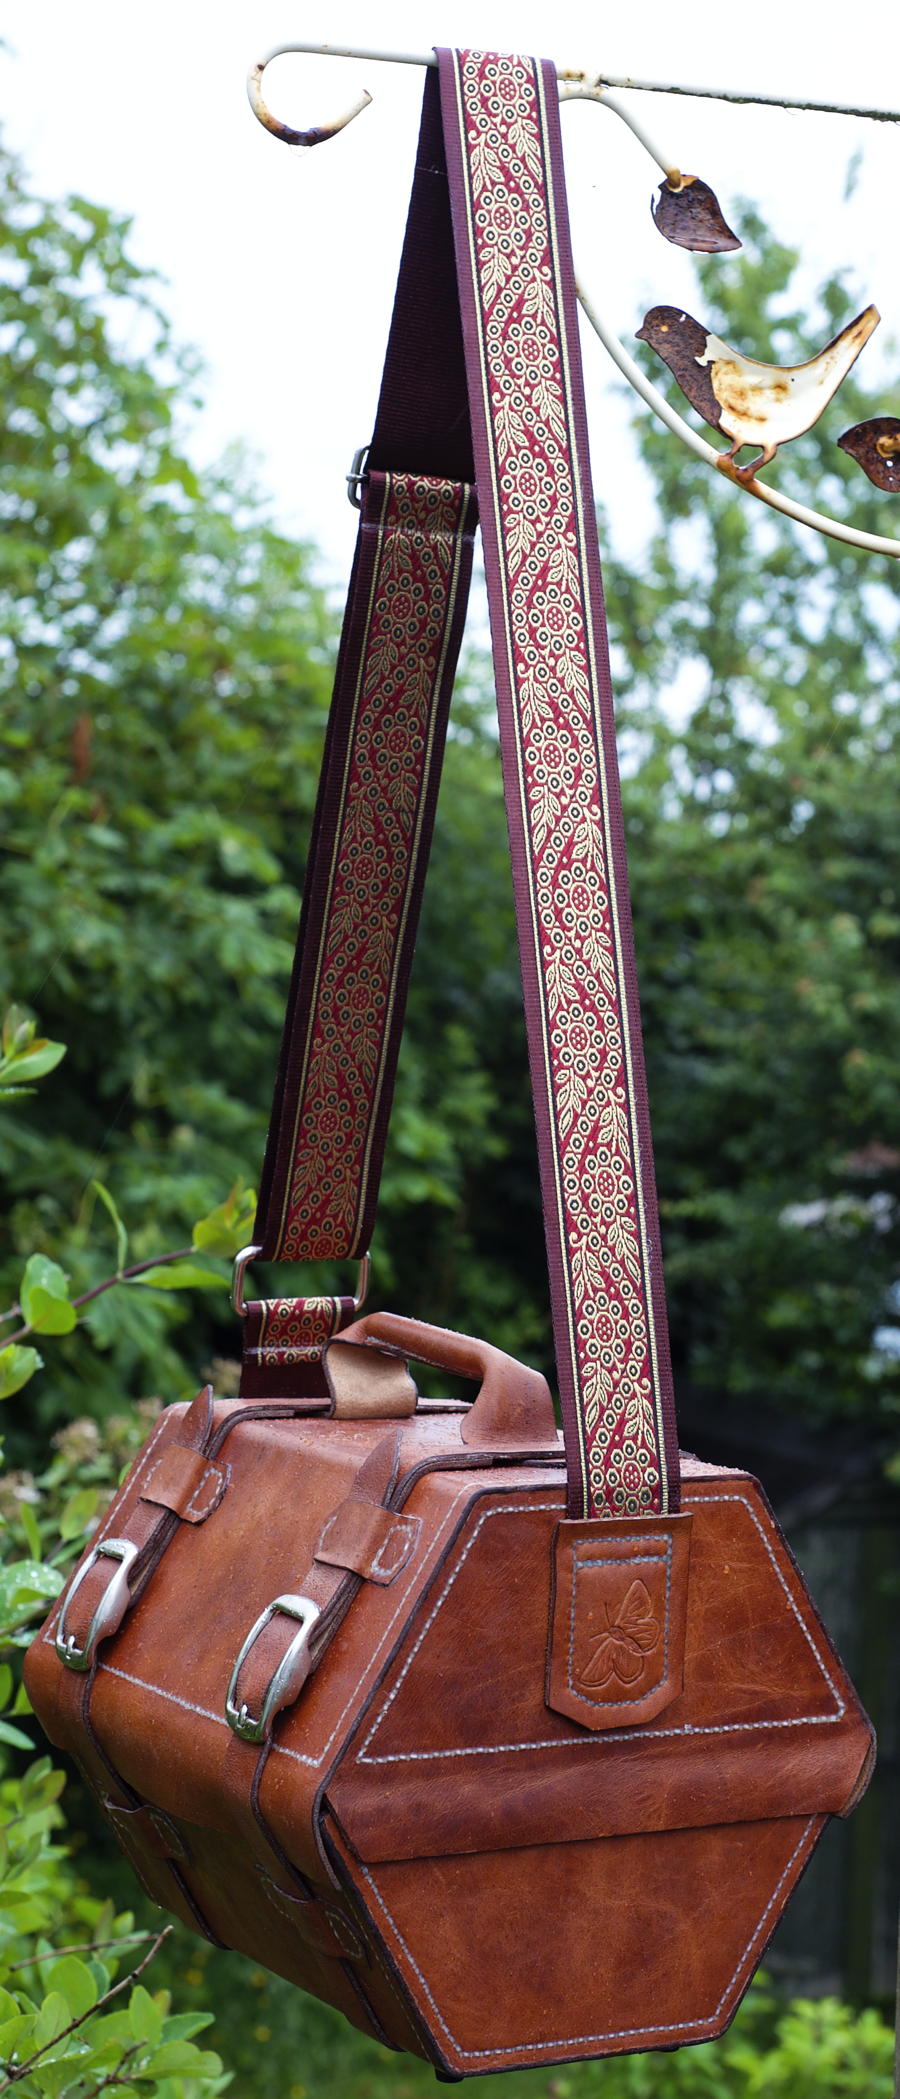
The method I used to hold the halves of the case together with a pair of sturdy leather straps and buckles was a deliberate choice: although it is a little more fiddly to open and close than spring clips or latches, I am confident it won’t accidentally spring open while carrying it, even when subject to rough handling and jostling. The leather straps are also very simple, adjustable if they stretch, and easy to replace if they ever wear out. The shoulder strap was stitched directly to the case rather than using D rings and spring clips for the same reason; clips are more convenient than stitches, but significantly less dependable.
The lovely strap was custom made for me by Paxton and Morris, who make lots of different instrument straps as well as pet collars and other items. It is made from a decorative woven ribbon sewn onto a length of seatbelt webbing strap. The adjustment mechanism is very easy to use and has been designed in such a way that it won’t accidentally come undone if you lengthen it too far.
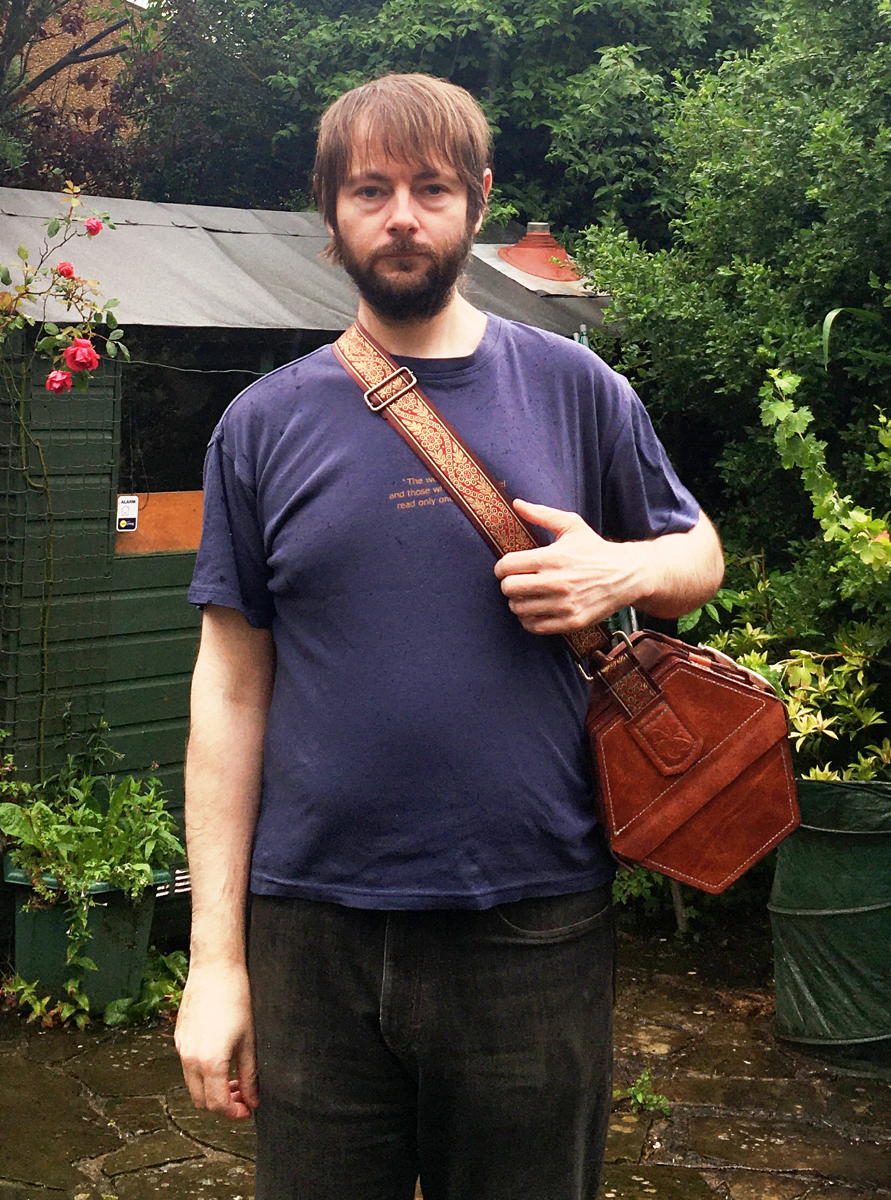
Finally, a self portrait of the instrument maker and his latest creation in front of the workshop where it was built.