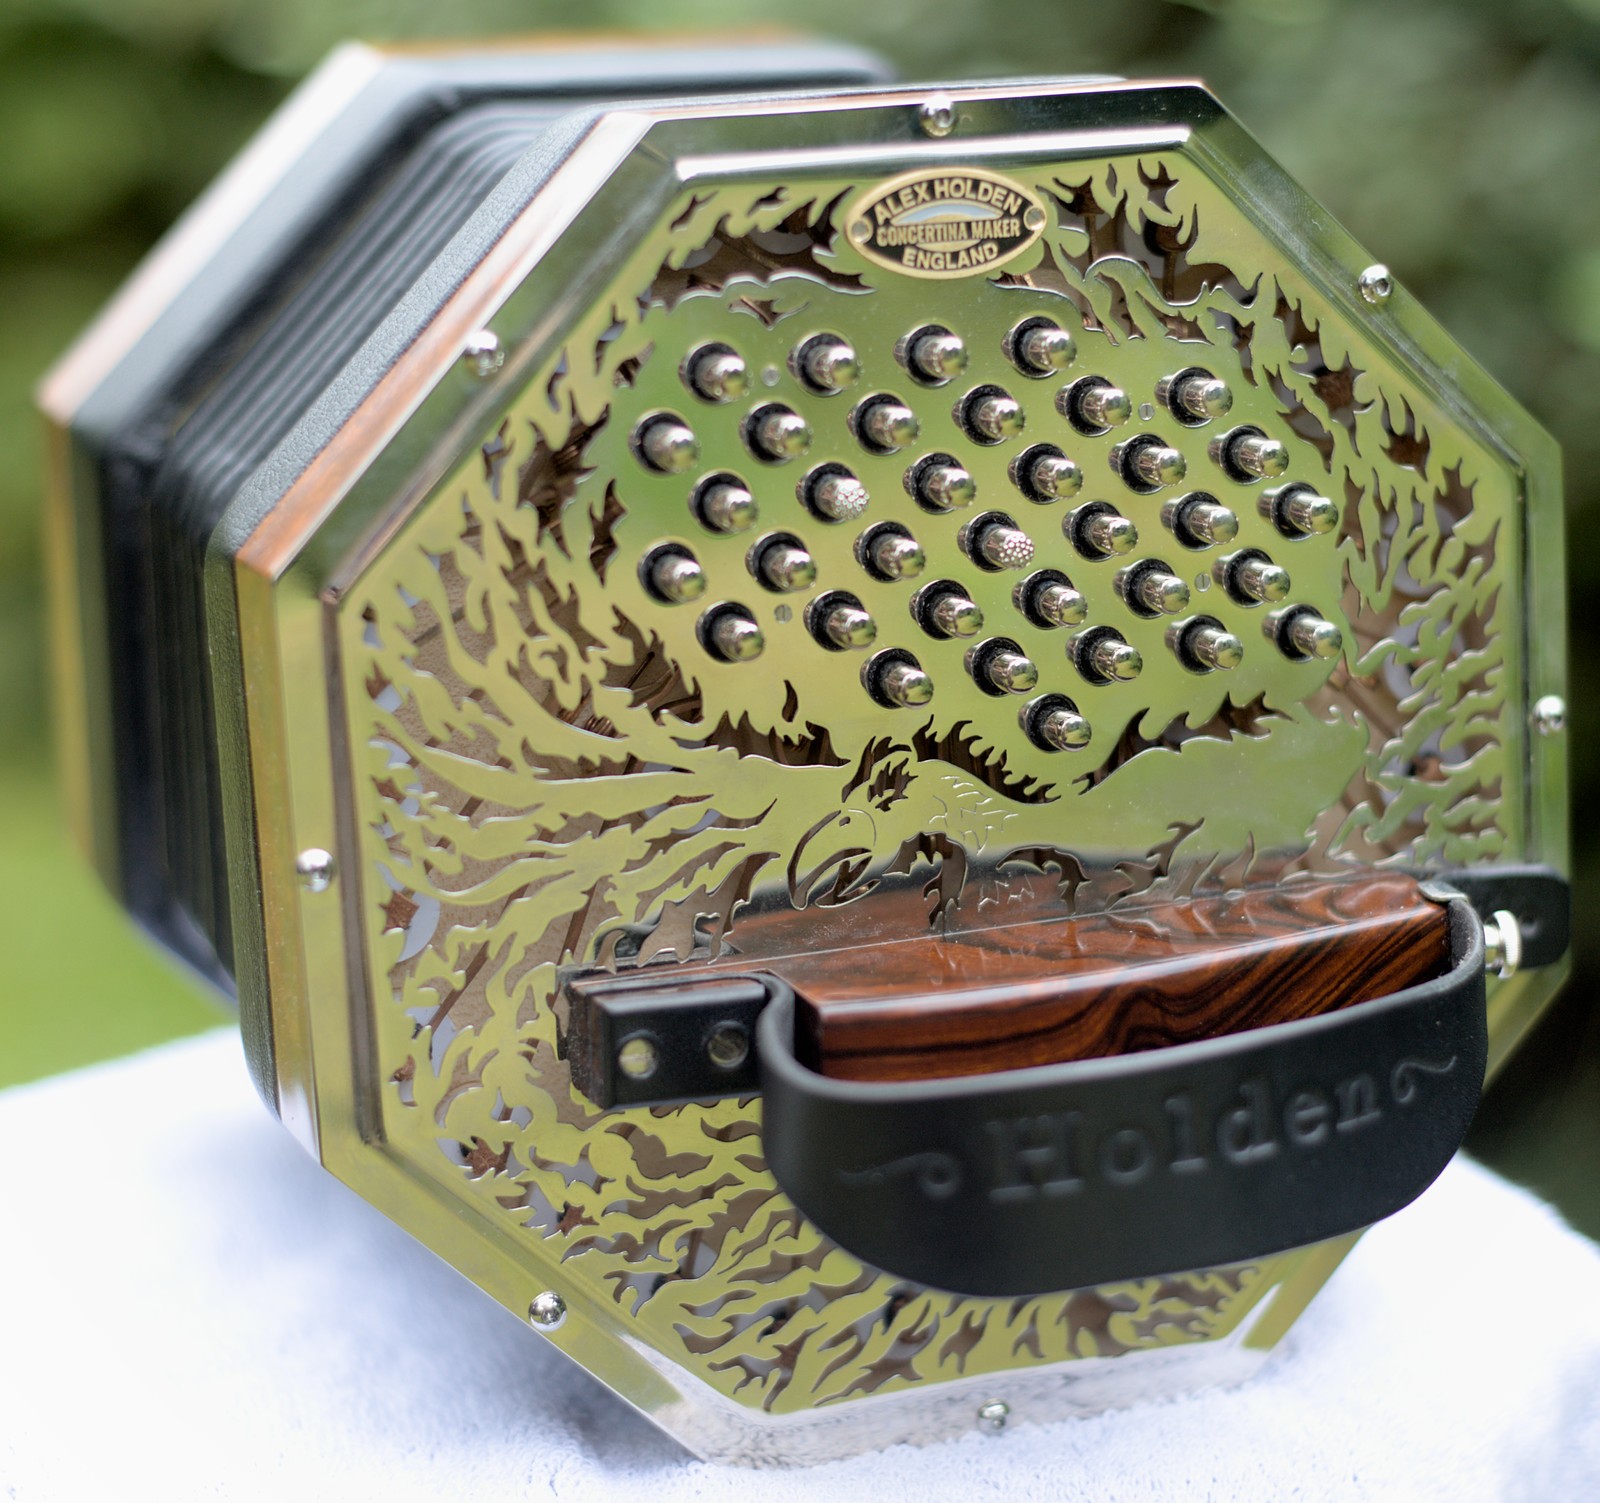
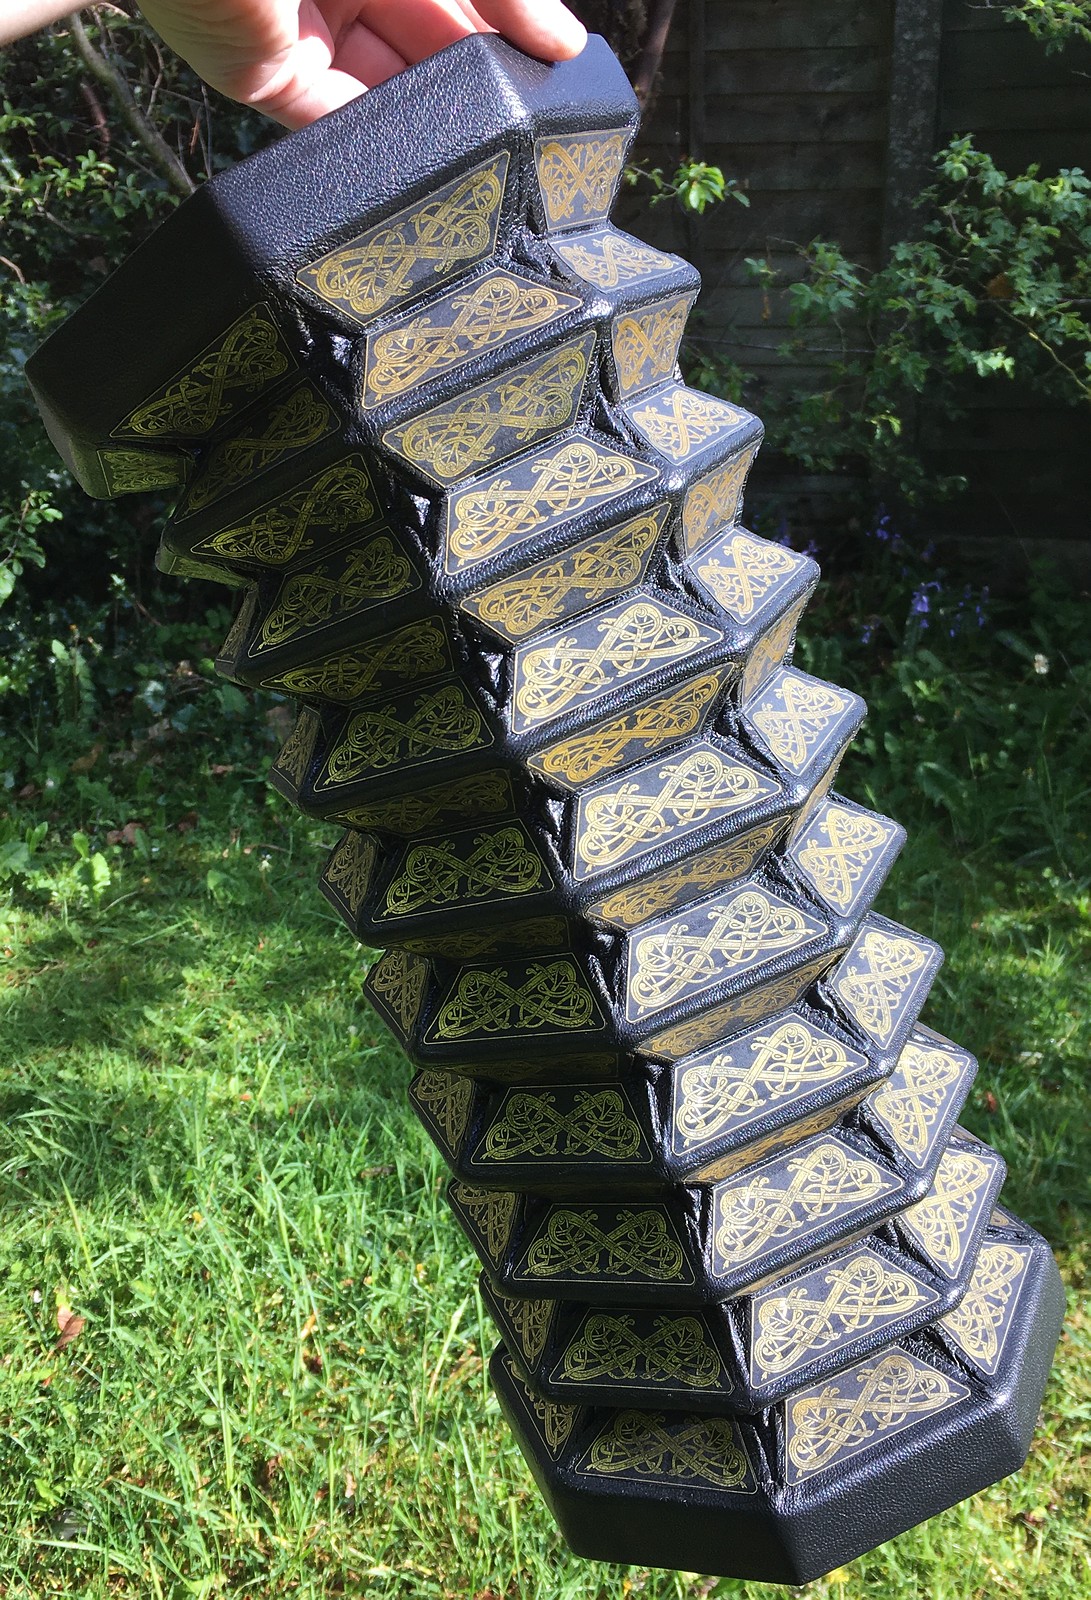
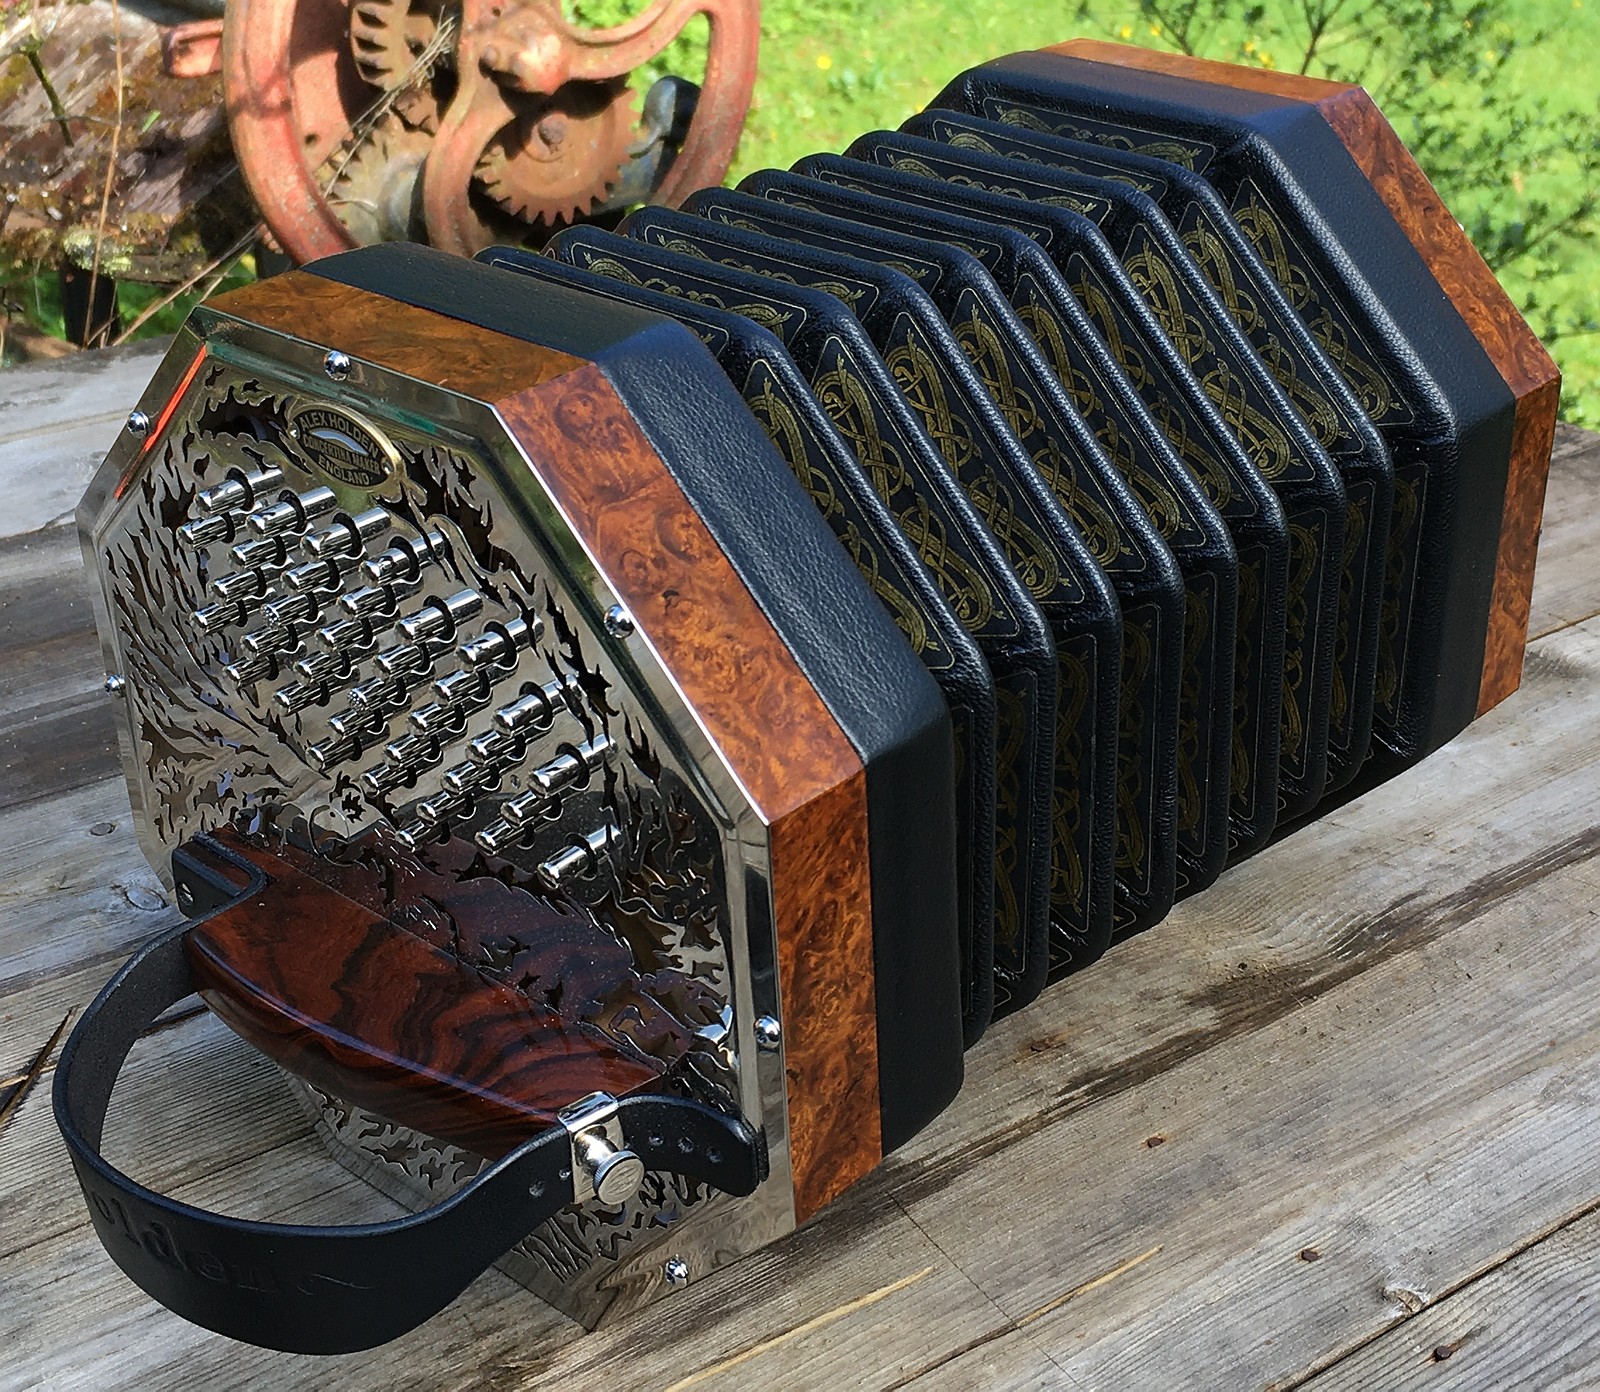
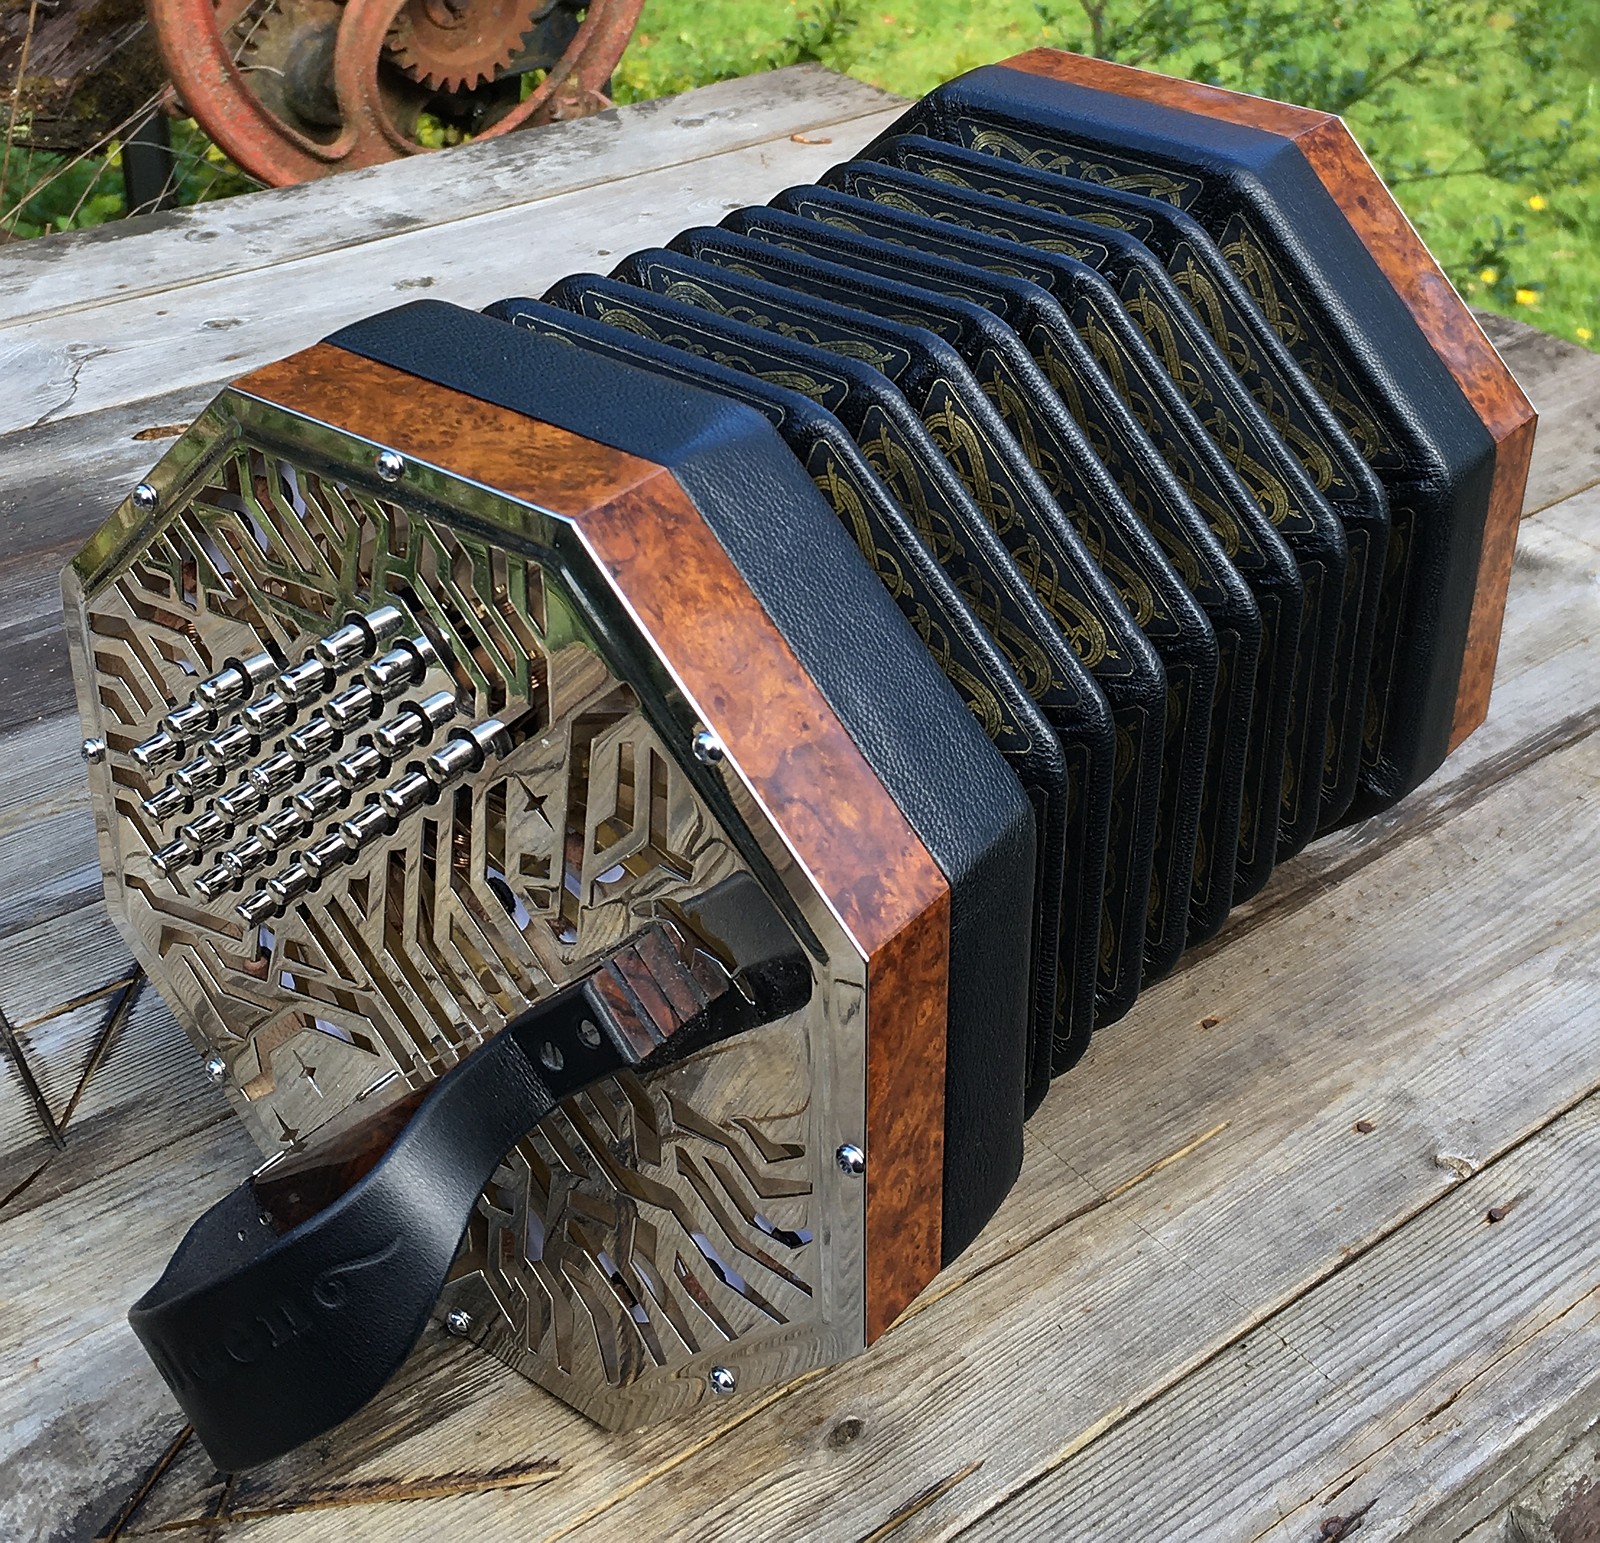
Earlier this year I built my largest instrument to date, a 62 button (+ air) Hayden duet with a range from F2 to E6 in a 7 3/4″ wide octagonal frame.
Specification
- 62 buttons (+ air) Hayden duet, standard spacing but with the rows aligned parallel to the handrails.
- Eight sides, 7 3/4″ wide.
- Eight fold black goatskin bellows with 1 1/8″ deep cards and fancy custom bellows papers.
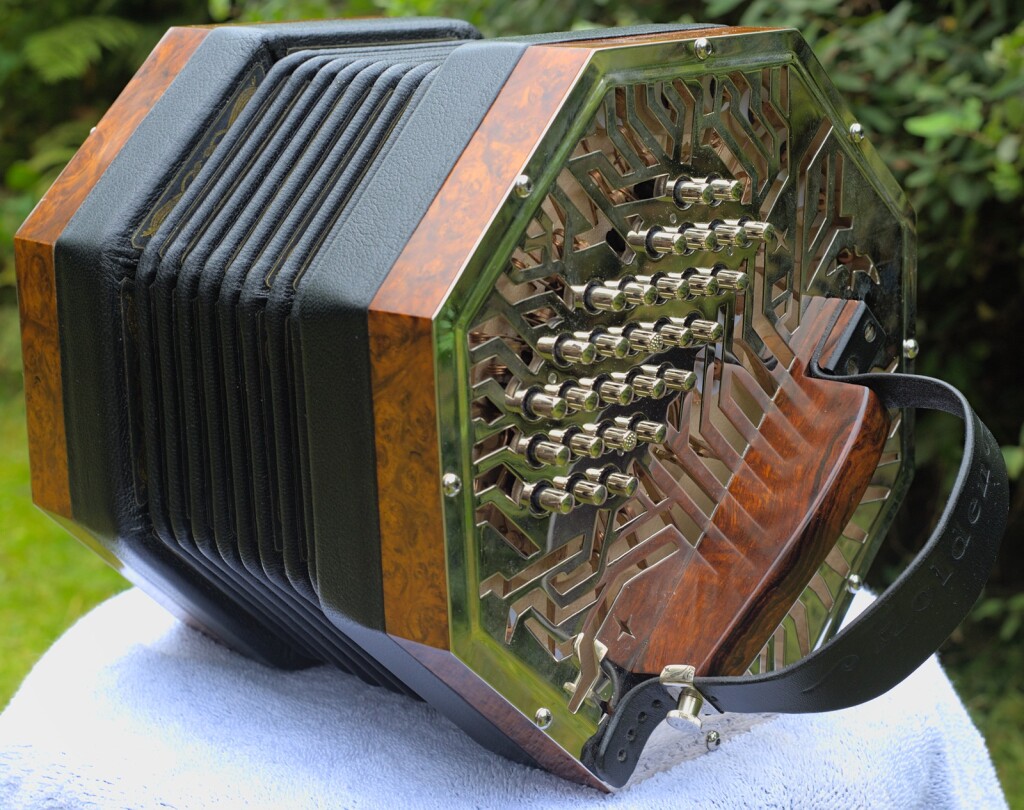
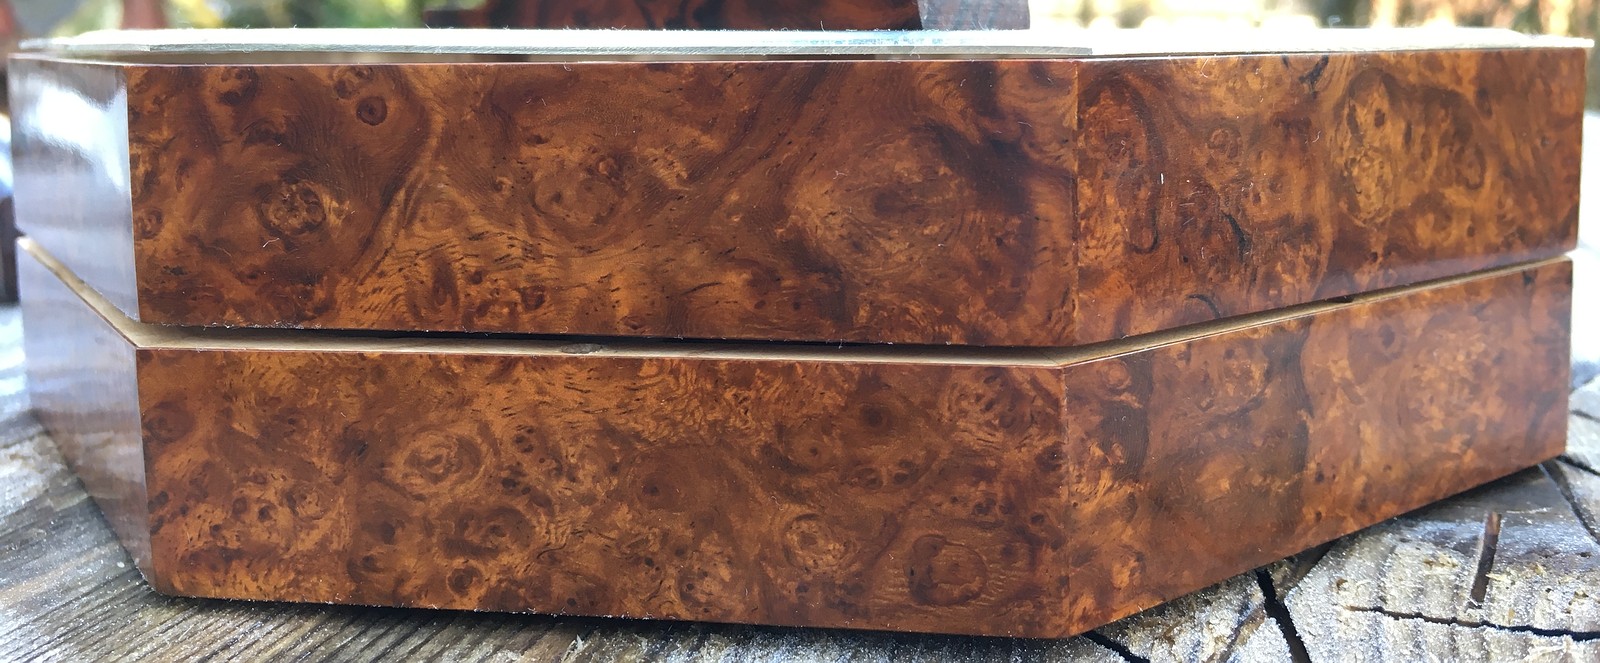
- Amboyna burl veneered action boxes.
- Curved-top desert ironwood hand rails.
- French polished finish.
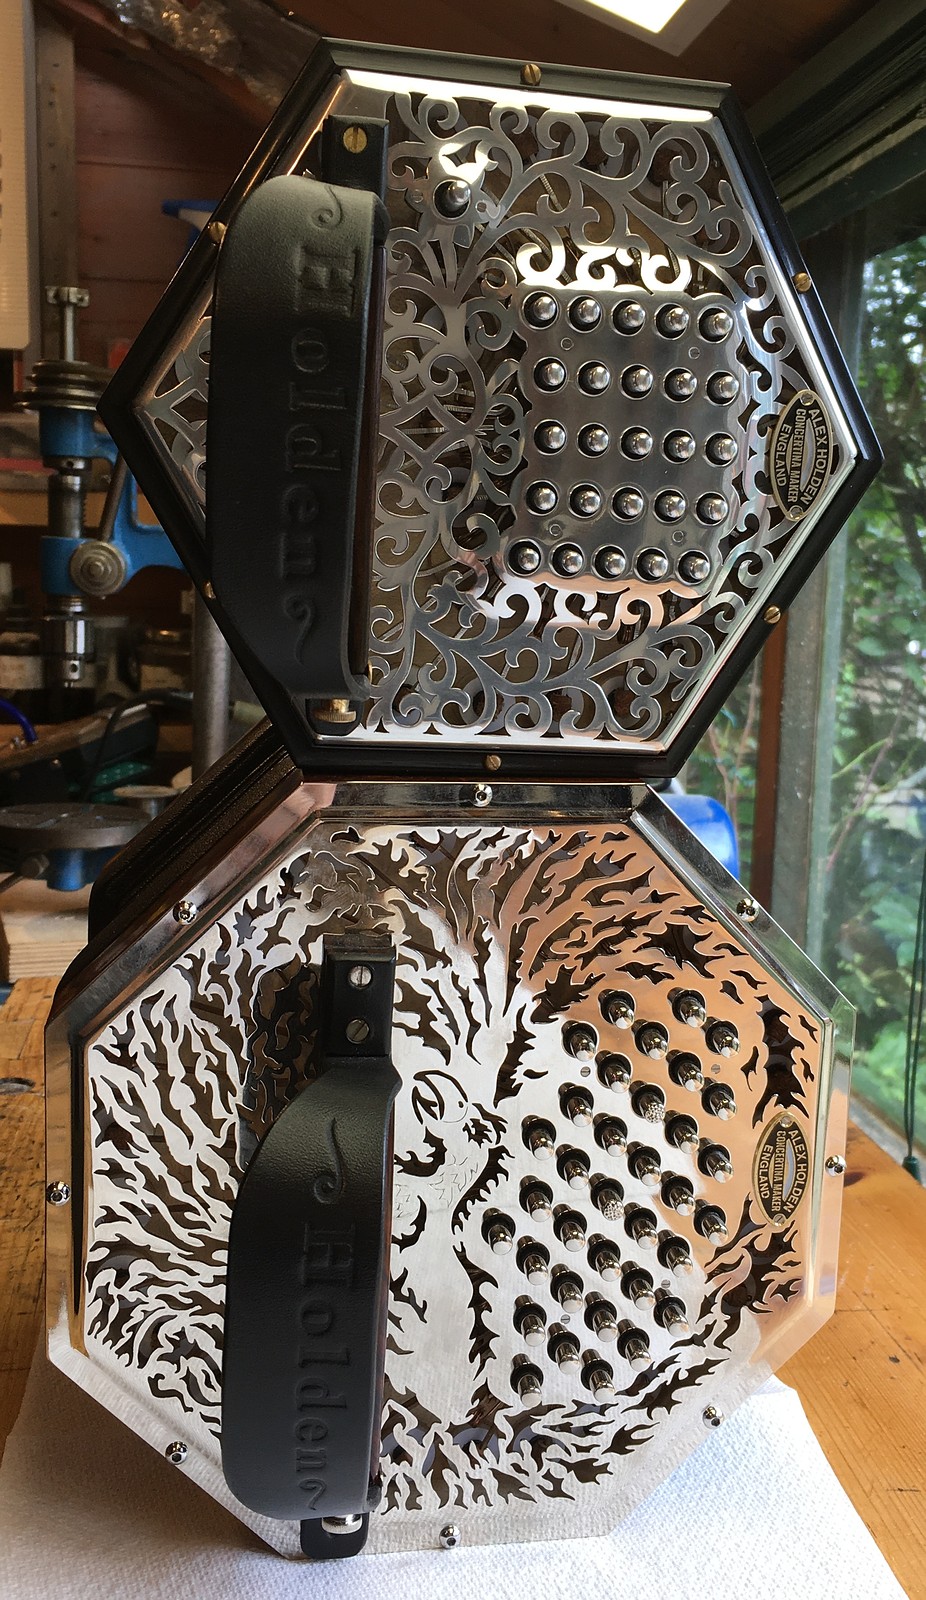
- Flat nickel-plated nickel-silver end plates with fancy custom fretwork and crimped borders.
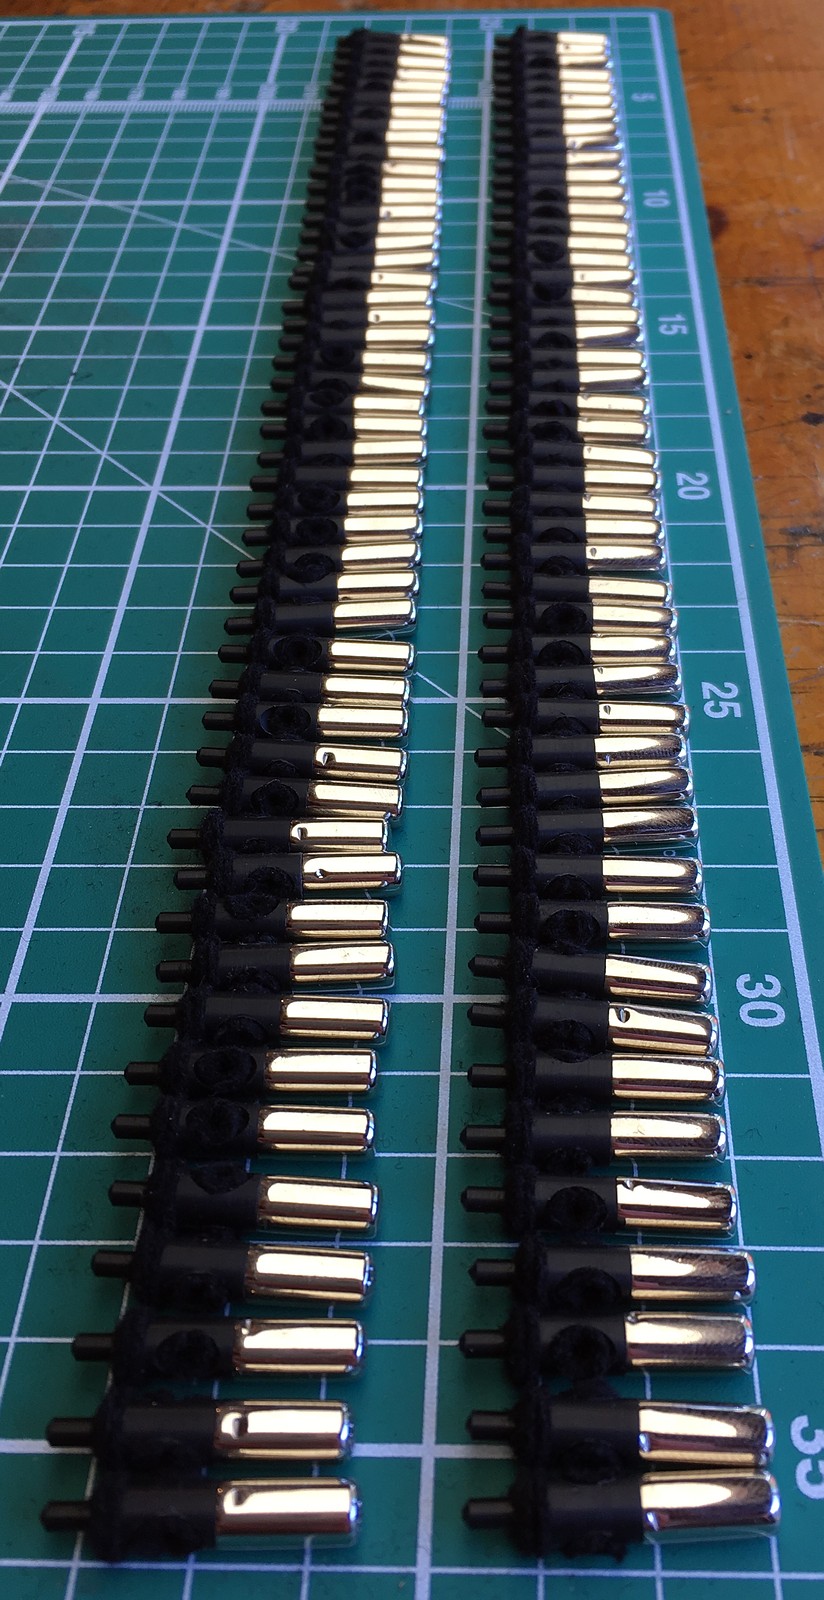
- 5.7mm diameter nickel-plated brass buttons with acetal cores.
- 2mm button travel (giving 4mm pad lift at 2:1 lever ratio).
- Traditional hand-made concertina reeds in dovetailed aluminium alloy frames.
- Equal temperament tuning, A=440Hz.
- Radial reed pans with sycamore chamber walls.
- Laminated maple reed pan boards for extra stability.
- Weight: 2072g.
- Deluxe hand-made hard case.
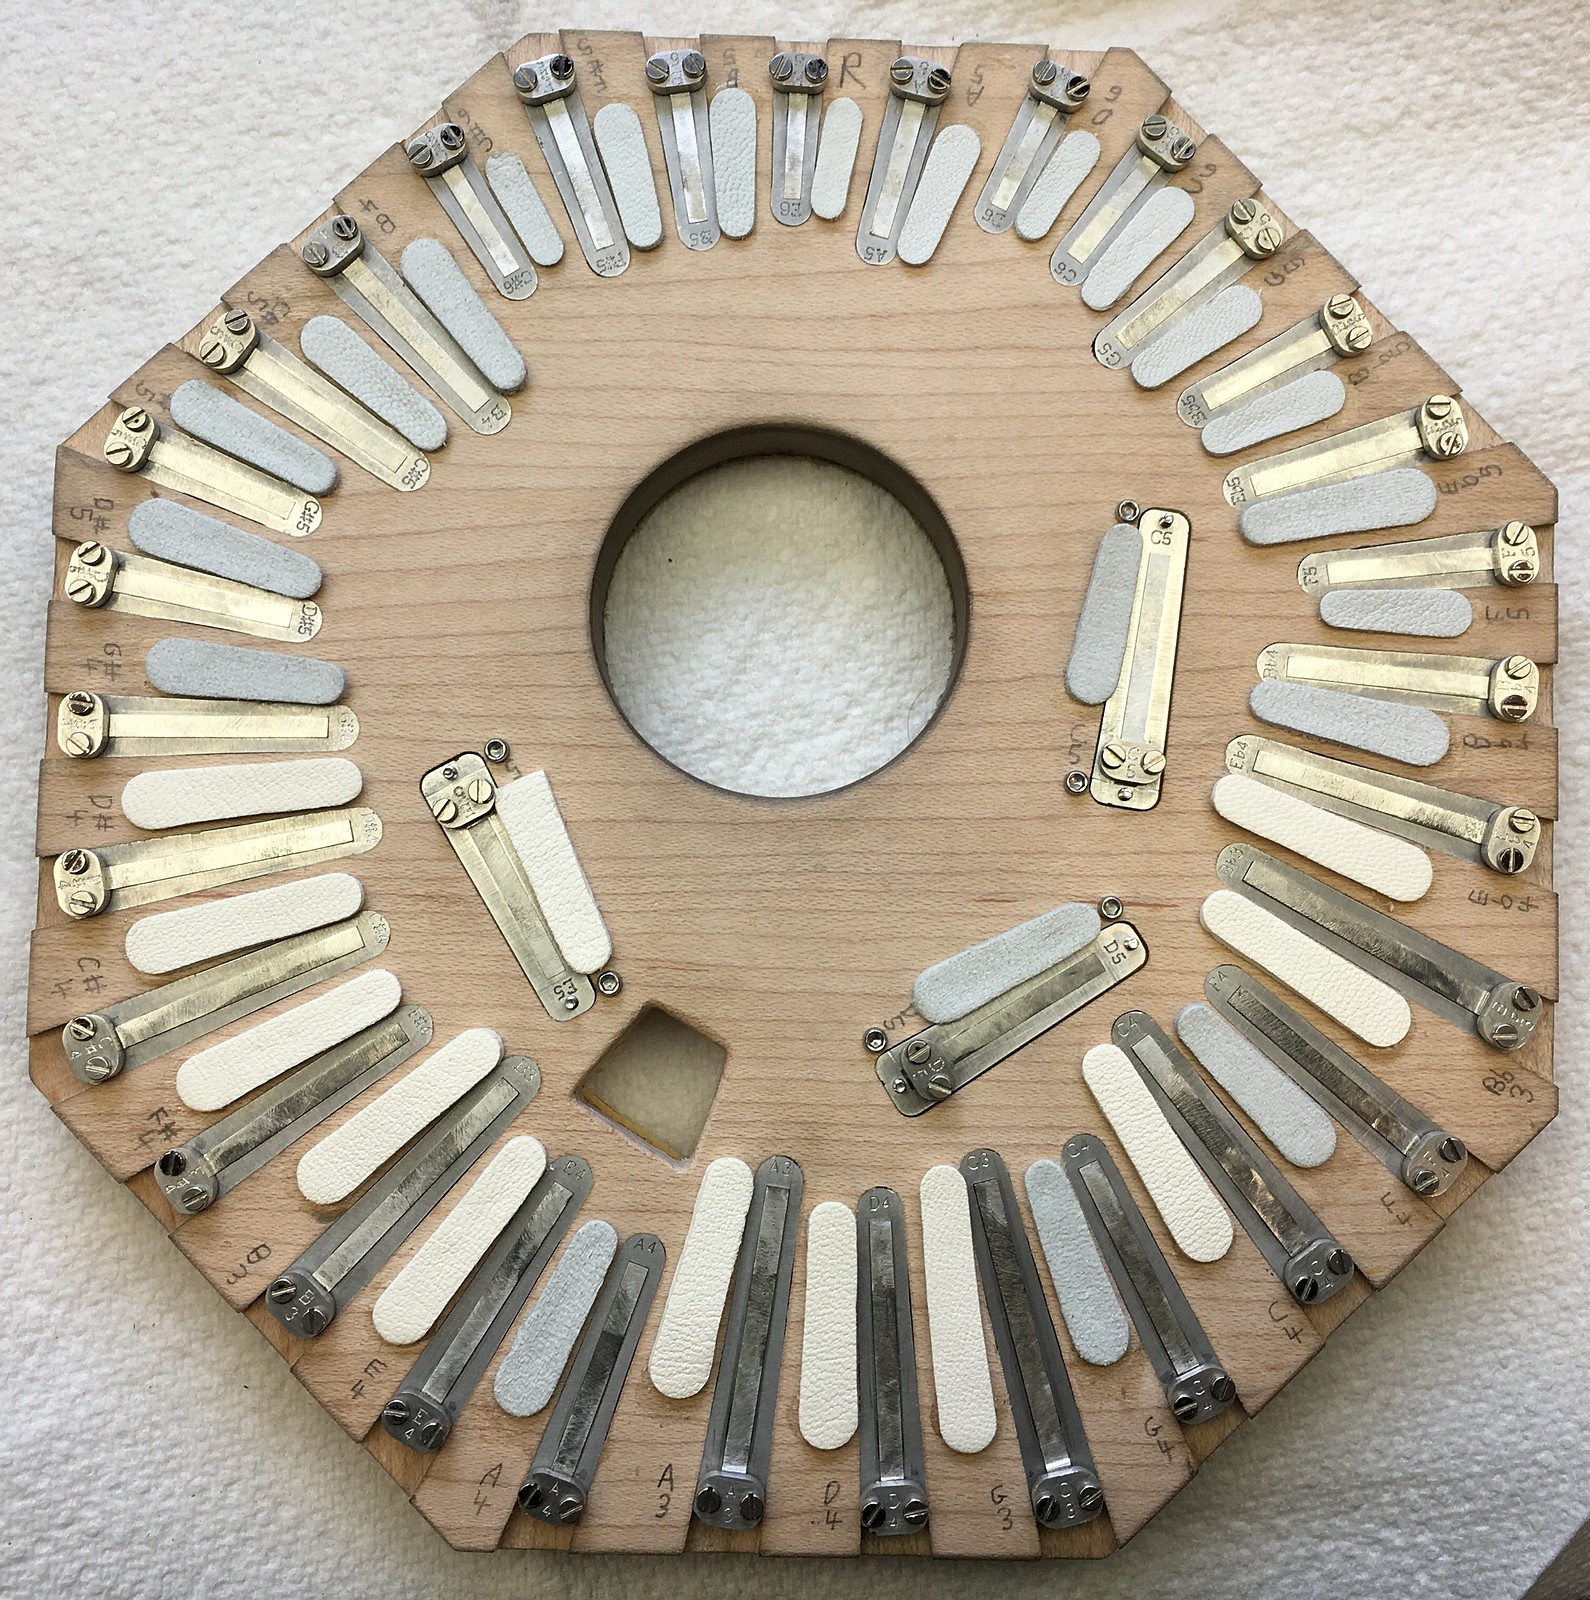
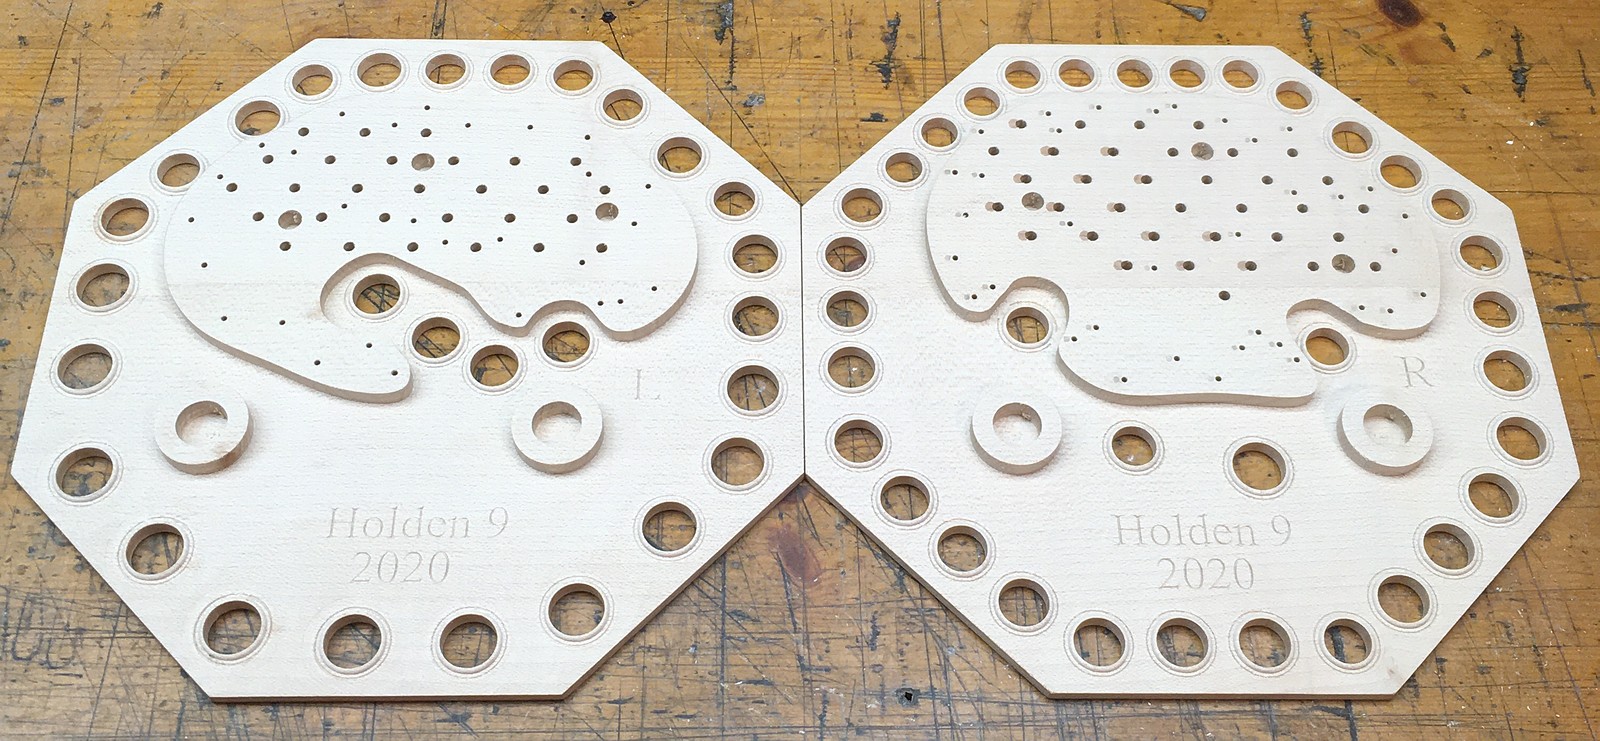
Button Layout
(Click on the chart to enlarge.)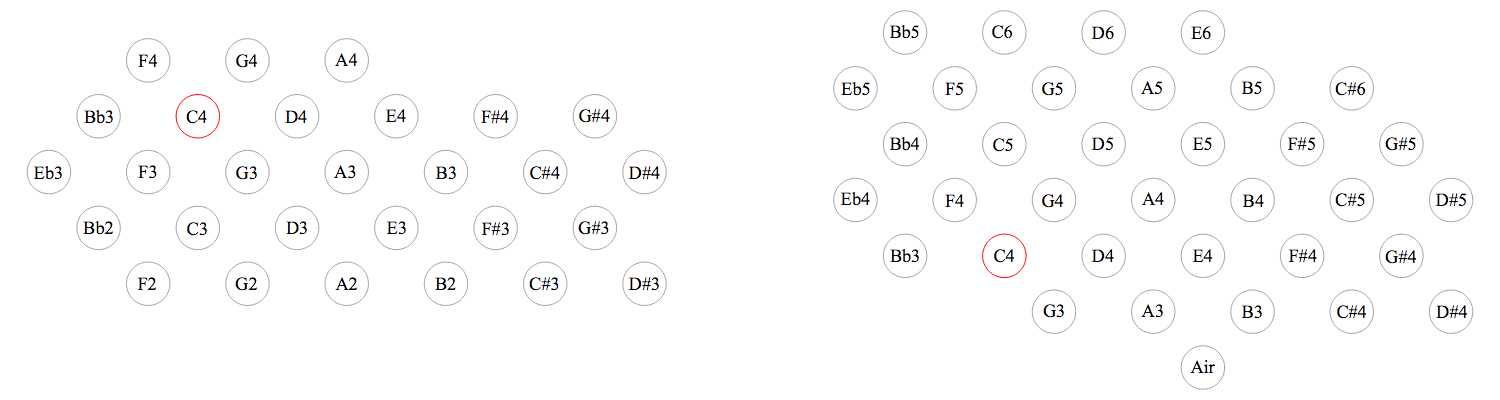
The layout is based on the Hayden duet system, with the exact buttons included on the instrument chosen according to my client’s specification. The F2 at the bottom of the range is the lowest pitch reed I have so far made. The whole bottom row on the left hand has an impressive, deep cello-like sound.
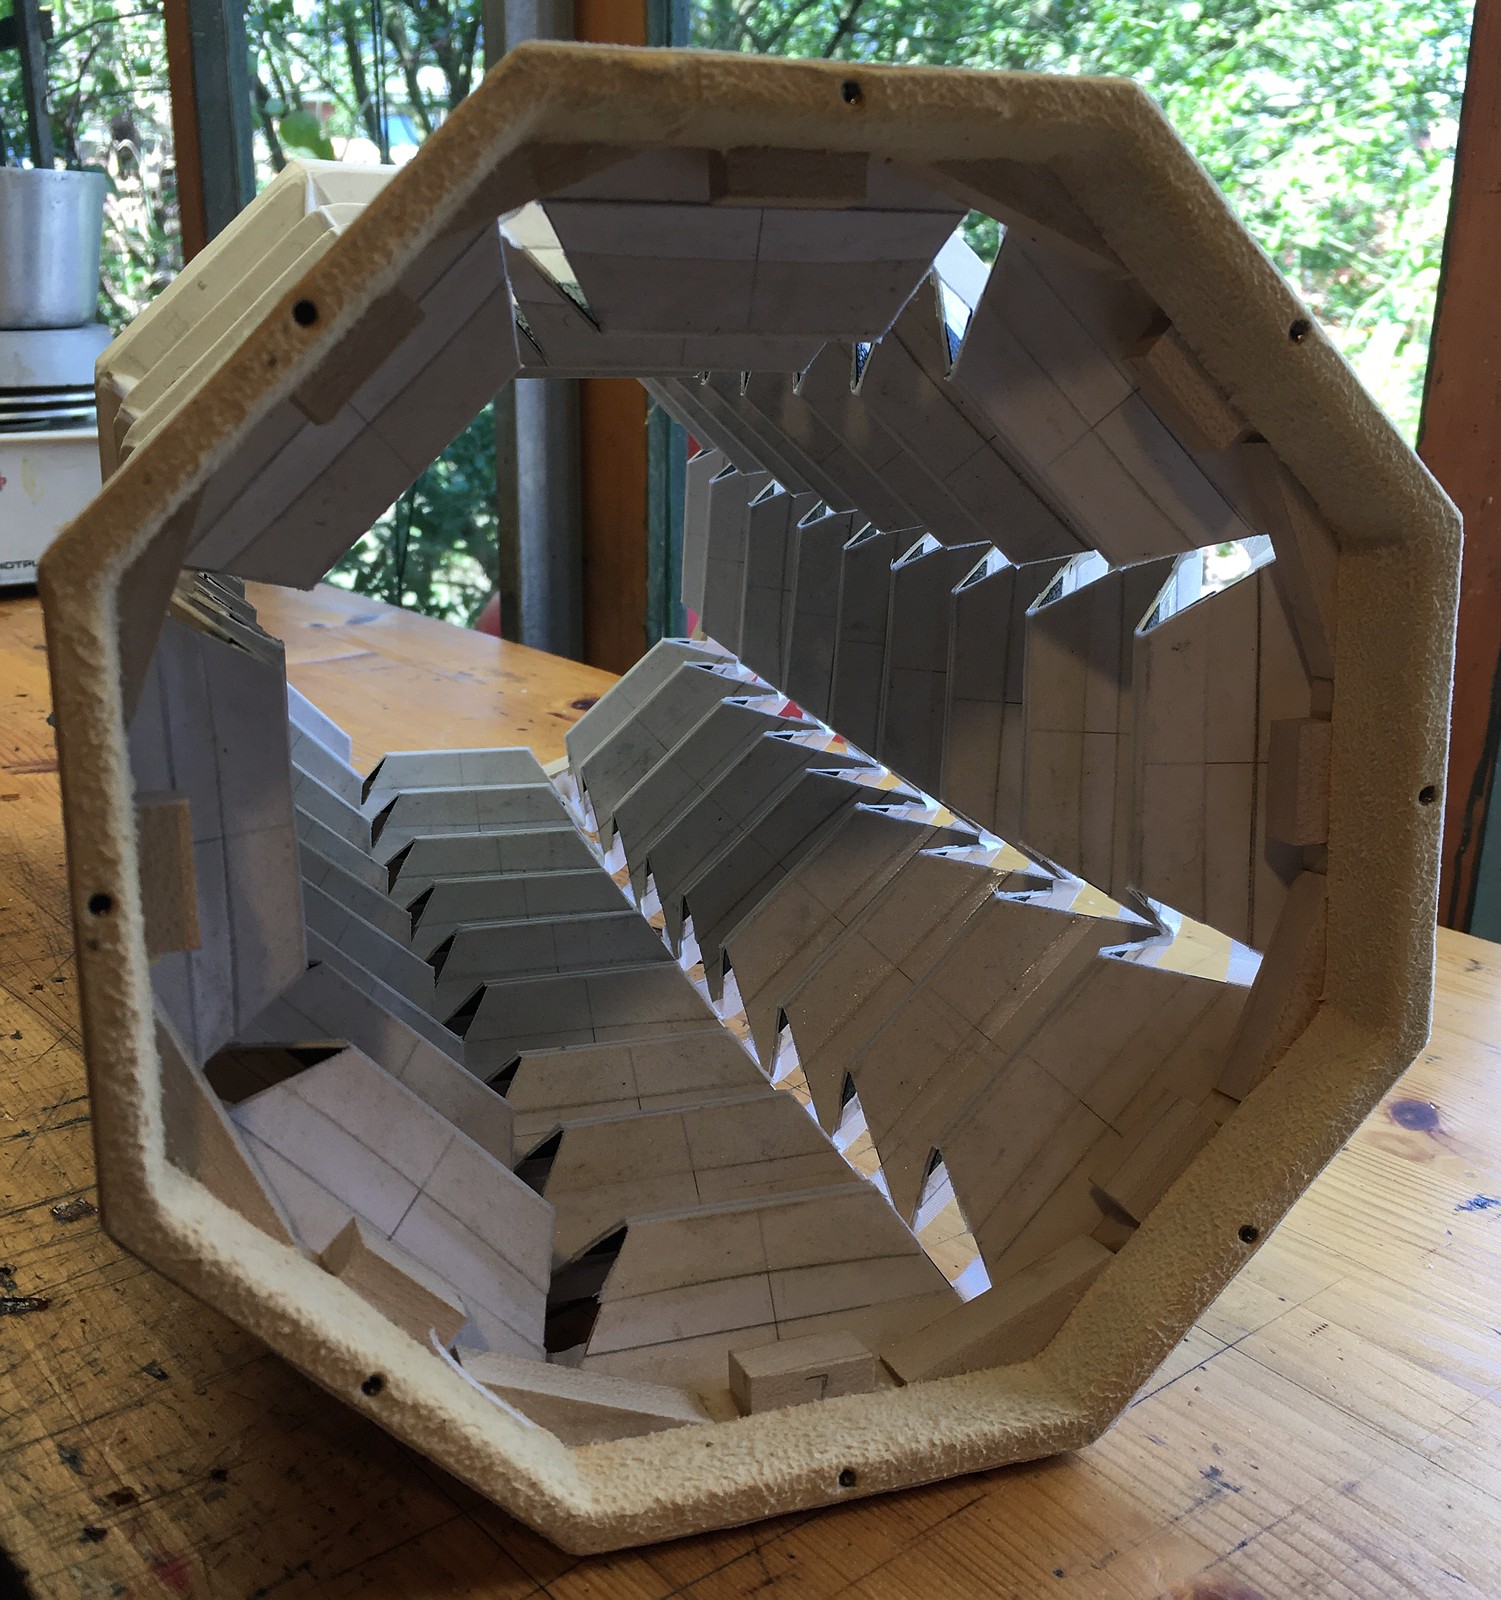
Reed Pans
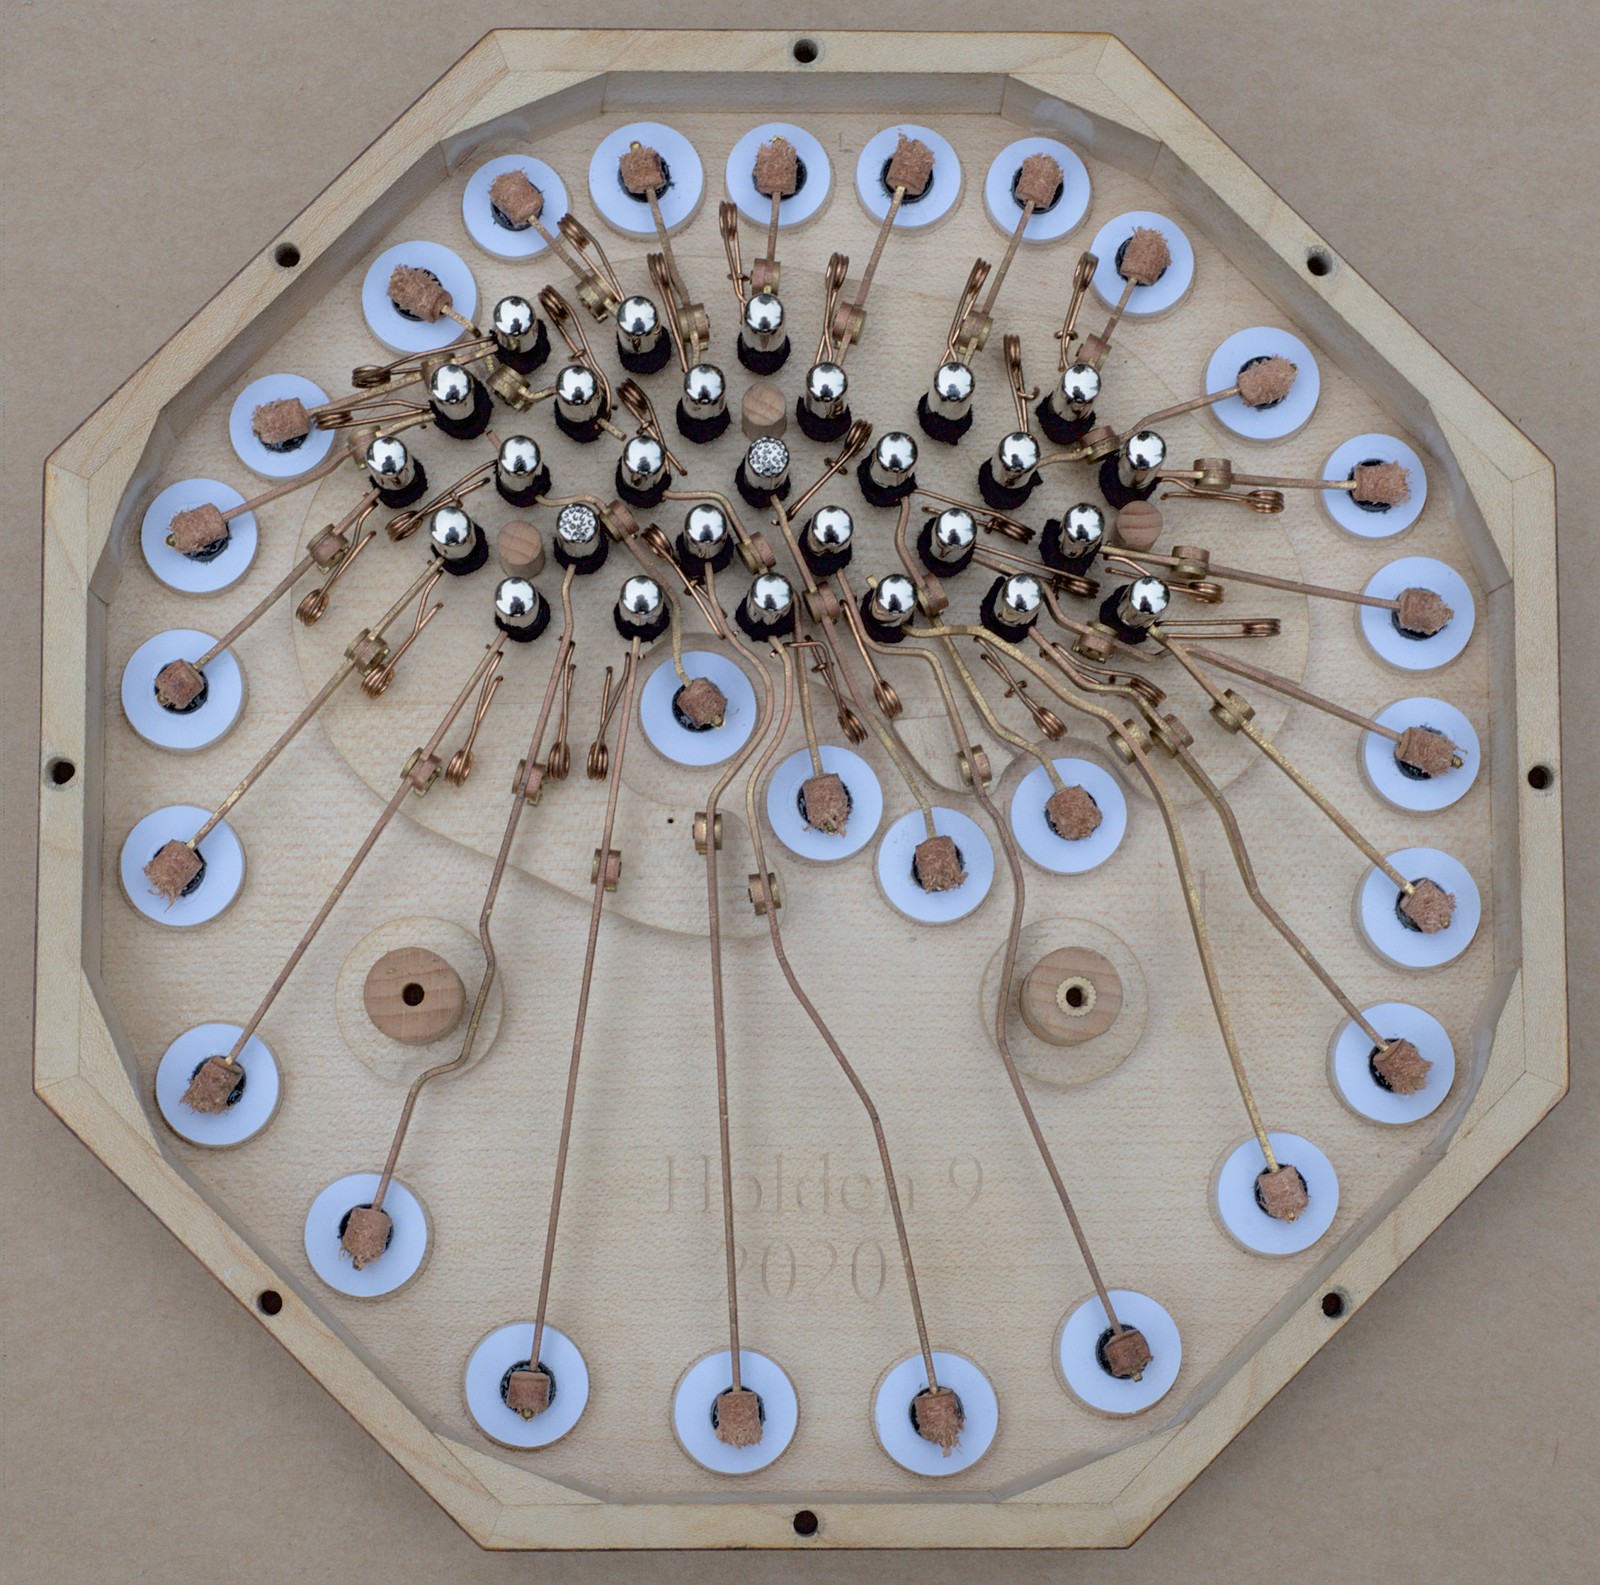
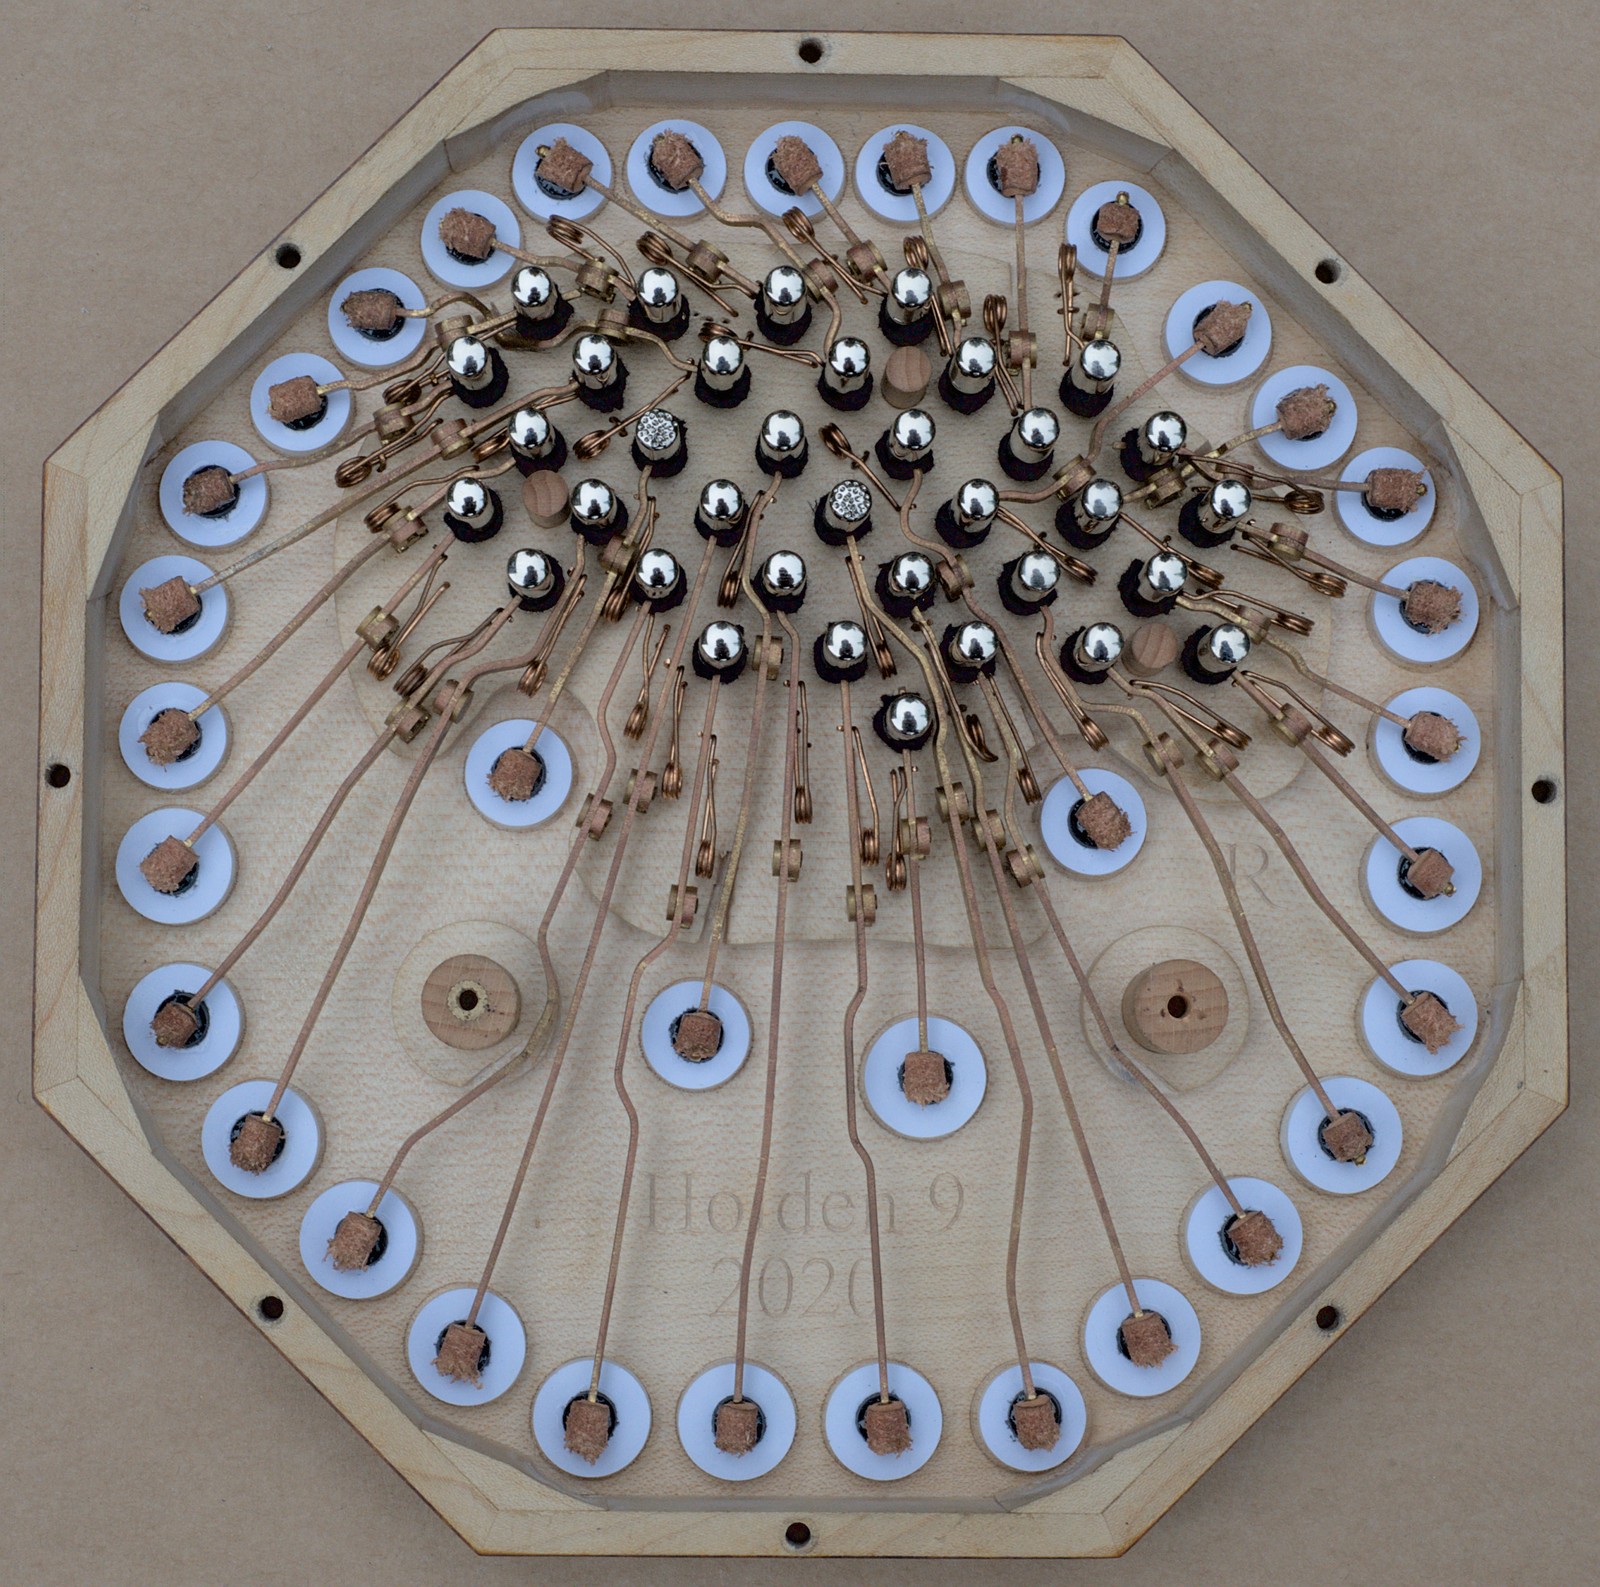
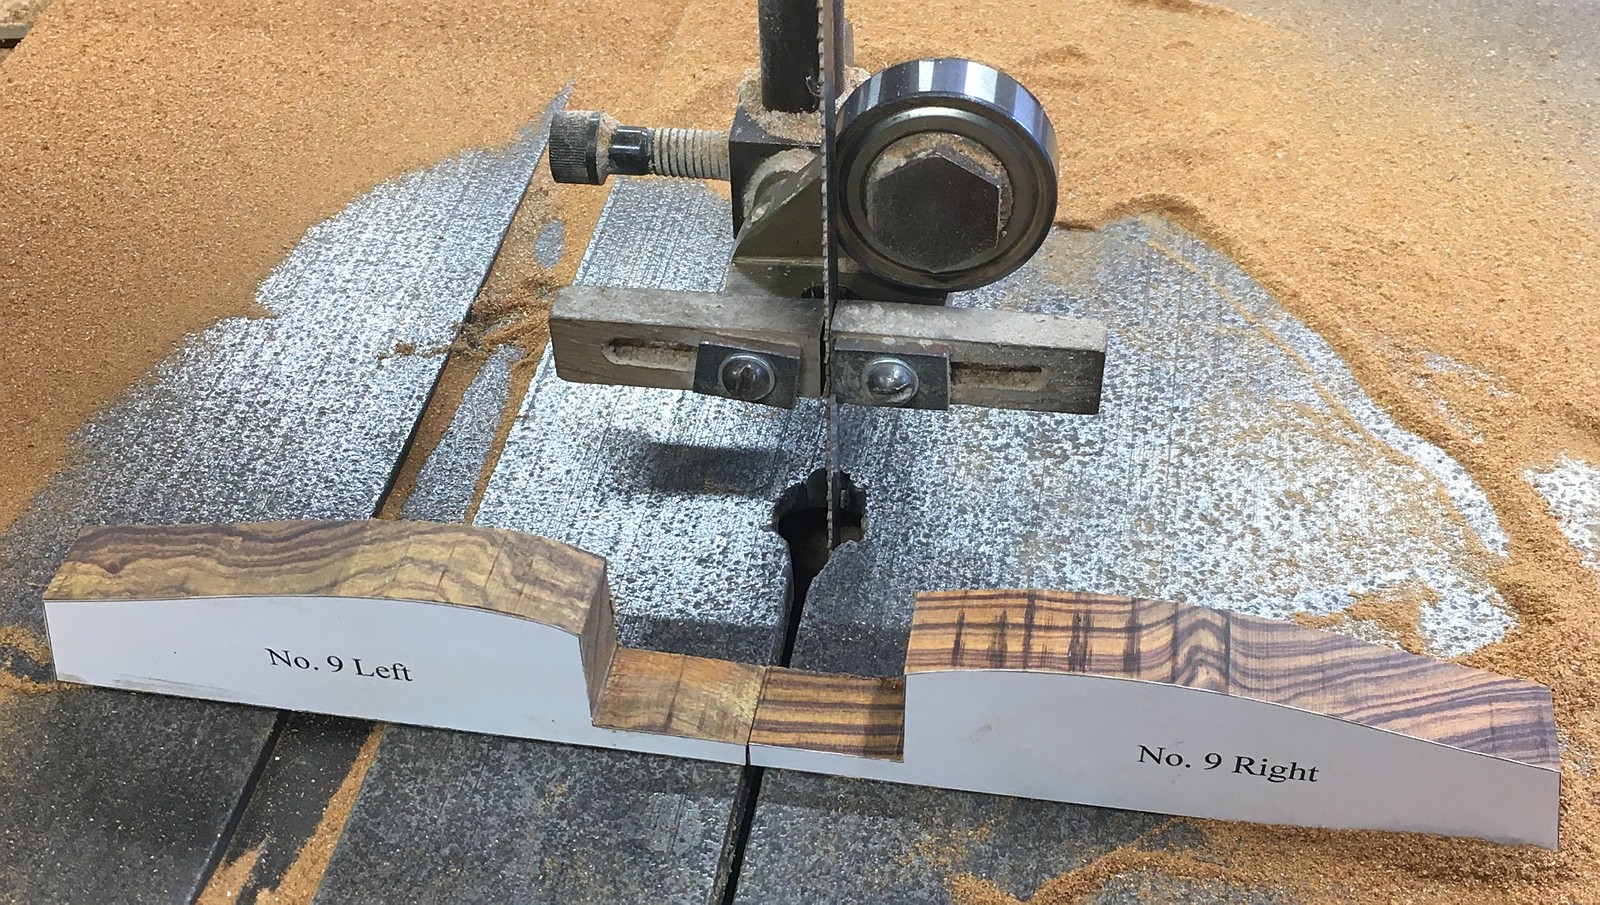
The instrument was built for a part of the world that sees greater seasonal humidity variation than Britain, so I chose to make the base boards of the reed pans from the same laminated hard maple that I previously used on No. 6 and No. 7.
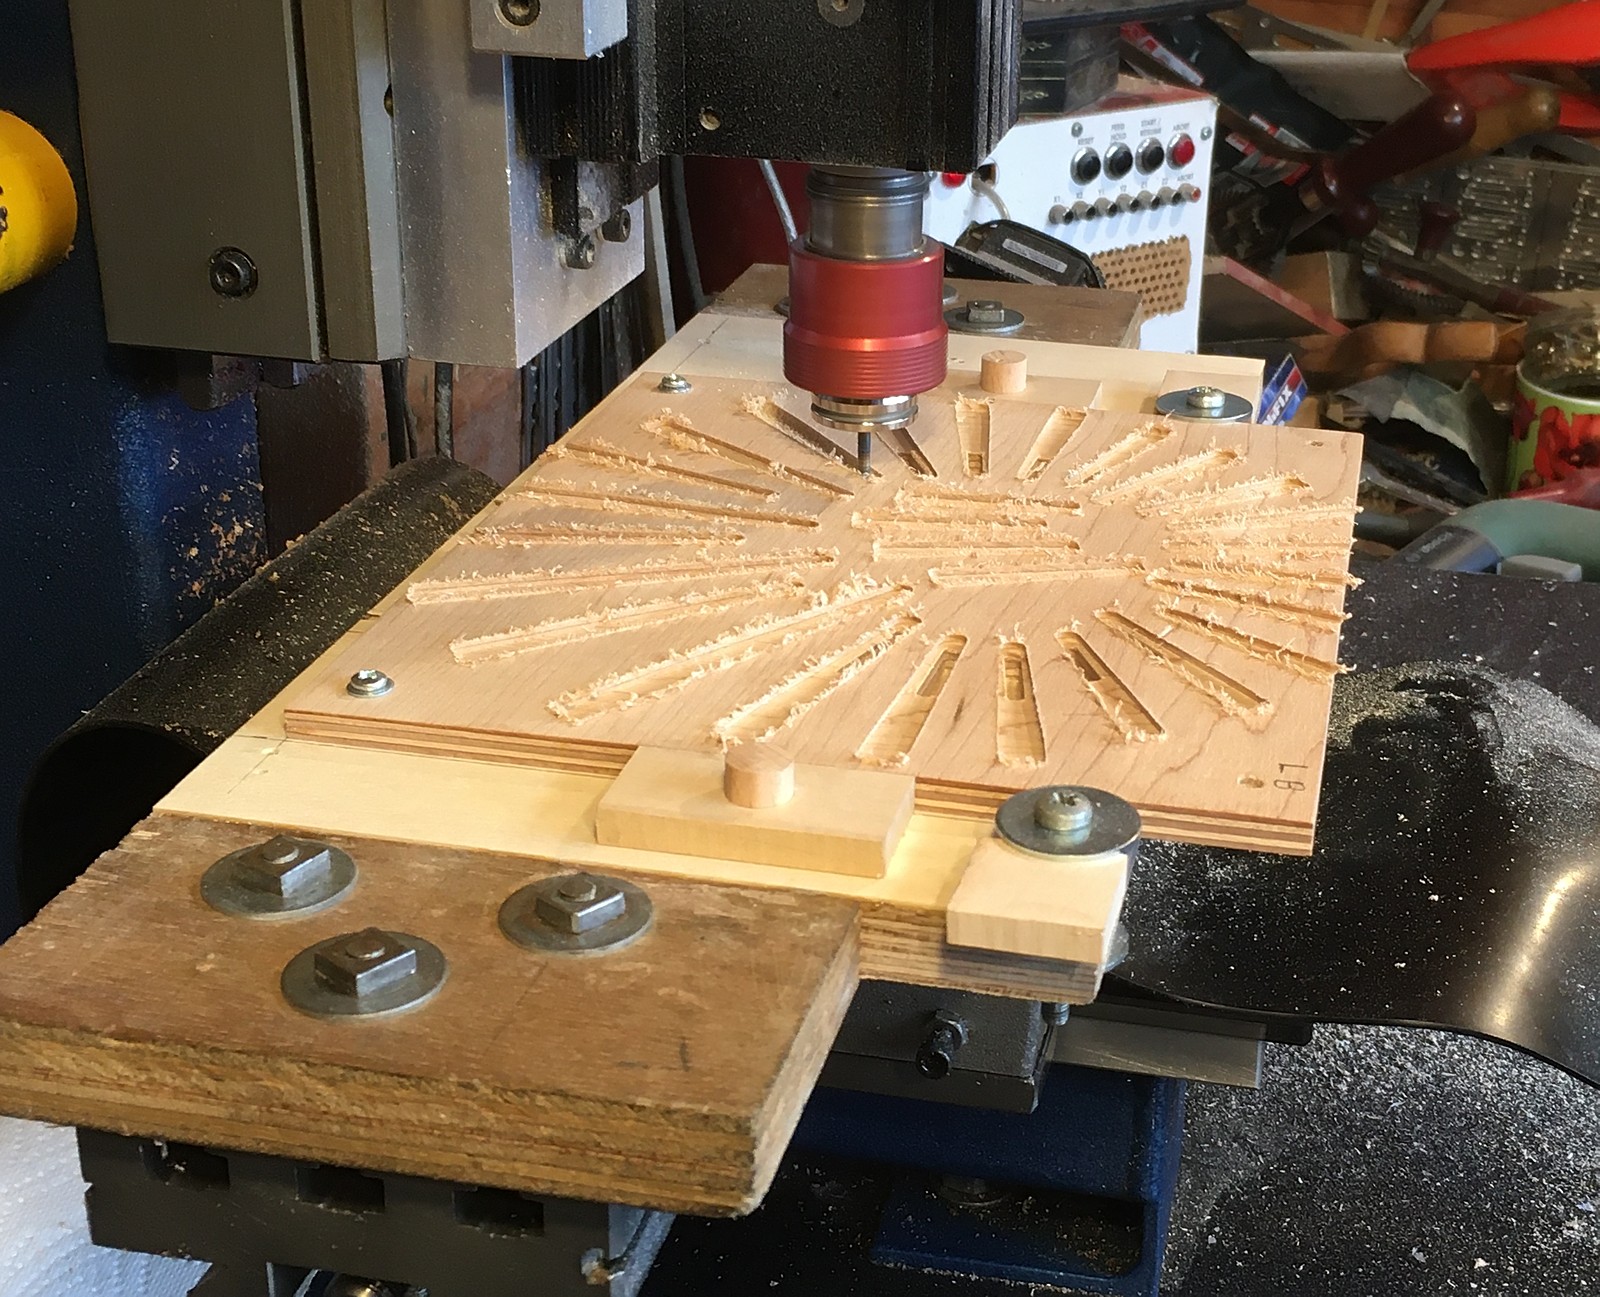
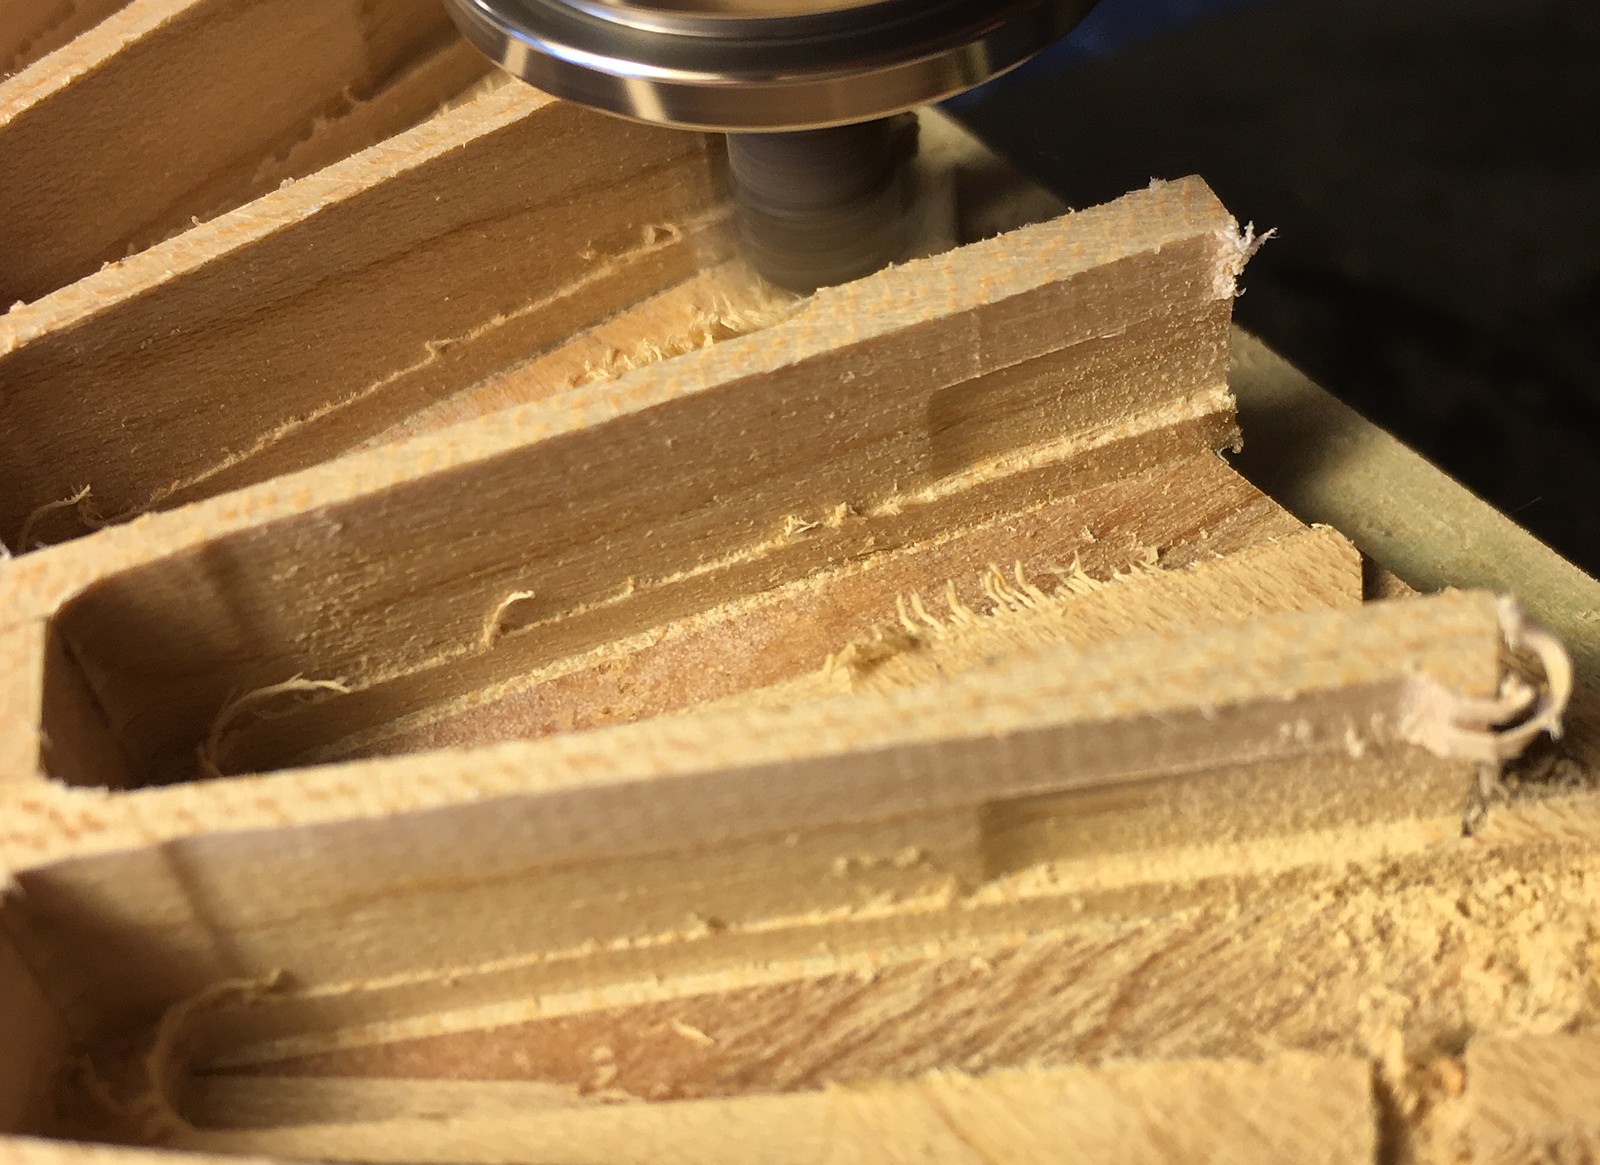
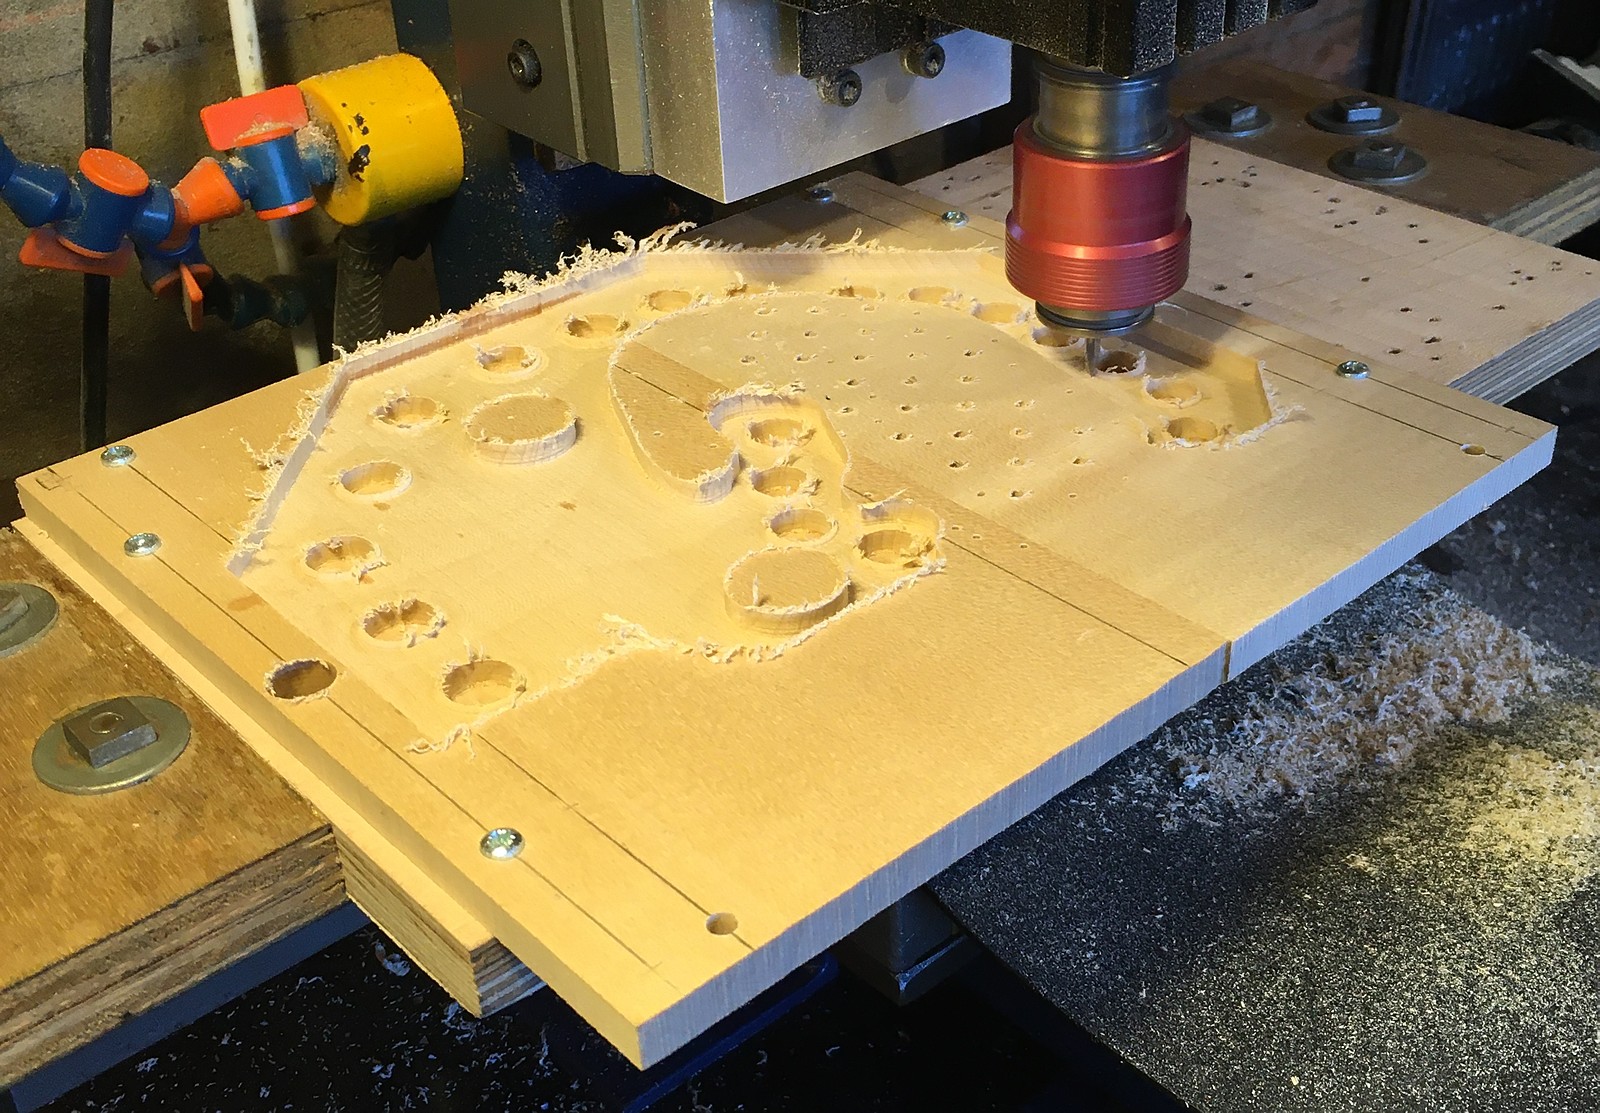
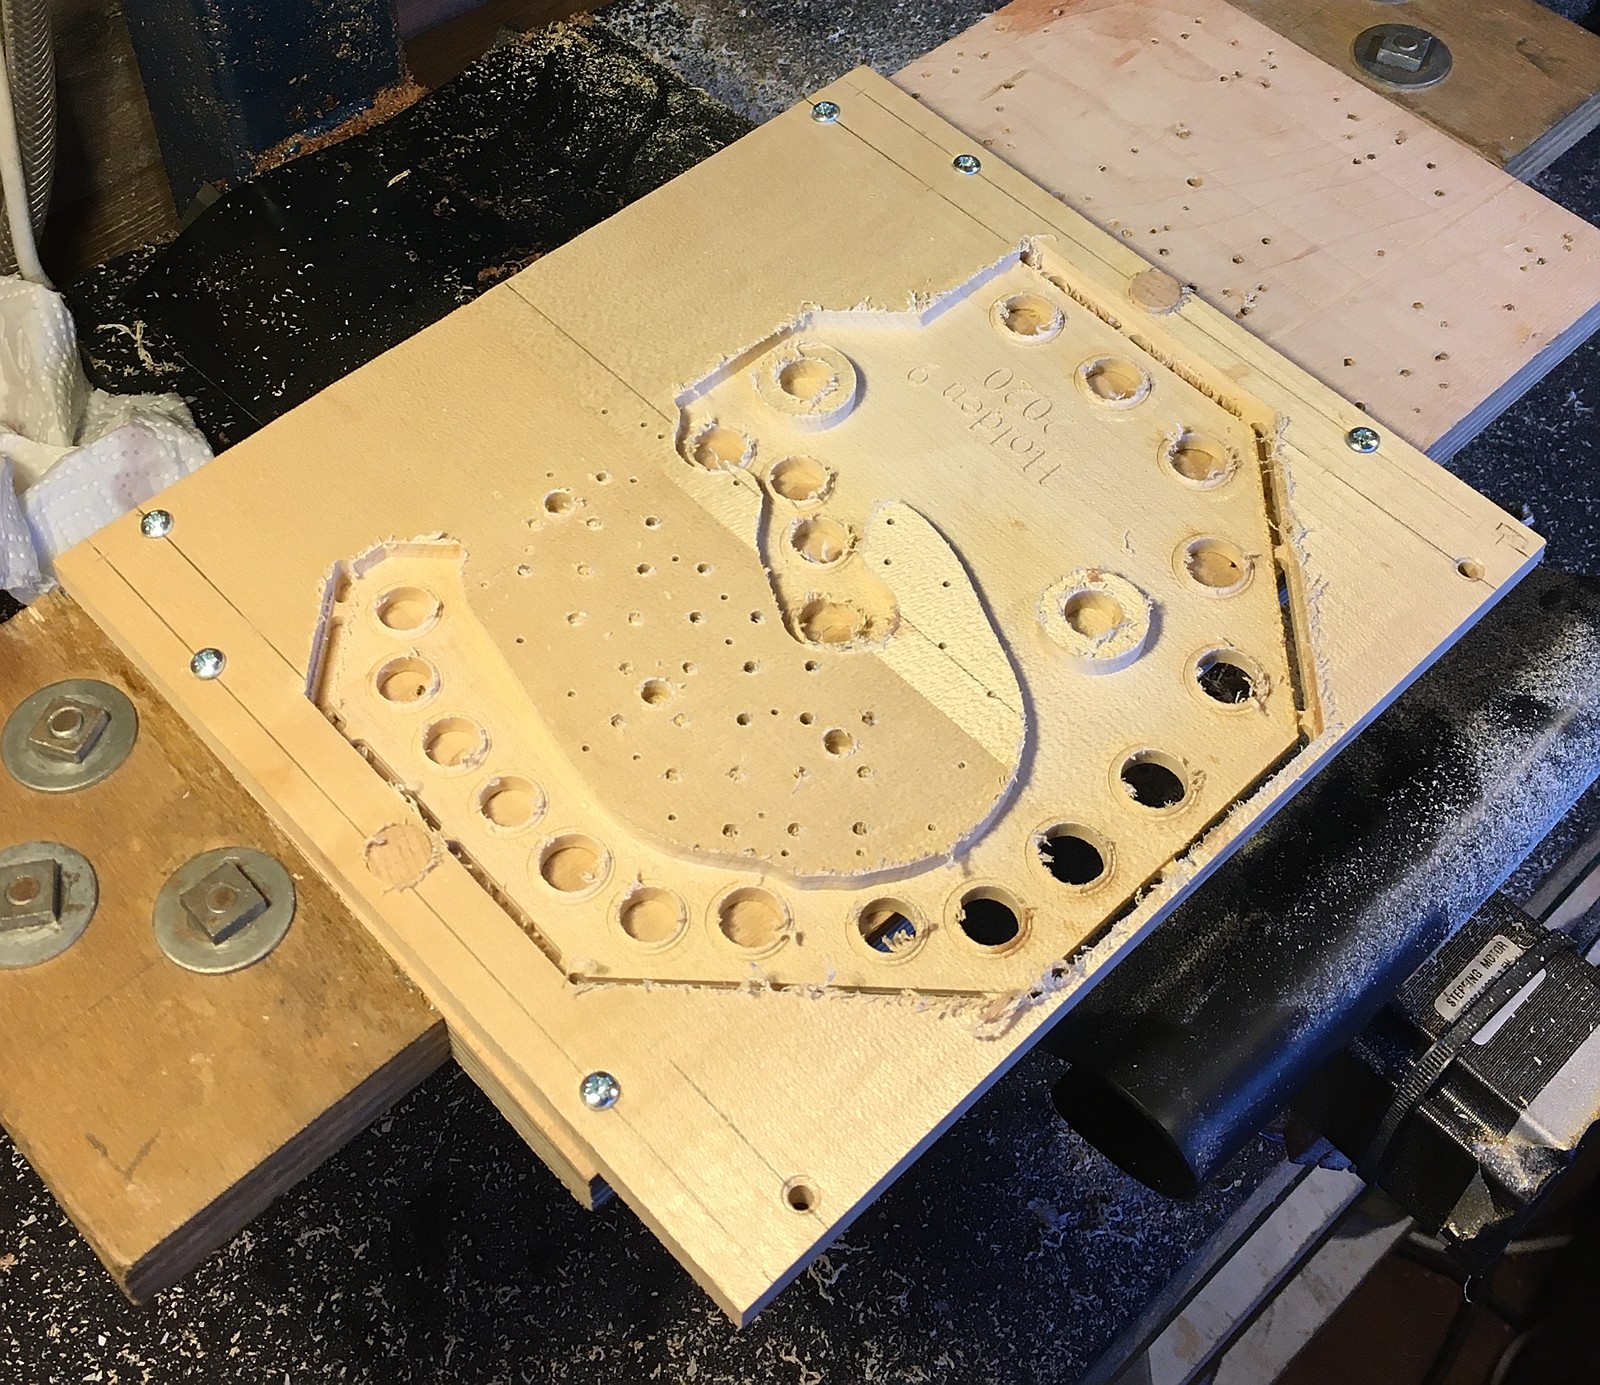
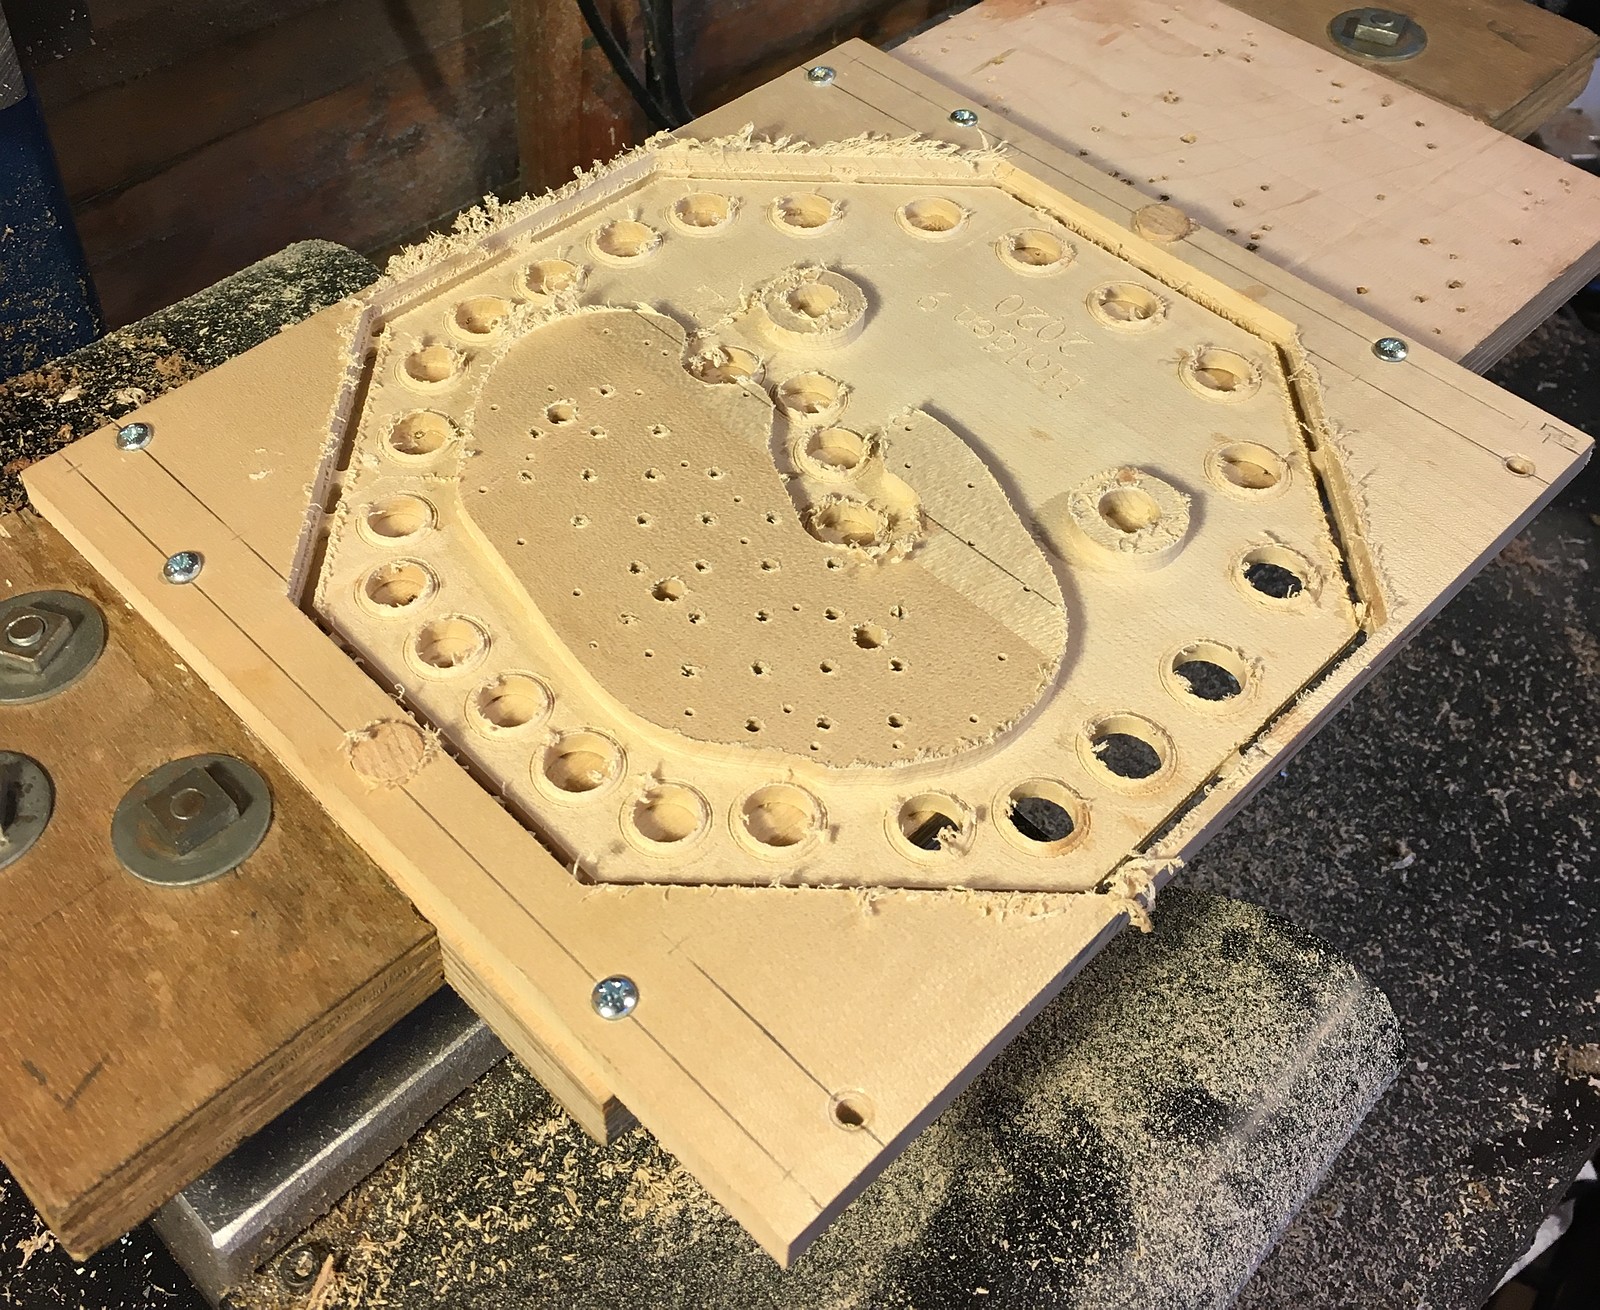
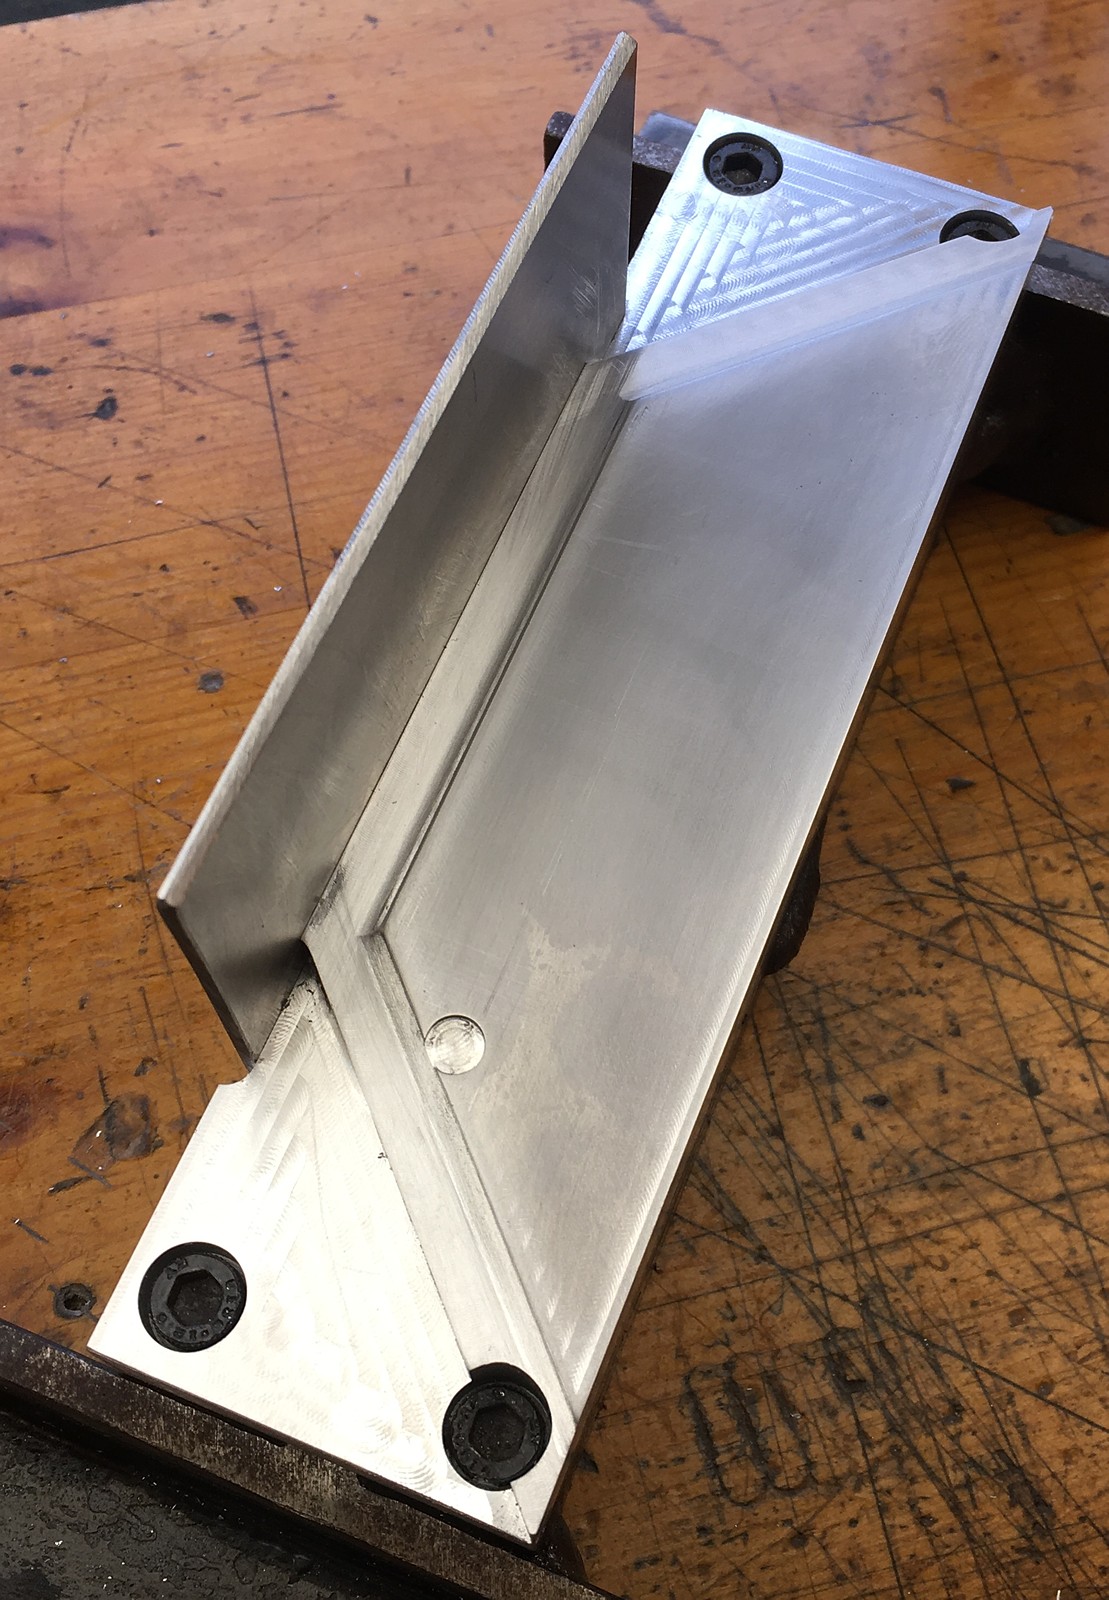
The greater size of this instrument caused several constructional challenges, because my CNC milling machine has insufficient travel in the Y axis to reach the entire surface of a board that is more than about 6 1/2″ wide. The way I got around the problem was to use registration dowels and machine part of each board, then rotate it 180º to machine the rest of it. This meant I had to do double the usual number of CAM programs and setups, plus extra work to split things up so that each feature on the board got machined exactly once.
First operations on the bottom of the left hand pan:
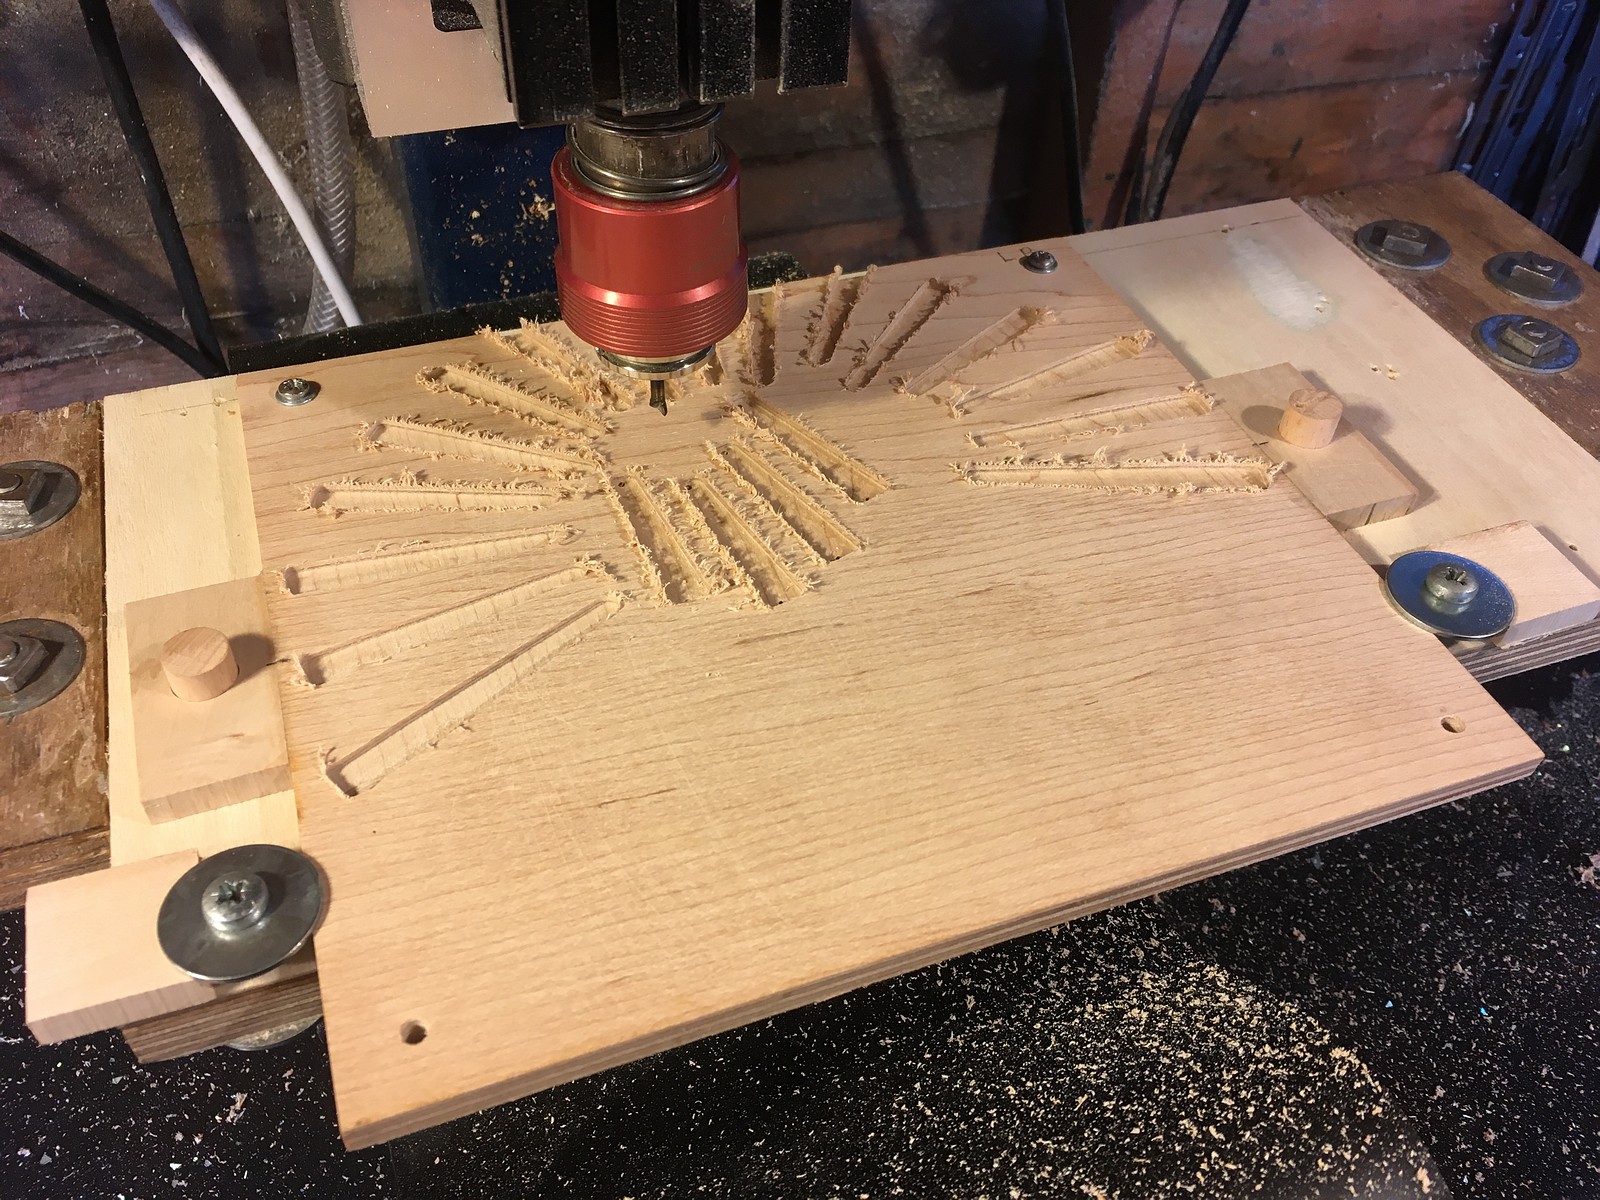
Take it off the machine and rotate it 180º:
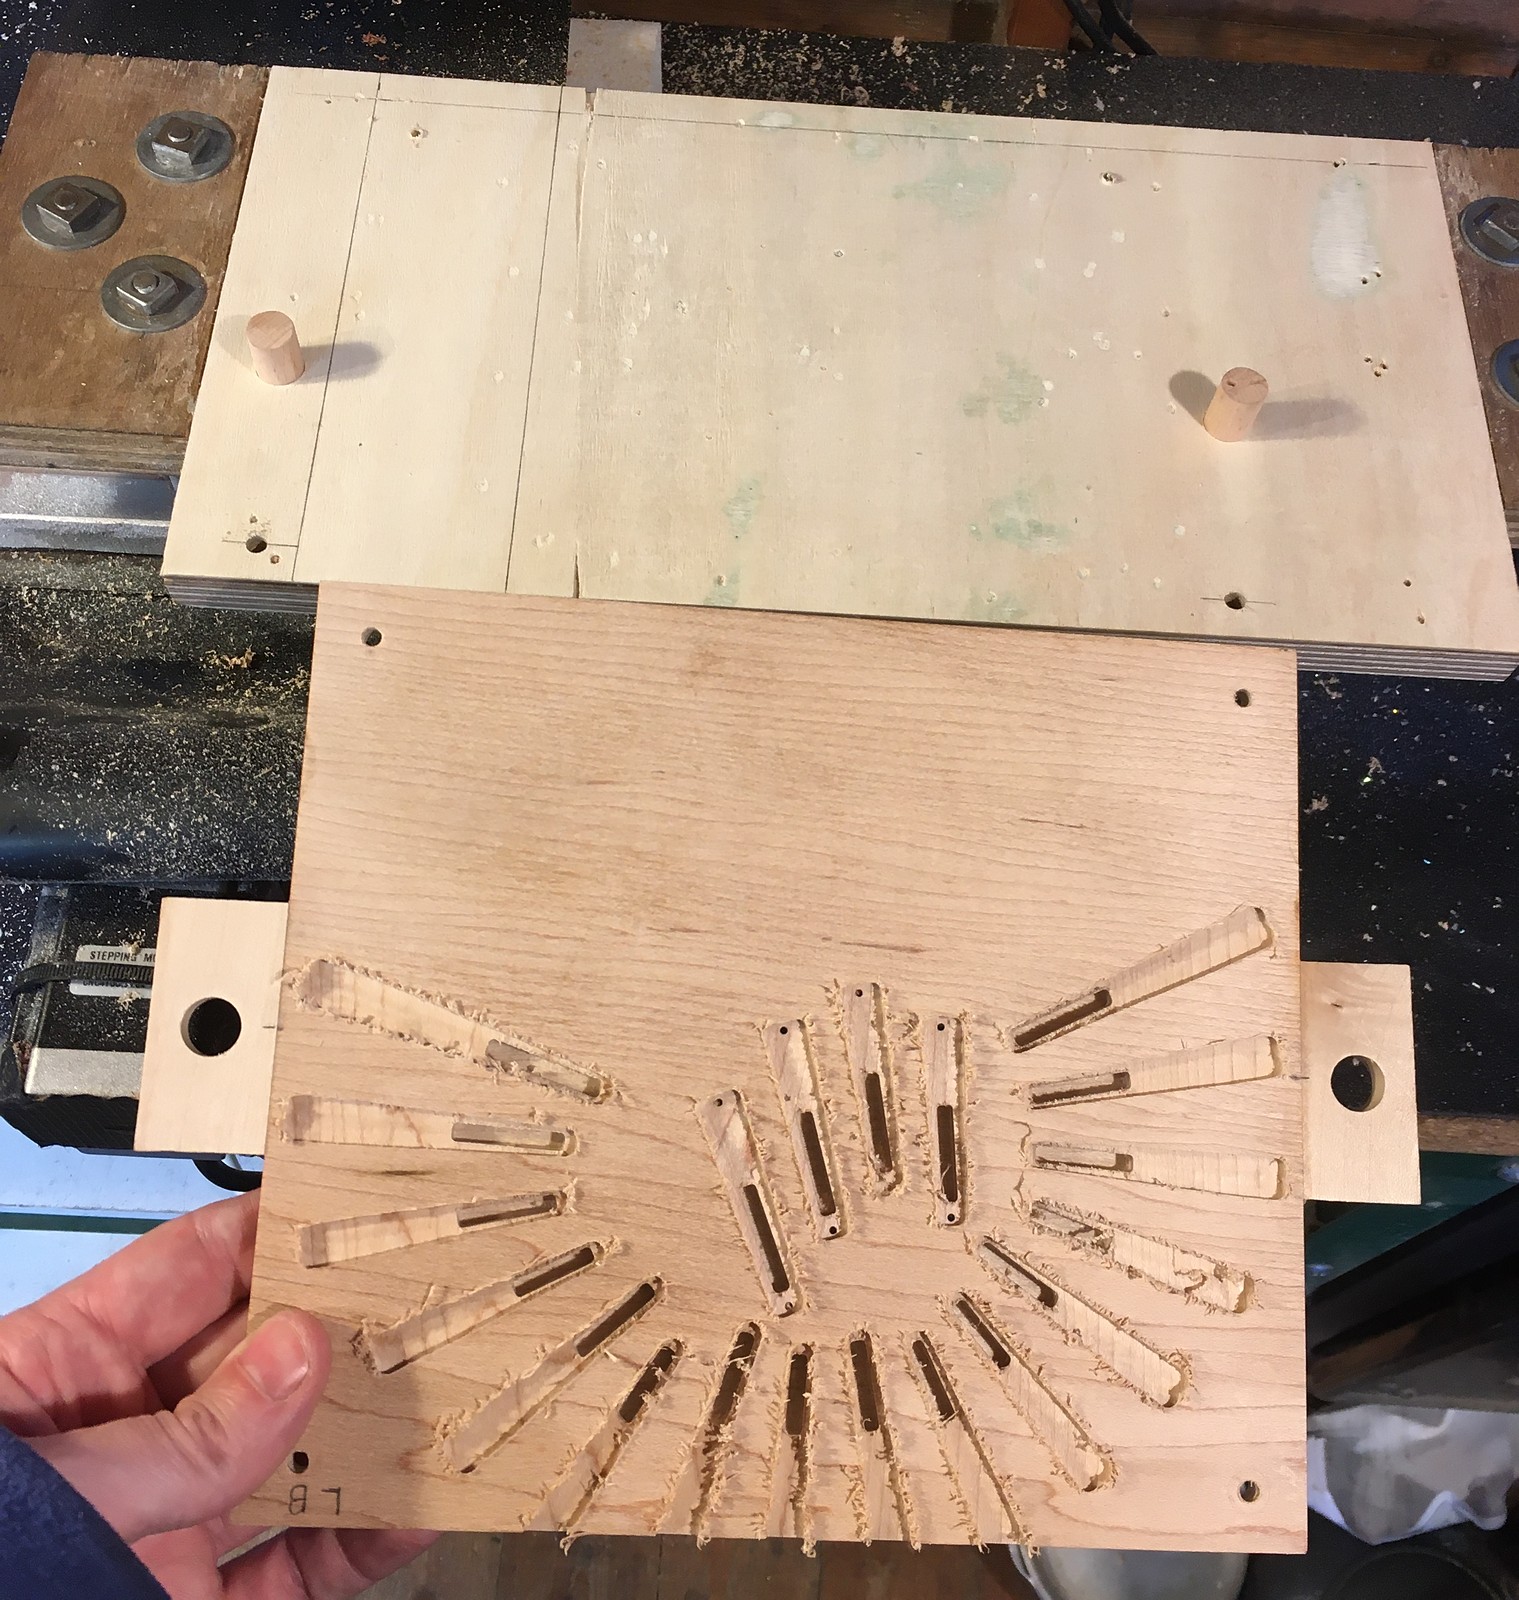
Back on the machine, using the two locating dowels to ensure it all lines up accurately:
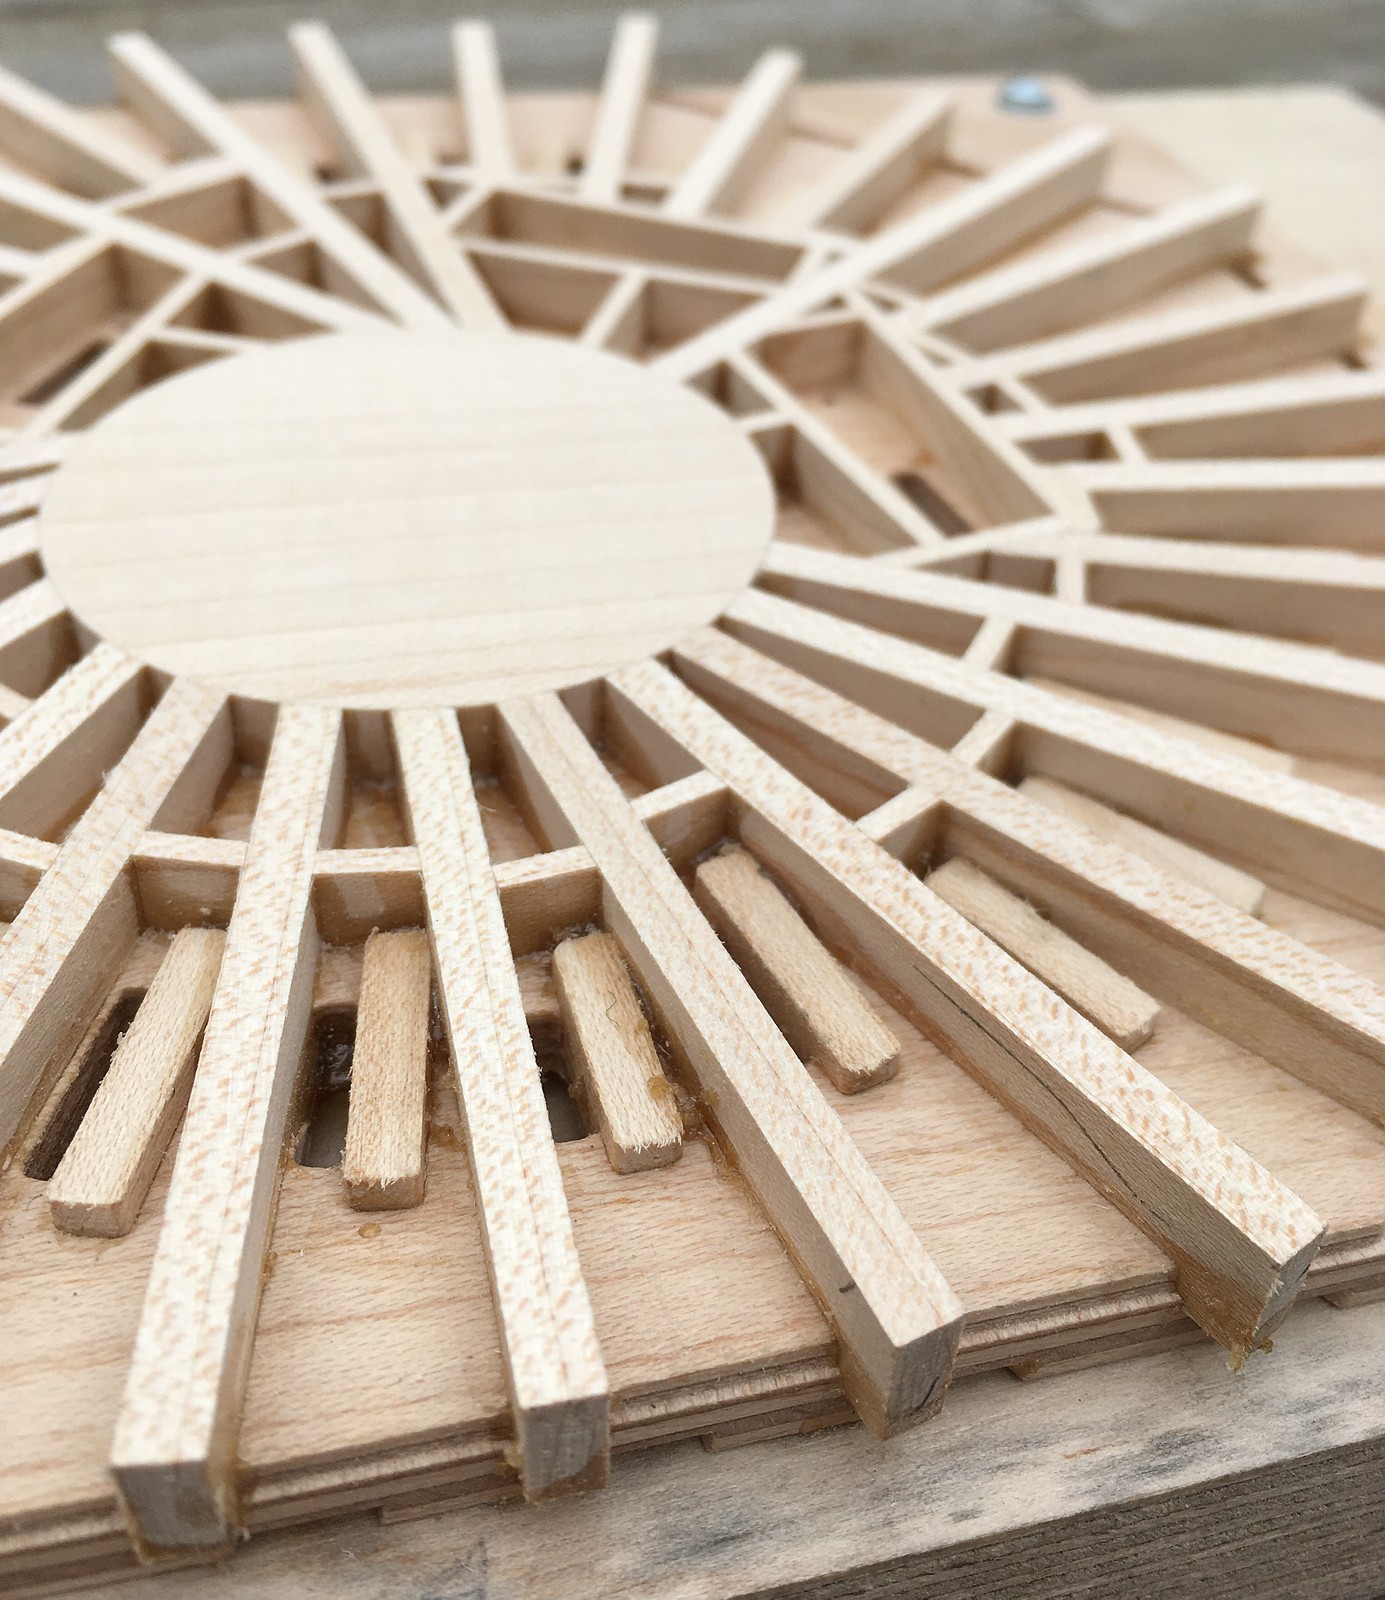
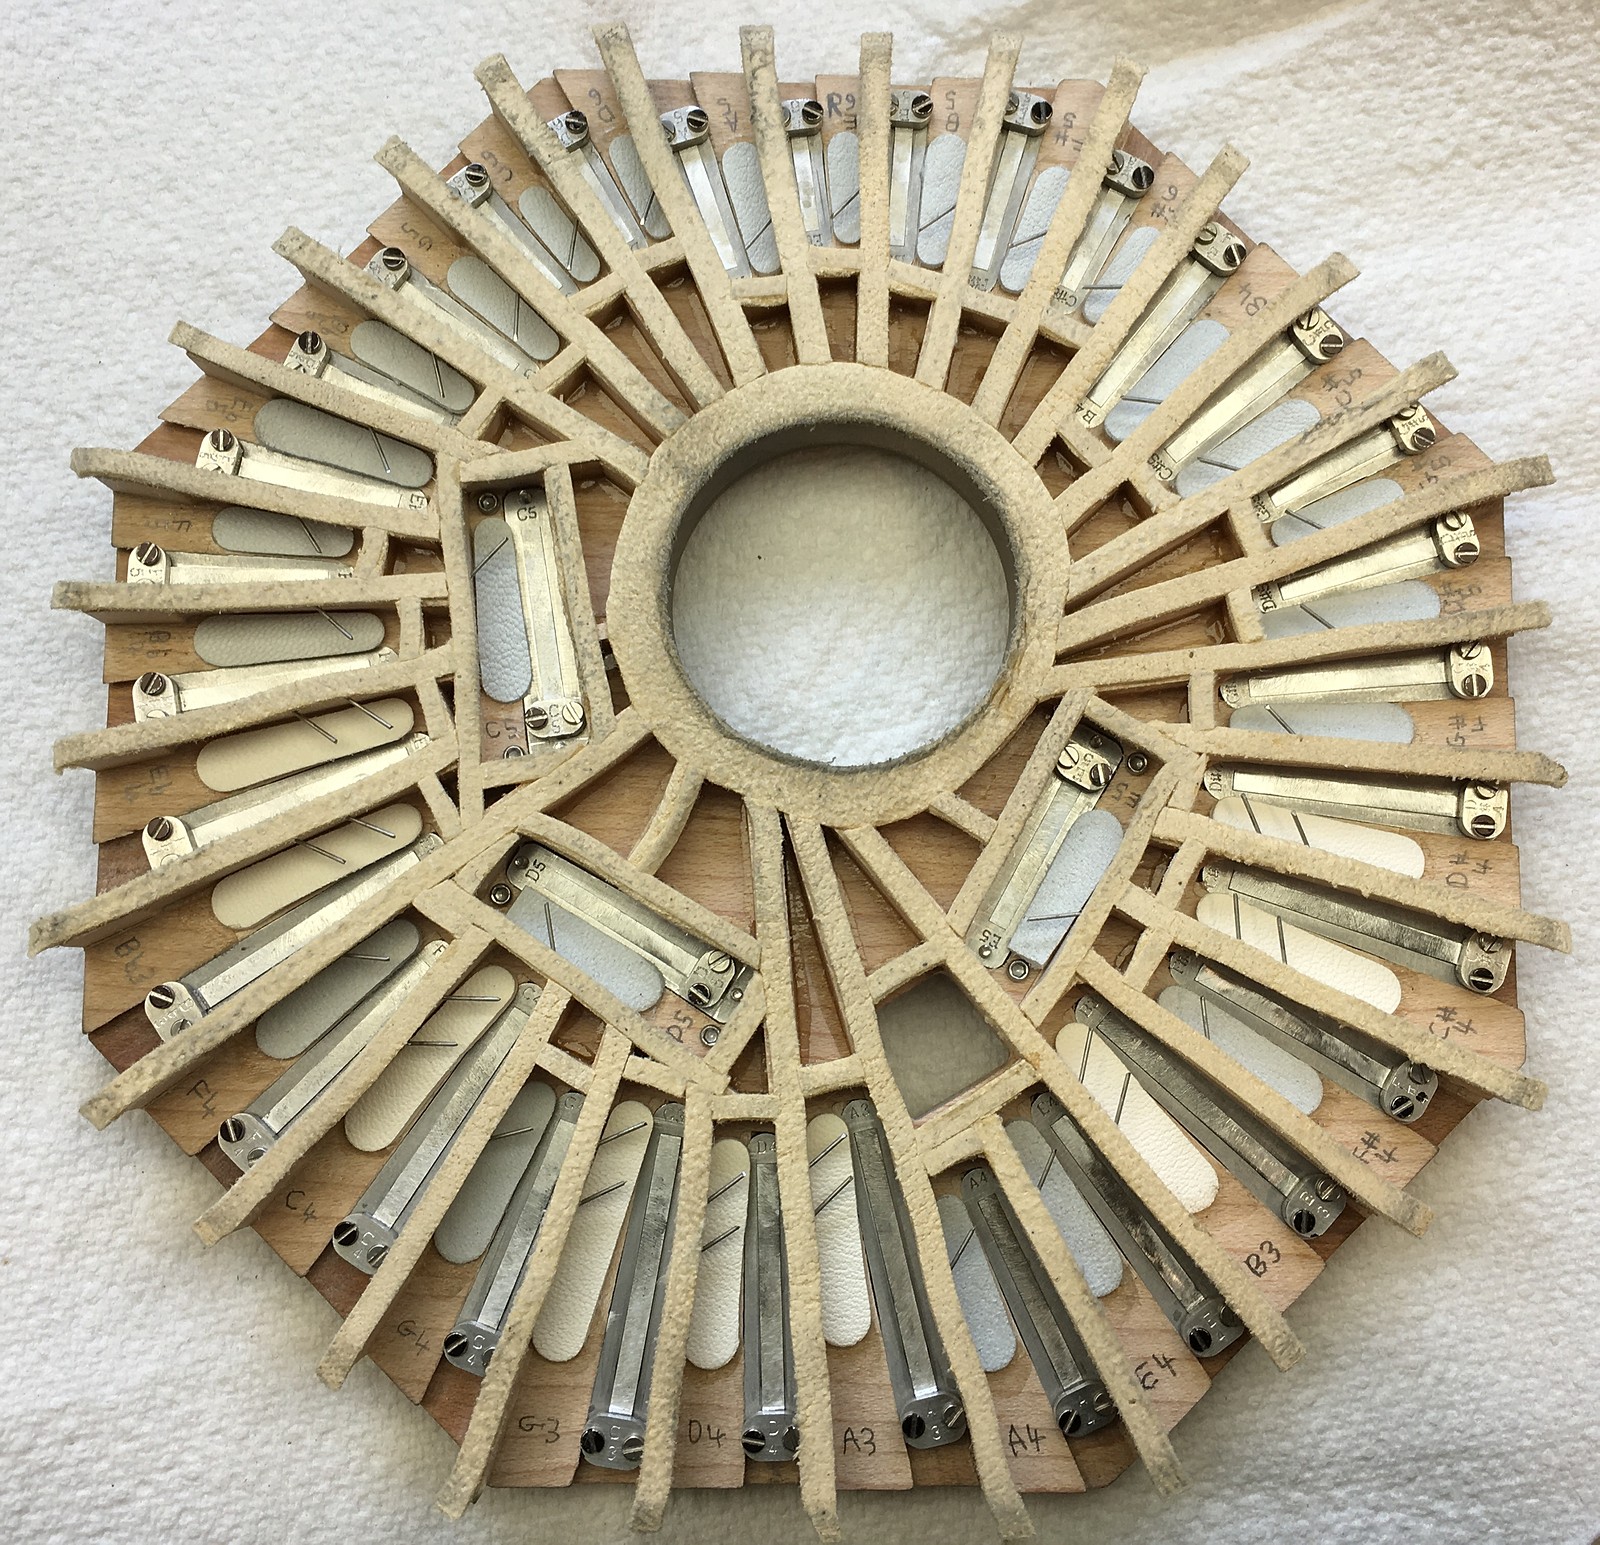
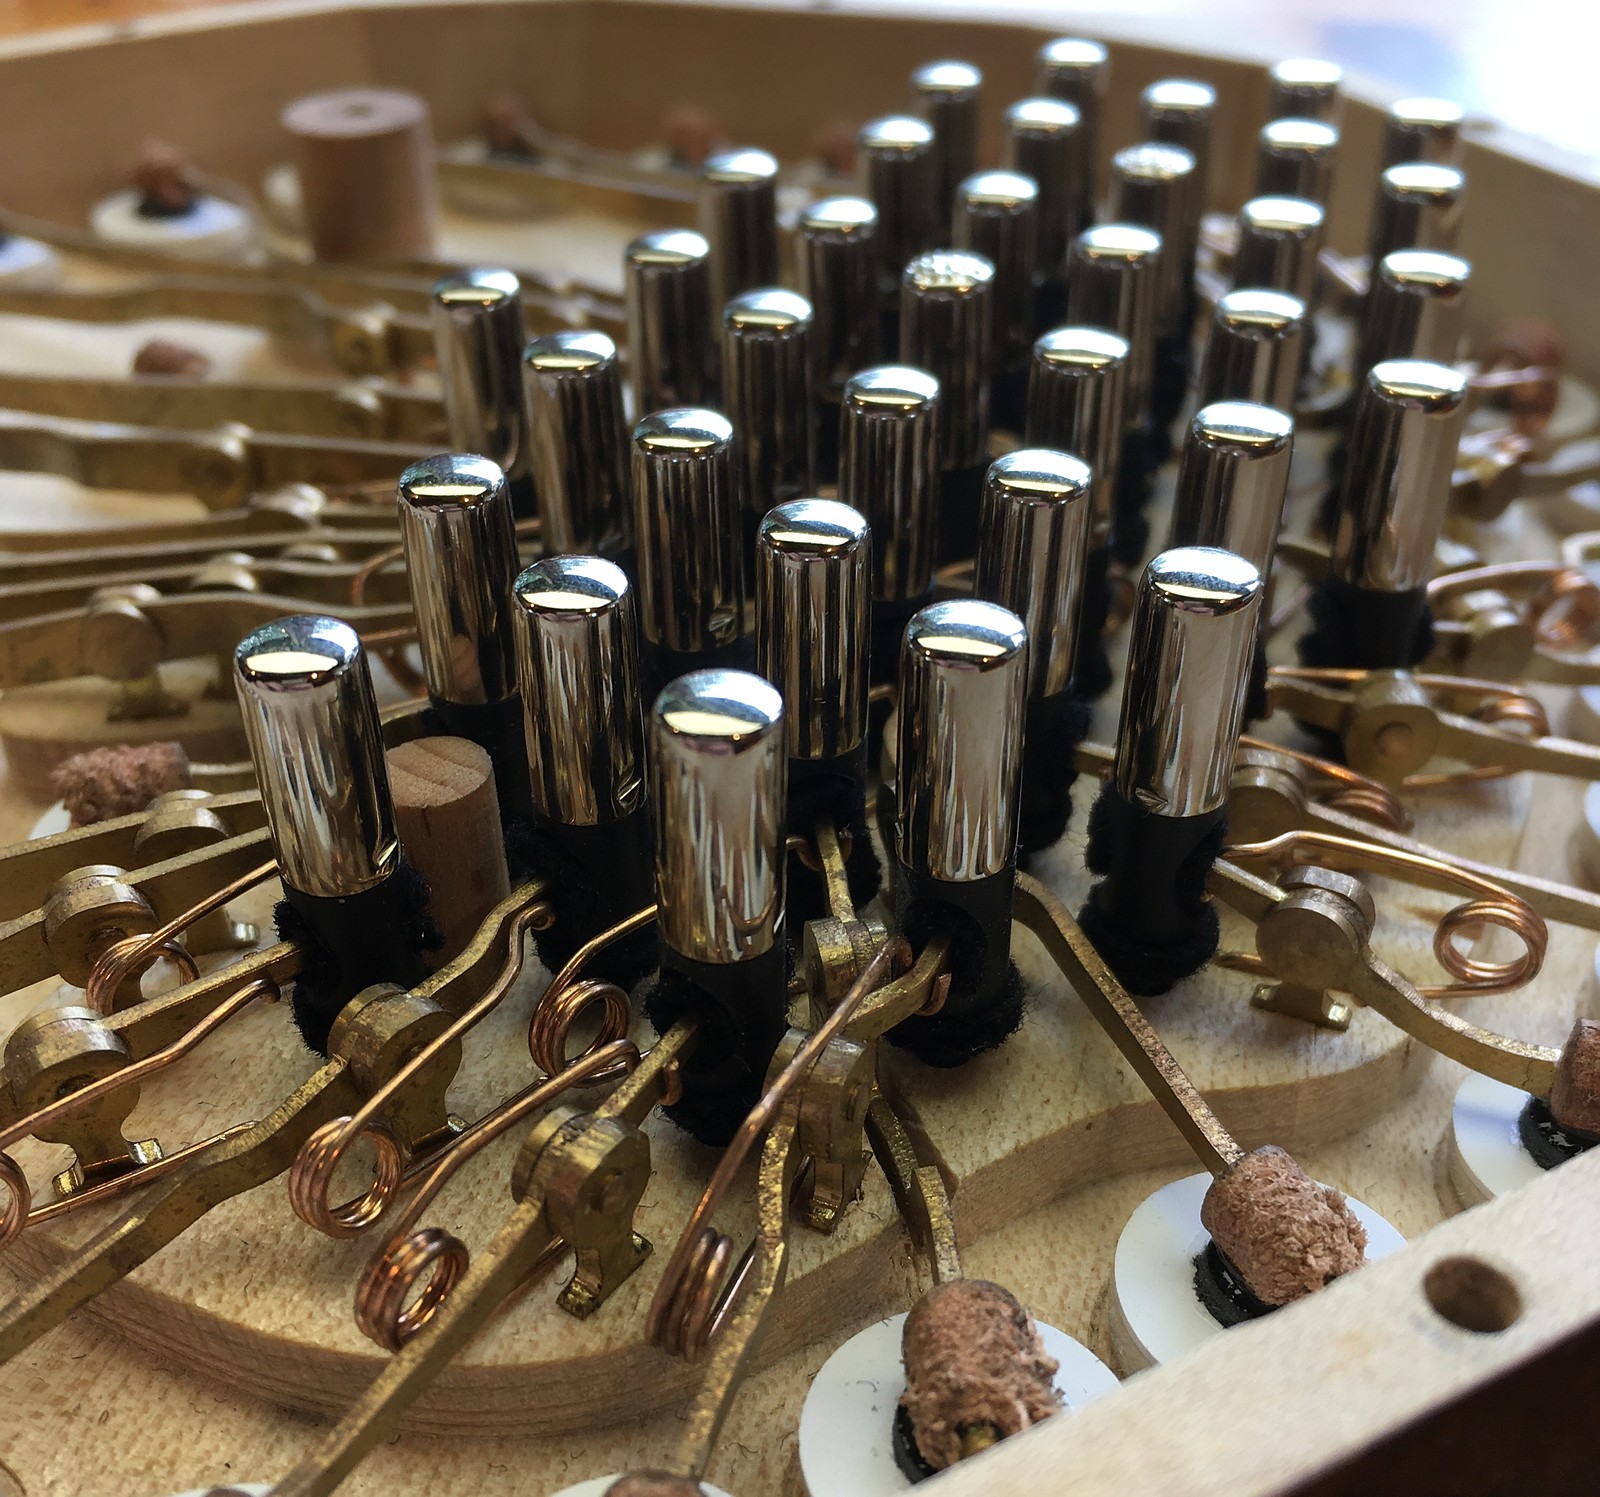
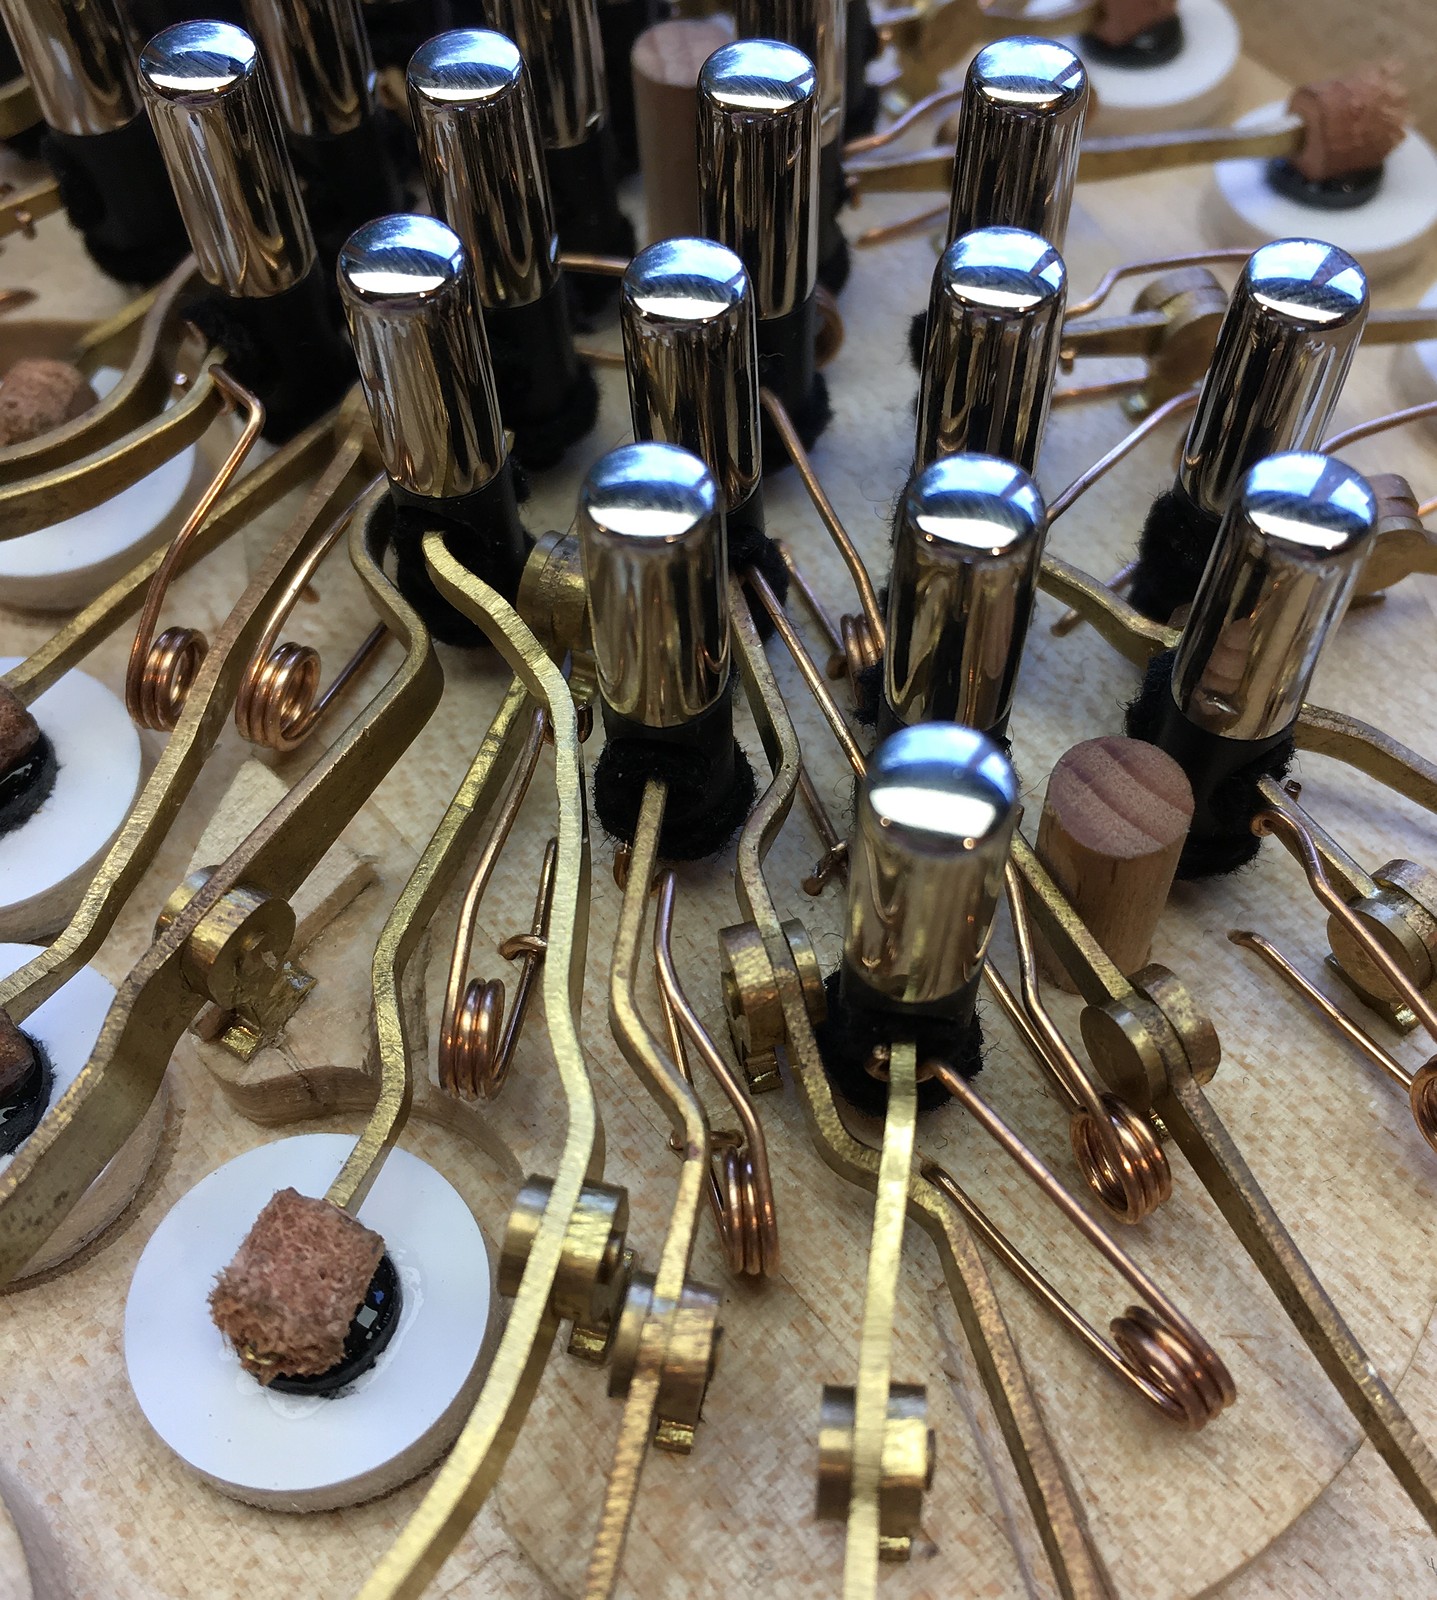
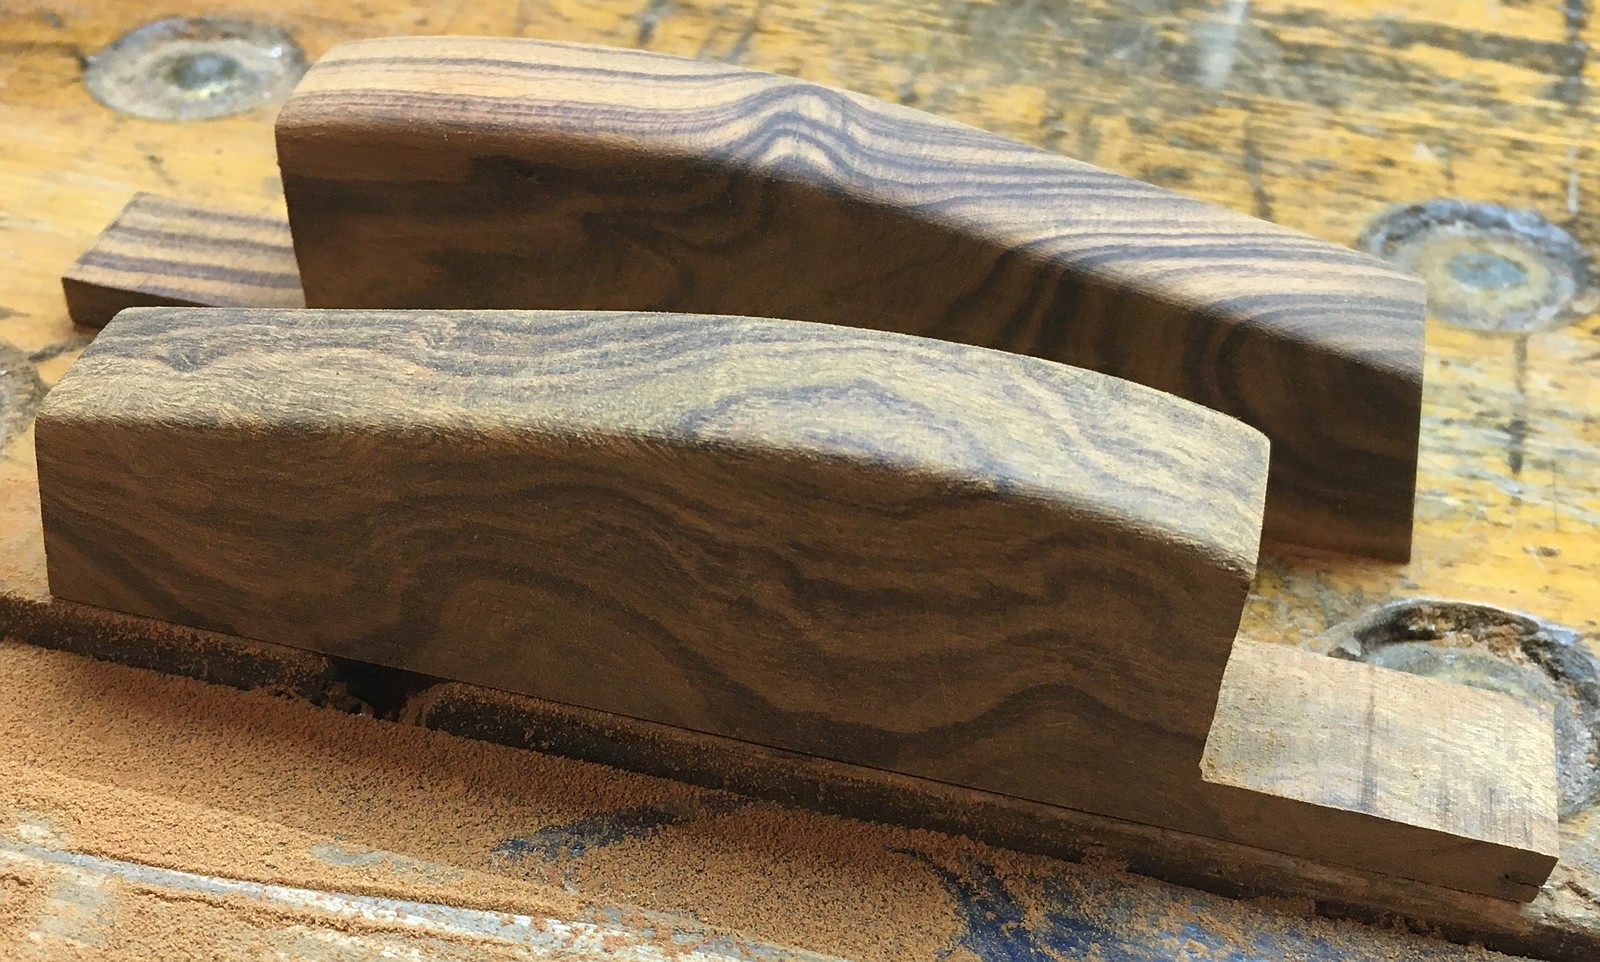
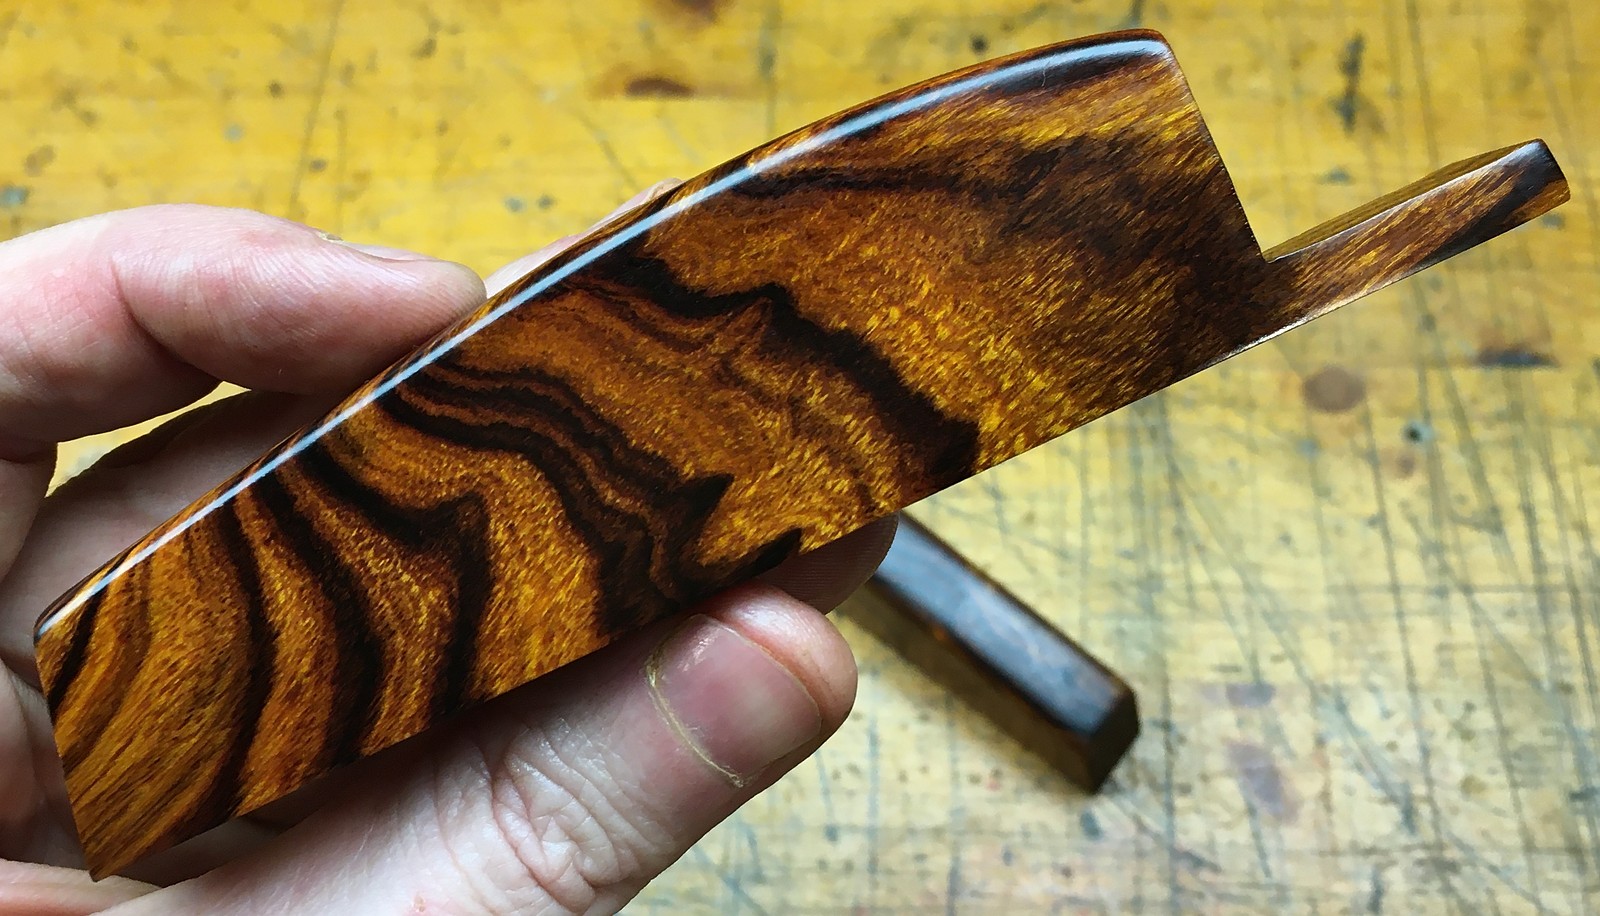
You might notice that there is a small inlaid piece of sycamore between each pair of reeds inside the chambers. I won’t go into detail about this yet because it was an experimental idea that I further improved on No. 10. The chamber walls start out unusually wide, then I machine away quite a bit of the thickness; this has some advantages with radial pans and laminated boards in particular by providing a section of straight-grain wood for the side of the dovetail slot that isn’t prone to splintering out.
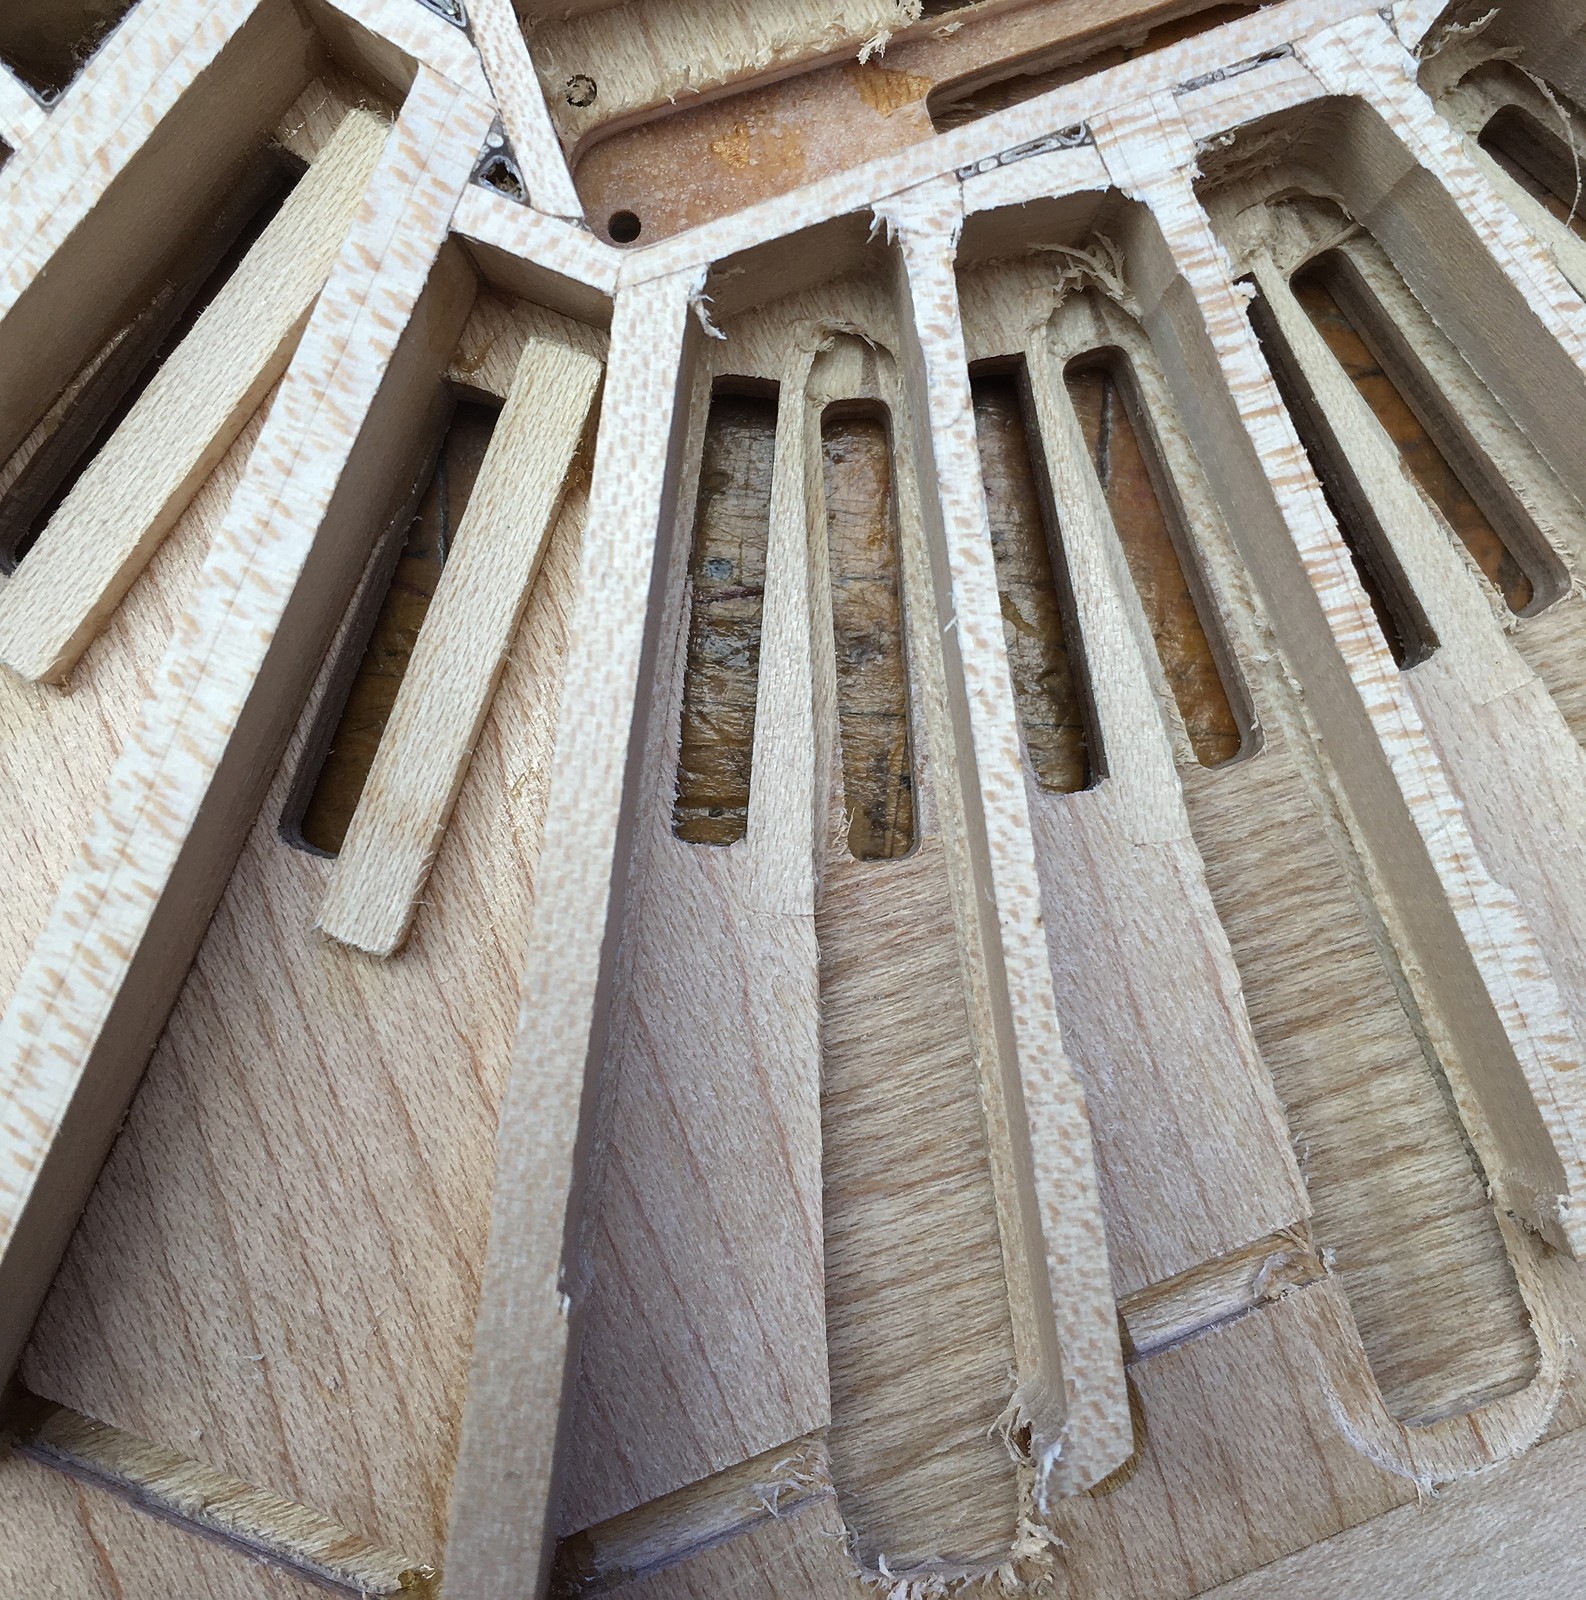
I made a special T cutter to mill grooves for the reed frame clamps to fit into (previously I cut these grooves by hand with tiny chisels and files, and it was a very tedious and error prone process). I also thickened the chamber walls in the area that is partially undermined by the clamp clearance slot (if you don’t do this, the wall can be quite weak in this area – I have repaired several vintage reed pans with split walls caused by this problem).
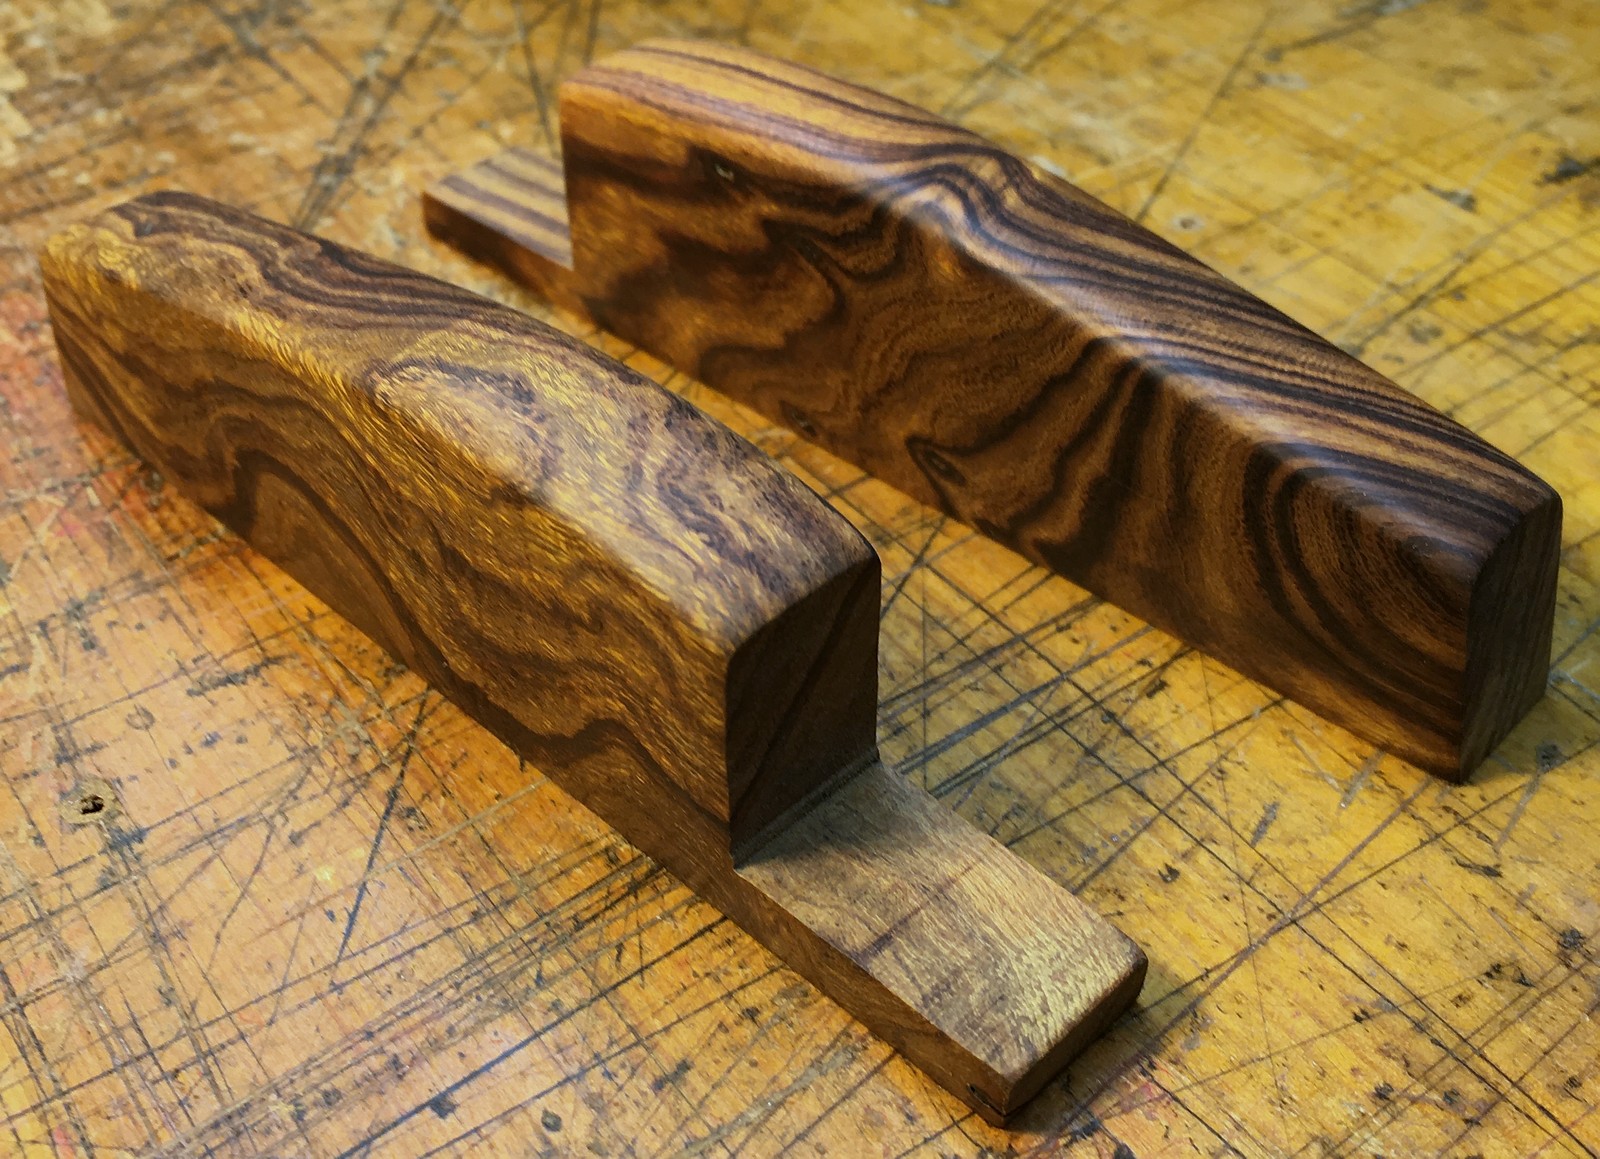
The left hand pan didn’t have any space for a thumb hole so I added a leather pull handle attached to a brass loop.

The reed pans were very densely packed and both sides had several inner chambers. Quite a few of the bass chambers on the left hand were extended in from the edge to help those reeds start quicker.
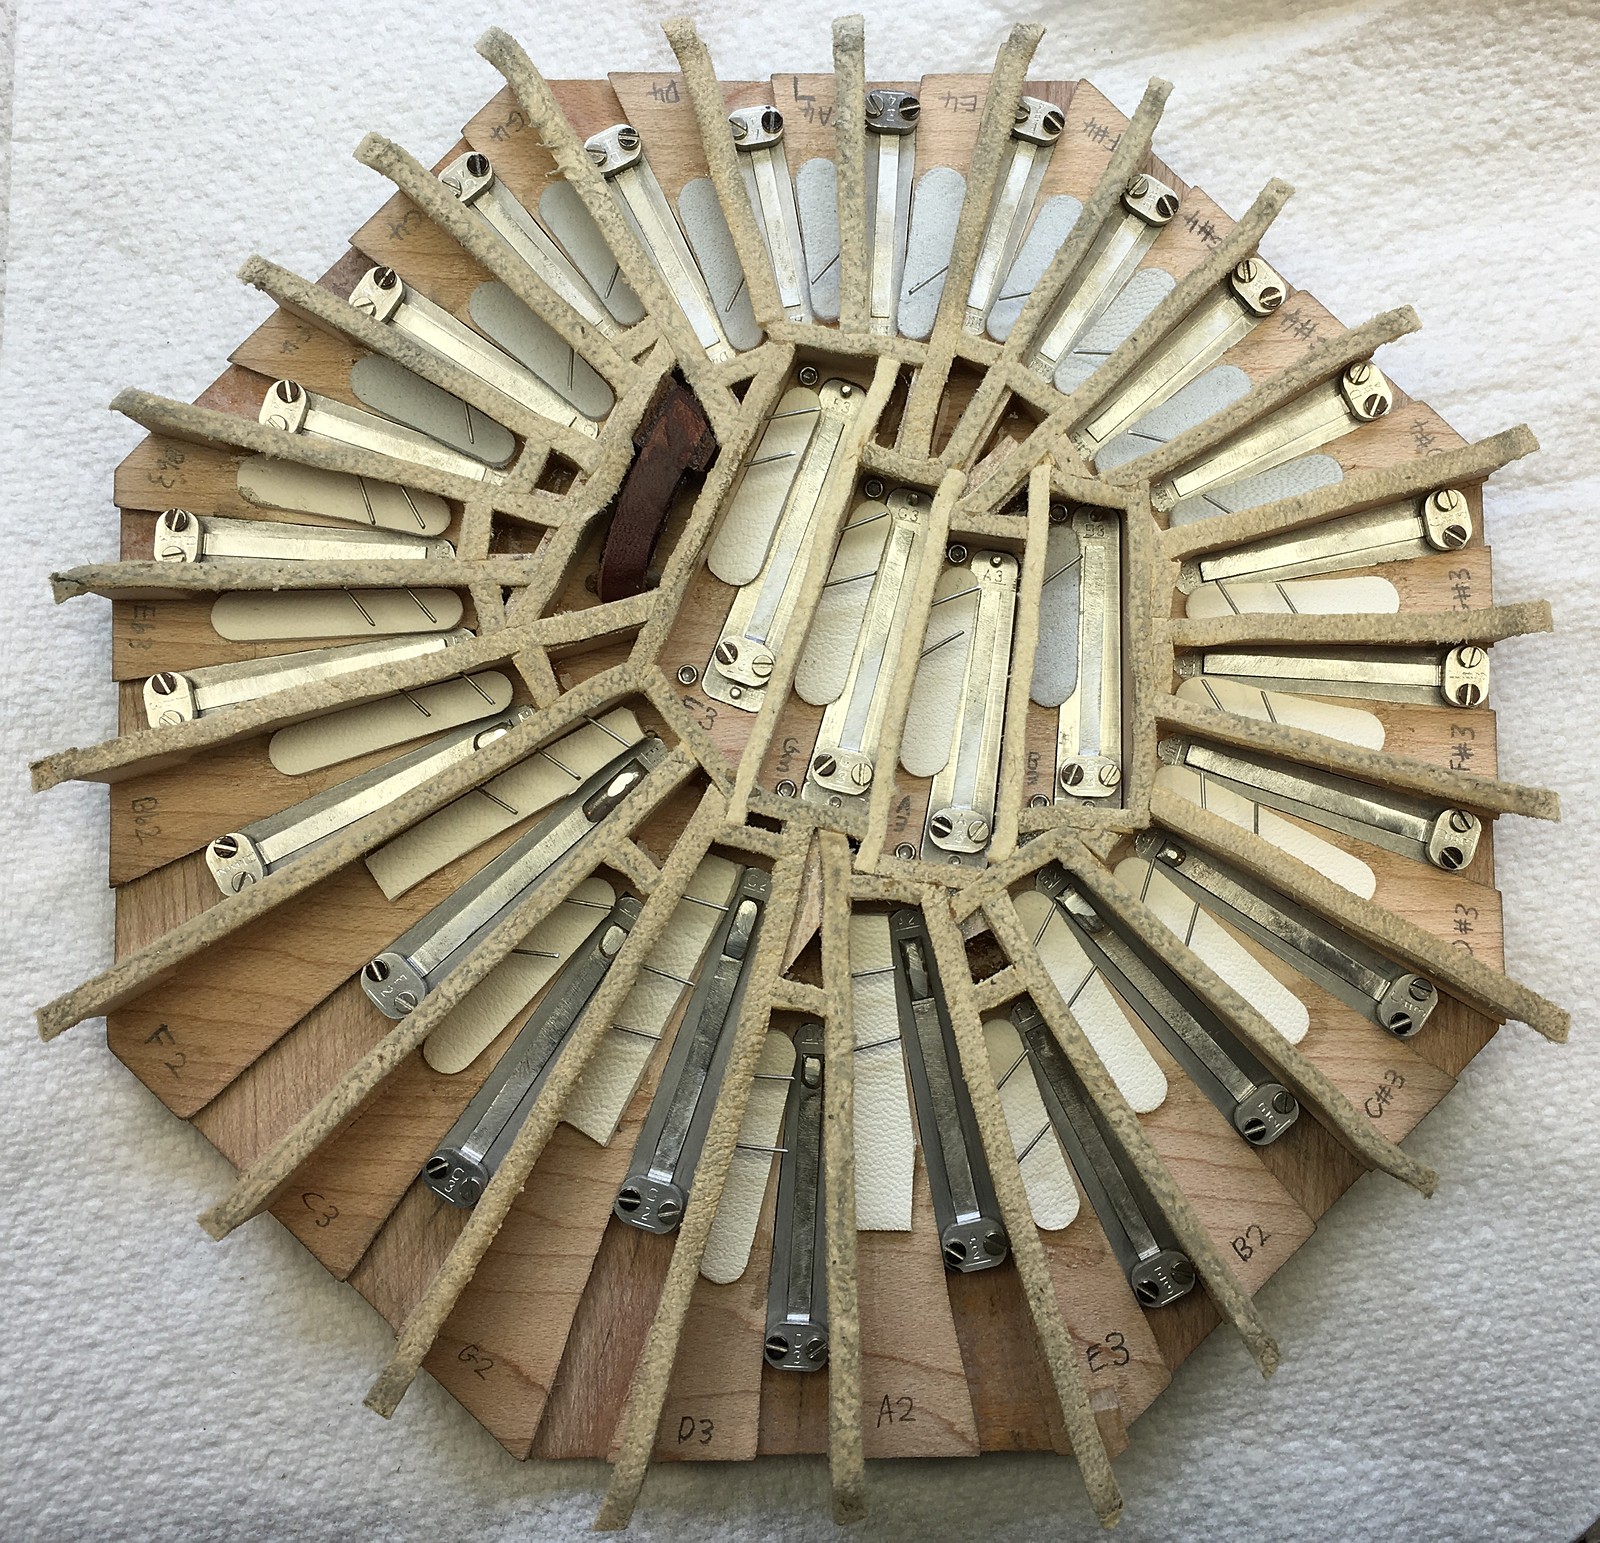
You might notice that I put an accordion-style valve spring on the bottom valve of the lowest reed. I was having problems with valves in that location buzzing when changing bellows direction, so I tried adding a booster spring to it as an experiment and found that it solved the problem without any noticeable side effects.
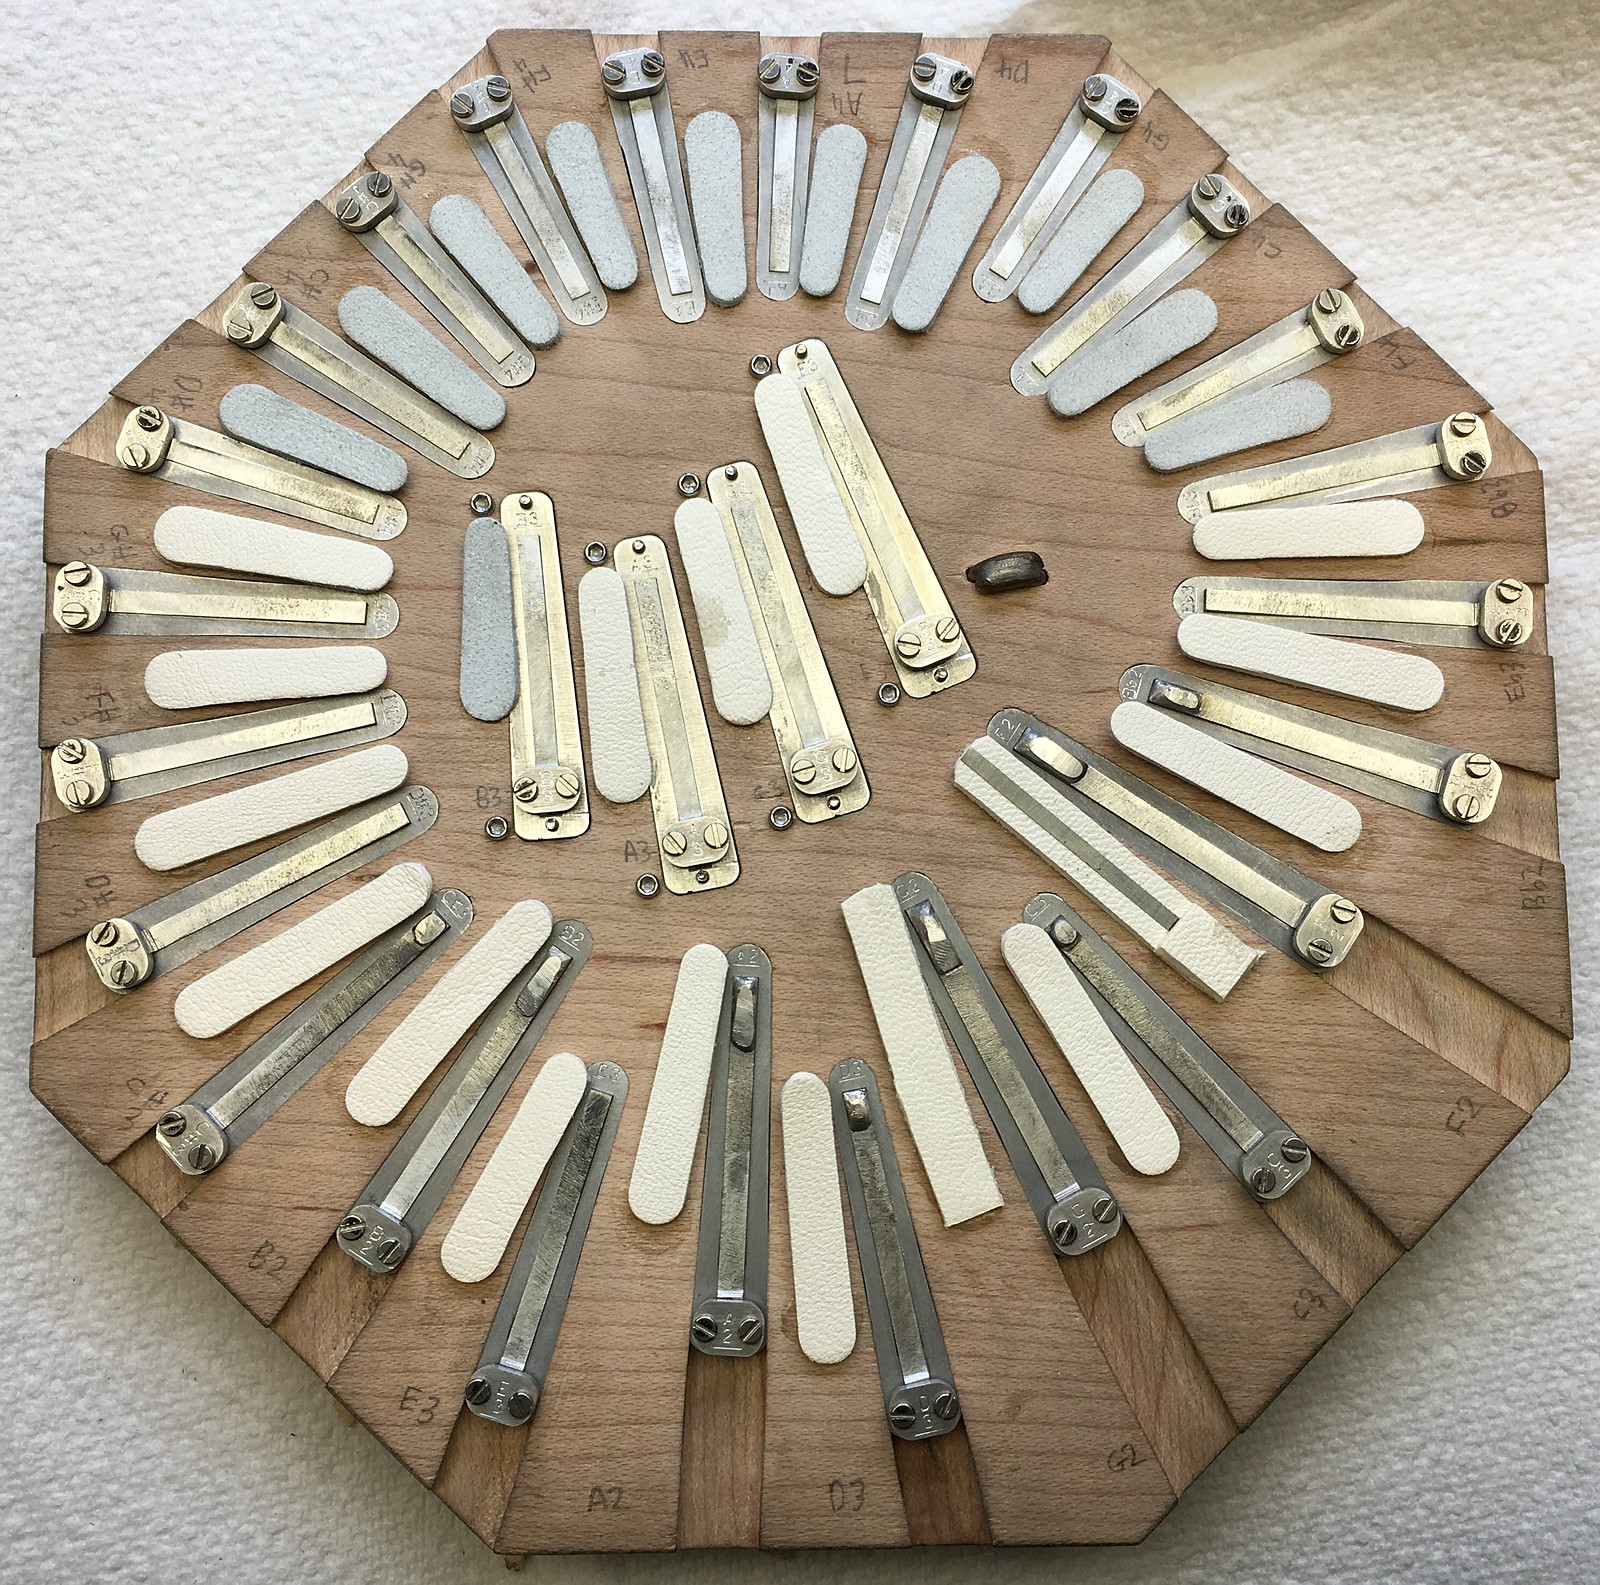
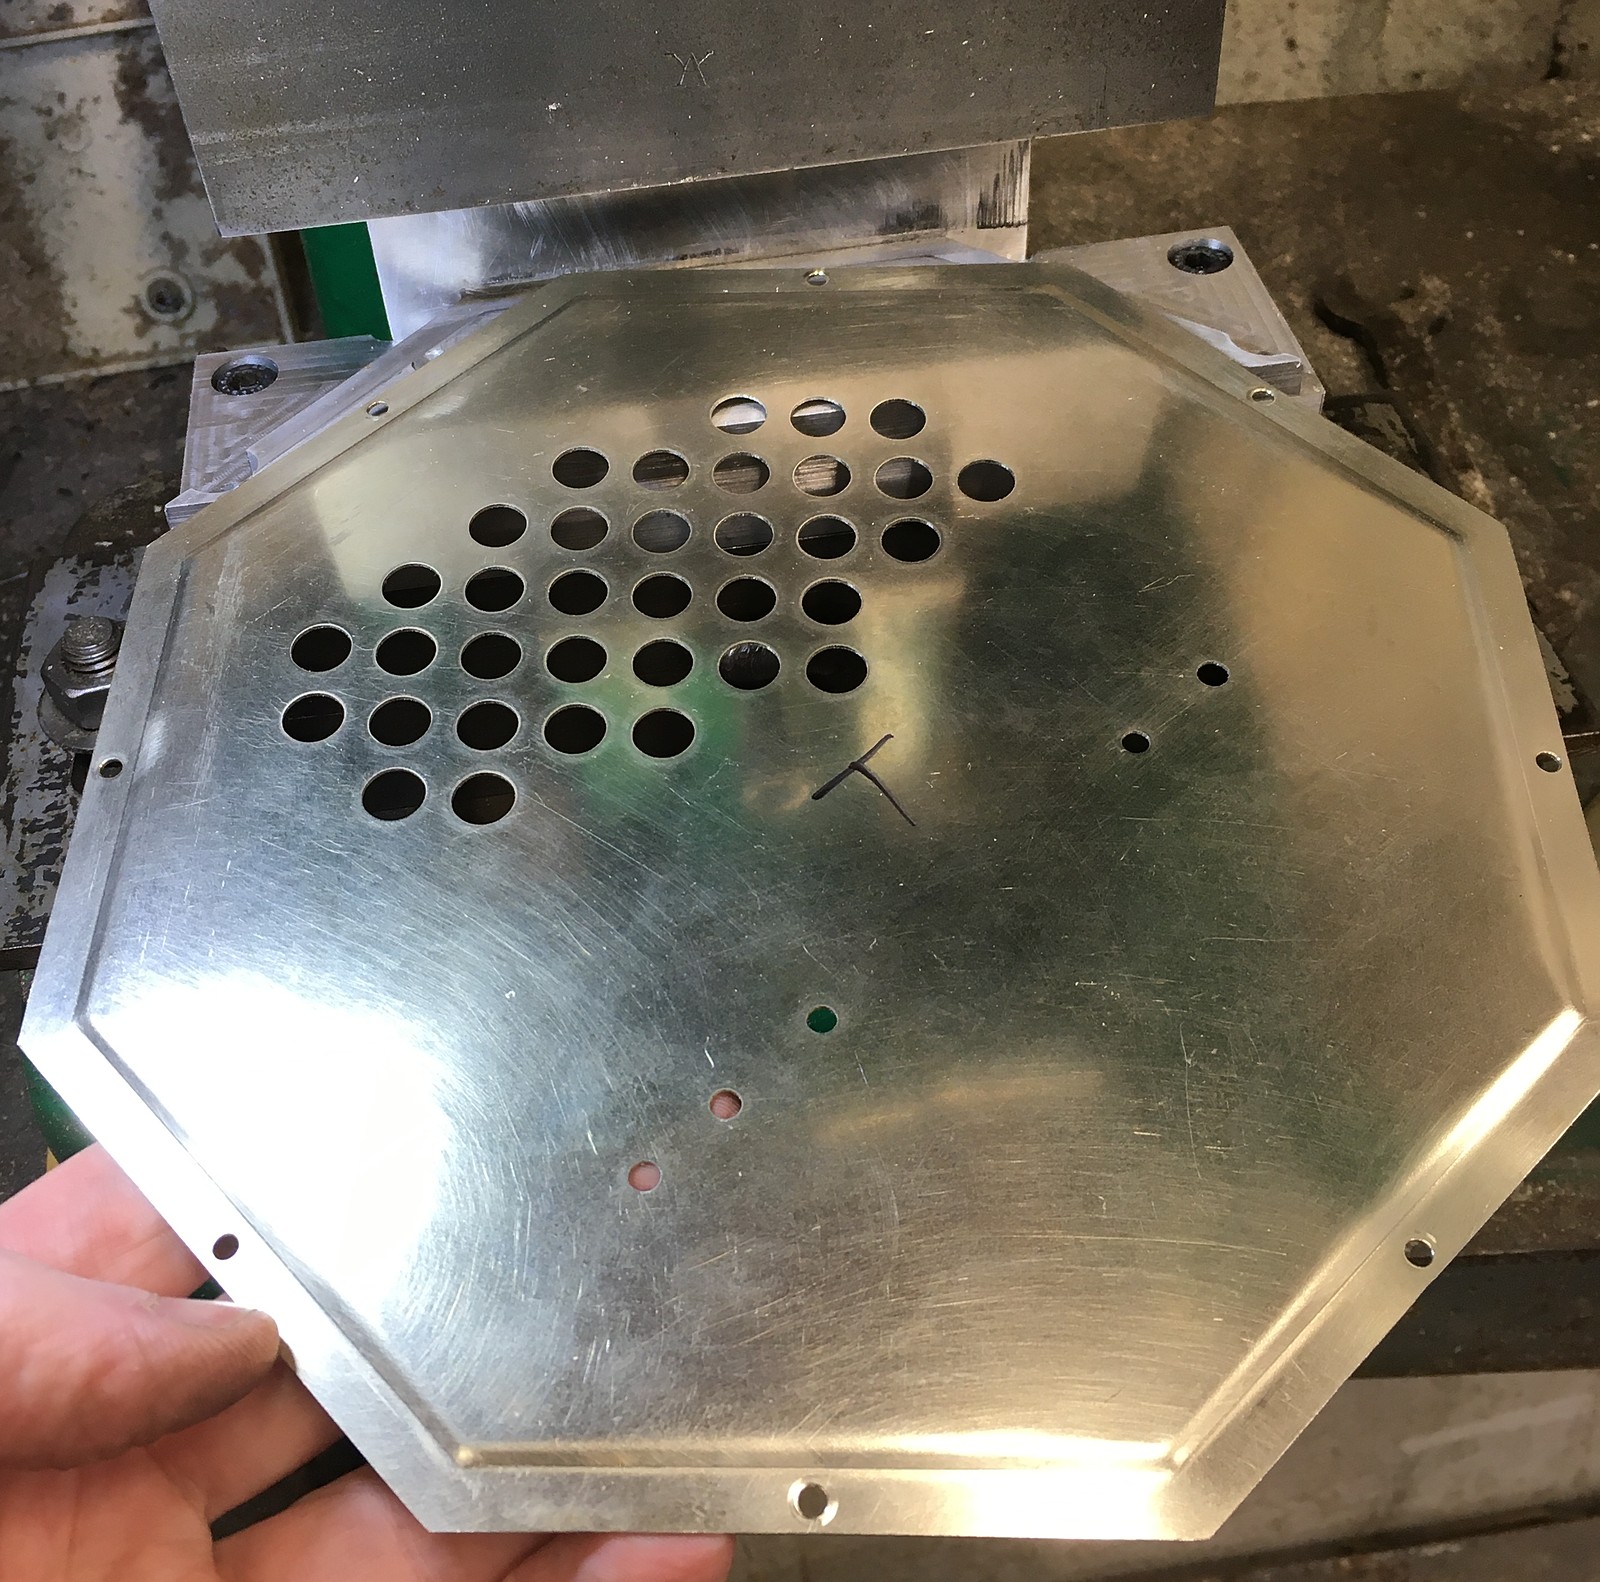
The small trapezoidal hole in the right hand pan is the passage for the air button.
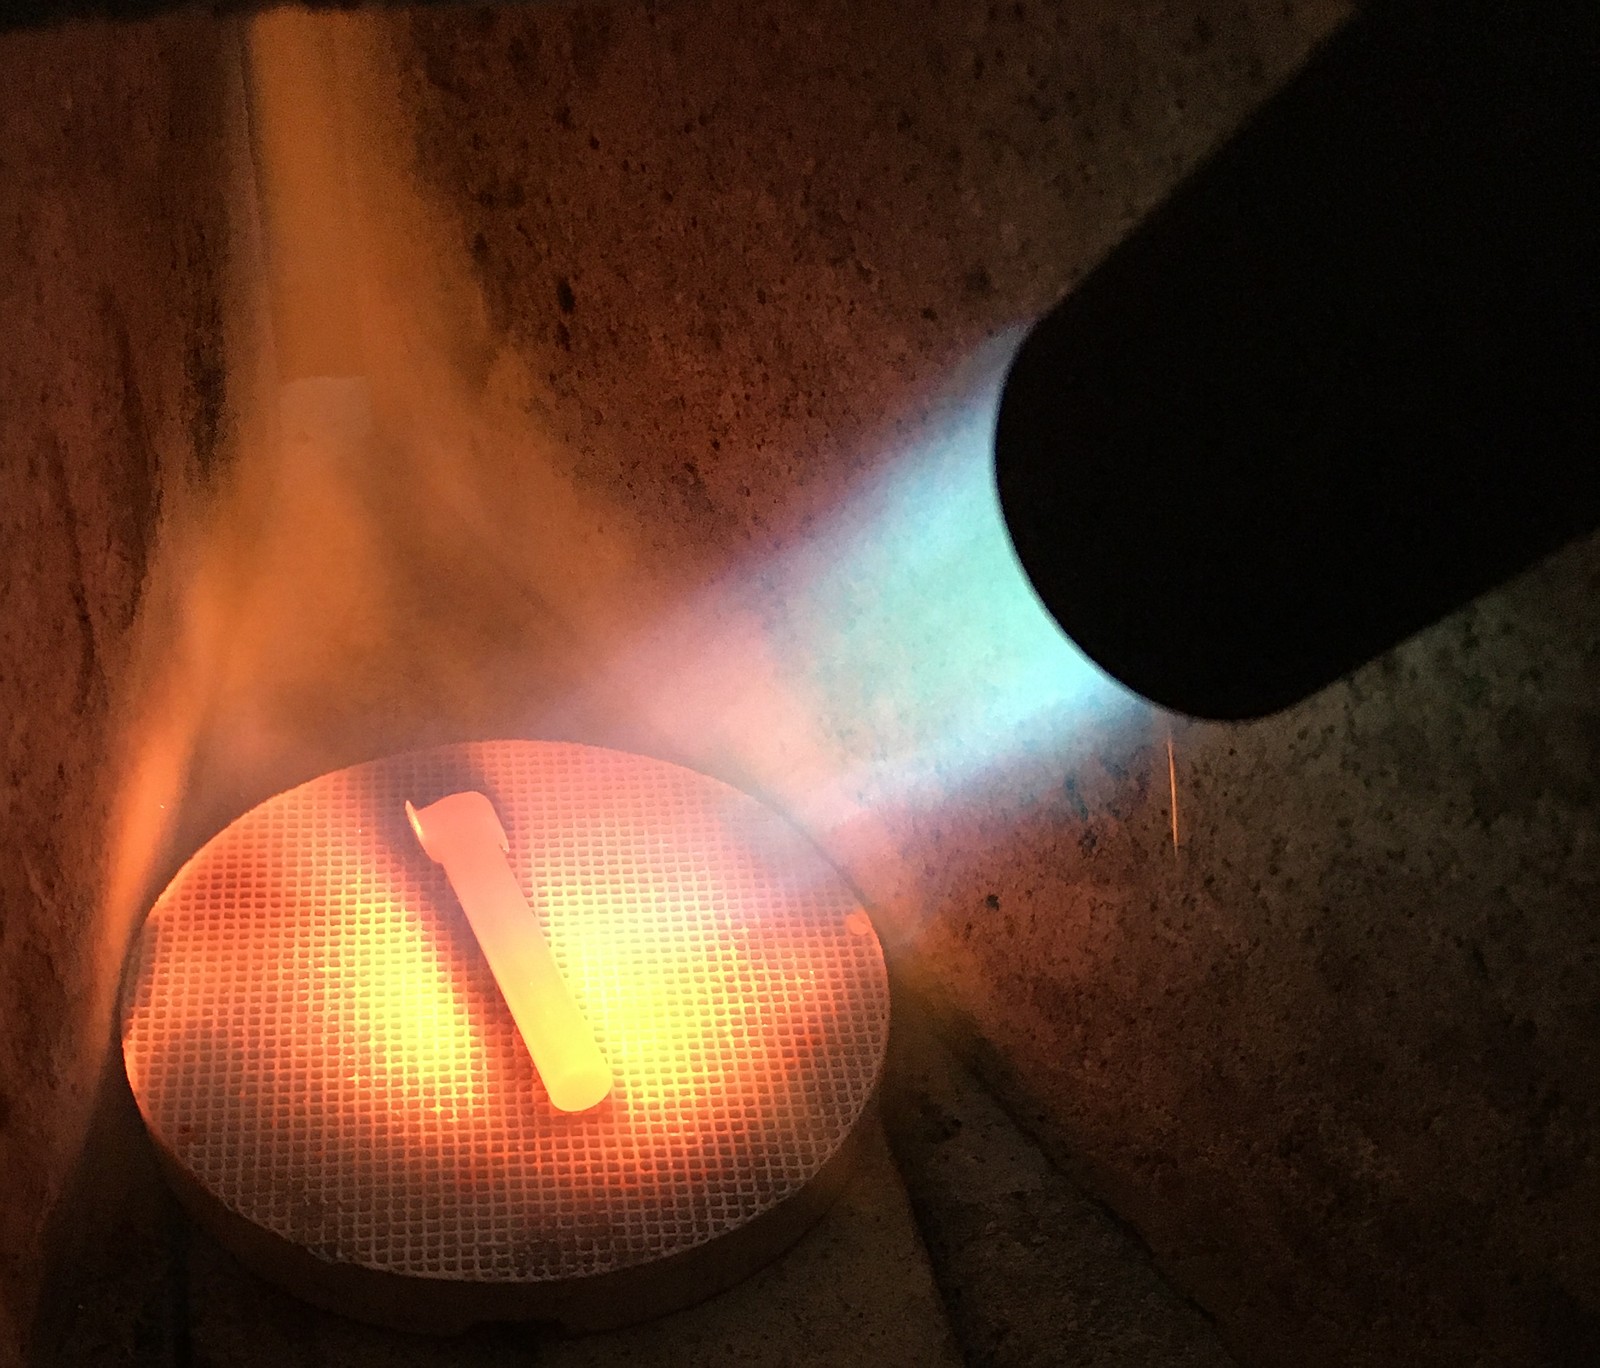
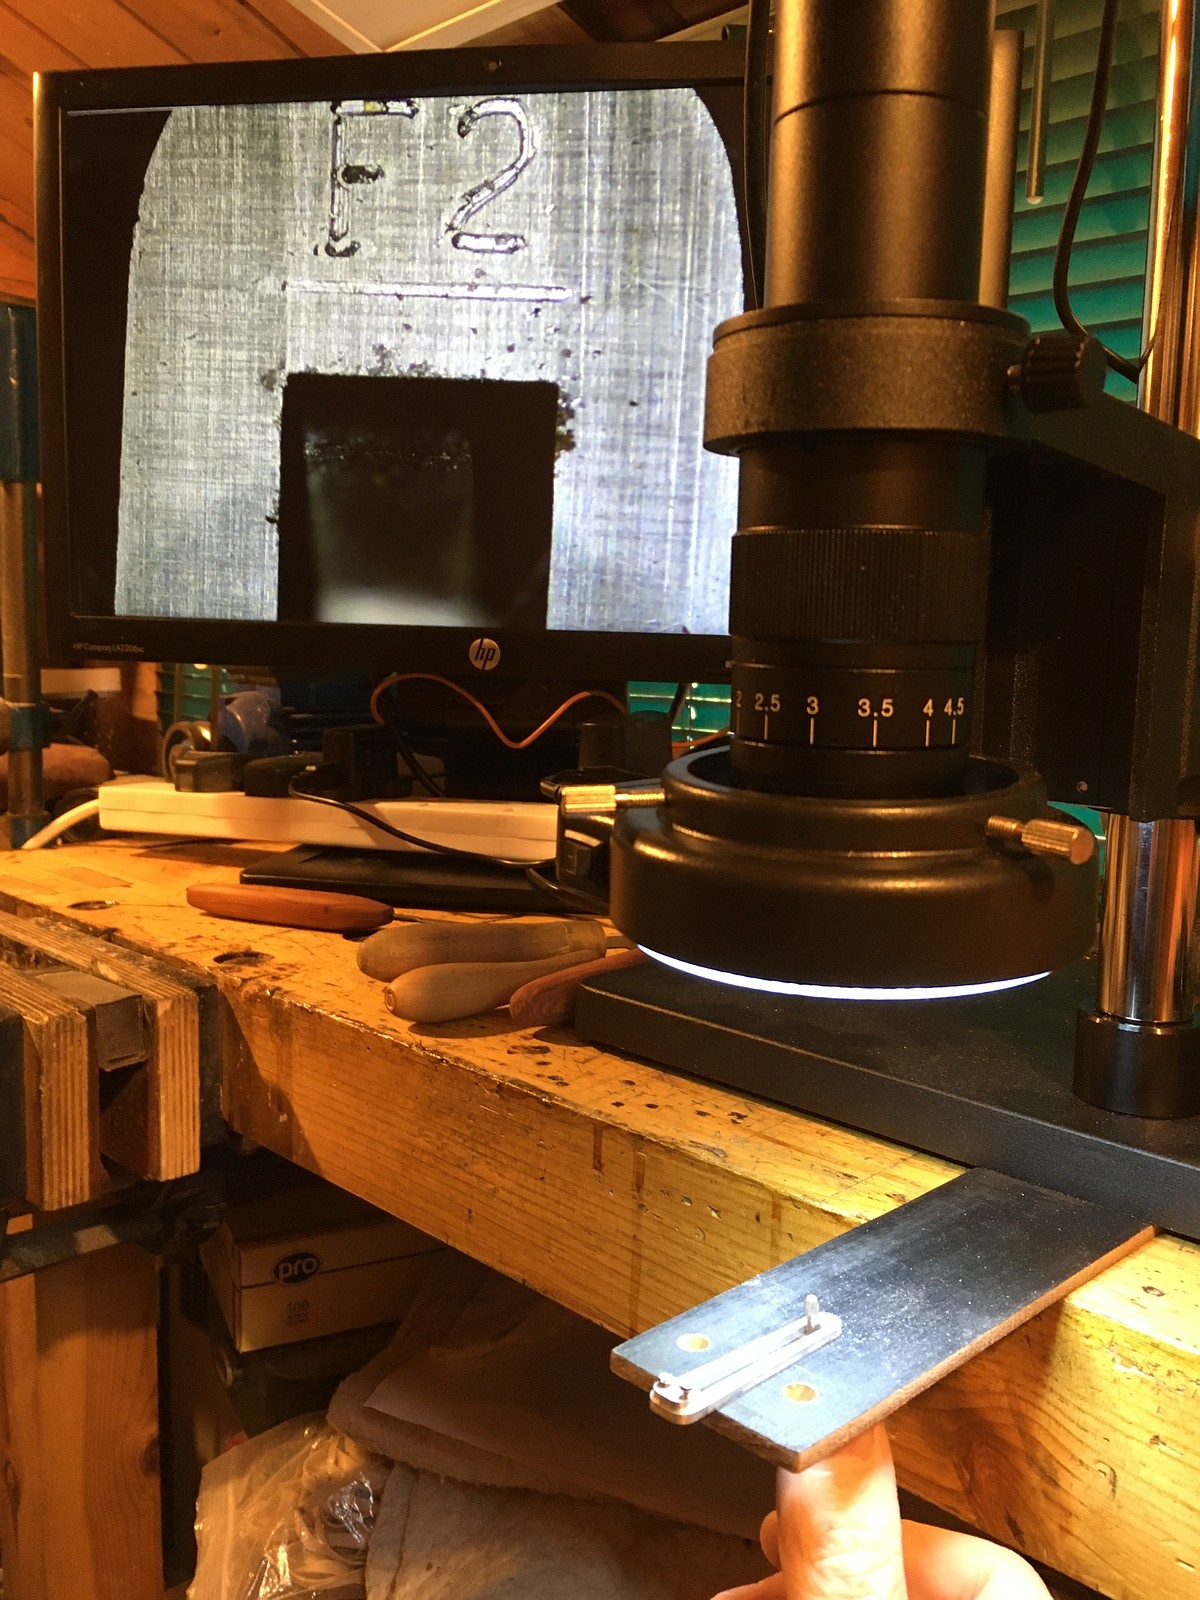
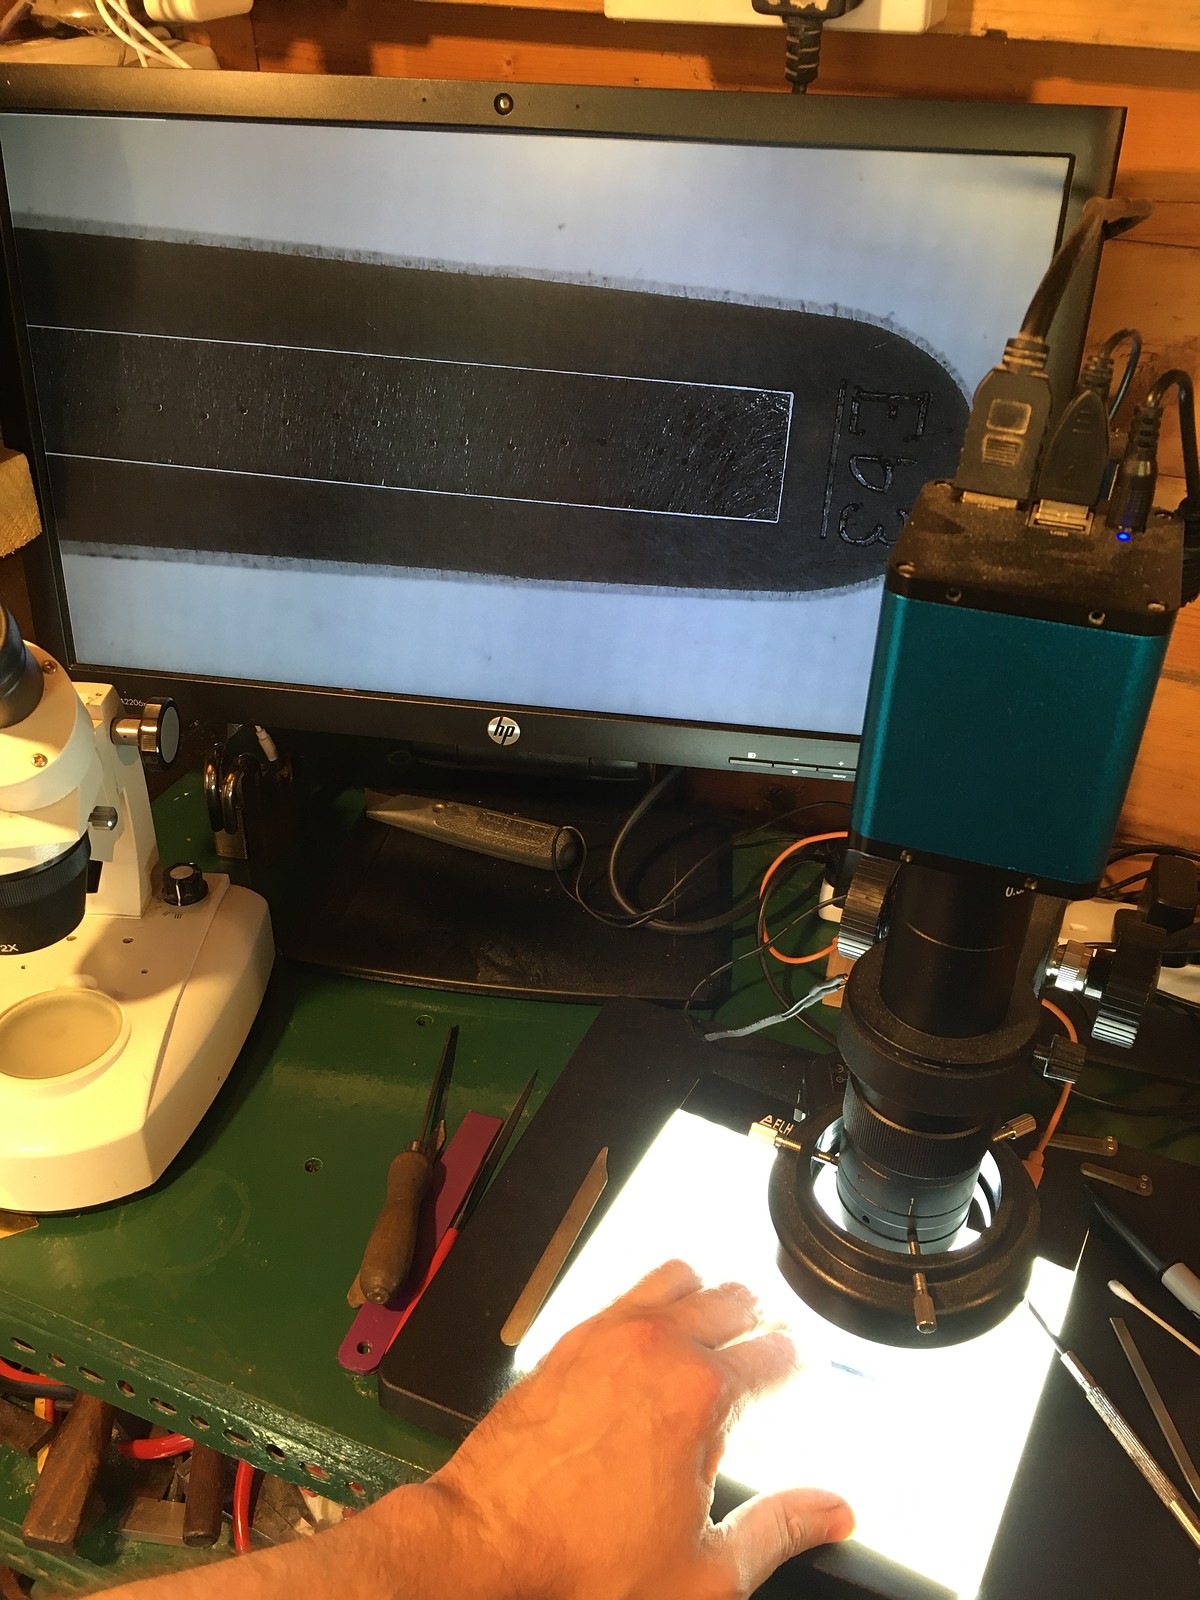
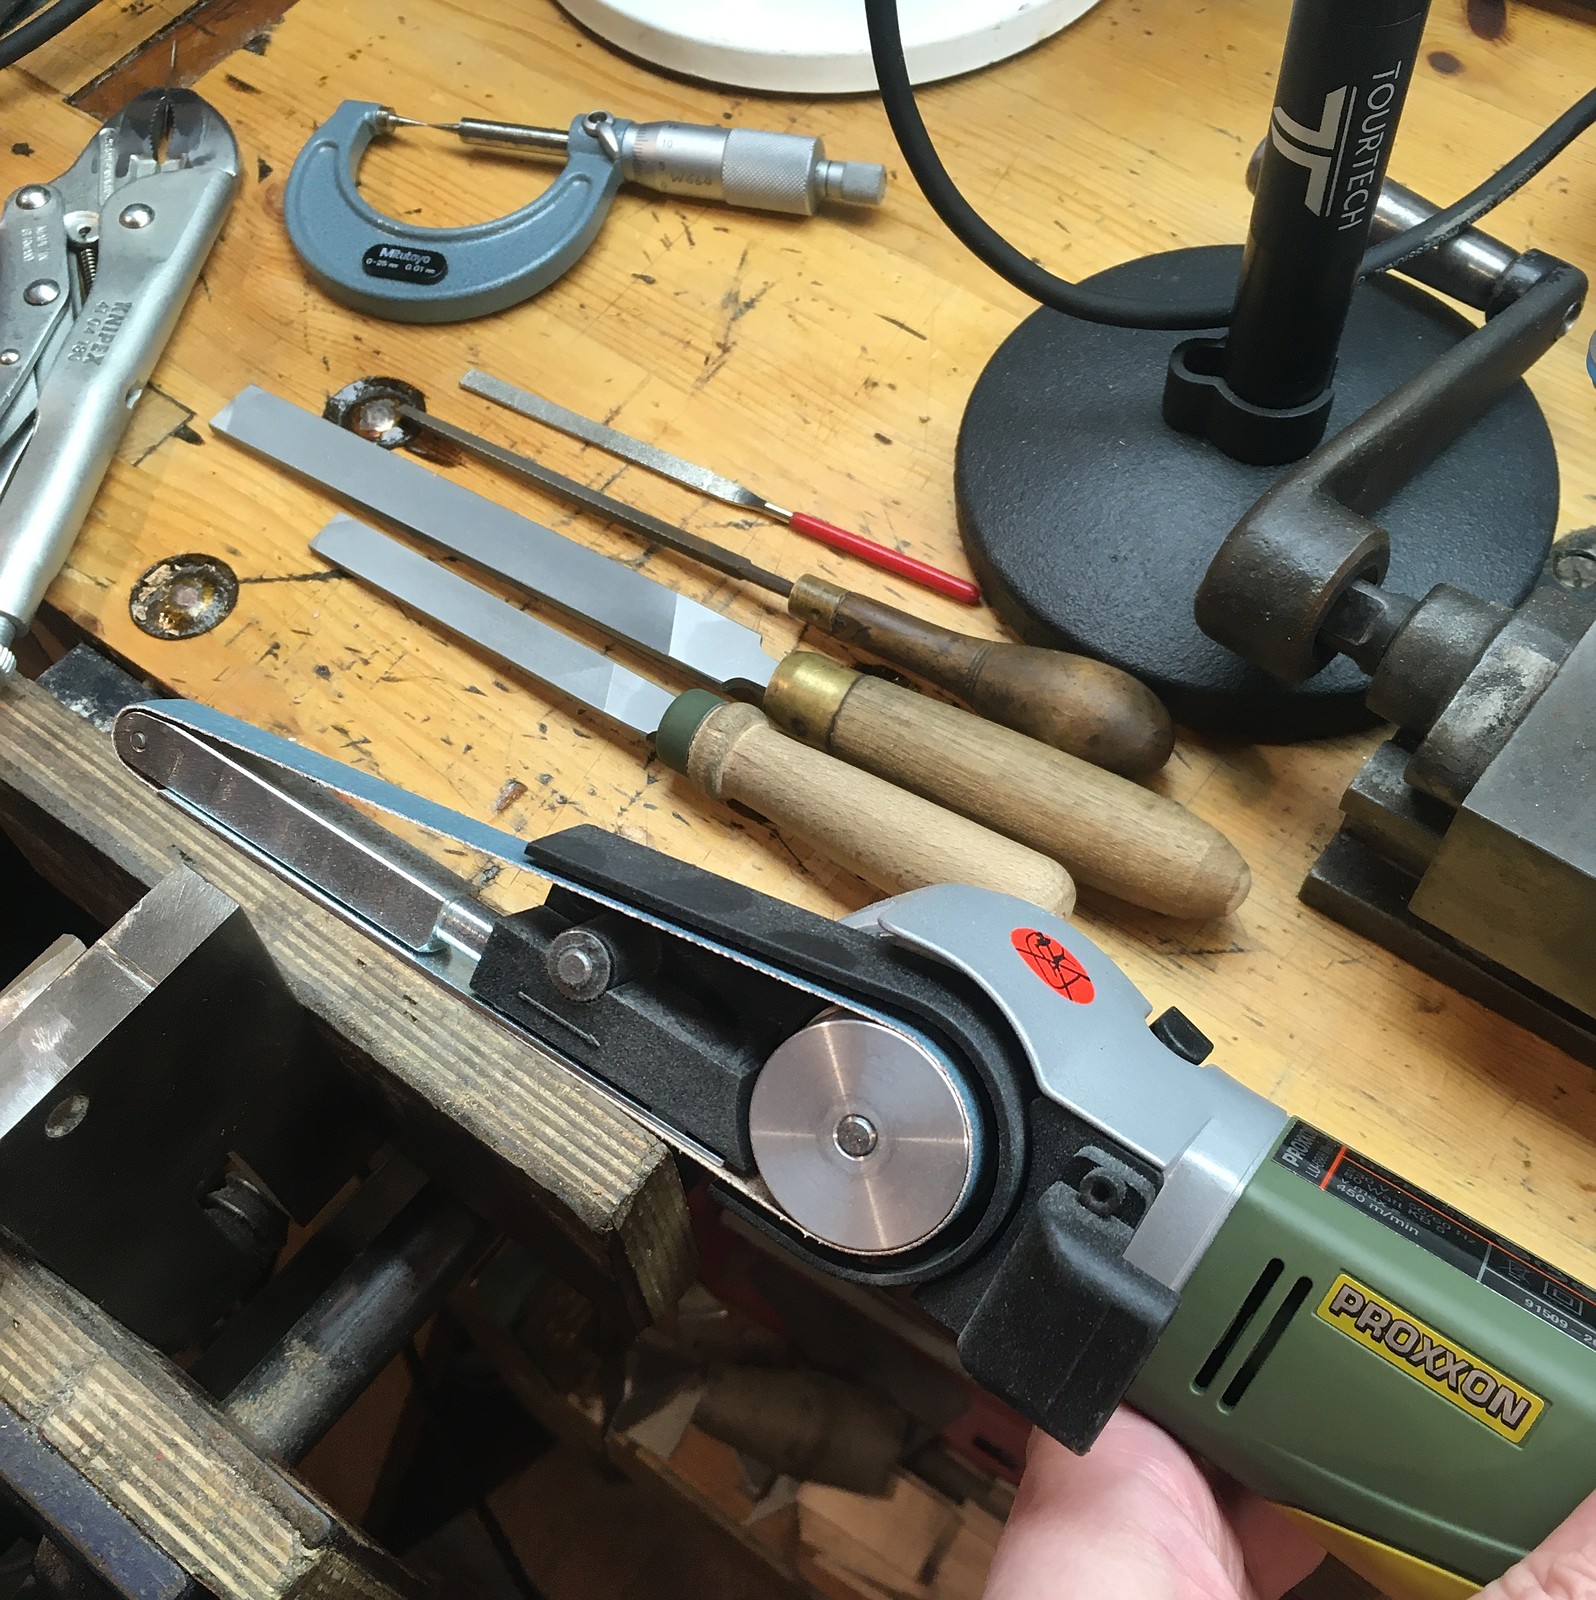
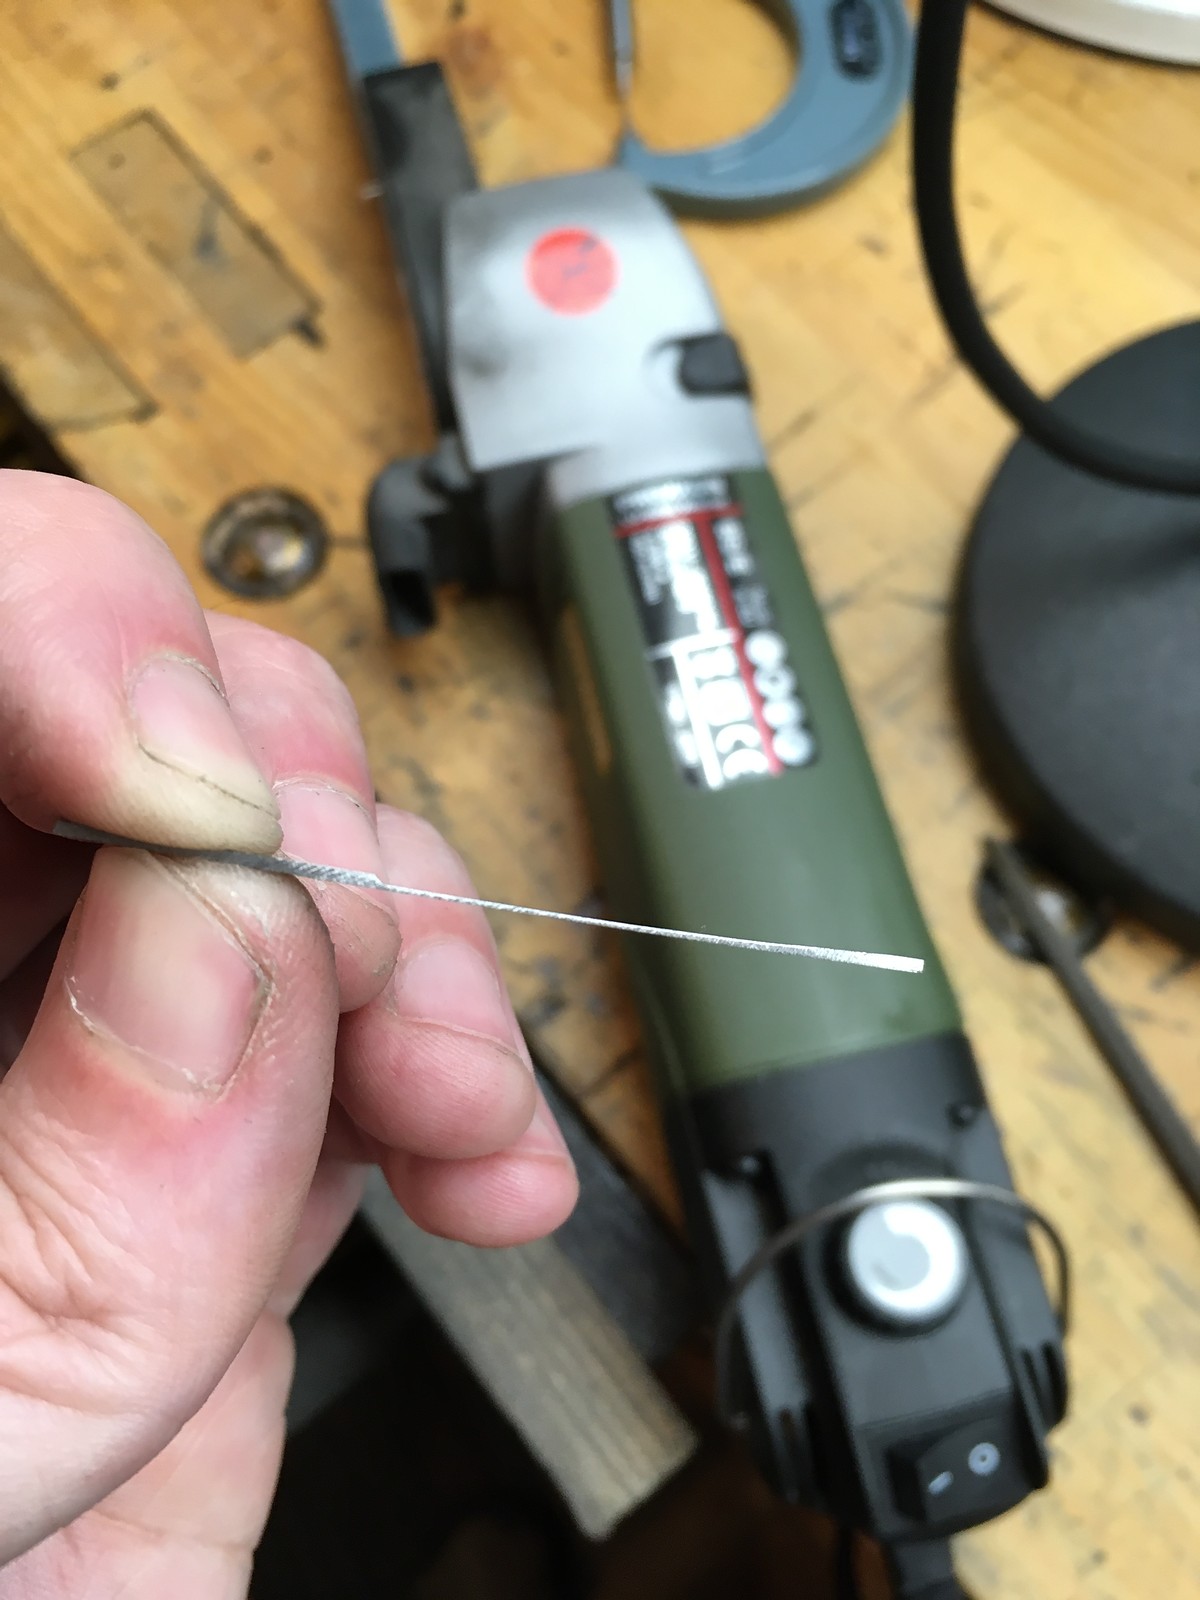
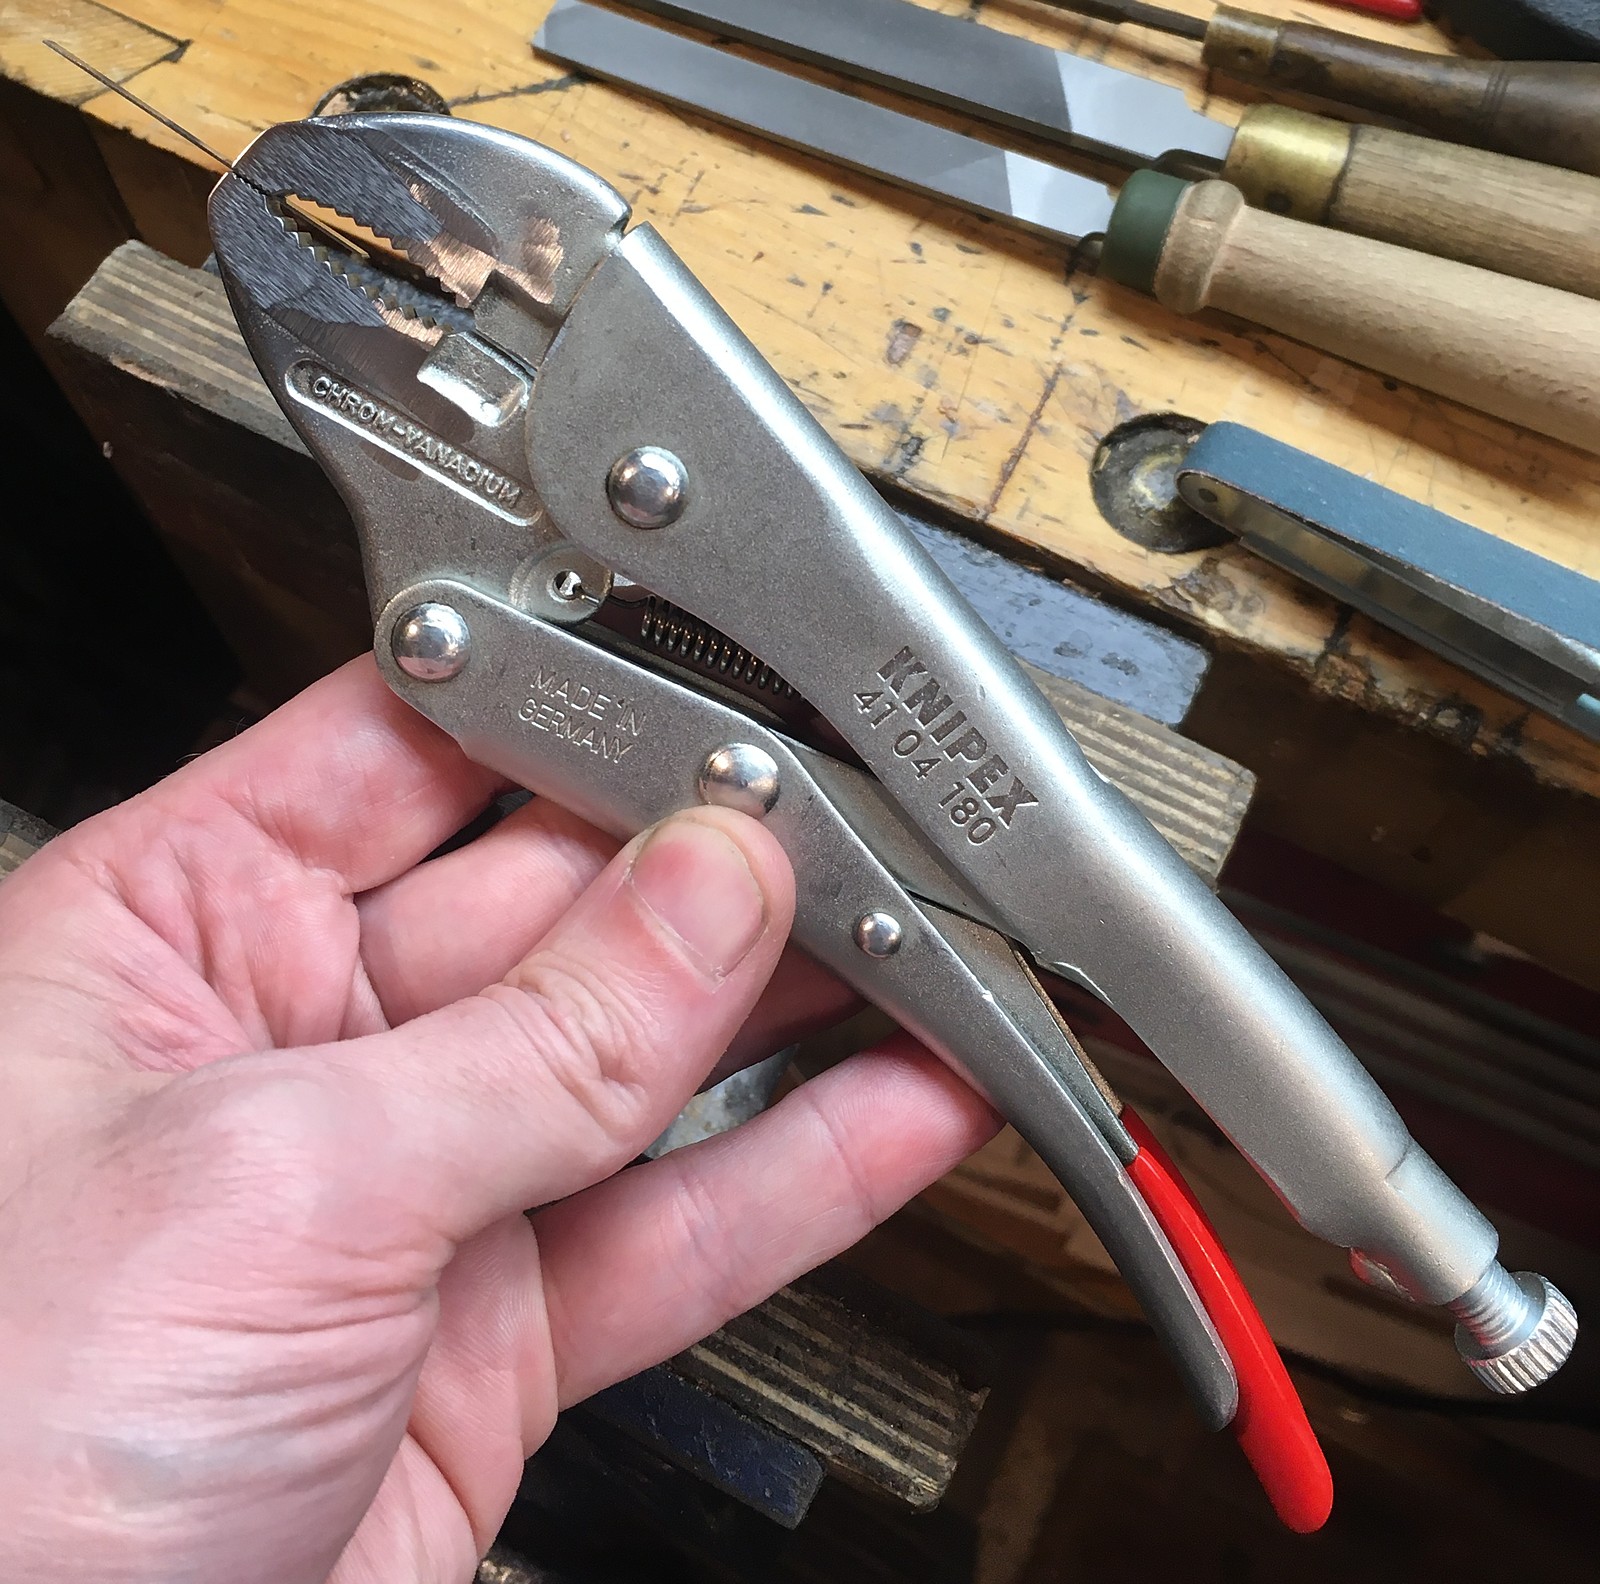
Making so many reed assemblies is a huge amount of work. I invested in a couple of new tools that helped a bit: a video microscope helped with filing the corners of the vent slots square and fitting the reed tongues to the frames, and a small electric power file helped with rough-profiling the reed blanks before further refining them the usual way with hand files. I also upgraded to better quality locking pliers for holding the tongues while I profile them.
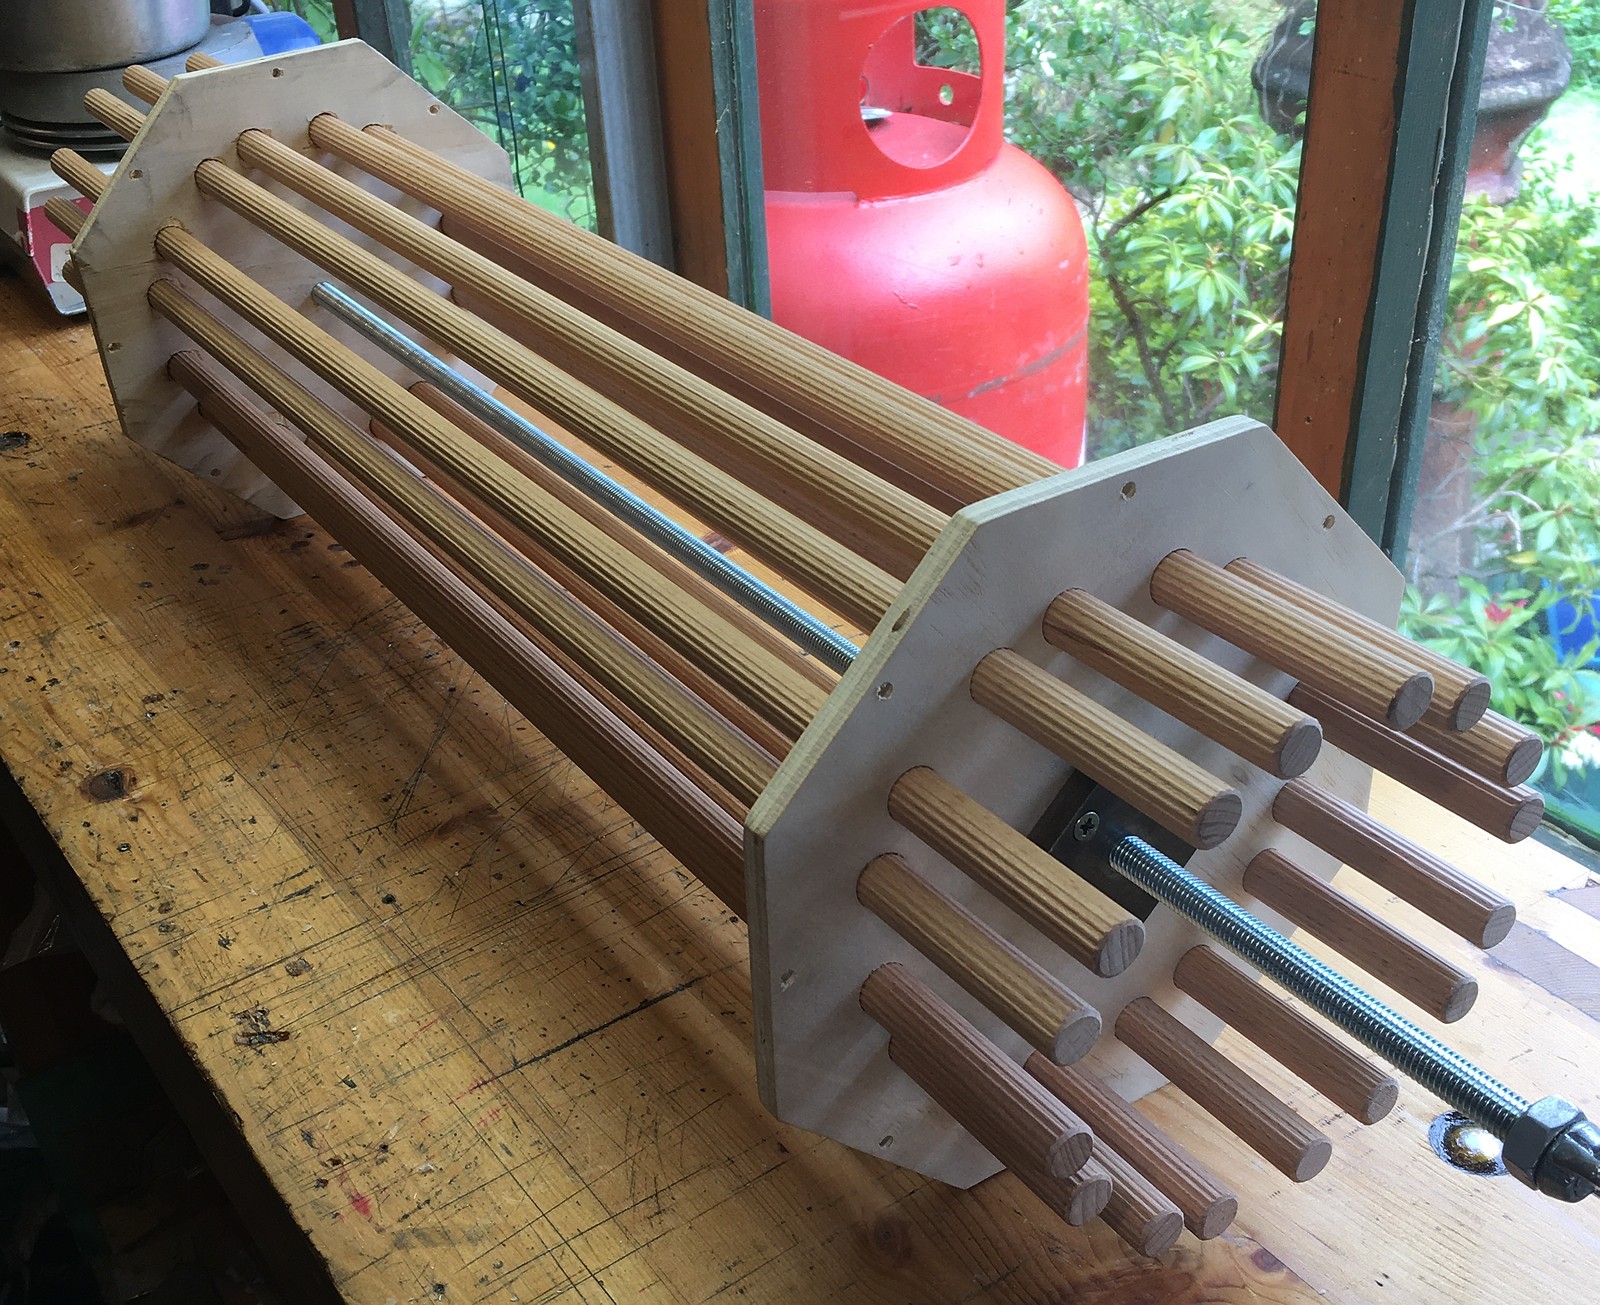
Action Boxes
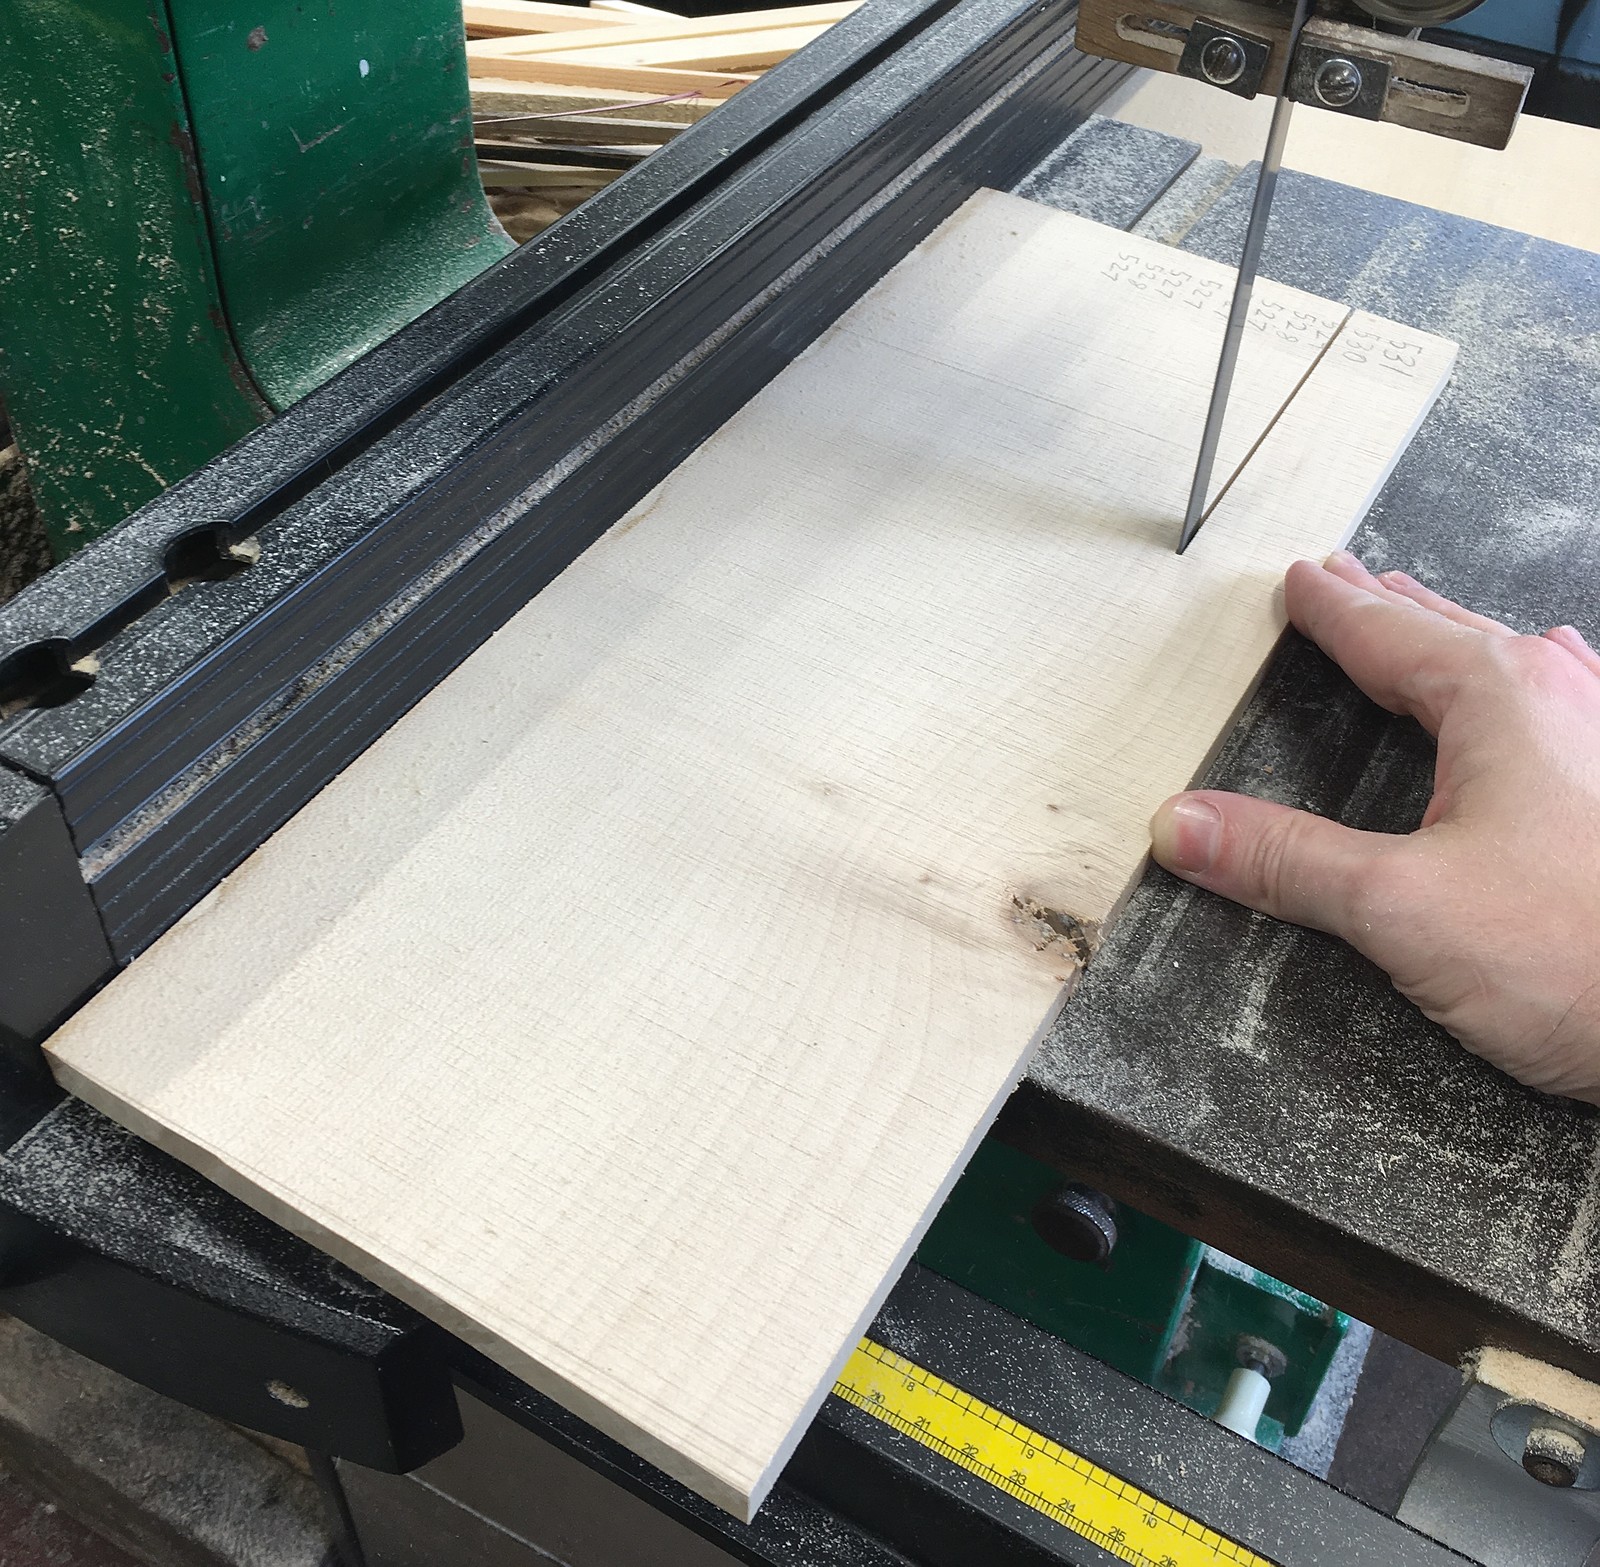
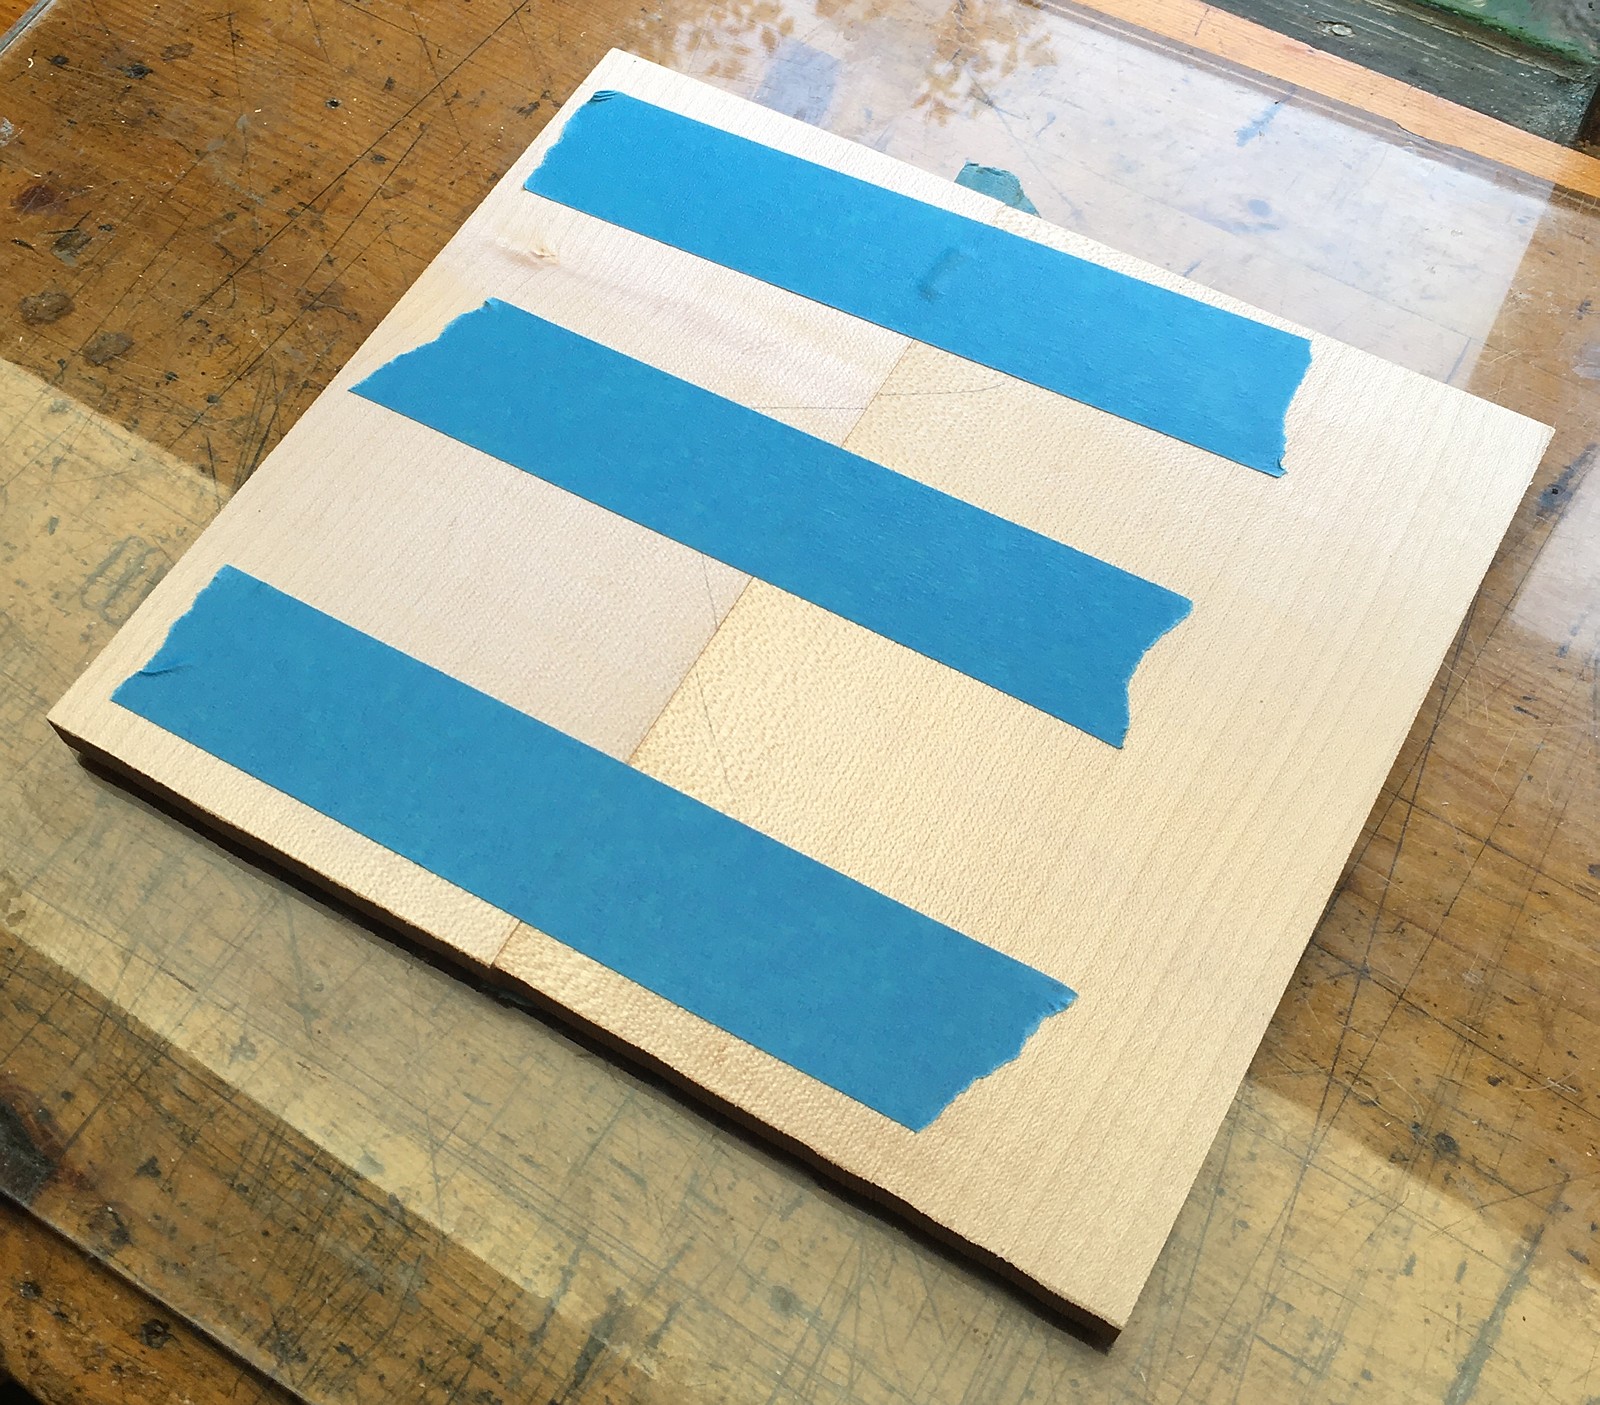
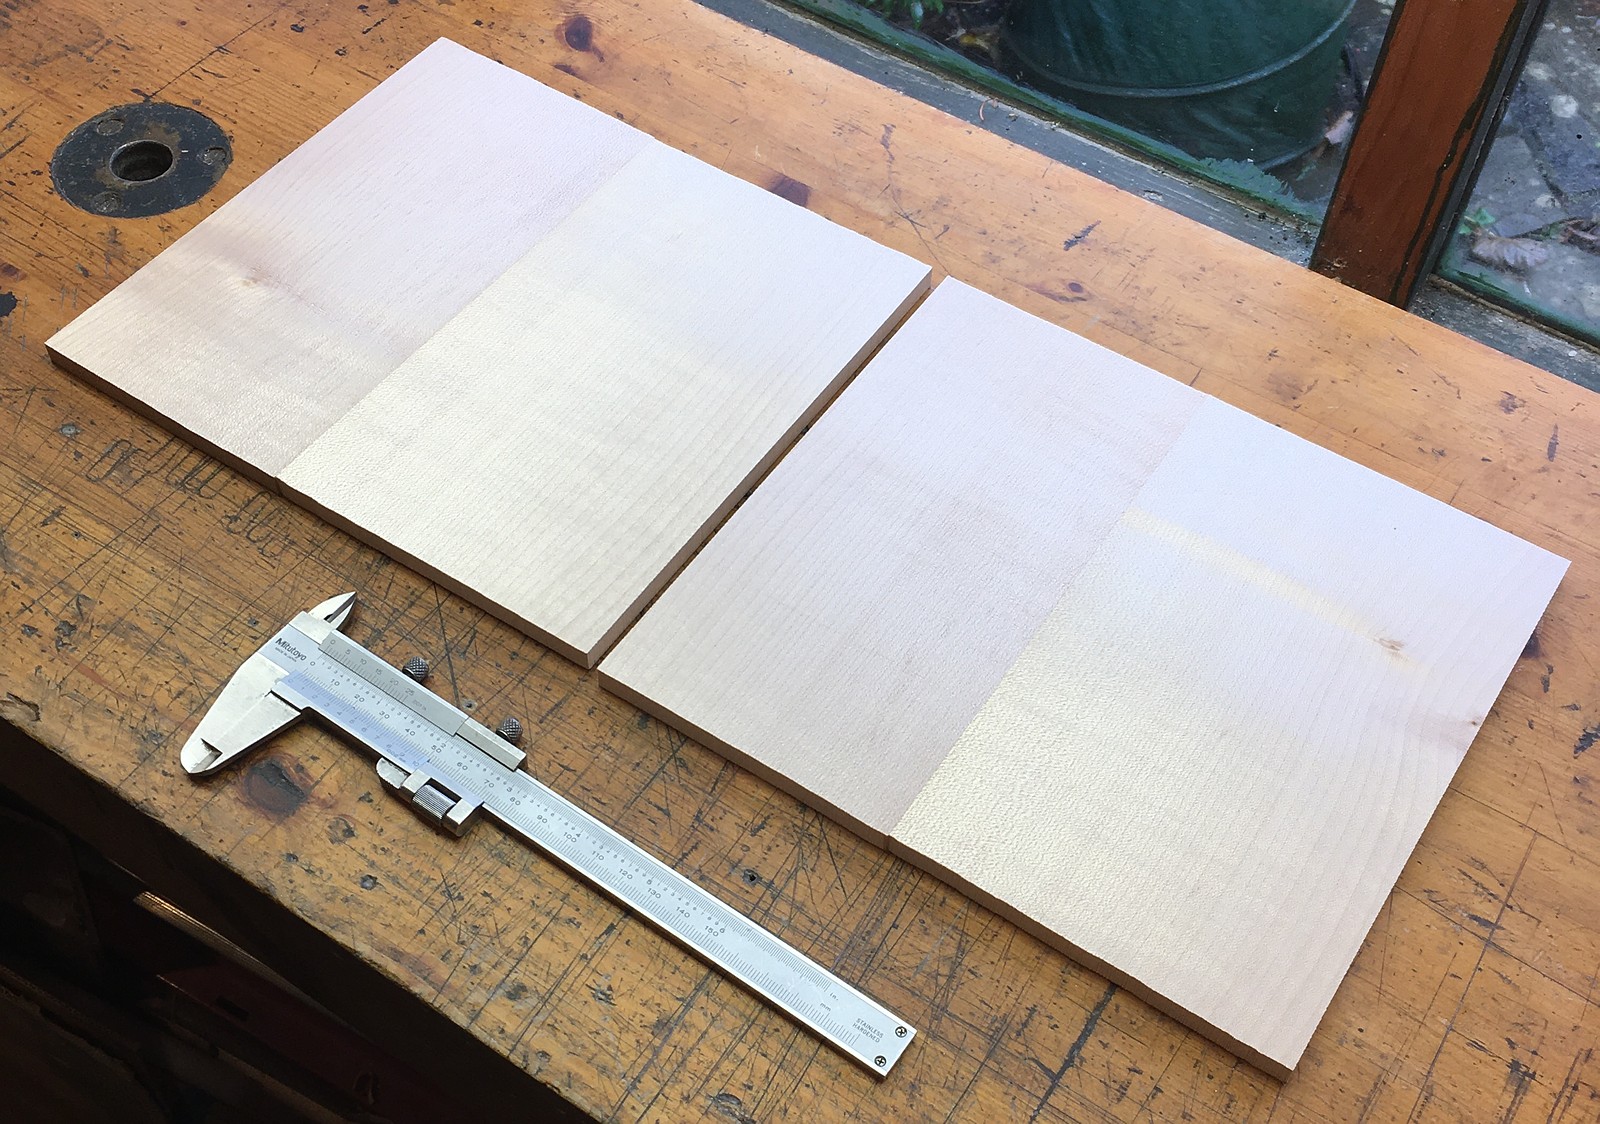
The action boards were made from solid sycamore as usual, however this instrument was too large for me to be able to resaw a board of sufficient width on my bandsaw, so I instead jointed and edge-glued a pair of narrower boards, similar to how most violin backs are made. Because I only needed to make a two-piece board about 8″ wide, this also allowed me to use the good parts of boards that I had previously rejected because they had knots that prevented me using their full width as a normal single piece action board. It was a significant amount of extra work and wouldn’t be worth the trouble for a normal sized instrument, but it did work pretty well in this case.
As with the reed pans, the limited capacity of my CNC mill meant that it was necessary to route part of the action board, then rotate it 180º and route the rest of it.
The action box sides were veneered with amboyna burl. With this style of end plate, you don’t need to split the boxes into two sections. Sometimes you scribe a pair of grooves along the middle of the wall to imitate a split box, but in this case we decided it would look better without scribe lines.
Because of the high button count and density of this instrument, the actions were especially complicated to design and tricky to assemble.
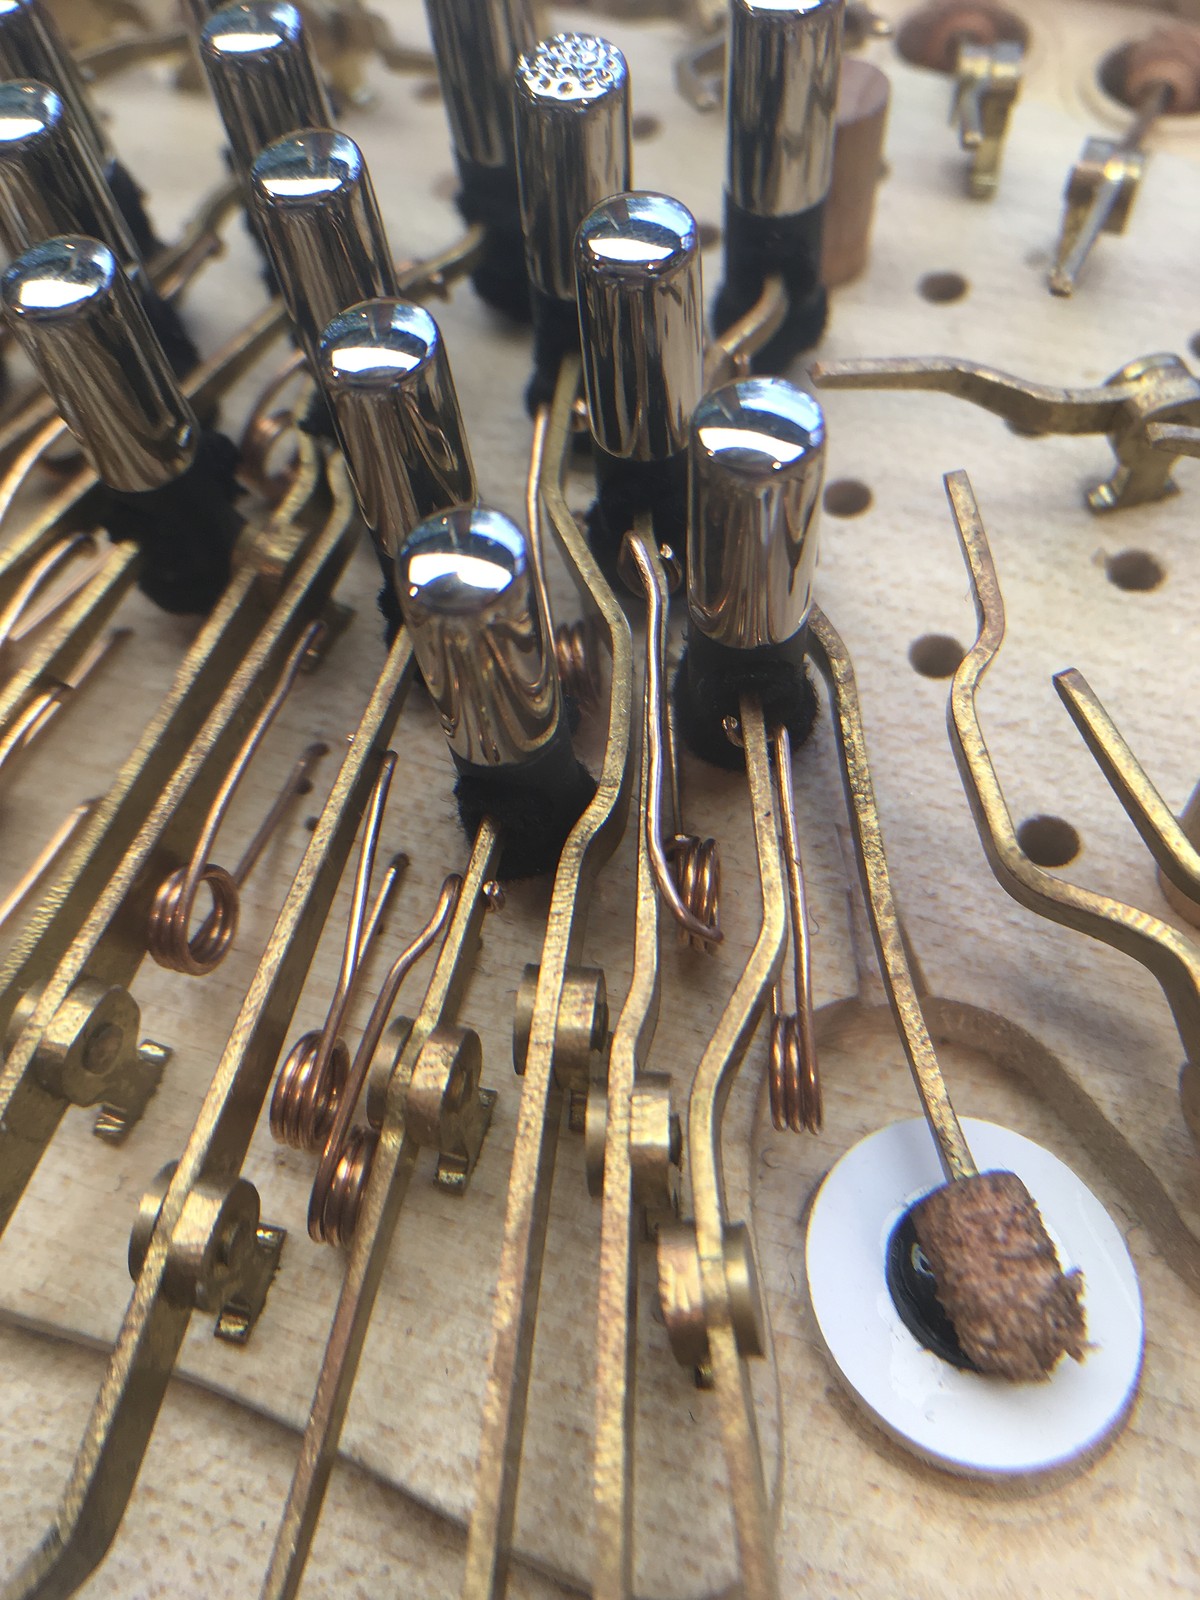
I installed two hand rail support pillars on each side, to provide a firm attachment without any risk of the end plates flexing during playing.
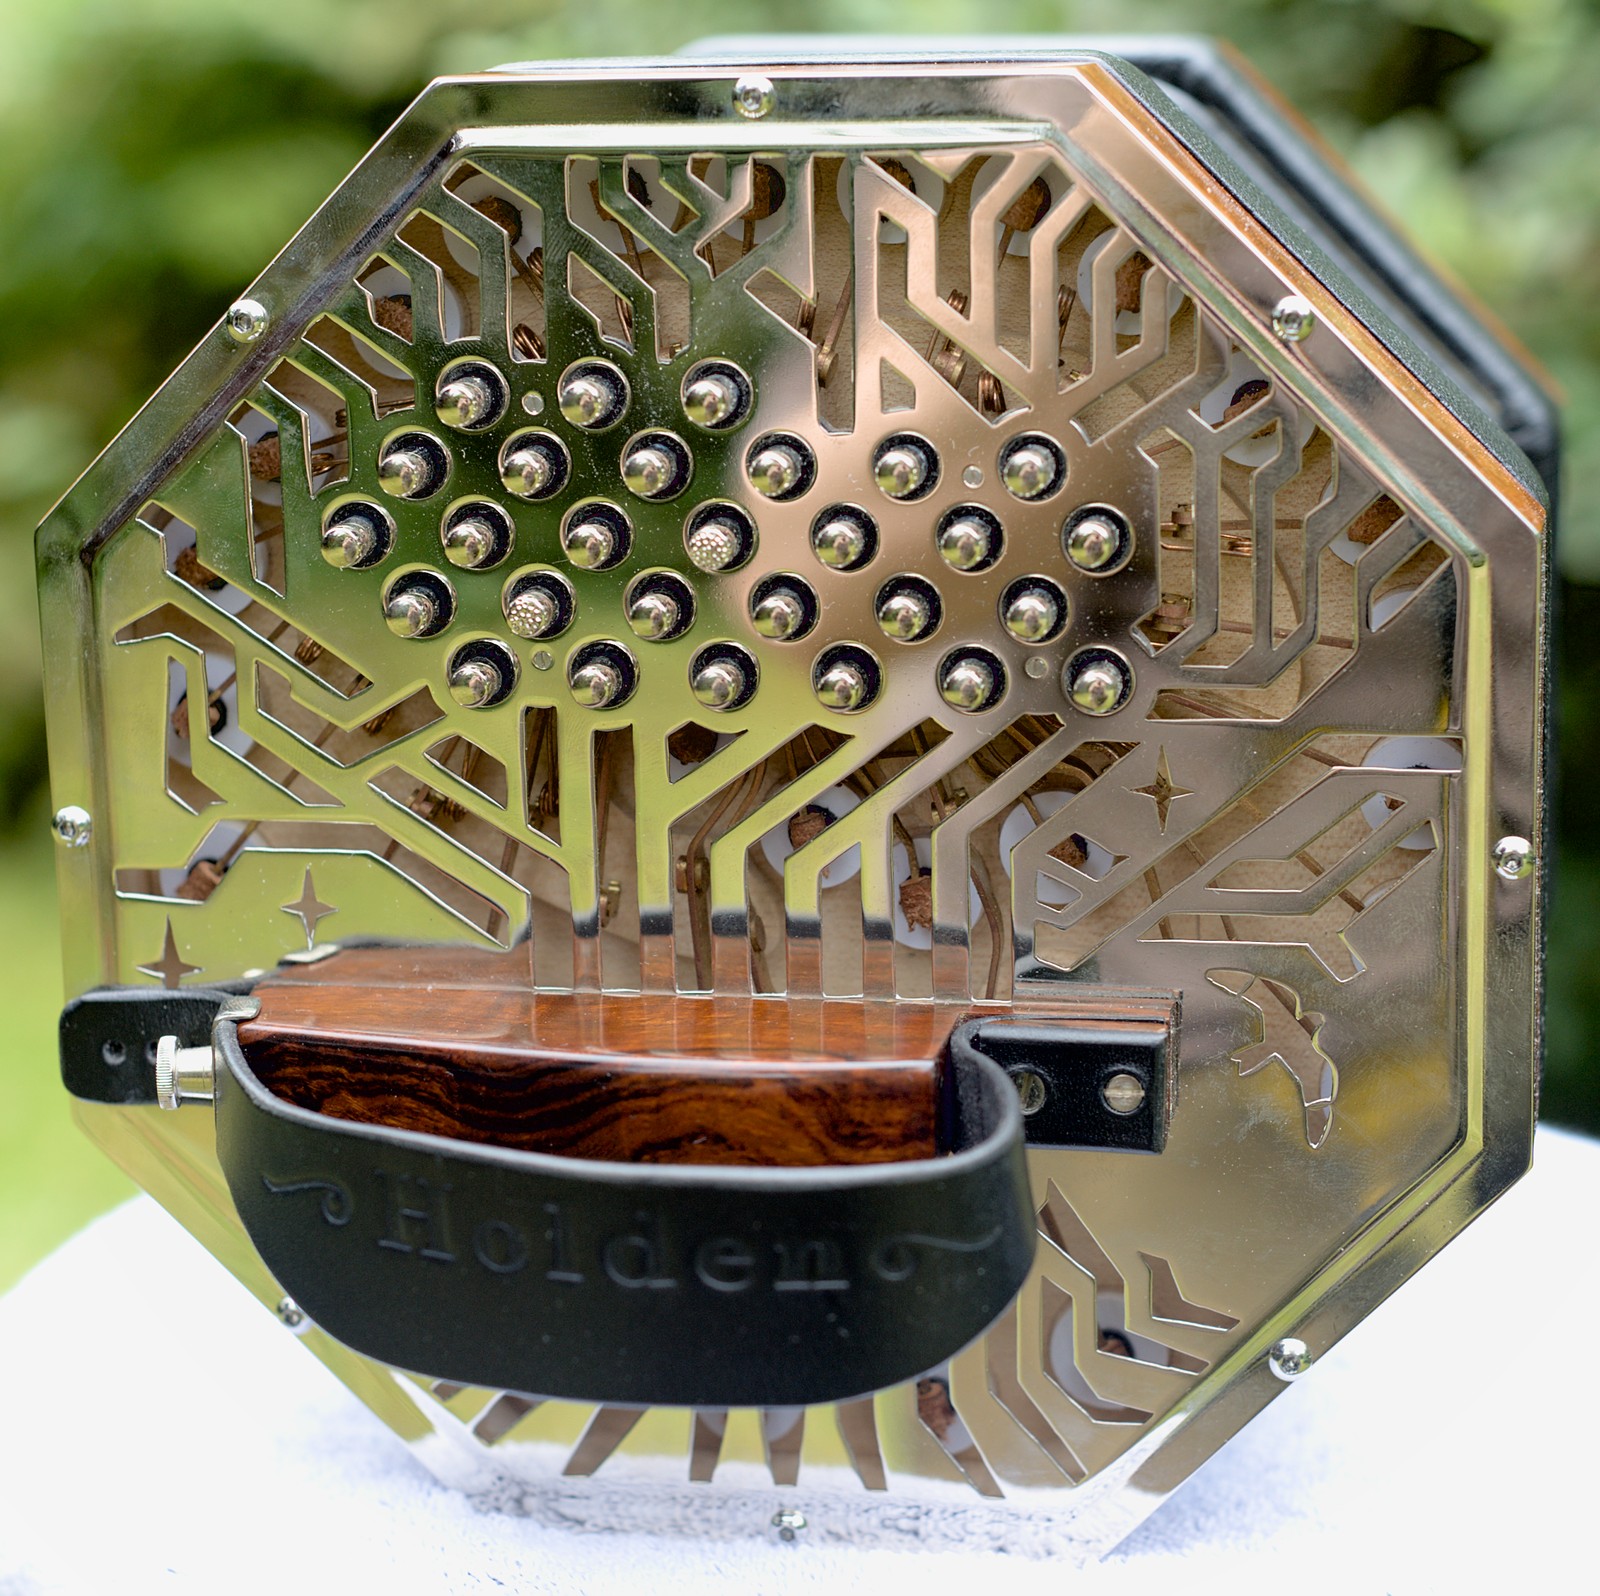
The unconventional location of the air button (the closest button to the handrail on the right hand side) was dictated by the limited reed pan space for the air passage and the very cramped lever layout inside the action box. Two buttons on each side have a lightly textured top to aid in finding your position on the keyboard before you start playing.
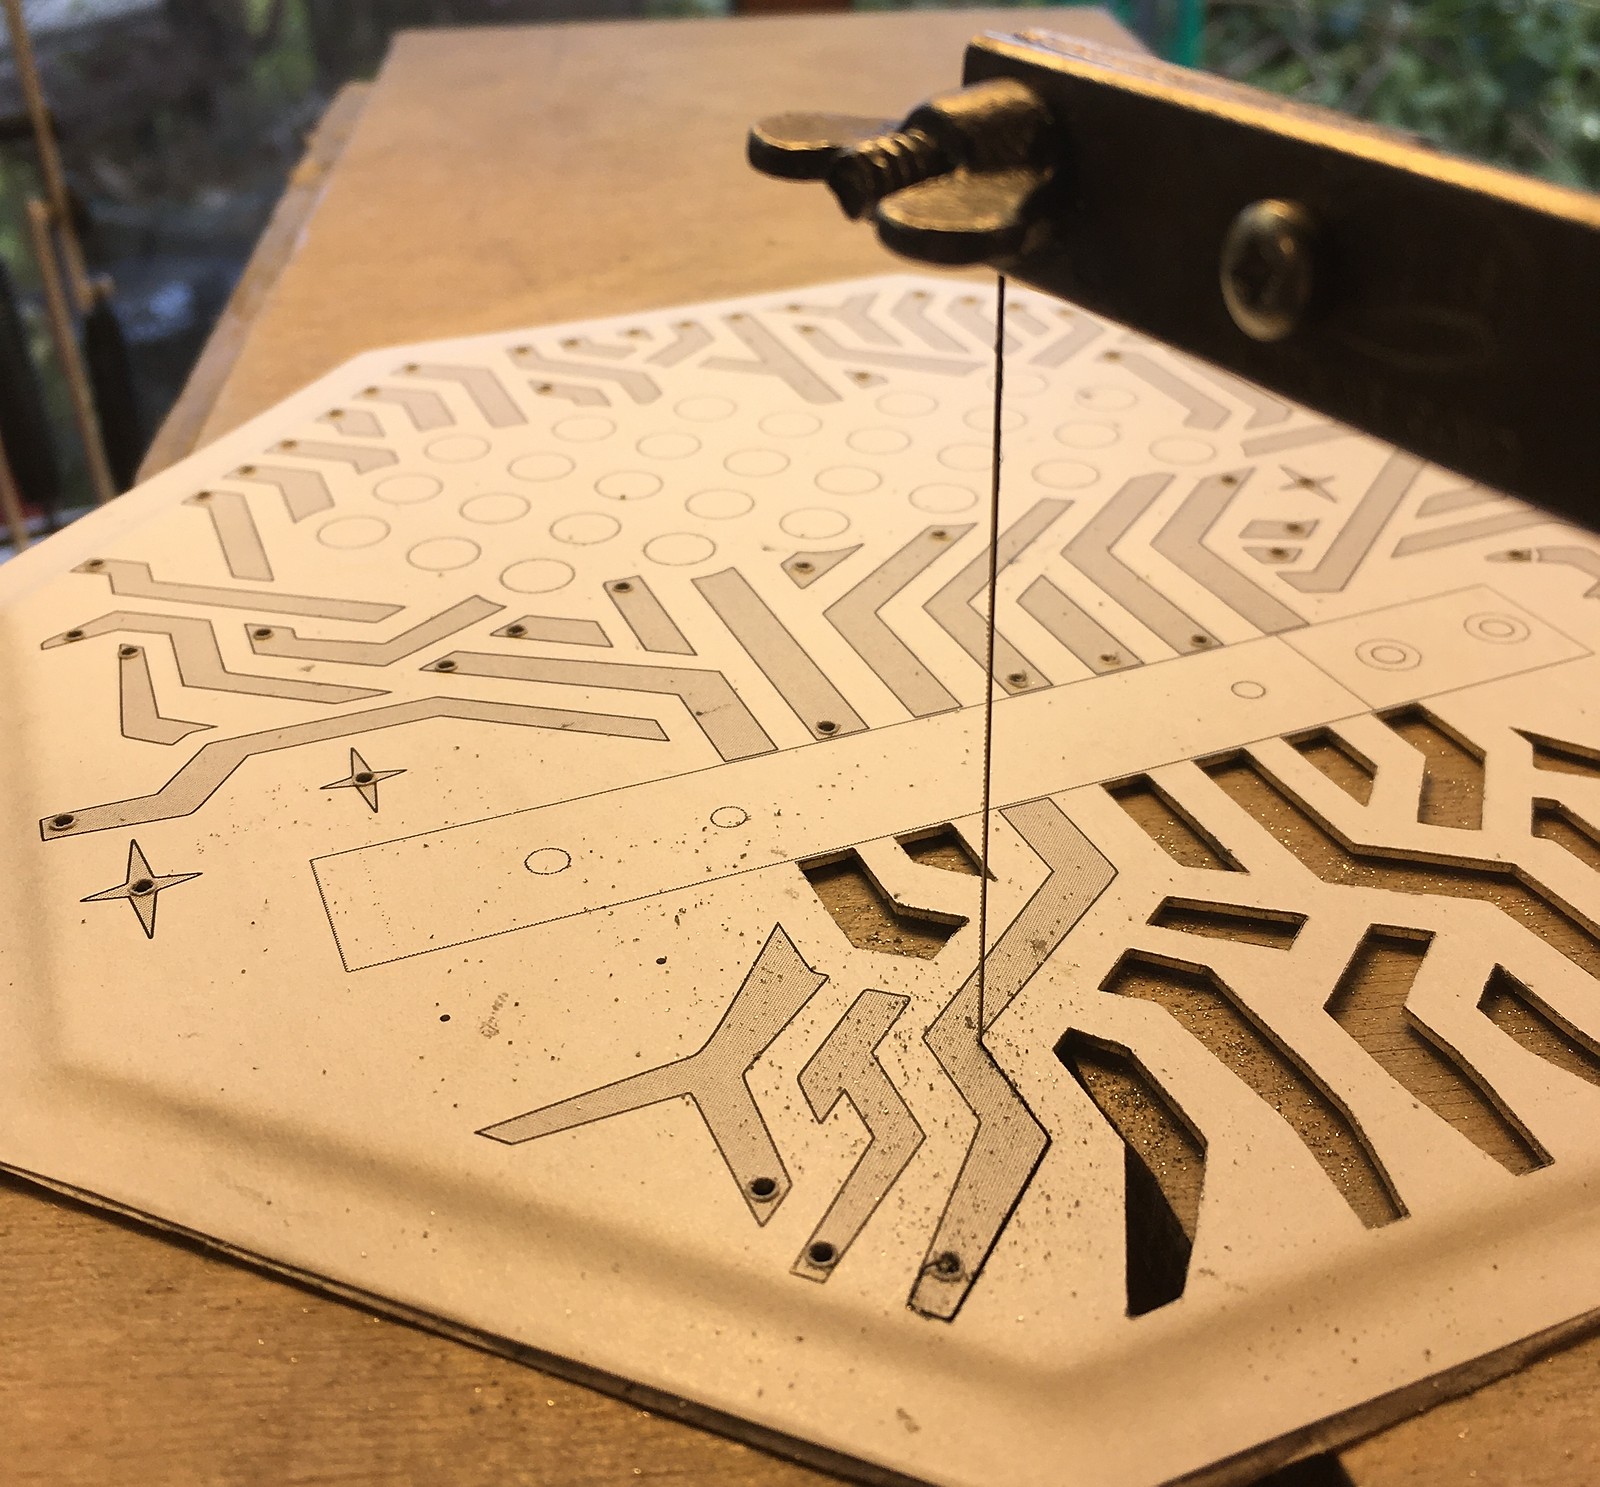
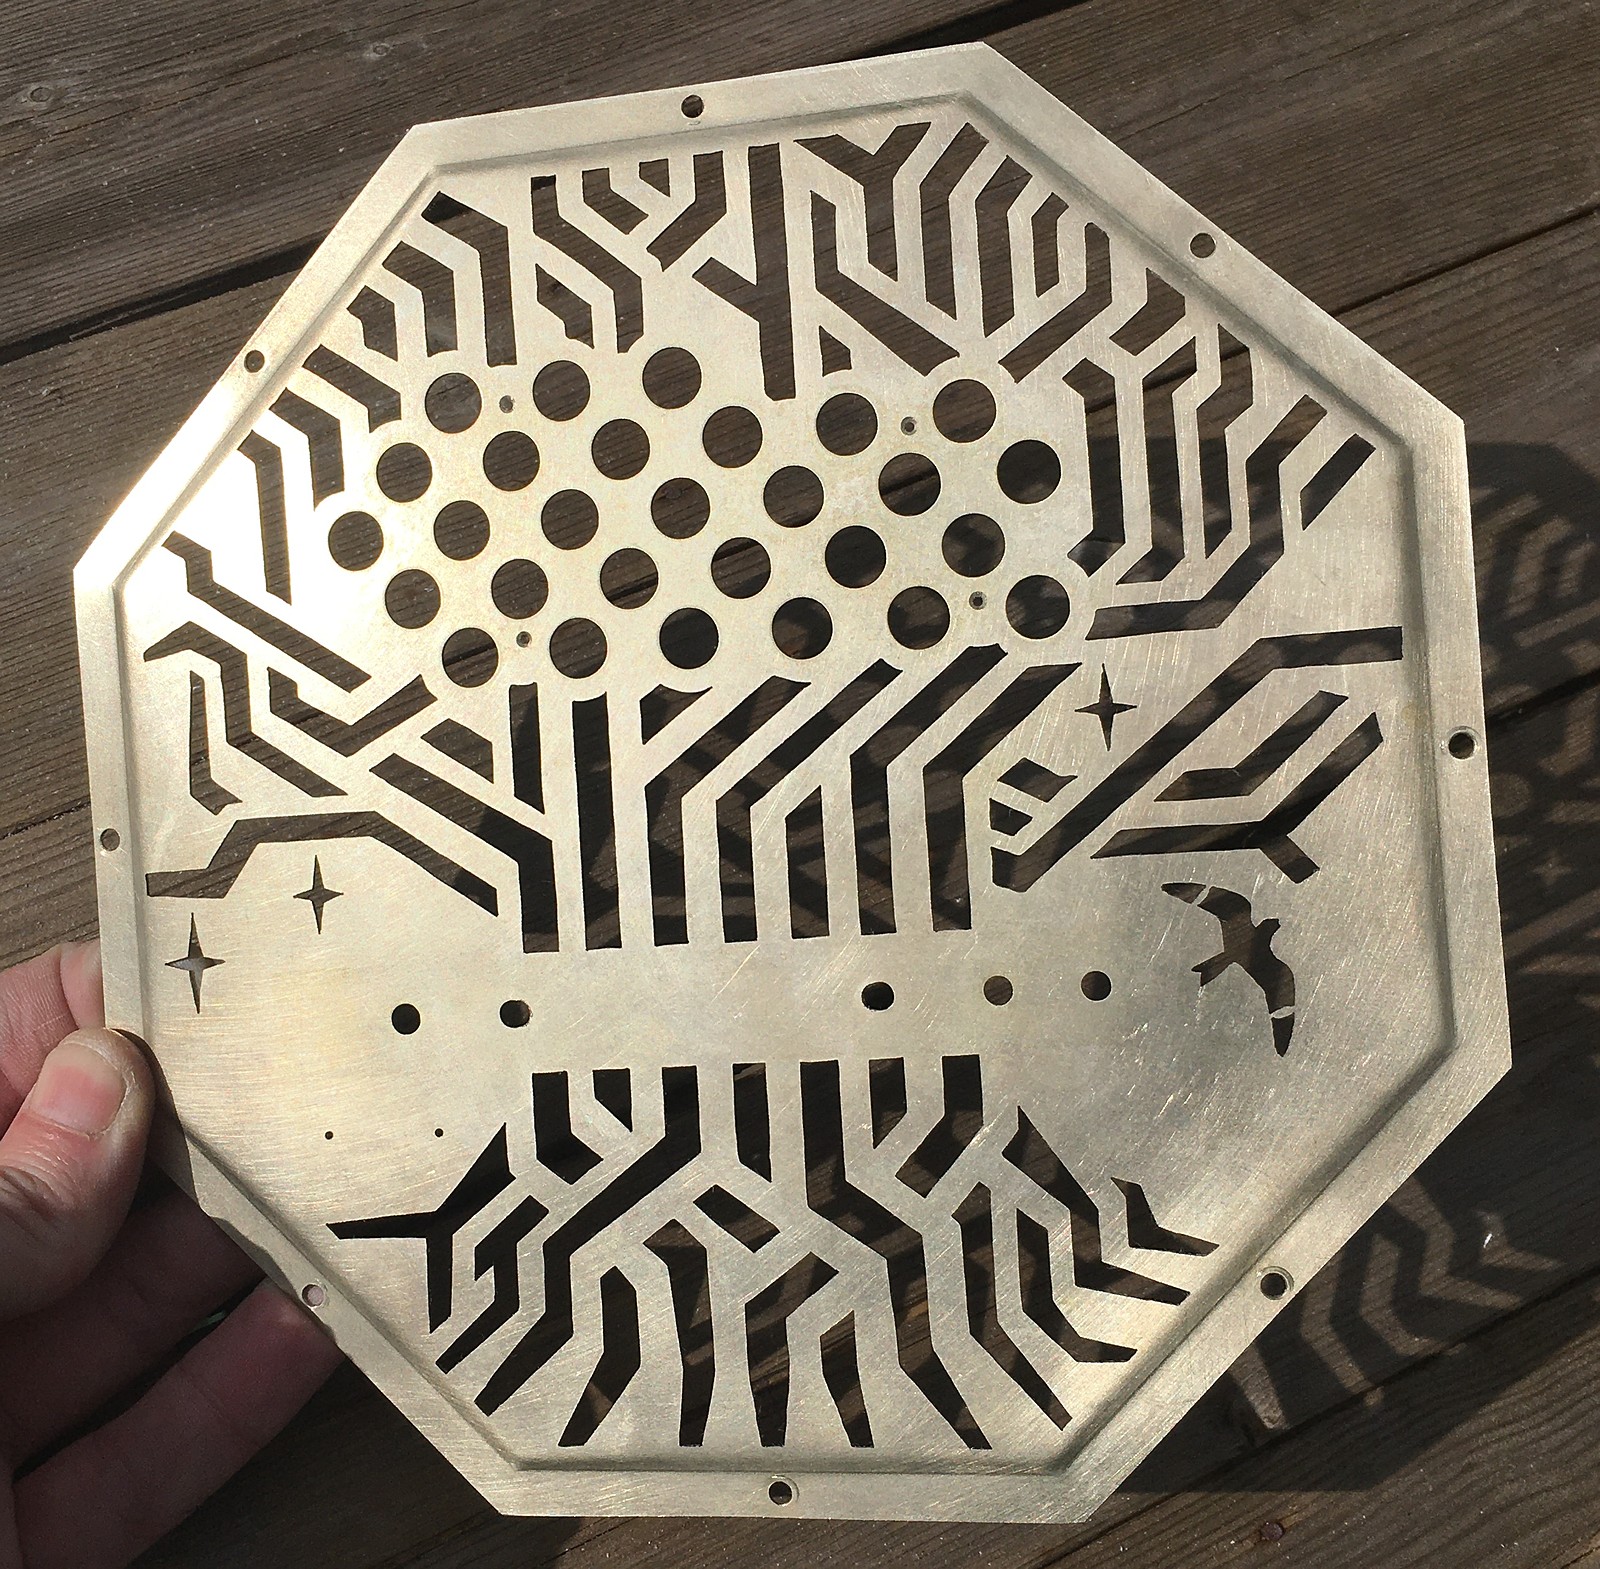
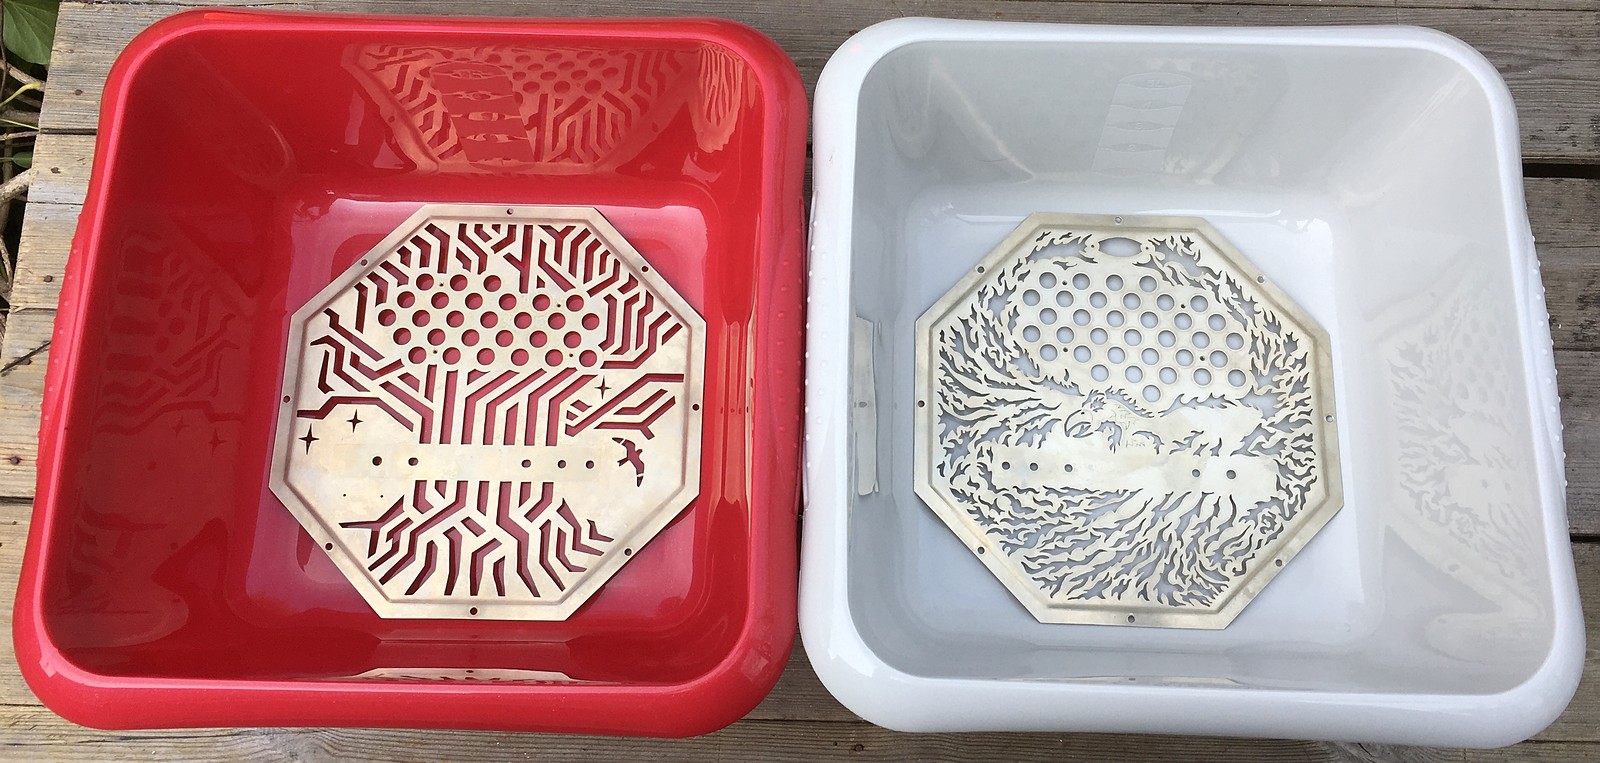
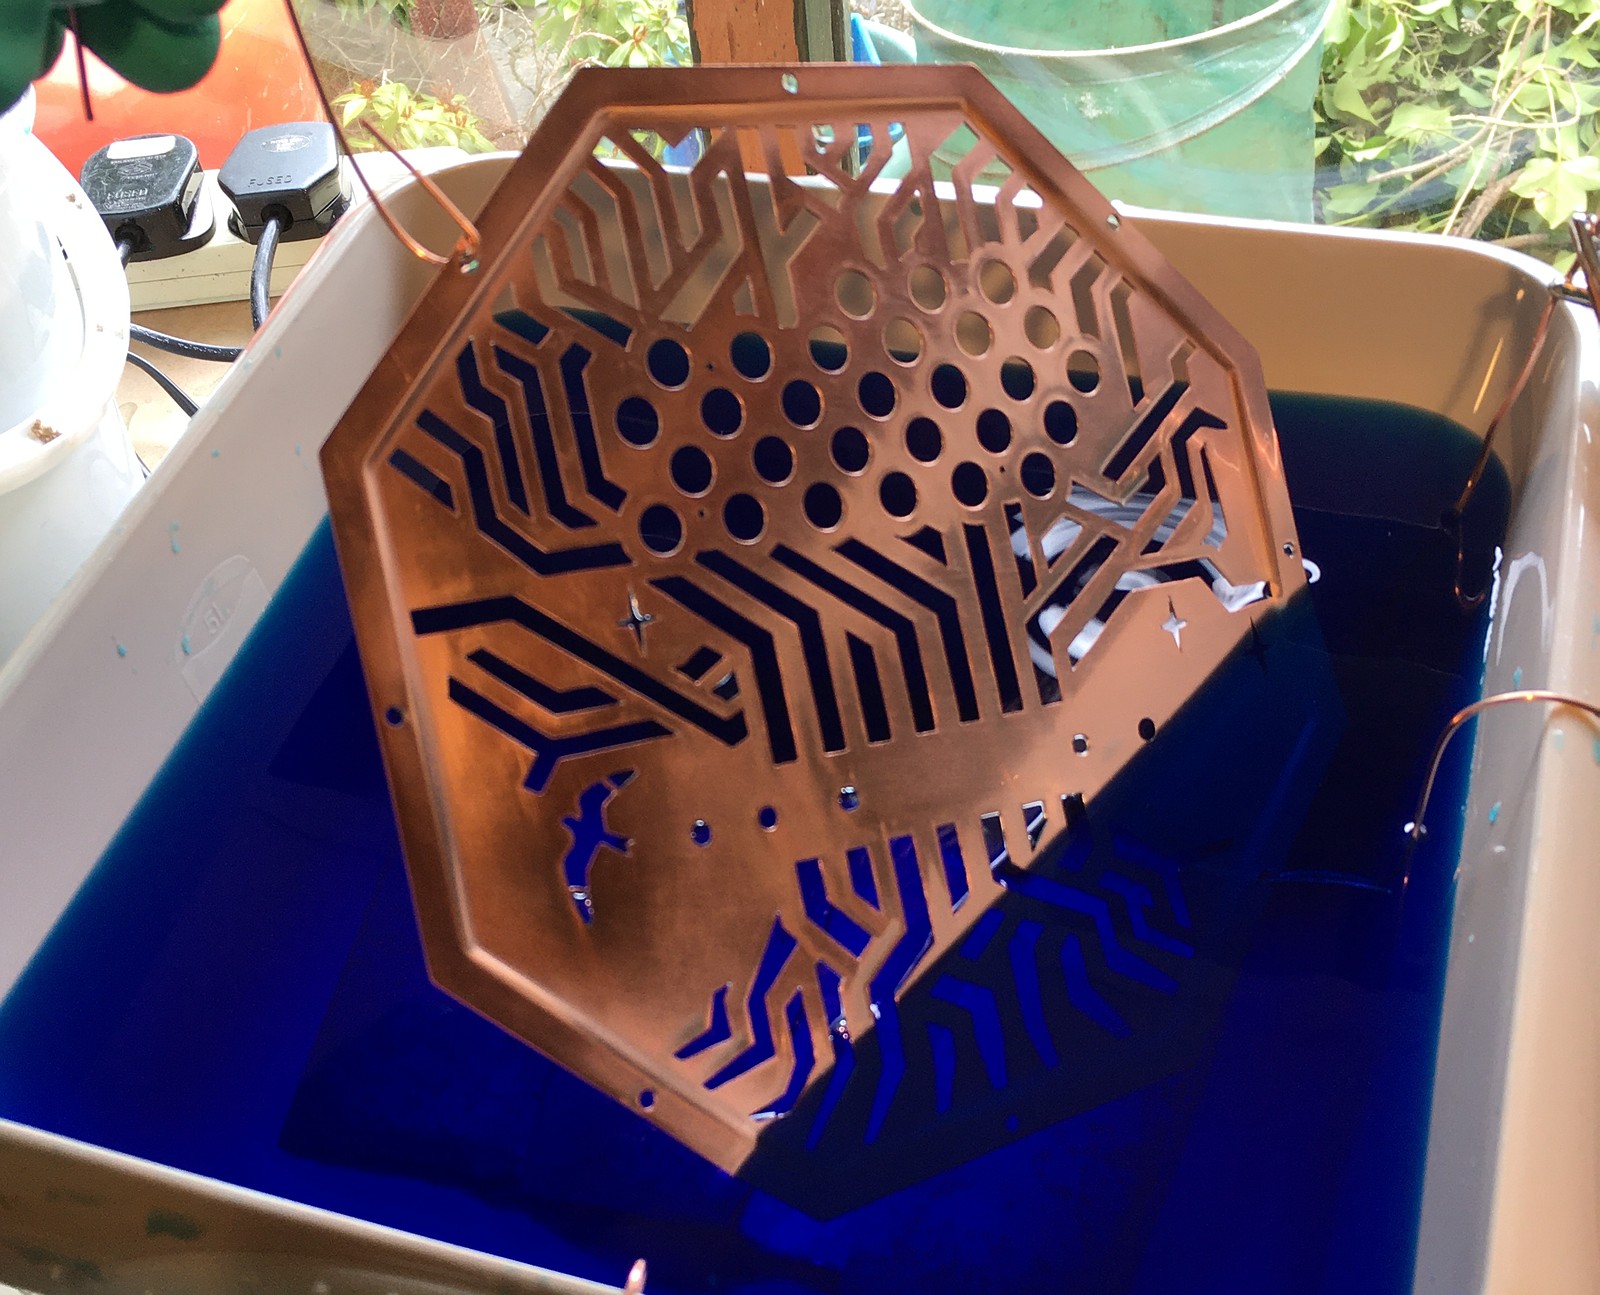
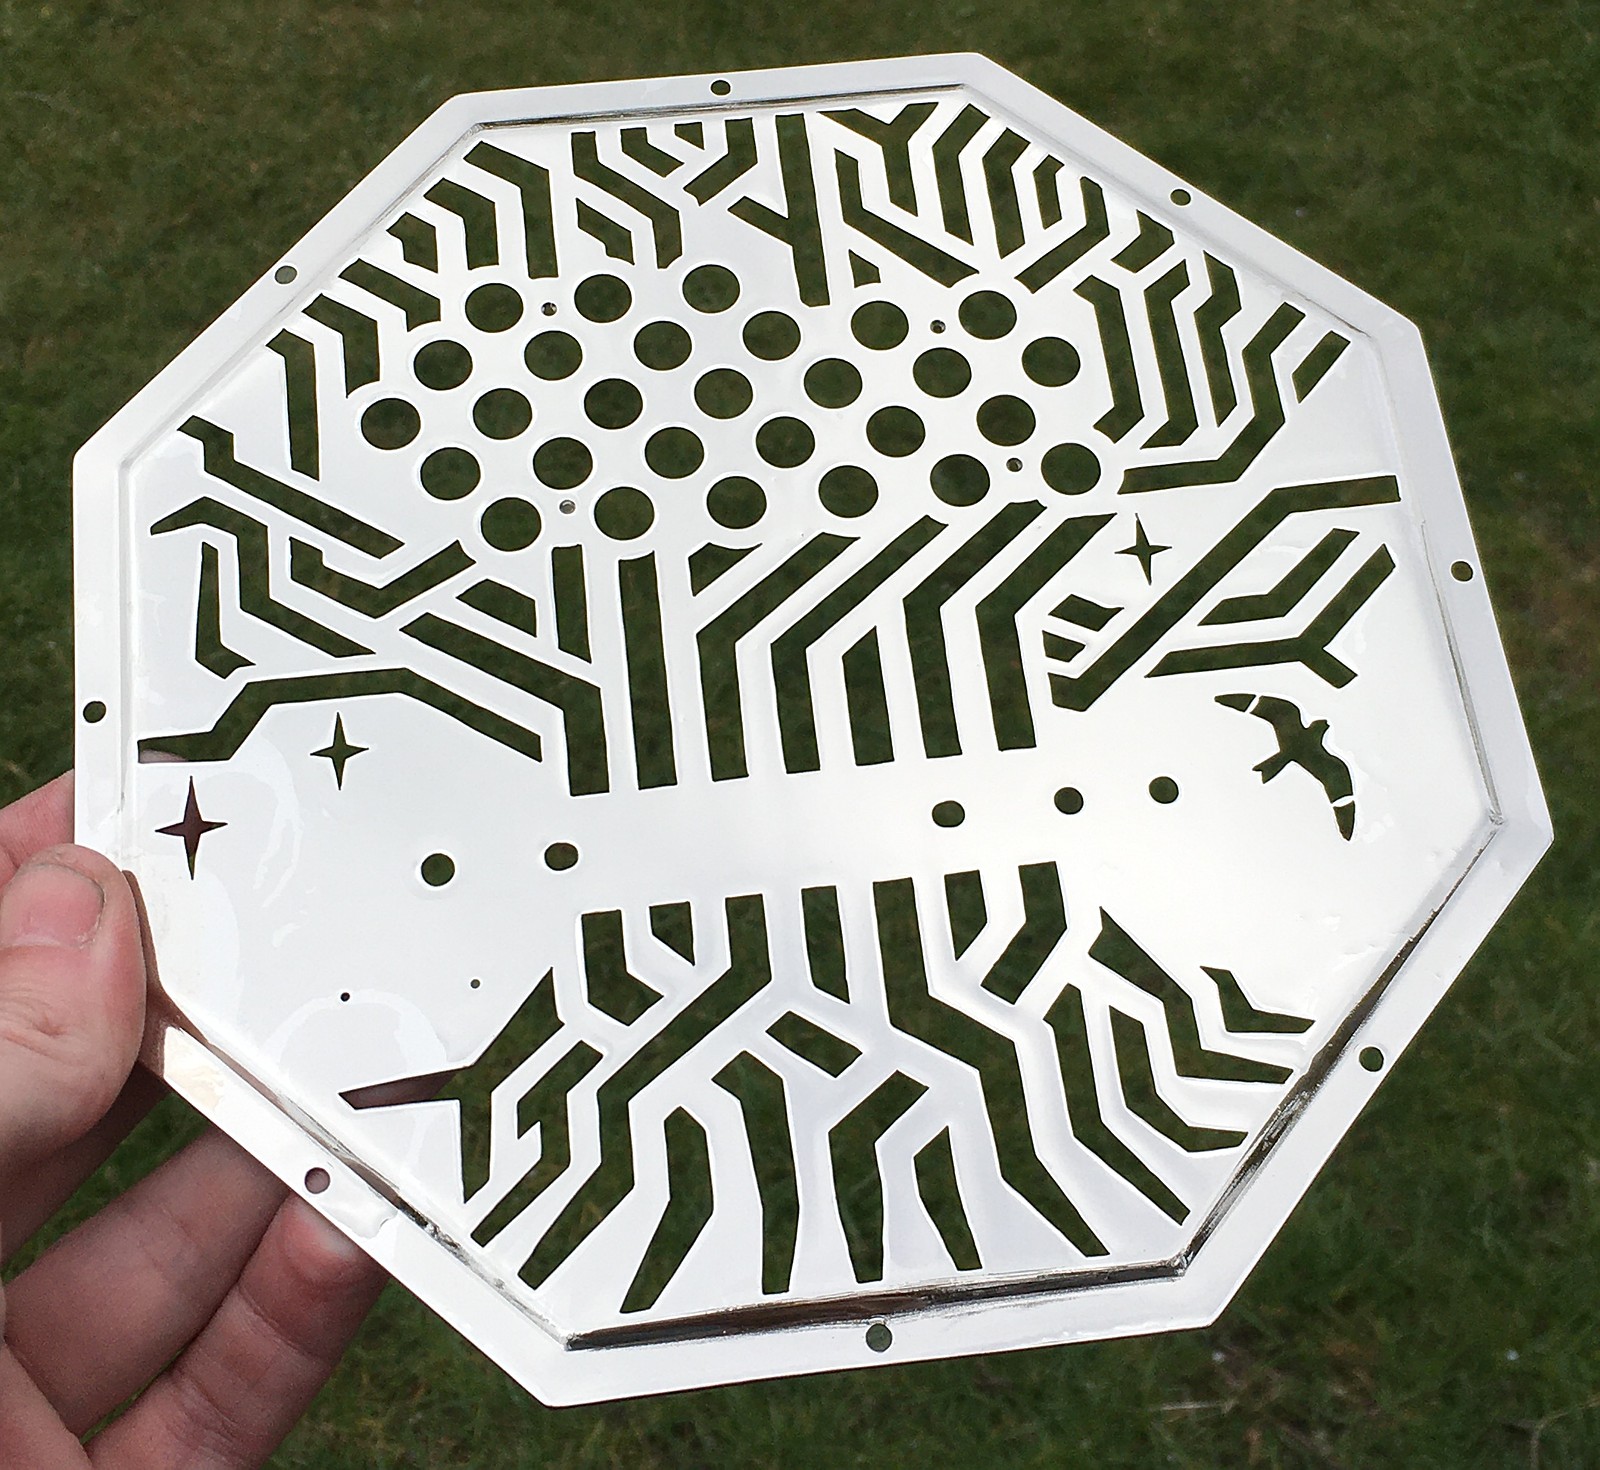
End Plates
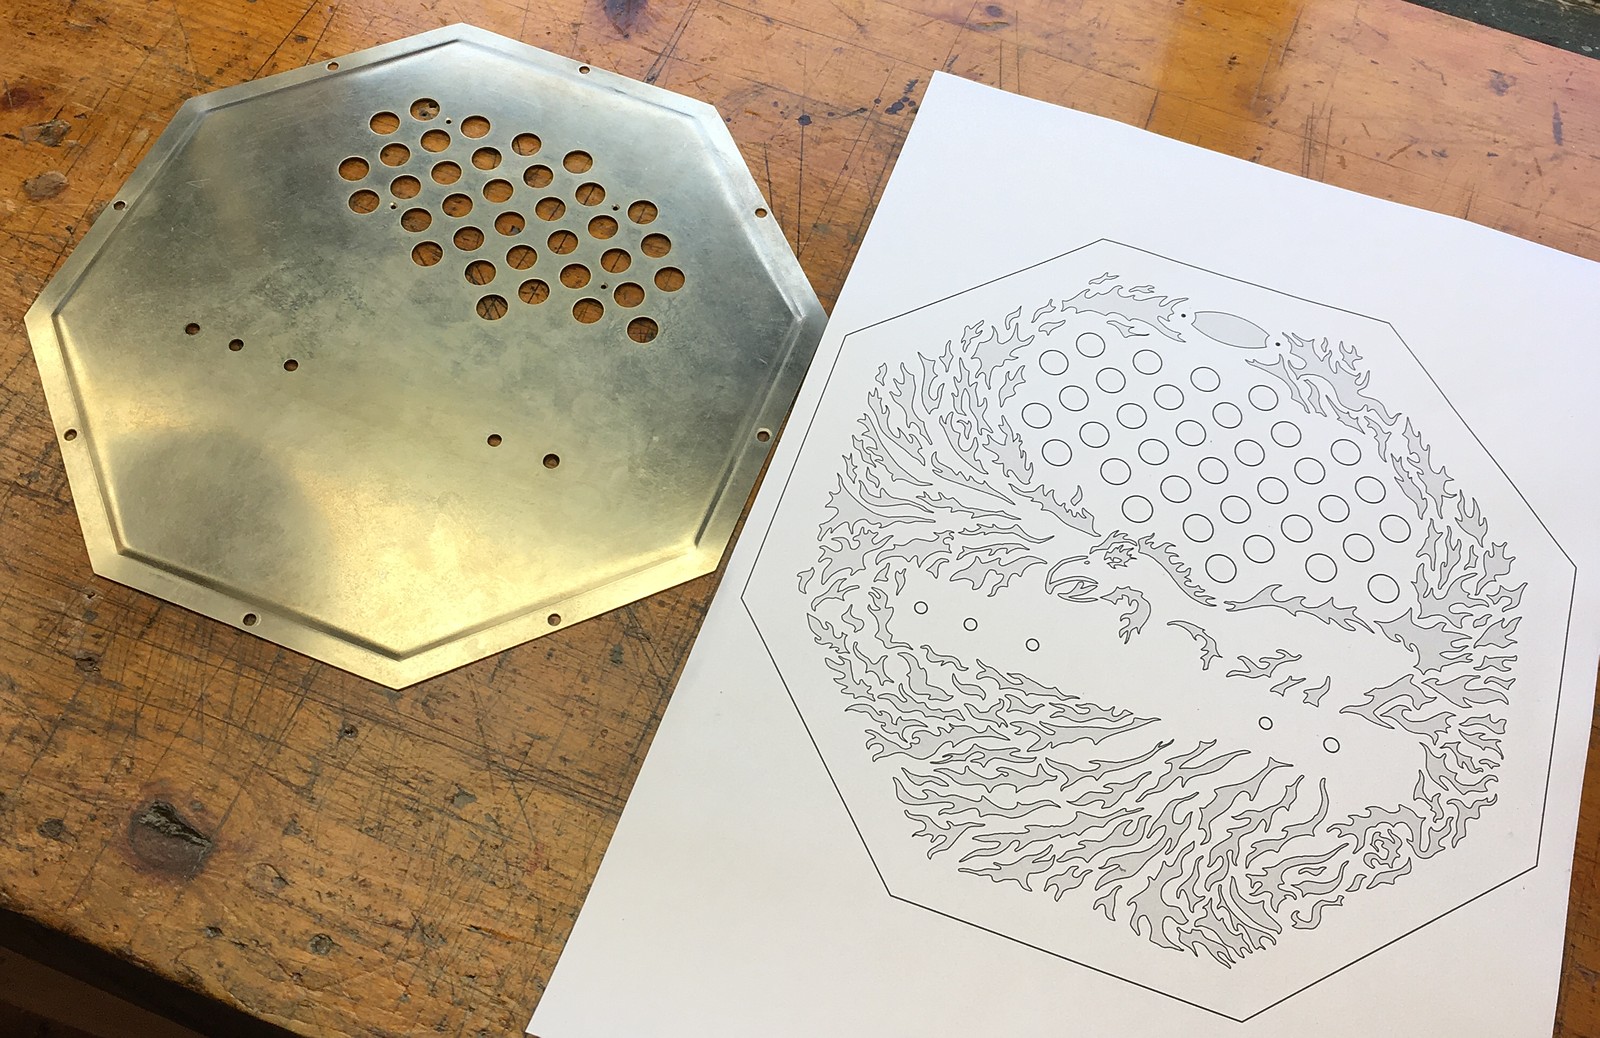
The unique fretwork designs of this instrument were supplied by the client. I can’t recall having seen any other concertina that has a totally different design on each hand.
My usual piercing saw was too small for these end plates, so I modified a vintage fretsaw frame to be the ideal size for the job.

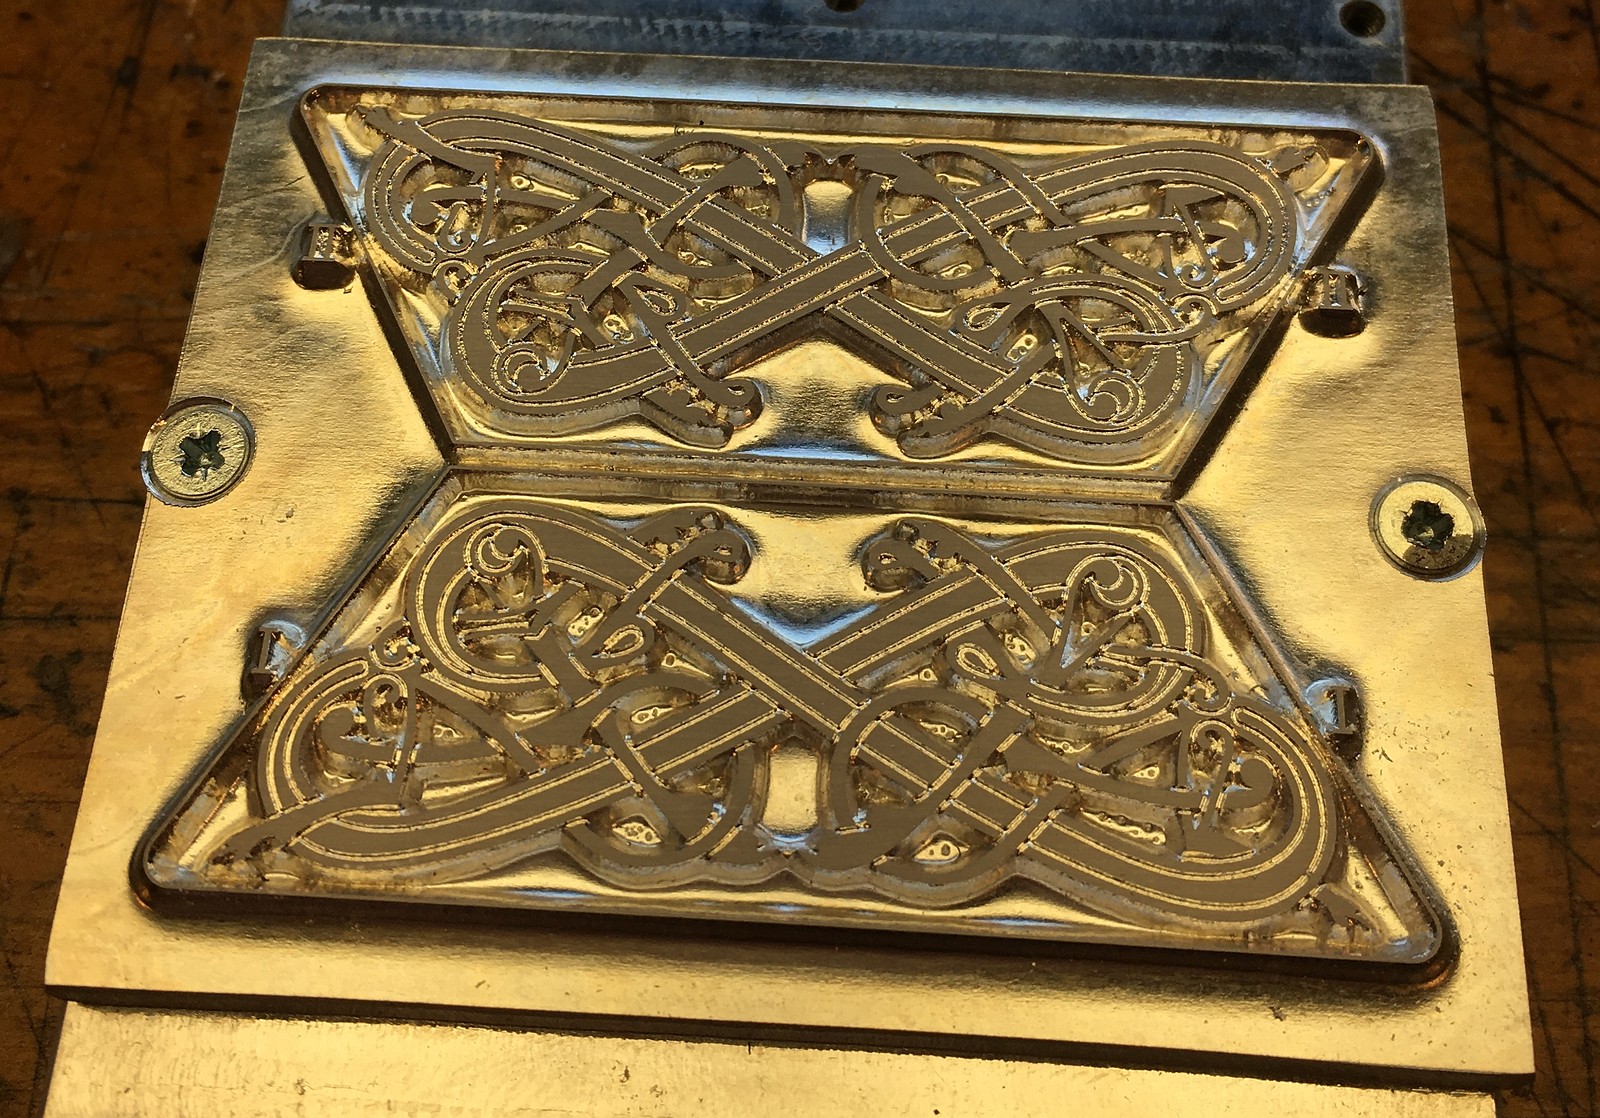
I have previously only crimped the edges of smaller six-sided end plates, so I had to make a new press die for these plates. I decided to try machining it from aluminium rather than steel (although my mill can cut steel, it’s not a very pleasant experience), and it worked fine with no noticeable wear after crimping both end plates.
The flames on the right hand end plate were particularly time-consuming to pierce because of the hundreds of pointy corners.
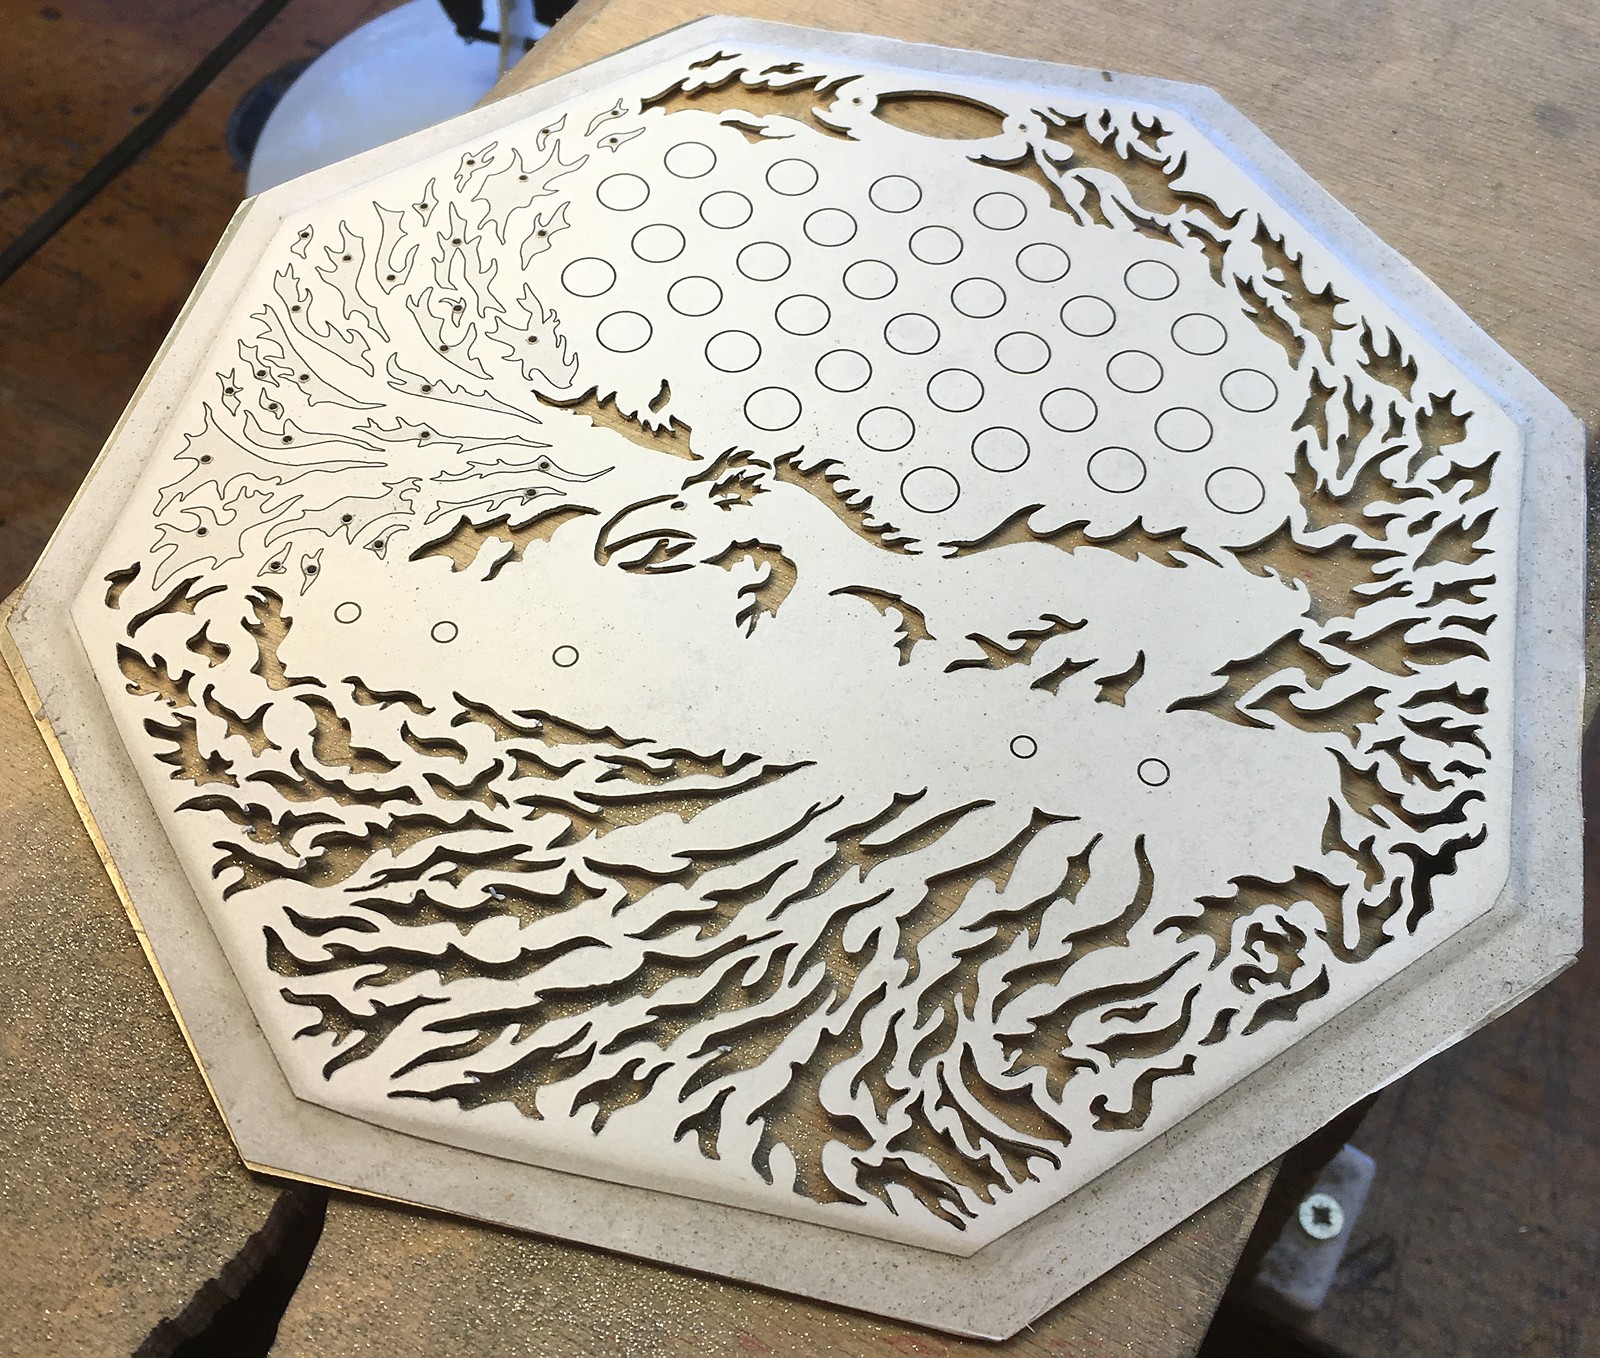
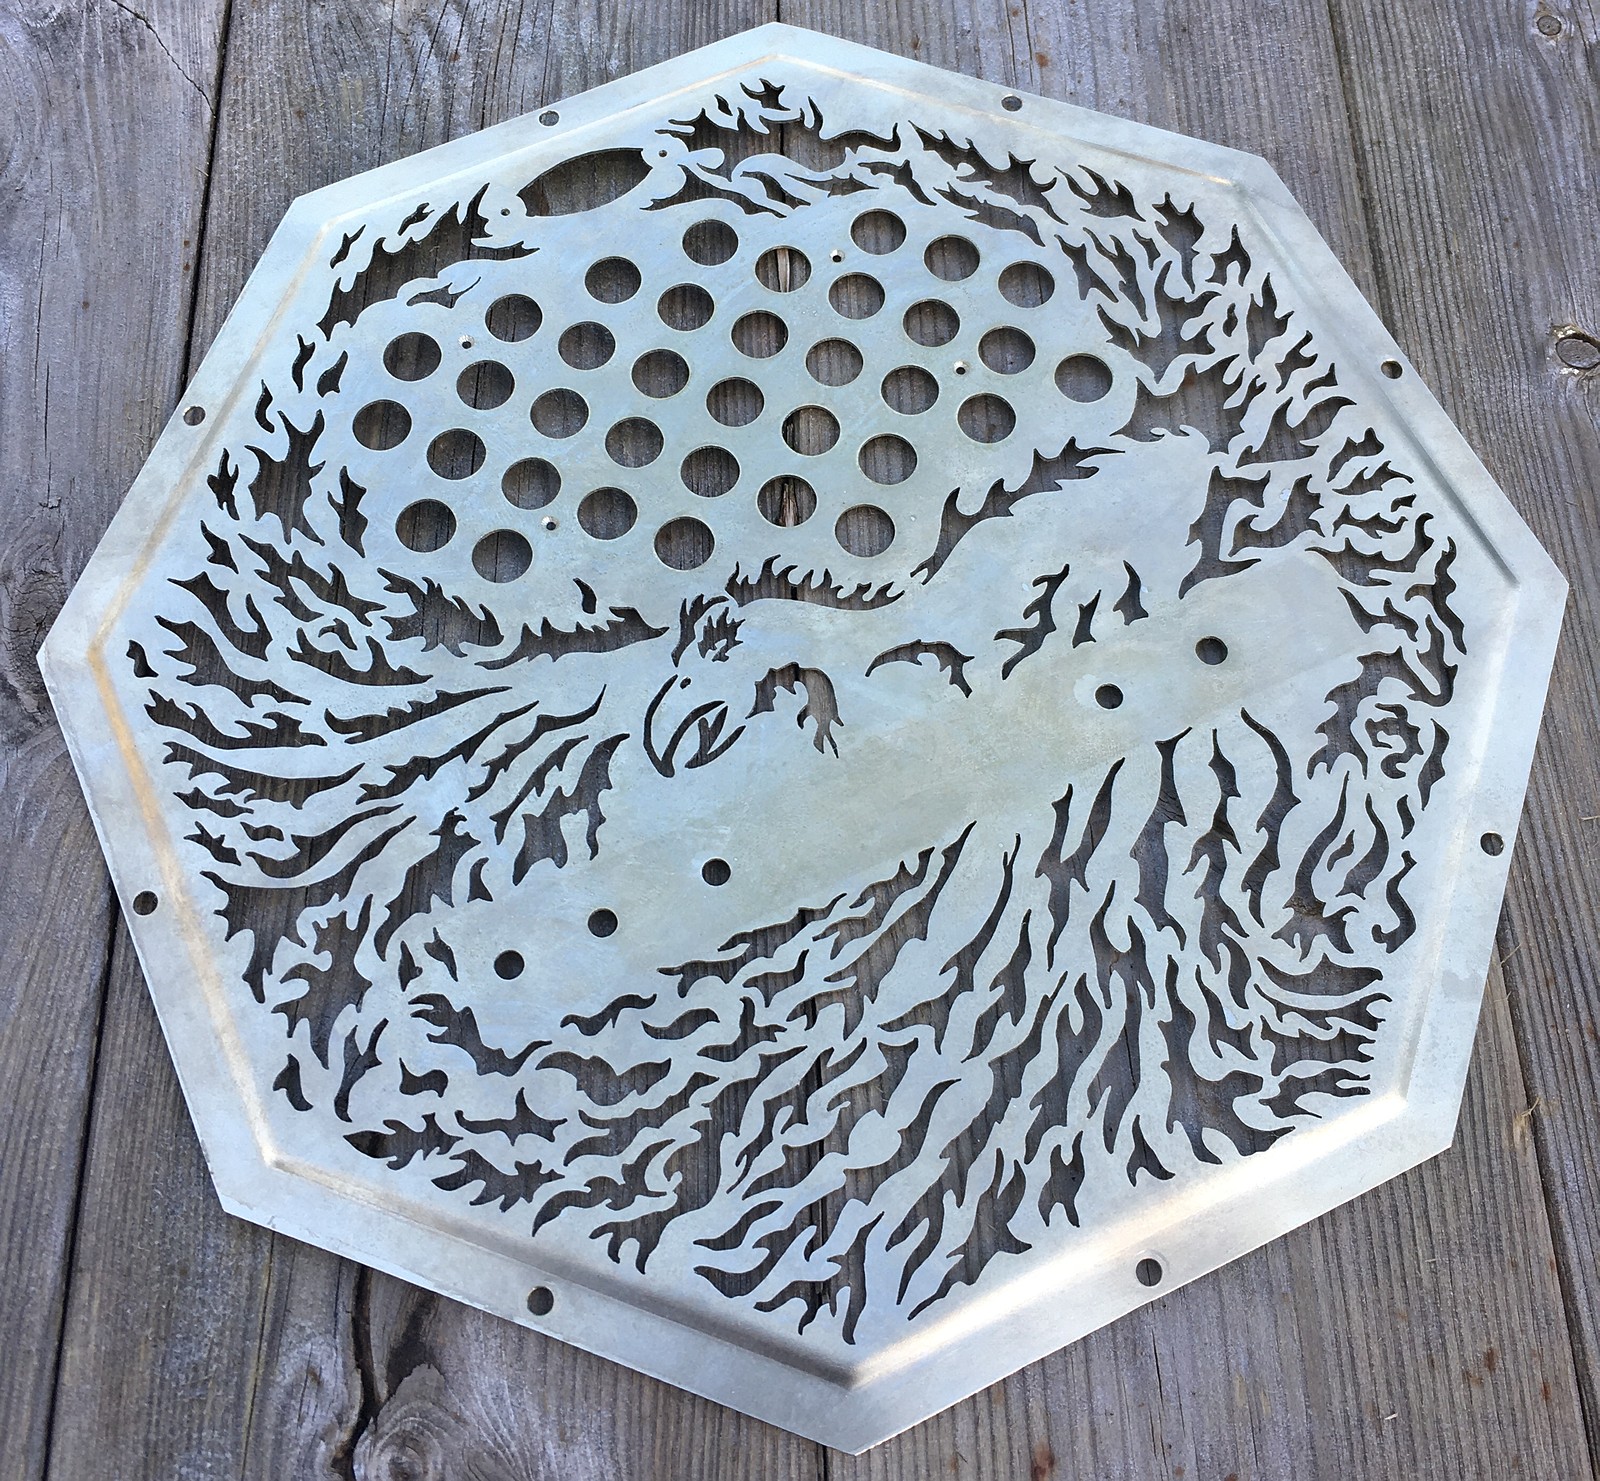
There was also a little bit of hand engraving on the firebird.

The left hand was a stylised Yggdrasil with stars and a flying bird. It was quite a bit simpler and easier to cut out than the right hand.
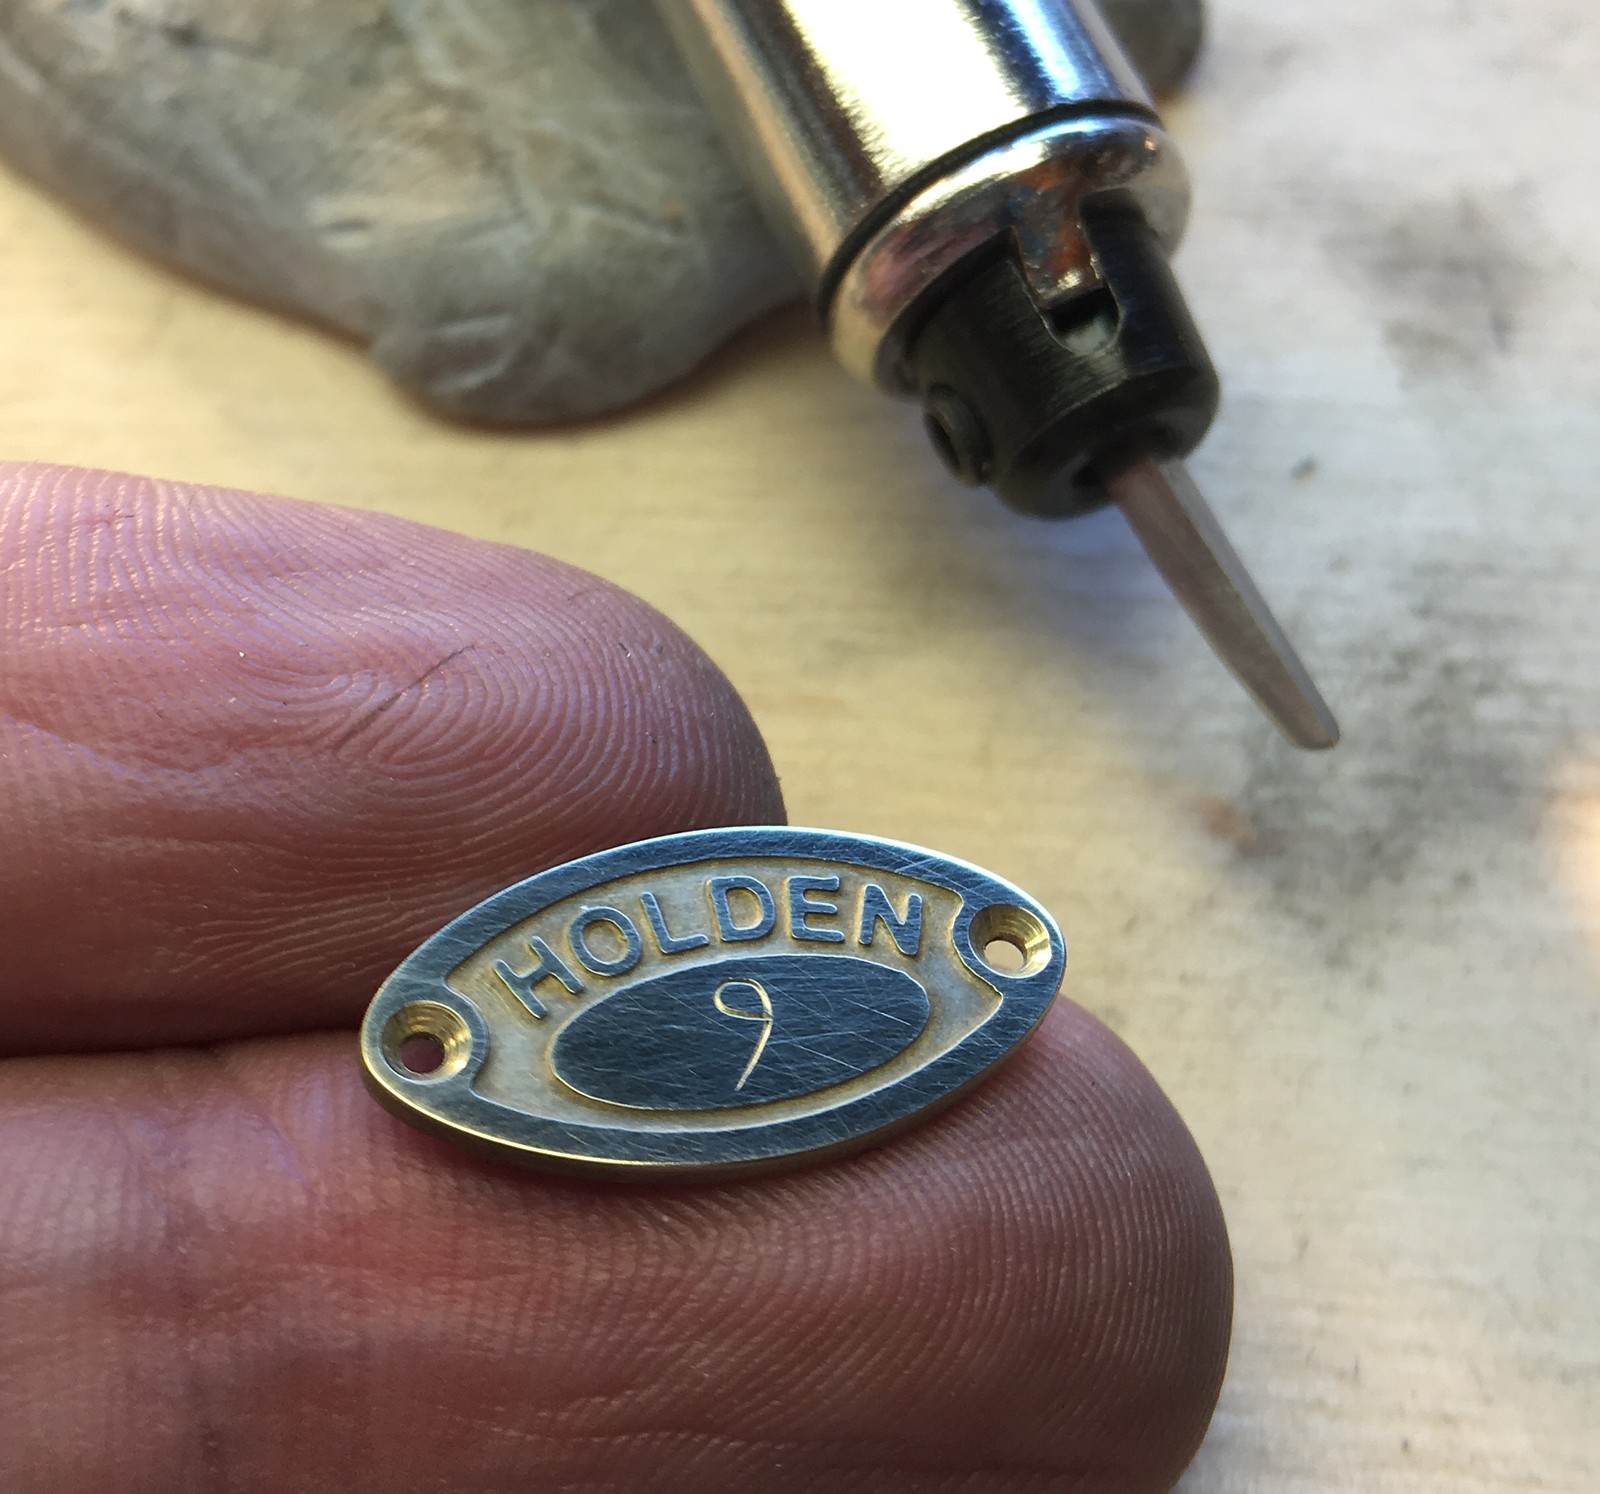
A new feature that I am including on my instruments from No. 9 onwards is an etched brass serial number plate with an engraved number, in the same style as the maker’s plate but smaller.
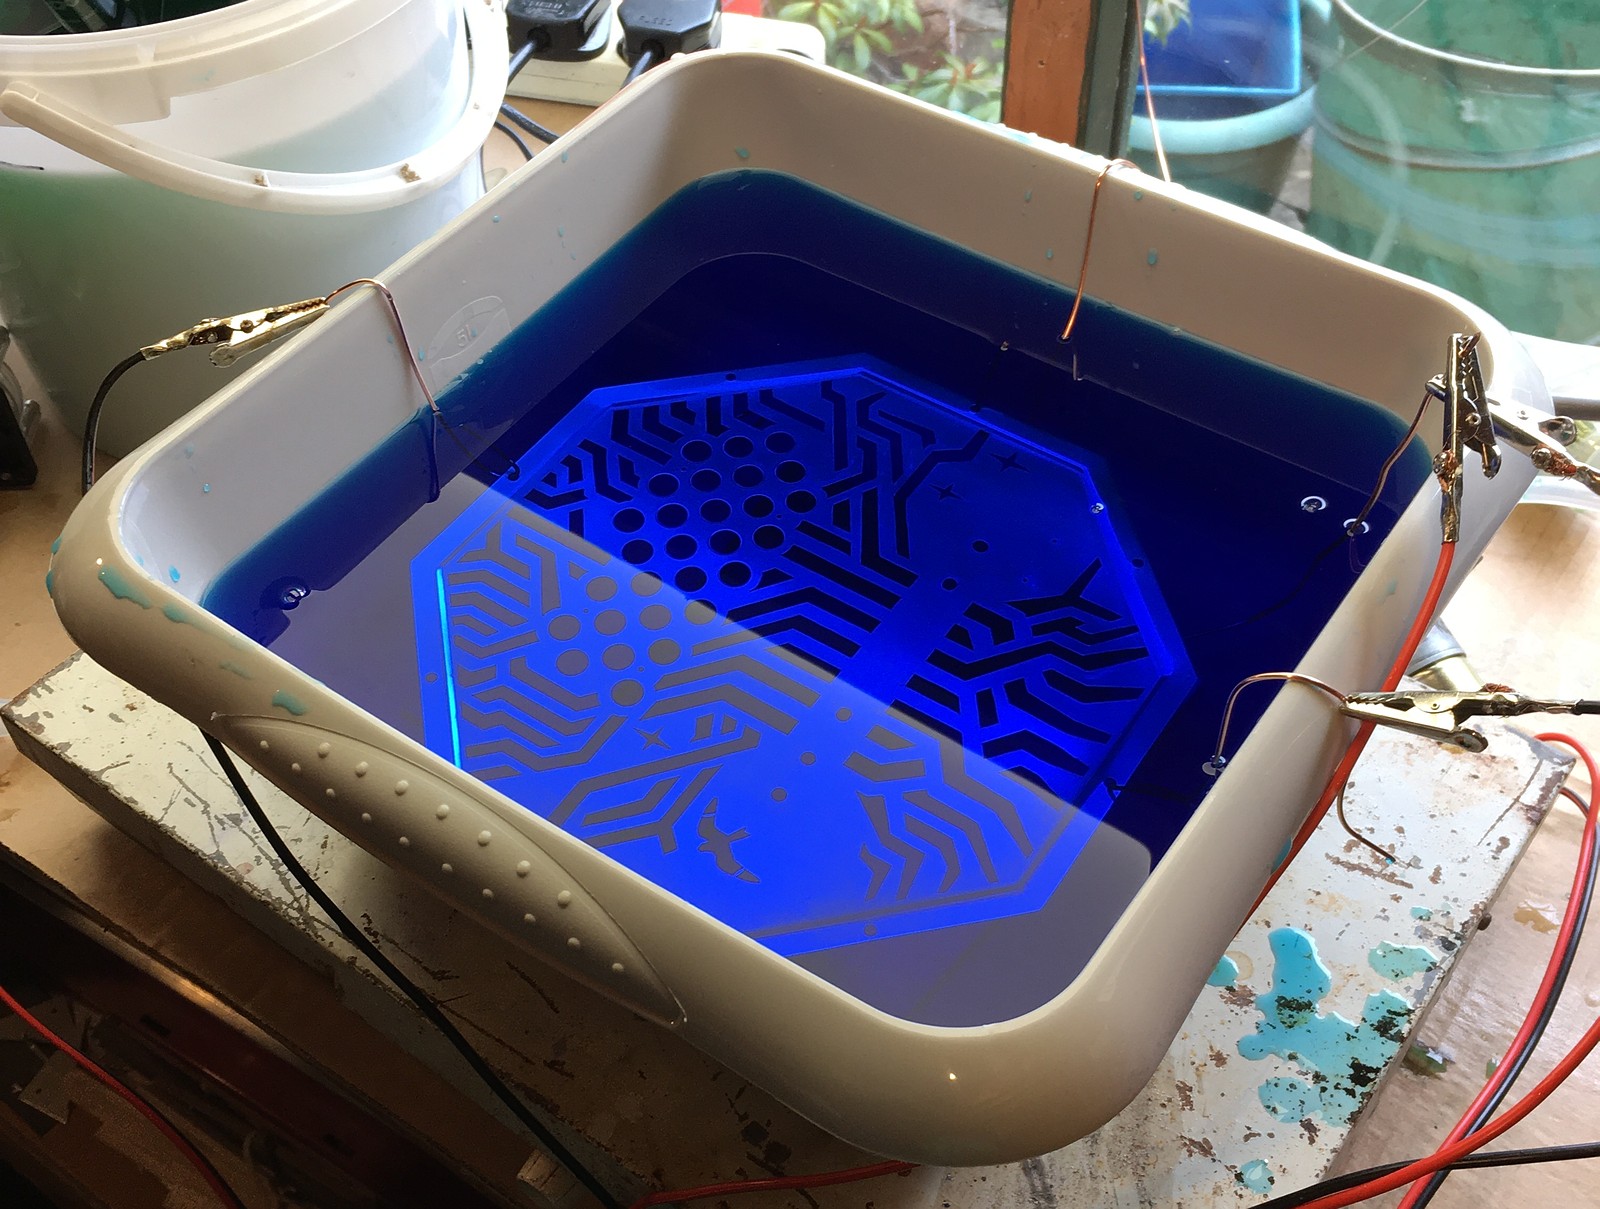
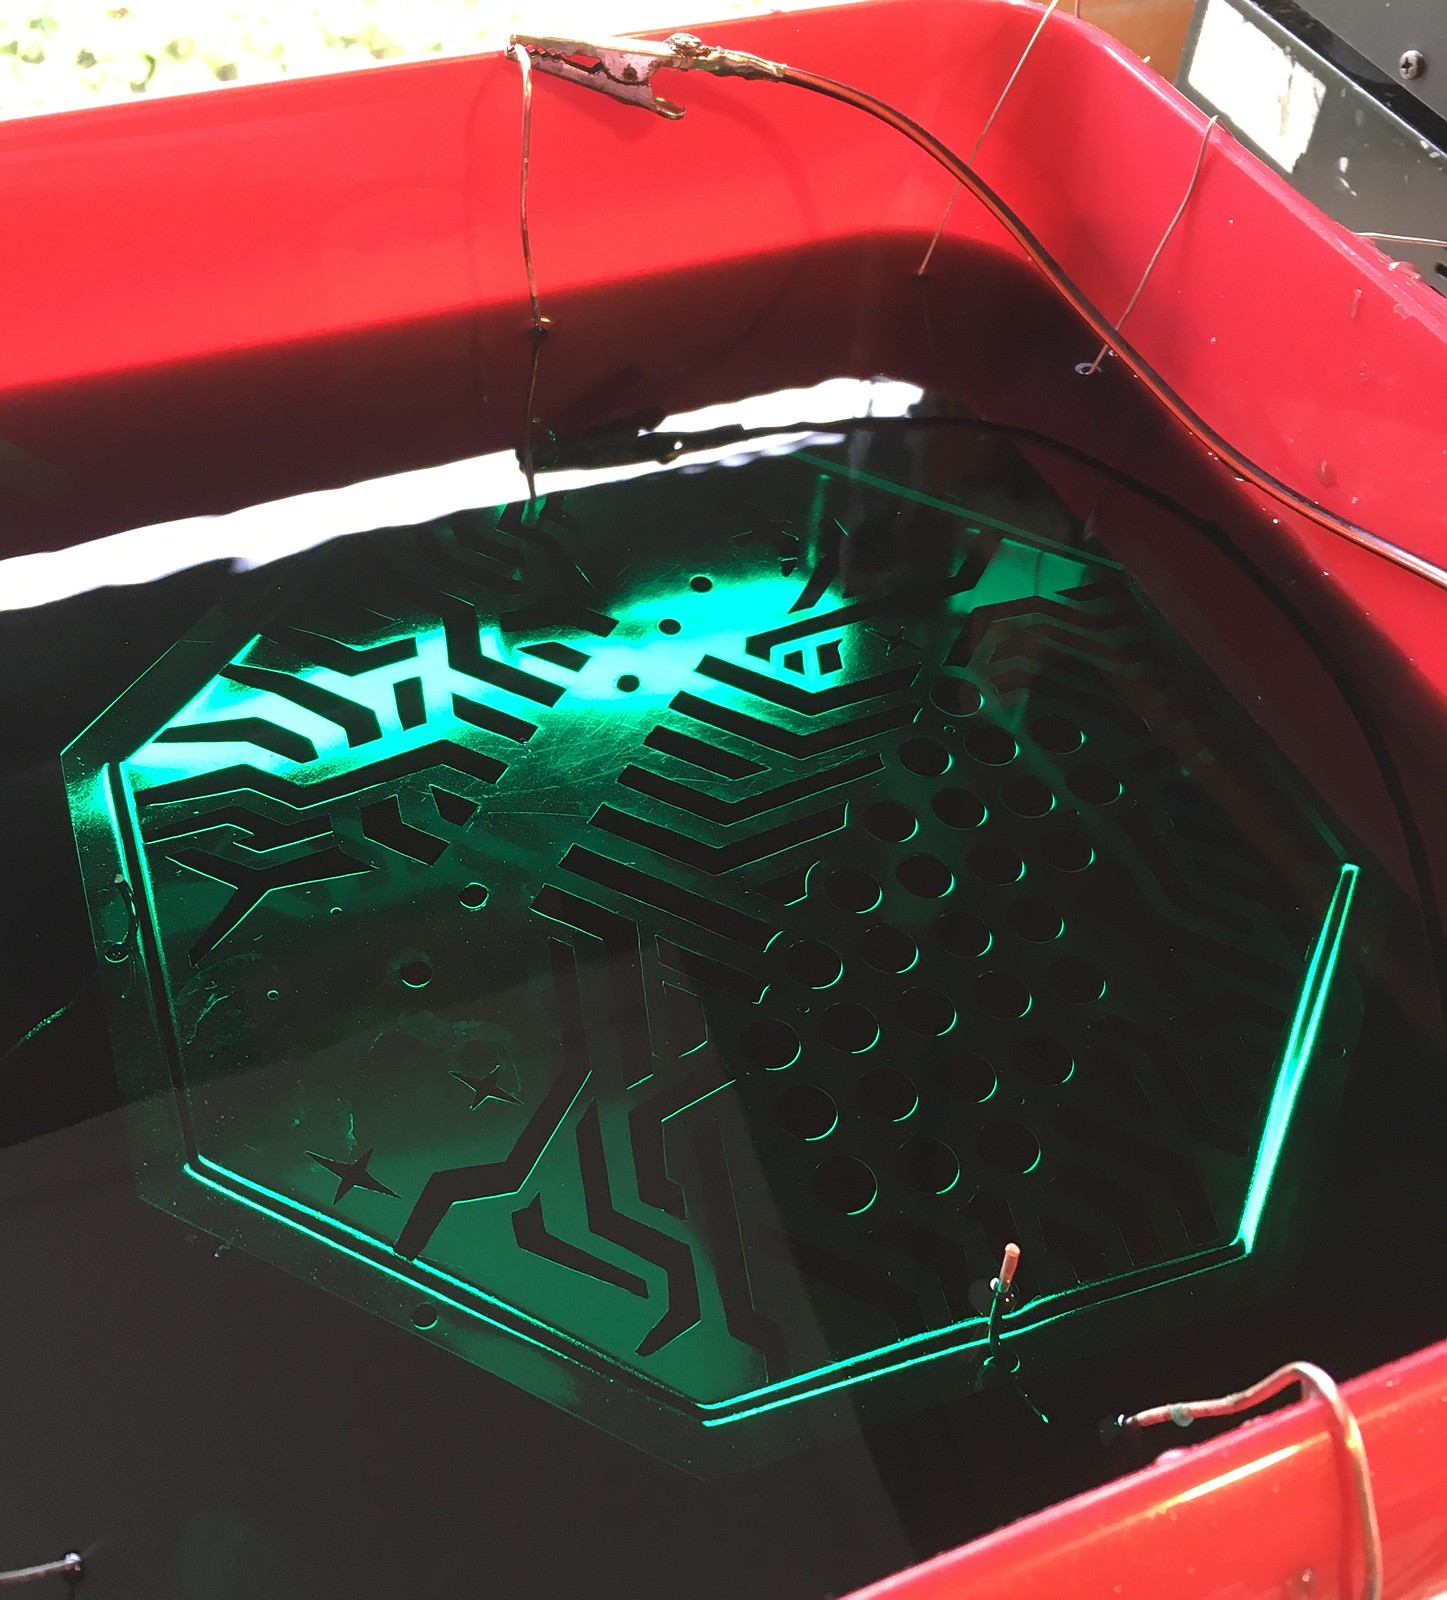
I nickel plated the end plates, button caps, and hand strap attachment hardware. An improvement I made to the process was to build a system that constantly pumps the electrolyte through a filter cartridge to remove dust/lint that falls into the tanks. It didn’t totally solve the problem of dust particles sticking to the finish, but it was far less of an issue than when I plated No. 6.
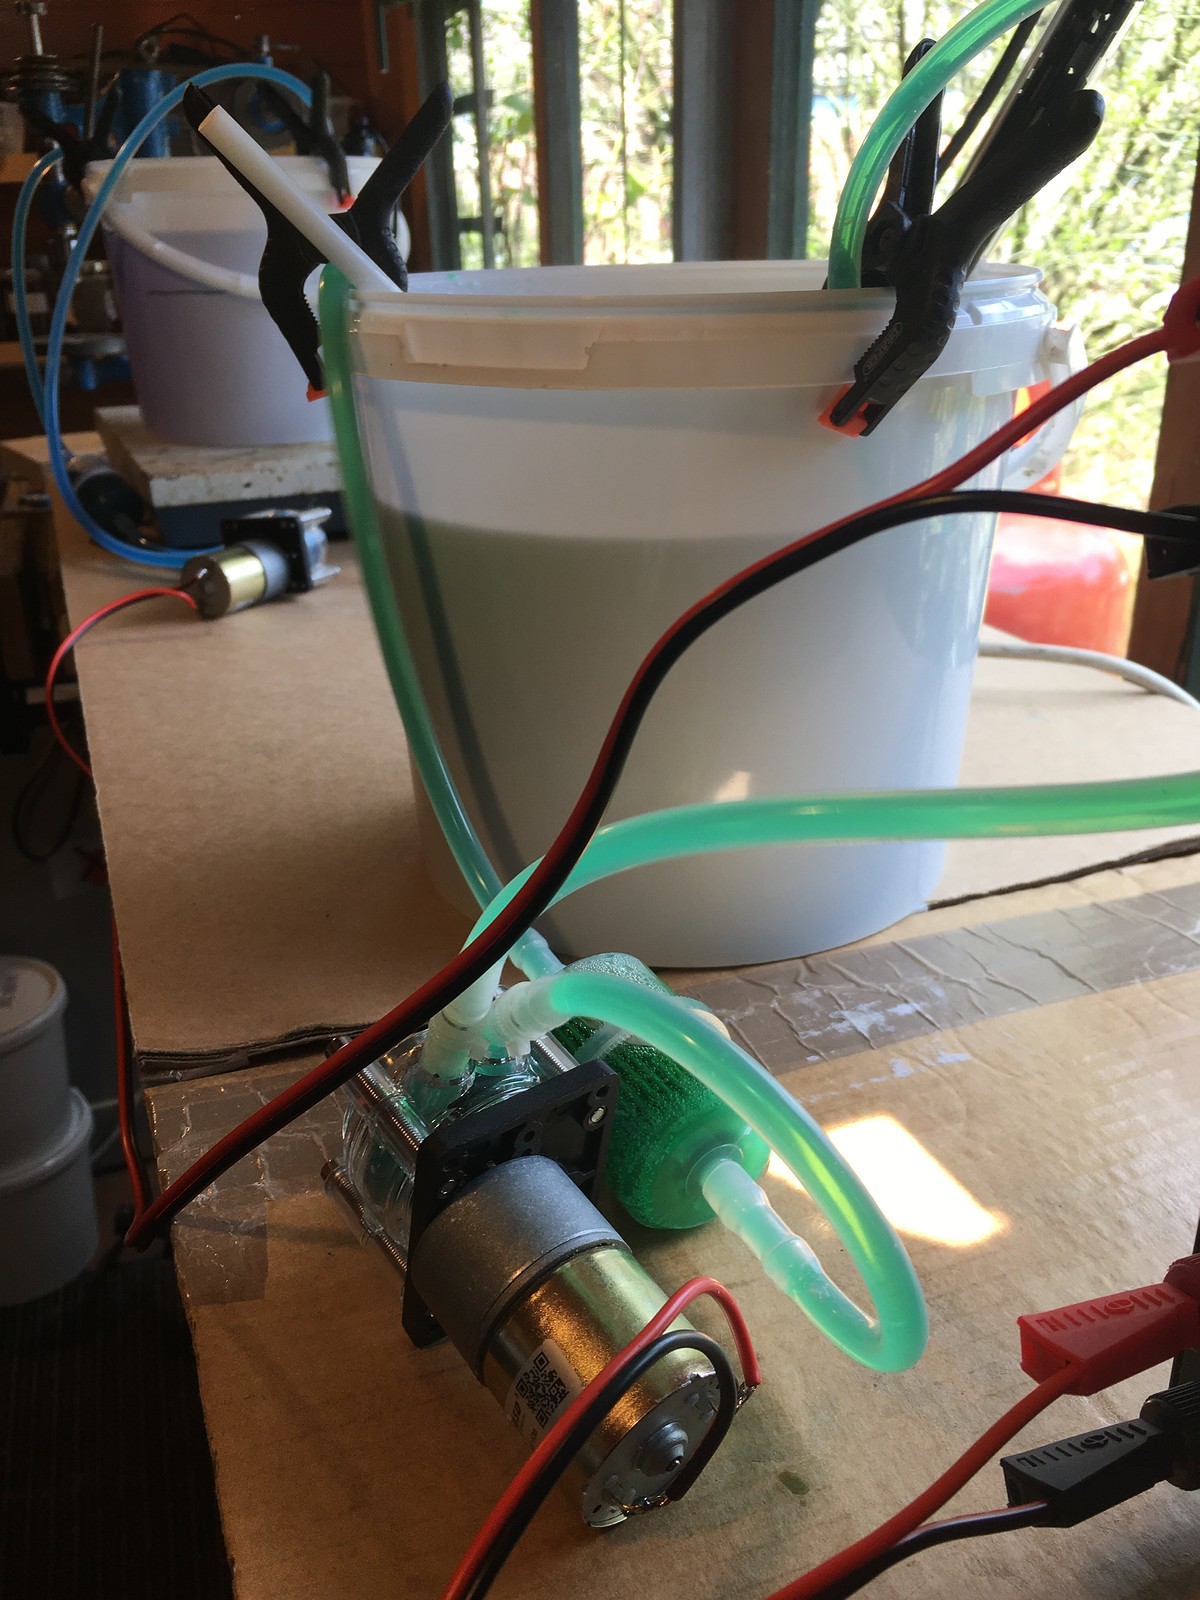
The end plates were too large to fit in the buckets I used previously, so I instead transferred everything to two square washing up bowls.
I thought perhaps I might need a more powerful power supply for the larger surface area of these plates, but actually it worked fine to just leave them in the bath for a longer time instead. They turned out very nicely.
Hand Rails
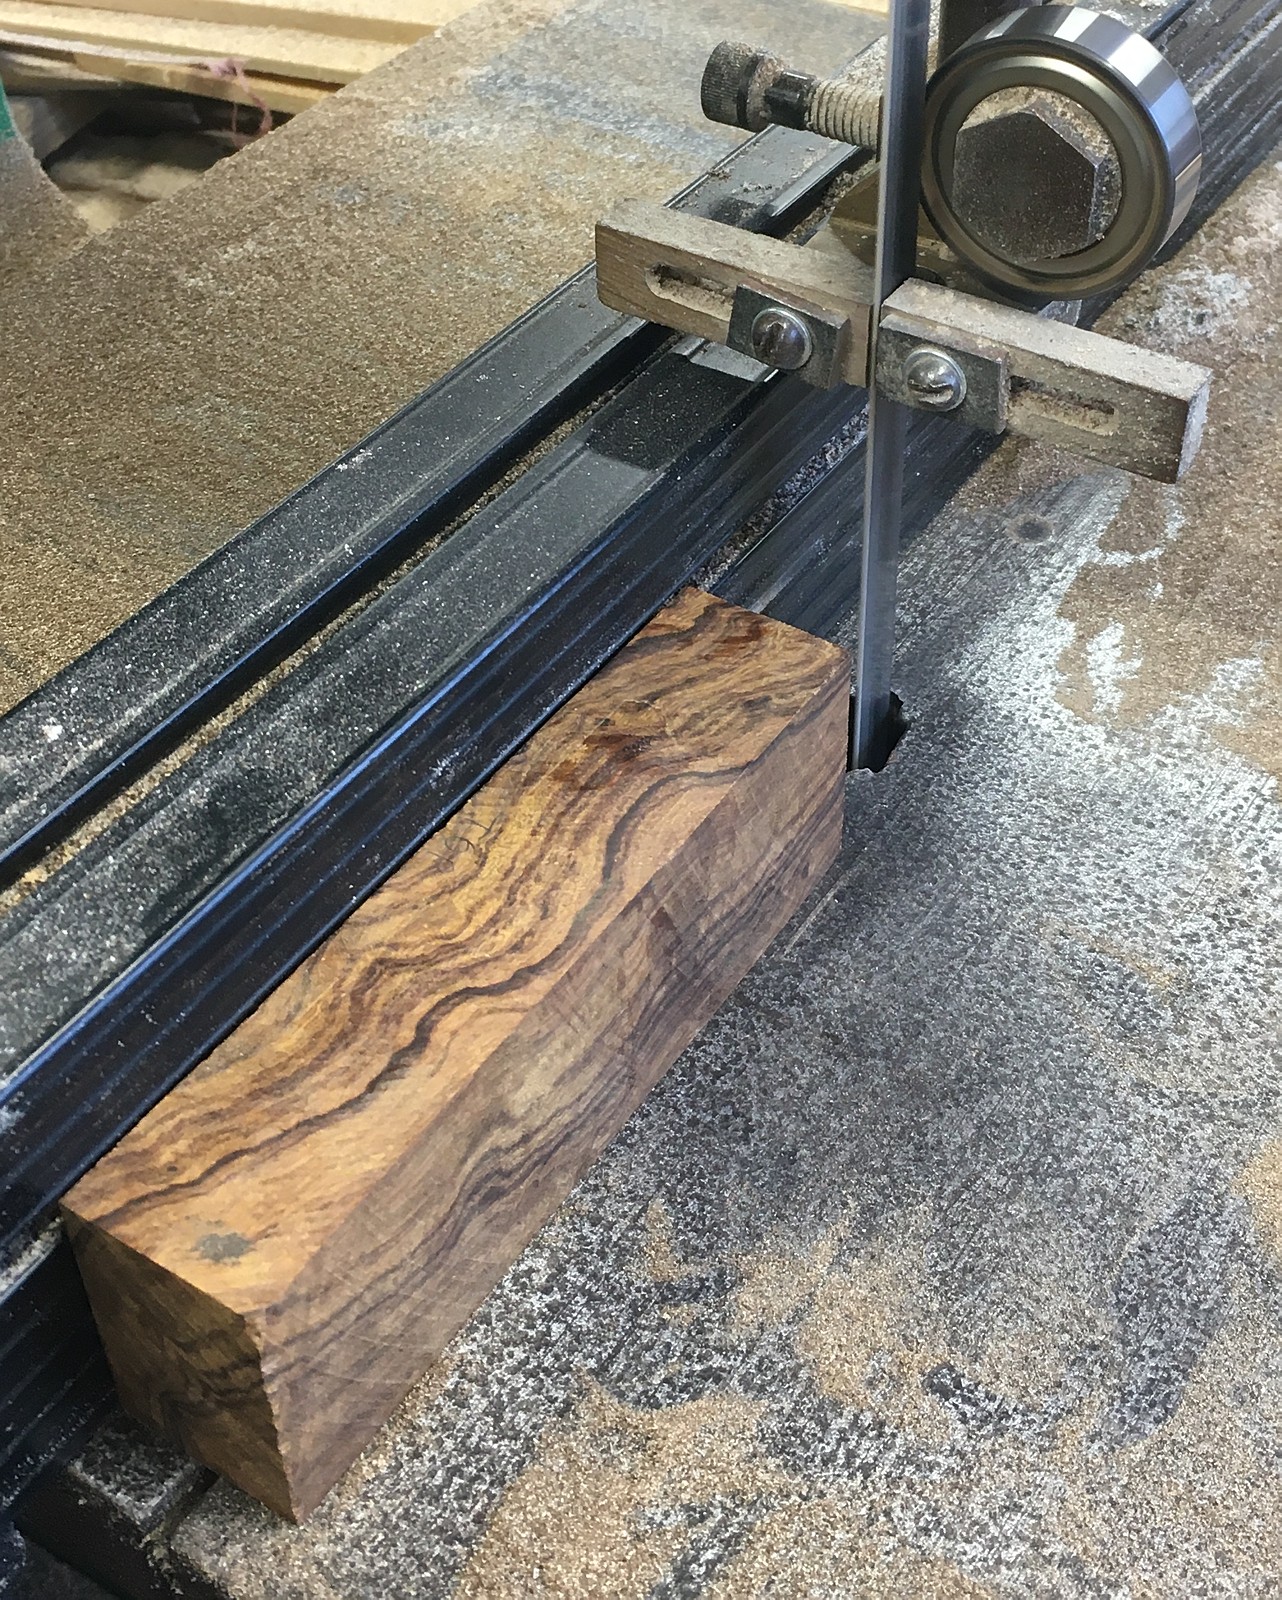
The hand rails were made from desert ironwood (responsibly sourced and sent to me by the client), which is very beautiful when polished, but it is also unusually dense, hard, and generally difficult and unpleasant to work with. I think it must be full of silica because it dulls cutting tools very quickly, and the dust it produces is very itchy and irritating.

Bellows
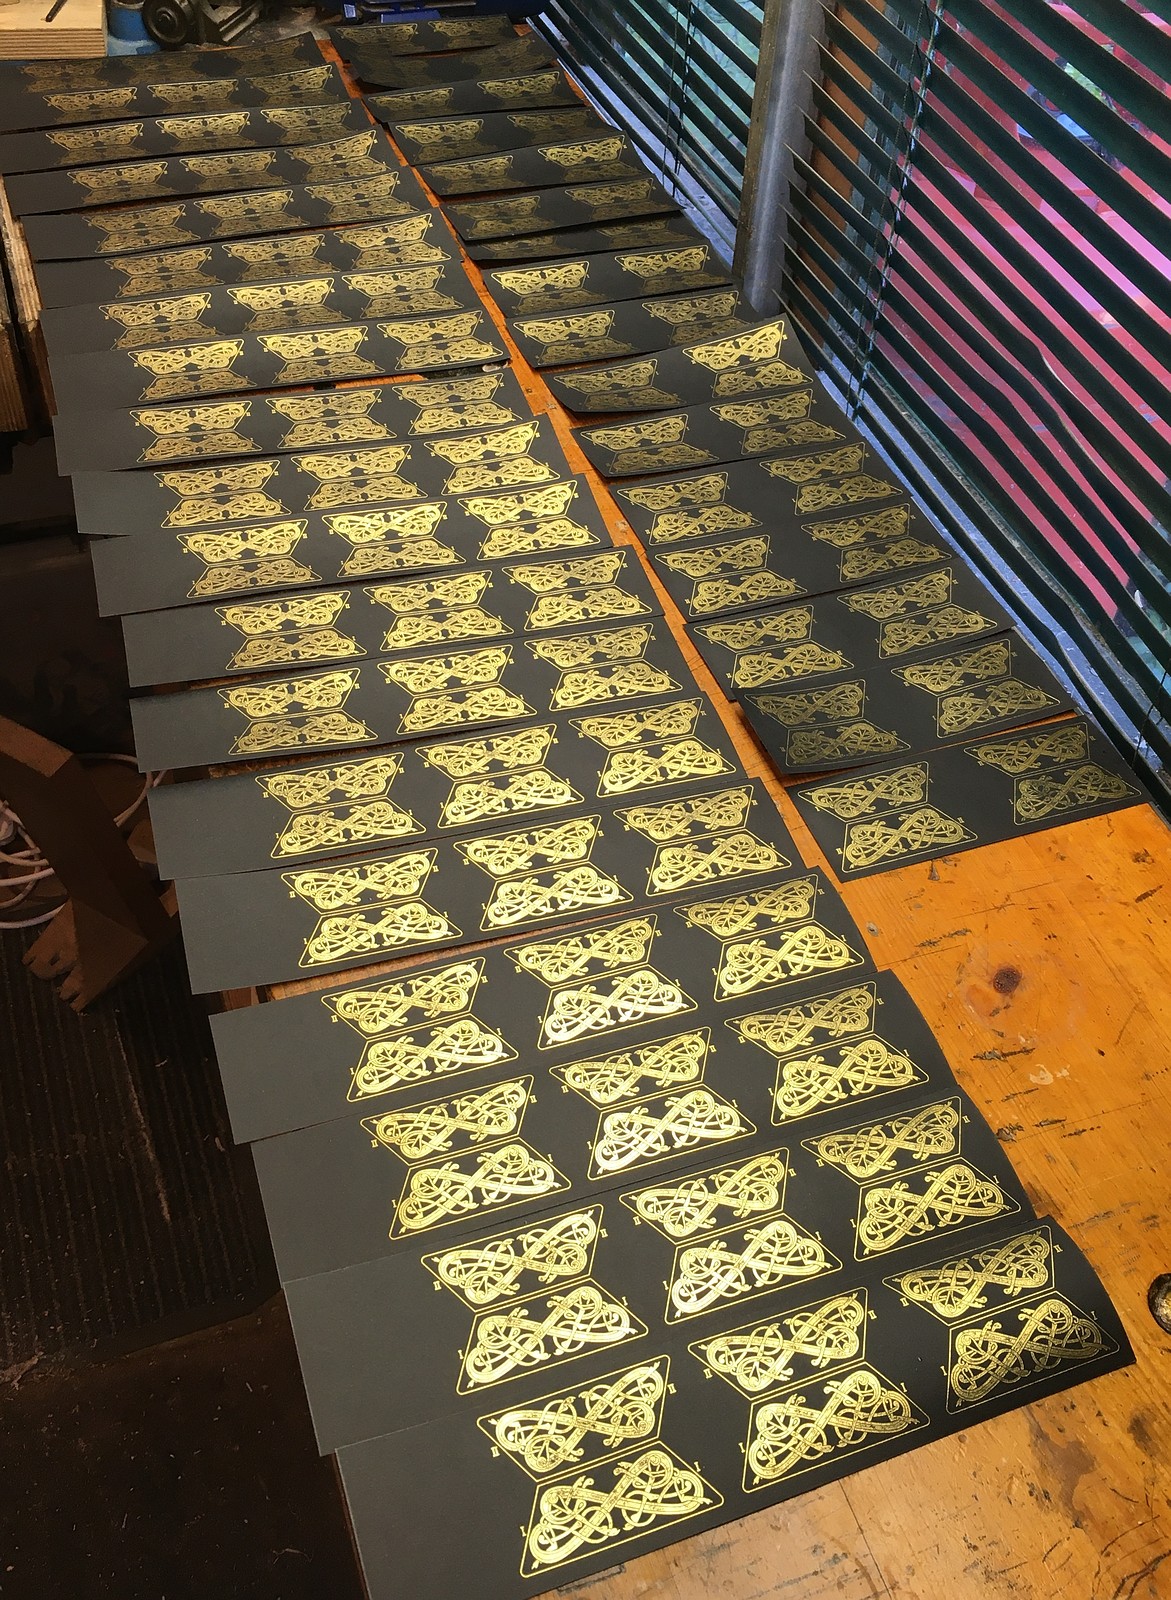
The wide eight-fold bellows with 1 1/8″ deep cards on this instrument have a very large air capacity. They don’t have any trouble sustaining even large bass chords for many seconds between direction changes. They also had the most pieces of any set of bellows I have made to date.

I came up with a new style of gluing jig for supporting the folds while I glue the gussets on. It is much simpler to make than a full traditional bellows jig but works really well.
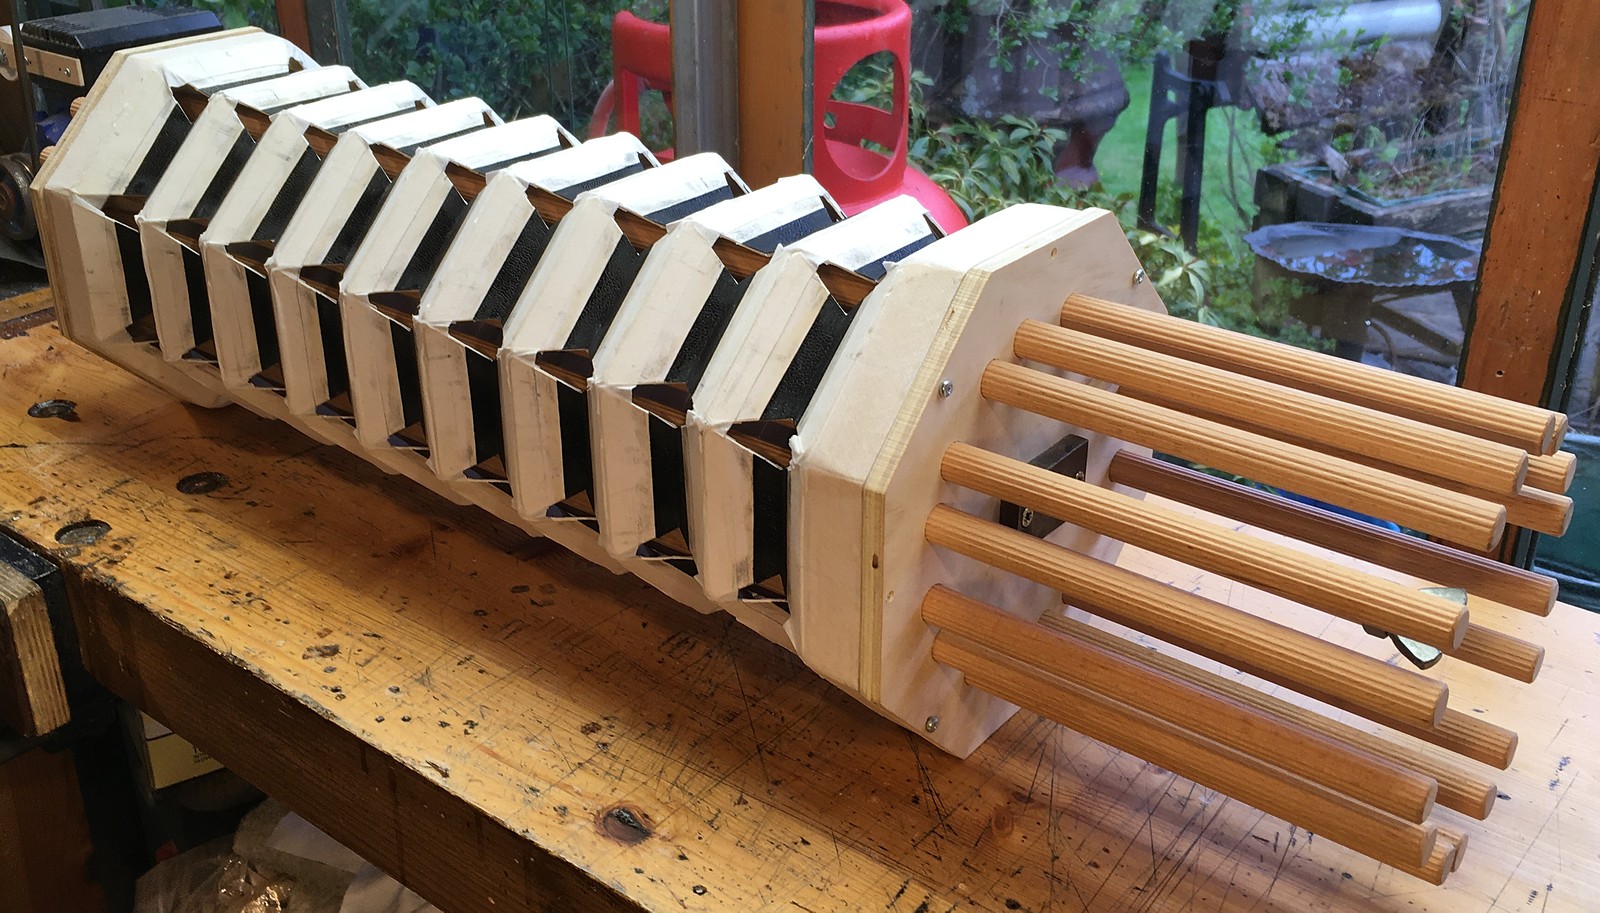
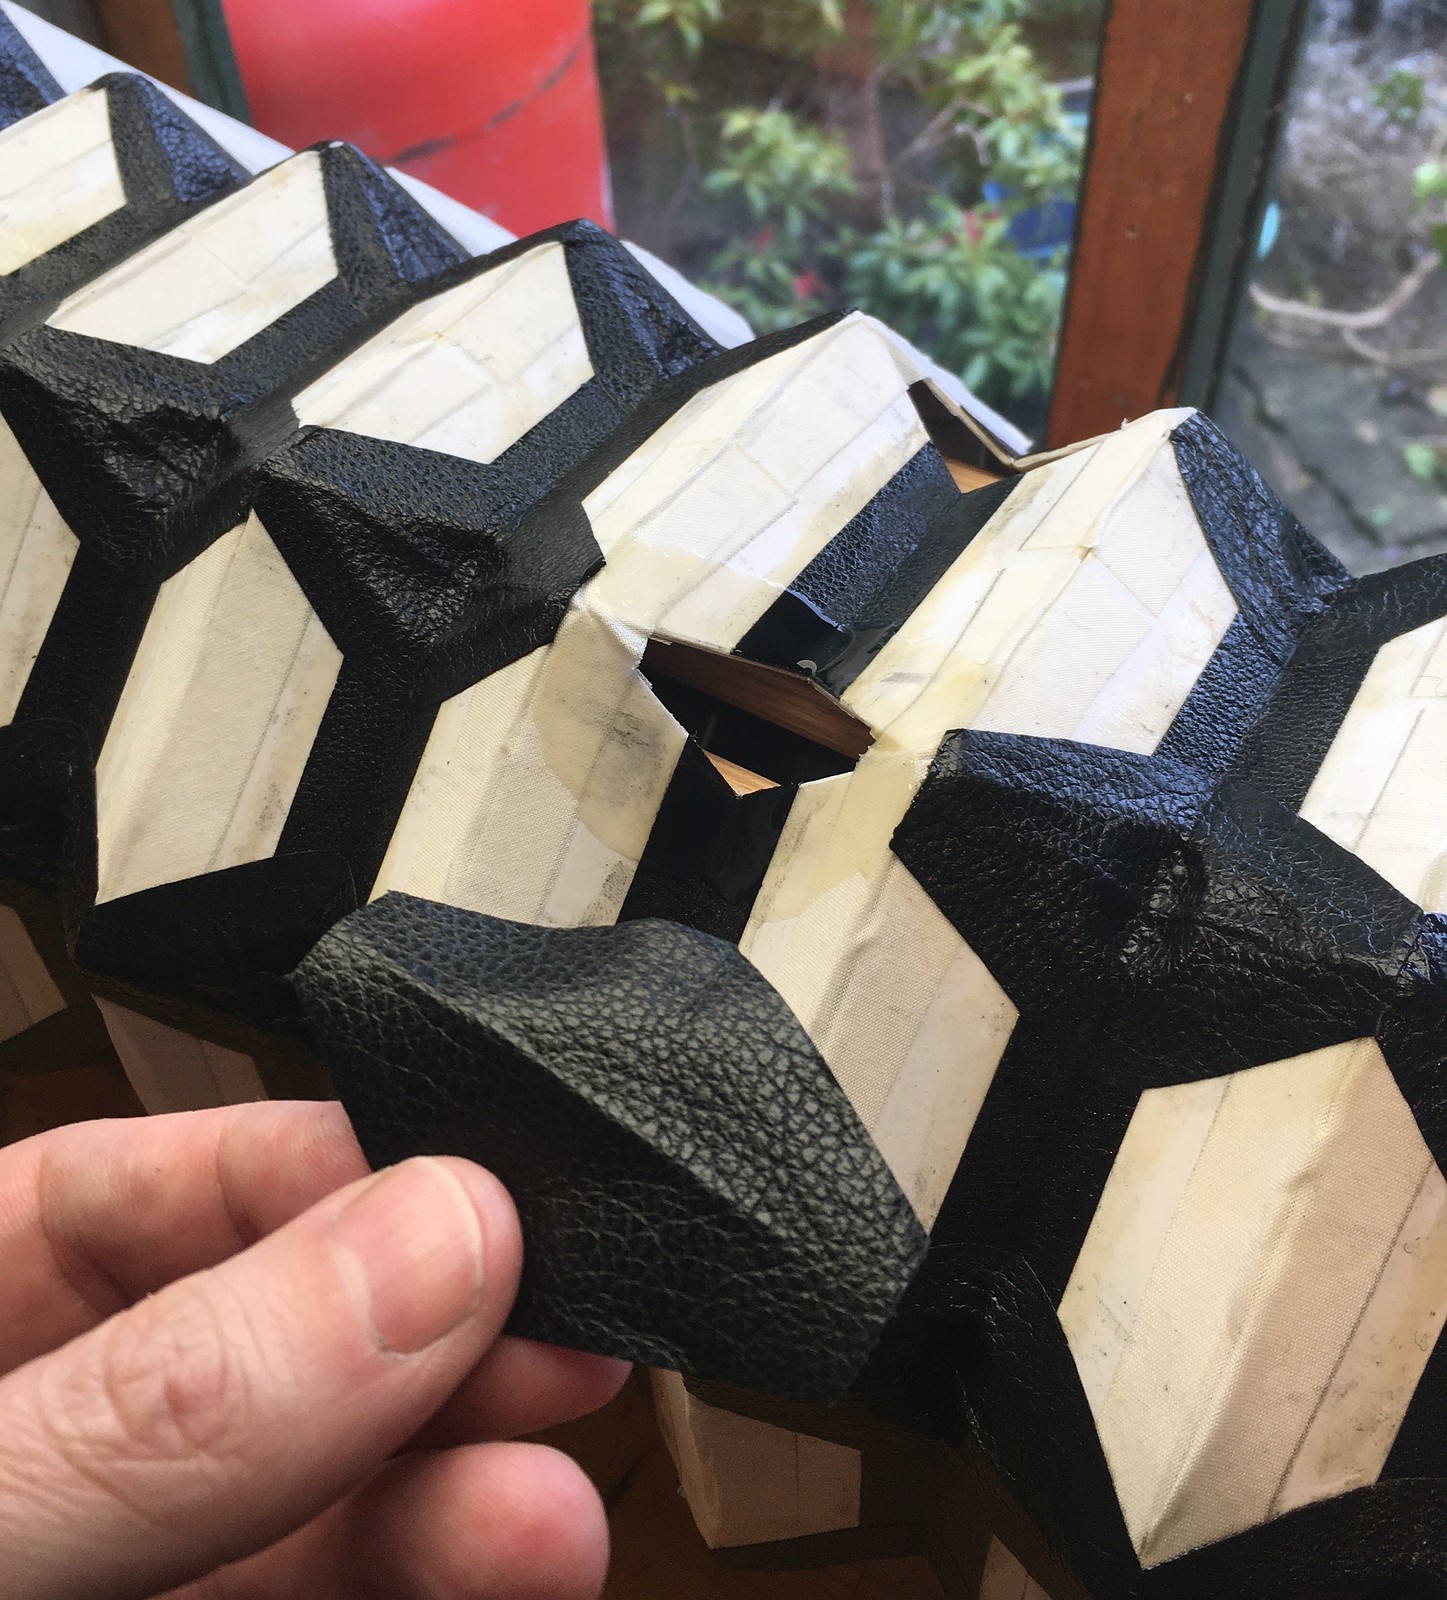
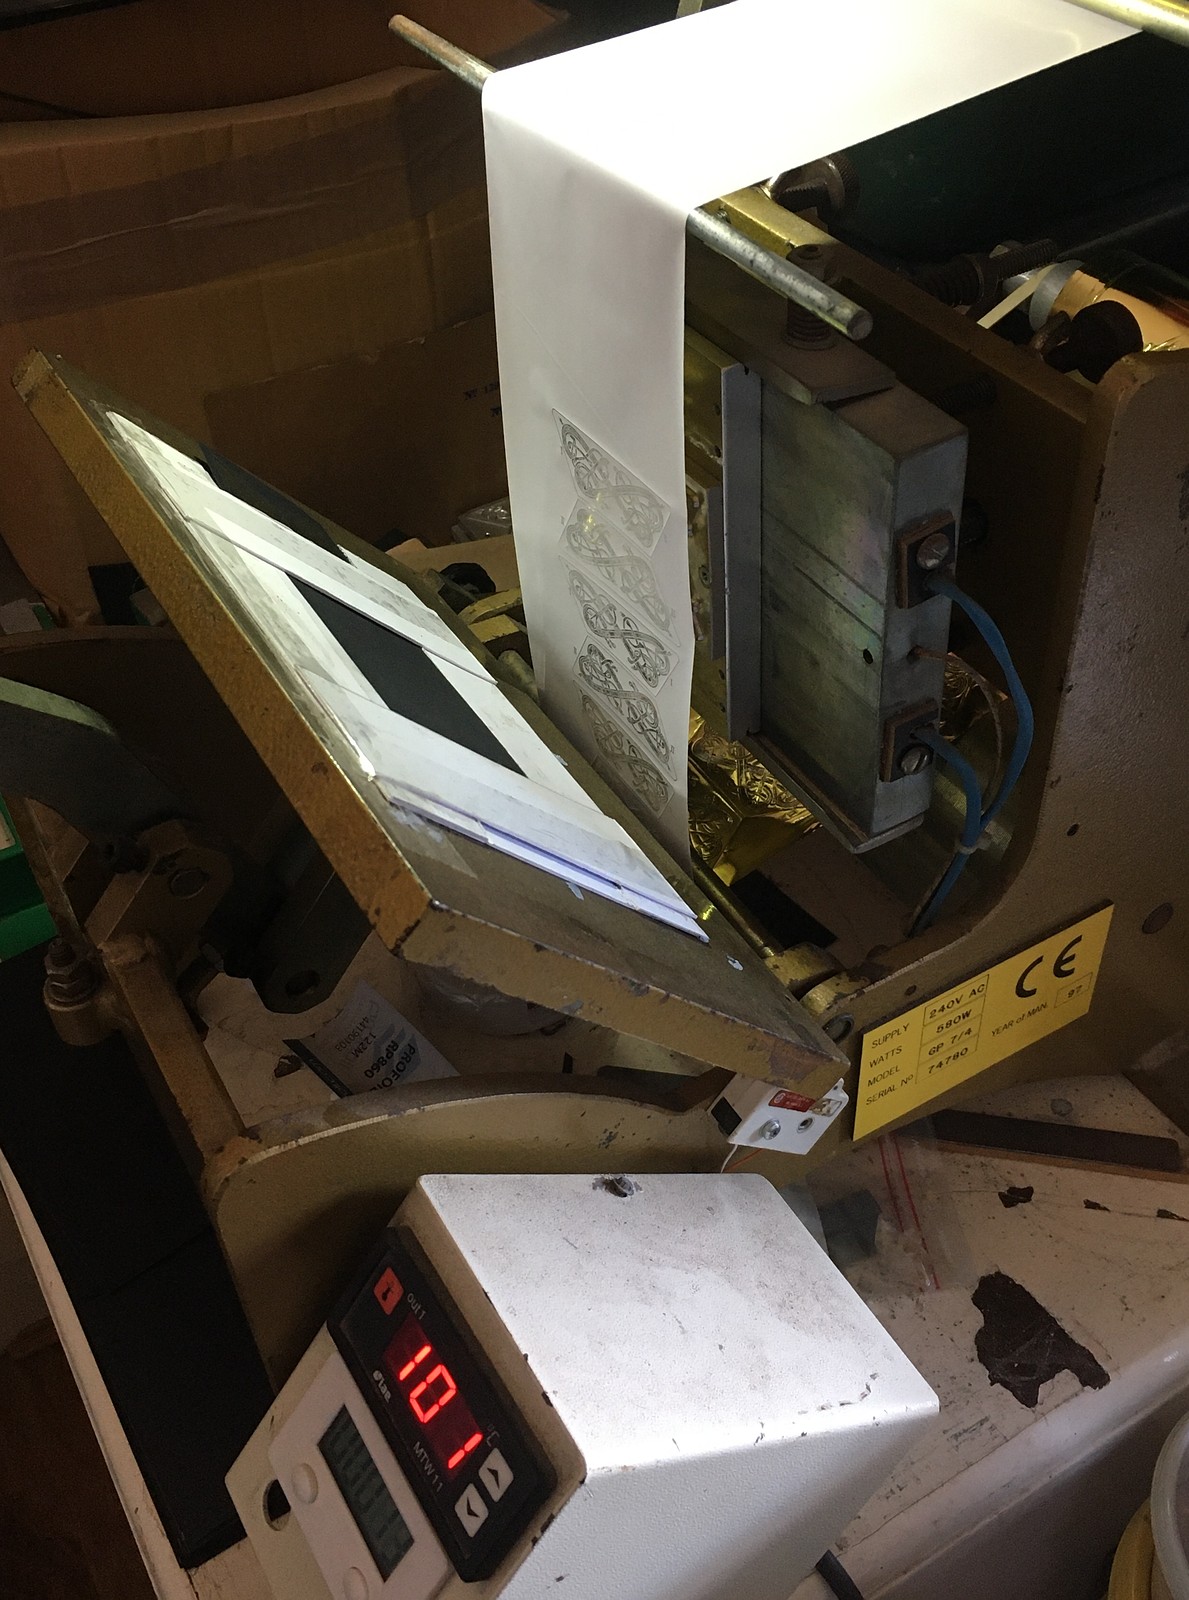
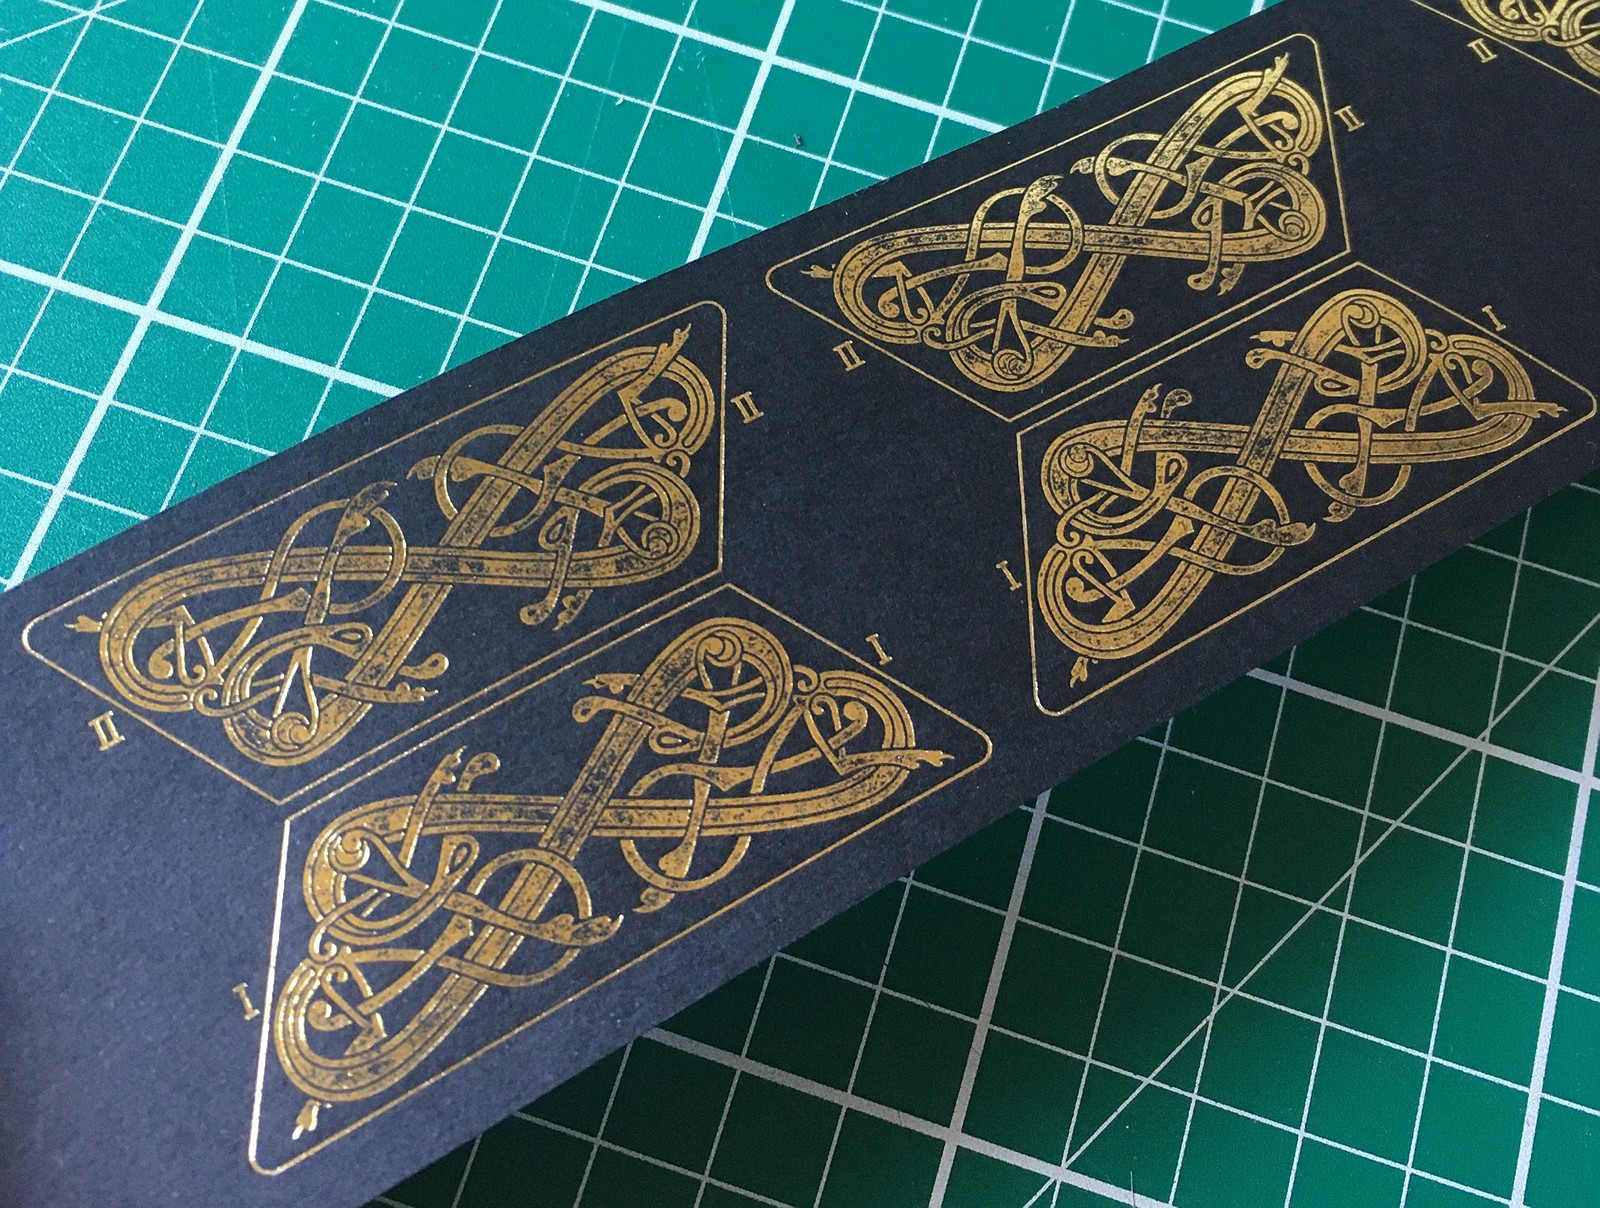
The fancy pictish beast bellows papers were printed in gold foil on black paper using a design supplied by the client.
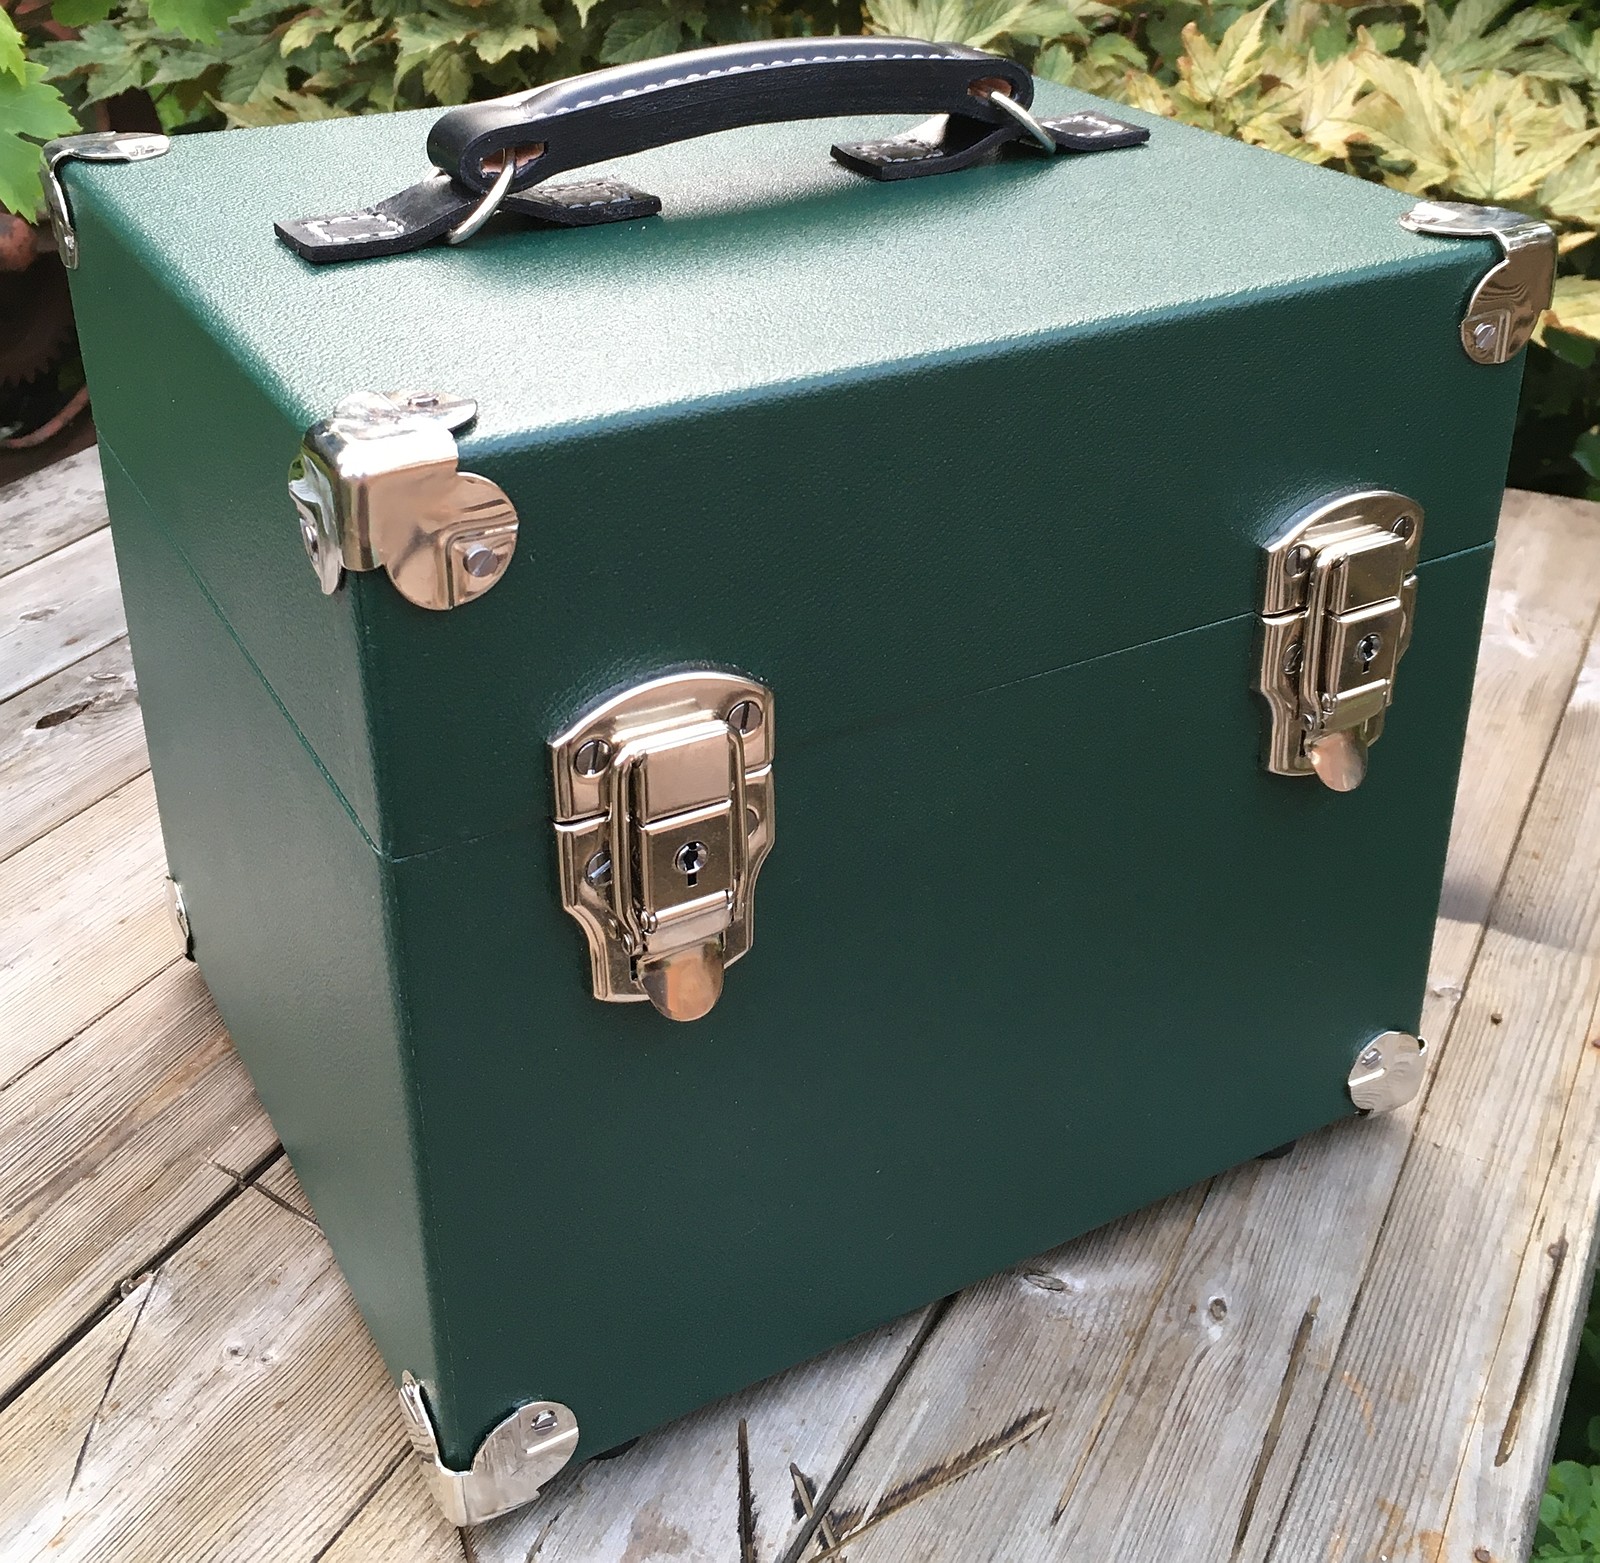
Case
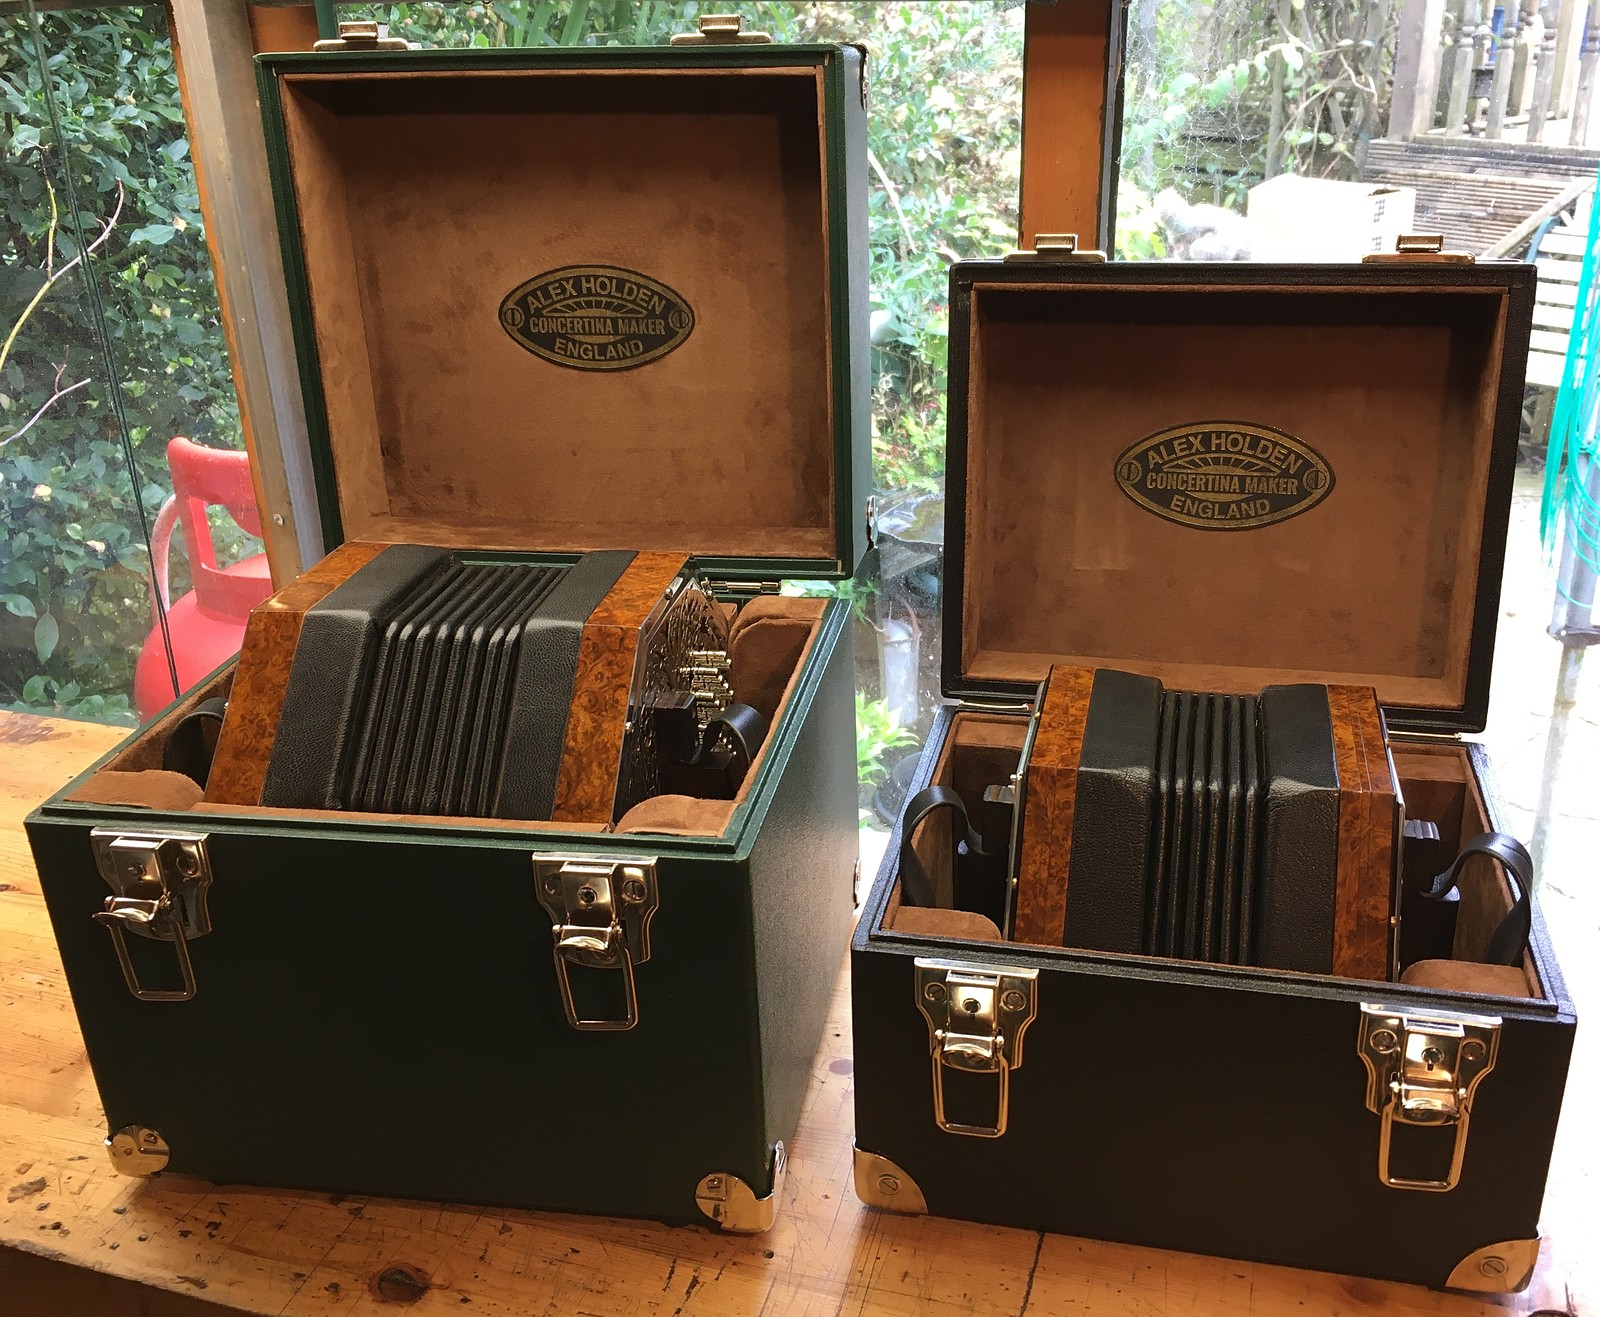
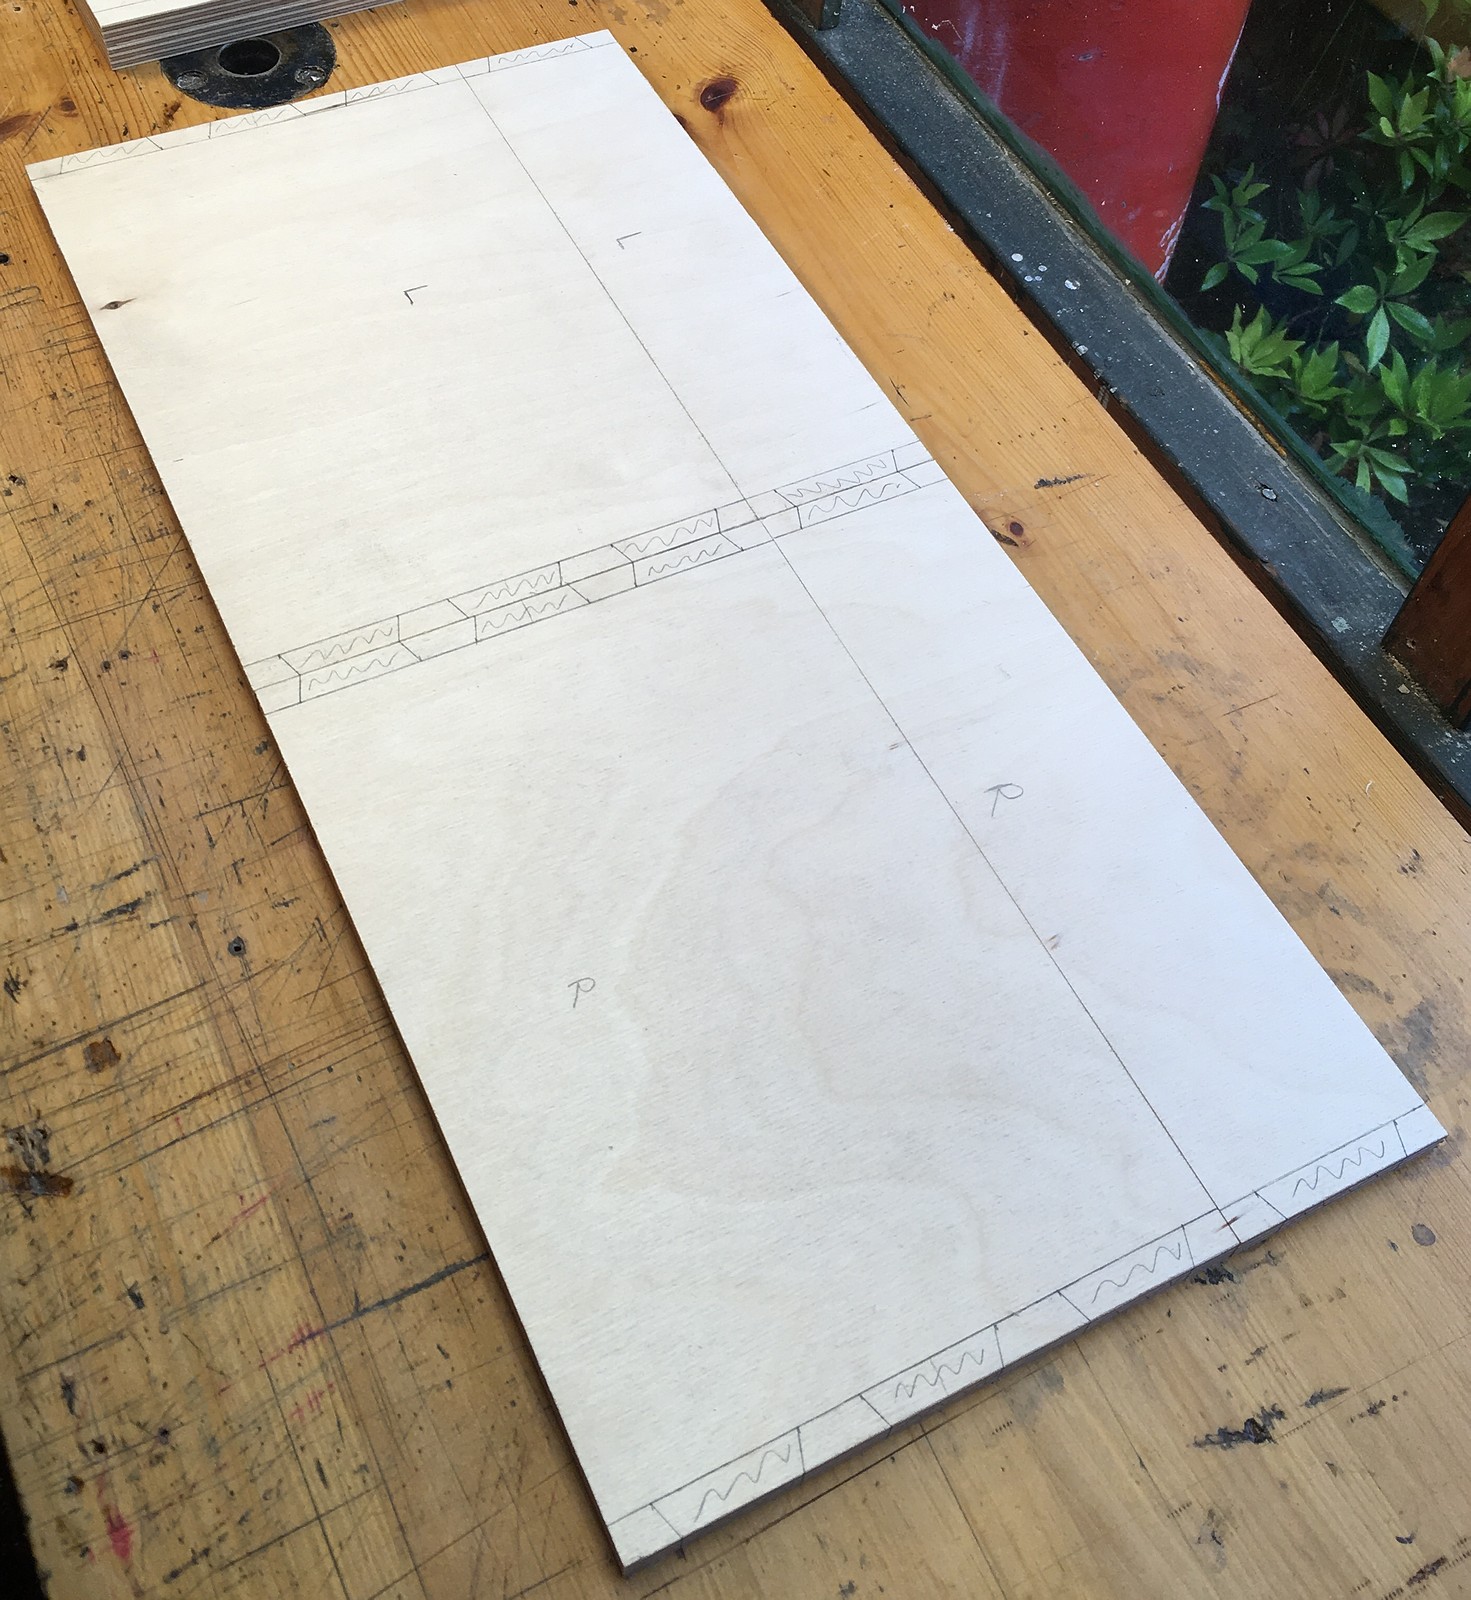
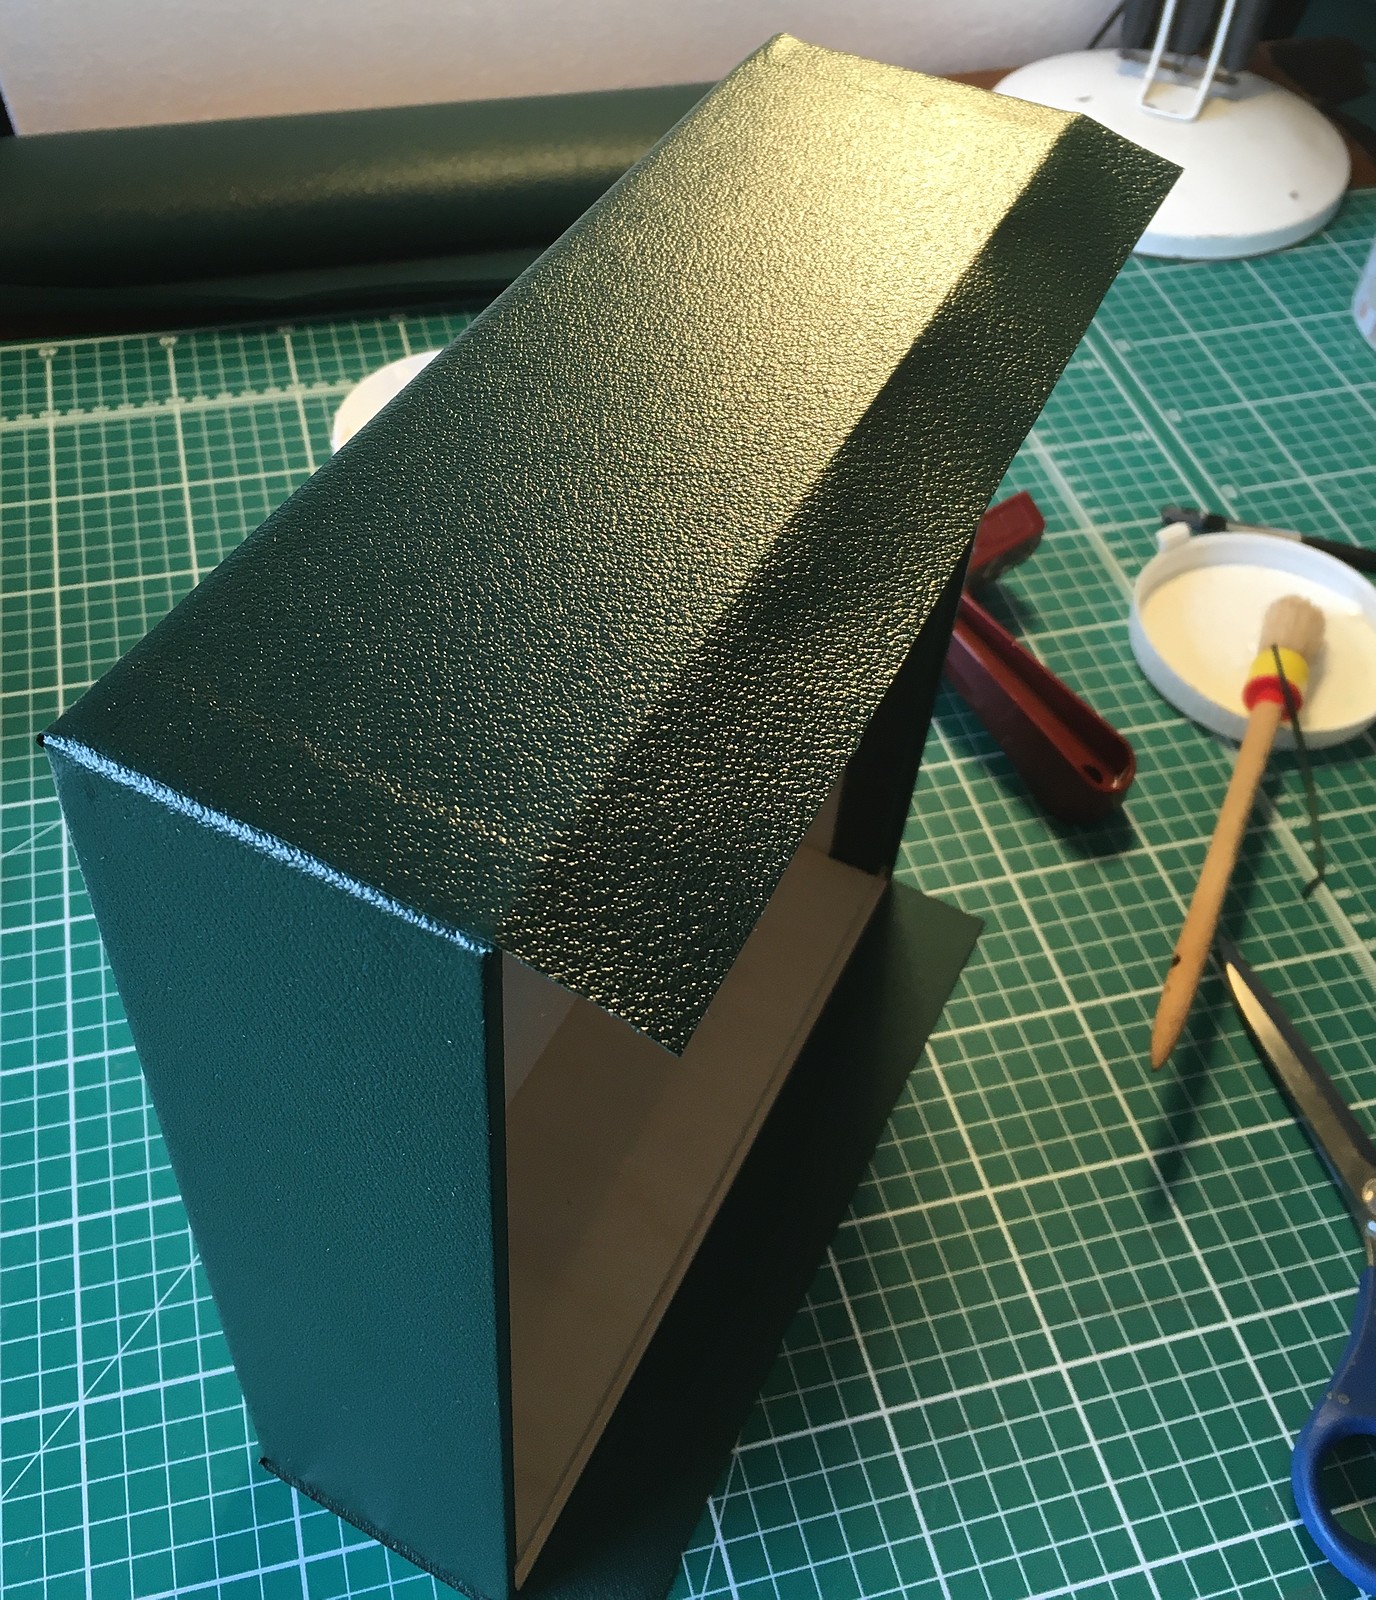
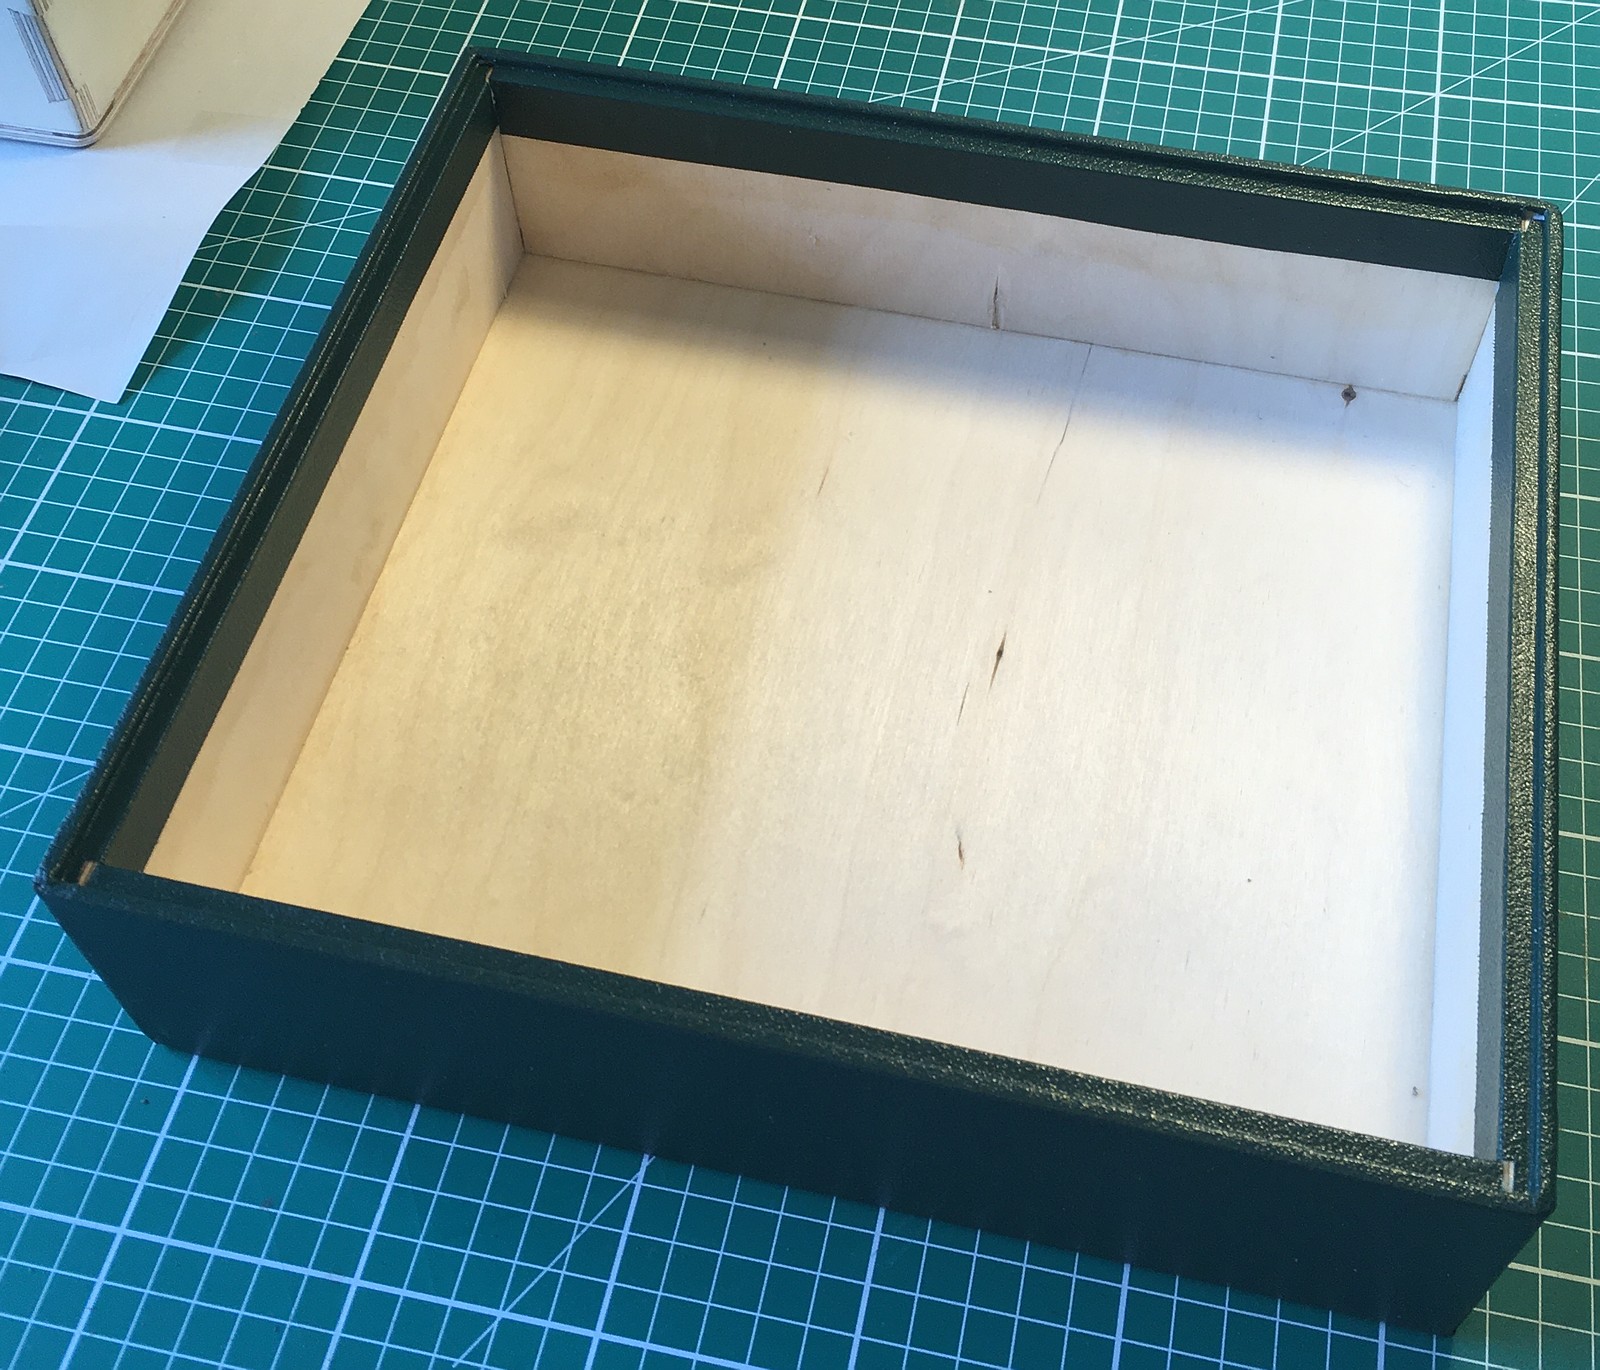
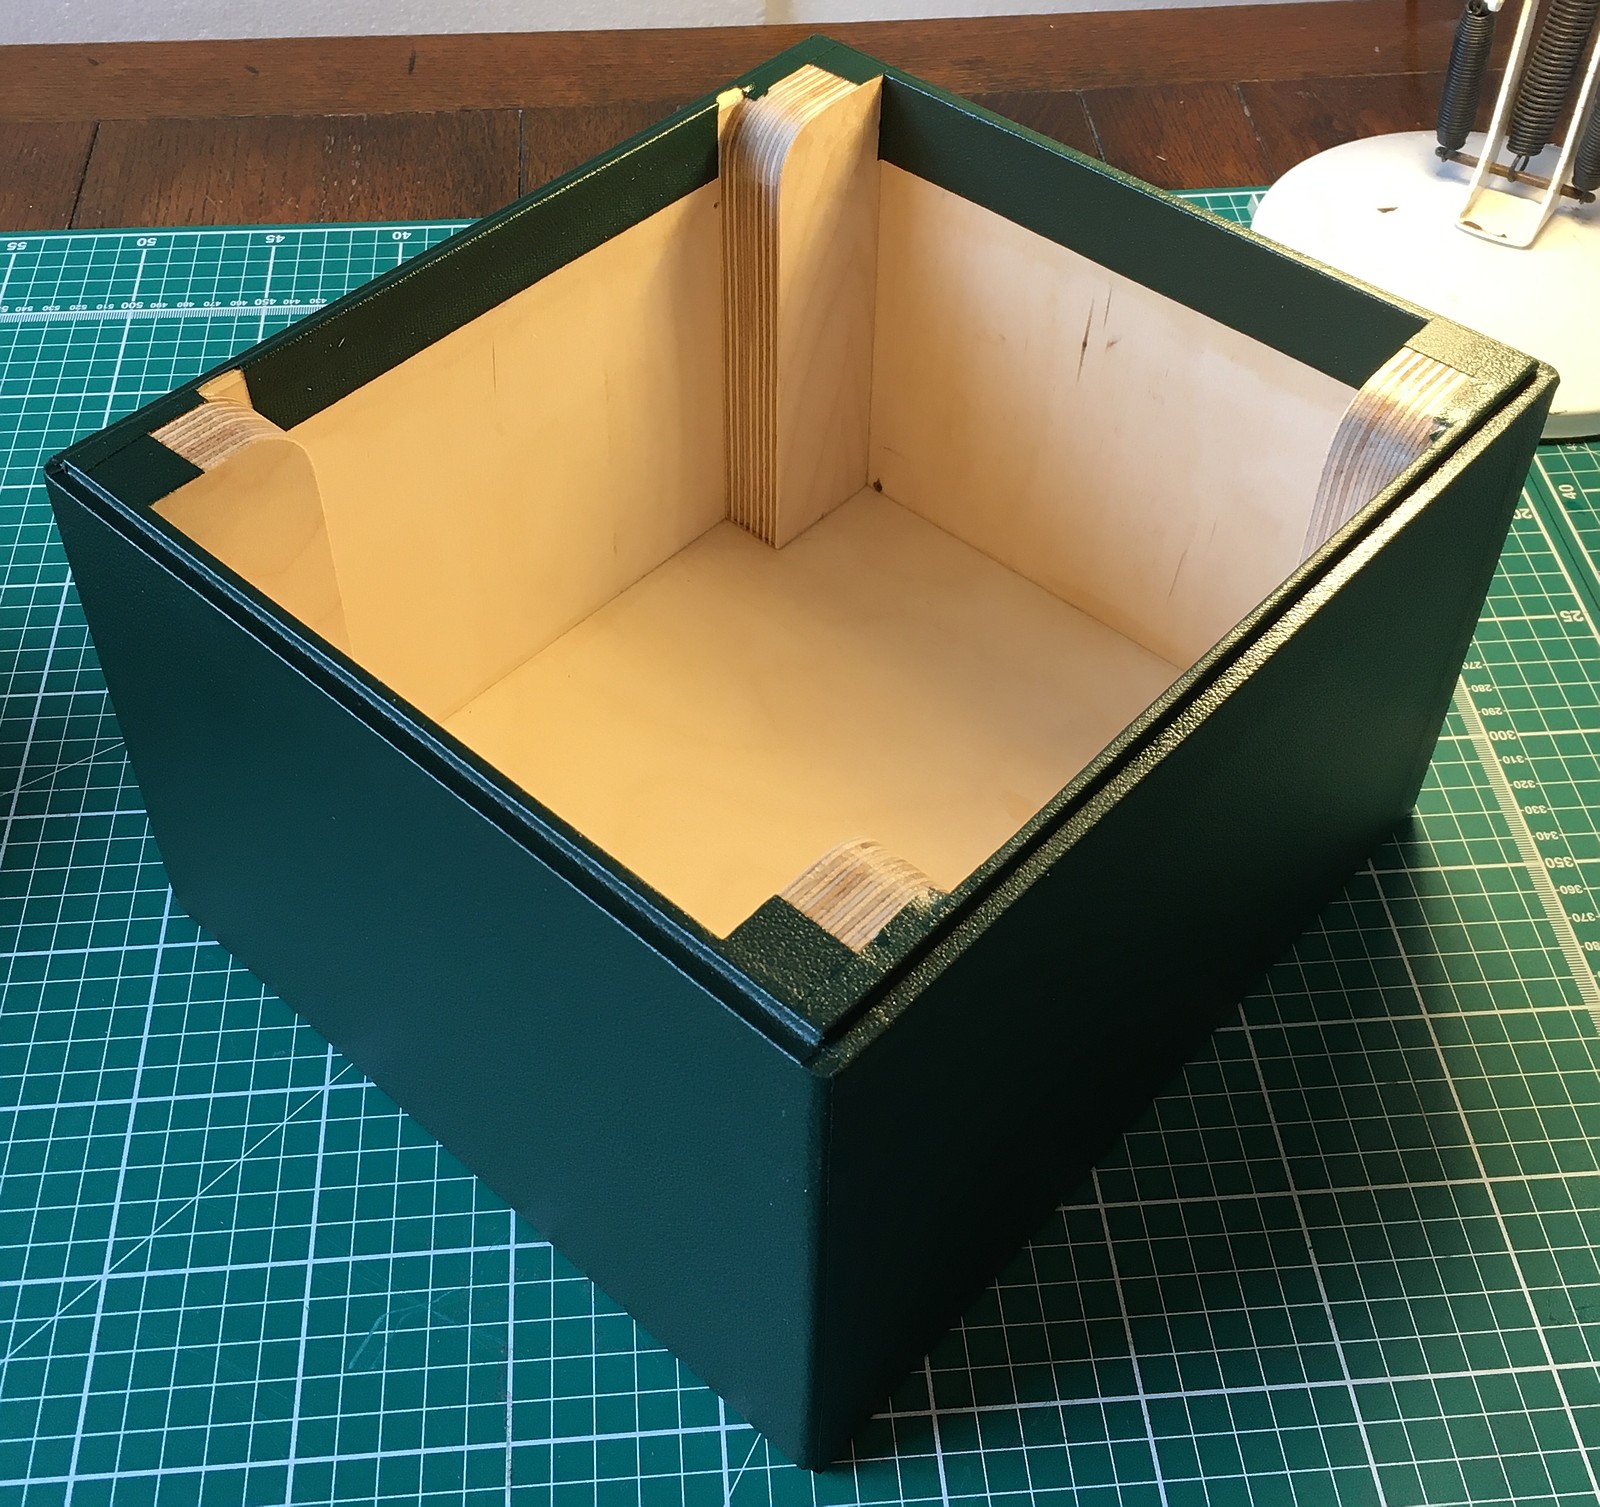
The instrument was too large to fit in one of my standard Italian hard cases, so after evaluating many different commercial options, none of which were quite ideal, I agreed to make a custom high-quality hard case from scratch. Although it was quite a lot of work and the fittings and materials were not cheap, the end result was so nice that I am now offering this style of case as a deluxe upgrade option on all future builds. I will also be putting the new style of lining and blocking into my standard cases going forward.
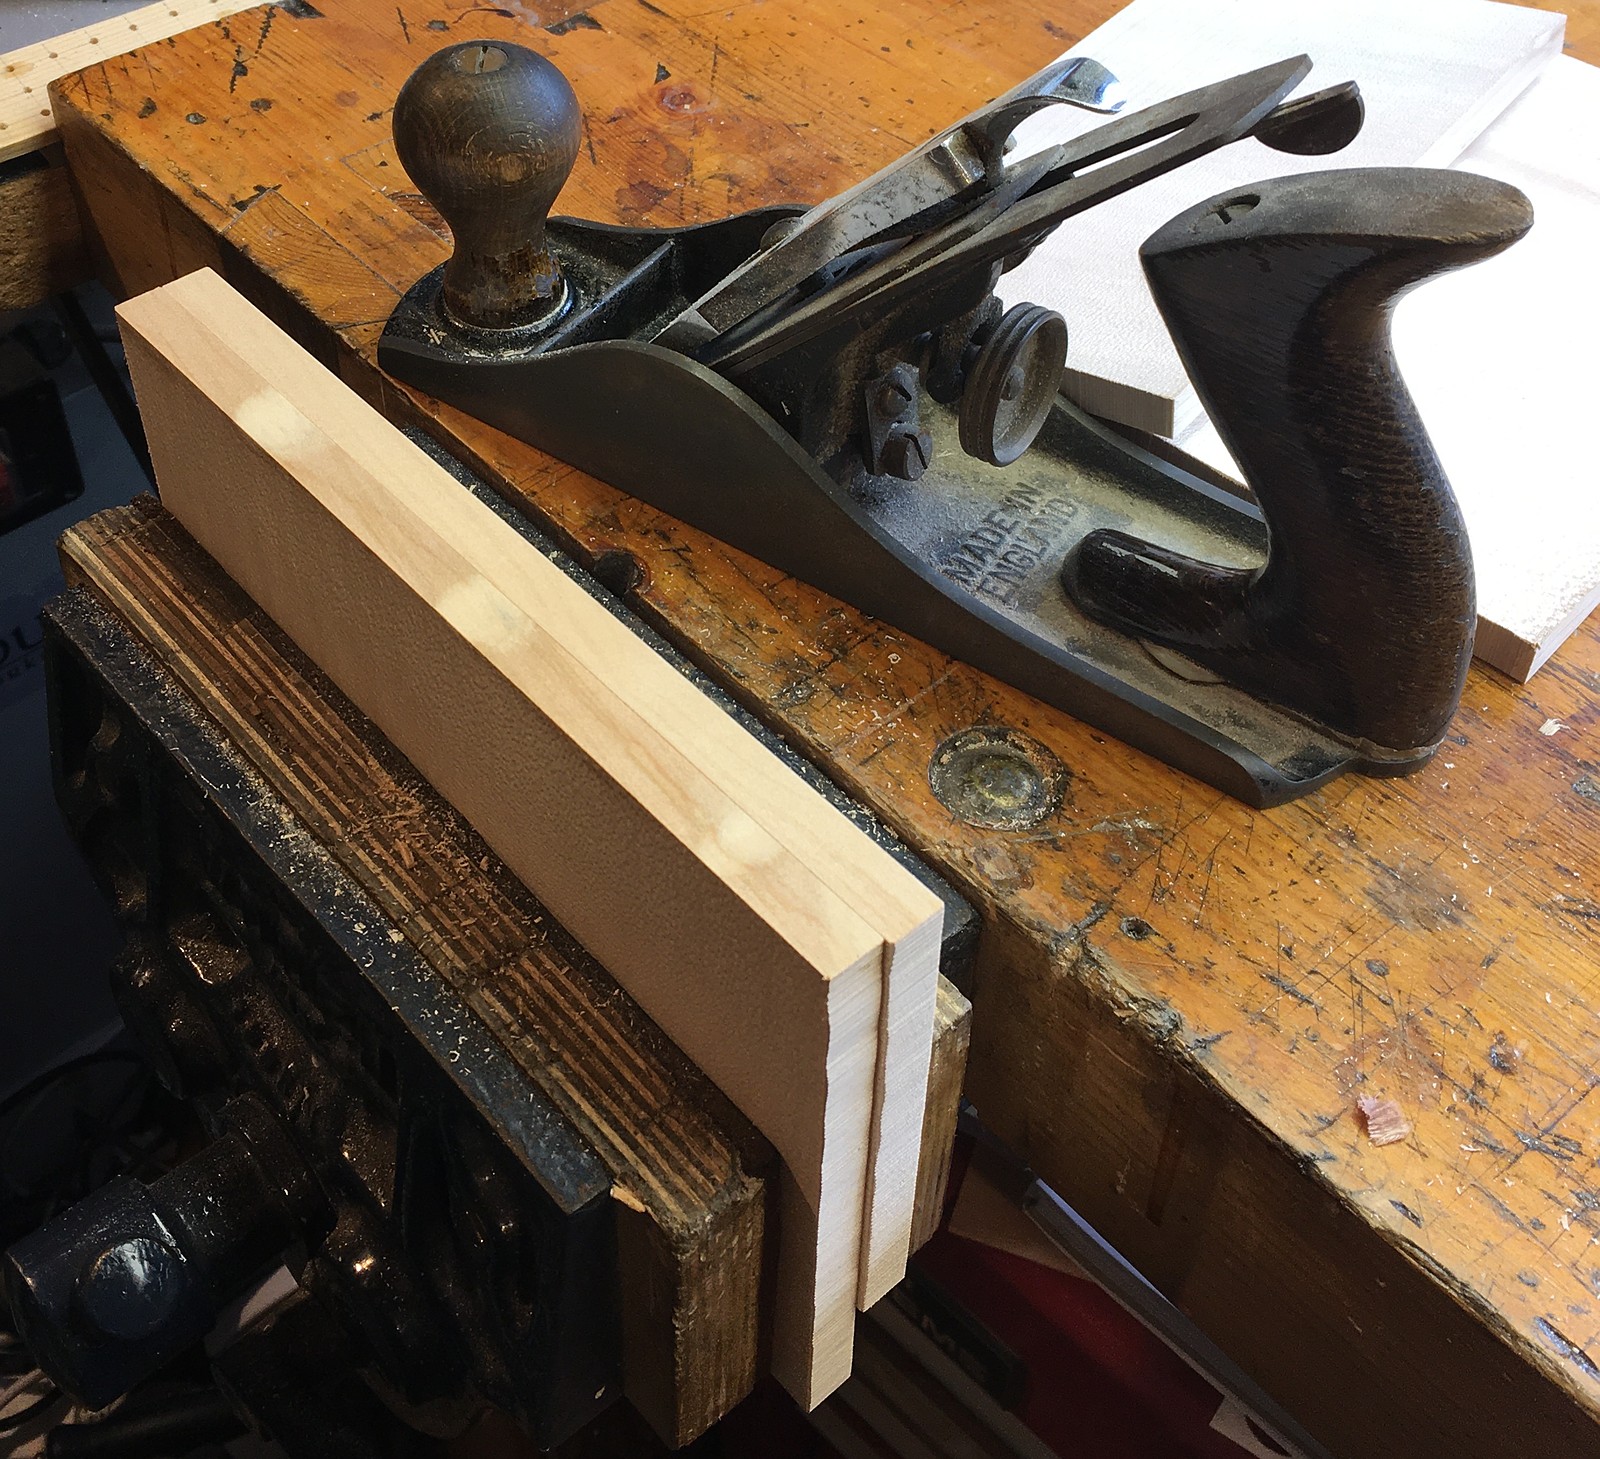
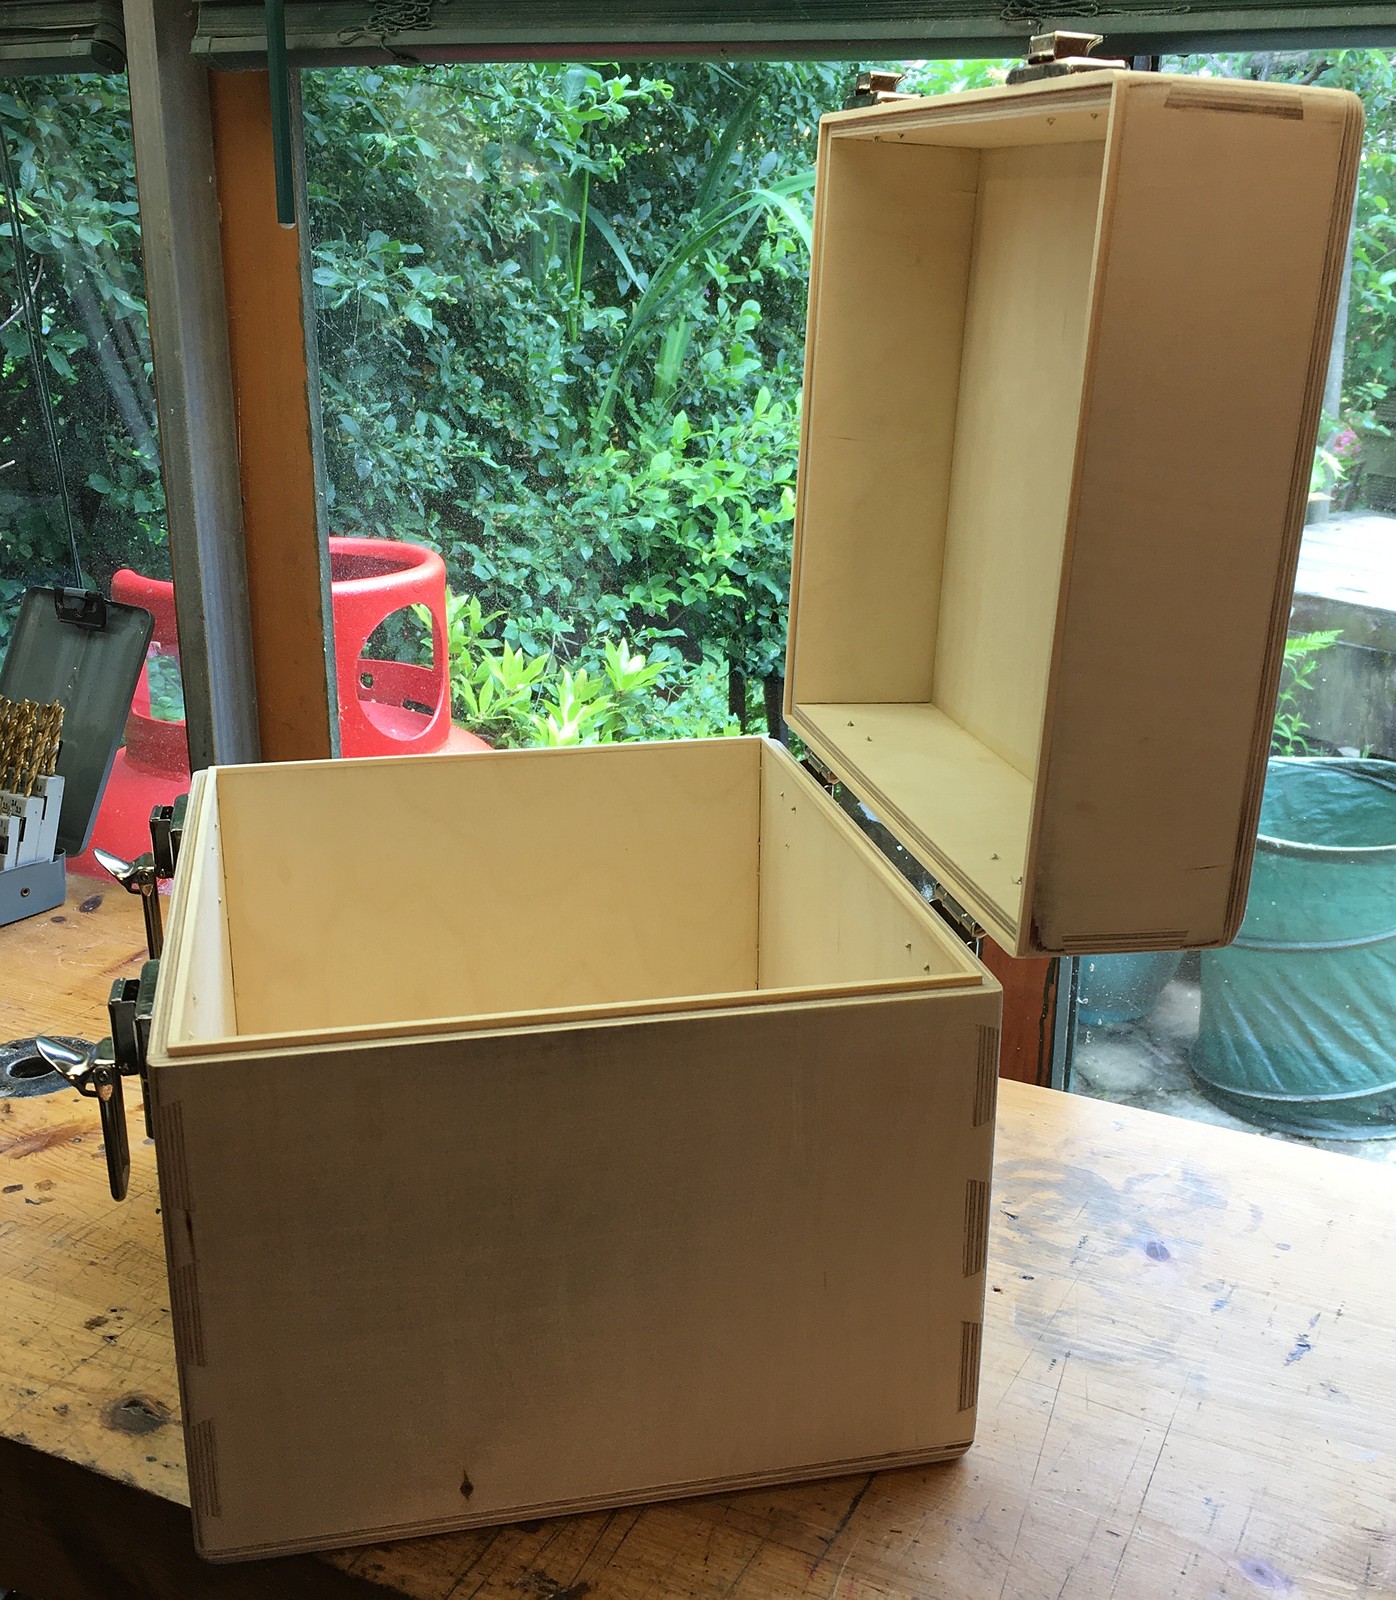
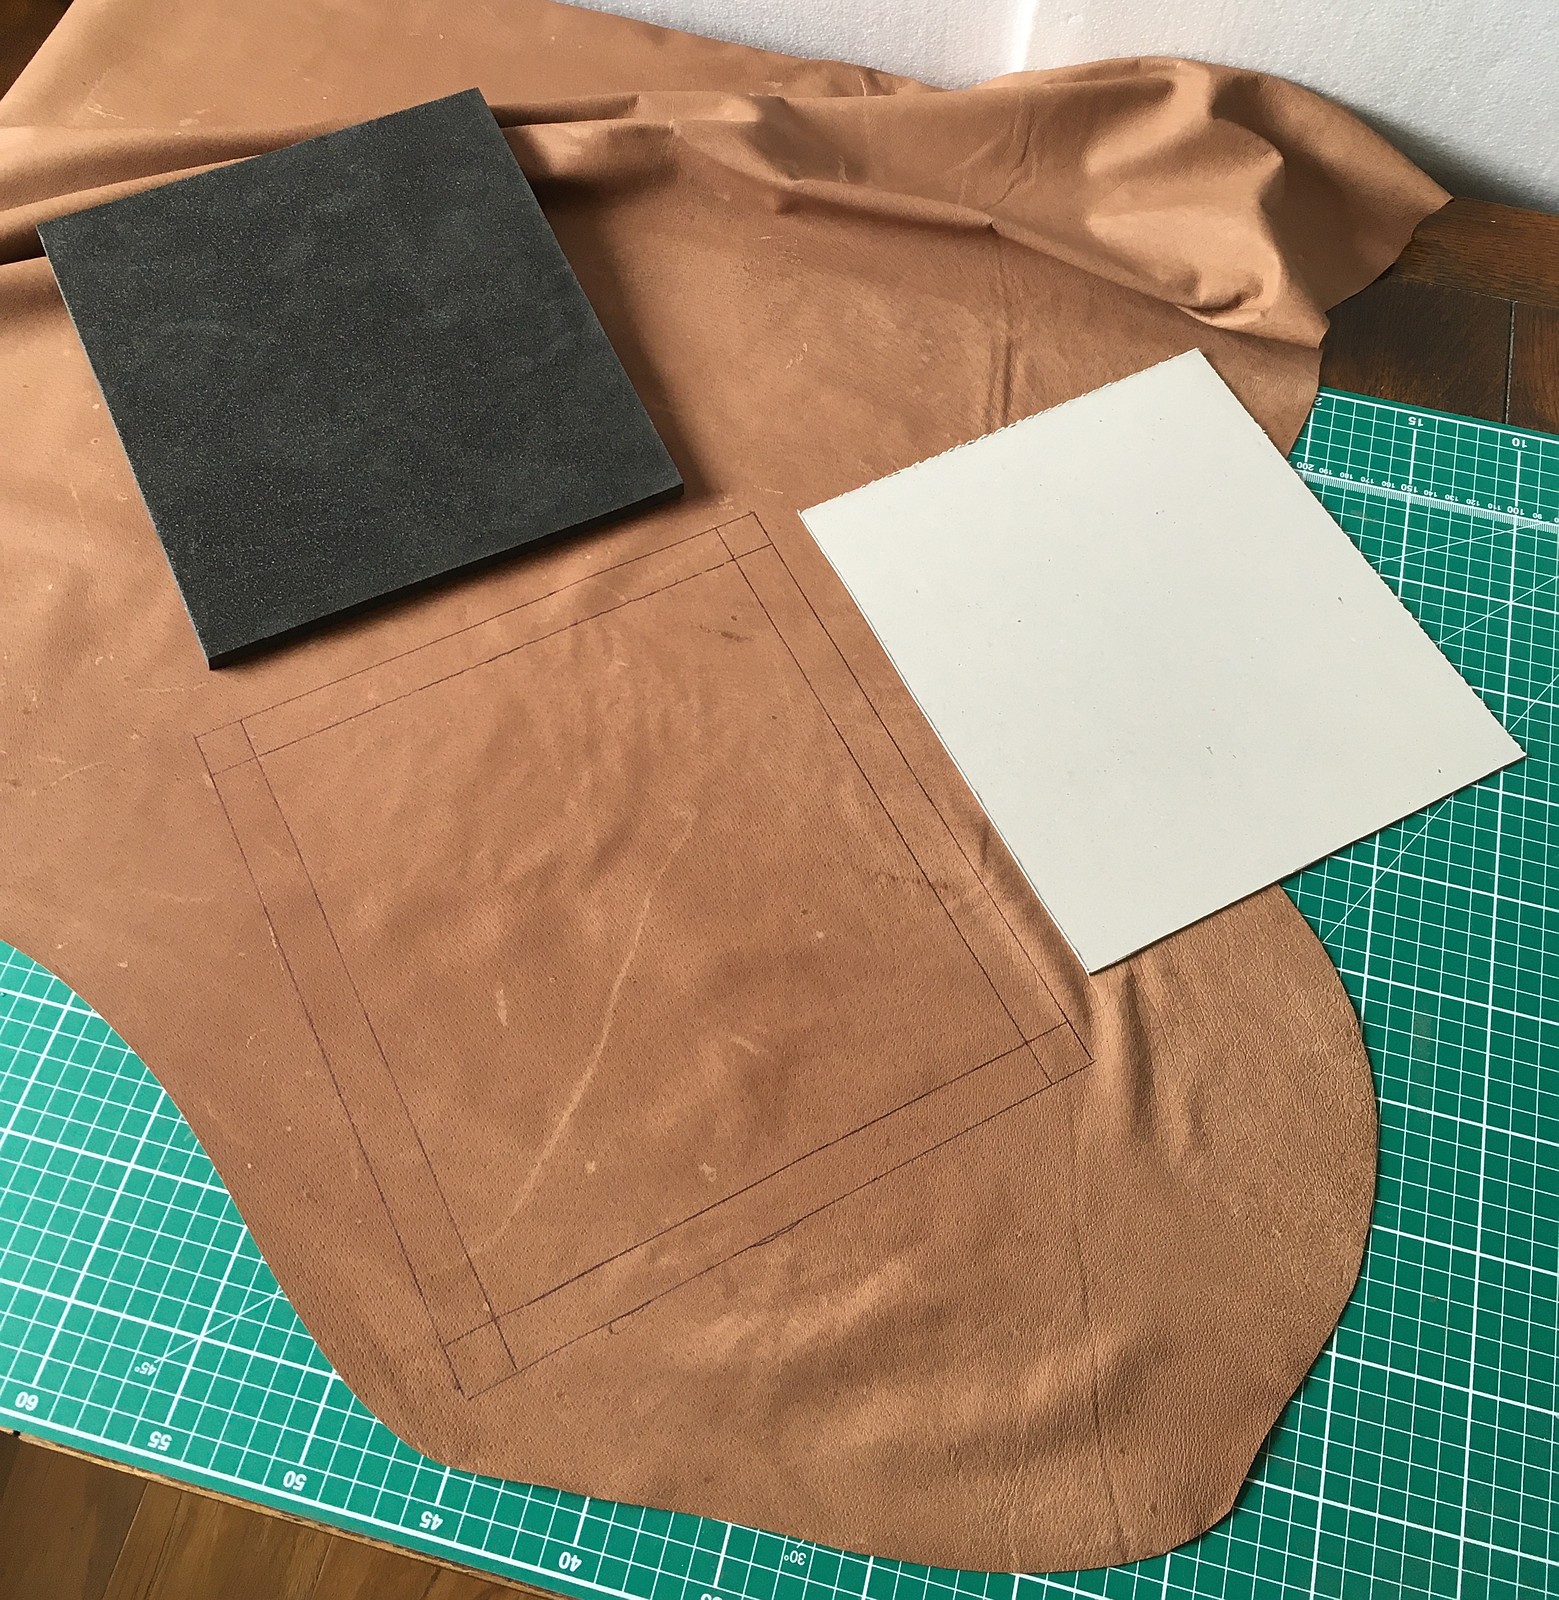
The structure of the box was made from high quality 9mm birch-throughout plywood. It is very strong, though a little heavier than cheaper 9mm softwood plywood. I still don’t own a table saw or edge jointer (largely because I’ve run out of space for new machines), so I cut the pieces to size on the bandsaw and trued up the edges with a hand plane.
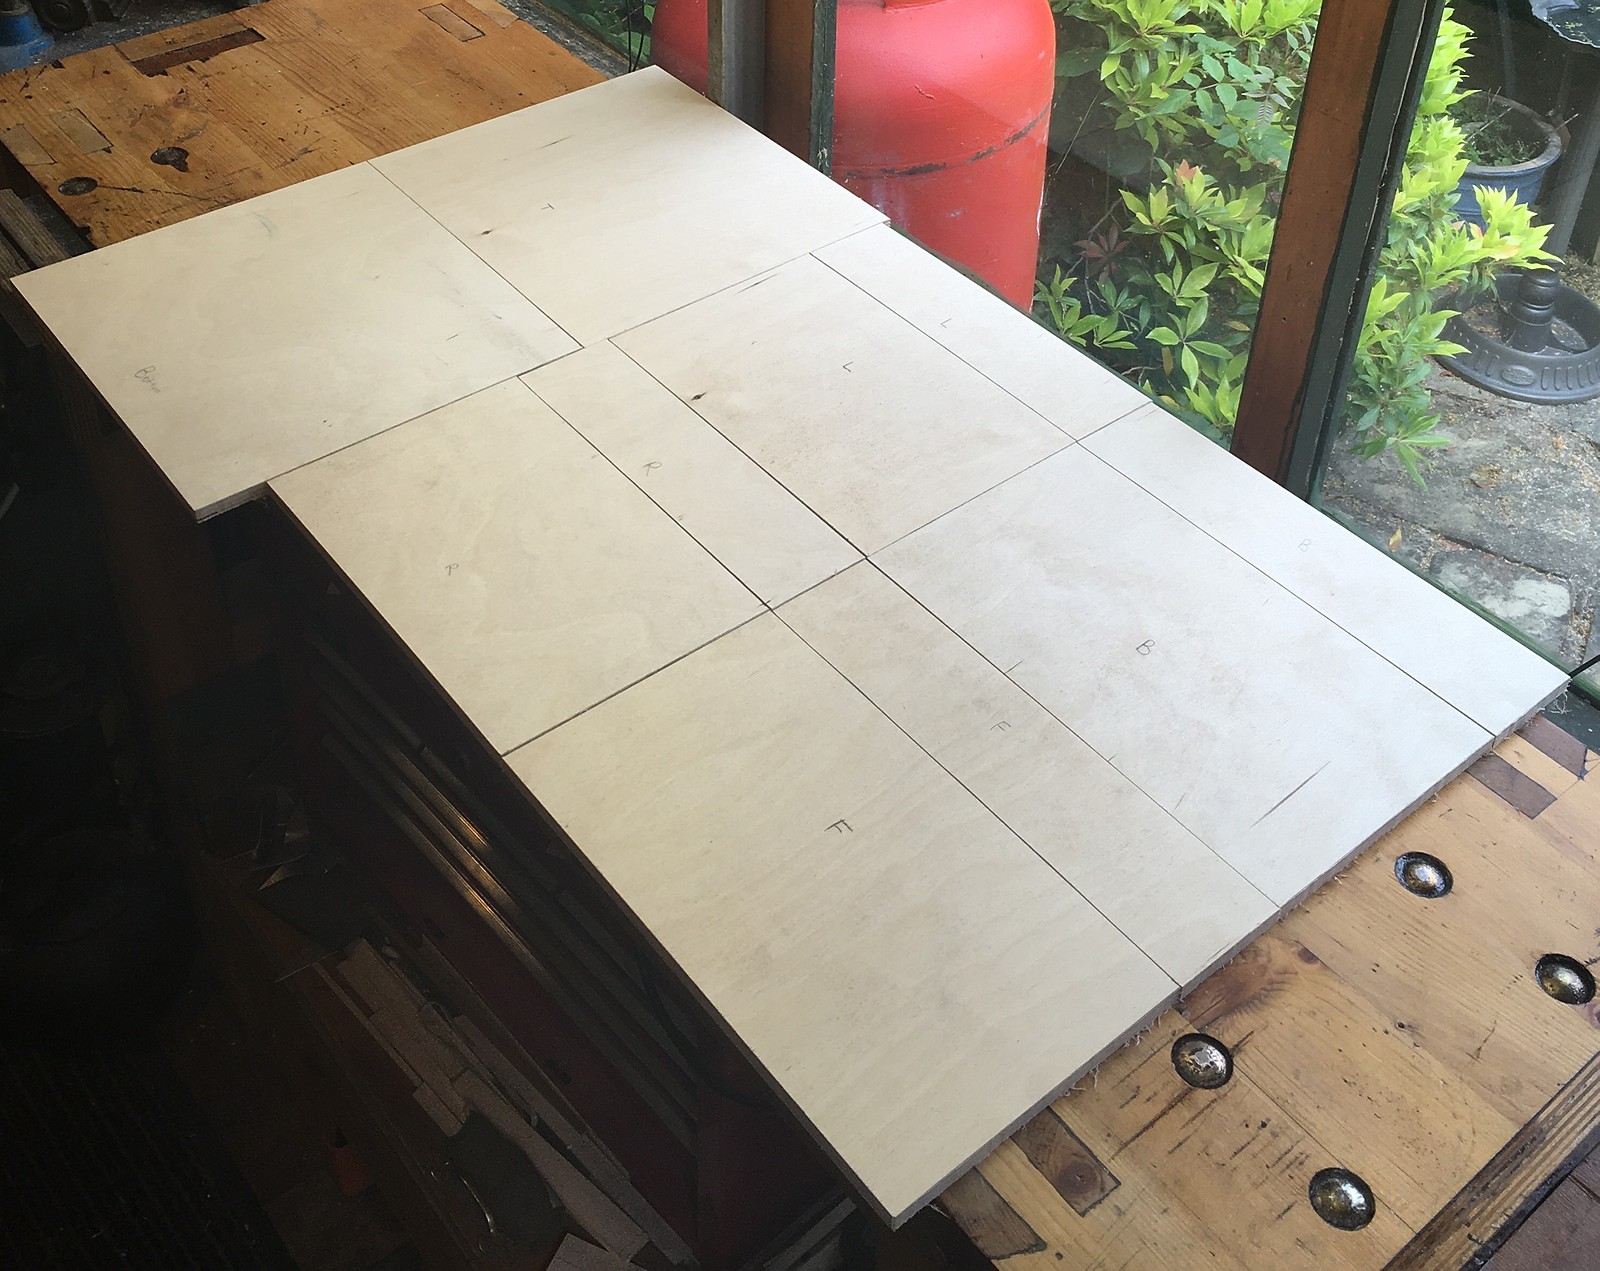
The sides were joined with hand cut dovetails.
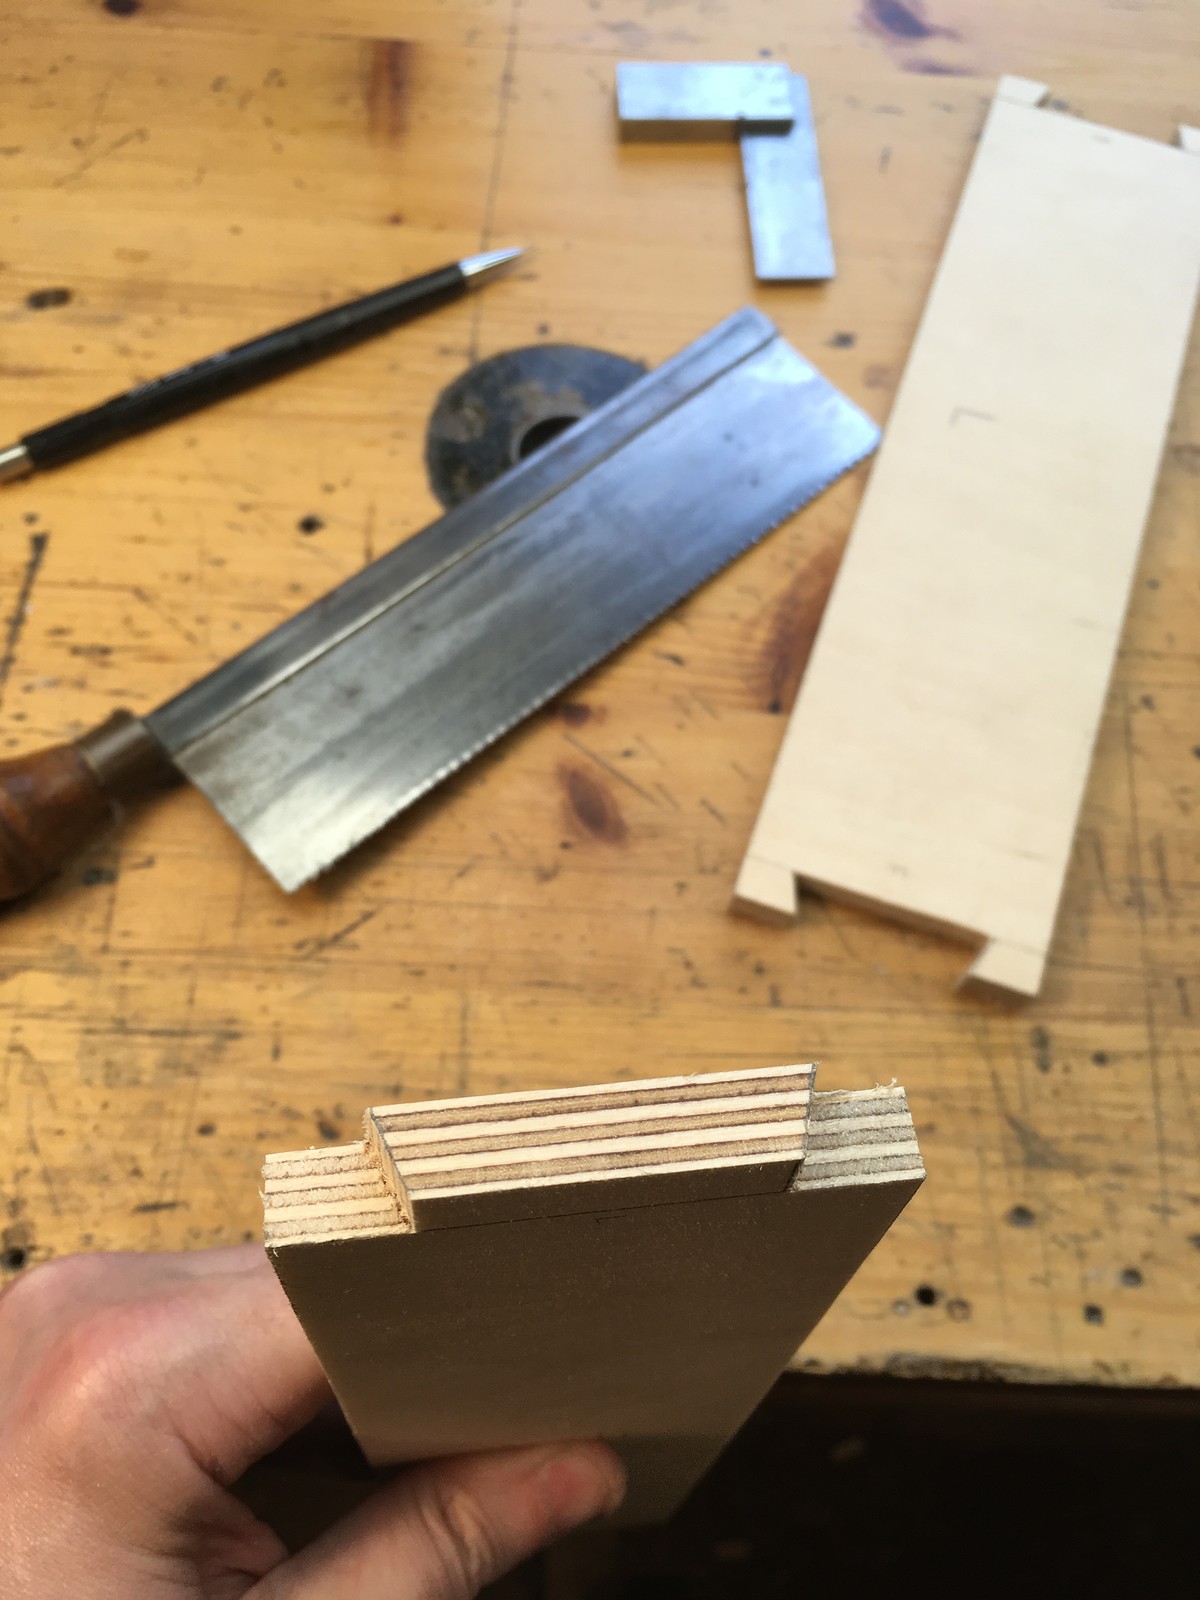
The top and bottom were simply glued and pinned to the sides. I made a bit of a mistake here in not ensuring that the pins were well clear of where I would later need to place the screws that hold on the corner bumpers.
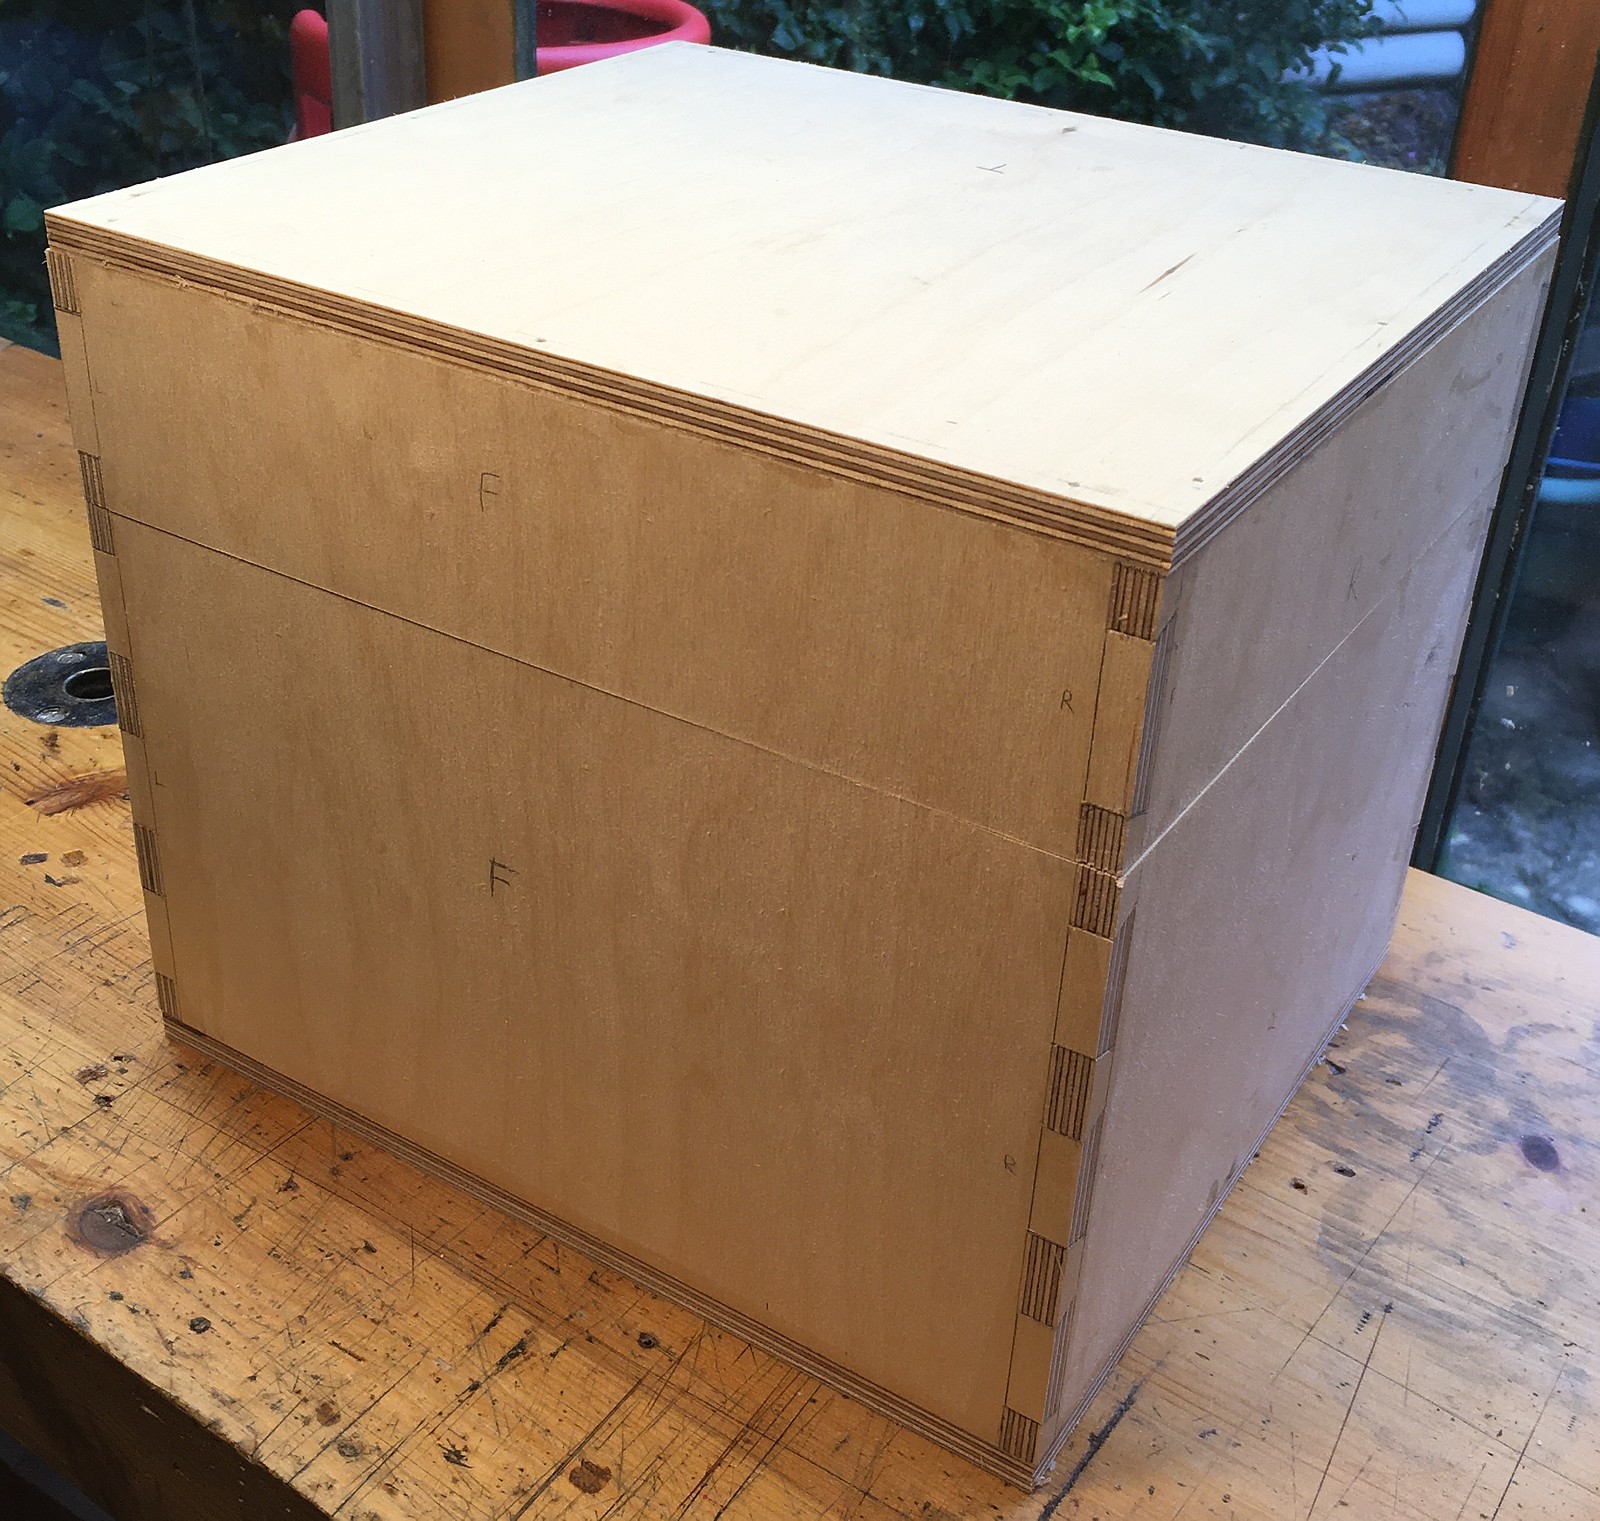
I smoothed the joints and slightly rounded over all the exterior corners, so that the covering would wrap around more neatly.
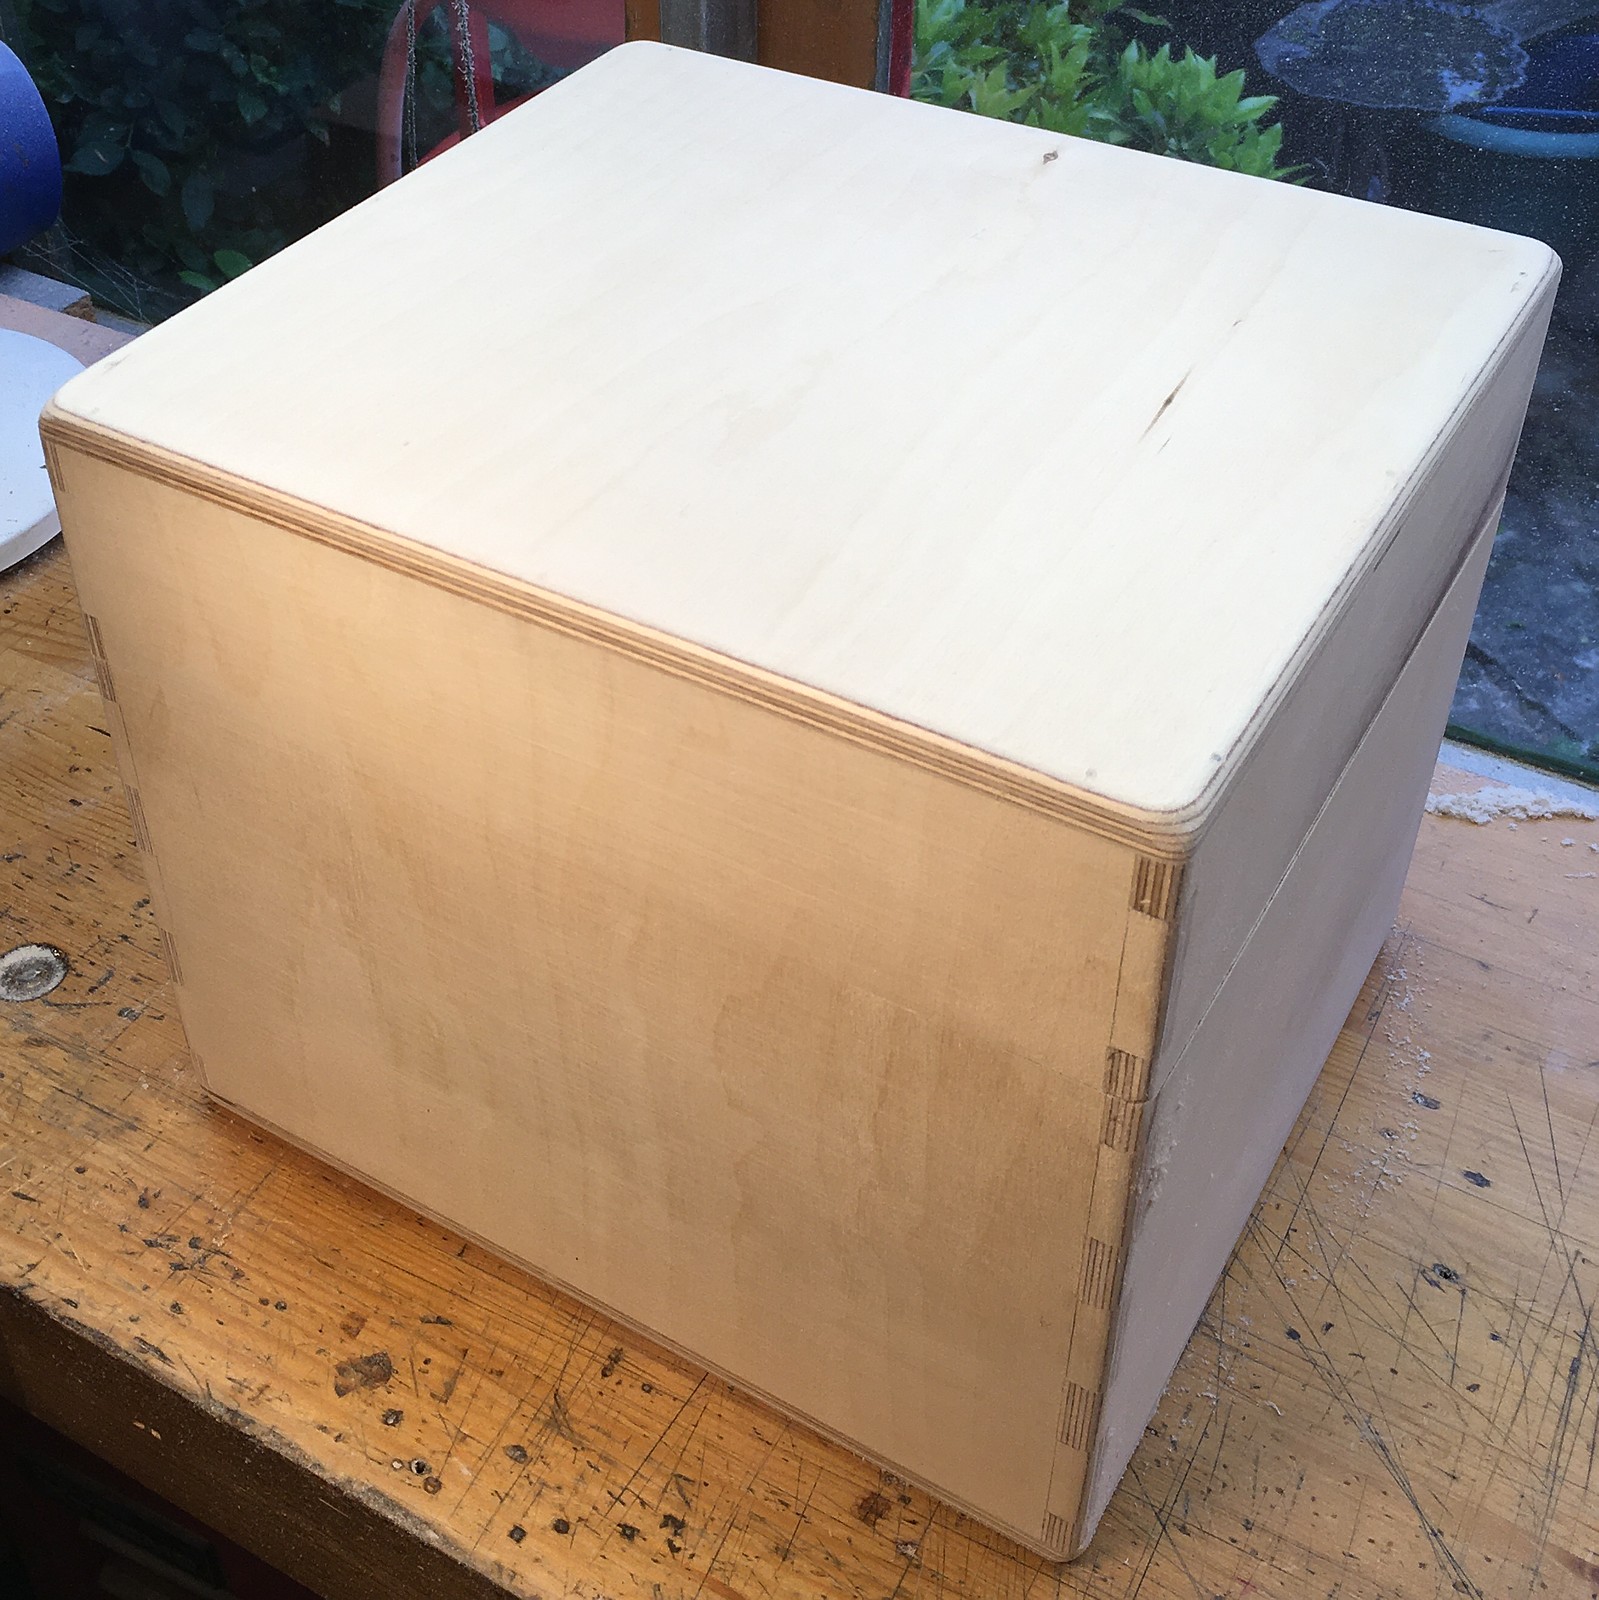
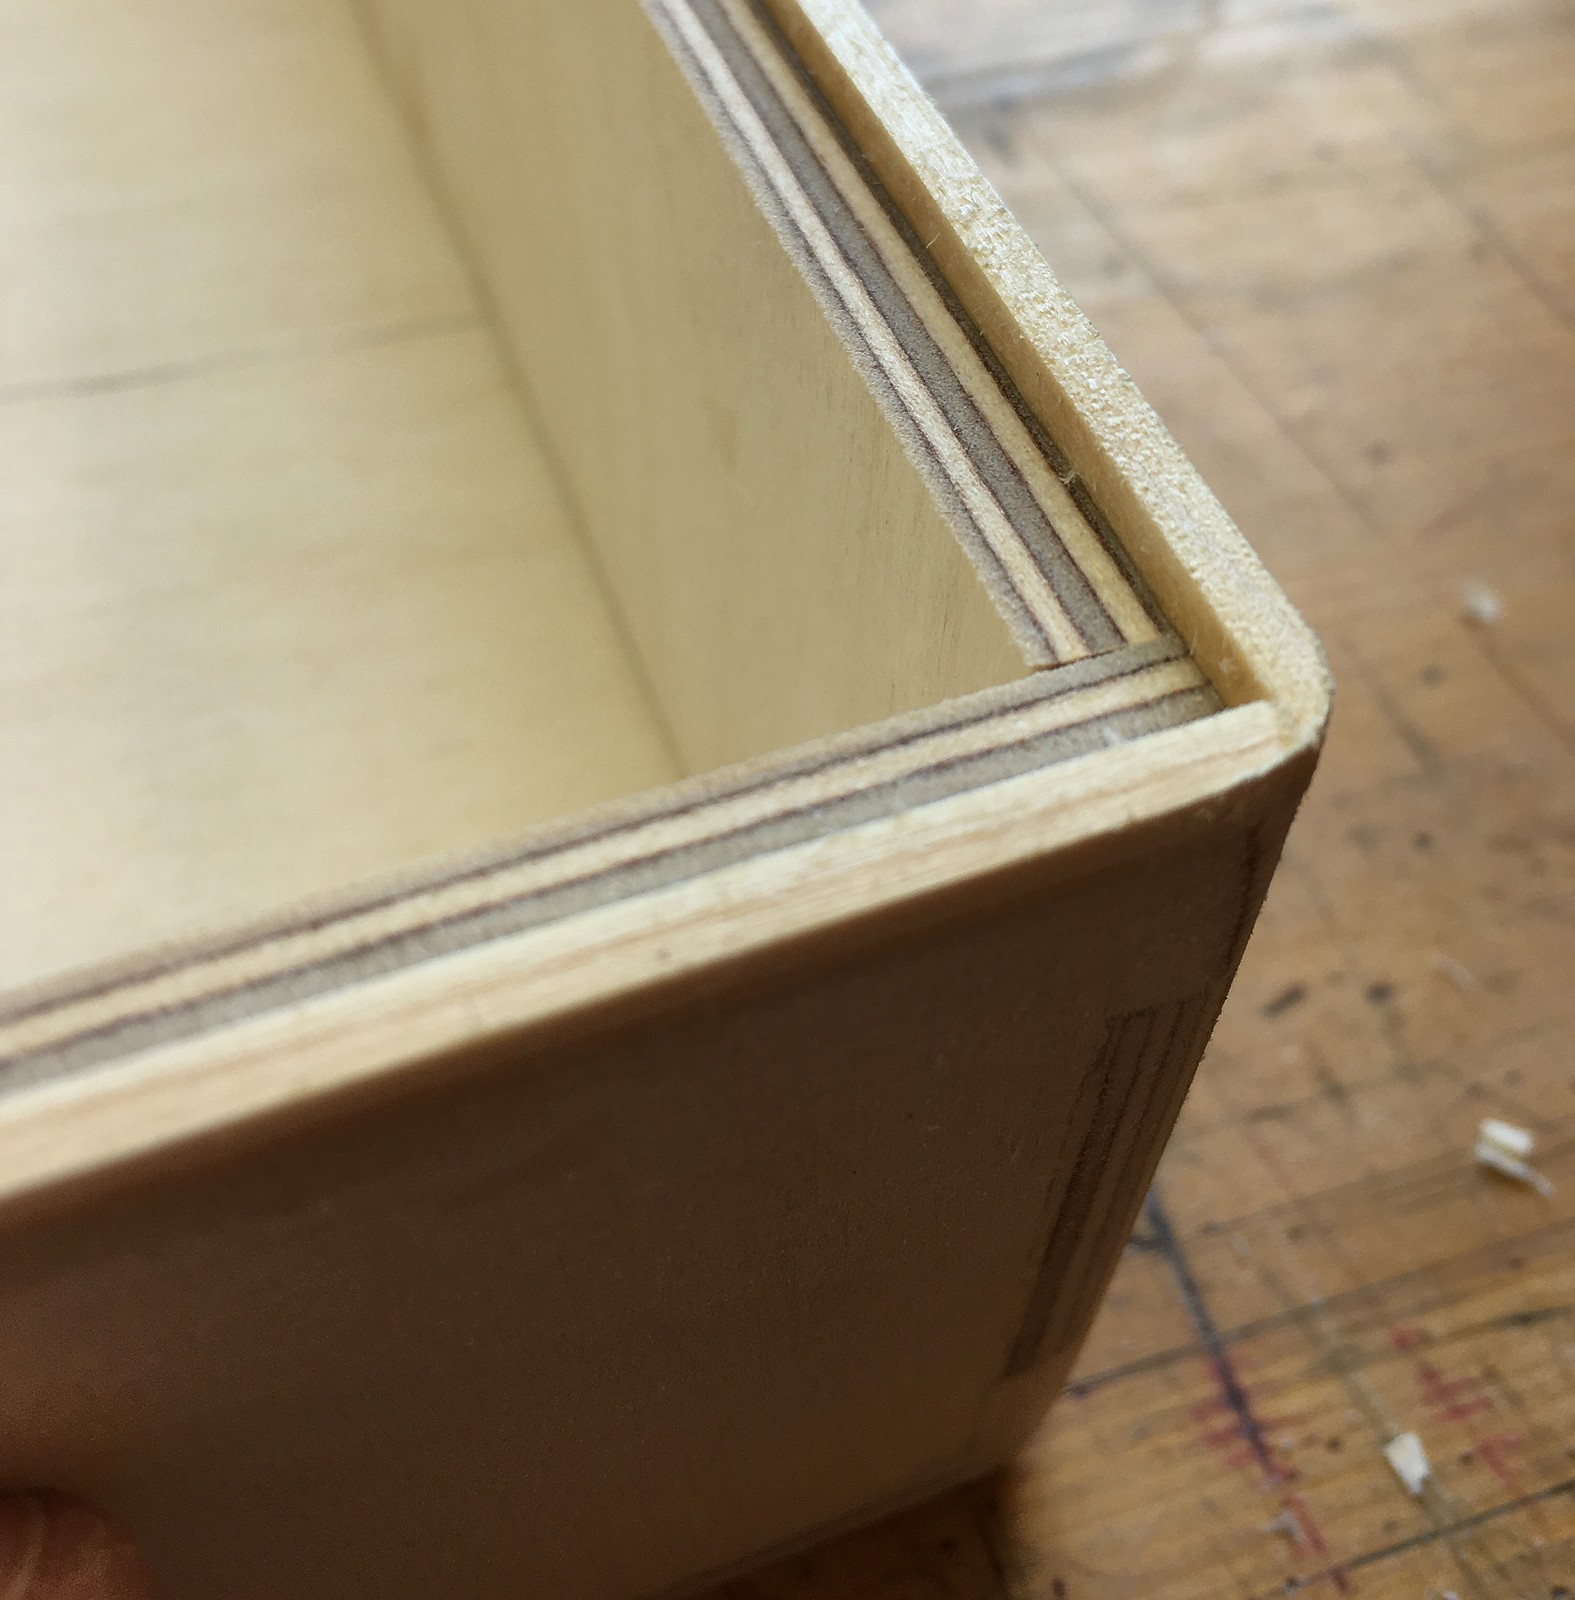
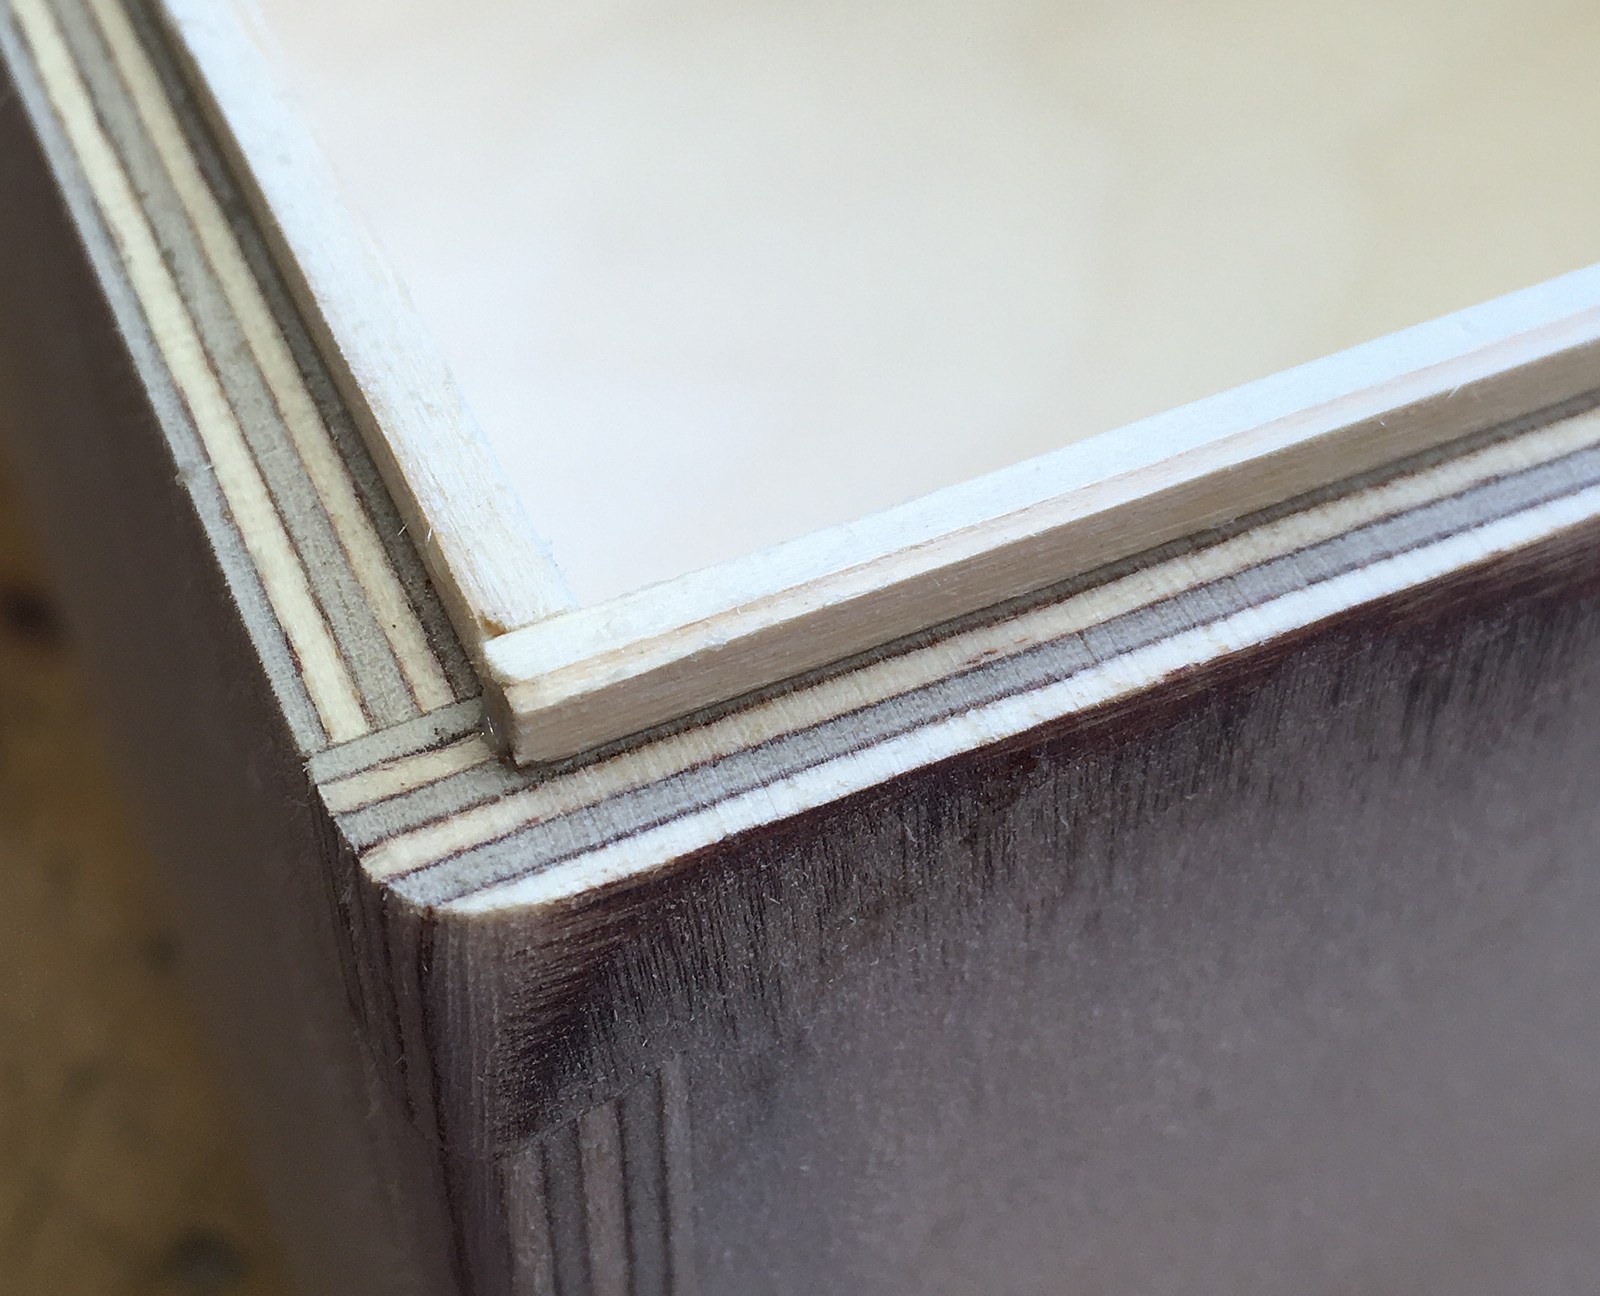
This part was a bit fiddly. I added overlapping lips on the top and bottom parts of the box, for improved weather resistance. I’m not claiming it is waterproof, but it should cope with a short time caught outside in the rain.
These hinges are sold for guitar cases. They open to slightly over 90º then hit a stop, so the lid stays up in a nice raised position when you open it.
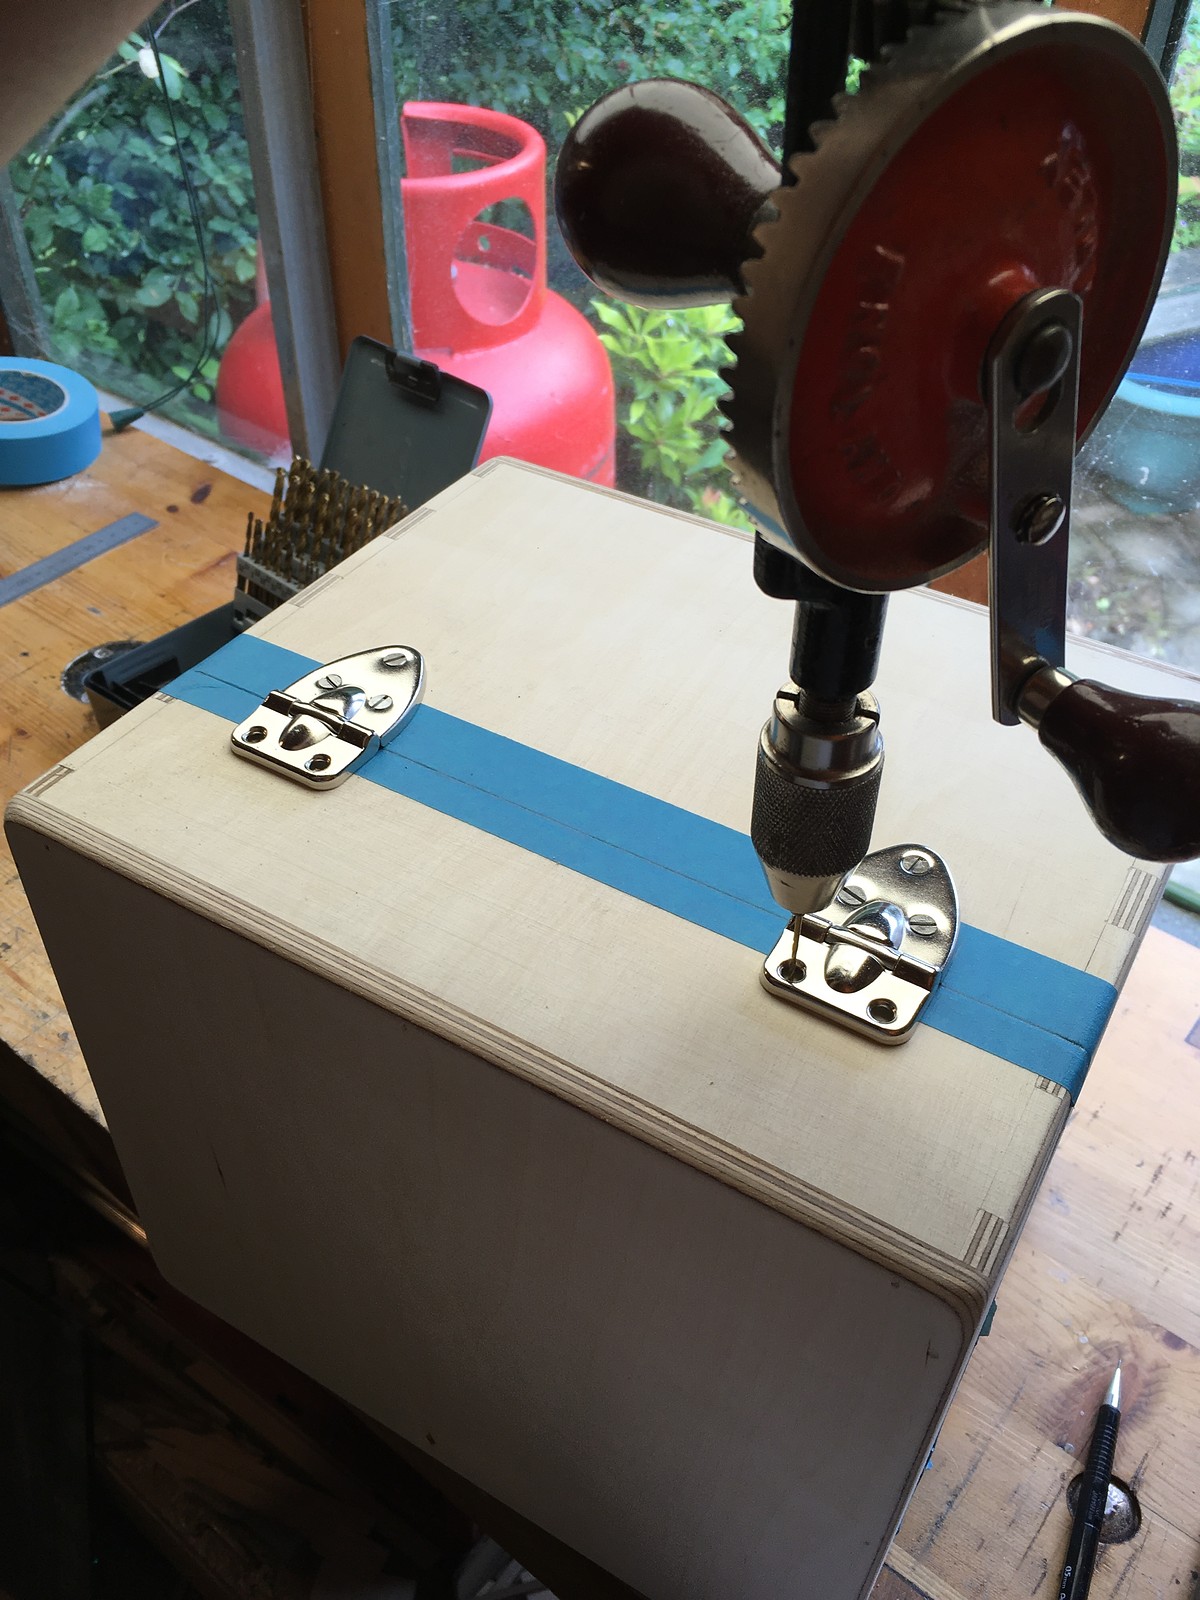
I used two sturdy latches of a type that I am confident won’t accidentally pop open. They can also lock for a little extra security.
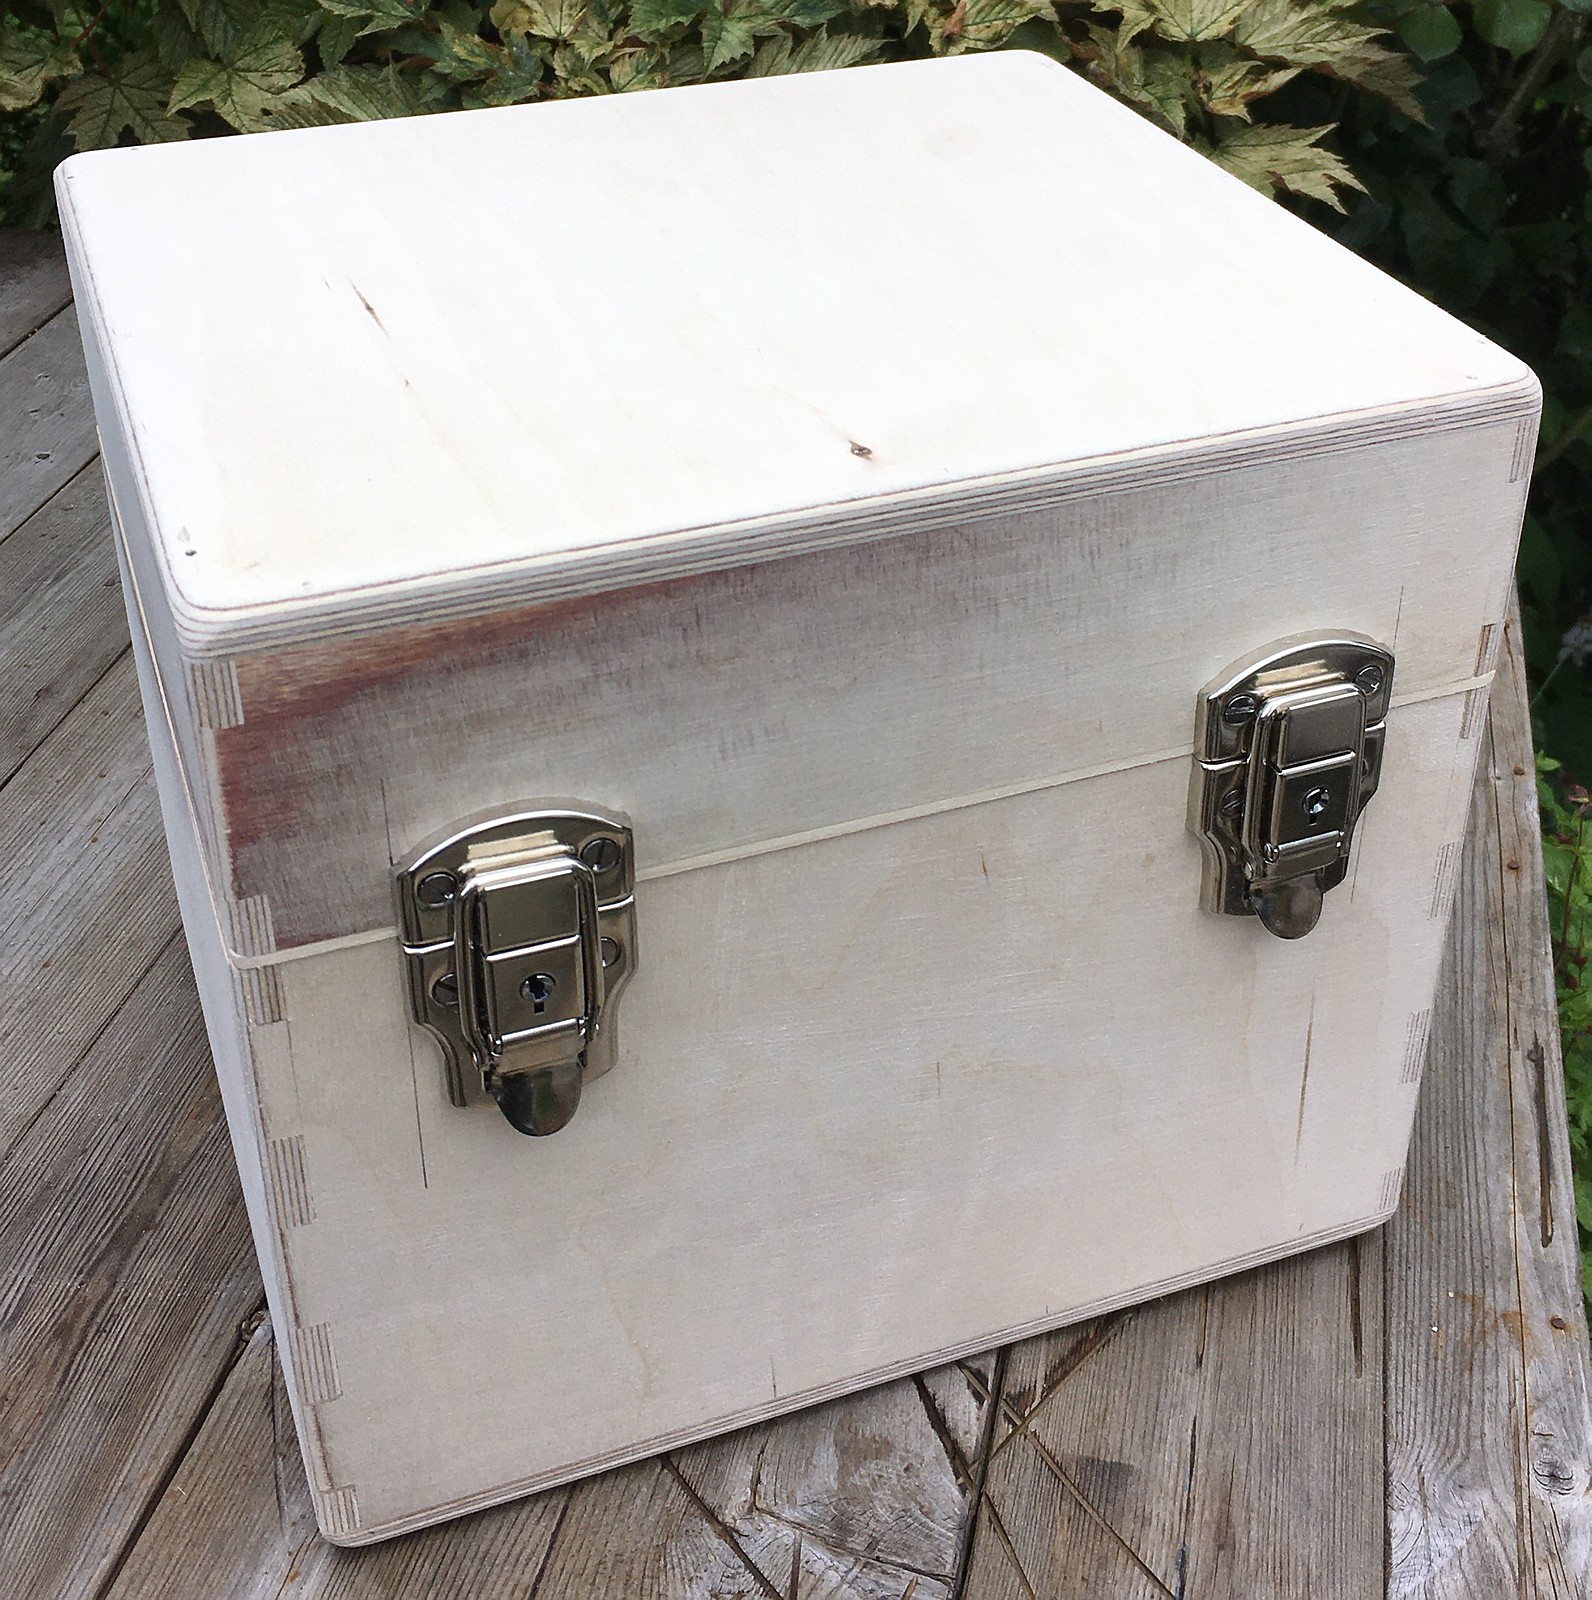
The covering material I used is a coated fabric called Arbetex. It is available in a few different colours including dark green and black, though sadly they don’t make it in dark brown.
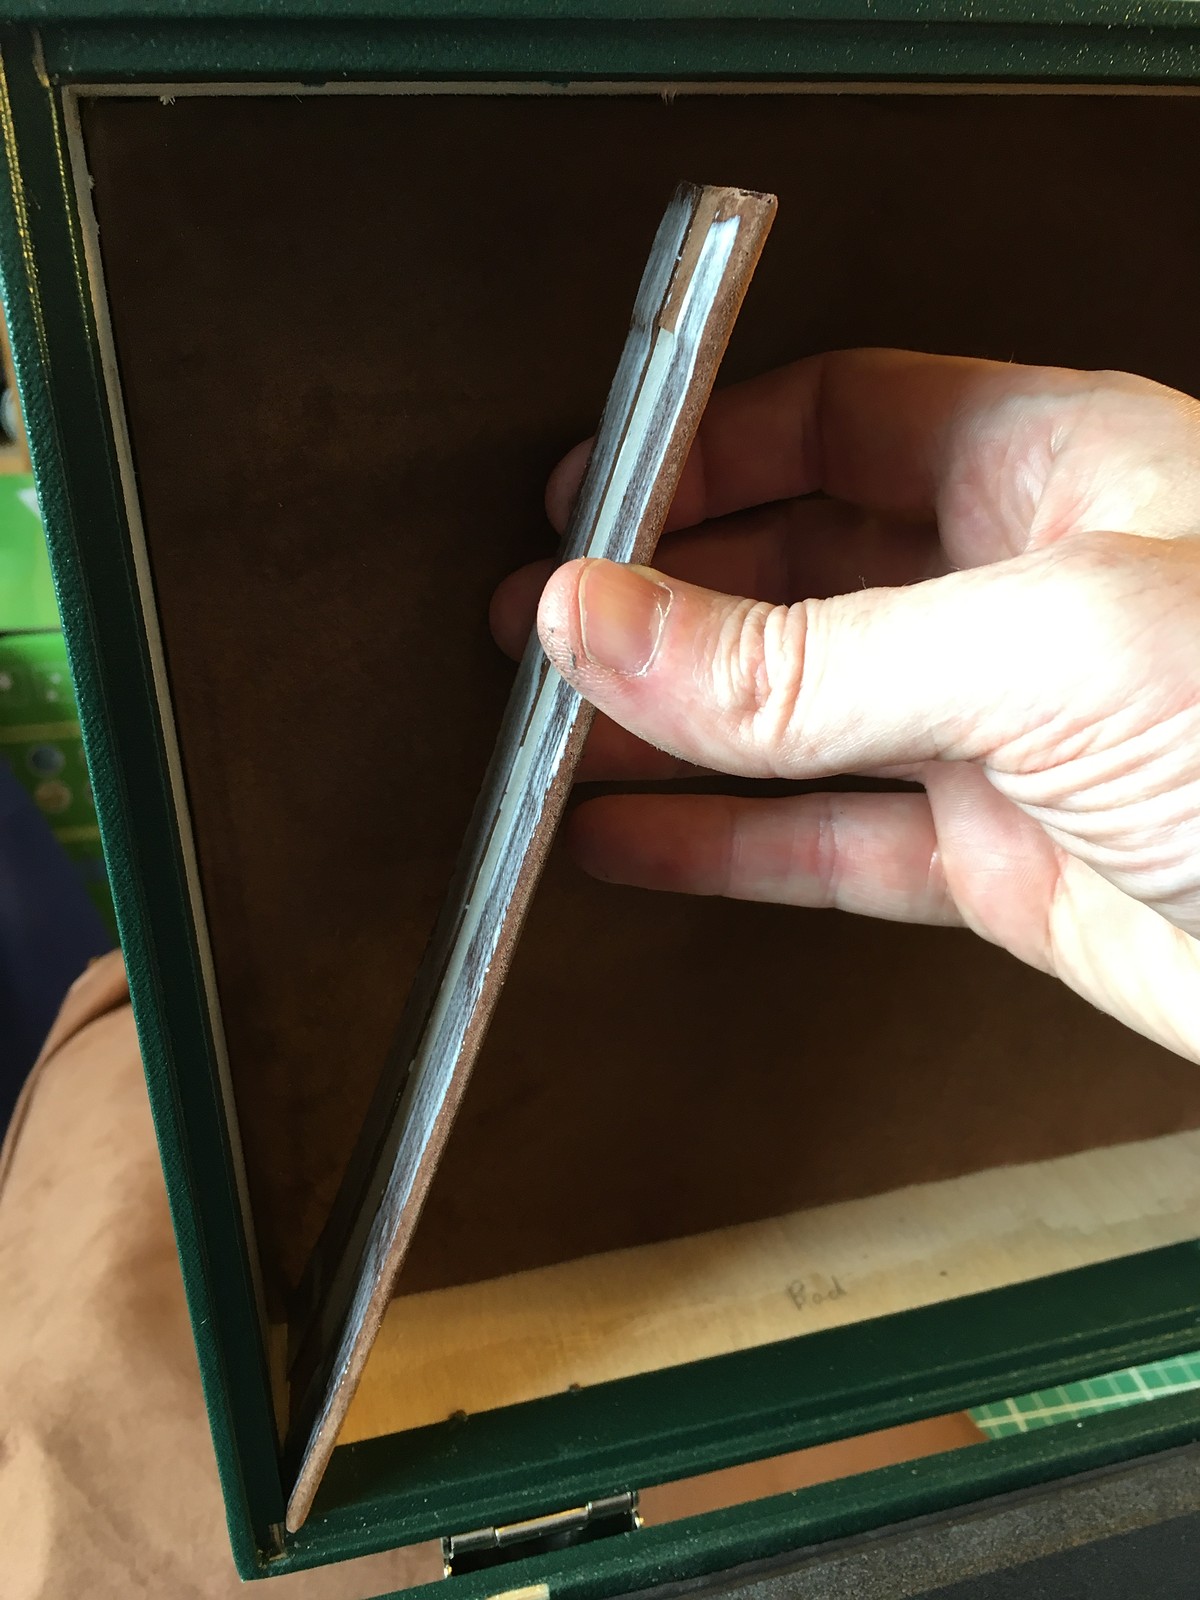
By far the trickiest part of the covering was where it folds over the weather lips. It’s nearly impossible not to end up with some tiny gaps in the inside corners.
In hindsight this was not the best way to block the corners of the case, because it led to some real headaches with the covering and lining – I did it differently on the case for No. 10.
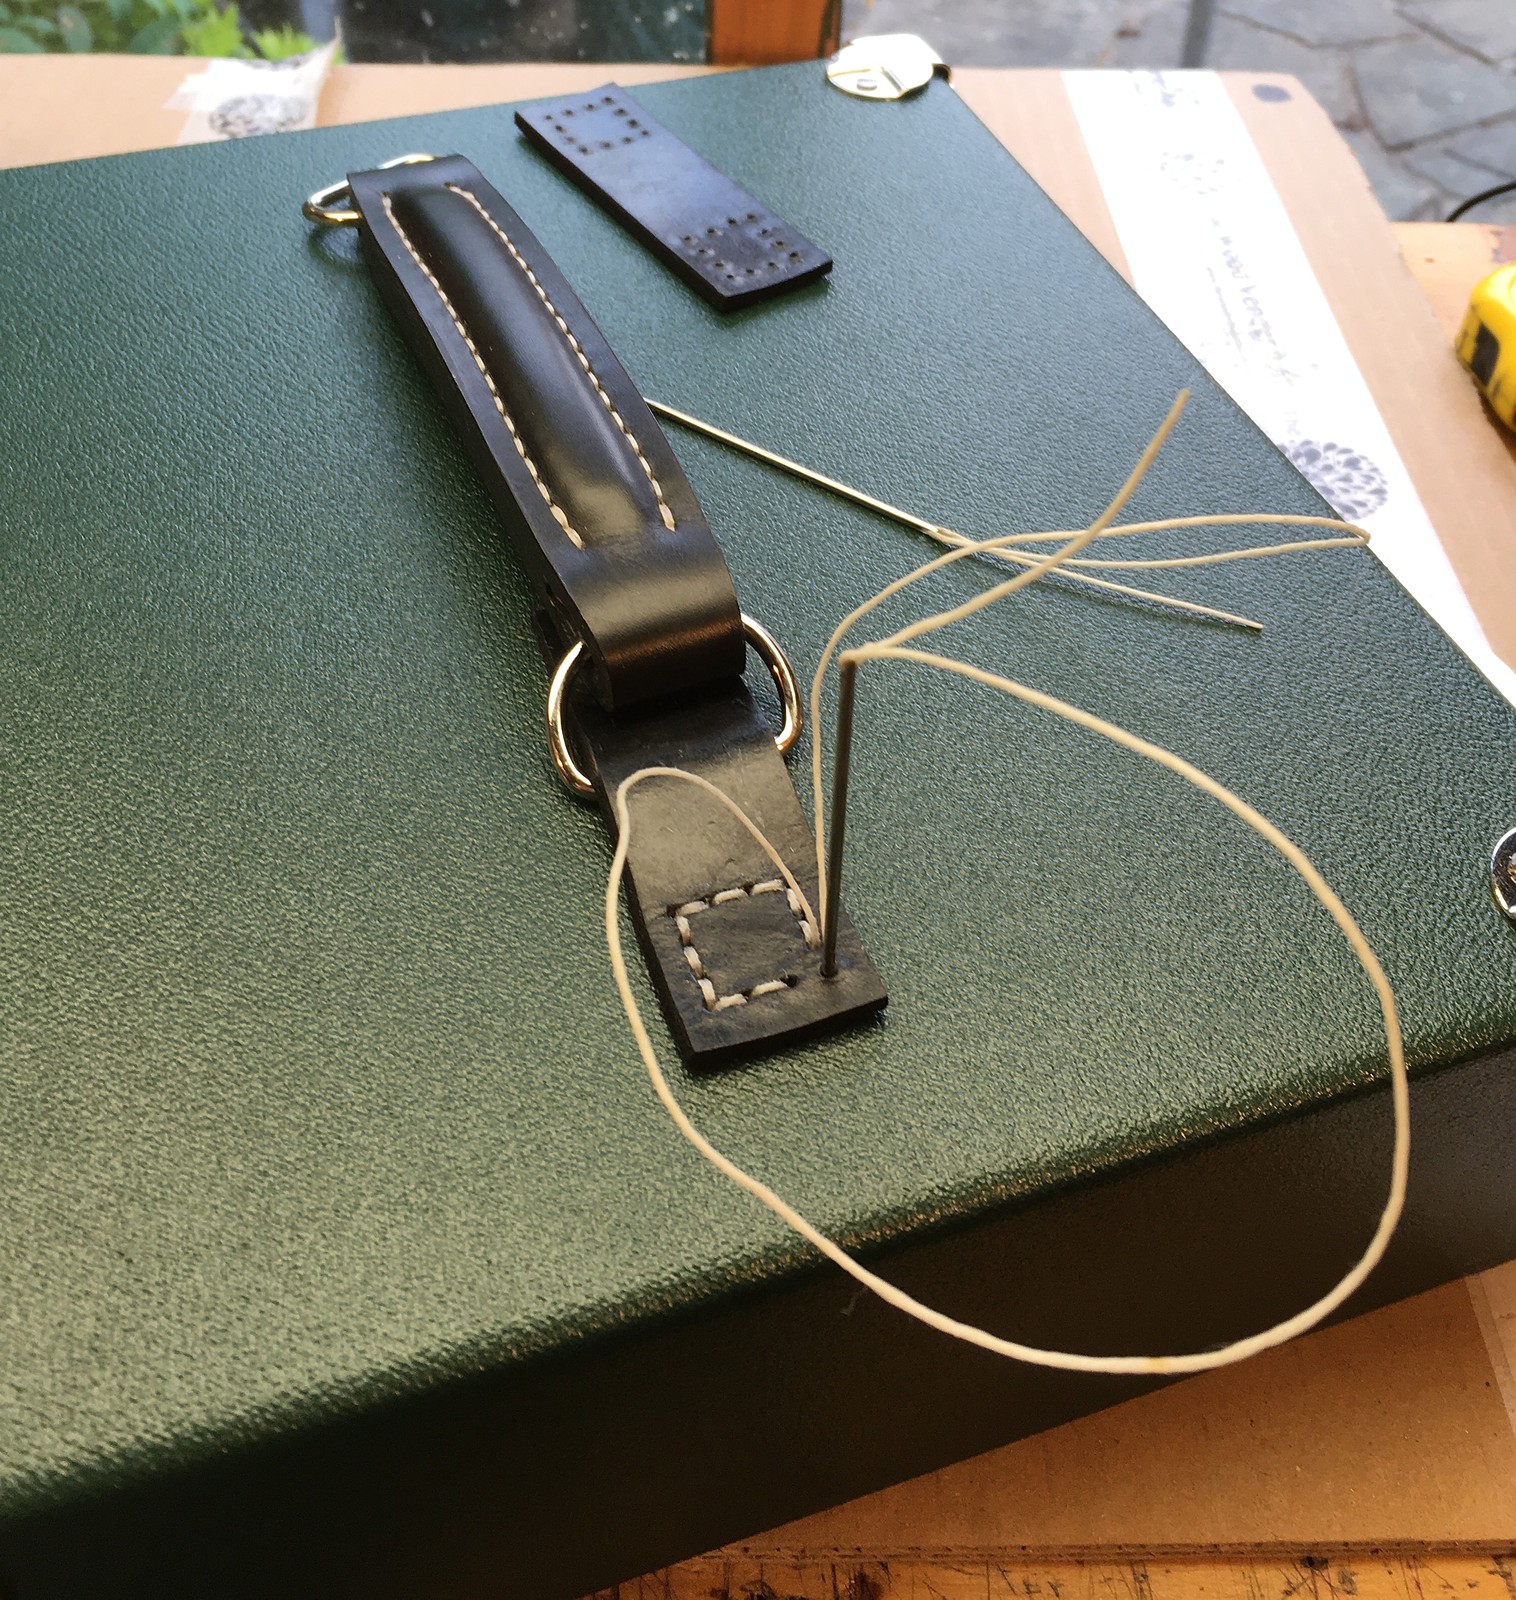
I bought in the handle from a leatherworker (it was sold as a replacement briefcase handle). It came with the D rings installed, but I had to come up with my own way to fasten them to the case.
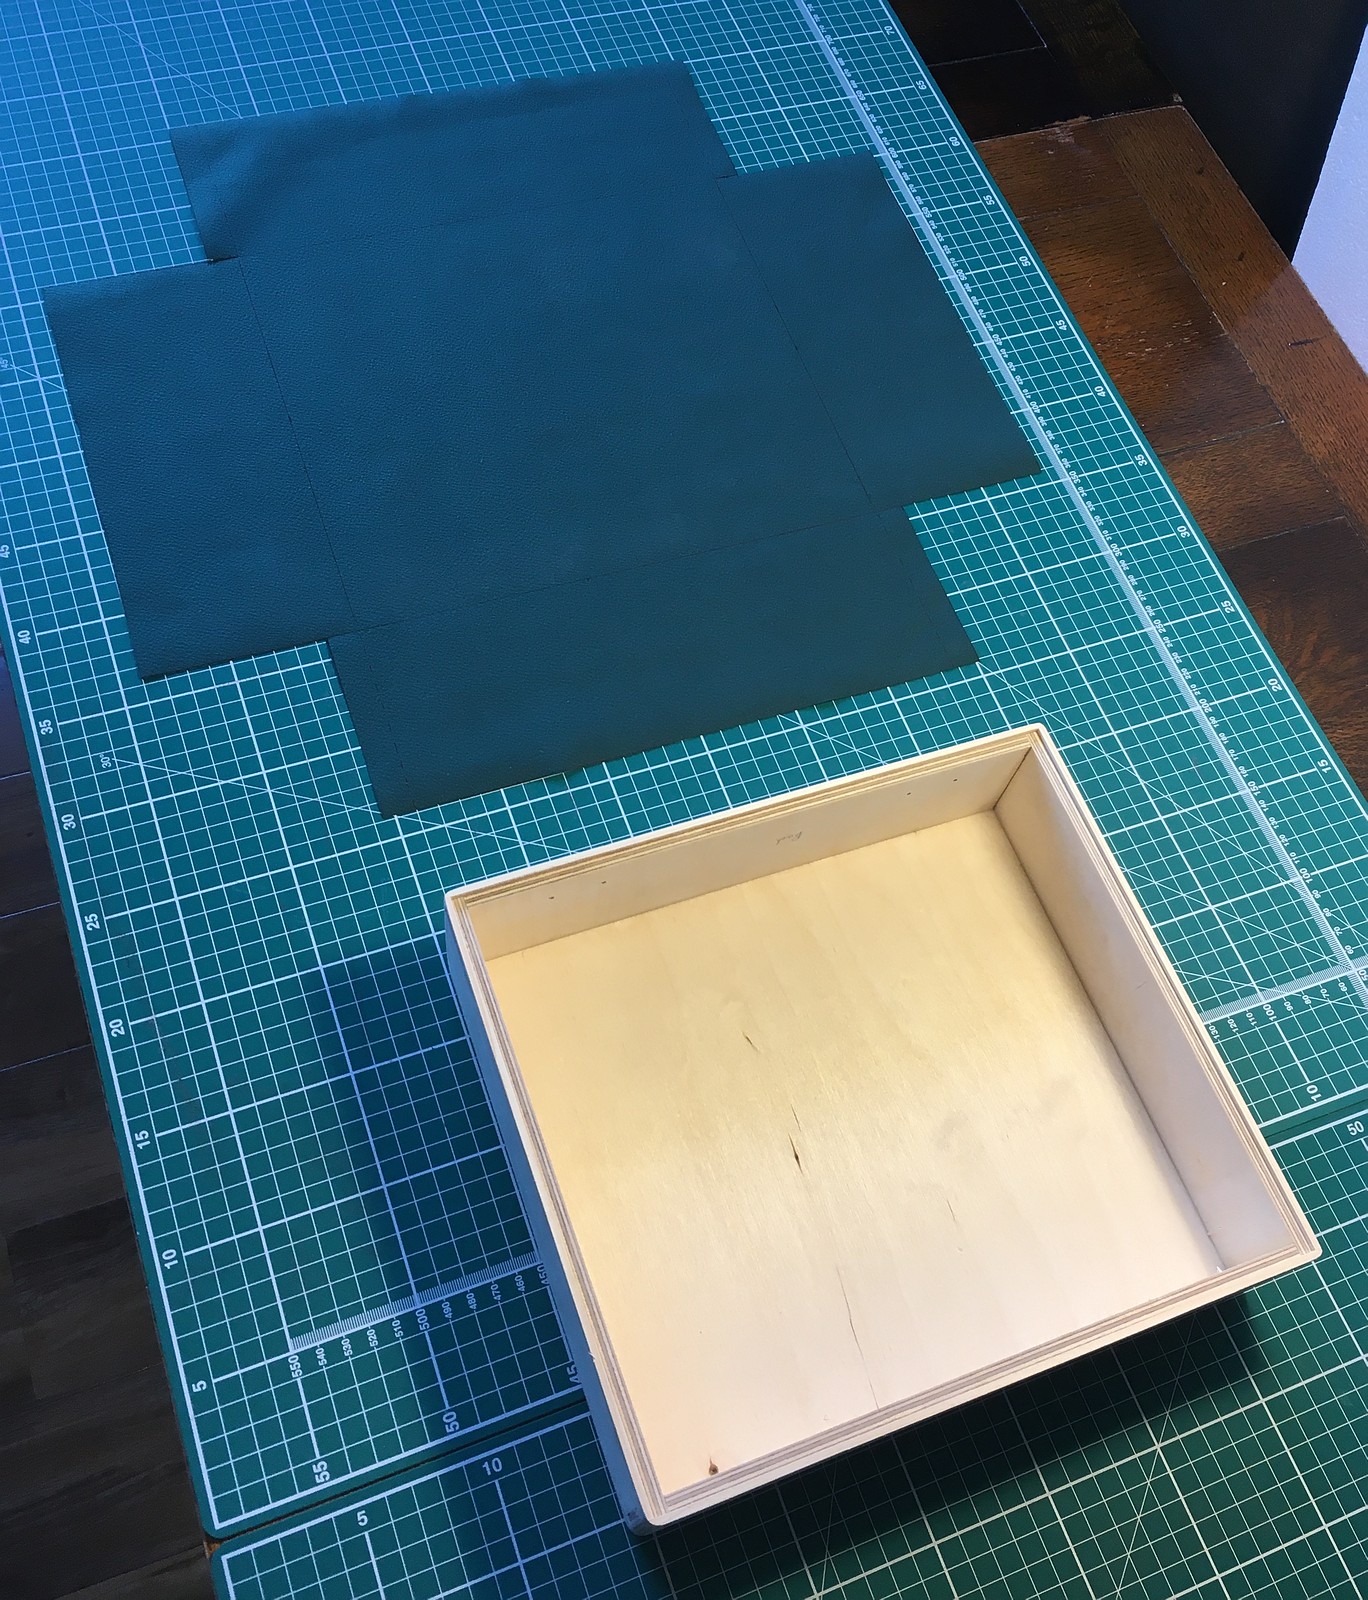
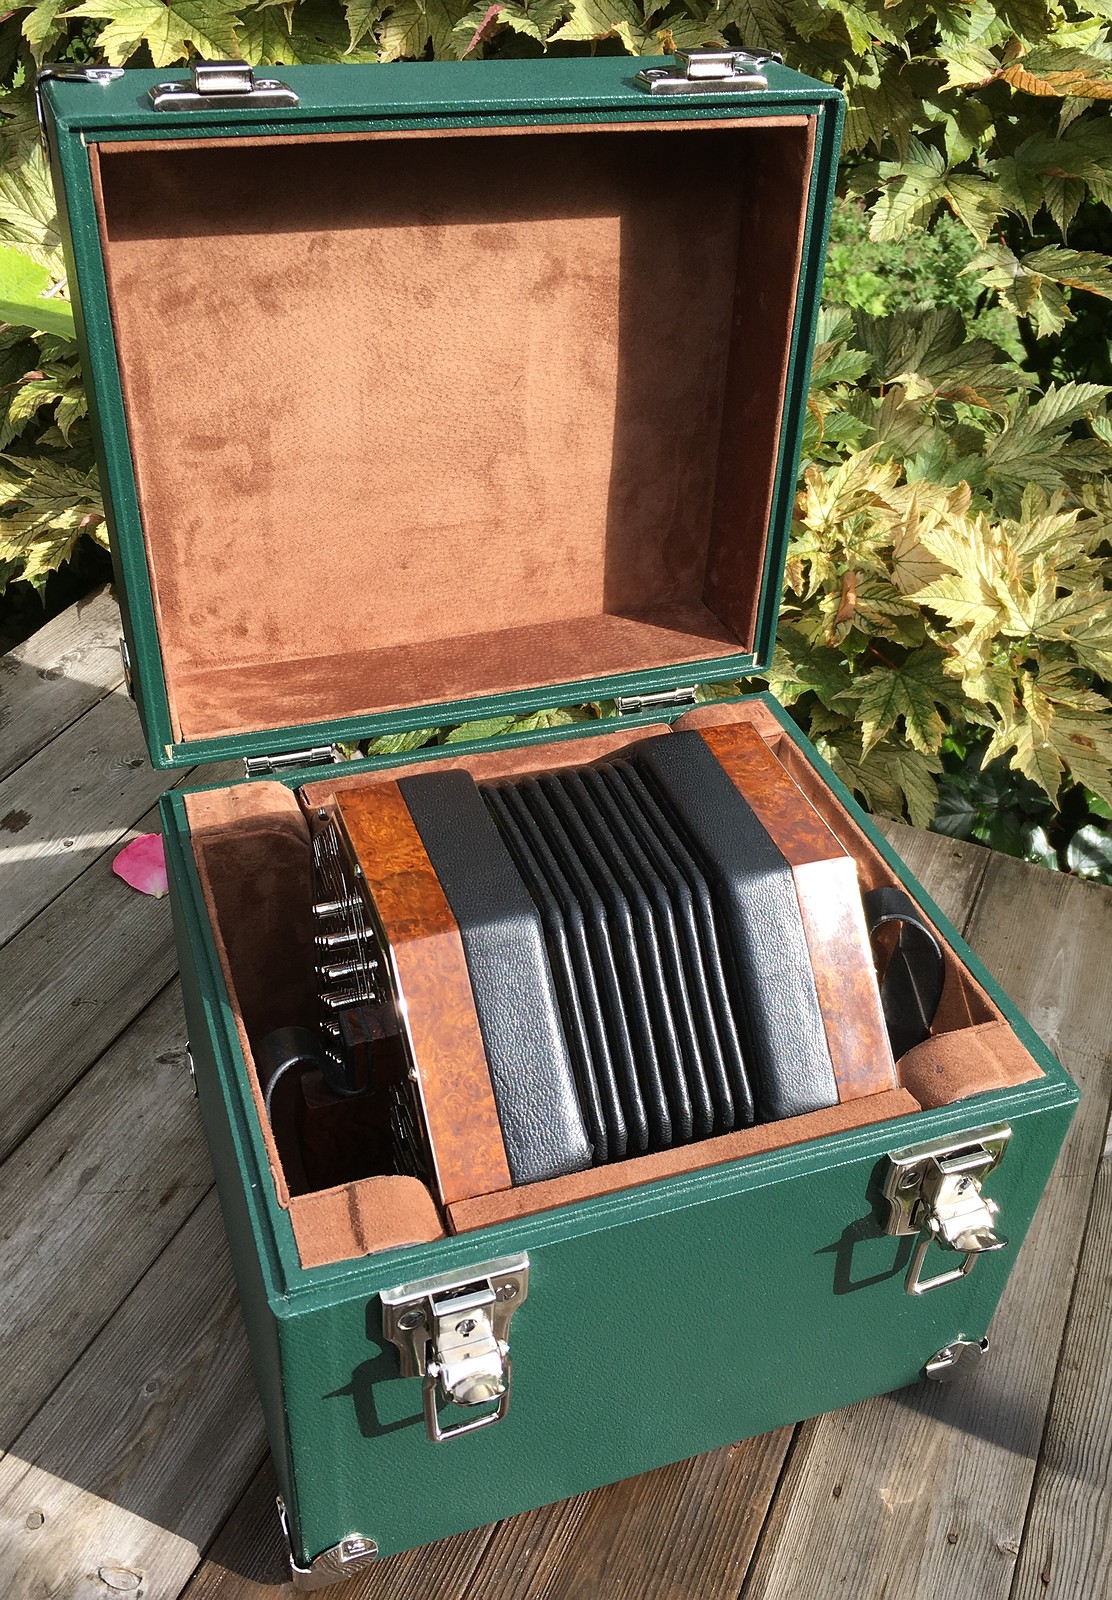
The lining was soft pig suede. Rather than trying to attach it directly to the inside of the case, I made up panels of suede-covered card and then glued those into the case. I also incorporated a sheet of shock-absorbing foam into those panels that directly contacted the instrument (this is optional – on No. 10’s case I left out the padding to make the case slightly smaller).
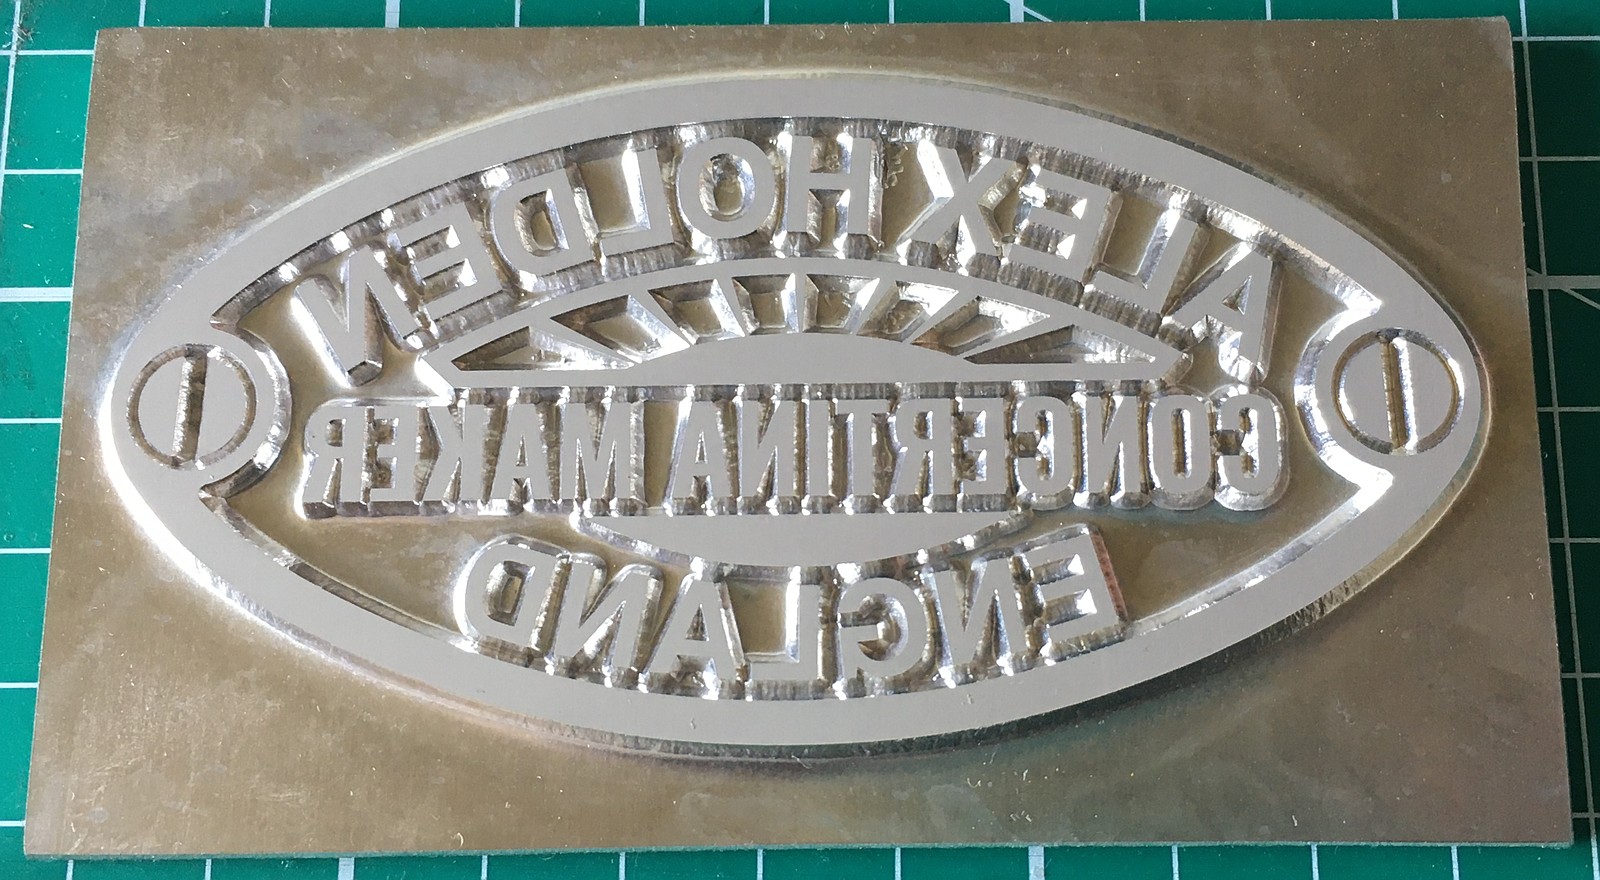
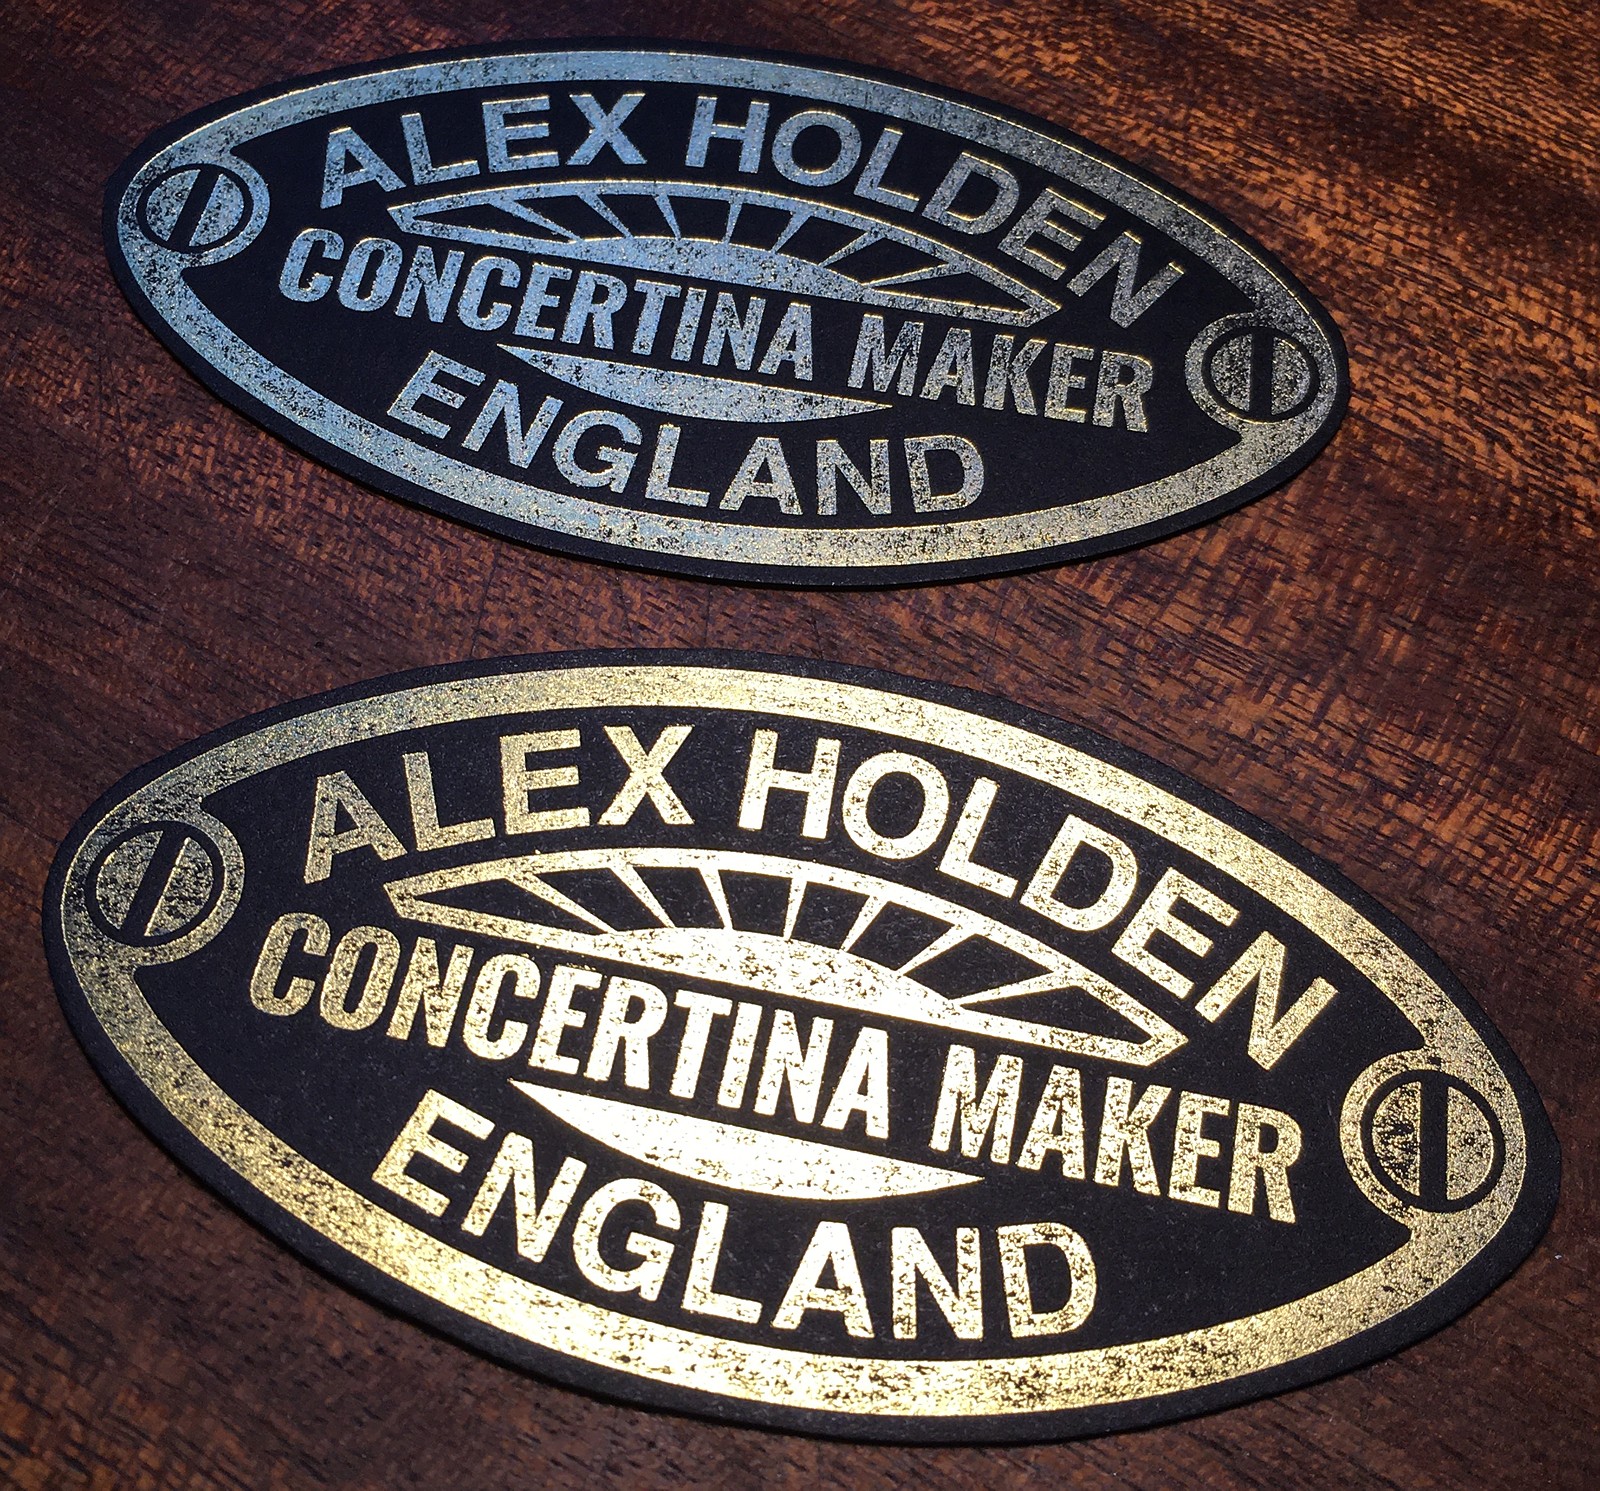
As the final touch I had a printing plate made for a maker’s label to go inside the case lid, that is basically an enlarged version of my maker’s plate (though I added sun rays and fake screw heads).
I also added metal corner bumpers to protect the case from knocks, and (not visible) four rubber feet on the bottom.
I deliberately made the case wide enough so that you can easily slide your hands in either side of the instrument, squeeze the concertina together slightly, and lift it out. Some of my previous cases were a much tighter fit and you have to awkwardly tug on the hand straps to yank the instrument out because there isn’t room to get your hands in. This picture was taken before I added the maker’s label in the lid.
Here are a couple more pictures of the finished instrument.
A self-portrait of the maker.
I hope to update this article later with a video of the instrument being played by the client.
Finally, a quick sneak peak at No. 10, which I have already finished and will be writing about soon.