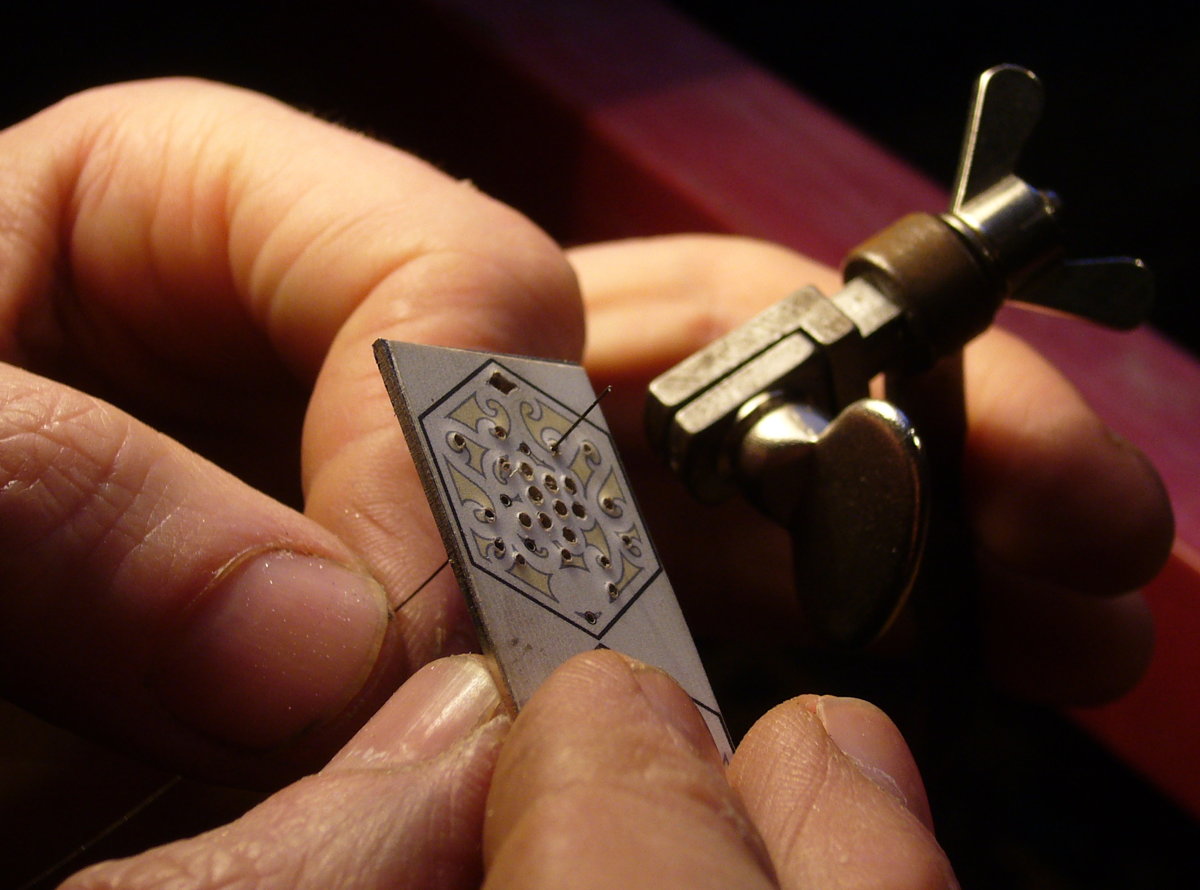
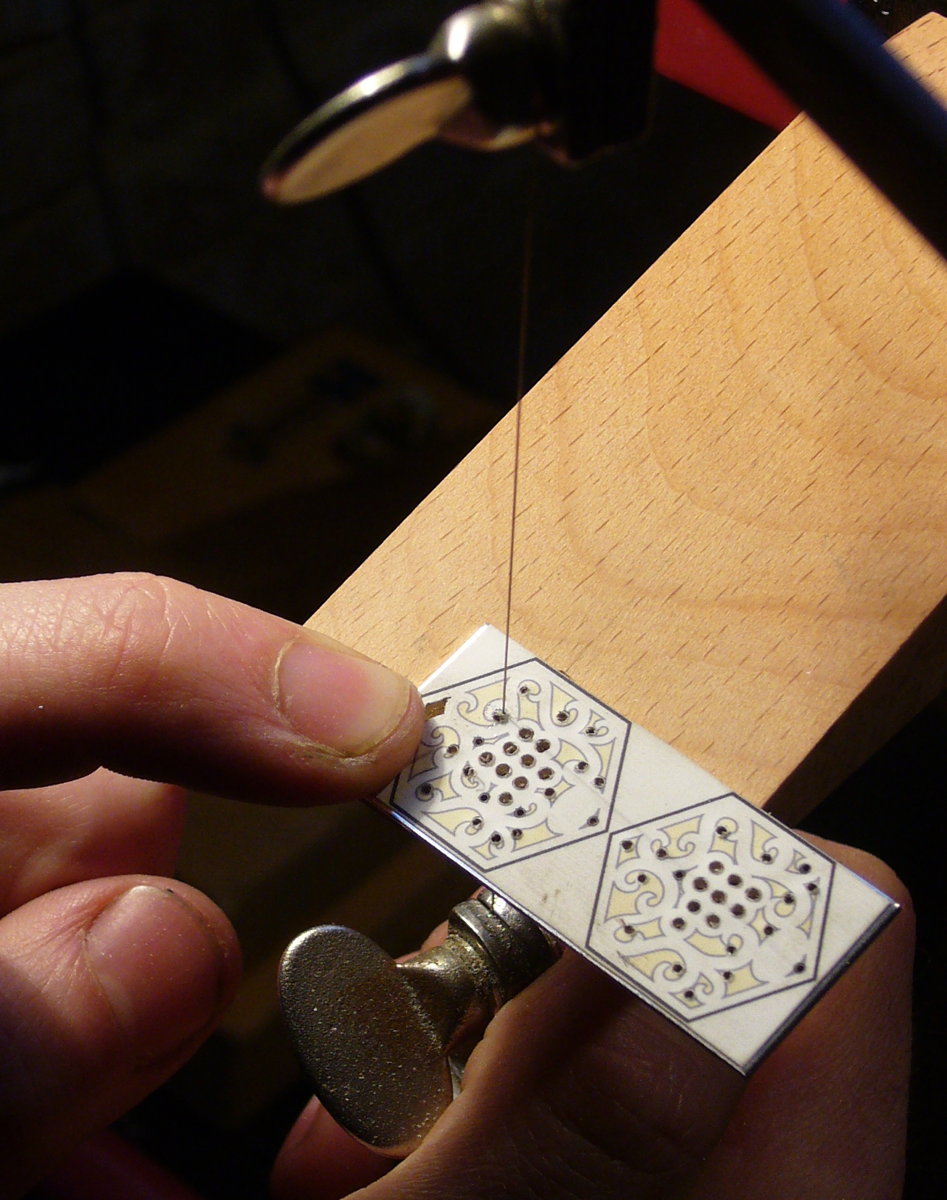
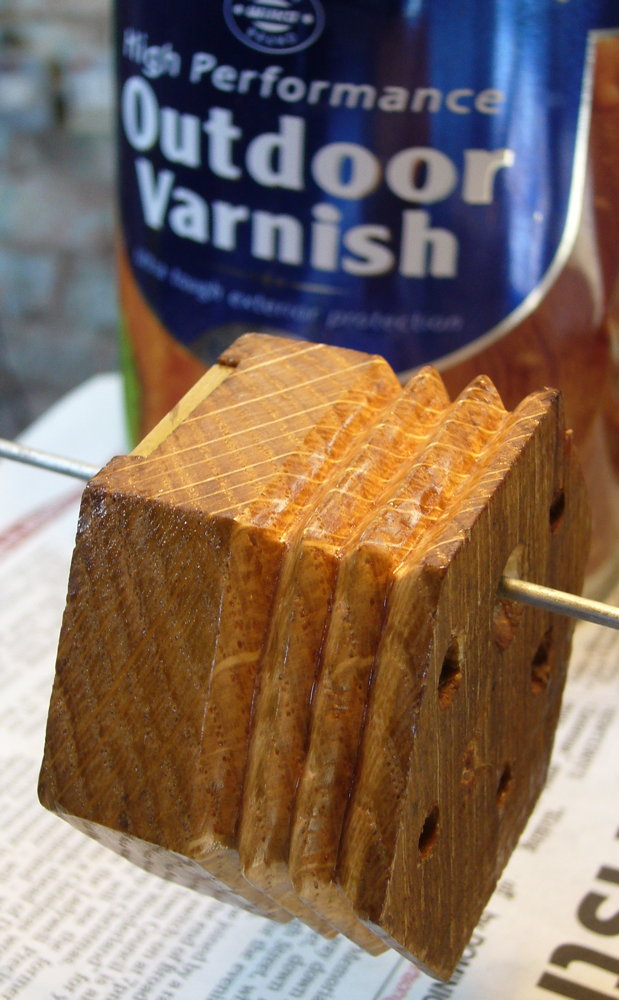
Because I made the bellpush fretwork before I started this blog, I thought I would take a step back and write a bit about how I did it. Here’s a picture of the finished item (remember it’s only 50mm wide):
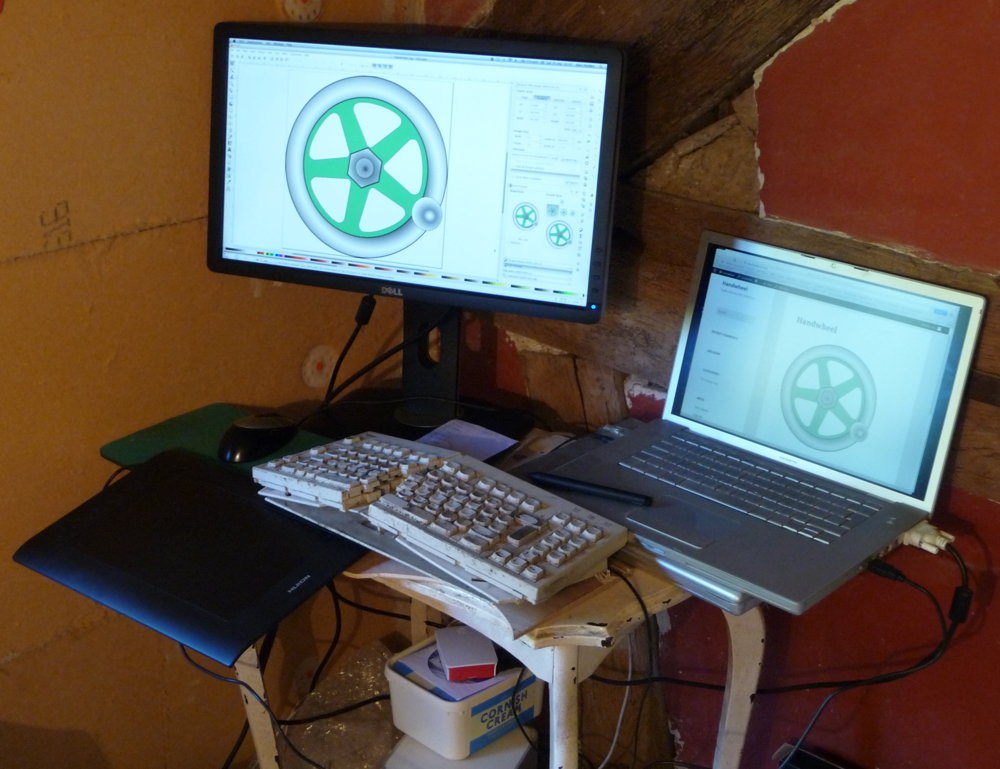
What I didn’t do was to design it 1:1 with paper and a pencil. Given my limited artistic ability and the level of fine detail involved, using computer aided design software saved me a lot of time and almost certainly led to a better end result. I could zoom in and out, automatically turn wonky hand-drawn curves into nice smooth ones, repeatedly draw and erase (without leaving smudgy marks each time), undo, redo, tweak, retweak, and basically fiddle with the design for hours on end until I felt it was good enough to hit ‘print’. That’s my little secret: I’m not very good at freehand drawing (I wish I was), but if you’re patient enough CAD lets you keep on making hundreds of tiny incremental improvements until you finish up with something that looks pretty good. In theory also I could go from a vector drawing to a control program for a CNC tool like a laser cutter, which is something I want to try in the future, though this project was about learning to cut an end by hand.
The software I used is an open source vector drawing program called Inkscape. I’m using a snapshot of the current development version for two reasons: it has a couple of whizzy new features that make it easier to do this kind of design, and it finally runs natively on Mac OS X rather than via the rather clunky X11 interface. The two new features are both path effects: spiro spline and power stroke (stupid name). Spiro spline basically makes it easy to draw really smooth curves. Power stroke lets you draw variable width lines (you can later convert a power stroke into an outline path – i.e. two curves that define the edges of the power stroke line; unfortunately that’s a one-way conversion). Rather than me spend a few hundred words attempting to explain more clearly why the combination of these two features is really useful for drawing the scrolly shapes you find in a Victorian-style concertina end, take a look at this video. (Incidentally, he would have been better off using the Path->Union command at the end to combine multiple powerstrokes into a single path.)
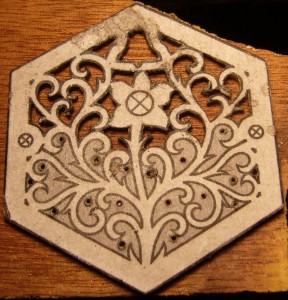
It took me three attempts to come up with a design I was happy with. Here are the three versions side by side:


I spent a lot of time studying pictures of vintage concertina ends between attempts 2 and 3: I could tell my version looked wrong but it took a lot of analysis before I figured out exactly why and how to fix it. Something you might notice if you look closely is that in the first two the right and left hand sides are almost exact mirror images of each other. In the third one there are many very small differences between the two sides – this asymmetry, I found, makes the design look far more organic.
If you carefully compare the final design to the photo above, you’ll spot where I made a mistake with the saw in one place. I carefully tweaked the design to work around the mistake and it almost looks like I did it on purpose now!
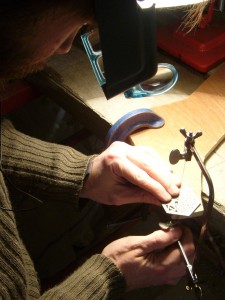
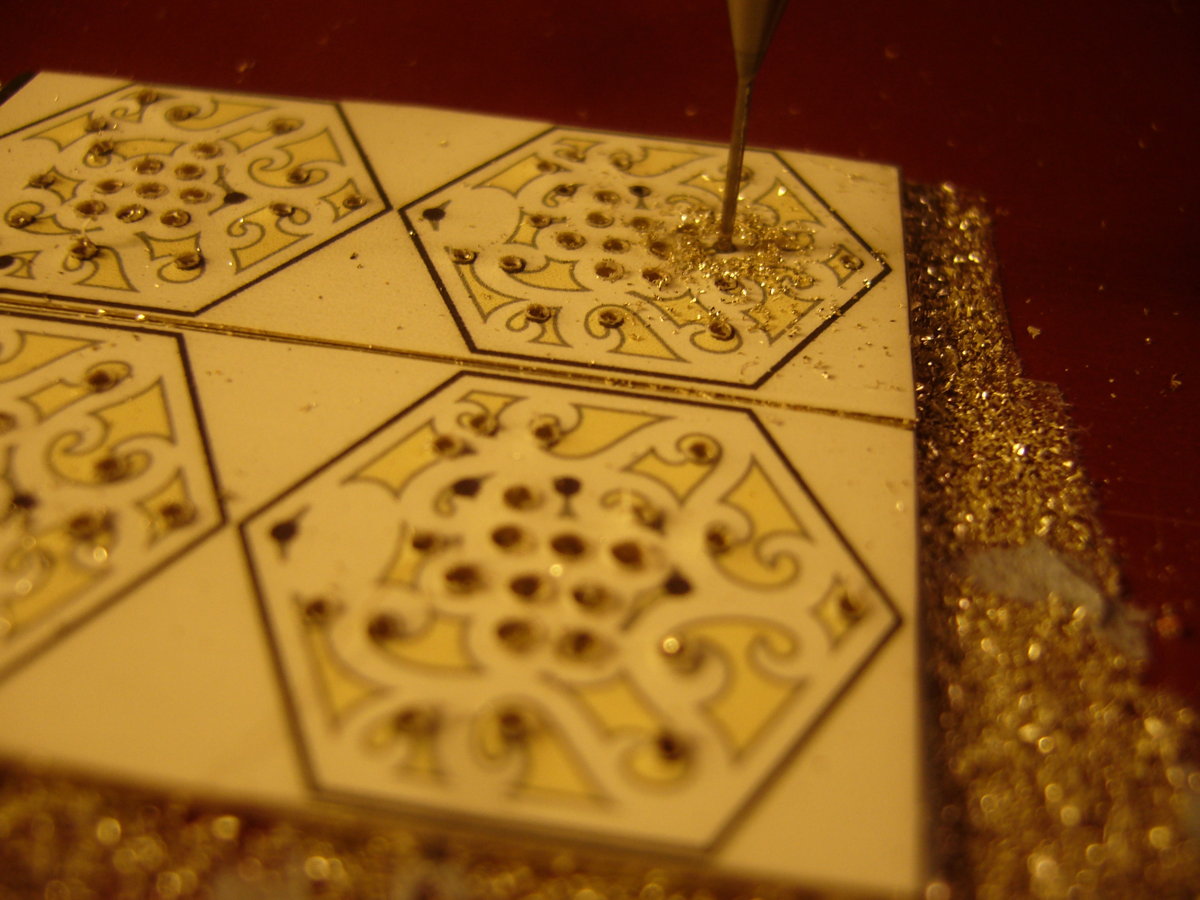
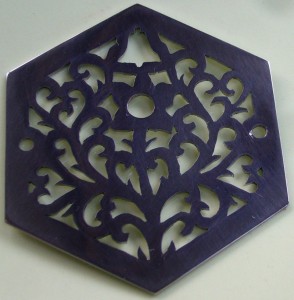
I cut the end by hand with a jeweller’s piercing saw, following a paper template glued to a piece of 1mm stainless steel. I used stainless because the bell push needs to be weather resistant – metal concertina ends are more commonly made of nickel-silver AKA German silver, which is actually a type of brass and is much easier to cut, though it would quickly tarnish outdoors. The biggest mistake I made was putting wax polish on the paper – I thought it would lubricate the saw blade and save me having to keep manually waxing the blade. Bad idea. The sawing generated a very fine black dust which stuck to the waxy paper and smudged it so badly that eventually I couldn’t see the lines clearly (hence the mistake mentioned above, caused by carrying on cutting where I thought there was supposed to be a line). After that mistake I printed out and glued a new template on top of the smudged one – very tricky to get the two perfectly registered – but then I had lots of problems with the bottom, waxy layer coming unstuck from the metal when I was cutting the points of the scrolls, hence why many of the points are slightly misshapen.
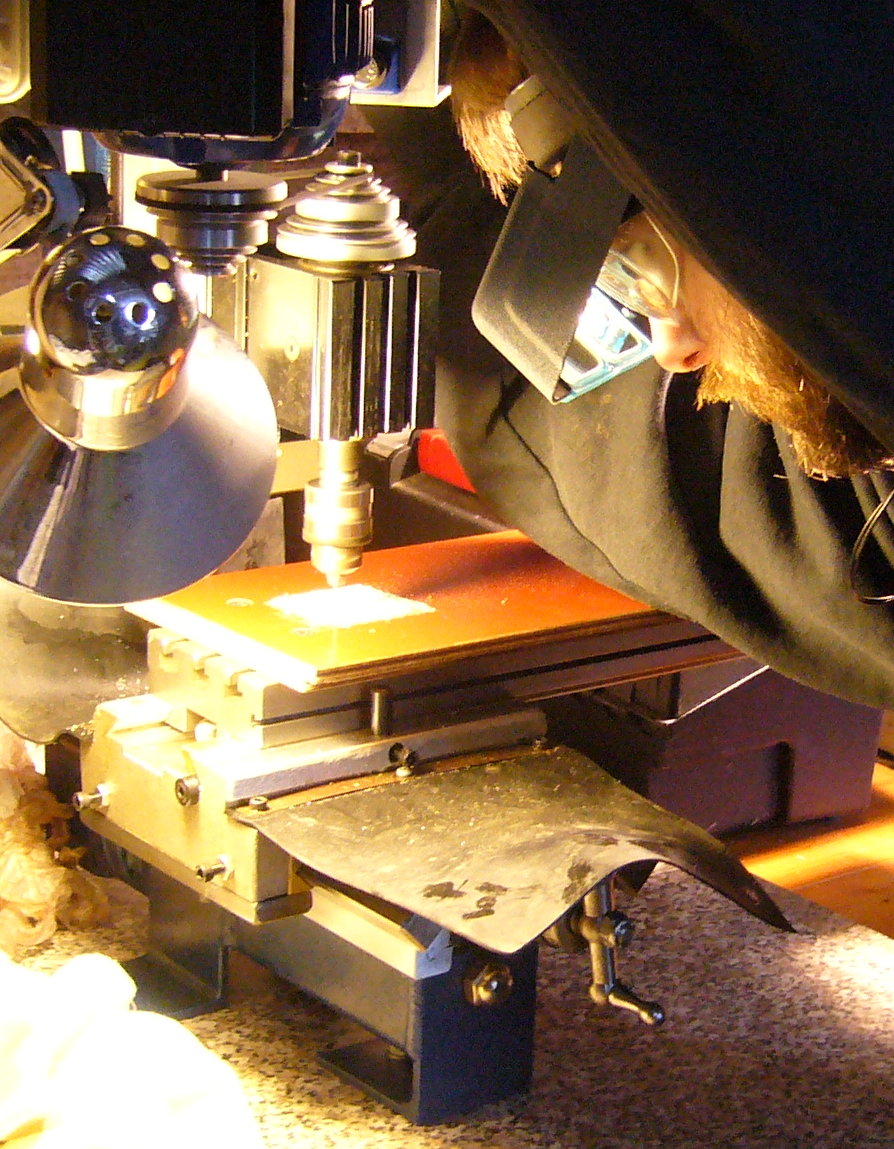
Another problem I ran into was blunting and breaking 1mm drill bits because I centre-punched where I wanted the holes to go, which work-hardened the stainless enough to cause my HSS drill bits to rub and go blunt instead of cutting. I switched to solid carbide bits (actually re-sharpened PCB drilling bits from eBay, which are good and surprisingly cheap). They cut through the work-hardened stainless OK, but I broke several of them because they tend to snatch as they break through the back of the work. Carbide is so brittle and delicate that the bits just instantly snap when that happens. In hindsight a better solution might be: a. mark the drill points using a centre drill or a tri-cornered centre punch and a very light tap to avoid work hardening the material, b. drill on top of a sacrificial piece of brass or aluminium to reduce the likelihood of snatching on break-through. I could also try using good quality cobalt bits instead of carbide.
The final problem I encountered was that of blunting and breaking jeweller’s saw blades. I must have gone through two or three dozen of them. I’m talking about very fine blades here – the teeth are so small that you can barely see them with the naked eye. They need to be small so you can cut the tiny details and tight curves inside the piercings. I started out using a highly-regarded brand that I have had success with in the past when cutting silver and brass, but they turned out to be not hard enough for stainless – they tend to go dull in one or two strokes. I found another brand that stays usably sharp for a bit longer (perhaps two piercings), but it’s still extremely easy to snag the blade in the cut and snap them because they are so tiny and delicate. It’s also very hard to follow a line closely with a dull blade because it tends to want to drift off in one direction or the other depending on which side happens to be sharper. One trick I might try in future is cutting out the bulk of each piercing out with a thicker, more robust blade, then going back later and doing the inner points and other details with a fine blade.