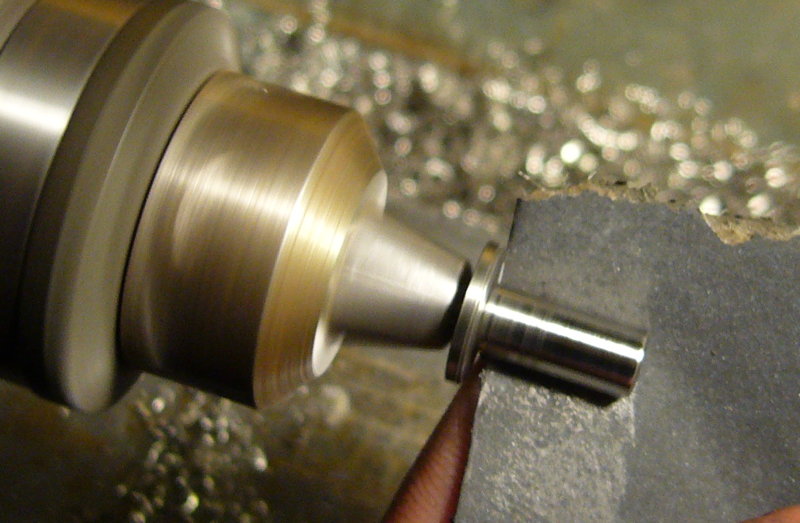
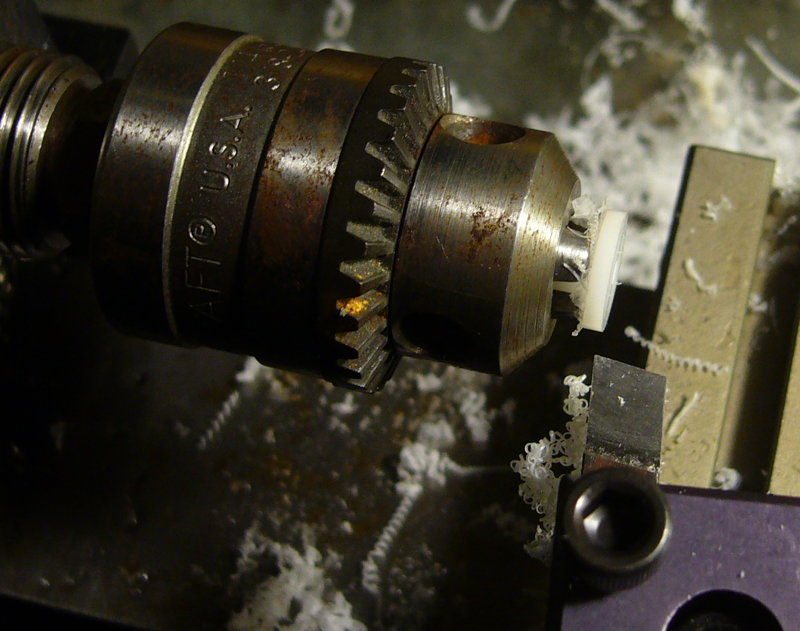
Work in progress

Turning Acetal

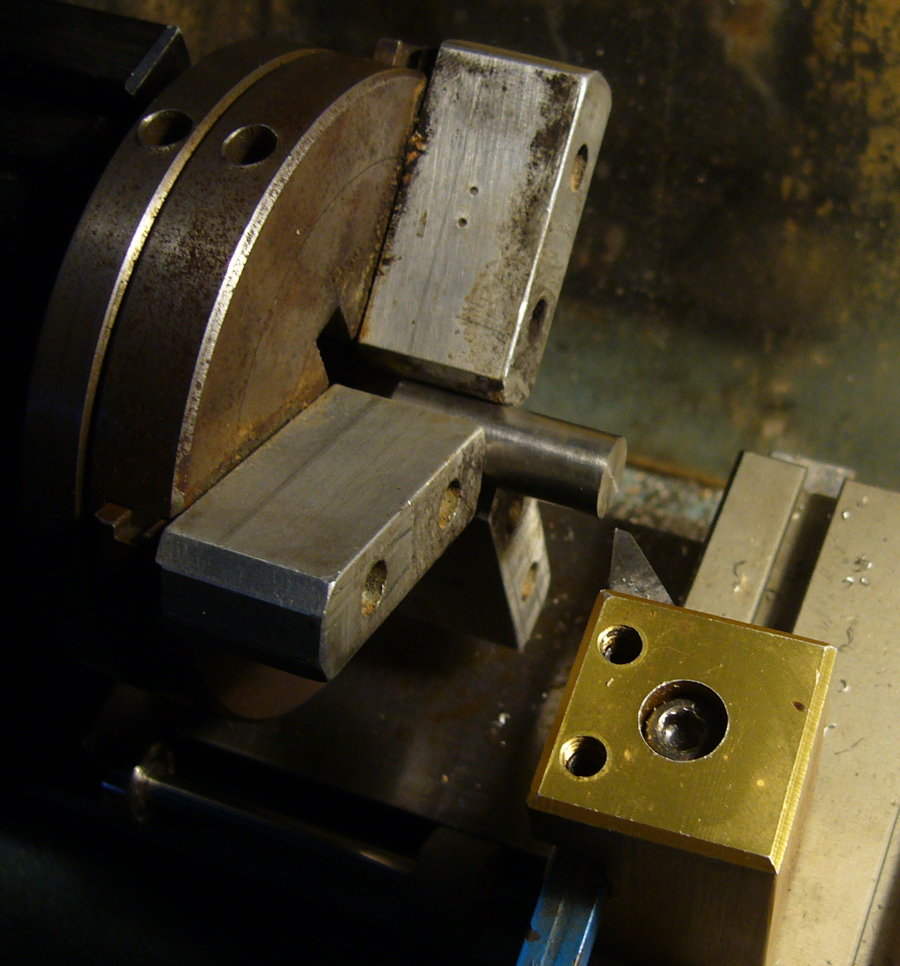
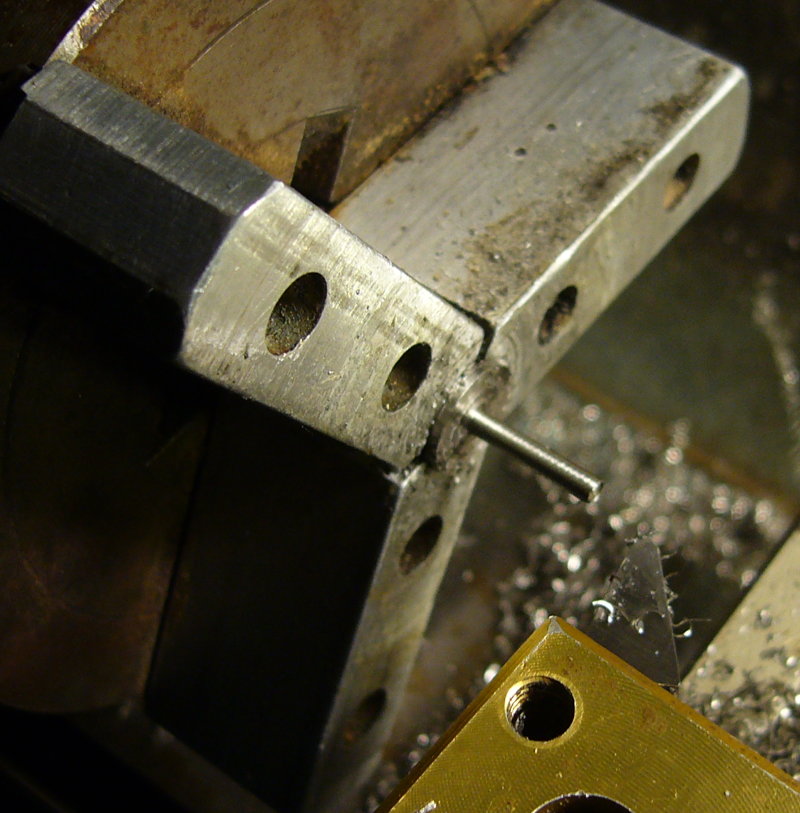
Tonight I had my first experience of turning acetal (often known by the trademarked name Delrin). It’s an engineering thermoplastic that is relatively expensive but is designed to machine well. I’ve turned other kinds of plastic in the past and usually struggled to get a good accurate smooth finish – they are usually soft and gummy and don’t cut cleanly. Acetal in comparison was a joy to use. With a sharp HSS tool and a high spindle speed, it cuts almost like it’s not there and leaves a lovely smooth finish straight off the tool. You can even take really fine cuts without it rubbing and melting. Lovely!

acetal1

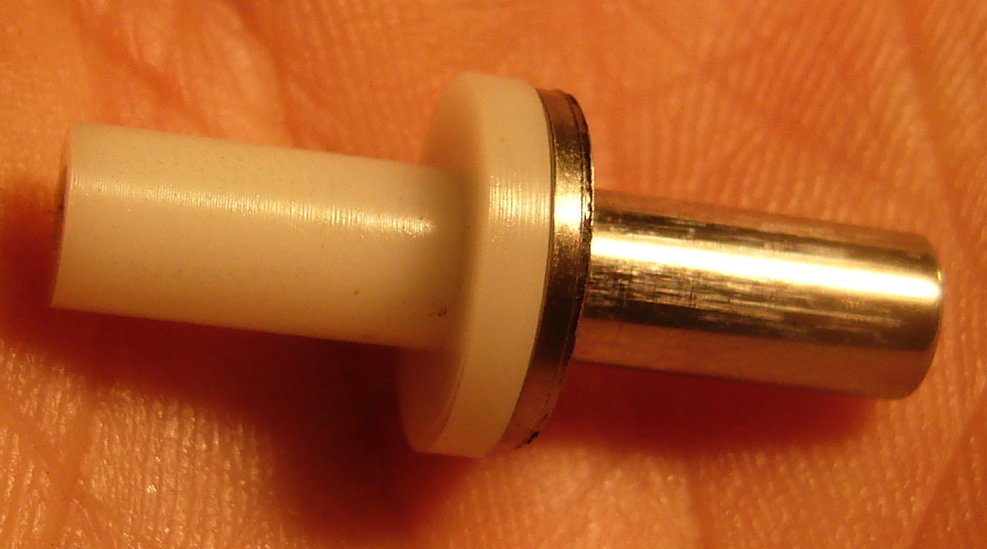
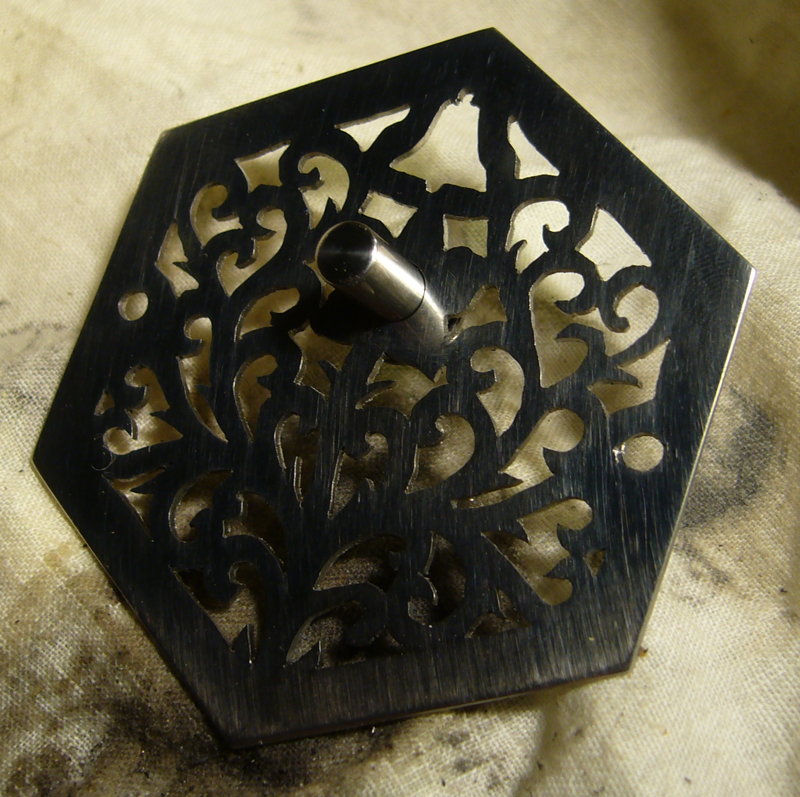
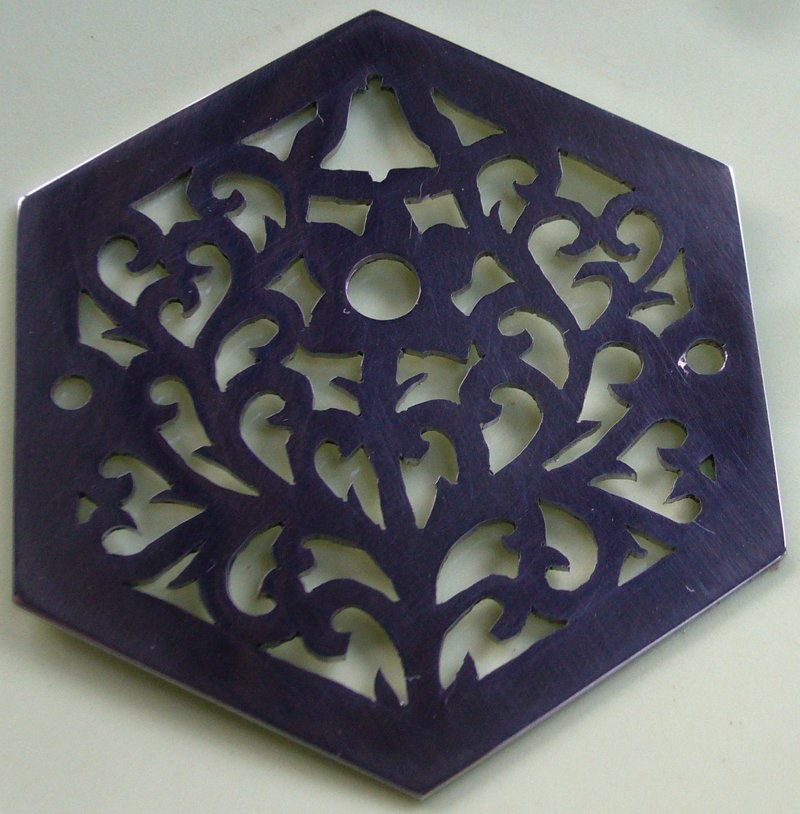
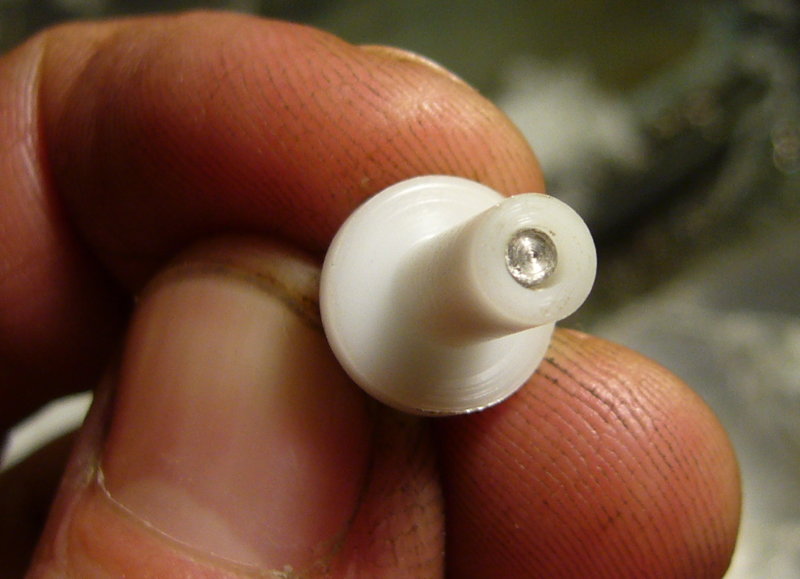
The part I was making was the sleeve for the bottom part of the bell push button. It will act as an electrical insulator to isolate the switch contacts from the metal part of the button. It also needs to slide smoothly into a hole bored in the wooden backing box underneath the contacts.

Because I have read that most types of glue don’t stick well to acetal, I designed the interface between the two parts of the component in a slightly unusual way. The stainless steel pin was slightly flared towards the end (actually caused by deflection from cutting forces when I turned it, but I expected this to happen and deliberately didn’t do anything to prevent or correct it). Also, the hole in the acetal was drilled 0.5mm larger than the diameter of the pin for roughly the bottom 90% of its length. The combination of the two produced a small tapered gap between the two which, when filled with epoxy resin, should act as a mechanical fixing that will prevent them separating even if the glue doesn’t bond to the plastic at all.

acetal2

The finished two-part button:

acetal3

Turning Acetal Read More »

Bellpush Button

Some photos of turning the button for the concertina bellpush this evening. The externally visible dimensions are copied from the metal buttons of my Lachenal English. Underneath the top it’s totally different because it won’t have a conventional lever action (so no need for a cross hole, but it does need a larger diameter lip to stop it coming too far out of the hole in the top). I turned it from 10mm stainless steel rod using a brazed TCT tool bit on my manual Taig lathe.


button1

button2

button3

button4

button5

Bellpush Button Read More »

Captive Nut Plates

One of my intentions for this blog is to document techniques that I learn don’t work as well as those that do. Here’s one of my ideas that didn’t go as planned.

I decided to use a pair of M2.5 stainless screws for the end bolts of the bell push (I bought them with slotted cheese heads, then re-shaped them a little and polished them in the lathe). M2.5 was the closest modern metric equivalent to the size of the end bolts on my antique Lachenal.

This meant I needed to make a pair of little metal captive nut plates to screw to the wooden back box with an M2.5 threaded hole in each one. Unfortunately I don’t have any M2.5 taps (M2 and M3 but not M2.5) to thread the hole with, so I thought I would instead try silver-soldering commercially made square stainless steel nuts onto thin brass plates.

Bad idea. The solder wicked into the threads of the nuts, pulled them out of position due to capillary action, and generally made a bit of a mess. I could probably clean the solder out of the nuts – if I had an M2.5 tap. But if I have to buy a tap anyway then I might as well buy a full set of them and then I can just make one-piece nut plates from thicker brass and not have to mess about with soldering and cleaning the flux and oxide off afterwards.

failed_nut_plates

Captive Nut Plates Read More »