Tools

Belgian Blue Whetstone

I like to sharpen my cutting tools, particularly the ones I use for wood carving. Actually that’s not entirely accurate; I prefer to carve with tools that are extremely sharp, which meant I had to learn how to sharpen them. I also often sharpen cooking knives, axes, chisels, hand plane irons, scissors, and for the concertina work I’ll need to be able to put a really good edge on leather skiving knives and possibly gravers.

Until now what I have tended to do is to sharpen tools on a fine India oilstone, which leaves a sharp but slightly rough edge, and then hone/polish them using a rotary electric polishing machine. That does sort of work, but because the wheel is flexible it tends to round off the edge at a microscopic level, dulling it slightly in the process. I recently went looking for a better solution and, after a lot of research, decided I liked the sound of the Belgian Blue whetstone. A letter was written to Santa Claus my parents, and as a result I found one in my Christmas stocking.

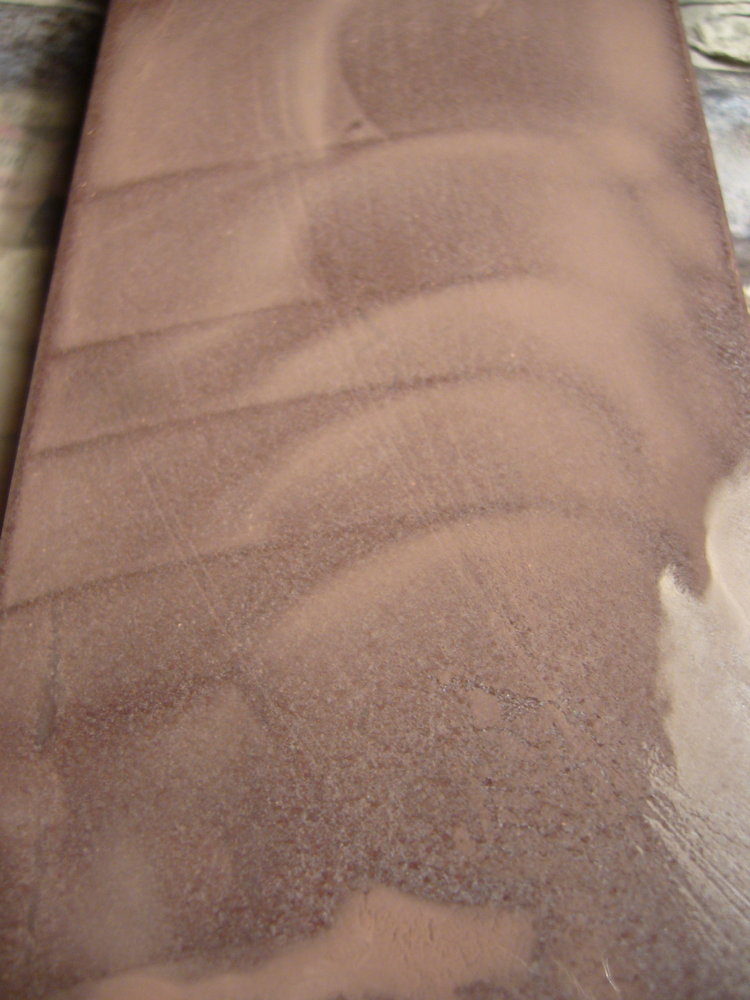
The Belgian Blue is a natural abrasive stone that is similar to, and found right next to, the famous Ardennes Coticule. It is less aggressive than the coticule, but it apparently produces practically the same finish and because it is much more abundant and found in larger pieces it is merely quite expensive rather than astonishingly expensive. It is a pretty purplish slate with red mottling:

bluestone1


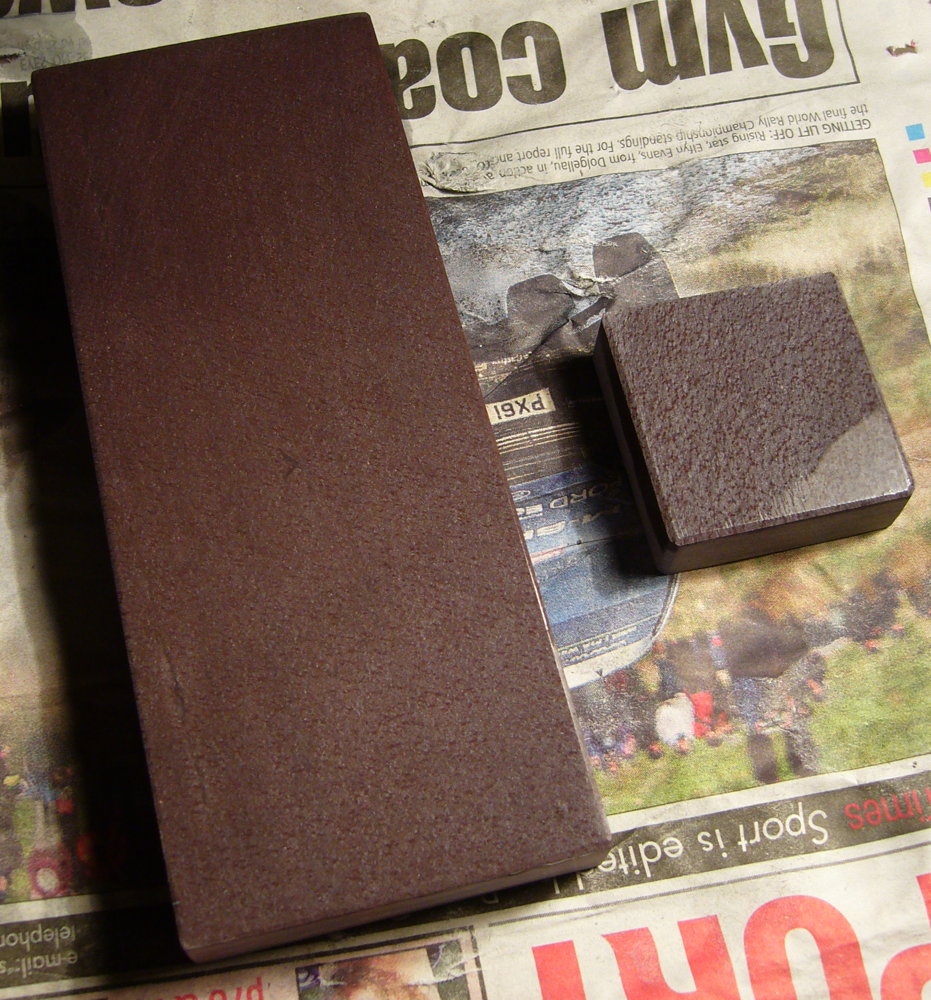
You can’t really see it in the photo, but it glitters subtly. This is because embedded throughout the slate are millions of microscopic garnets, which are very hard crystals. You can simply wet the surface of the stone and rub your knife on it in the usual way and it will slowly polish the metal, though it is much more effective if you first rub the smaller stone (known as a slurry stone) over the surface, which generates a pinkish abrasive slurry:

bluestone2

The Belgian Blue isn’t aggressive enough to sharpen a blunt edge in a reasonable timescale. You need something coarser to do that. What it’s good for is going from a rough but sharp edge to the next level: a smooth, shaving-sharp edge:bluestone3
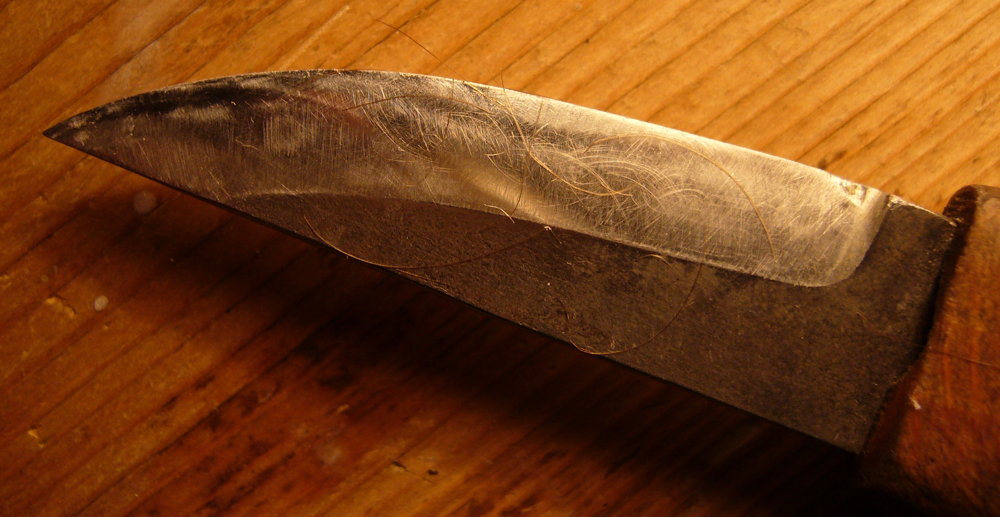
It should also be good for touching up edges that have gone a bit dull (too much to fix by simply stropping on leather) but aren’t damaged or blunt enough to need a lot of metal removing with a coarser stone.


Belgian Blue Whetstone Read More »

Pretty Punches

My best friend, Juliet, gave me a set of New Old Stock hand-cut 1/8″ number punches for Christmas. I plan to use them to stamp the serial numbers in all the instruments I make.
prettypunches1

The astute among you may have noticed that there is no number 9 punch – that is because you are intended to use an upside-down number 6 instead! The bottom line in the photo was my first attempt, punching into soft aluminium sheet on a block of wood; the metal deformed quite a lot so I tried again on an anvil and got much better definition.

Although it is possible to buy good quality brand new number punches, I believe they are now all cut by CNC machines and they look quite different. Being something of a traditionalist, I like the fact that they were hand-made, and it’s great that she managed to find a set in perfect un-worn condition. I’ve done a bit of research into how this kind of punch was made because at some point I want to cut a punch of my maker’s mark.

prettypunches2Taking the above No. 4 as an example. First they would have annealed a small piece of high carbon tool steel bar and filed the end into a triangular pyramid shape, then hardened and tempered it and polished it smooth. This tool is known as a counterpunch and could be re-used many times (perhaps occasionally dressing it on a fine stone if the corners get a bit rounded). Sometimes one counterpunch could be used for more than one character (e.g. ‘P’ and ‘R’).

Secondly they would forge another, larger, piece of tool steel into the shape of a punch blank and anneal it, then they would file and polish the end flat, square and smooth. They may have transferred the design onto it at this point, or more likely a skilled punch-maker would have just worked by eye.

Thirdly they would use the aforementioned counterpunch to punch the counter(!), which is the enclosed triangular space.

Fourthly they would use a small triangular file to cut away the metal around the outside of the lines, leaving a very narrow rounded top edge. The angle of taper is fairly important to get right so the tool cuts sharply-defined characters but doesn’t wear out quickly. On my punches they seem to have used a coarse file to remove most of the metal at a steep angle, then switched to a very fine file at a blunter angle in the last couple of mm.

Fifthly they would coat the point of the tool in something to protect it from firescale and then they would harden and temper it. They would use differential tempering to get a hard tip and a tough hammer-resistant shaft by heating the blunt end and watching the colours run up the shaft, then quenching it when the right colour reaches the point. I’ve seen a film of somebody using a pot of molten lead to do this in a very controllable way, though of course a skilled toolmaker can produce just as good results with a coal forge.


Pretty Punches Read More »

Manual Mill

It took more than a day’s work to dismantle, clean, reassemble and adjust the Taig mill. Funny how sometimes you don’t realise just how filthy a thing is until you start scrubbing the layers of grime off it (in this case, dried oil and grease with swarf and dust embedded in it):

mill1

Shiny clean parts ready for reassembly:

mill2

I also replaced the leadscrew bearings in the Y axis because they had gone rather lumpy. I’ll probably do the other two axes as well soon.

mill3

Reassembled mill, bolted to an offcut of kitchen worktop and ready to start a precision drilling job.

mill4

I need to drill about 120 holes, precisely located by eye (under magnification), 1mm dia or less in 1.5mm thick sterling silver. Annoyingly I broke two expensive Swiss 0.7mm HSS bits within the first few holes (not entirely sure why – it doesn’t help that you have no feel at all for how much torque you are applying). I am now using a 0.9mm carbide PCB drilling bit (which is bigger than I would prefer), and have successfully made it through about 40 holes by peck drilling and feeding very slowly indeed. I’m probably spending about a minute on each hole. CNC would certainly make the job easier, even if I was only using it to manually jog to each hole location before running a few lines of code to automatically drill the hole at a consistent feed rate.

Manual Mill Read More »

Mucky Mill

I’m back at my parents’ house for Christmas, and while I’m here I’m hoping to make a start on converting my Taig benchtop milling machine to CNC. It has been stored under a sheet of plastic in a damp shed since I moved out of my previous workshop about five years ago (crikey, has it really been that long?). Fortunately I smothered everything in oil at the time, so it hasn’t suffered too badly from rust – the worst bits are the handles, which I’ll be replacing with motors anyway. The oil has gone sticky and attracted a lot of dirt though, so my first task is going to be to completely dismantle, clean, oil, remantle (is that a word? if not, why not?), and adjust everything to run smoothly and accurately again. I have a little job coming up where a manual precision drilling machine would be very useful so I’m planning to do the first stage quite soon.

mucky_millThe thing on the spindle is a first generation HighTechSystems rapid tool changer. Unfortunately it’s now discontinued, though I already have a decent selection of holders for it and I think once I have converted my Taig lathe to CNC it shouldn’t be difficult to machine bespoke ones to hold different sizes of tool. The idea is you have a specific holder for each tool used in a job. You set up in advance a software table that tells the machine controller exactly how far each tool sticks out of its holder, so you don’t have to waste time re-zeroing it each time you change tools (which is a manual process but only takes a couple of seconds).


Mucky Mill Read More »