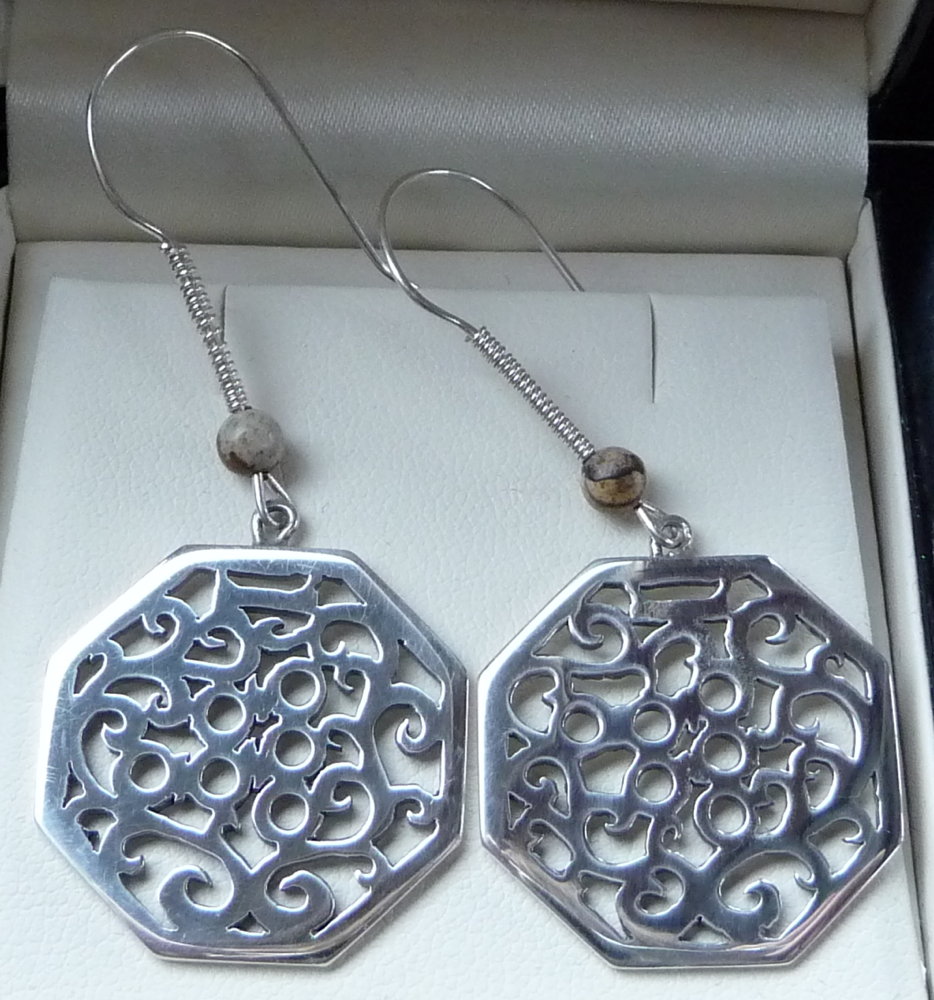
I made a new design of silver concertina earrings; an octagonal 12-button English layout, slightly larger than the previous two at 25mm across flats. The reason I reduced the number of buttons and also increased the overall size a little was so that I could fit in a more complex fretwork design than on my earlier hexagonal English design:
(Don’t try to make sense of the layout from the picture; I accidentally posed them the wrong way round.)
The pair in the picture was a birthday present for my mother. If anyone wants to commission a pair, I’ll do them for £75 + postage. Drop me an email via the contact address to reserve some time in my schedule, the sooner the better because I’m very busy with other projects.
As you might have spotted from the video in my previous post, this is the first design where I drilled the pilot and button holes using CNC. I still cut all the piercings by hand with a very fine jeweller’s saw because the details are extremely small with lots of sharp corners. Obviously all the soldering, polishing, and making the ear-wires are done by hand too.
A little over ten years ago I bought a manual Taig milling machine with the intention of converting it to CNC. For reasons too boring to go into here, the conversion got postponed indefinitely. It remained in its manual configuration and saw little use (probably a couple of hours a year, mostly as a glorified drill press with XY table).
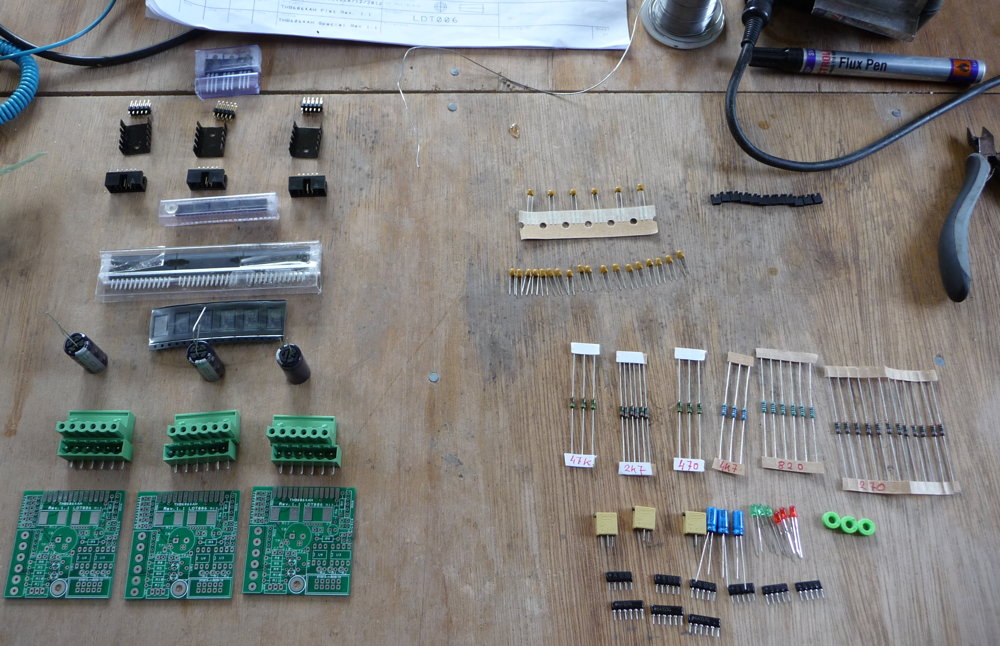
About a year ago I finally started collecting parts to do the conversion: Chinese stepper motors, switch mode power supply, driver boards and an Arduino Uno clone via eBay, and motor mounting kits from Lester Caine at Model Engineer’s Digital Workshop.
I was happy with most of the components, except for the Chinese driver boards which turned out to be a hopeless waste of money (basically, a design flaw means they only ever run at 30% power level, and poor quality components mean they would probably quickly burn out if you hacked them to work at full power). If money was no object I would have bought Gecko drivers, but they are very pricey here in the UK so I searched for an alternative and found these THB6064AH kits. I went for the ‘special’ model because it’s easier to mount to a heatsink. It took me a couple of hours to assemble three of them, and I’m very pleased with the design and performance of them.
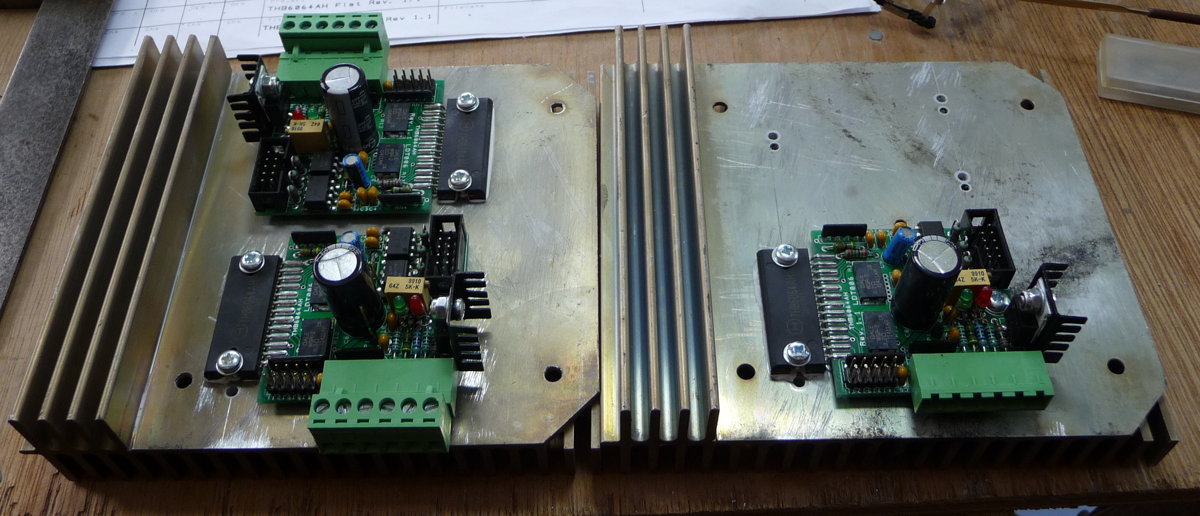
I mounted them on a couple of large P3 Xeon heatsinks salvaged from old servers. I’ve left space for a fourth driver board in case I ever decide to add a rotary axis for gearcutting or something. They barely get lukewarm.
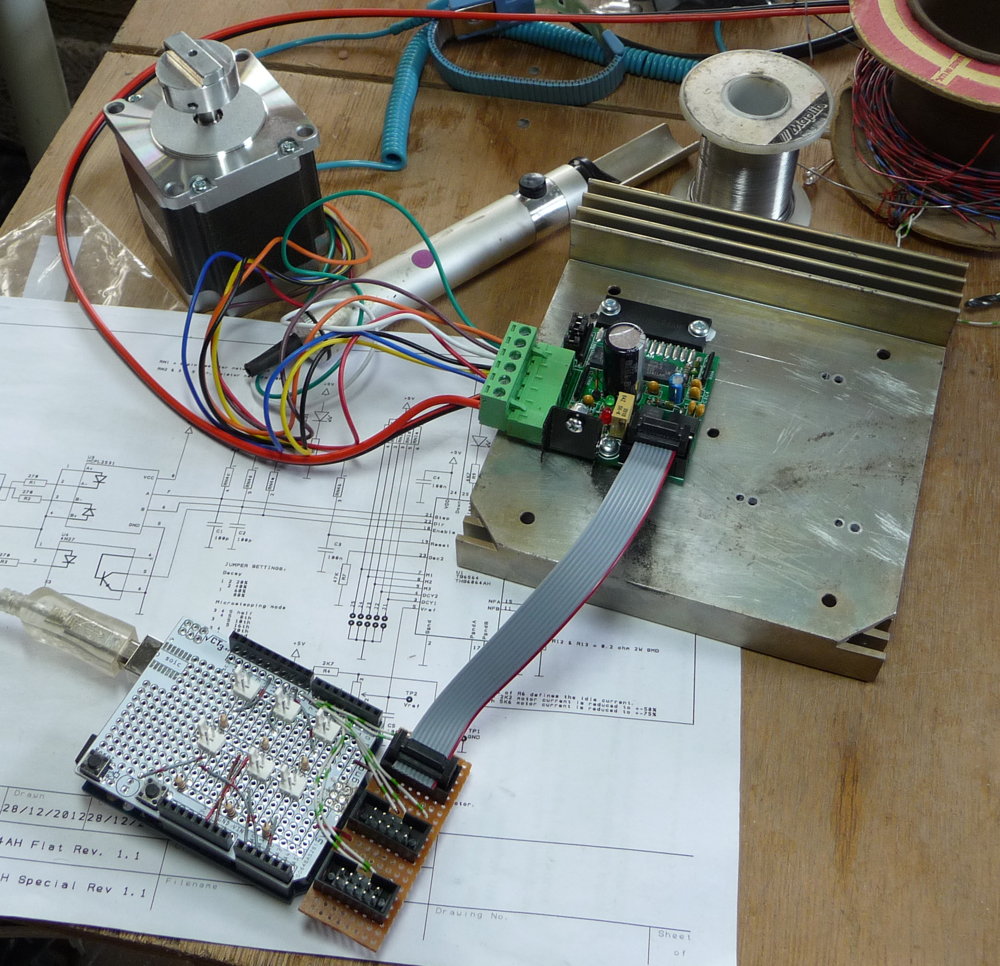
The stepper motor controller is a cheap Arduino Uno clone running grbl, which interprets simple g-code and generates step and direction pulses for up to three simultaneous axes. I needed a way to connect it up to the drivers and various switches so I knocked something up using a (poorly designed) prototyping shield and a bit of stripboard:
This is currently working fine for interfacing to the drivers, but I think I need to add opto-isolation to the inputs because I’m currently getting an occasional spurious e-stop when I switch my spindle on or off. Luckily it hasn’t happened at any other time and the program execution is always paused when I start/stop the motor, so it hasn’t caused an issue yet. It’s more likely to cause a problem once I get around to fitting limit switches. At some point I’ll probably switch to using an Arduino Nano soldered to a custom PCB with full isolation.
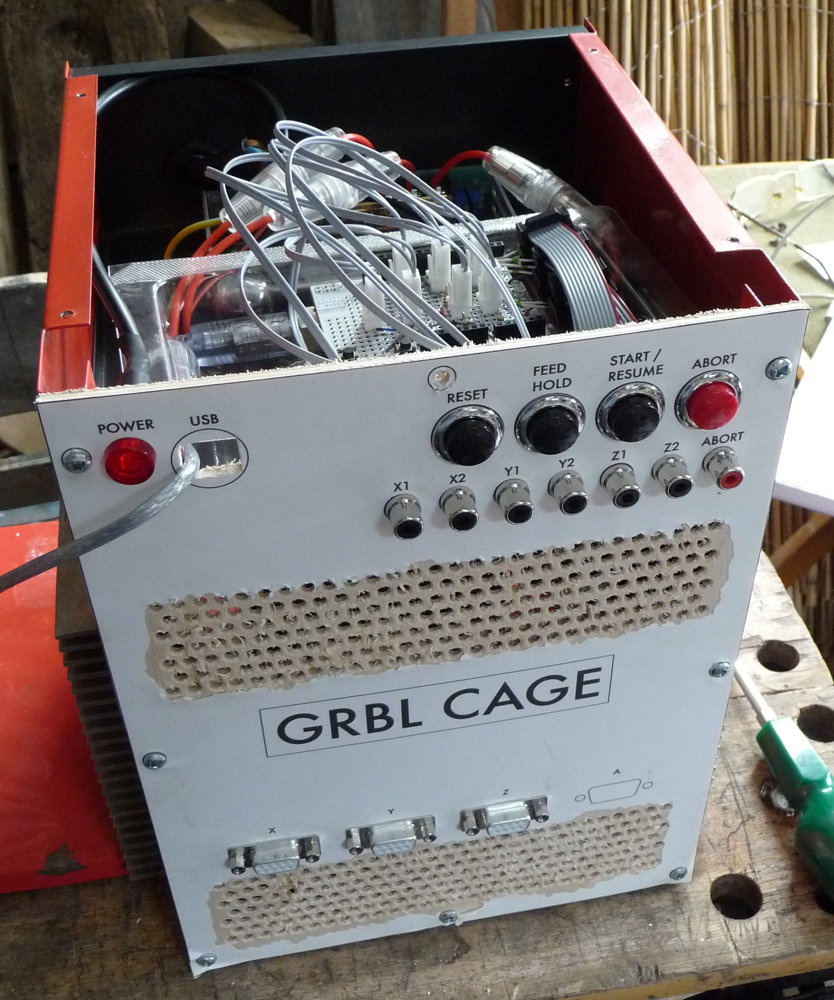
I mounted the power supply, drivers and Arduino inside a steel box that started out as a dead fan heater (sorry for the punny name):
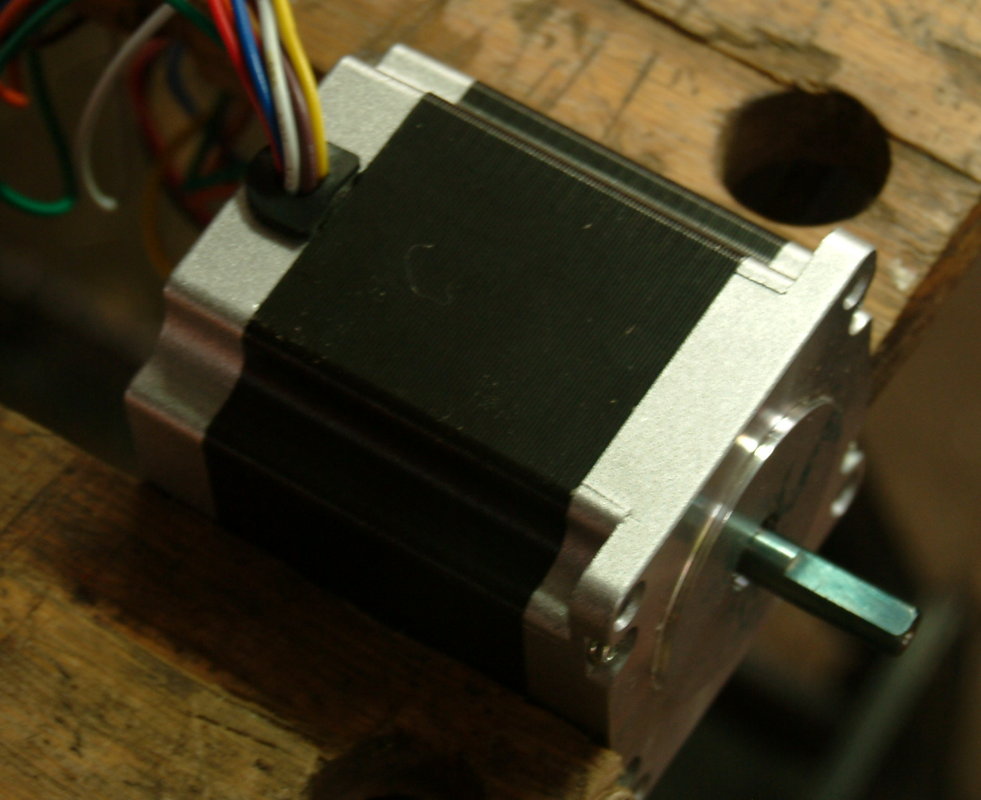
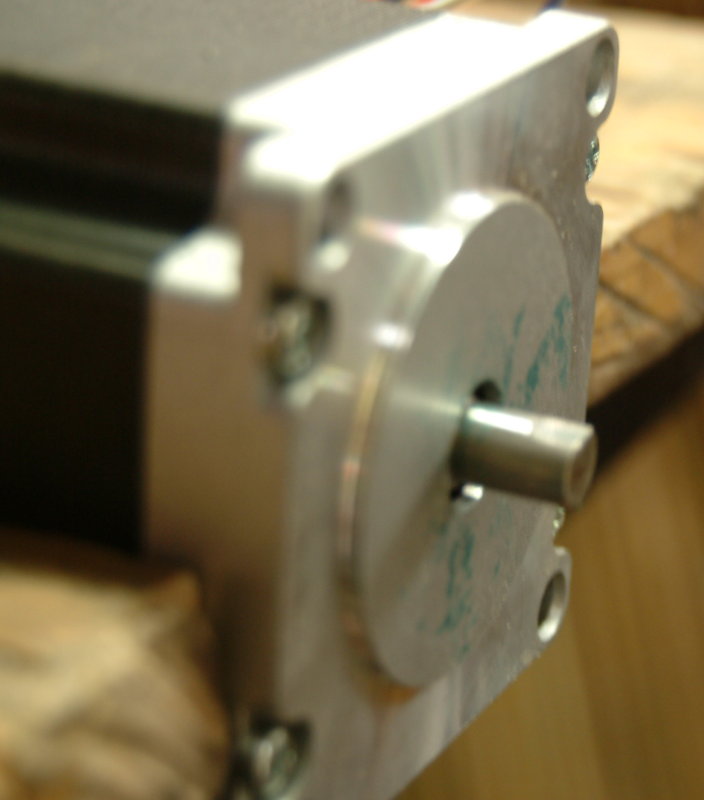
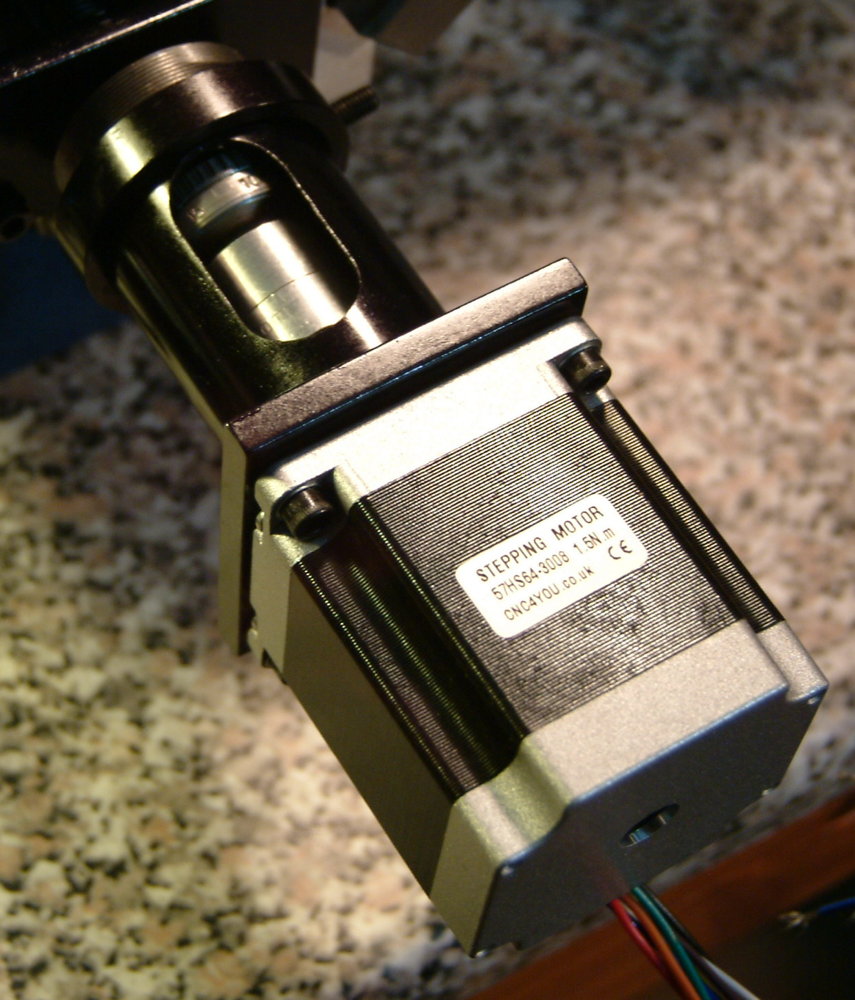
I’ve never liked the sound of the standard Taig stepper motor couplers so I decided to go with the MEDW Oldham coupler kit instead. When I took off the handles to install them, I soon realised it was going to take a bit more work than I was expecting. First I had to carefully shorten the stepper motor shafts so the couplers fit as close as possible to the motor:
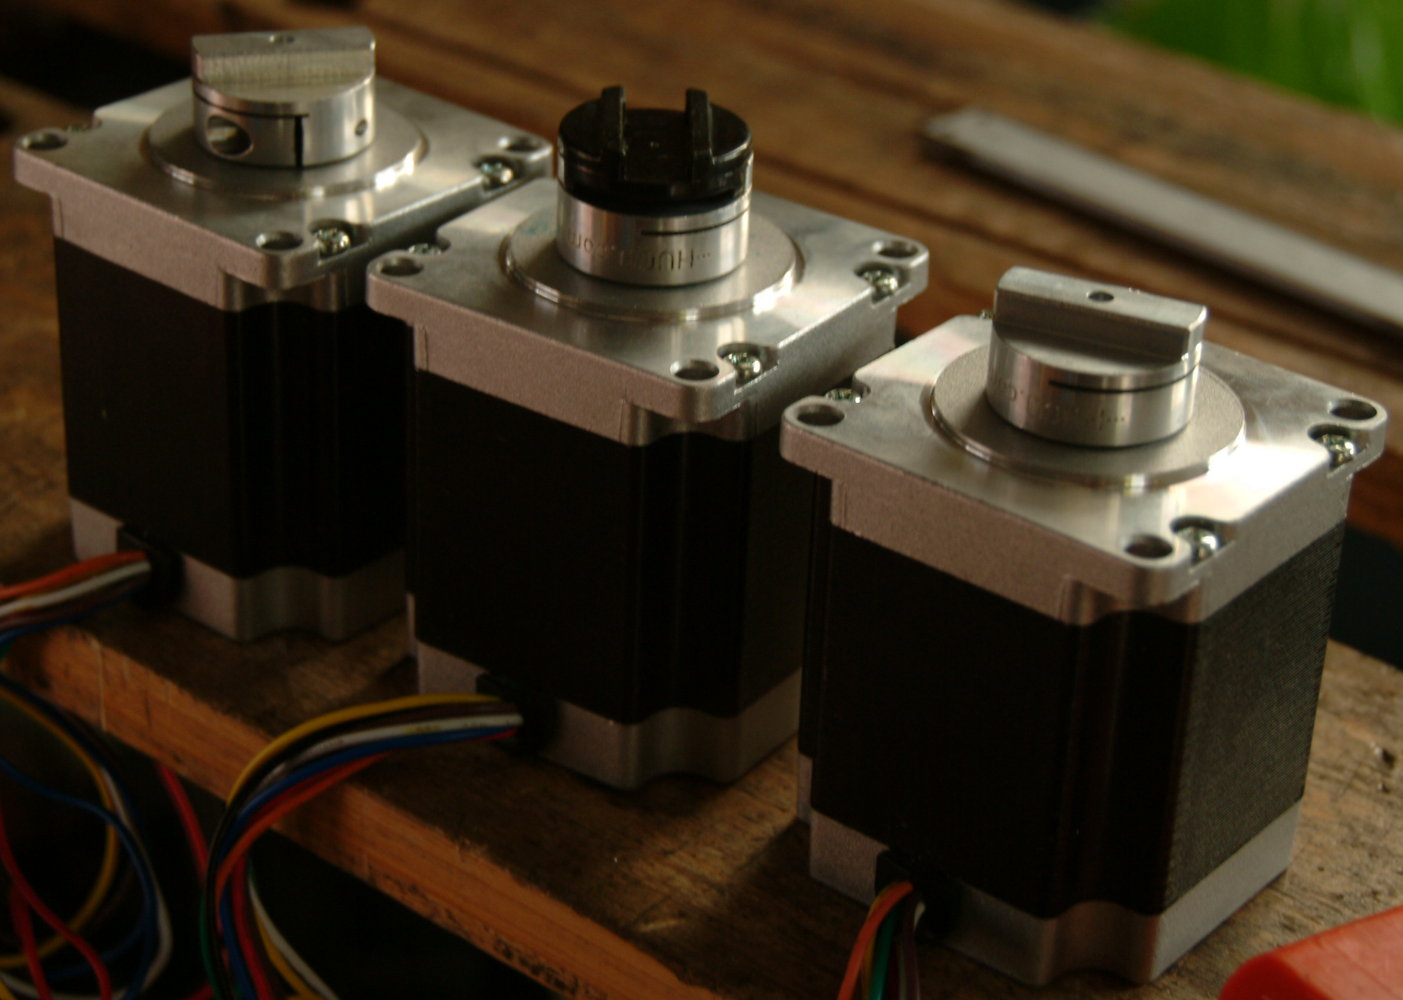
Then I had to make something to fill the space left between the nut and dial when you remove the ball handles (which you have to do because they won’t fit inside the coupler tubes). Theoretically I could have just sawn and filed the arms off the handles, but that seemed like a bodge too far for me, so I turned up some spacers from 1″ aluminium bar instead:
Installation and adjustment of the couplers was slightly fiddly, but I’m very happy with the results: no backlash and more than strong enough to handle the motor torque.
The most time-consuming piece of the project by far has been that I got side-tracked into writing my own user interface software called Handwheel. Turns out it’s a huge amount of work to implement a good CNC UI, but I’m pretty pleased with what I’ve ended up with. I’m going to release it as Open Source once I’ve cleaned up a few more rough edges and written some sort of user manual. More on that later.
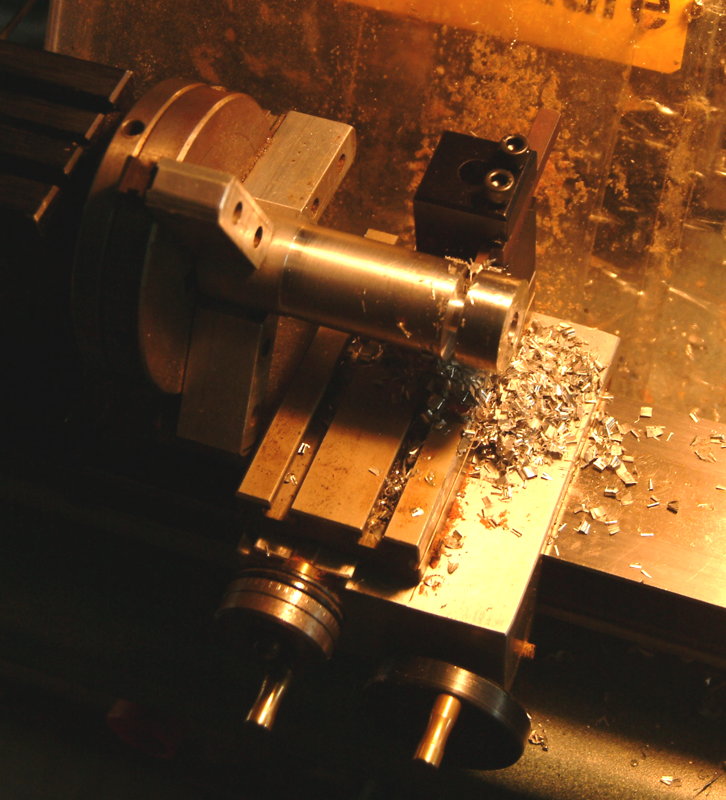
To finish off this rather long and rambling post, here is a video of the machine in action. This was slightly nerve-wracking for me, as it was the first time I’ve programmed a CNC machine, the first time I’ve used the mill to cut metal since the CNC conversion, and the first time I’ve used Handwheel on a real part. Just to up the stakes a little, the workpiece was £12 worth of sterling silver! Fortunately everything worked perfectly.
I made an eight-pointed star punch today for decorating an item of silver jewellery that I have been commissioned to make. Although it is not directly related to concertina-making, I thought it might make an interesting article for the blog anyway.
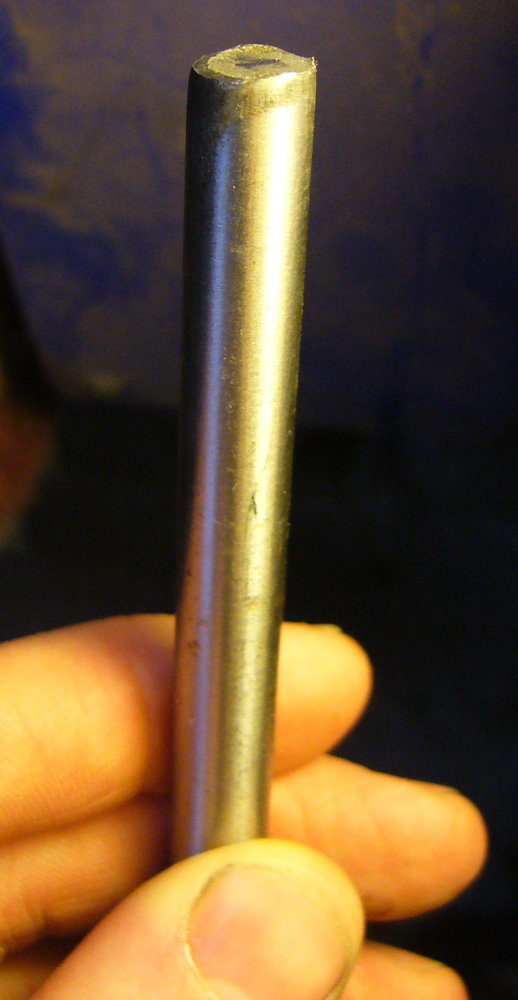
I made the punch from silver steel, which is a high-carbon tool steel with some chromium in it that comes as precisely-ground round bar stock in a range of standard diameters. It’s pre-annealed so it’s pretty easy to work with hand tools and machines before hardening. The bar I happened to have in stock was 3/8″ diameter.
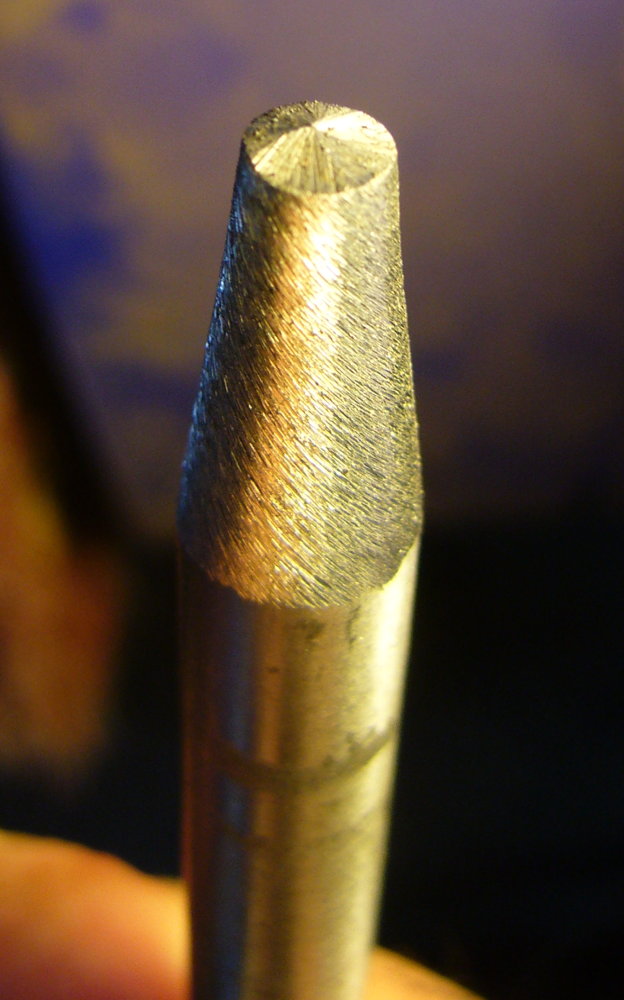
I started by grinding a double-angled cone on the end:
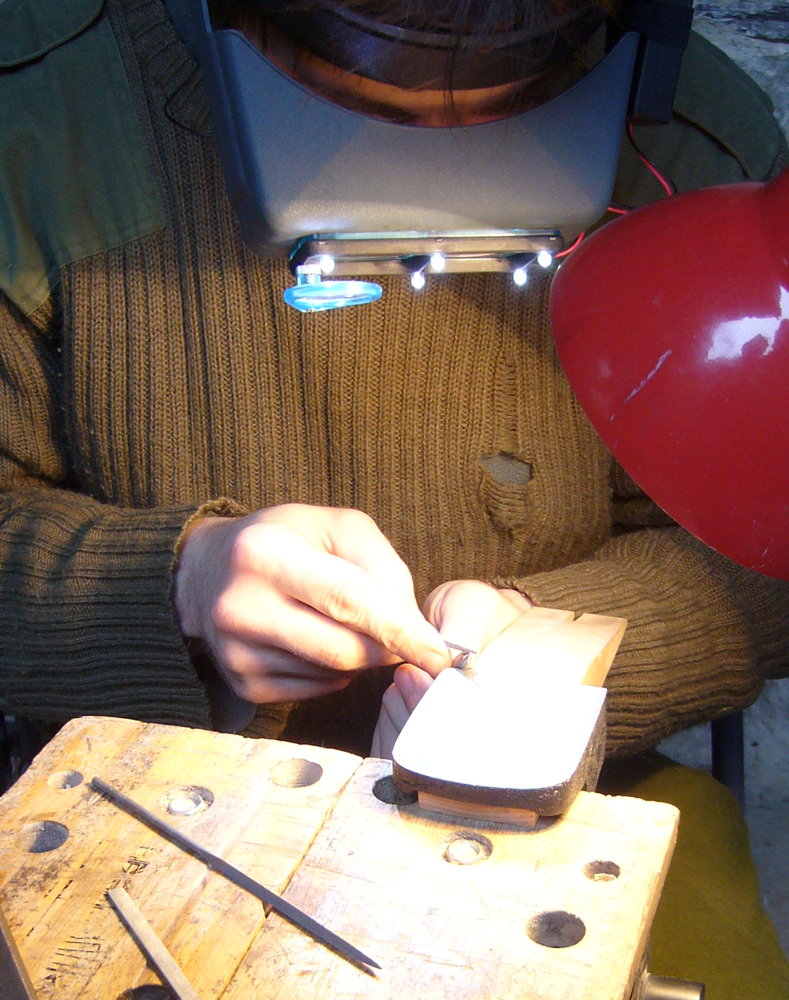
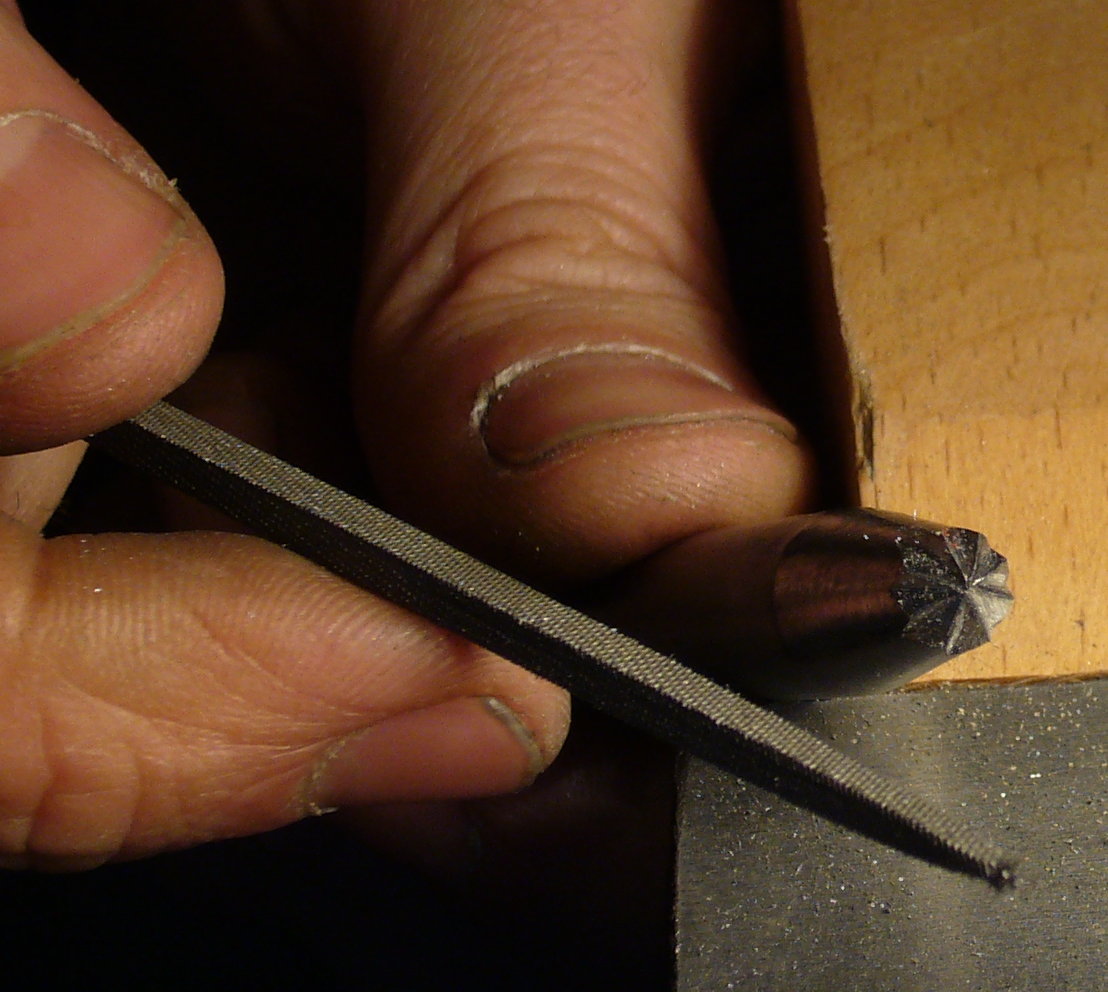
Then I filed the facets of the punch using square and triangular jewellers’ files under magnification and plenty of light, resting the punch in a corner of my bench peg.
I must admit this took me two attempts. The first time I completely messed up the relief angles (it produced a circle of eight triangles with no centre), so I had to file it back to a blank cone and start again!
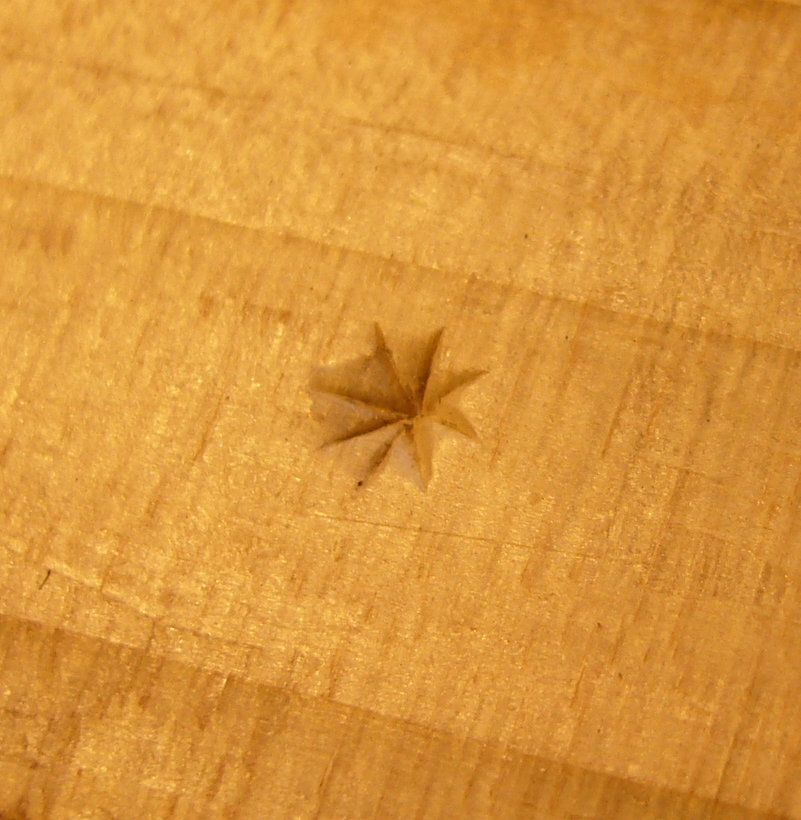
I lightly punched a piece of softwood to check how it looked prior to hardening:
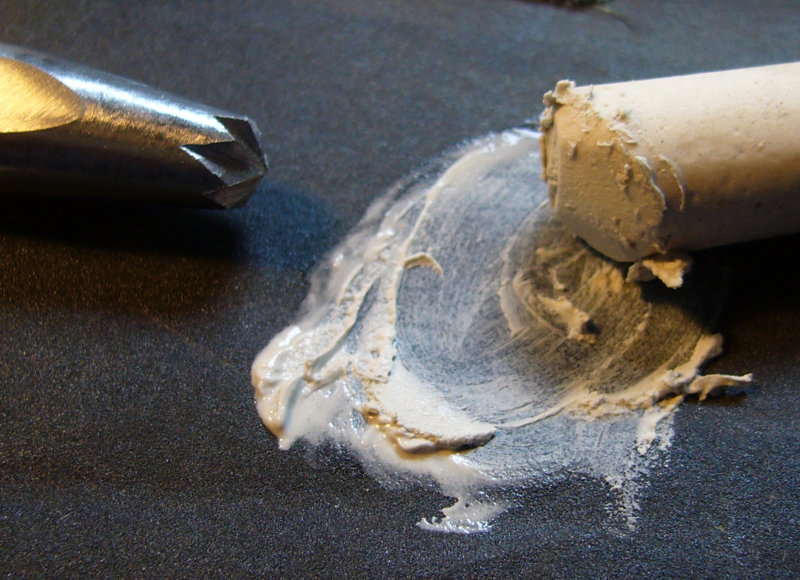
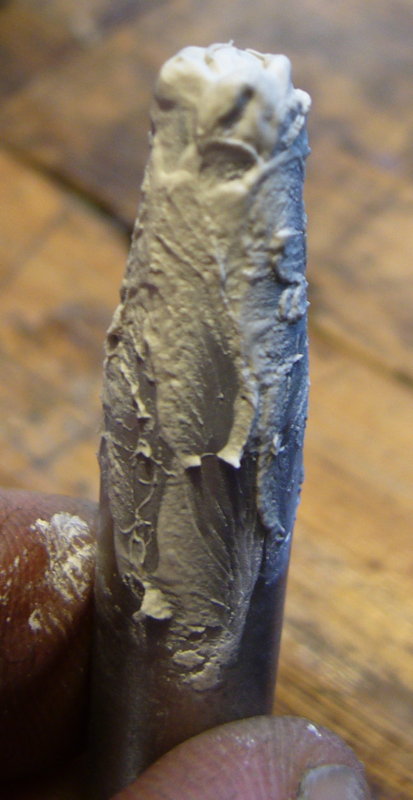
I didn’t want to have to try to grind firescale off the working end of the punch after hardening, so I coated it in a thick paste made from a stick of chalk mixed with a drop of water. The idea is that it prevents oxygen getting to the surface of the steel so it doesn’t corrode despite the extreme heat. My research on what substance to use for this purpose turned up a wide range of possibilities from specially-formulated industrial coatings through cockroach poison (boric acid) to something that sounded like a recipe for white bread. I had some chalk on hand and I saw it recommended in more than one place, so I thought it was worth a try.
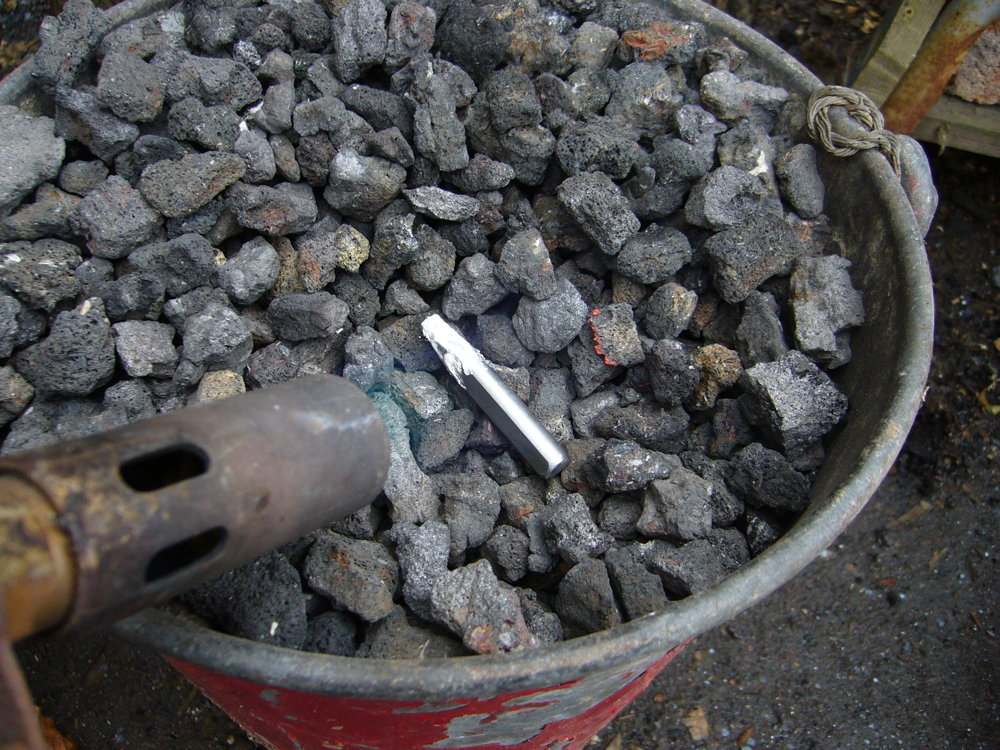
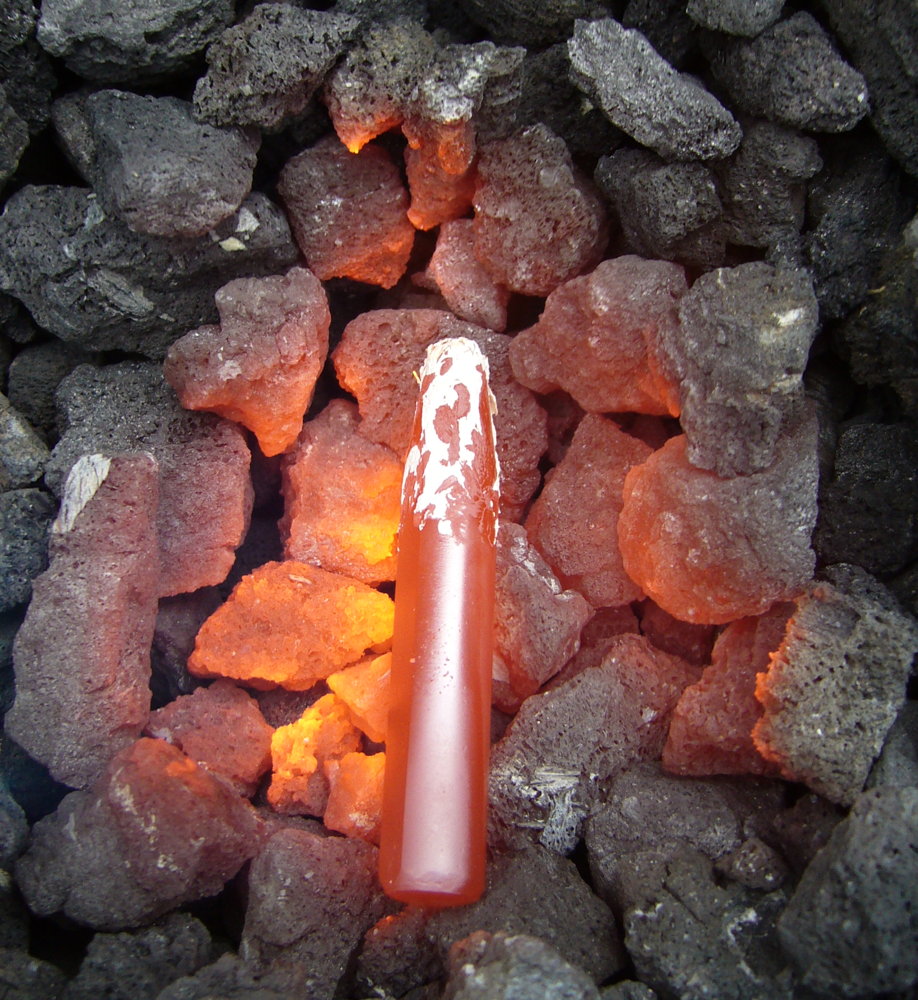
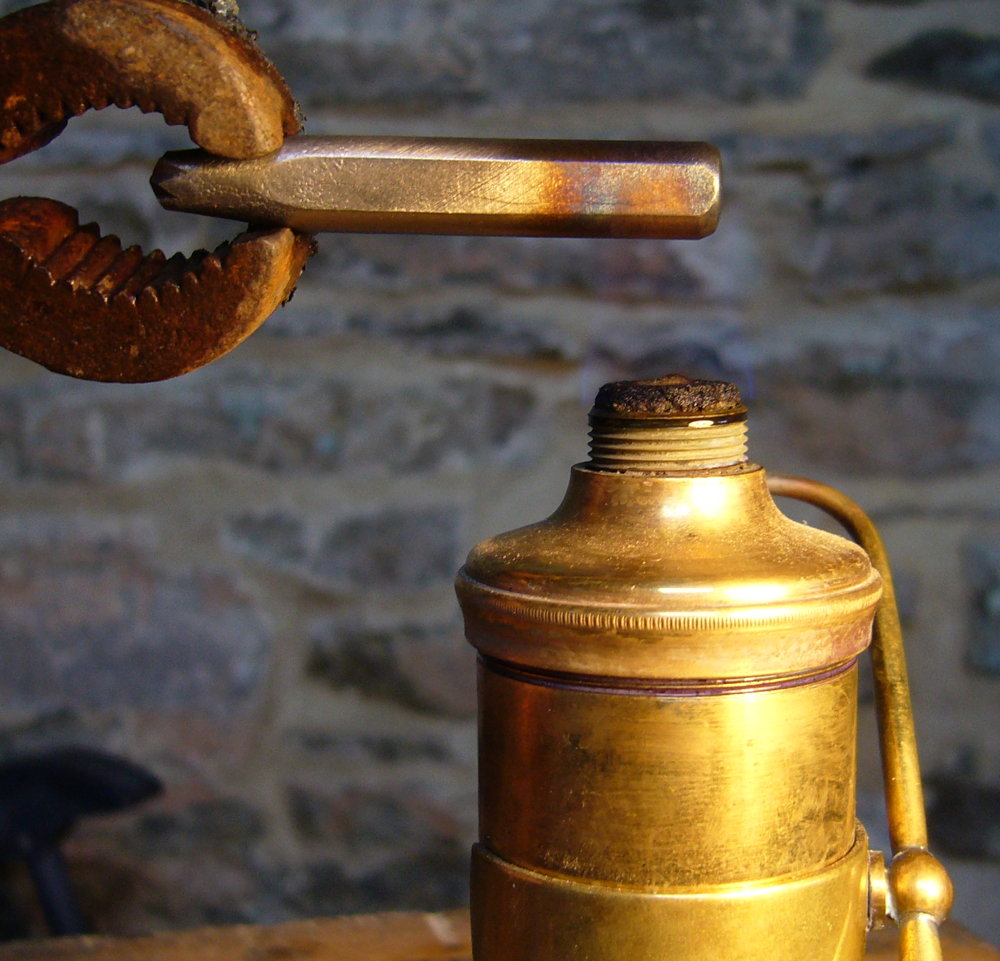
It wasn’t worth firing up the forge for such a small job, so I simply placed the punch in a (metal) bucket of dry coke and hit it with a propane torch. The coke quickly heats up and reflects heat back at the work.
Here’s where I made my second mistake. In the heat of the moment (literally) I forgot that you are supposed to quench the tool by lowering it gently into the water tip-first so as to minimise stress and risk of cracking. Instead I thought “must cool it as quickly as possible,” grabbed it with the tongs, and randomly dunked it into the bucket side-on. This resulted in a crack along the length of the shank, luckily not reaching all the way to either end.
I tempered it by heating the shank in a spirit flame until the straw colour reached the sharp end. This differential tempering makes the end you hit with a hammer much softer and tougher than the end that cuts into the work, which is a desirable quality in a punch.
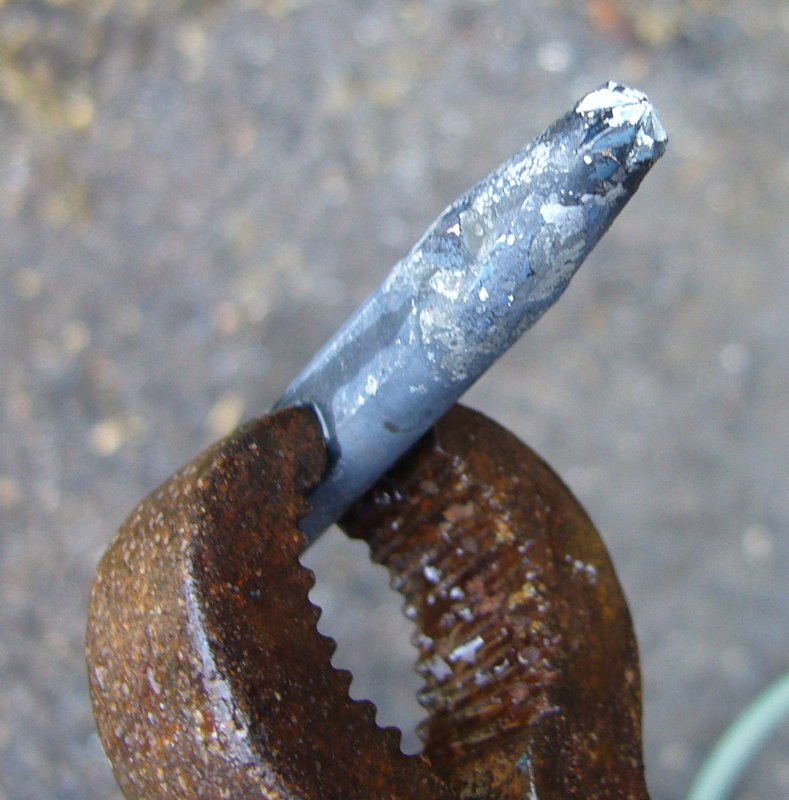
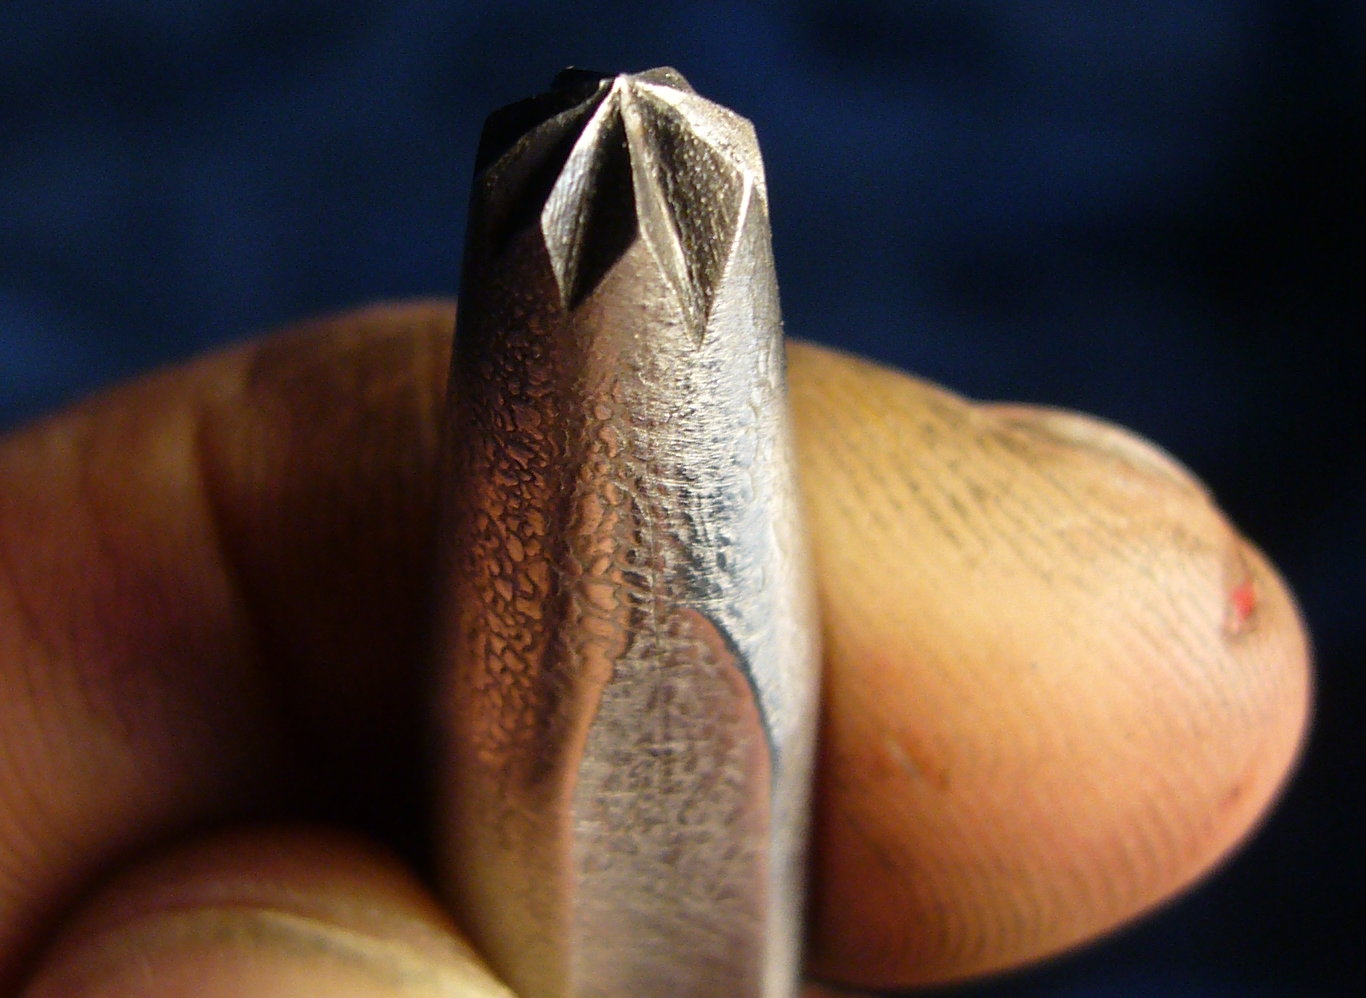
The finished punch. The anti-scale chalk paste did a reasonable job I think; all I did after hardening was to clean it off with a wire brush:
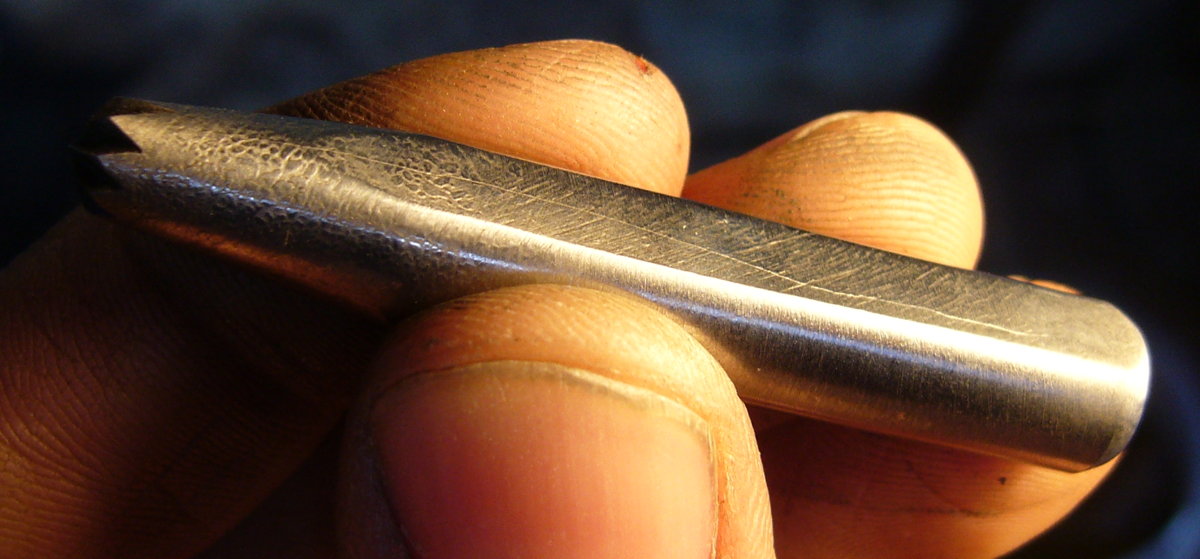
Here you can see the crack most of the way along the shank. The tool seems to be working OK regardless though:
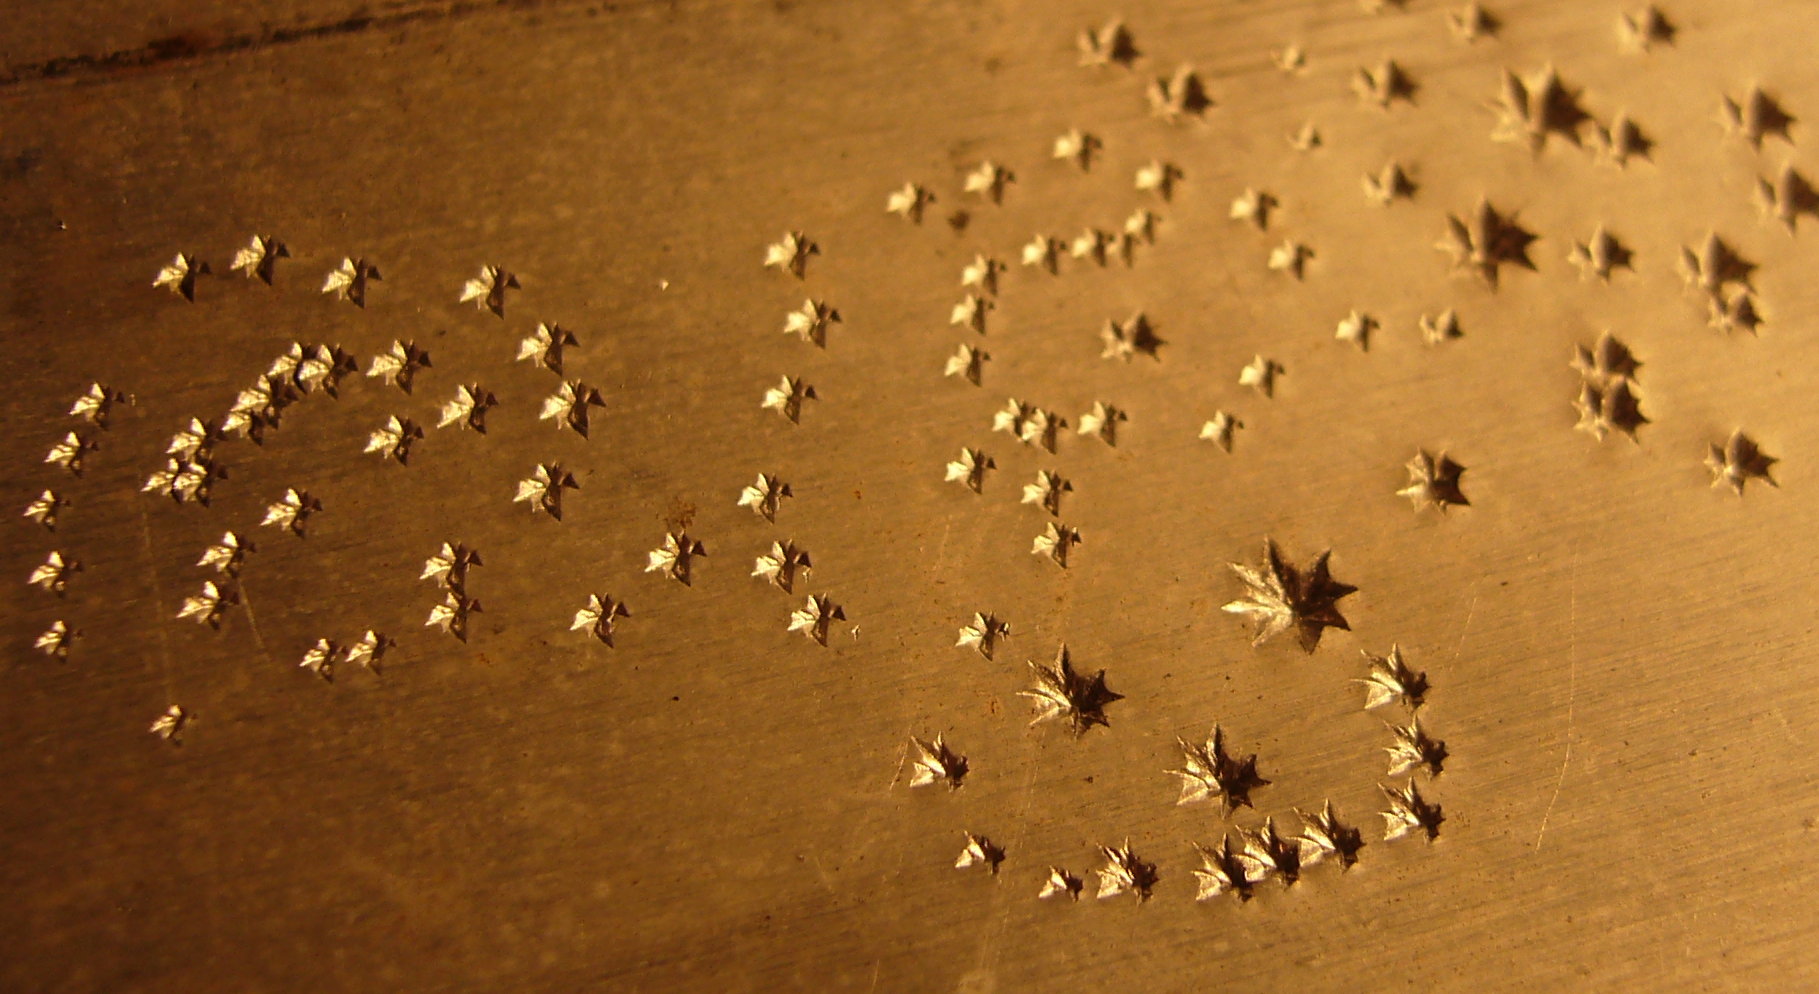
Finally, the proof of the punch is in the marks it makes. I haven’t tried it on silver yet, this is a piece of scrap aluminium. I rather like the slight unevenness of the points, and it’s nice how you can vary the size of the star by the strength of the hammer blow:
I’m a fan of hot hide glue for musical instrument work. There’s no need to rehash the pros and cons of HHG versus liquid hide glue and modern synthetic glues like PVA; suffice it to say that it has been used successfully for millennia and I think there are very good reasons to continue using it for certain things including high-quality instruments.
To use HHG, you first dissolve it in water to make a gel, then heat it to about 60C (140F) to melt it. Too cold and the open time is reduced; too hot and it ‘cooks’, compromising the strength of the glue joint. Traditionally cast iron or brass double-boilers were used on a stove, an alcohol burner, or a charcoal brazier. Around the turn of the previous century somebody invented an electric glue pot, which used a thermostat and a heating element to maintain the correct temperature with much less fuss and risk of overheating the glue.
I know of two manufacturers still making electric glue pots. Hold Heet in the USA makes fairly large pots that are probably best suited for antique and reproduction furniture work. Herdim in Germany make smaller pots that seem to be targeted mainly at luthiers. From my research it seems that the Hold Heet pots are expensive in the US and very expensive in Europe, while the Herdim pots are expensive in Europe and very expensive in the US. Second hand electric glue pots of either brand never seem to come up on eBay in the UK, and it wouldn’t have made financial sense to import a used Hold Heet from the US and buy a 240V-110V transformer to power it. I strongly considered buying a new Herdim, and if money was no object that’s probably what I would have done.
If you search Google for alternatives to commercial electric glue pots, people have made them from various kinds of electric coffee pots, baby bottle warmers, old cast iron glue pots on electric hotplates, etc.
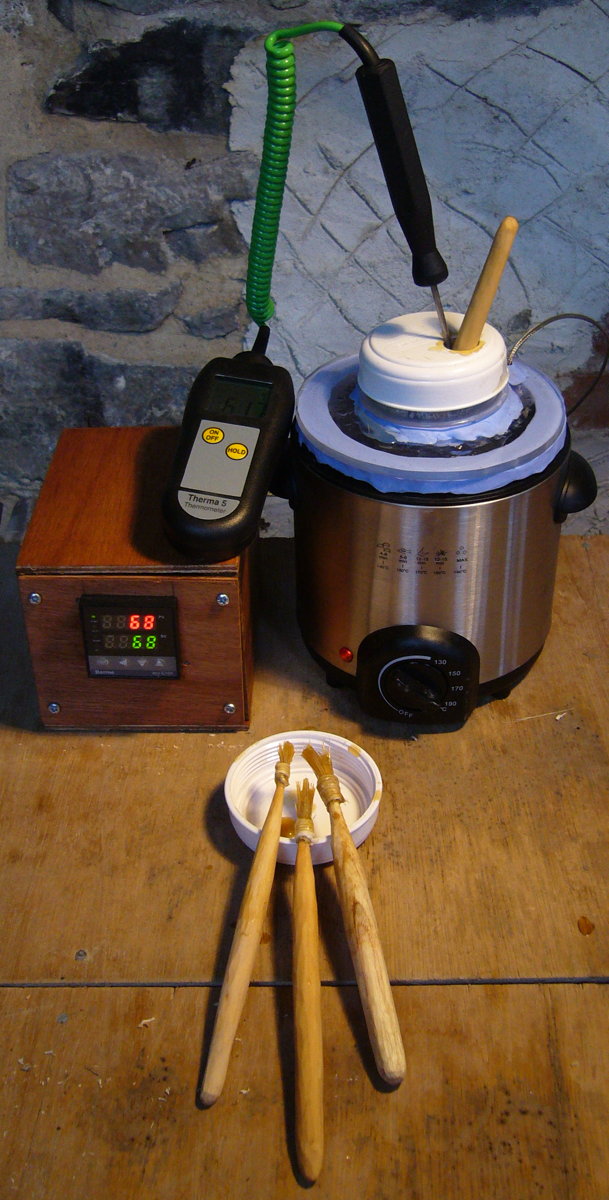
My new one is made from a mini deep fat fryer (0.5 litre oil capacity). I wasn’t happy with its built-in mechanical thermostat (it had about 15C of hysteresis and would probably have needed frequent adjustment), so I have instead hooked it up to a cheap Chinese PID temperature controller (a Rex C100 clone) with solid state relay output. This works remarkably well, regulating the temperature of the water bath to within a degree of the set temperature by pulsing a little bit of power into the heating element about once a second. I found I needed to set the water bath temperature several degrees higher than the desired glue temperature.
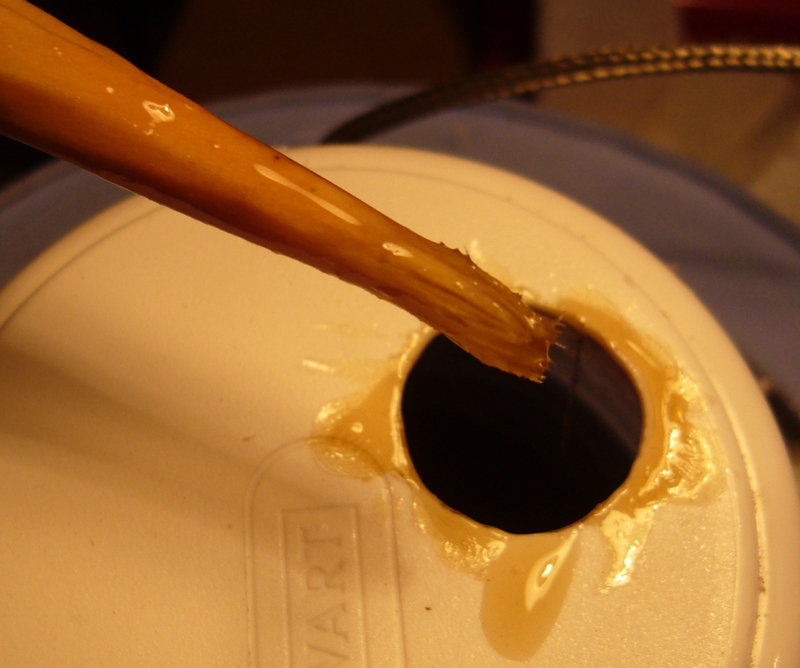
I knocked together a simple wooden box to hold the controller and the SSR, and a Perspex cover to hold the inner pot in position and prevent the water in the outer bath evaporating away. The light blue gaskets are made from two-part mouldable silicone rubber. The inner pot is a 0.25 litre Stewart Sealfresh screw-top food container. I have several of them and I cut a brush-sized hole in one of the lids to reduce the rate at which water evaporates from the glue in the pot.
I also made several glue brushes in various sizes by whittling the handles from green wood and binding hog bristles to them with string. The smallest brush I made by boiling the end of the stick in water for five minutes, then smashing the fibres apart with a hammer:
This website uses cookies to improve your experience while you navigate through the website. Out of these, the cookies that are categorized as necessary are stored on your browser as they are essential for the working of basic functionalities of the website. We also use third-party cookies that help us analyze and understand how you use this website. These cookies will be stored in your browser only with your consent. You also have the option to opt-out of these cookies. But opting out of some of these cookies may affect your browsing experience.
Necessary cookies are absolutely essential for the website to function properly. This category only includes cookies that ensures basic functionalities and security features of the website. These cookies do not store any personal information.
Any cookies that may not be particularly necessary for the website to function and is used specifically to collect user personal data via analytics, ads, other embedded contents are termed as non-necessary cookies. It is mandatory to procure user consent prior to running these cookies on your website.