Following on from this morning’s post, I had been thinking for several months that I would like to learn to sharpen wood-cutting hand saws. A pre-requisite for that was buying a saw that is made from appropriate steel that can be successfully re-sharpened. This tends to mean either a vintage/antique saw made before the invention of modern hard-point disposable saws, or a new ‘heirloom quality’ carpenter’s saw from a company like Lie-Nielsen Toolworks. The new ones are justifiably expensive, as are restored vintage tools from a reputable dealer (especially if they are a particularly ‘collectible’ example). If you haven’t got much money to spend the third option is to take a chance on an unrestored vintage saw and hope that you can successfully restore it yourself. That was the option I went with, partly because I wanted to teach myself saw sharpening and didn’t want my first attempt to be on a valuable tool in case I made a mess of it.
The biggest gap in my wood saw collection was a small fine-tooth backsaw, bigger than a razor saw but smaller than a tenon saw. That means either a gent’s saw or a dovetail saw (the main difference between them, as I understand it, being that a gent’s saw has a round turned handle and a dovetail saw has a pistol grip handle. Dovetail saws may also be slightly bigger). I searched around on eBay and found a vintage Sheffield-made 7″ gent’s saw from a vintage tool dealer with excellent feedback. It was cheap enough to take a chance on, didn’t look too bad in the photos, and the condition was described as “Blade is quite sharp, tool is good to use.” Now “quite sharp” is a subjective term and I like my cutting tools to be very sharp, so I fully expected to need to sharpen and probably re-set it. What I didn’t expect was for the blade to be kinked.
It was rather hard to take a photo that showed the kink (it was more obvious to the naked eye). It had obviously been caused by somebody getting the heel of the blade stuck in a saw cut and pushing it over sideways, something that is quite easy to do if you’re pushing too hard because the blade is very dull (which it was). It may not look like much, but it had the effect of causing the heel of the blade to have far too much set on one side, which forced it to cut in a curve rather than a straight line. The next photo shows what happened when I attempted to make a straight perpendicular crosscut through a piece of softwood. Personally, I wouldn’t have described this saw as ‘good to use.’ Update: I’ve been in touch with the eBay seller and we agreed on a partial refund.
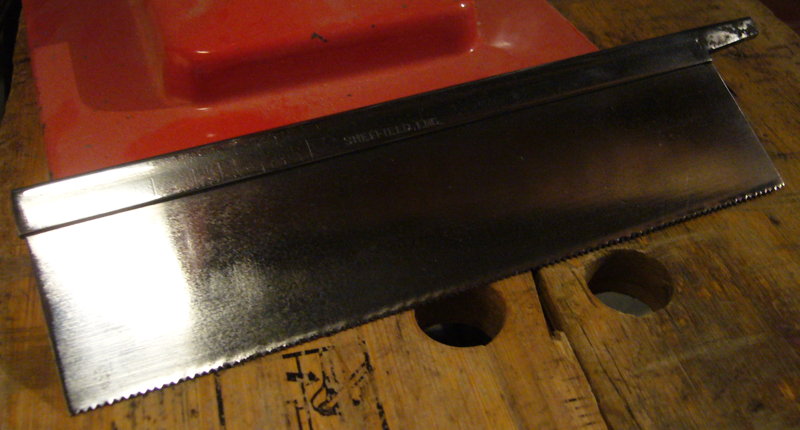
My tin-bashing experience came in handy here, and a few minutes of careful work with a lead mallet and a slightly domed anvil took out the kink. It flattened out the set too, but that wasn’t a problem because I intended to re-set the whole blade anyway. Here’s the blade after straightening and polishing it to reduce drag:
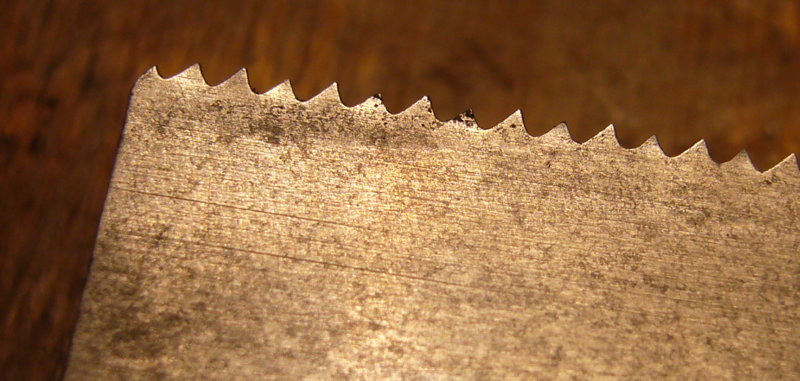
The photos I took of jointing the blade (filing the tops of all the teeth to make them the same height) and sharpening them with a triangular file didn’t come out very well. Suffice it to say that after watching a few instructional videos and reading some tutorials I didn’t find it difficult. The videos from Lie Nielsen are easy to follow. Marking all the teeth with a Sharpie so you can easily tell which ones you’ve already filed was a good tip, and an Optivisor was helpful to see what I was doing clearly. The teeth were previously filed with a rip cut profile (optimised for cutting along the grain rather than across it), so I decided to keep it like that for simplicity’s sake, though I made the rake angle slightly more aggressive.
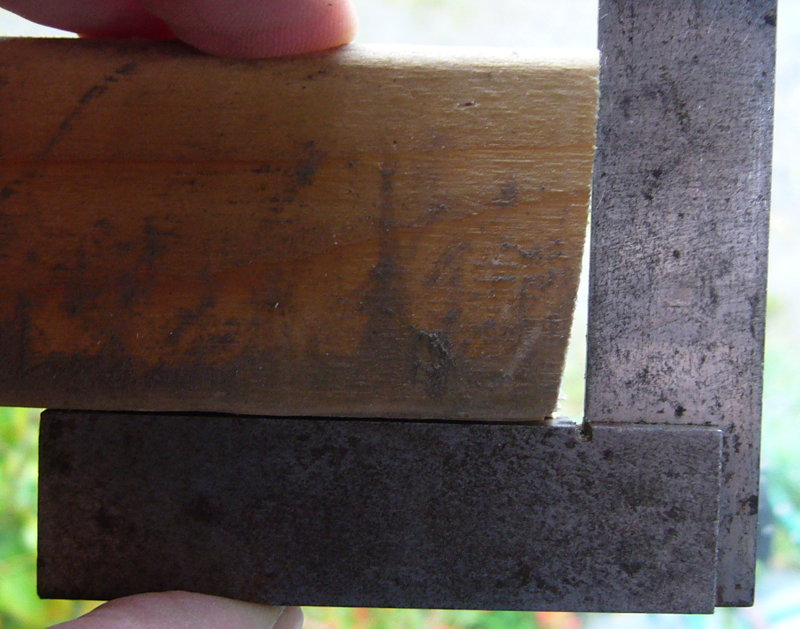
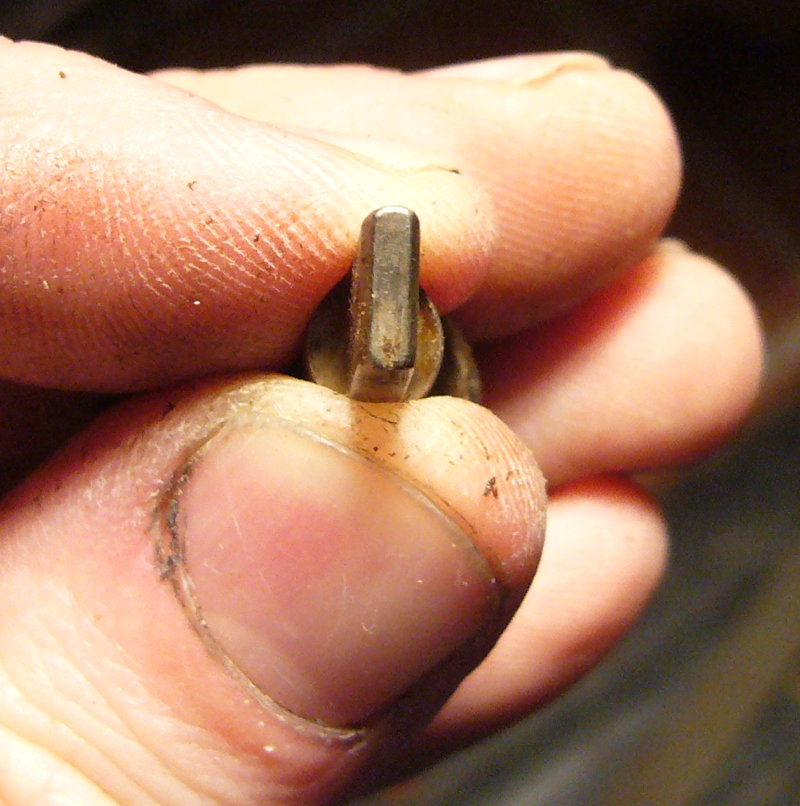
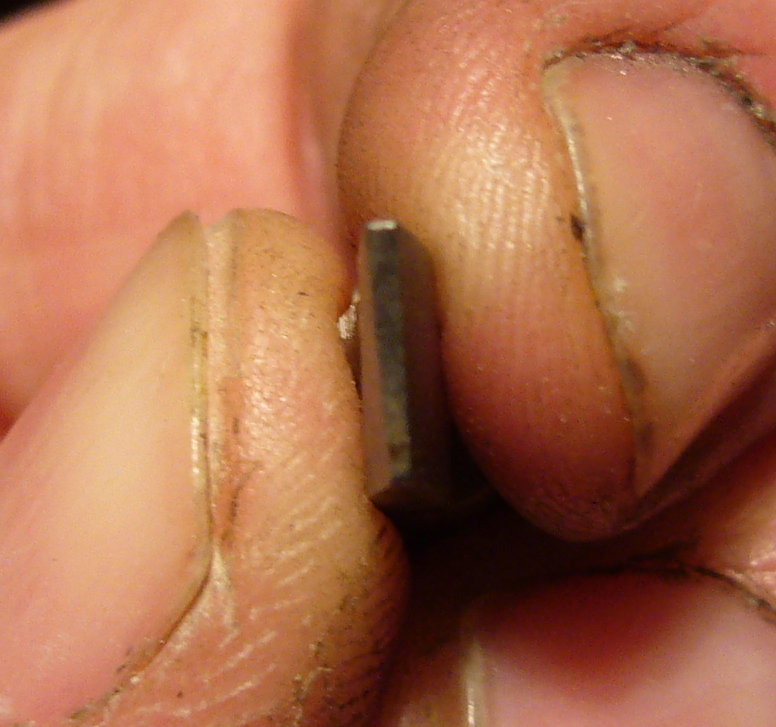
I bought an old Eclipse No. 77 saw setting tool to set the teeth. (You need to do this to make the saw cut a kerf slightly wider than the stock of the blade, so that it doesn’t bind and it’s possible to steer it back if it starts to deviate from a straight line.) Incidentally I’ve seen at least three very different tools on eBay with this make and model number – the one I got has a cast bronze body and seems very robustly made. On advice from my friend John Wilson and the Lie Nielsen video, I ground the pin narrower to suit the very fine teeth on my saw (it was made of steel so hard that a file skated off it, so grinding and stoning was the only way to do it). Before and after photos of the reduced width pin:
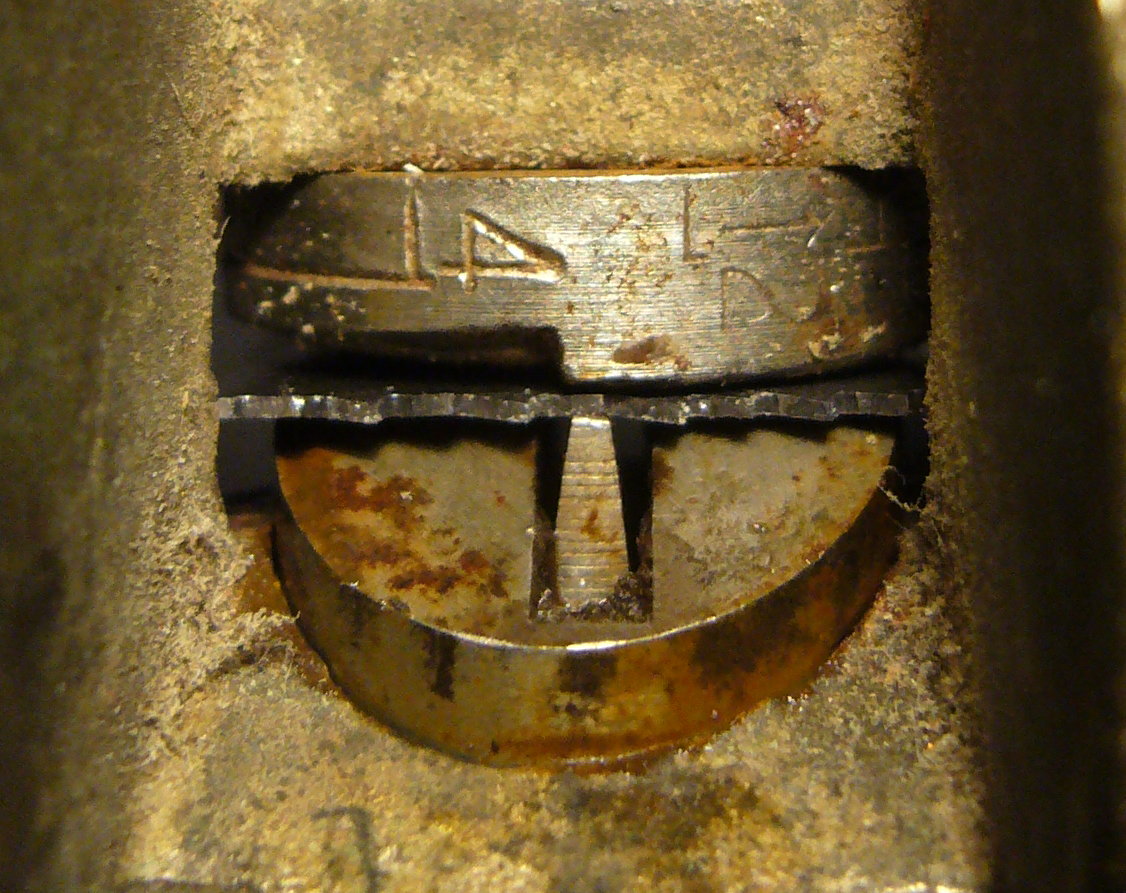
And here is a photo looking in through the window of the saw set with a tooth gripped between the pin and the anvil (rotated to the finest tooth setting, which is probably slightly too coarse for such a fine blade). Again, magnification really helped me to do this part accurately with such small teeth:
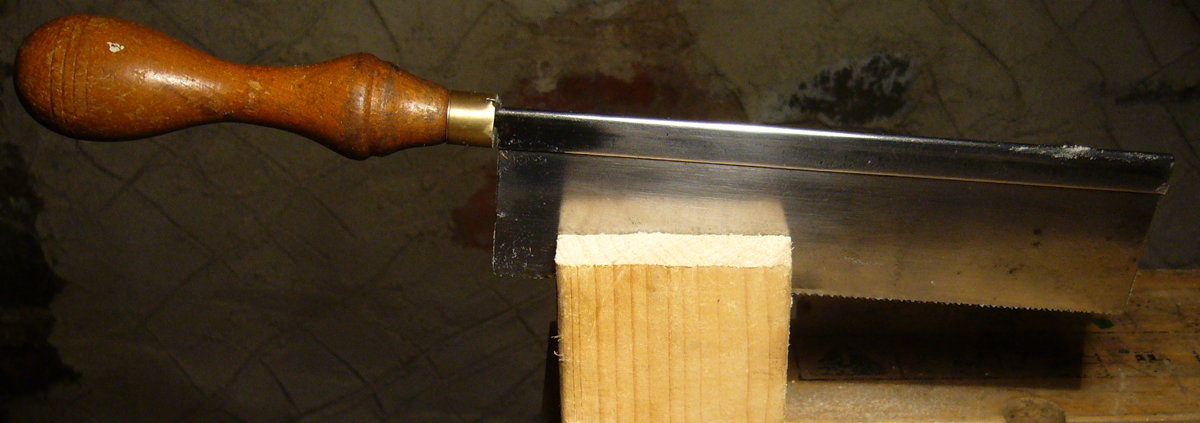
The end result: a nice little saw that cuts well and follows a straight line (I haven’t done anything to clean up the handle yet), and that I have the ability to re-sharpen and re-set whenever I need to: