Part four of the story of how I made my first instrument is about the actions (i.e. the mechanisms that uncover holes and let air through a reed when you press a button).
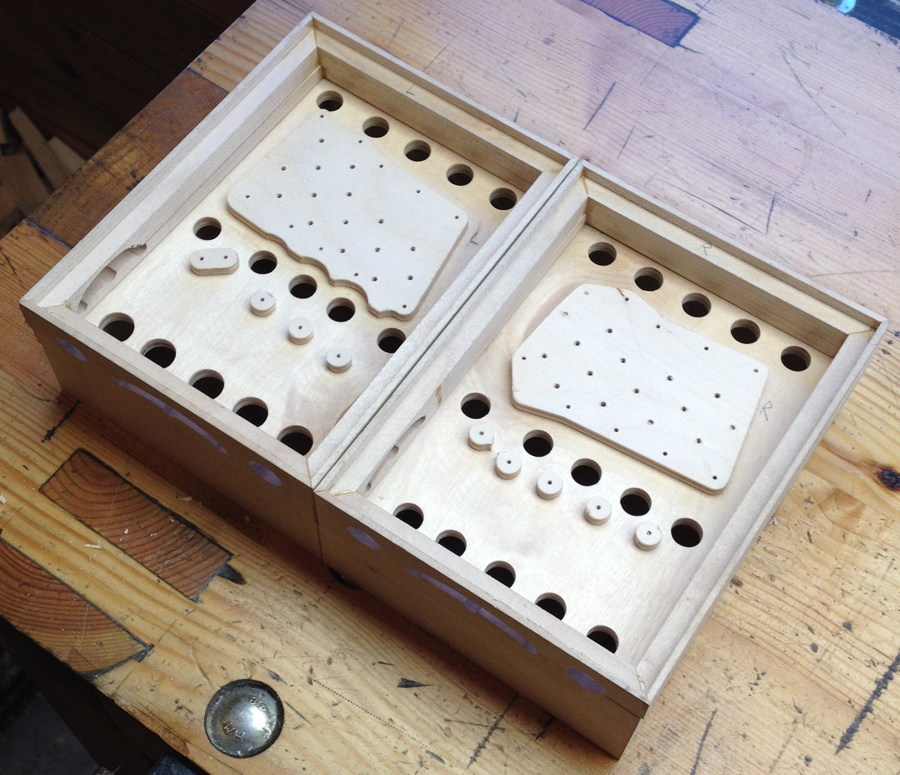
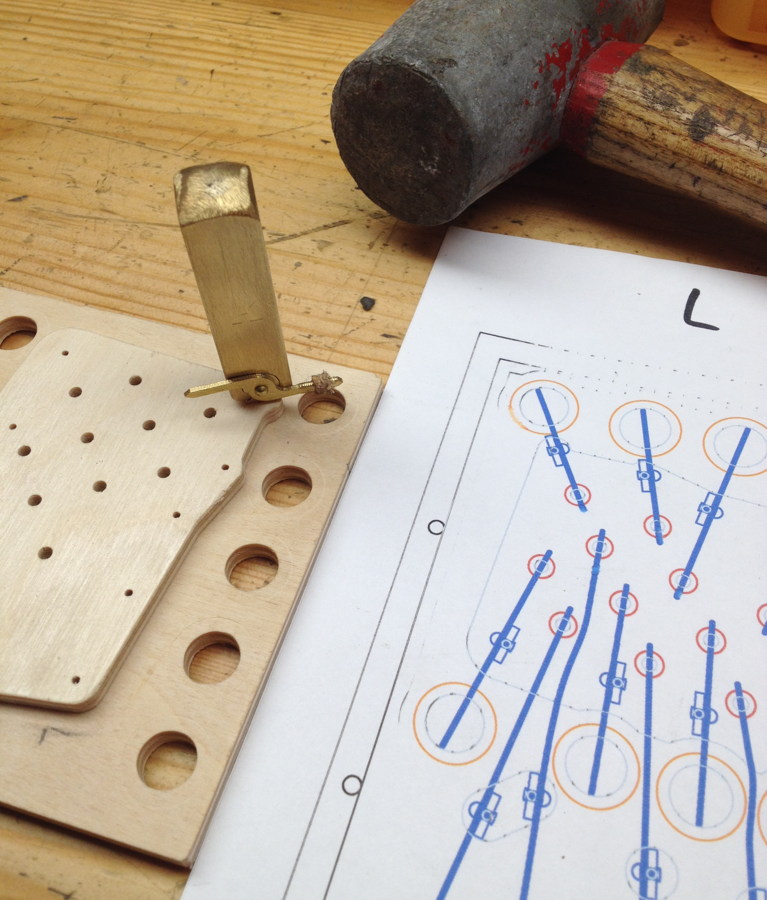
I made the action boards from birch plywood on the CNC milling machine, which seemed to work pretty well. Although I’m sure high-quality plywood is a good choice for strength and stability, on the next instrument I may try making the action boards from solid wood instead to see if it has a beneficial effect on the tone.

Another thing I will probably do differently next time is to not drill the button peg holes at this stage using CNC. They need to be very accurately aligned with the button holes in the end plates for the buttons to work smoothly, and by doing it this way it took me a lot of fiddling about to get the two boards to line up well enough to avoid the buttons sticking. I think a more accurate way would be to bolt the action boxes together with the action boards inside, then use the pillar drill and spot through the end plate using a drill bit glued into a mandrel that is the same diameter as a button (not my idea: I recently heard about this technique via another maker).
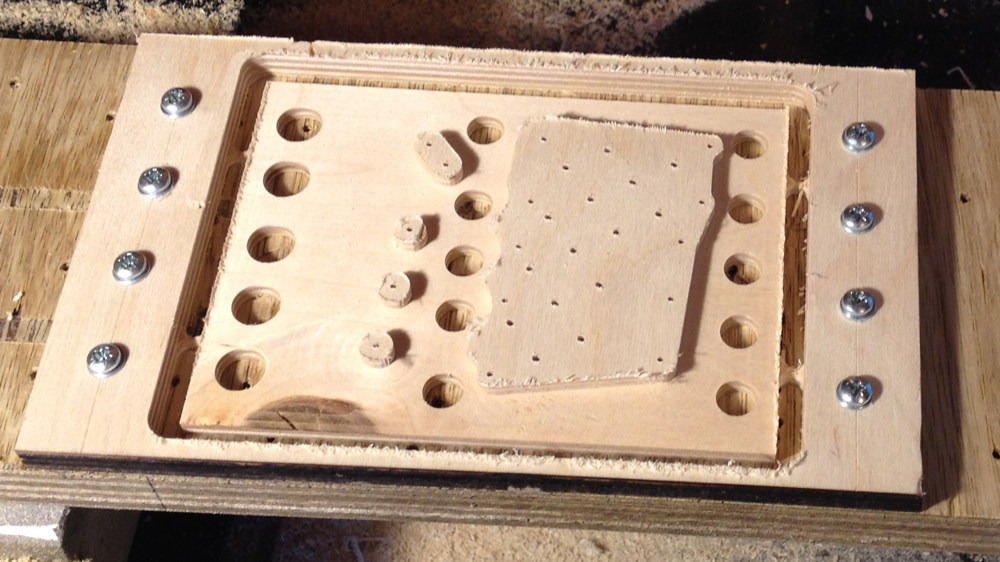
The action boards sit in a rebate in the bottom half of the action boxes. The problems I had with the walls not gluing up perfectly square meant I had to make careful adjustments to the edges of the action boards to get them to fit snugly in the rebates while also accurately aligned with the button holes.
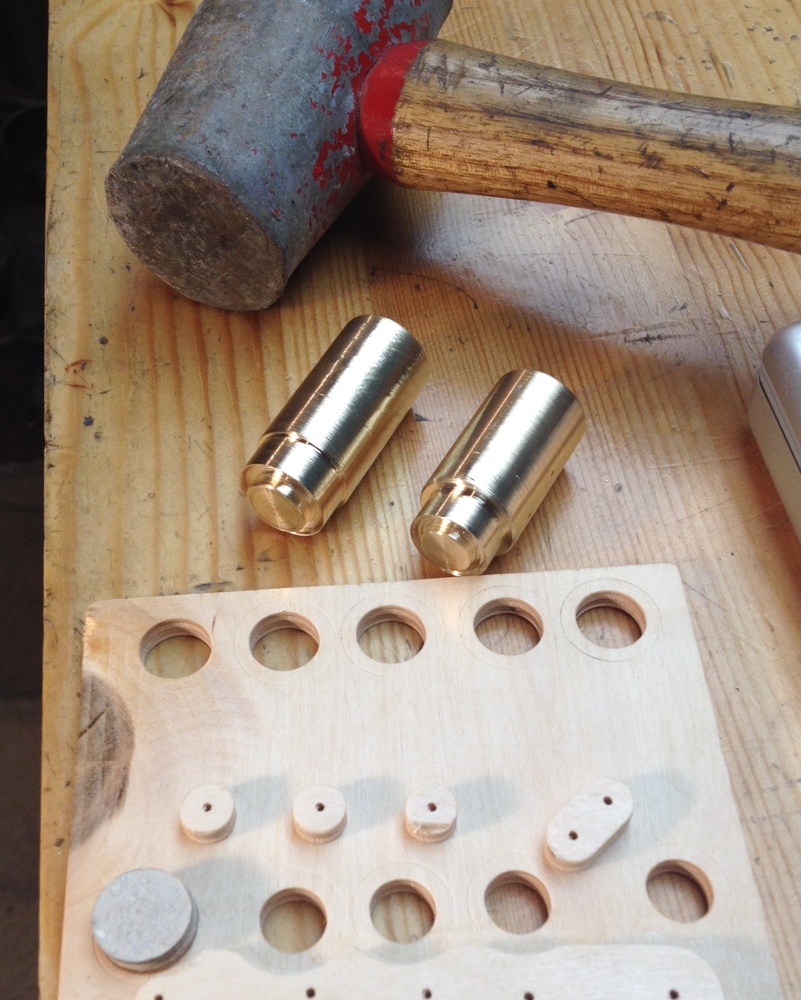
I turned a couple of cylindrical brass dies that mark a circle around each pad hole to help glue the pad in the right place.
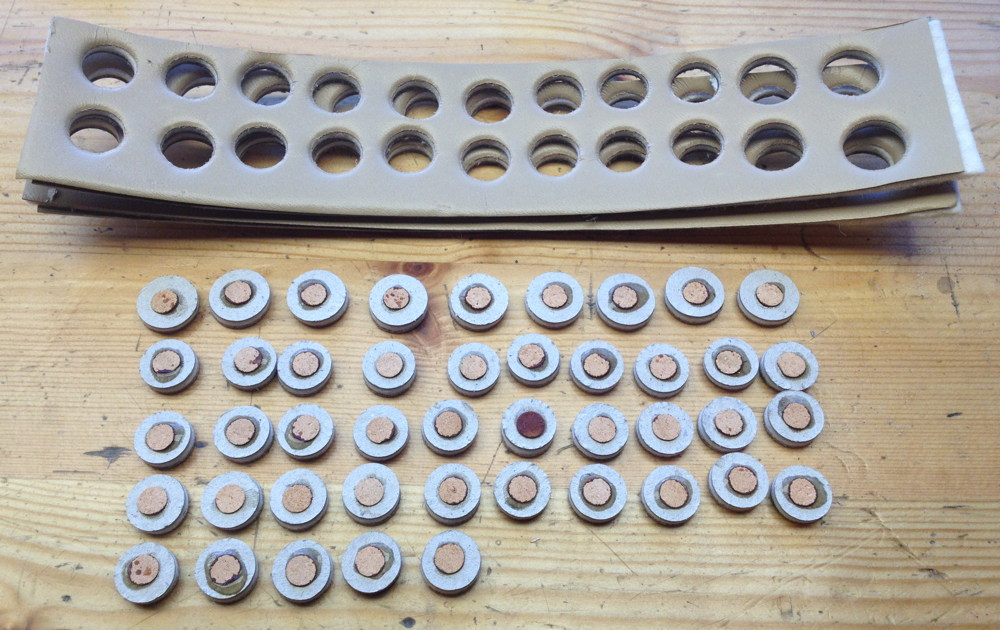
Lots of pads.
I made a couple of button guide boards to hold them in the right place while gluing the pads on.

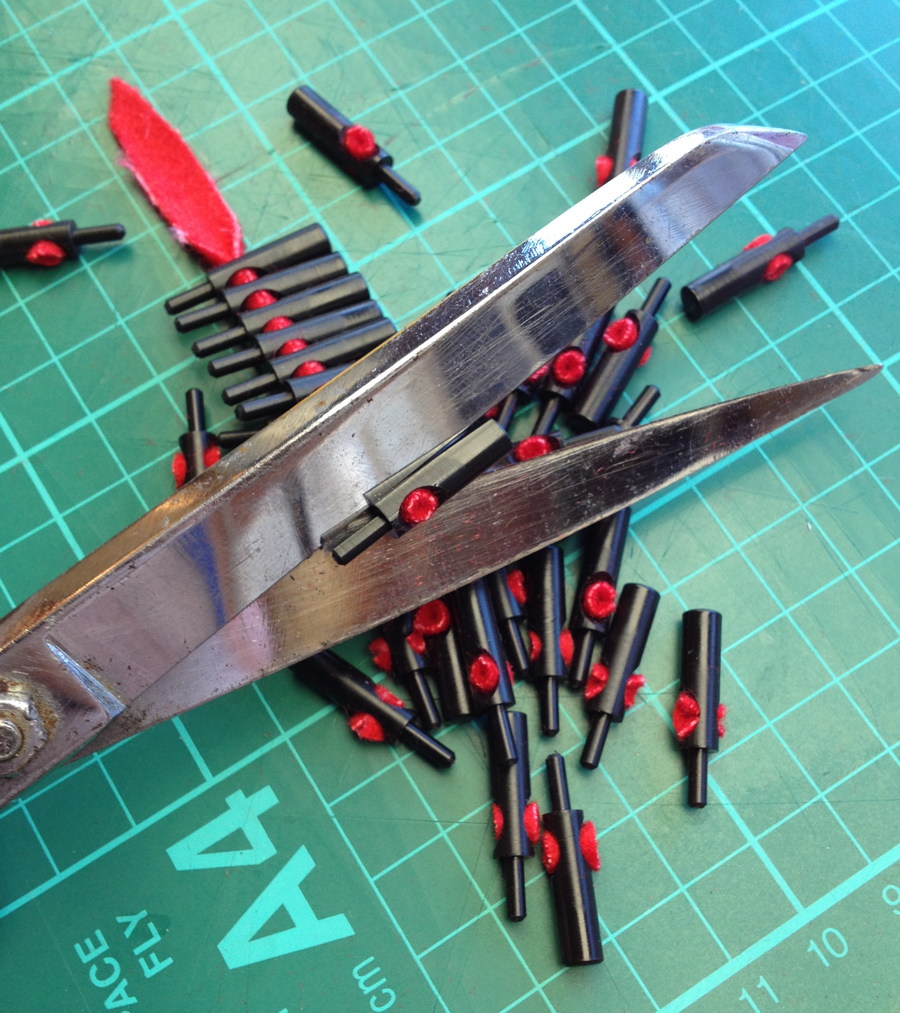
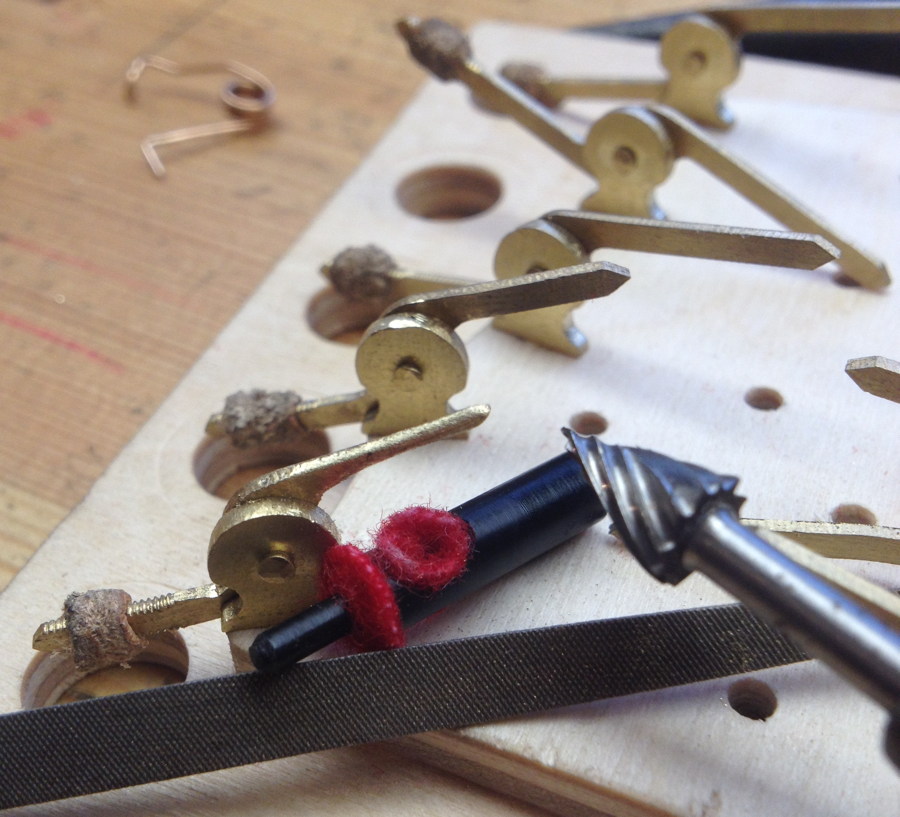
Fitting the cross hole bushes in the buttons (see my earlier article about how I made them) using Bob Tedrow’s method of pulling a strip of cloth through them all, then snipping them apart with scissors:
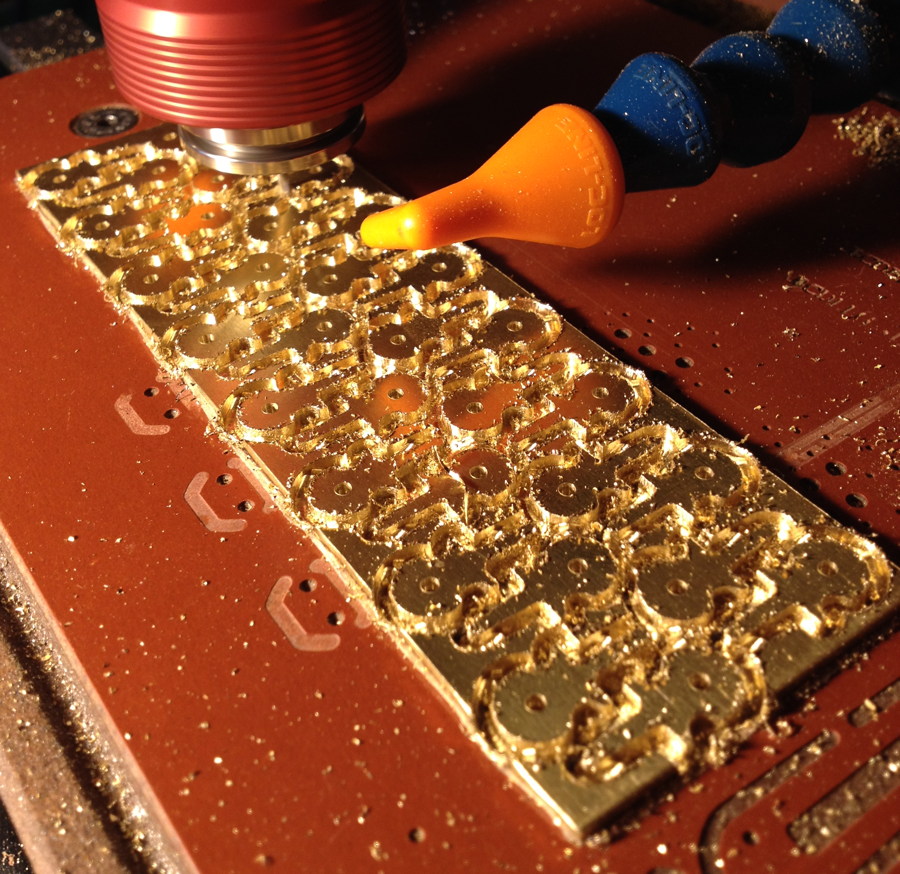
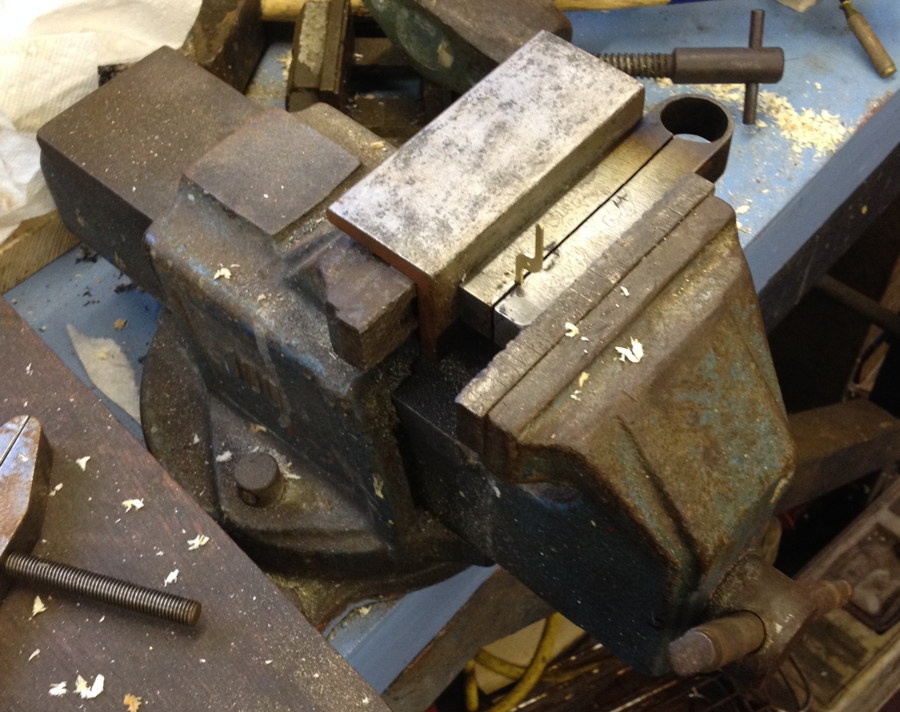
I cut the lever posts from 1.5mm brass on the CNC mill:
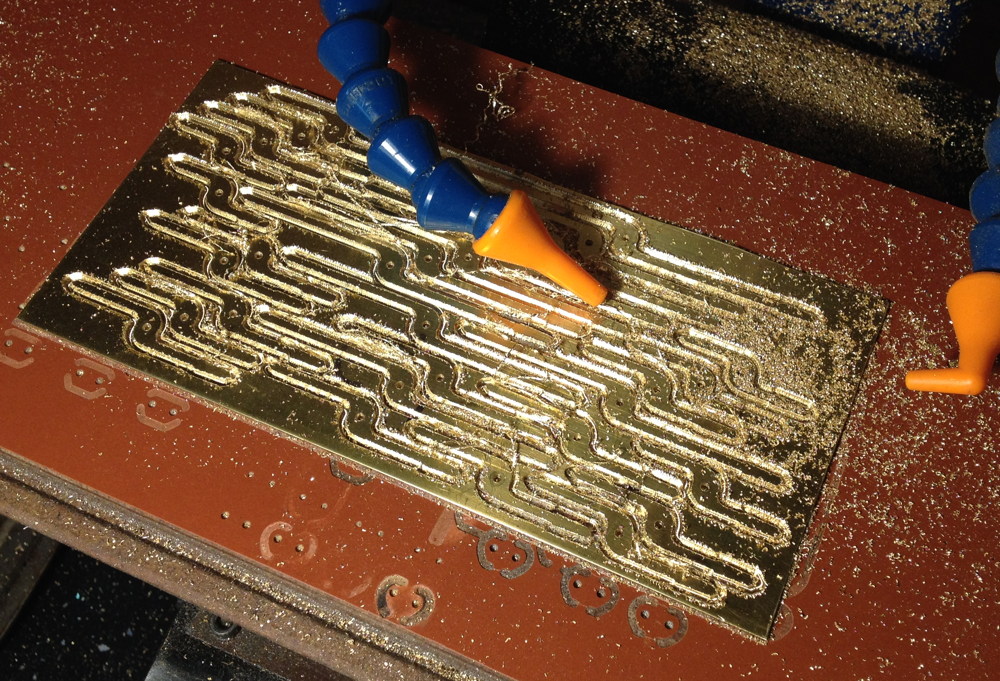
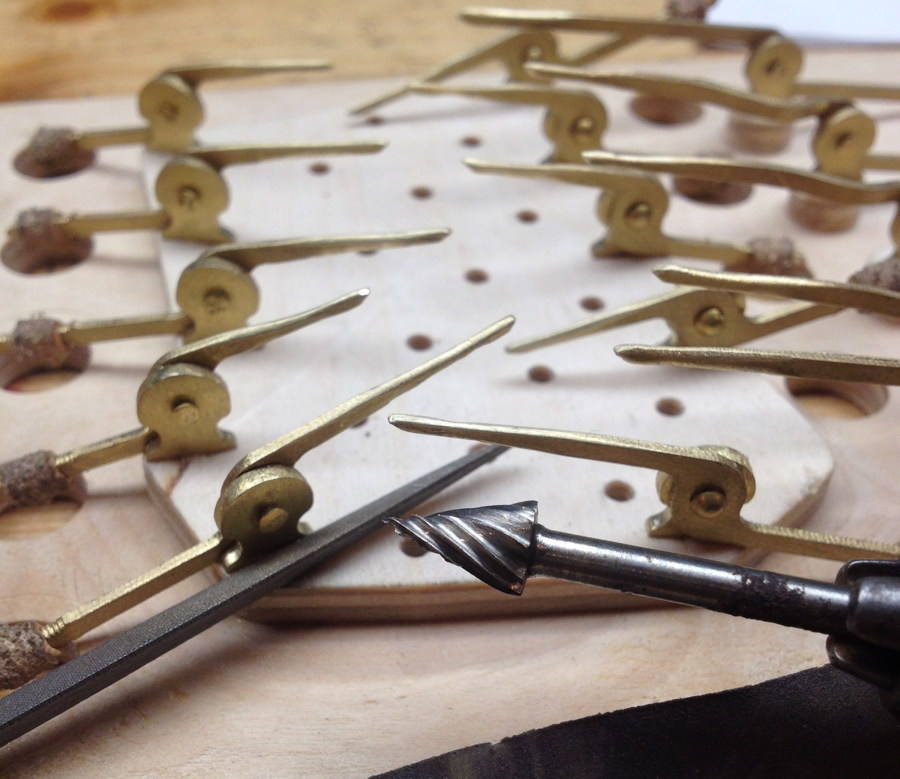
And the levers themselves from 1mm brass:
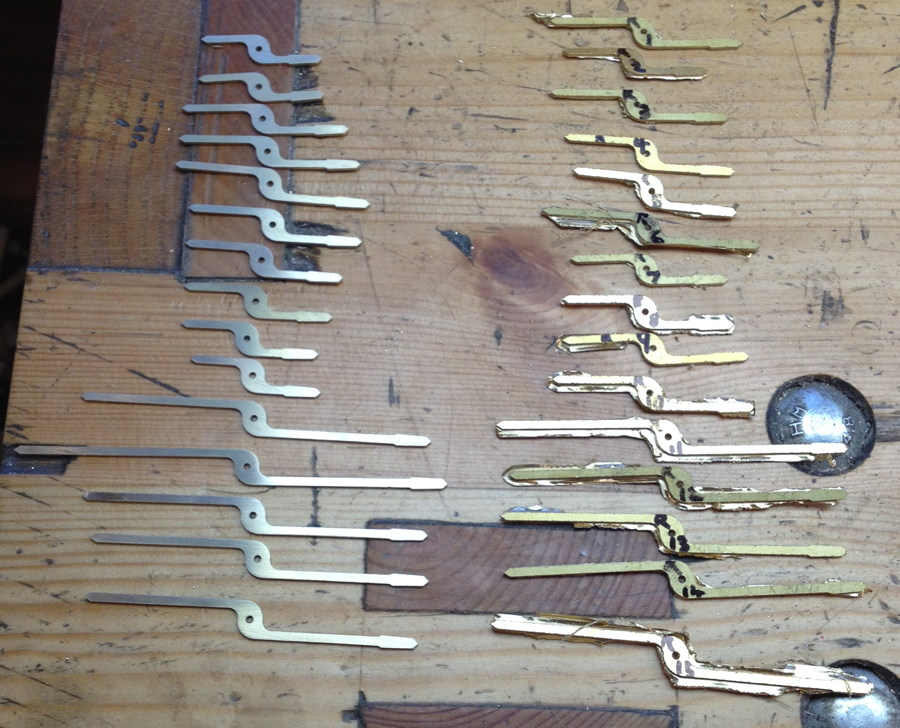
It took quite a lot of fettling with needle files and emery paper to clean them up. I put the pivot points at the half way points for reasons that made sense on the drawing board, however I have since learned that it is better to put them closer to the button if you can find the space to do so (this causes the pad to lift up by more than the distance the button travels down). In hindsight this may have helped with some of the issues I later had with ciphers because I could have reduced the button height by 0.5mm without compromising the amount of pad opening.
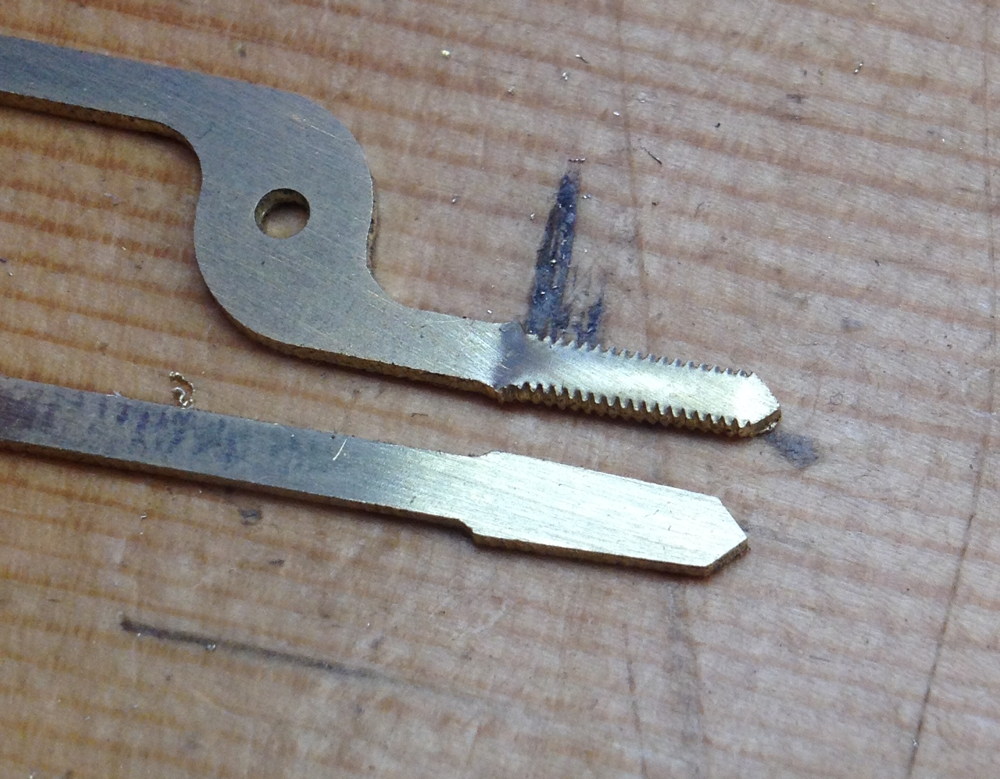
I already wrote about the die I made to thread the grommet ends of the levers, but I have since learned that I get a cleaner, more consistent result from it if I squeeze the tool in a vice instead of hitting it with a hammer.
Before and after forming the threads:
Riveting went fairly smoothly. I only had to redo a couple of them because the pivots tightened up.
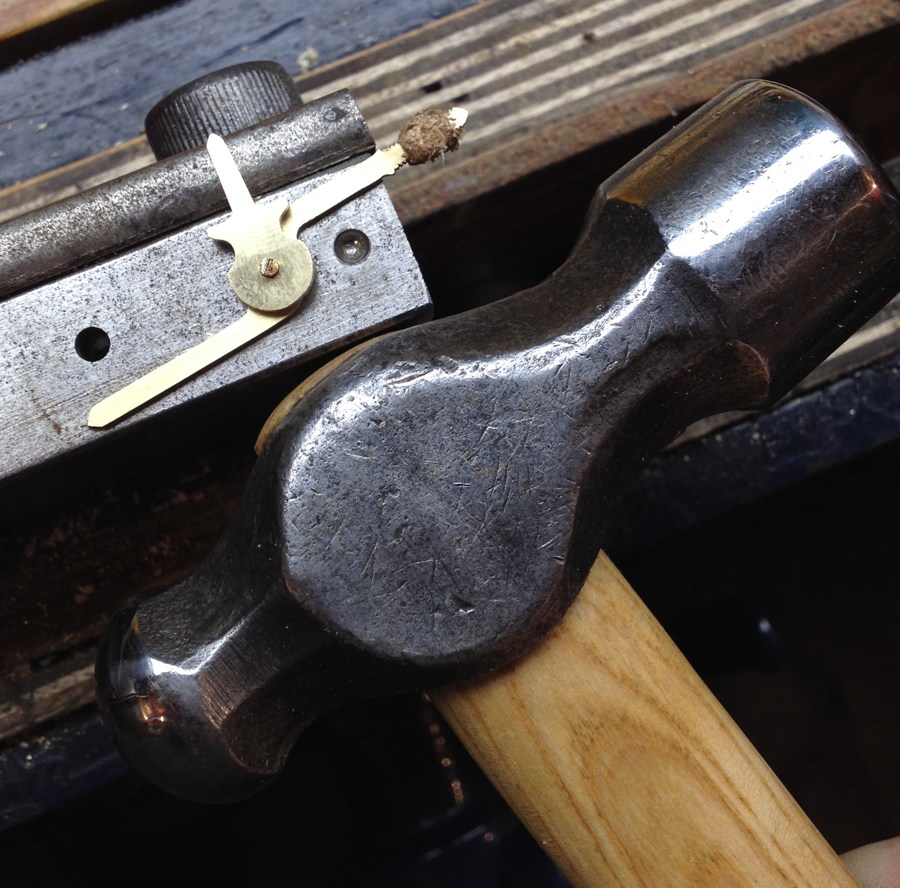
The reason for the odd shape of the lever posts is so I could knock them in or pull them back out using a tool with a matching notch cut in it (not my original idea).

The tool has a flaw: because the socket is on an edge of the tool but you hit it in the centre, the force is transmitted to the post off-axis, which tends to cause it to go in at a slight angle. I had to straighten up each post with needle nose pliers after knocking it in. I will probably modify or remake the tool before the next instrument to prevent this happening.
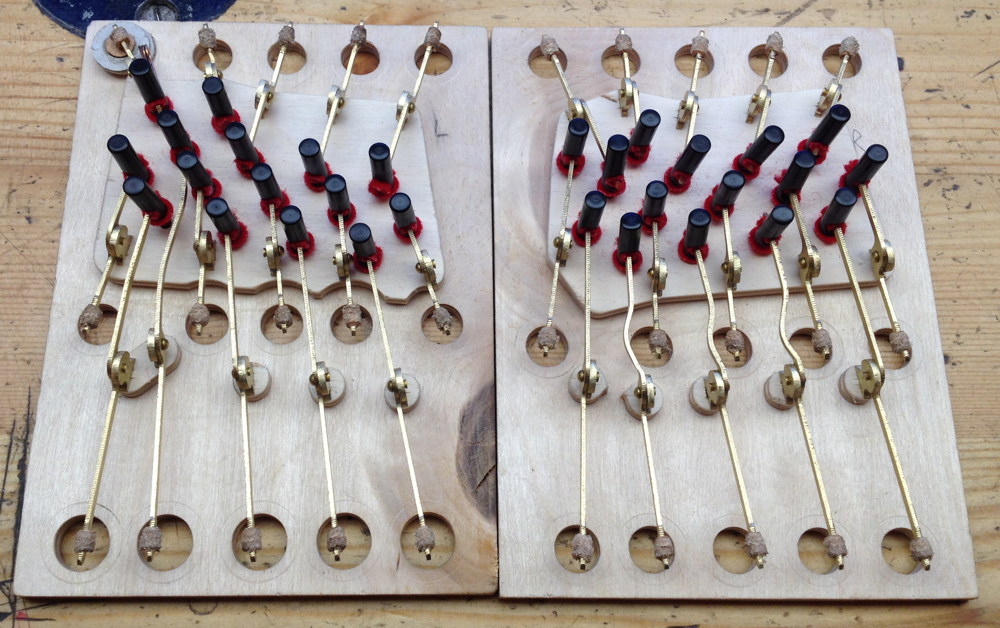
All the levers and buttons installed. Unfortunately I discovered a significant problem at this point. The button ends of the levers were too fat, making them very stiff, especially on the shortest ones.
I didn’t want to pull them all out again, so I instead used a rotary burr and needle files to slim them down in situ, which solved the problem.
Some of the springs.
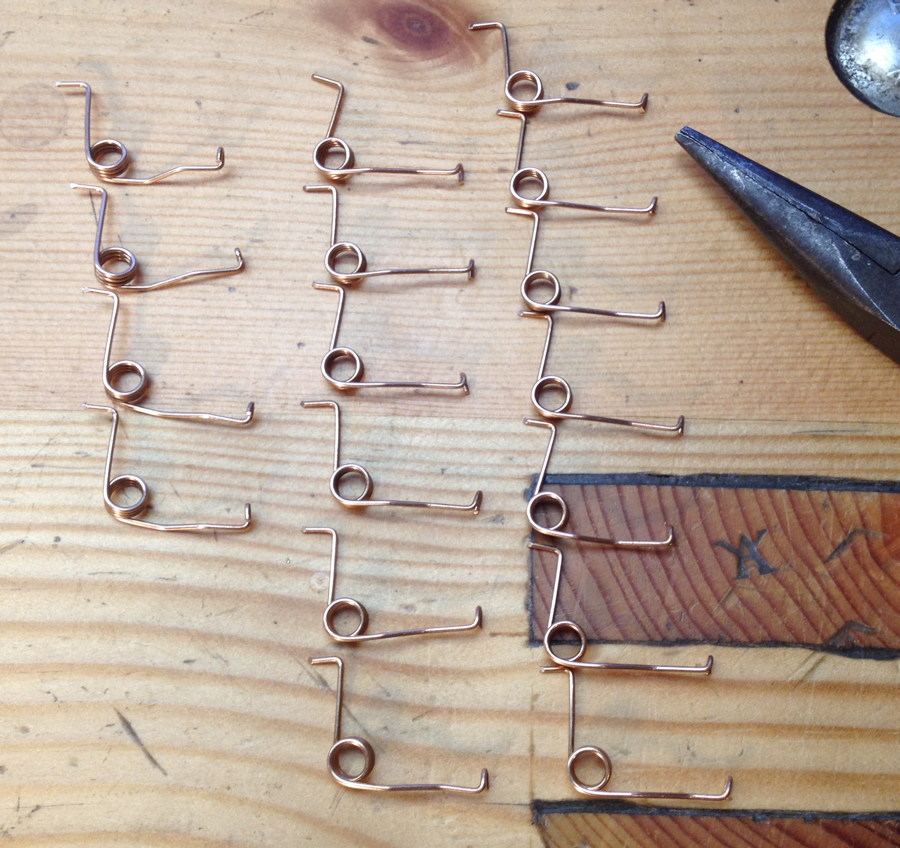
An action board with all the springs and pads installed. Some of the spring locations proved problematic due to lack of space around the middle row of pads, and I wound up spending quite a bit of time working on getting the button pressure consistent across the instrument while also eliminating ciphers (notes that don’t stop playing when you let go of the button). Most of the ciphers were caused by the end of a lever or part of a spring hitting the underside of the end plate; there was really almost no wasted height inside the boxes.
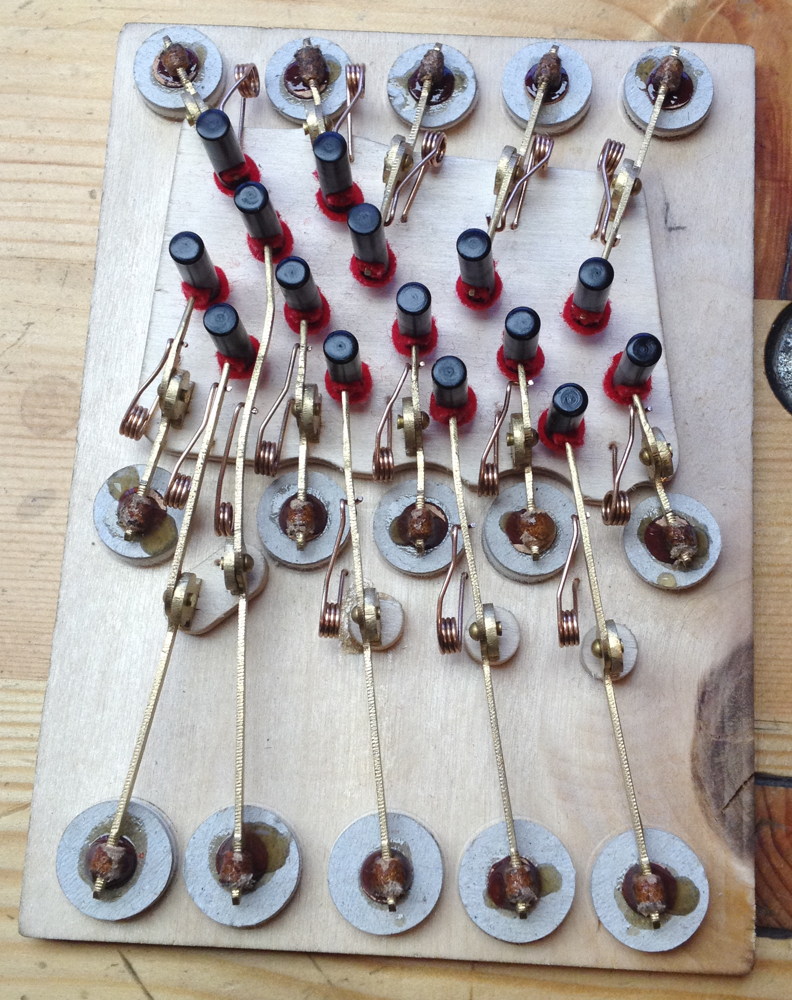
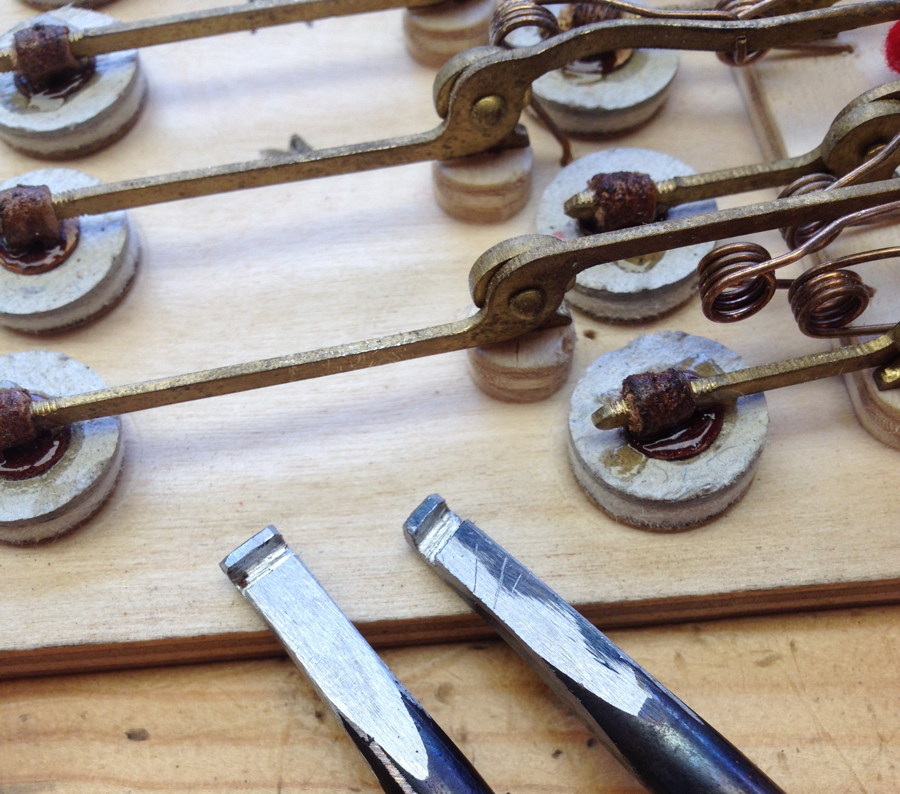
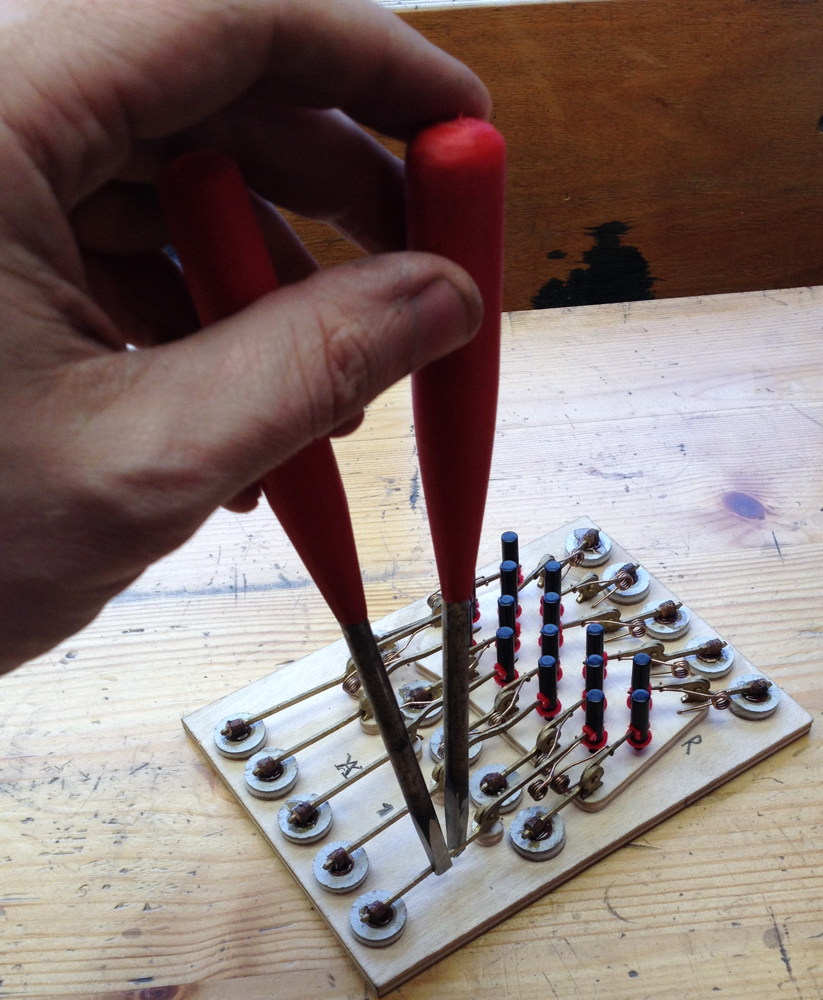
Adjusting the heights of the buttons to get them consistent is done by bending part of the lever it’s attached to. To make this easier I made a pair of special tools from old screwdrivers to grip the levers in situ.
Overall, I’ve learned that there’s nothing tremendously difficult about building a concertina action, but there are lots of little parts to make and it takes a great deal of patience to assemble and adjust it until it works smoothly, consistently and reliably.
Hi, Alex –
Any idea of what your button pressure is?
I recently had an epiphany concerning button pressure. Something I had suspected for years, but never come around to doing anything about.
On the instrument I finished this spring (pun?) – (Wheatstone 1909 reeds and reed pan with my own ECUI (English Concertina User Interface) I used Suttner’s buttons (I like metal caps), which are 4.75 mm. Even though I liked the 5.5 mm buttons on my first instrument these felt even better. But somehow I got curious about pressure, measured some of the hardest ones and found that they were approx. 175 grms! That sounded a bit high, so I lowered to approx. 100 grms. Fine – no leakage.
Whoohoo – new instrument, but a very trigger happy one! To such a degree that I am now trying to play through all I know in order to get used to the hair-trigger buttons.
It had another effect: when I then played my first instrument (from 2006) I wondered “Who’s put glue in the bushings?”… So I lowered those as well. Another new instrument.
One could very well ask why I didn’t do this earlier? Partly from the initial fear of pad leakage, partly just getting used to it, not thinking it could be any different. But it certainly could!
Pressure was measure with a simple spring-type gauge, held horizontally.
Best regards,
/Henrik
Hi Henrik! I don’t remember exactly what they finished up at; I think I started in the region of 60g but I was having trouble with ciphers so I raised it to somewhere around 75g or 80g. I used the electronic kitchen scales method to measure them, but found it a little slow and awkward so I have bought a spring force gauge for the next one. I suspect that may be a bit high – I’ve read of other makers using 50g or even 40g. I have been experimenting with a softer leather for facing the pads that I suspect might be a bit less prone to leakage than the stuff I used on No. 1.
Hi, Alex – 40g, 50 g! Even with veeery soft leather I wouldn’t dare. But there may an effect in “shape-ageing” of pads: if they are left a fairly long time, say several months, a nic depression will form in the leather and it may be possible to lower the pressure.
/H
Pingback: Hayden Duett Part 7: Reed Pans – Holden Concertinas