When I made my first prototype reeds, I found that it is nearly impossible to cut 0.9mm hardened and tempered spring steel with hand shears. After I obtained and restored a heavy duty industrial bench shear that was strong enough to cut the metal, I learned that it is extremely difficult to accurately and consistently cut narrow, tapered strips to a specific width and angle. Because the fit of the tongue to the frame is crucial to the performance of the reed, the only thing I could do was to cut the tongues significantly wider than necessary and spend a long time painstakingly filing them down to final fit. The bench shear also had a tendency to bend and sometimes even twist the tongues, making it necessary to carefully straighten them out before profiling.
A solution to my problem came in the form of Geoffrey Crabb’s description of a press tool his family has used for all the reeds they have made since Victorian times. I made a few small changes to the design, mainly because my press is a different type1, which necessitated rotating the blades through 90 degrees.
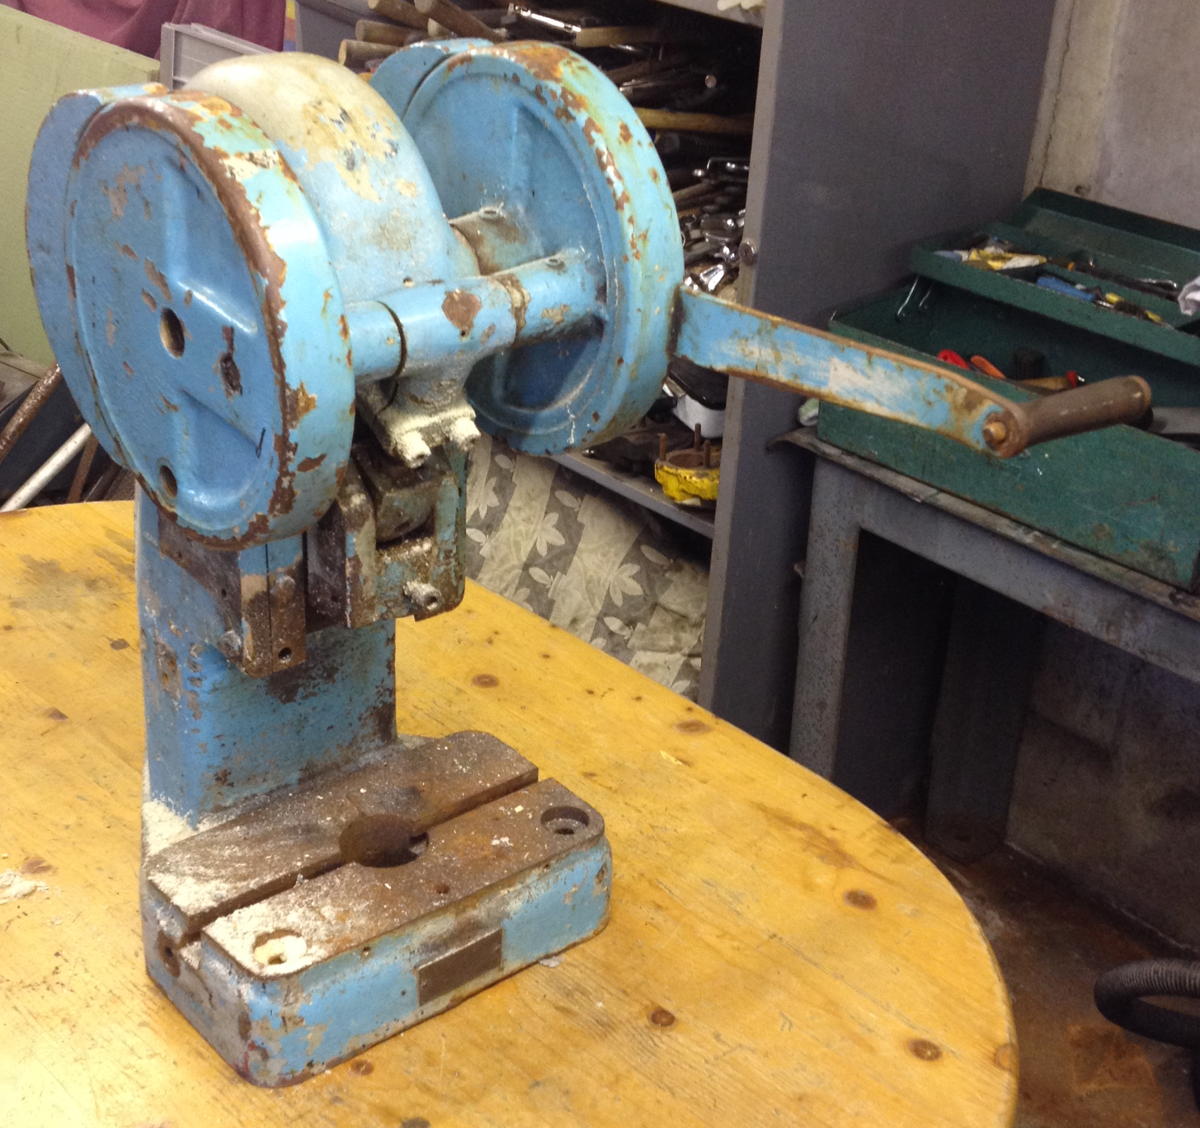
This was how my press looked when I first acquired it. It is a Smart & Brown H5 2-ton toggle press. Although it looked cosmetically rather tatty, it was fully functional with not much wear.
And here is the restored press with the shear tool I made for it installed:

I made the blades from 15mm thick O1 tool steel that I hardened and tempered myself, and the holders are made of various oddments of scrap mild steel that I stick-welded together (my welds may not be very pretty but they are strong enough!).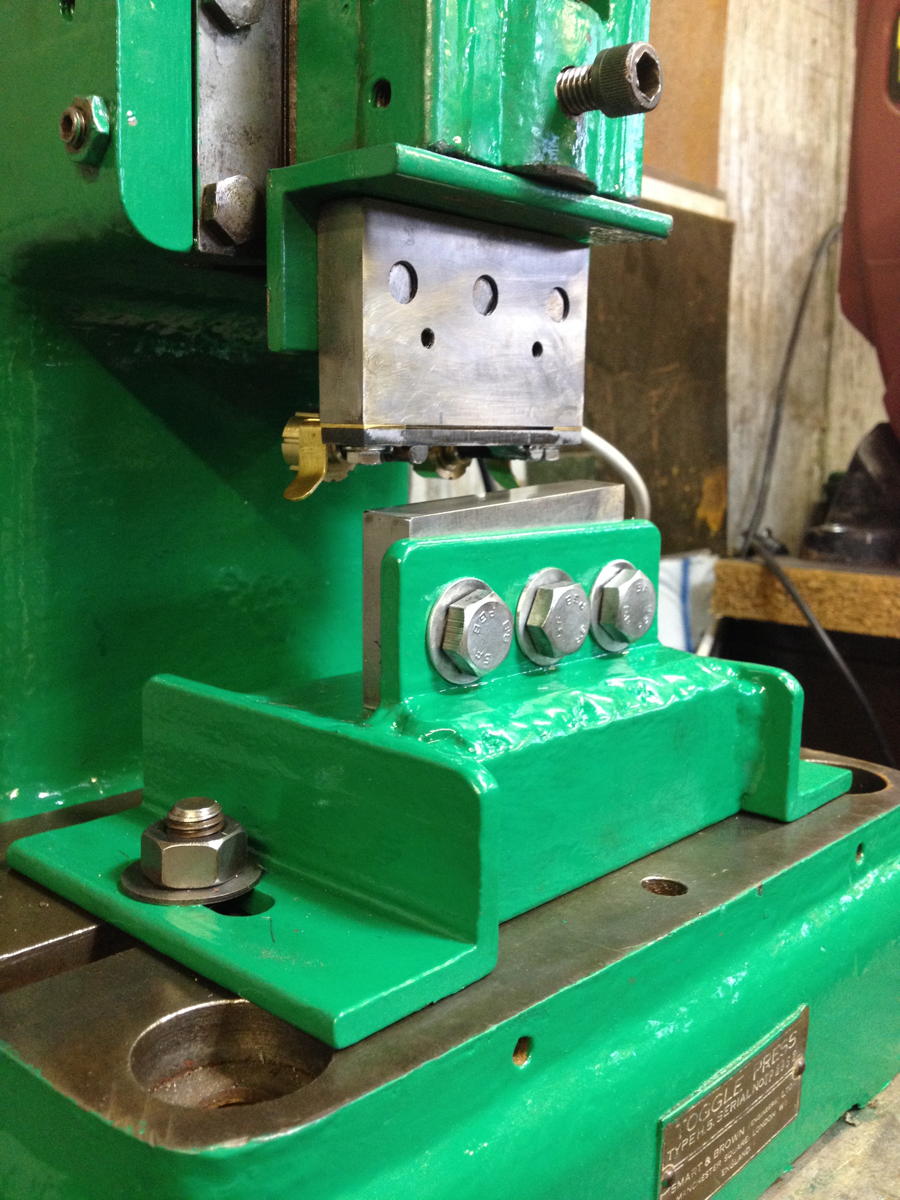
This thing bolted onto the bottom of the moving blade is the clever part. It has a 1mm tall slot with a moving spring-loaded brass plate inside it that acts as a width stop and ejector.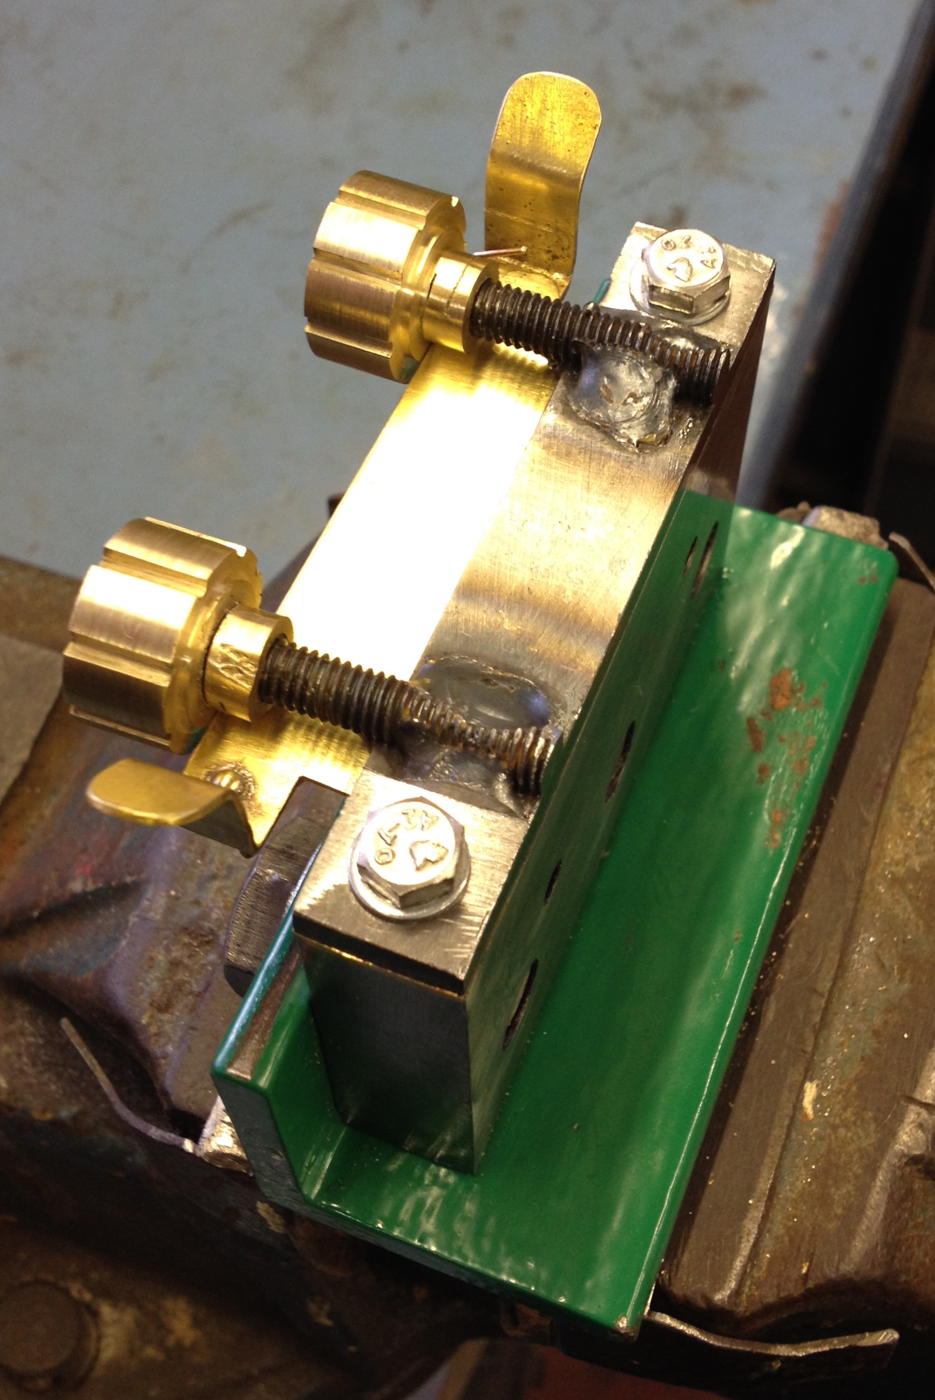
You insert a piece of stock (already sheared roughly to length on the bench shear) into the slot until it stops against the brass plate. The two brass thumb-nuts control the position of the brass plate, thus setting the desired width and taper angle of the tongue. After pulling the press handle to shear the metal, the tongue is now trapped inside the slot, so you pull the plate towards you using the two bent tabs, ejecting the tongue, then a pair of springs pulls the plate back against the adjuster nuts. See this brief video for a demonstration:
I’ve found it helps to have a box on my lap to catch the sheared-off stock and the ejected tongues before they fall on the floor!
With the new tool I was able to cut these four identical tongue blanks in less than a minute. They still need deburring and a bit of finish-fitting with a file, but much, much less than when I was trying to cut them with the bench shear.
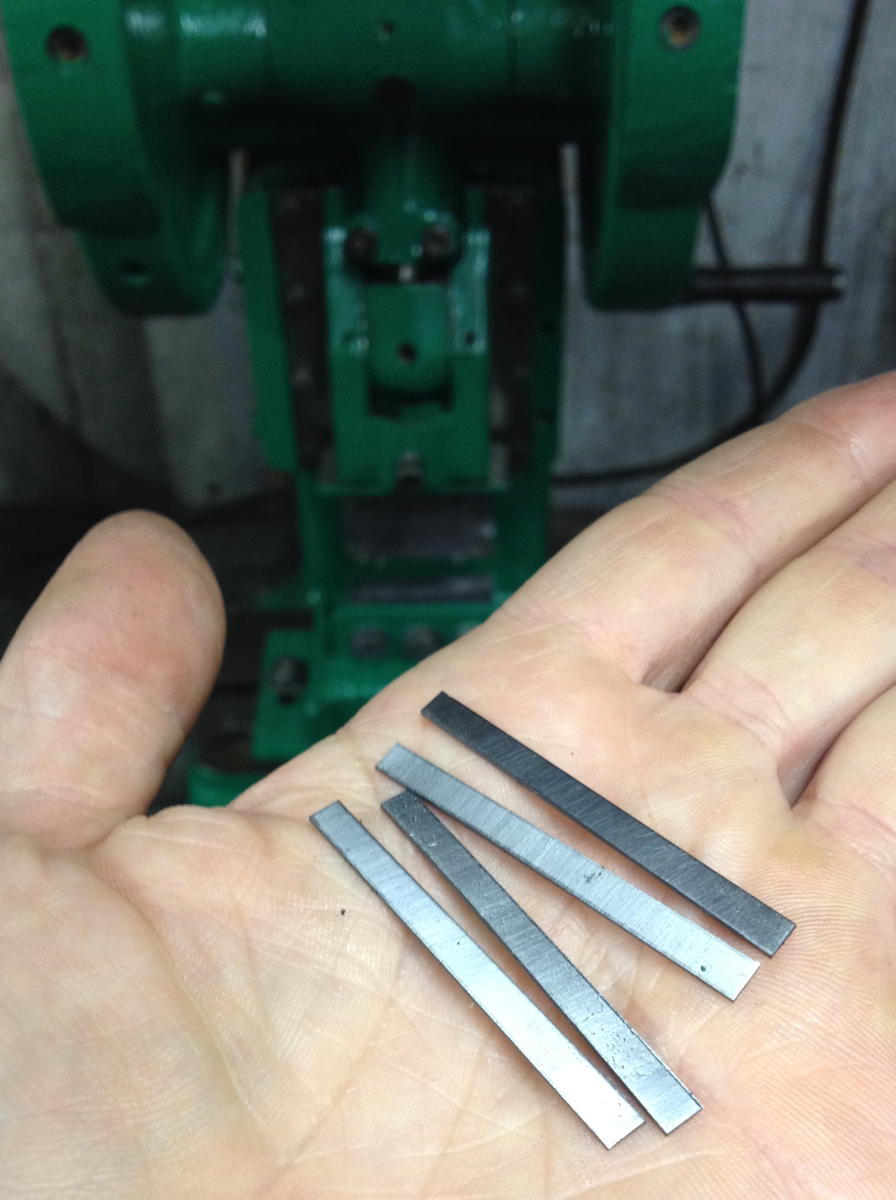
Note that, as Geoffrey Crabb pointed out in his description of the process, it is preferable to turn the stock over between each cut so that the burrs are both produced on the same face of the tongue blank rather than opposing corners. The face with the two burrs on it becomes the bottom of the tongue, because once you lightly stone the burrs off it leaves you with a nice sharp, square edge.
Nice. I’ve enjoyed reading your blog, and really admire the organized approach that you’re taking with your craft.
Thanks Ron! I’ve just been planning out how to tackle the challenge you set me.