The seventh part of the story of how I built my first concertina is about the reed pans; the removable boards that carry the reeds and valves.
One thing I have learned is that the reed pan layout is one of the most difficult and important aspects of designing a new instrument from scratch, and it has to be done in conjunction with the action board layout. It’s no good coming up with a nice logical arrangement of chambers on the reed pans, if it means some of the pad holes end up underneath the keyboard, or the levers have to snake around all over the place to reach the appropriate pads, or you have to use levers that are too short to operate smoothly. Sometimes you have to compromise in one area or another, either in the reed pan (e.g. making reeds smaller because there isn’t room for the ideal size of chambers), or in the action (e.g. making two levers cross over each other or bend sideways).
This being my first instrument and a brand new design, I spent several days at the design stage figuring out a good compromise. When I began the process, I wasn’t even sure how many buttons I was going to end up with (the design brief specified the overall size of the instrument, to include as many buttons as practical in that form factor). The design I came up with looks pretty simple and logical, however in order to reach it, I tried and discarded a number of more complex arrangements. The three main compromises I ended up making were that a few of the levers are shorter than ideal (those buttons feel a bit stiffer than their longer neighbours); six of the chambers are in the centre of the instrument (for reasons I don’t fully understand, they sound a bit less good than chambers on the outside – this is a well-known phenomena in the concertina world); and I was forced to abandon the idea of including an air button.
You might find it interesting to take another look at the photos of Wheatstone’s Duett concertina of the 1850s. My Brun is the same size but with an extra three buttons per side. To achieve that, I went with a similar reed pan arrangement but with a second, smaller pan on each side. Wheatstone’s had one pan with two rows of six chambers; mine has a pan with two rows of five and a second pan with one row of five. Five columns is actually a fairly tight fit in the available width. I tried fitting in six and it was ridiculously tight: I suspect Wheatstone must have used narrower reed frames and smaller diameter pads, which probably had a negative effect on the sound it produced. My actions are a more conventional riveted lever type, and I suspect are probably more comfortable to play.
My first idea for making the reed pans was to mill them from thick pieces of birch plywood. This didn’t really work, because the chamber dividing walls were too weak due to the cross-grain layers, causing them to break during the machining process.
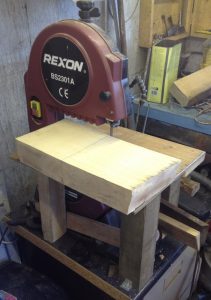
Plan B was to mill them from solid quartersawn sycamore. Using quartersawn wood means it will move and warp less due to changes in humidity level. The little bandsaw I had at the time was just barely powerful enough to rip the slab I had in the thin dimension.
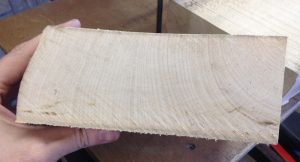
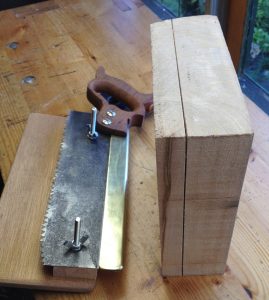
Looking at the end grain, you can see it is reasonably quartersawn towards the bark side of the piece. Because the pans only needed to be a little over 4″ wide, I was able to pick the best section.
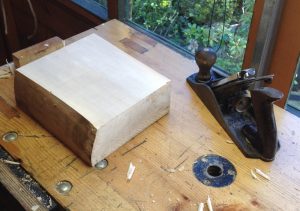
Planing one face true.
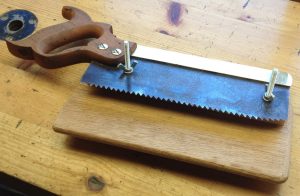
The bandsaw was never going to resaw the full width of the board, so I had to do it by hand. Step 1 was to make a kerfing saw; a special tool that cuts a shallow kerf at a specific distance from the face of the board.
This kerf was then used to help guide the path of an ordinary rip saw.
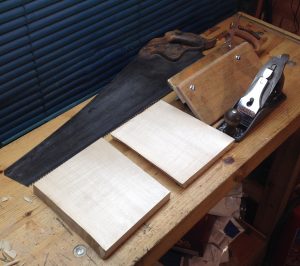
Here are the two roughly sawn reed pan blanks, with the rip saw I used behind them. I’ve since got a bigger rip saw with coarser teeth that would have made the job a bit easier, but it wasn’t too bad really because the boards are so small.
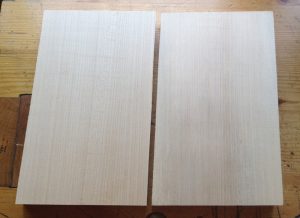
At this point I put the blanks on one side and started recording their weight once a day. Although this slab was supposedly kiln dried before I bought it, it still seemed to have a higher than equilibrium moisture content inside. They lost a few grammes of moisture each over the first few days, and warped a little too. After a couple of weeks they stopped losing weight, so I felt they were probably stable enough to carry on working on them. First I planed one face of each flat and smooth (this face was to become the bottom of the pan) and ripped them narrower, being careful to follow the direction of the grain as closely as possible.
I left the other face alone because I planned to use the milling machine to flatten it, thus getting it very accurately parallel.
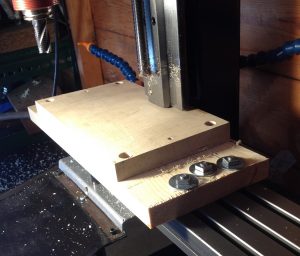
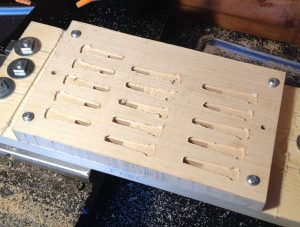
Problem! When I mounted the blank on the milling machine, the back edge fouled on the bottom of the Z axis slide before it was far enough back for the cutter to reach the front of the board.
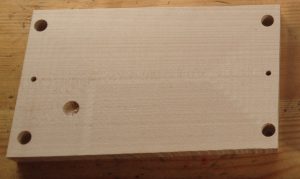
The solution was to make a thinner fixture that (just) allowed the blank to fit under the Z slide. The two small holes in the middle of either end match with registration pins in the spoilboard, thus allowing the blank to be flipped over and still be in the same position, so the bottom reed slots end up in the right place relative to their chambers.
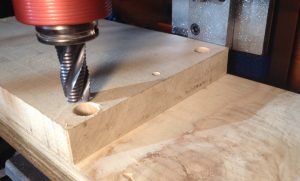
Oops. I did something stupid in zeroing the Z axis and plunged the 1/2″ end mill a few mm deep into the first blank. This could have been a major setback as I didn’t have a spare blank prepared, but luckily I managed to reposition the pan on the blank such that the damage was in an area that was due to be milled out anyway.
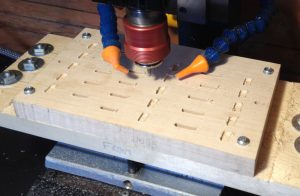
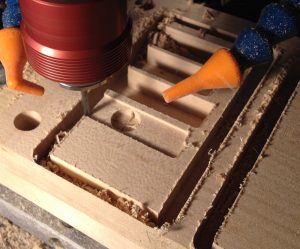
After truing up the top surface, I flipped the piece over and cut the bottom slots. There needed to be little pockets next to each dovetail slot for the dovetail cutter to start in, because the tool isn’t designed to be able to plunge into the work. I cut the wind slots for the bottom reeds at the same time as the dovetail slots, to ensure they are perfectly aligned with each other.
Bottom reed slots cut.
Back to the top again. I cut the outsides of the pans before the chambers, but not all the way through the board, because this reduced the amount of stress on the dividing walls. This picture shows how I managed to position my previous accident inside a region that was due to be removed.
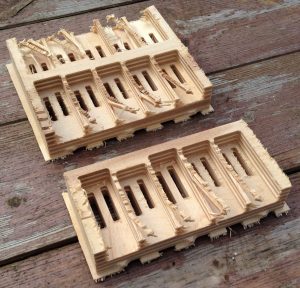
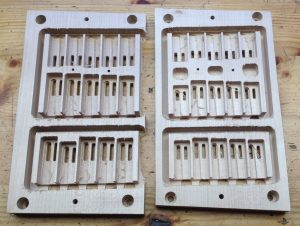
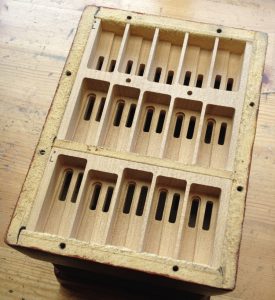
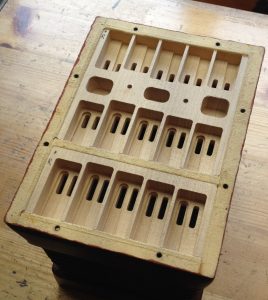
Both reed pans fully routed. The left hand one is off-centre because of the previously mentioned repositioning.
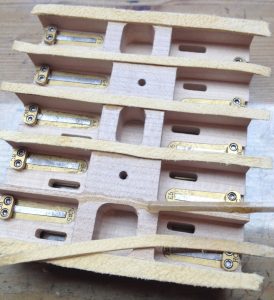
This picture shows a few interesting things. In order to fit the reeds in as tightly as possible, the frames overlap, but not quite enough for a dovetail slot to break into the opposite side’s wind slot. They also undercut the walls slightly, more so at the outside edge (because the frames are tapered). Thirdly, I tried something new here that I haven’t heard of any other maker doing in this way: I made the chambers different depths, based on a ratio of the chamber length. It was common for English concertinas to have sloping pans, where the chambers at one end were deeper than at the other, but that only really works when it’s possible to arrange the pan in such a way that the pitches gradually increase from one end to the other. The way I did it here, it was possible to have a deep chamber right next to a shallow one (the first and second chambers are an octave apart).
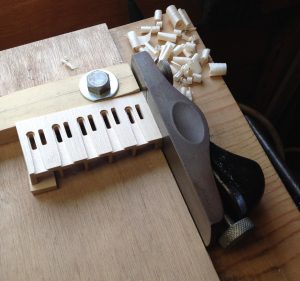
The inner walls of the bellows frame are tapered to get a good seal, so I had to cut a matching taper on the outsides of the reed pans. The side walls I was able to do on the shooting board with a shim to tilt it up.
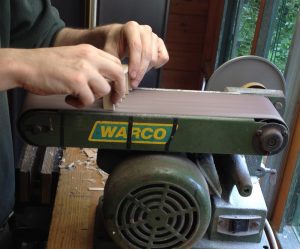
I daren’t try to use the shooting board to plane across the ends of the chamber walls, so I used the linisher for that instead.
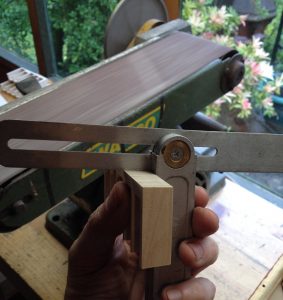
Checking the angle with a bevel gauge.
It took a fair bit of careful work to get a good fit because the earlier problems with the frames not gluing together perfectly square meant the holes the reed pans had to fit into weren’t quite square either. In hindsight it might have been easier if I’d fit the pans to the frames before I put the chamois leather gaskets on the frames, and it definitely would have been much easier to do it before attaching the bellows to the frames.
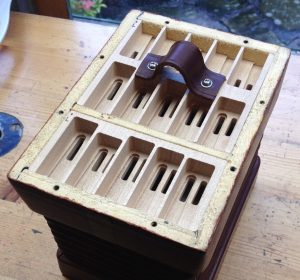
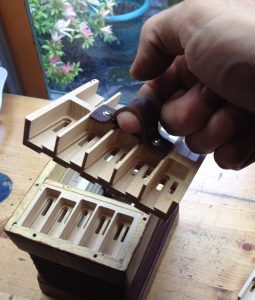
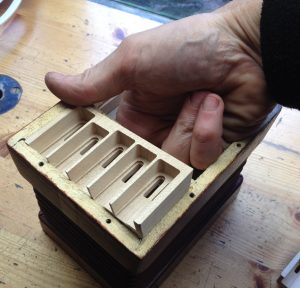
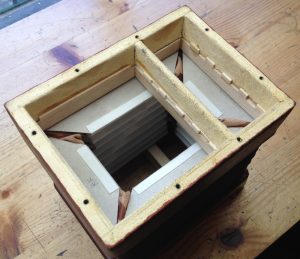
If you’re familiar with more conventional concertina reed pans, you’re probably wondering at this point how you pull out the reed pan (which tends to be a fairly tight fit) without a hole in the middle to put your fingers through. Because I didn’t have any space for the finger hole, particularly on the left hand side, I instead attached captive nut plates on the bottoms of the larger pans and made a leather handle that screws onto the pan.
Once you have lifted out the larger pan, you can put your fingers through the hole and push out the small pan from underneath.
Here’s a quick video clip showing the first time the instrument made a sound:
https://www.instagram.com/p/BUKcZ9XDiGZ/
When I made the bellows frames I didn’t know how deep the reed pans were going to be, so I allowed a generous depth of 20mm and put off the decision until later. As it happens, I eventually made the left hand pan 18mm deep and the right hand pan 16.5mm, which meant I then had to add some sort of spacer blocks that stopped the pans going in too deep. I thought I could just make strips that went all the way around, but they fouled on the bottom reed clamps so I had to cut a lot of notches out of them. In hindsight I went about this a particularly difficult and tedious way, and on future instruments I will be reverting to the traditional-style corner blocks instead, preferably fitting them to the frames before the bellows!
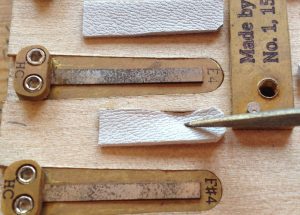
Gluing strips of chamois leather to the tops of the walls with rabbit skin glue. I found that skiving the ends of these strips needs a slightly different technique to skiving bellows leather because the chamois is so soft and stretchy.
All the gaskets installed.
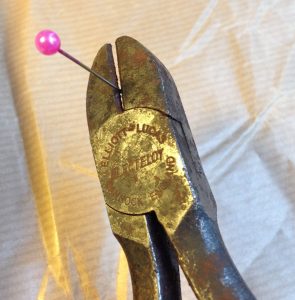
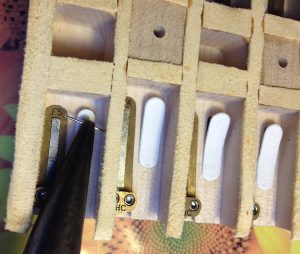
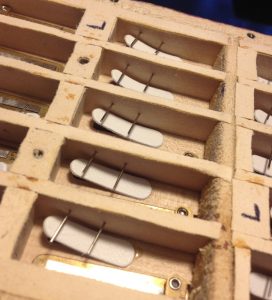
I made the valve restraint pins from chrome plated sewing pins. After struggling to push a few of them through the chamber walls with needle nose pliers, I found they went in a bit easier if I sharpened them on a stone first.
There’s a bit of a knack to deciding exactly where to place the pins, so as to allow the valve to open properly without getting stuck. On my next one I’m planning to try making the pins from a slightly smaller diameter stainless steel spring wire instead.
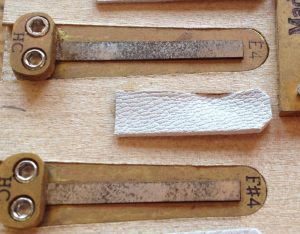
I had lots of problems with the valves. My first attempt, I cut them by hand from sheepskin skiver, and they were terrible. The leather was too stiff, and every note sounded muffled if it played at all. My second attempt, I bought a set of valves from a parts supplier, and I’m not totally sure what the problem was but they didn’t seem to want to stay flat against the pans. This photo shows how some of them have lifted up until they are touching the restraint pins. This caused a problem with the bottom few notes making a sort of ‘raspberry’ noise if you changed bellows direction while holding the button down because the valves weren’t keen to stay closed.
On advice from several other makers, I ordered some hides of Columbia Pneumatic Leather from Columbia Organ Leathers (who are based in a town called Columbia, Pennsylvania, not the Republic of Columbia). It’s not cheap but it’s nice stuff. I removed all the previous valves (I found the easiest way was to just rip them off, then use hot water to remove the remnants of the old glue) and cut a new set, mostly from the extra heavy weight hide, though I did use the heavy weight for the higher notes. It was recommended to me to wash the leather and dry it on a sheet of glass to make it a bit stiffer, but I couldn’t tell any difference before and after washing (maybe I did it wrong). For the most part, the new valves behaved much better and solved the problems I was having. A few of them misbehaved in testing, not always for obvious reasons, but replacing them solved the problem.
Here’s one of the misbehaving valves where I was able to find the cause. If I played the blow reed, then played the corresponding suck reed very softly, it would start muffled, then ‘pop’ and play normally.
It turned out I had glued it off-centre, and one edge of the valve was getting sucked down into the wind slot.
Replacing it in the correct position solved the problem. It’s quite tricky to get them positioned right because you can’t see the slot while you are gluing the valve down. I’ve considered drawing a centre line in pencil first.
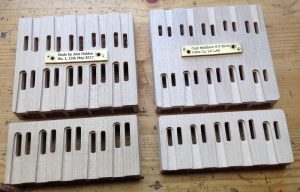
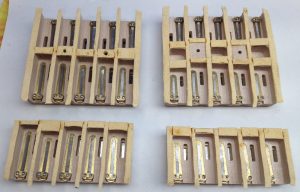
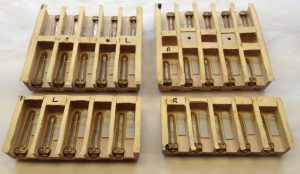
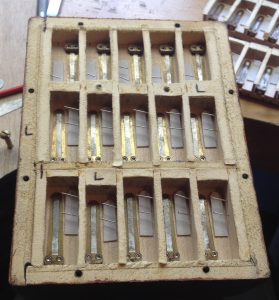
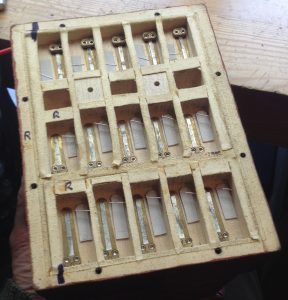
The finished reed pans. Note all the marks in biro indicating where and which way round they fit.
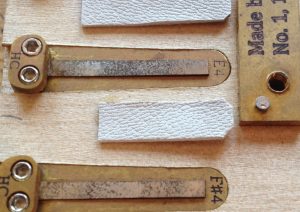
These two pictures show the difference in size between the biggest chamber (C3) and the smallest (G5). In hindsight I suspect I could have made them all a bit smaller, but I was trying to be conservative and working on the theory that a too-small chamber will sound terrible, whereas a too-big one will just start up slowly. In fact, as far as I can tell, they all seem to respond pretty quickly.
The final thing remaining was fine tuning all the reeds, and bits and pieces of troubleshooting: tweaking the action to eliminate ciphers, replacing misbehaving valves, etc. The client asked me to tune the reeds in quarter comma meantone, with G as the root note. I made a quick video clip showing it playing a few chords, though in hindsight this doesn’t really show it off very well. You’ll have to take my word for it that it has a much nicer sound in person than recorded on an iPhone microphone. I hope at some point I’ll get to hear what it sounds like in the hands of a good player.
https://www.instagram.com/p/BWuuyH5DyWq/



Hey Alex, interesting way to change the chamber depths!
In regard to the issue of insufficient travel in the Y axis of the mill there is a very easy mod which gets you about another 1.5″ travel. This means you can cut around a 6 1/4″ hex with a 1/4″ cutter with a few thou to spare. Let me know if you want pictures.
Cheers
Chris
Thanks Chris! I’ve already got the parts for the Taig Y axis modification, just need to get around to doing it. I had to buy a new leadscrew because my existing one has an unworn section at the end that prevented me adjusting the nut properly after increasing the travel. Eventually I plan to get a CNC router with more capacity but funds won’t stretch that far just yet.
I finally got around to doing the Taig Y axis upgrade:
https://www.instagram.com/p/BYAvXAOnj-W/
PS. The reed pan design I am using took me one month full time work to come up with. In the end I came up with two solutions, both similar to other designs, only a limited number of ways to swing a cat…
For #2, a 30-button Anglo, I’m planning to try doing a semi-radial arrangement like in some late Wheatstones. I know those instruments had some problems, but the chamber arrangement seems quite logical to me. http://www.concertina.net/forums/index.php?showtopic=14037
That was one of the solutions I came up with independently; it is very similar to Wally Carroll’s smaller concertinas. I initially used parallel chambers but making them semi-radial eased the fit somewhat.